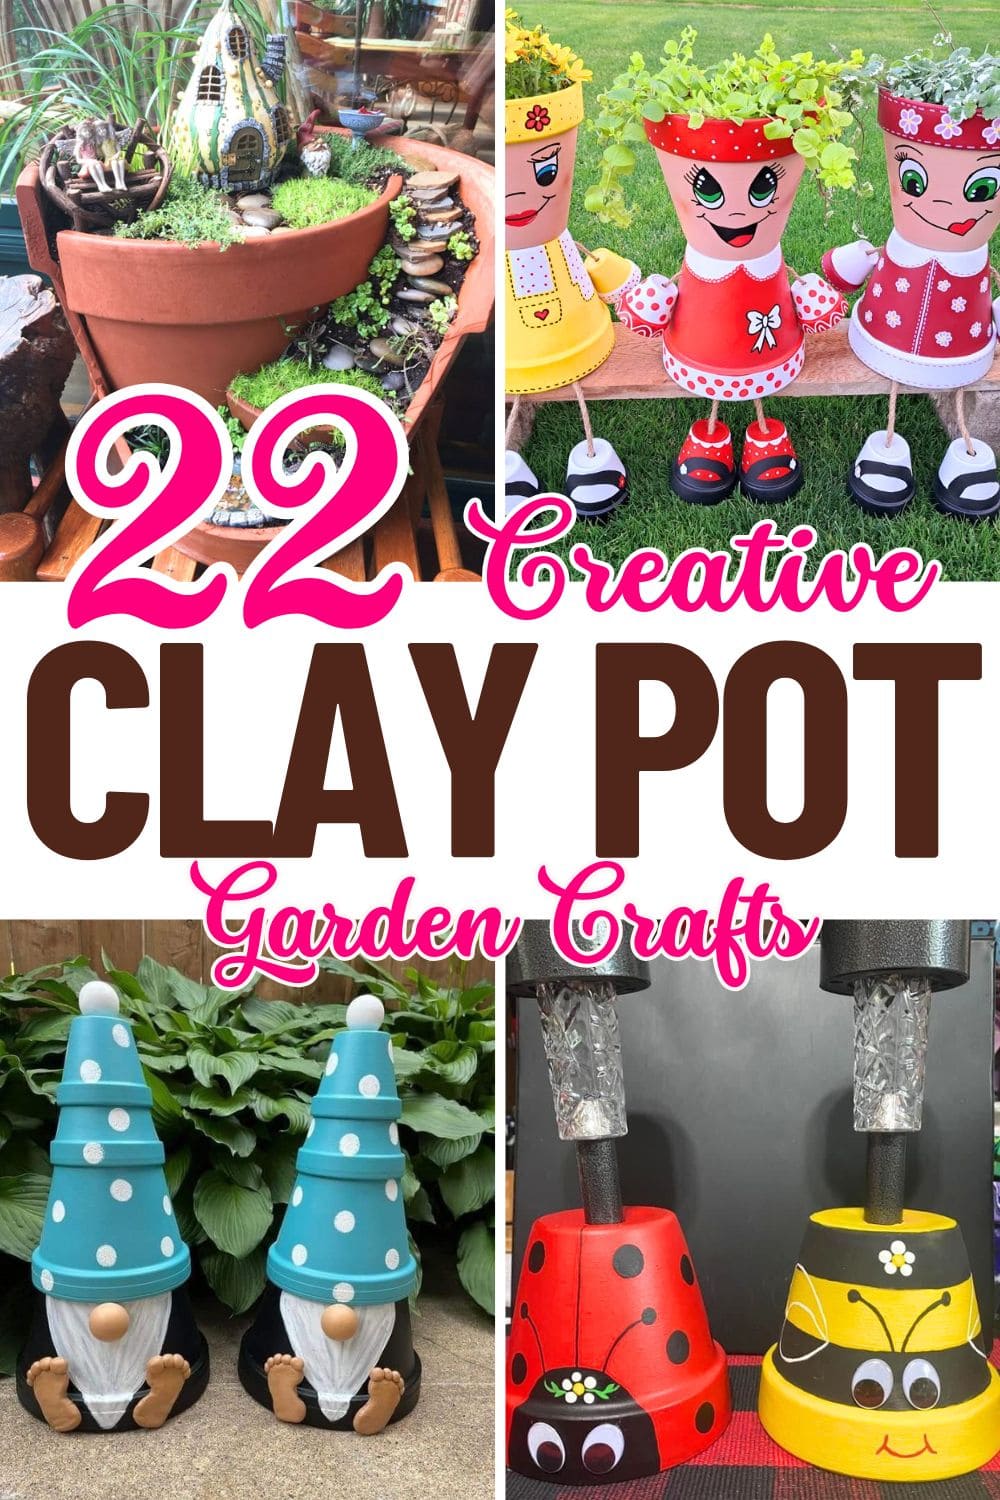
Are you a creative DIYer? The post today has clever projects for your creativity. Here are 22 Pretty Clay Pot Garden Crafts you might complete in the span of a single afternoon to make oh-so-similar versions.
They are easy to make and look amazing once done. All you need is a little color correction, and a few accessories and you can turn clay pots into pretty and cute crafts.
Not only used for growing plants but there is also a wide range of clever ideas inspired by clay pots. In addition, the material is inexpensive and easy to buy, so it’s not hard to upcycle those plain boring clay pots and take them from blah to “wow!”.
This article contains affiliate links. If you purchase through them, I may earn a small commission at no extra cost to you. Thank you for your support!
#1. Cheerful Clay Pot People Planters
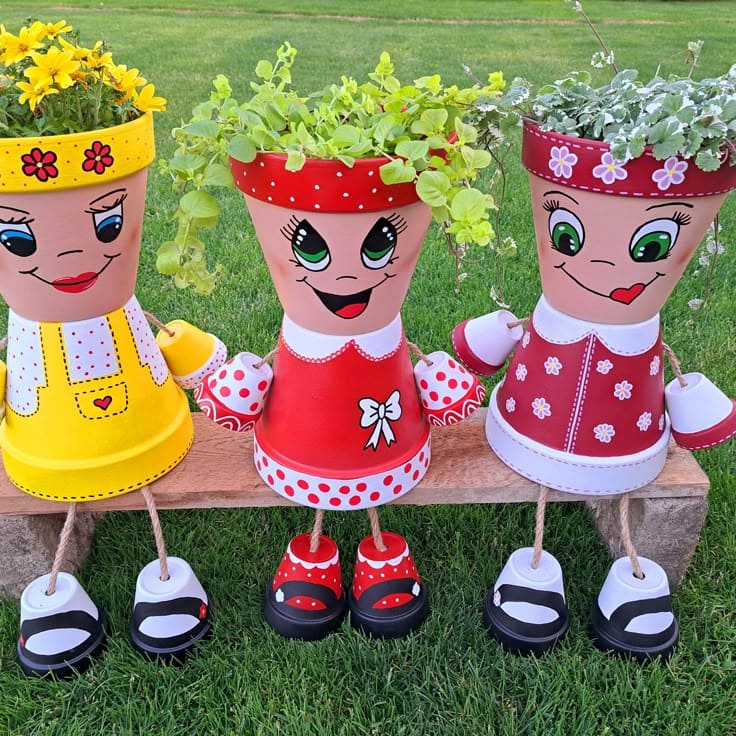
I made a trio with my kids one sunny weekend, and we couldn’t stop giggling at their expressions.
Materials Needed
- 6 terra cotta pots (6-inch)
- 12 mini clay pots (2.5–3 inches)
- 3 nylon ropes (40–50 inches long)
- 1 set of acrylic paints and paintbrush
- Sealer spray
- 1 hot glue gun with glue sticks
Step-by-step Guide
- Paint each pot according to your character design. Use bright base colors for clothing, soft tones for skin, and get playful with eyes, lashes, and smiles.
- Assemble the body by gluing the rim of one large pot upside down for the torso. Glue another (right-side-up) on top for the head.
- Attach mini pots on the sides for arms using rope inside for flexibility, and do the same with the legs, stringing rope through and tying knots to hold the mini shoes in place.
- Once assembled, add your plants! Choose trailing or upright greenery like golden oregano, calibrachoa, or silver falls dichondra to mimic “hair.”
#2. Halloween Decor Idea
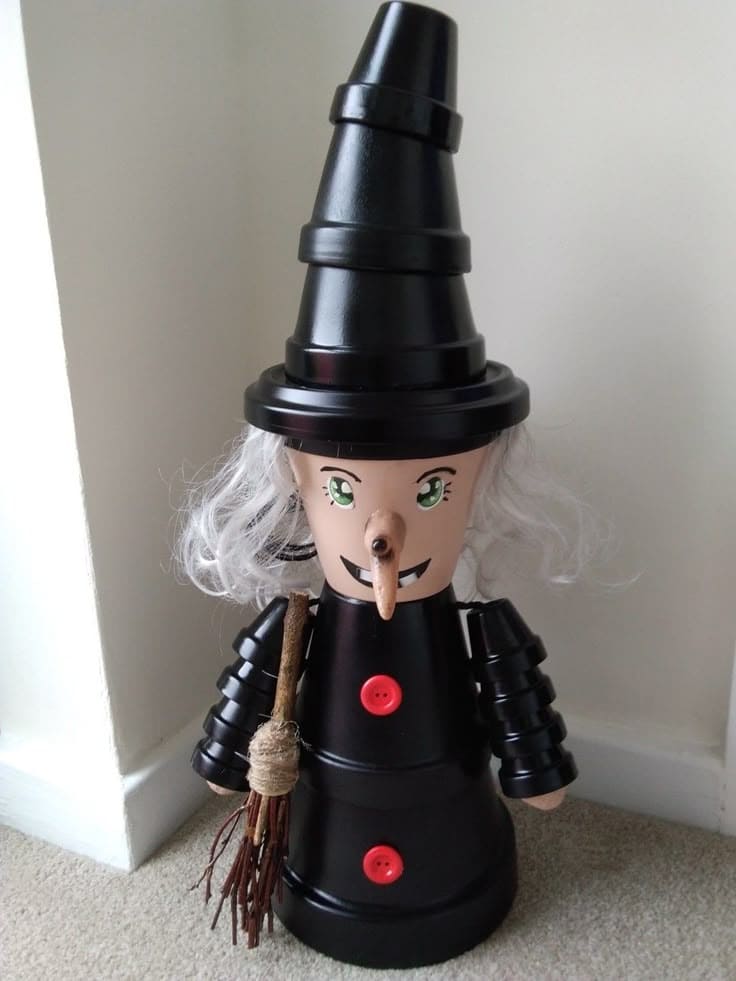
This quirky witch made from stacked clay pots brought a whole lot of cackles and creativity to our entryway last October.

Materials Needed
- 3 clay pots (6-inch)
- 3 small clay saucers (various sizes: 4″, 5″, 6″)
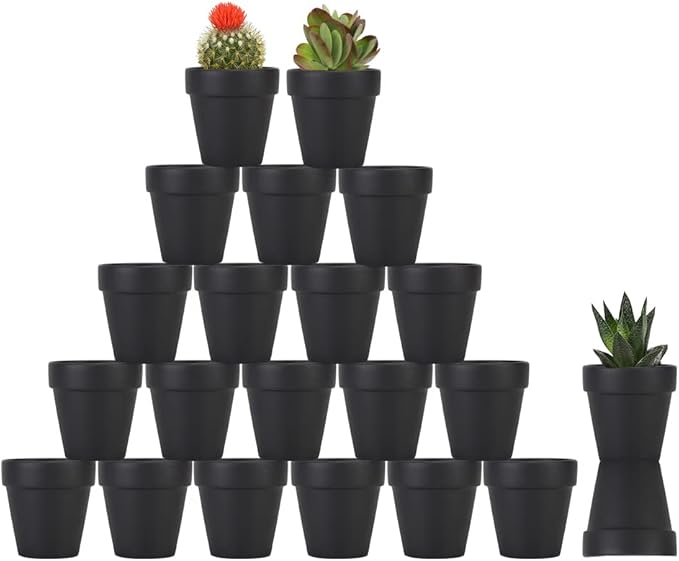
- 8 mini black plastic pots (2.5–3 inches)
- 1 hot glue gun with glue sticks
- 1 acrylic paint set (including black, white, green) and detail paintbrushes
- 2 red buttons (1 inch)
- 1 small stick broom
- 1 wooden doll nose
- 1 white doll wig
Step-by-step Guide
- Paint two large ones black for the body, and one beige or peach for the face, then paint the mini pots black for the arms.
- For the hat, stack and glue the saucers and smallest pot, all painted black. Add facial features with fine brushes or paint pens.
- Assemble the witch by stacking the two body pots upside-down and gluing them in place. Glue the face pot right-side-up on top.
- Attach the hat securely with hot glue, then add the wig around the rim beneath the hat brim. Add buttons vertically down the front.
- Use hot glue to secure the mini pots along each side for arms. Glue the nose to the face and position the small broom in one arm. You can glue the broom directly to the body or tie it with twine.
#3. Whimsical Animal Clay Pot Tower Planter
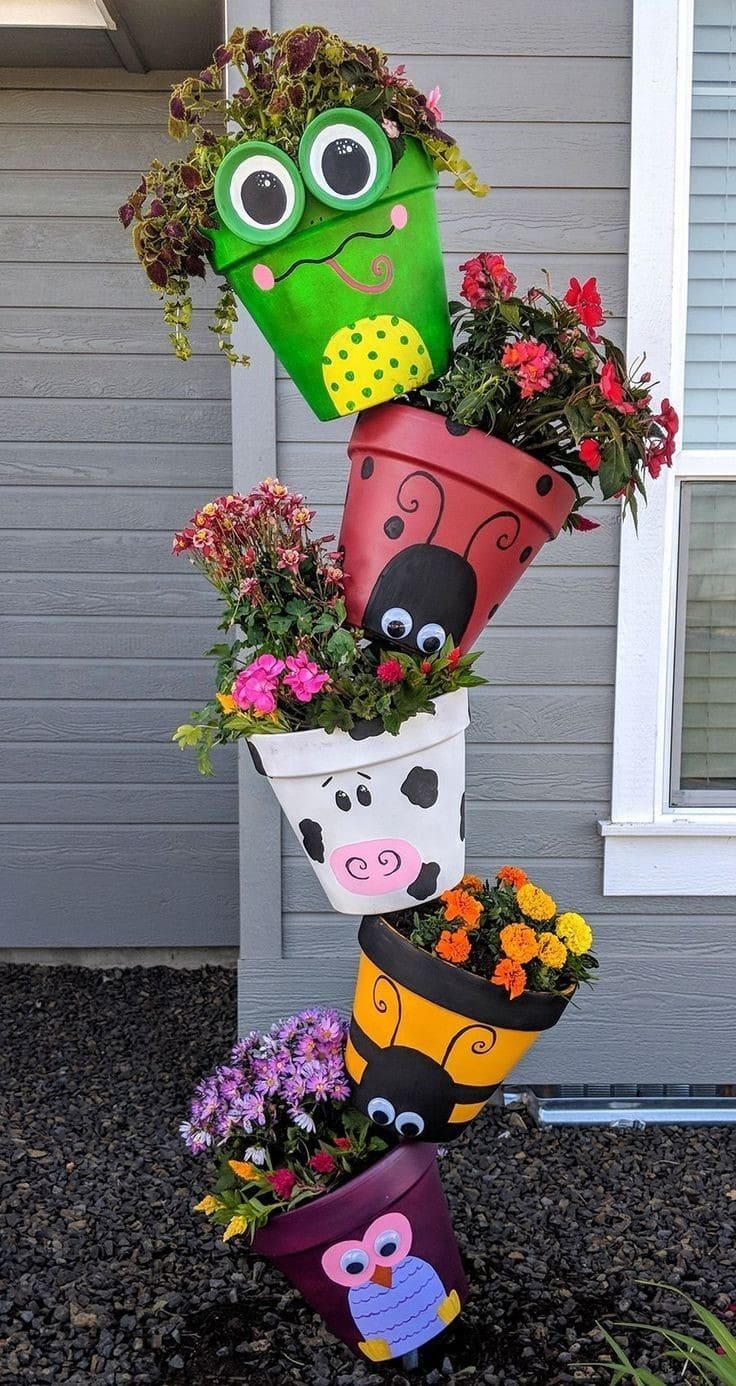
What I love most is the illusion, it looks like they’re defying gravity, leaning with trust into one another like old friends. And it’s surprisingly sturdy when built right.
Materials Needed
- 5 clay pots (6-inch)
- 1 long metal rod (at least 36 inches)
- 10 lb bag of quick-set concrete mix
- 1 large bucket
- 1 set of acrylic paints and paintbrushes
- 1 hot glue gun with glue sticks
- 10–12 wiggle eyes (1 to 2 inches)
- Optional: sealer spray
Step-by-step Guide
- Paint each pot with its own theme: frog, ladybug, cow, bee, and owl, then add details like eyes, wings, or cow spots using brushes or cut-out foam shapes.
- In your base bucket, mix and pour concrete. Insert the metal rod upright while the mix is still wet. Once cured (usually 24 hours), slide the first pot down the rod, tilting it to one side.
- Stack each additional pot by tilting them in alternating directions, this creates the “leaning” effect while staying balanced on the rod.
- Add wiggle eyes and any glued details after stacking. Fill each pot with potting soil and colorful flowers.
#4. DIY Clay Pot Birdbath

This clay pot birdbath is simply beautiful in its simplicity. It’s sturdy, elegant, and feels like a piece of functional garden art.
Materials Needed
- 4 clay pots (6″, 8″, 10″, and 12″)
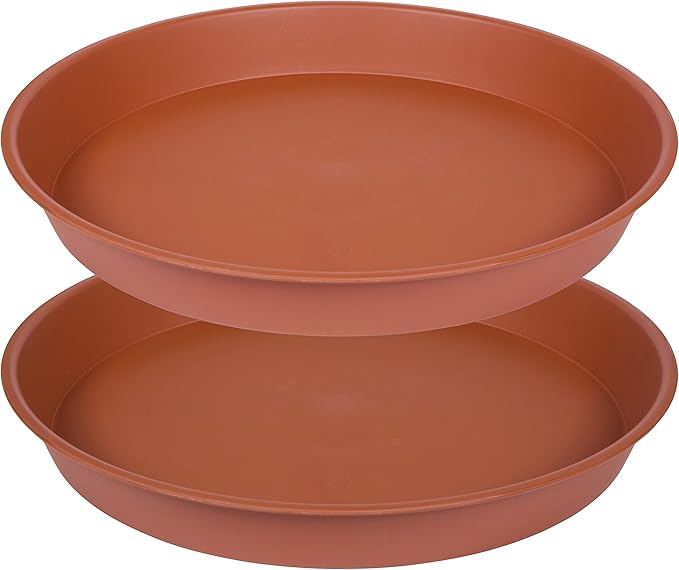
- 1 large clay saucer (14″ or wider)
- Outdoor acrylic paint and paintbrush set
- 1 tube of strong waterproof adhesive
- Sealer spray
Step-by-step Guide
- Flip all the clay pots upside down and stack them from largest to smallest to create a tapered base, then, glue each pot to the one beneath it.
- Paint the entire birdbath, including the stacked base and saucer, using your favorite outdoor paint. I used turquoise for a fresh, calming feel, then added a few simple blossom branches on the saucer using a fine brush.
- Attach the saucer securely on top of the smallest pot using waterproof adhesive. Let everything cure completely before placing it outside.
#5. DIY Patriotic Clay Pot Wind Chime
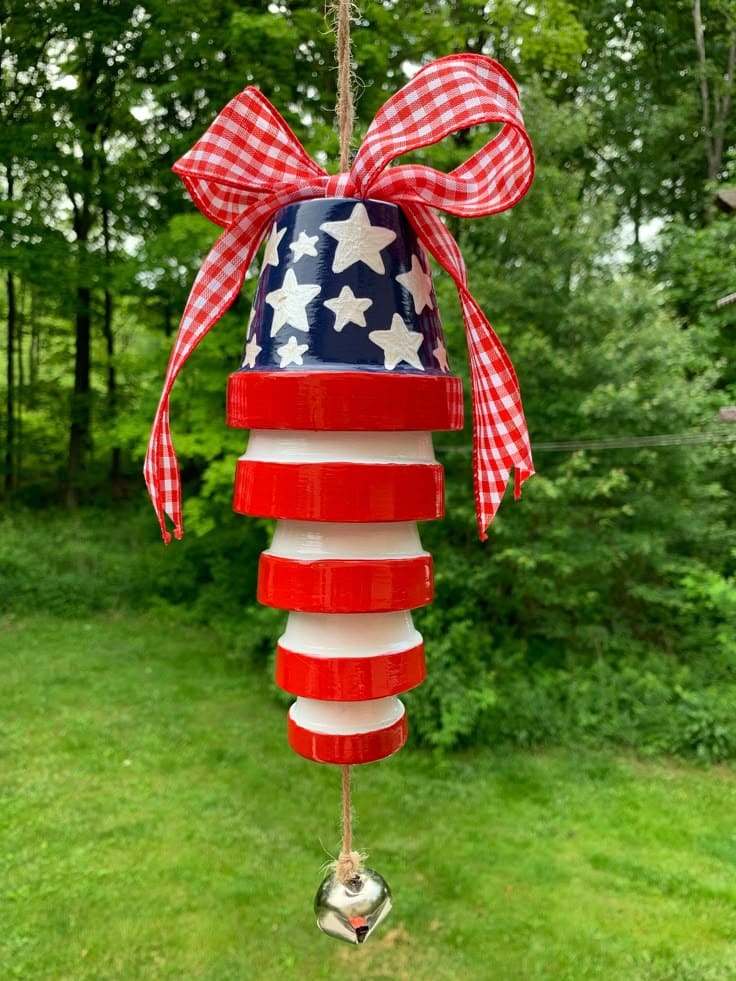
This red, white, and blue beauty was our family’s Fourth of July weekend project.
Materials Needed
- 1 mini clay pot (3-inch), 4 smaller clay pots
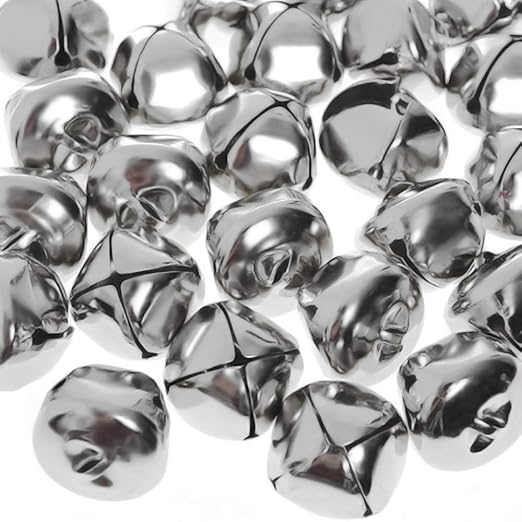
- 1 silver bell (1.5–2 inches)
- Jute twine
- 1 acrylic paint set (red, white, navy blue)
- White star stencil
- 1 large red gingham ribbon bow
- 1 hot glue gun with glue sticks
- Sealer spray
Step-by-step Guide
- Paint the top mini pot navy blue and add white stars using a stencil. Paint the four smaller pots alternately red and white to resemble stripes.
- Cut a long piece of jute twine and tie the silver bell securely to one end. Begin threading the painted pots onto the twine, starting from the bottom. Leave about ½ inch of space between each for movement.
- Thread the twine through the hole in the navy pot and tie a knot at the top to hold it all in place. Use hot glue to secure a gingham bow to the top.
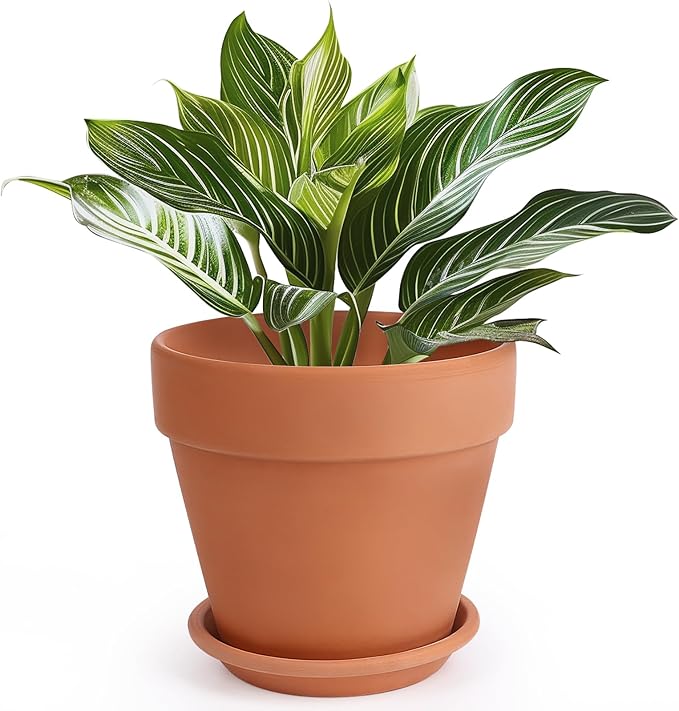
#6. DIY Mosaic Clay Pot Planter
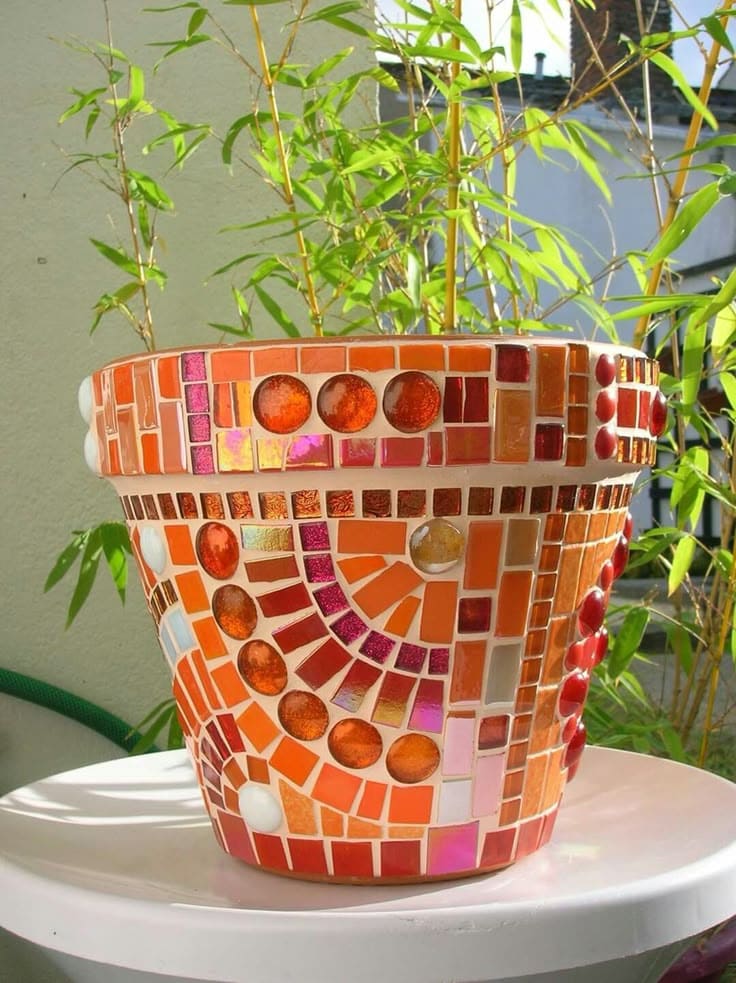
Whether you’re new to mosaics or just love tactile crafts, this project is a joyful, meditative escape into color.
Materials Needed
- 1 large terra cotta pot (8–12 inch)
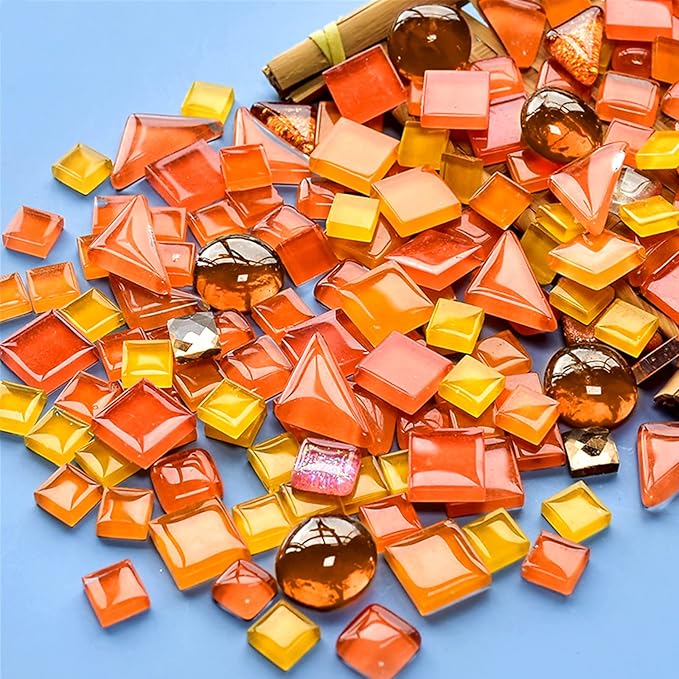
- 1 set of mosaic glass tiles in warm tones (reds, oranges, pinks)
- 10–15 small glass gems
- 1 tile adhesive or E6000 glue
- 1 grout (white or neutral)
- 1 grout spreader
- 1 pair of rubber gloves and soft cloth
- 1 clear sealer spray
Step-by-step Guide
- Lay out your tiles and gems on a flat surface before gluing. Arrange in circular sunburst patterns, gradients, or patchwork.
- Apply adhesive directly onto the pot or the backs of each tile. Work in small sections, pressing tiles firmly into place. Leave small gaps between each for grouting. Let dry overnight.
- Spread grout over the surface with a plastic card, pressing into gaps. Let it sit for 15–20 minutes, then gently wipe excess grout from the tile faces with a damp cloth.
#7. DIY Stacked Clay Pot Planter
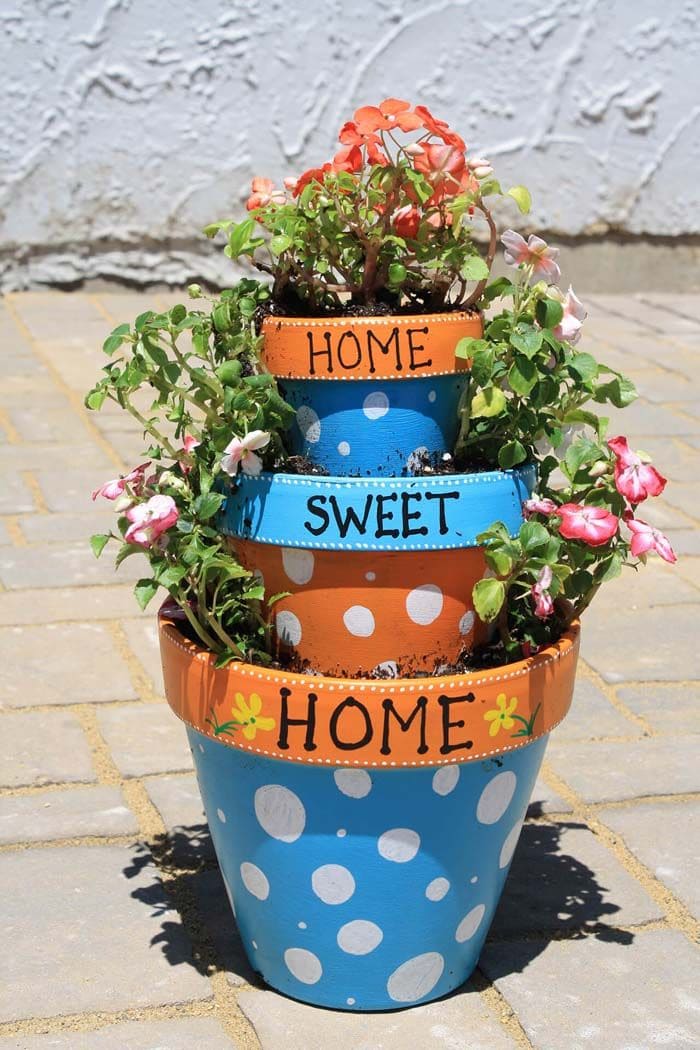
With its playful polka dots, cheerful color scheme, and sweet “HOME SWEET HOME” message, it’s more than just a flower holder, it’s a warm welcome in 3 tiers.
Materials Needed
- 3 terra cotta pots (sizes: 10″, 8″, 6″)
- 3 acrylic paints (orange, blue, white)
- 1 set of paintbrushes and dotting tools
- 1 black paint pen
- 1 hot glue gun (optional)
- Potting soil and flowering plants
- Optional: clear acrylic spray sealer
Step-by-step Guide
- Paint each pot in alternating colors (orange and blue) and let them dry. Add large white polka dots with a foam dabber or fingertip for a playful vibe.
- Once dry, use a paint pen or fine brush to write “HOME,” “SWEET,” “HOME” on the rims of each pot.
- Next, stack the pots from largest to smallest, slightly tilting the middle pot to give a cascading effect for the flowers. You can glue them for added stability.
- Fill each pot with soil and colorful plants. Let them spill naturally over the edges for a lush, layered look. Seal with a protective clear spray if displaying outdoors.
#8. DIY Broken Pot Fairy Garden
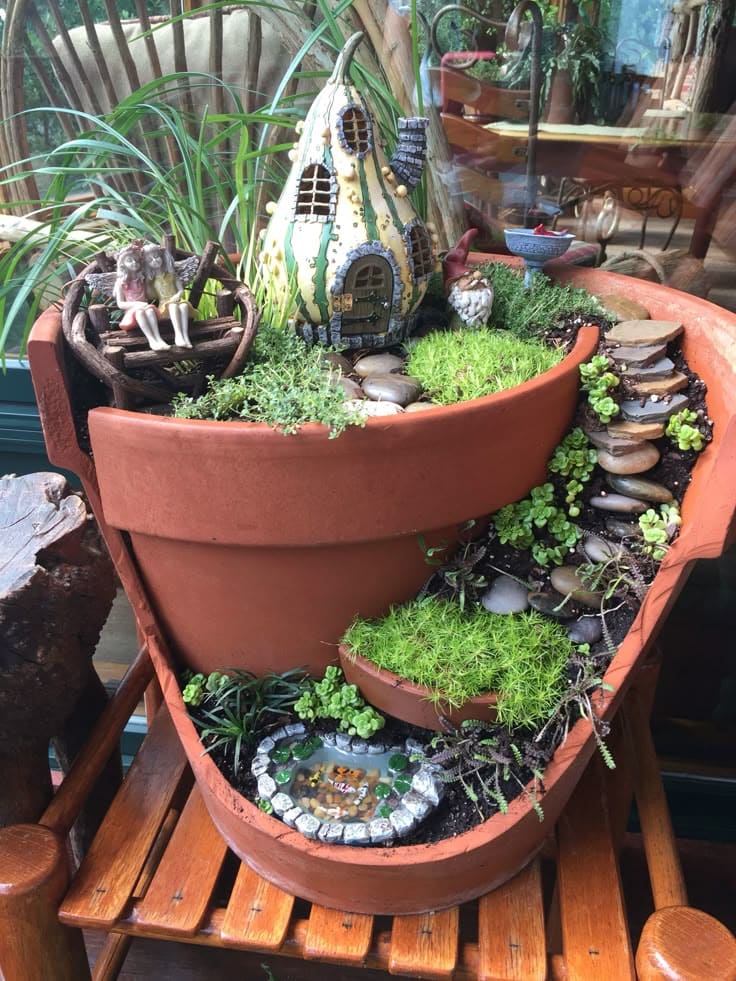
What began as a cracked pot became a doorway to imagination. I created this fairy garden on a quiet weekend and found myself lost in each detail.

Materials Needed
- 1 large broken terra cotta pot
- 1 small clay saucer
- Miniature fairy house
- Mini fairy figurines, benches, animals
- Pebbles, stepping stones, or mini slate chips
- Moss
- Potting soil and succulent mix
- Optional: miniature pond kit
Step-by-step Guide
- If using an intact pot, carefully break a large side off with a hammer and towel. Place the shard back inside at an angle to create a tier or wall divider. Fill with soil, adjusting levels to create slopes or terraces.
- Arrange small pebbles to form steps or a path. Add mossy patches, layer tiny plants across the levels, and tuck in succulents or trailing ground covers. Position the fairy house on top and scatter your tiny accessories around it.
- Place the fairy figures, pond, and tiny creatures. Use bits of bark or twigs for fences or ladders.
#9. DIY Clay Pot Solar Lights
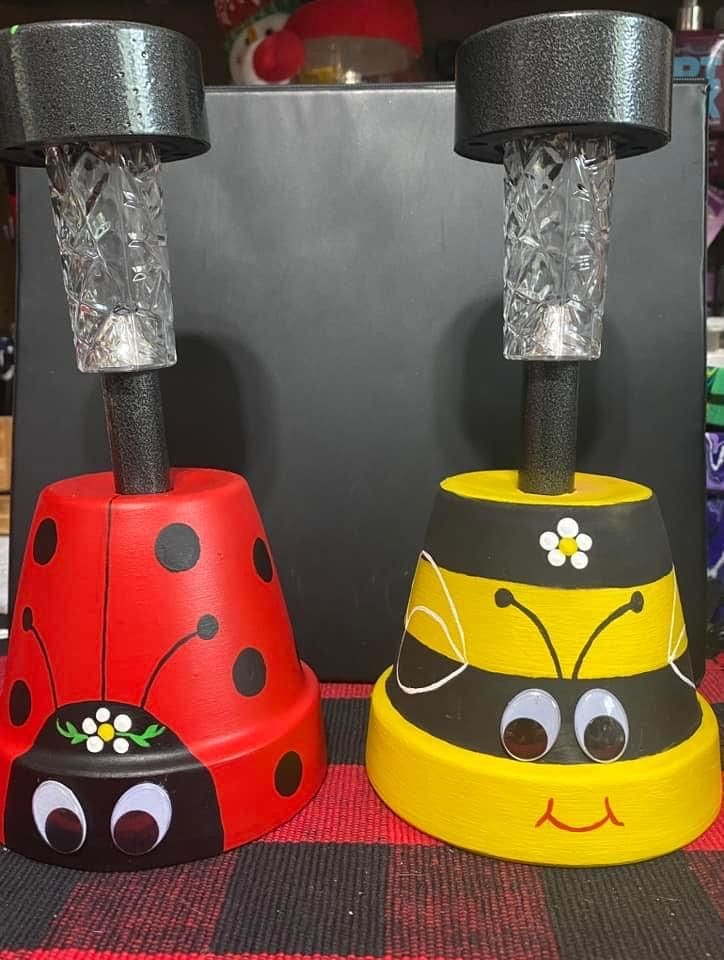
They’re both solar lights and sweet yard décor, and I promise you’ll want to make more than one.

Materials Needed
- 2 clay pots (4–6 inch)
- 2 outdoor solar path lights
- 1 acrylic paint and paintbrush set
- 2 sets of googly eyes (1–2 inch)
- 1 hot glue gun with glue sticks
- Optional: clear sealant spray
Step-by-step Guide
- Paint one pot red with black spots for the ladybug, and the other with yellow and black stripes for the bee then, add fine details like antennae, wings, or tiny smiles using detail brushes.
- Use hot glue to attach googly eyes to each face. For a whimsical touch, add a tiny wooden flower above the eyes for that playful garden vibe.
- Remove the ground stake from each solar light and insert the remaining light into the top hole of each pot.
#10. DIY Clay Pot Windmill
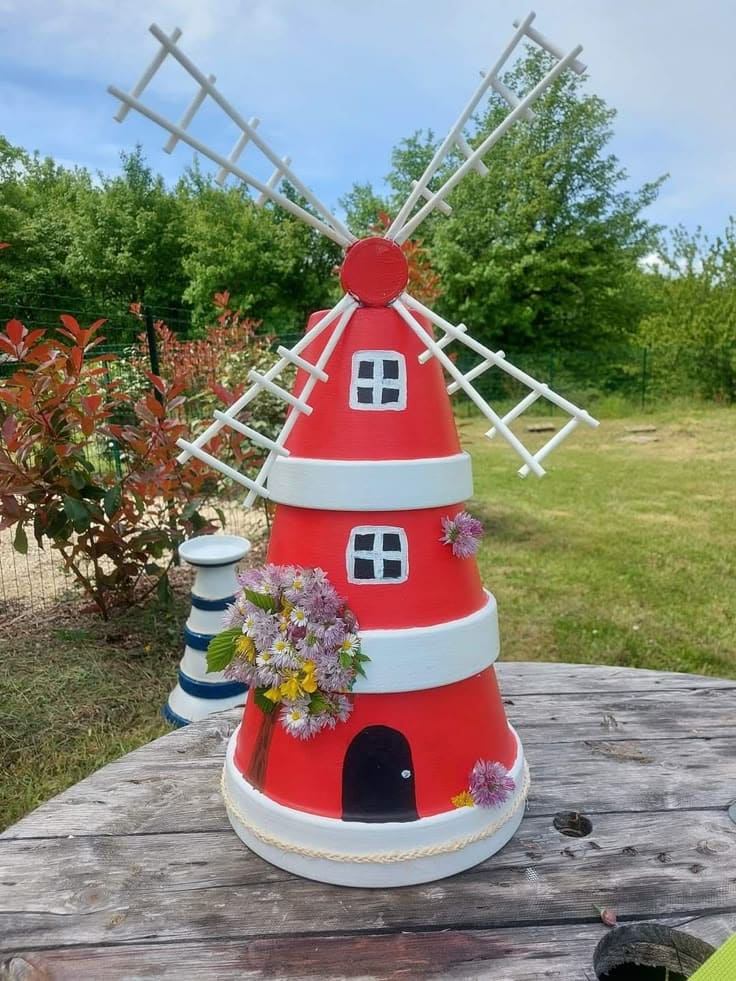
This one is fun, creative, and costs around $20–$25 depending on materials. It makes a perfect centerpiece for flower beds, or even patios that need a touch of storybook charm.

Materials Needed
- 3 terra cotta pots (6″, 8″, and 10″)
- 1 wooden circle (3–4 inches); 8 wooden dowels (10–12 inches)
- 1 set of acrylic paints (red, white, black) and paintbrush
- 1 spool of jute rope
- 1 hot glue gun with glue sticks
- Sealer spray
- Optional: faux flowers
Step-by-step Guide
- Stack the pots upside down from largest to smallest and glue them securely in place. Paint the entire tower red. Add white bands between pot levels, and paint small doors and windows in black and white for character.
- To create the windmill blades, glue 2 dowels into an “X” shape and repeat with the other 2 sets.
- Next, attach each set at an angle around the wooden circle using strong glue. Once assembled, glue the full blade structure to the top of the windmill using hot glue or epoxy.
- Wrap jute rope around the bottom for added texture, then decorate with faux flowers around the base or near the windows.
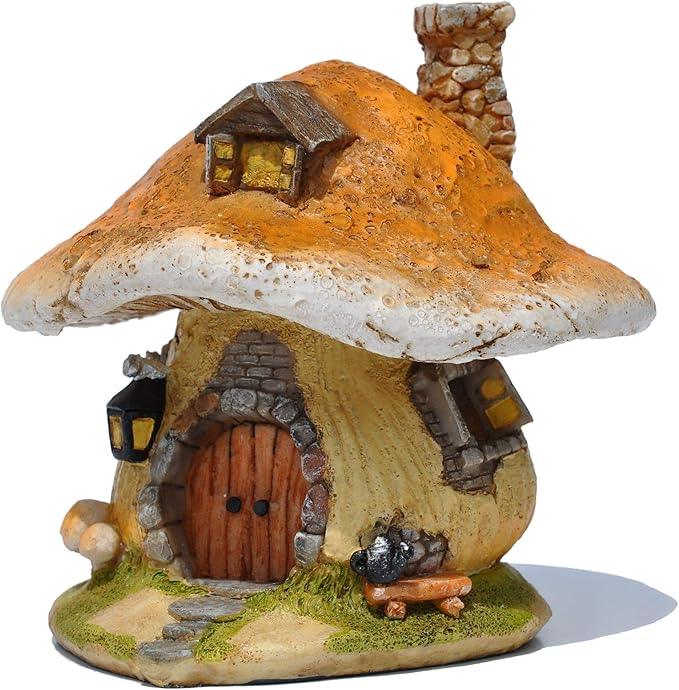
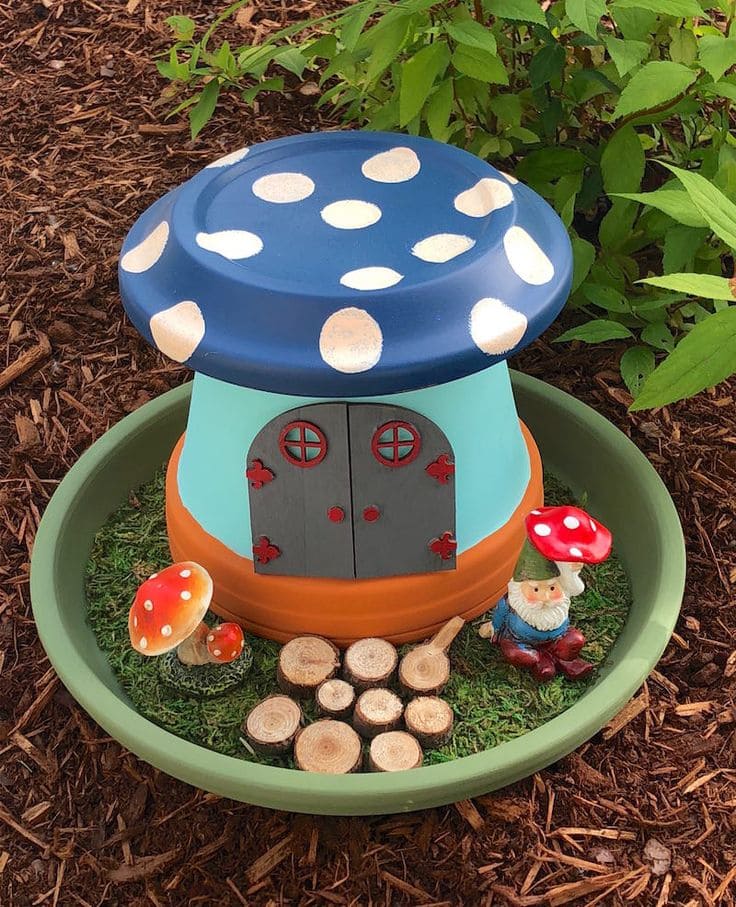
#11. DIY Clay Pot Mushroom Fairy House
Every neighbor who sees this little toadstool cottage leans in for a closer look, and honestly? I still smile every time I walk past it.
Materials Needed
- 1 medium clay pot (6–8 inch); 1 large clay saucer (10–12 inch)
- 1 wide shallow plastic plant tray
- Acrylic paint and paintbrush set
- 1 hot glue gun with glue sticks
- 1 sheet of craft foam
- Faux moss
- 9-10 Miniature wood slices
- Optional: mini gnome figurines, mushroom decorations
Step-by-step Guide
- Flip the clay pot upside down and paint it in your chosen “house” color. I used turquoise with a terracotta base.
- Paint the saucer separately as the mushroom top – navy blue with large white dots works beautifully. Let everything dry and seal if desired.
- Create a door using craft foam, then paint details like windows, hinges, or round handles. Once dry, glue the door to the front of the pot. Glue the saucer on top, centered over the pot’s base, to form the mushroom cap roof.
- Fill the shallow tray with faux moss to create a forest floor effect. Place your mushroom house in the center and add small details: wooden slice stepping stones, miniature gnomes, or mushrooms.
#12. DIY Clay Pot Gnomes
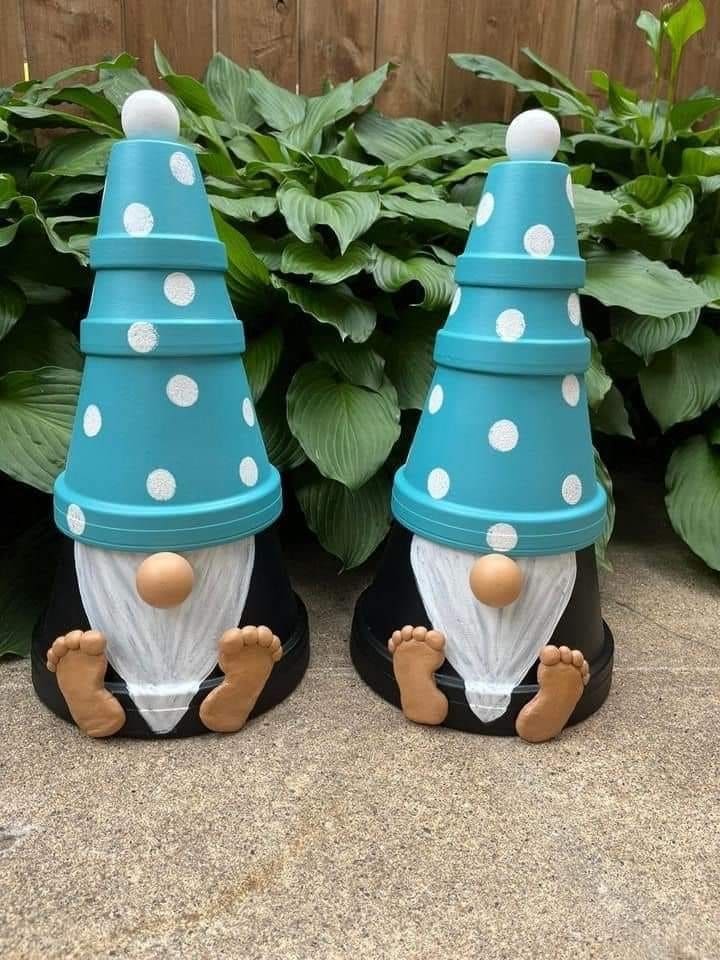
Each gnome costs about $12–$18 depending on what you already have on hand, and they’re durable enough to stand proud in your garden all year round.

Materials Needed
- 1 large clay pot (8–10 inch); 3 small clay pots (3–4 inch)
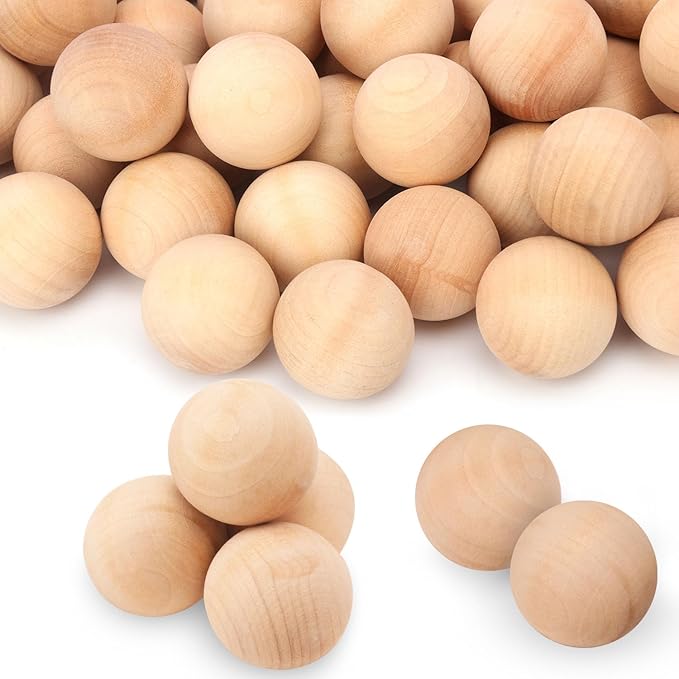
- 1 wooden bead (1.5–2 inch)
- 1 foam ball (1 inch)
- 1 acrylic paint set and paintbrush set
- 1 hot glue gun with glue sticks
- Sealant spray
- Optional: air-dry clay and white paint pen
Step-by-step Guide
- Paint the large pot black for the gnome’s body. Use white paint to create the beard shape, letting the brush strokes taper to resemble hair.
- Next, paint the small pots light blue and add white polka dots for the hat by using a white paint pen.
- Stack and glue the three blue pots on top of the body to form the hat. Glue the foam or wood ball at the very top. Attach the nose where the hat meets the beard, right in the center.
- Sculpt small feet and toes from air-dry clay and paint them in a soft skin tone. Glue them at the base so they peek out beneath the beard.
#13. DIY Painted Clay Pot Ladies
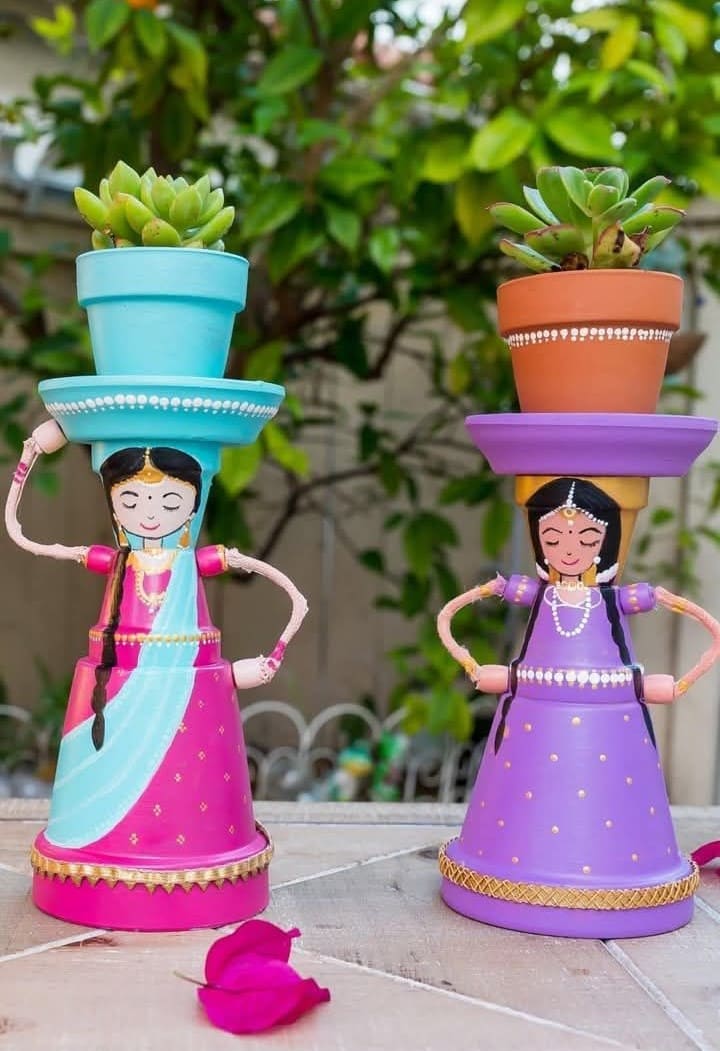
Inspired by traditional dress and graceful posture, they make perfect indoor accents or sunroom plant holders.
Materials Needed
- 1 large clay pot (6–8″); 1 smaller clay pot (4″); 1 clay saucer (4–6″)
- 1 mini pot or bowl
- 2 flexible wire
- 1 set of acrylic paints and paintbrush
- 1 hot glue gun with glue sticks
- 1 gold ribbon
- Optional: clear sealer spray, small succulent
Step-by-step Guide
- Paint the large pot as the dress, using vibrant colors and gold accents to mimic traditional attire. Wrap the bottom edge with gold ribbon or a border design to resemble a saree. Let dry.
- Use a neutral tone for the face, then paint expressive features – eyelashes, a bindi, and jewelry. Glue the head pot upside-down on top of the body. Then glue a saucer and small pot on top to mimic a vessel being carried.
- Bend wires to each side of the top pot, then paint them to match the attire. Paint or add bangles to bring life to the pose. Finish with sealant if placing outdoors.
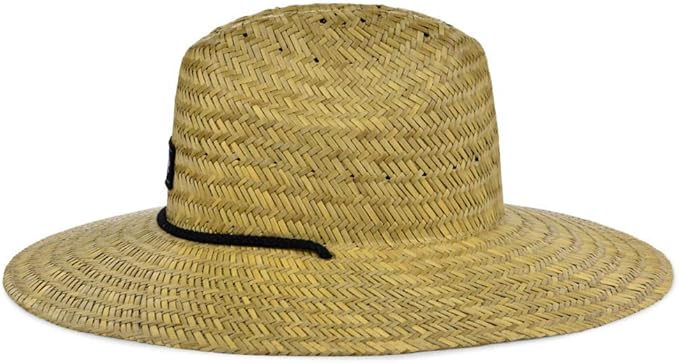
#14. DIY Life-Size Clay Pot Person

With its straw hat, bandana, and jointed limbs, it looks like it stepped right out of a country folk tale to guard your flower beds.

Materials Needed
- 1 large clay pot (12″)
- 2 medium clay pots (8–10″)
- 2 small clay pots (6″)
- 8–10 mini pots (4″) per arm/leg
- Thick jute rope
- 1 large straw hat
- 1 bandana
- 1 roll of floral wire
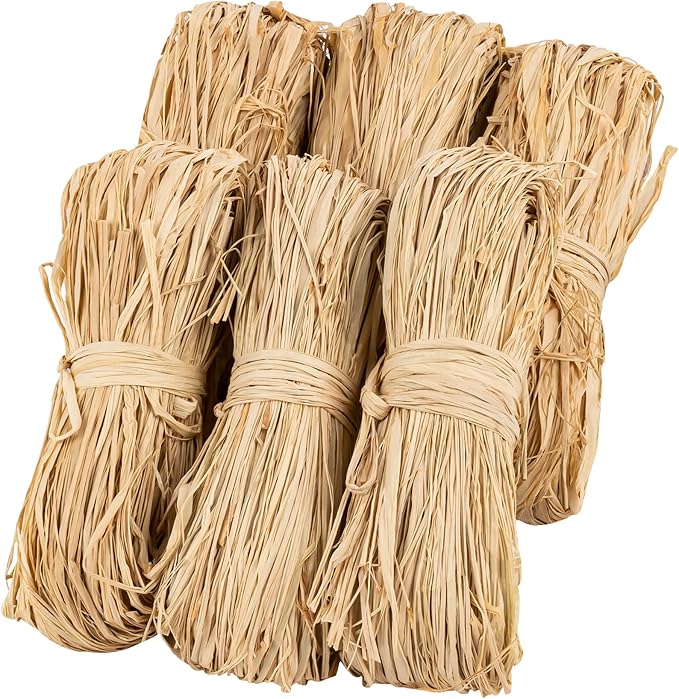
- Optional: raffia or straw
Step-by-step Guide
- Use the largest pot as the torso. Thread jute rope or wire through the drainage hole, leaving excess to tie on limbs. Wrap a bandana or cloth around the neck area for personality.
- For each leg and arm, thread 8–10 small pots onto a rope with the bottoms facing out. Secure them with knots or zip ties inside the first and last pot to keep everything snug. Use slightly larger pots near the top of each limb to give it shape.
- Use the same rope running from the torso pot to connect each arm and leg. Position the body on a sturdy bench or step.
- Tie the limbs in place with extra rope if needed so they drape naturally. Add a large hat and optional painted-on face or garden gloves.
#15. DIY Watermelon Clay Pot Planter
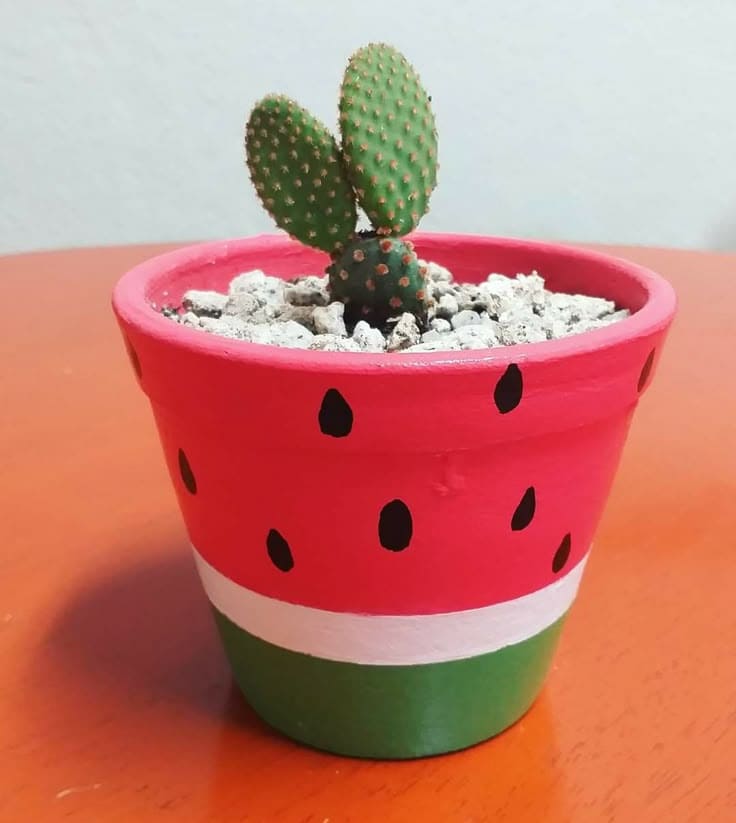
The mix of green rind, white stripe, and pink “flesh” topped with seed dots is so simple yet eye-catching.
Materials Needed
- 1 clay pot (4–6 inch)
- 1 acrylic paint and paintbrush set
- 1 hot glue gun (optional)
- 1 small cactus or succulent plant
- Potting mix
- Optional: clear sealant spray
Step-by-step Guide
- Paint the bottom third of your clay pot green (the rind), the middle third white (the pith), and the top red or bright pink (the juicy part), then apply a second coat for more vibrancy if needed.
- Next, use a fine brush or black paint pen to add teardrop-shaped watermelon seeds randomly around the top half.
- After everything dries, spray with a clear sealant if your pot will sit outdoors. Fill it with cactus soil, pop in your plant, and top it off with a layer of decorative white rocks or sand.
#16. DIY Clay Pot Scarecrow Couple
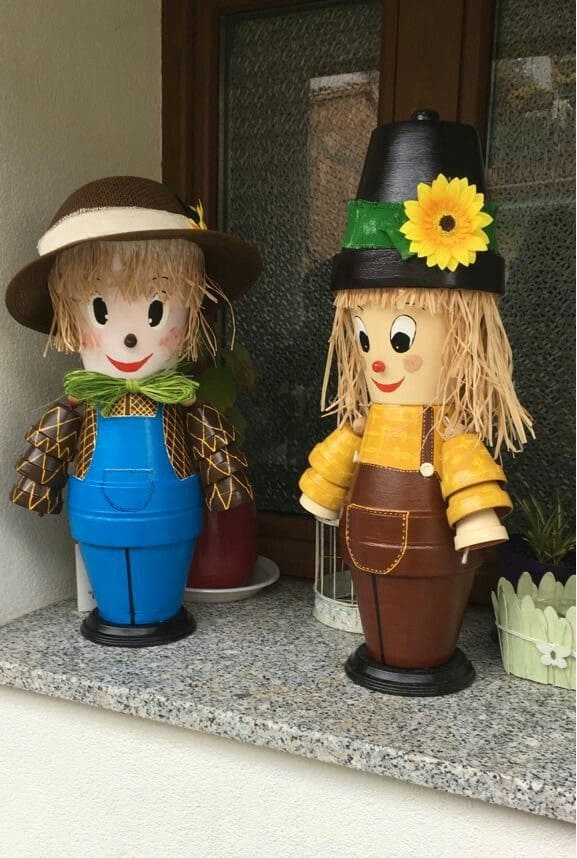
With straw hair, painted outfits, and wide, friendly smiles, they make the perfect fall or harvest-themed porch decor.
Materials Needed
- 6 clay pots per scarecrow; 2 plastic plant saucers (10″)
- 12 small clay pots
- 1 bag of straw strands
- 1 acrylic paint and paintbrush set
- 1 hot glue gun with glue sticks
- 1–2 fabric ribbons
- 1 small straw hat
- Optional: faux sunflower clip, clear sealer spray
Step-by-step Guide
- Paint your clay pots in your desired colors – brown or blue for overalls, yellow or plaid for the shirt, beige for the face. Let each one dry completely.
- Add clothing details like buttons, pockets, and suspenders using fine brushes. Use a round pot for the head and paint a simple, friendly face with rosy cheeks and big eyes.
- Stack and glue the three large pots to form the lower body. Attach six small pots on each side as arms using hot glue.
- Glue raffia or straw around the rim of the head pot to create hair, then attach the head on top. Add a small hat (real or painted) and embellish it with ribbon or faux flowers.
- Wrap a ribbon around the neck and glue it in place. Secure your scarecrow to a plastic saucer base or directly onto a porch step for extra stability.
#17. DIY Painted Bee And Honey Clay Pot
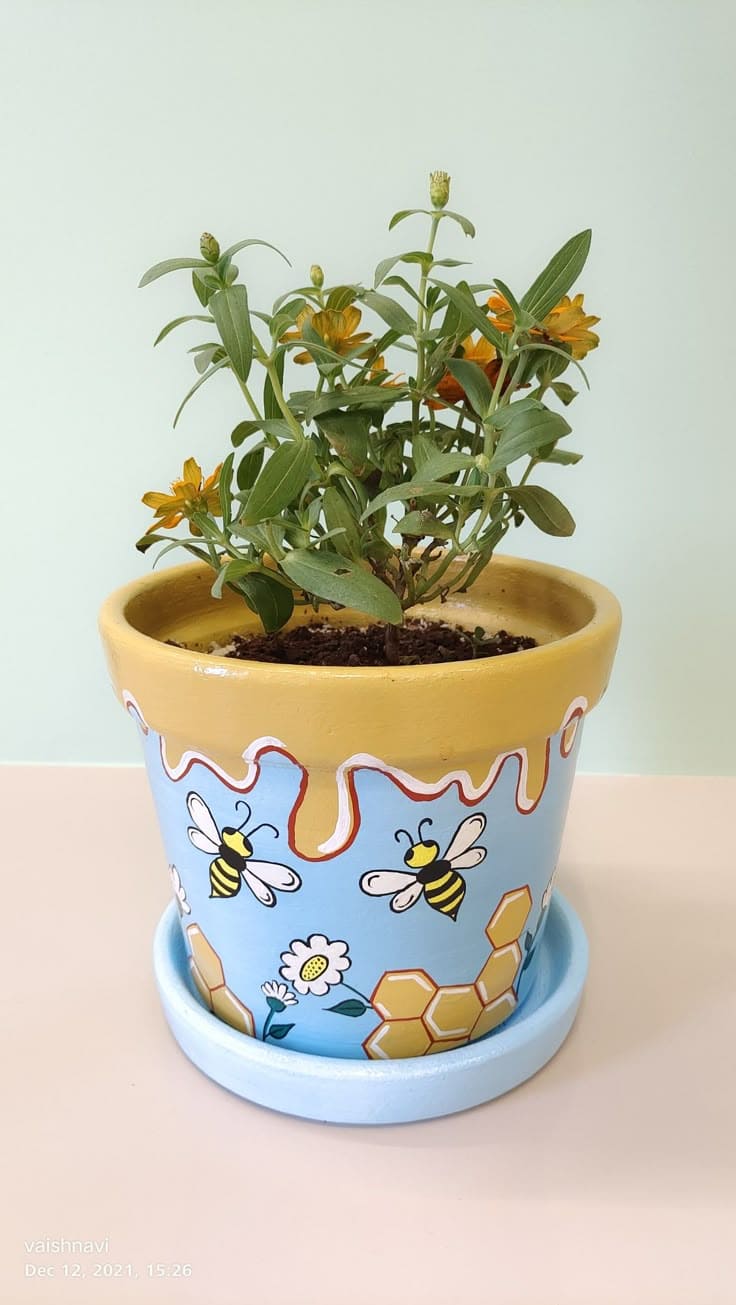
I created this honey-themed pot as a tribute to the little pollinators who keep my garden blooming.
Materials Needed
- 1 terra cotta pot (6–8 inch)
- 1 matching clay saucer
- 1 acrylic paint set and paintbrush
- 1 white paint pen
- 1 clear acrylic sealant spray
Step-by-step Guide
- Paint the entire pot and saucer with a sky-blue base coat and let dry. Then, paint the rim and top edge of the inside in a warm honey-yellow. Once dry, use a fine brush to draw honey drips flowing down the edge.
- Sketch bees, flowers, and honeycombs lightly in pencil, then fill in the shapes with bright acrylics. Outline in black for pop, and use the white paint pen to add wing detail and dot accents.
- Seal the entire surface with a clear acrylic spray to protect your artwork from water and sun.
#18. DIY Mini Clay Pot Snowmen

These tiny snowmen are perfect for mantel displays, classroom gifts, or even place settings at your holiday dinner. Each one takes about 10 minutes and a whole lot of heart.
Materials Needed
- 5 mini clay pots (2–2.5 inch)
- 1 set of acrylic paints and paintbrush
- 5 small white pom-poms (1 inch)
- 5 mini foam balls
- 1 hot glue gun with glue sticks
- Optional: white paint pen, clear sealant spray
Step-by-step Guide
- Paint each clay pot white for the snowman’s face and body. Once dry, flip a second pot upside down, paint it red for the hat, and decorate with small white dots. Use a white paint pen or brush tip for even spacing.
- Use hot glue to attach the red “hat” pot to the white one. Glue a white pom-pom to the top as the hat’s puffball. Paint a cute smile with black dots and glue an orange foam nose in the center of each snowman’s face.
- Touch up details by adding blush dots, tiny eyebrows, or a dusting of glitter if you’d like a snowy shimmer.
#19. DIY Mickey Mouse Clay Pot
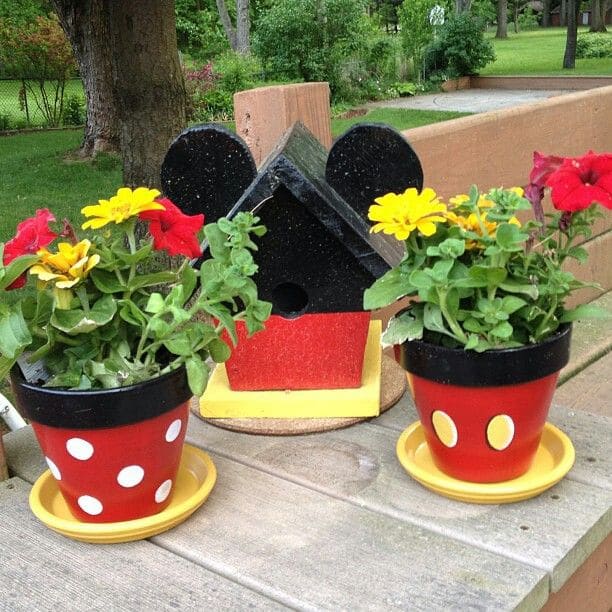
Bright, cheerful, and packed with playful Disney charm, they instantly bring a smile whether on your porch, garden table, or party setup.

Materials Needed
- 2 clay pots (4–6 inch), 2 clay saucers
- 1 wooden birdhouse
- 1 small round wooden plaque
- 1 set of acrylic paints and paintbrush
- 1 hot glue gun with glue sticks
- Optional: 2 black wooden circles, clear sealer spray
Step-by-step Guide
- Paint the clay pots red for the base, and the saucers yellow. Paint the rims of each pot black. Let dry completely, then add white dots (for Minnie) or two yellow ovals (for Mickey’s buttons).
- For the birdhouse, paint the bottom half red and the top half black to match the Mickey theme. Paint the base (plaque or cork pad) yellow. Glue two black circles to the back as Mickey ears.
- Once fully dried, pot vibrant flowers like marigolds, petunias, or zinnias in the planters for a cheerful pop.
#20. DIY Stacked Clay Pot Snowman
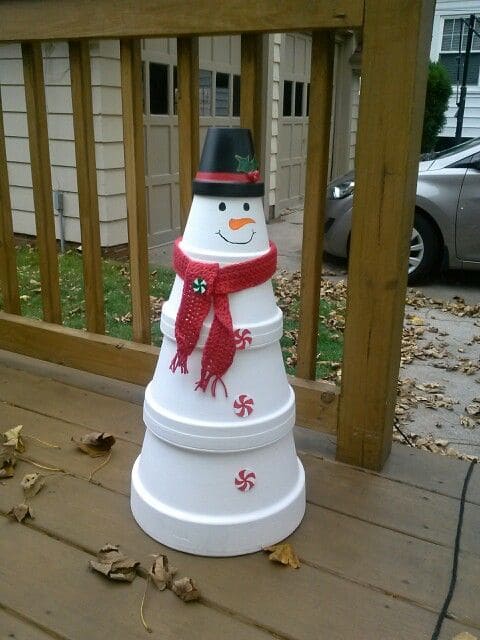
I made this snowman with three clay pots and a big cup of hot cocoa nearby, classic crafting weather.

Materials Needed
- 5 clay pots (sizes: 12”, 10″, 8″, 6″ and 4”)
- 1 acrylic paint and paintbrush set
- 1 red scarf or ribbon (18–24 inches)
- 3 peppermint embellishments
- 1 hot glue gun with glue sticks
- Optional: clear sealer spray
Step-by-step Guide
- Paint all four large pots white and the smallest pot black (for the top hat). Stack the large pots upside-down from biggest to smallest and glue them together with hot glue.
- Flip the black pot right-side-up and glue it to the top as a hat. Paint on a face – two black eyes, a curved orange carrot nose, and a smile made of black dots.
- Tie a scarf around the “neck” where the pots meet. Then, glue peppermint buttons or red embellishments onto the front of each pot section.
#21. DIY Clay Pot Fire Hydrant
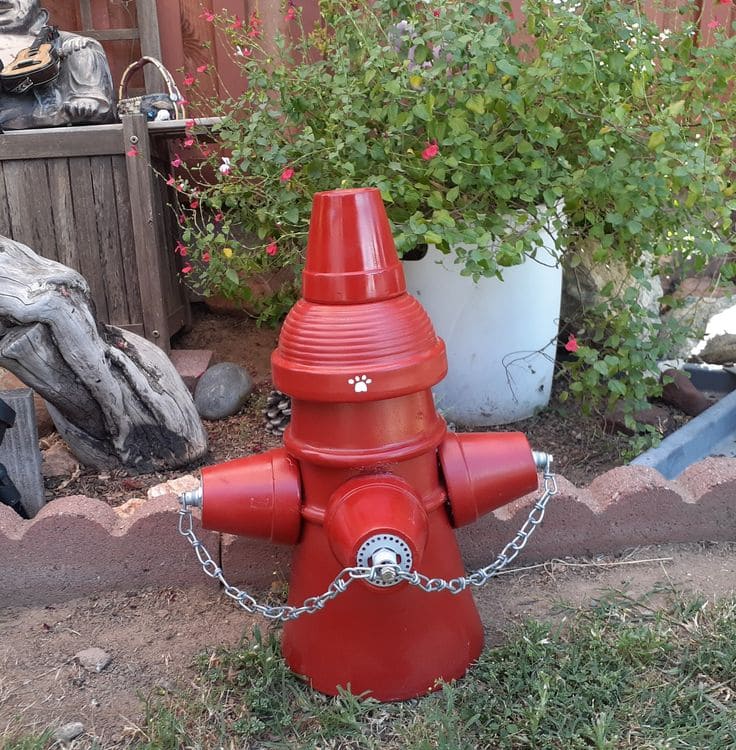
I built this fire hydrant as a tongue-in-cheek gift for our dog-loving neighbor, and it became the hit of the whole block.
Materials Needed
- 3 clay pots (6″, 8″, and 10″)
- 2 small clay pots (4″)
- 1 round clay saucer (4–6 inches)
- 1 set of acrylic paint and paintbrush
- 1–2 metal cabinet knobs
- 1 small length of chain (12–18 inches)
- 1 hot glue gun with glue sticks
- Optional: clear weatherproof sealant spray
Step-by-step Guide
- Paint all your clay pots and the saucer bright red. Once dry, stack the three largest pots upside-down, gluing them together to create the hydrant body. Glue the saucer to the front of the bottom pot to resemble the valve outlet.
- Attach the two smaller pots to each side of the middle pot as nozzles. You can add hose connectors, silver-painted circles, or glued cabinet knobs to simulate caps. Use black and silver paint to add accents and realistic lines.
- For extra flair, attach a small length of chain across the nozzles using glue or hooks. Add a paw print decal or stencil if you’re making it pet-themed.
#22. DIY Clay Pot Pig Planters
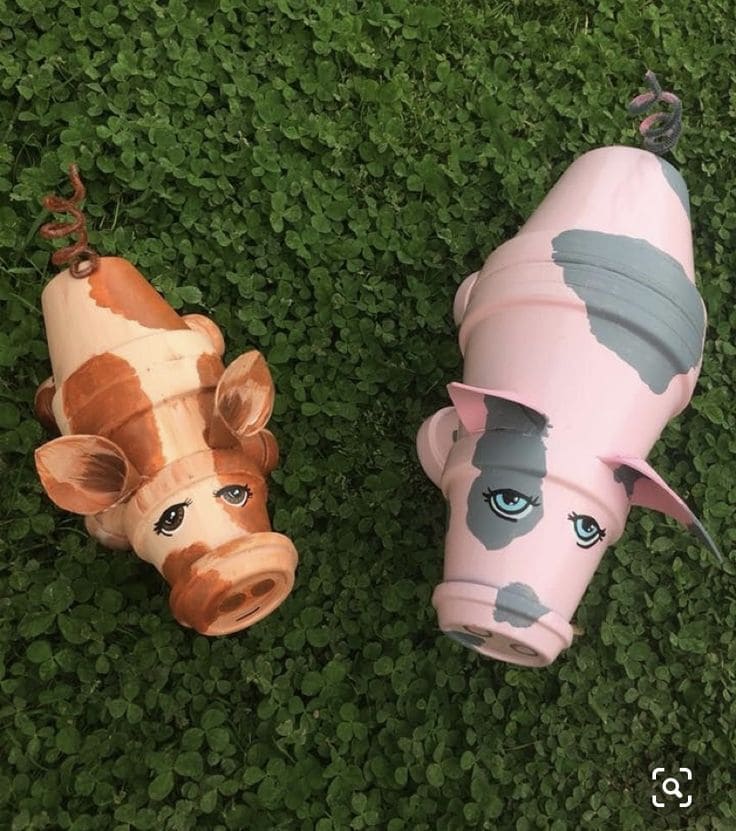
I made these with my niece on a spring weekend when we couldn’t stop laughing at our wobbly pig snouts and mismatched ears.
Materials Needed
- 3 medium clay pots (6–8″); 4 mini clay pots (2″)
- 2 clay saucers
- 1 piece of floral wire
- 1 set of acrylic paints and fine paintbrush set
- 1 hot glue gun with glue sticks
- Optional: clear weatherproof sealer
Step-by-step Guide
- Paint all three stacking pots in your pig’s base color. Paint the mini pot (snout) in the same color, and add two dark dots for nostrils.
- Glue the three large pots together, upside-down and stacked smallest on top. Attach the mini pot snout to the very top.
- Use craft foam or felt to cut out two ear shapes and glue them on either side of the top pot. Paint a cute pig face with wide eyes and sweet lashes.
- Wrap a piece of floral wire or a pipe cleaner into a curly shape and glue it to the bottom as a tail. Seal your pig with a weatherproof spray if it’ll live outside.