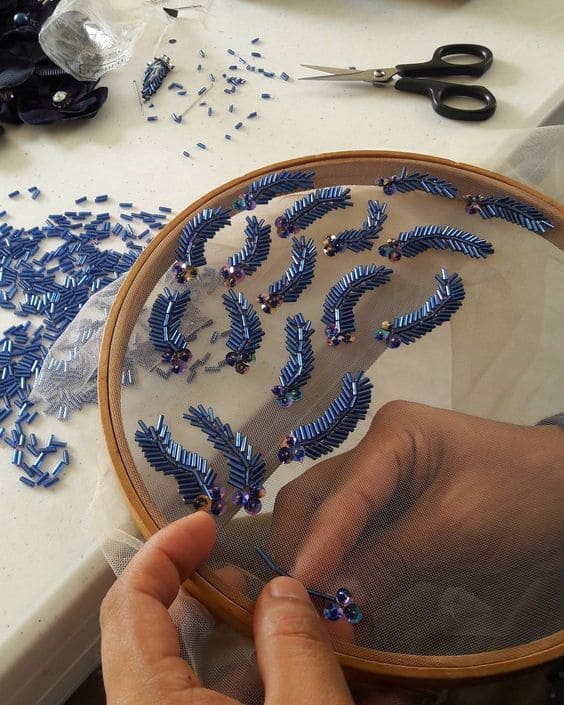
 Each of these leaves looks like it has been dipped in moonlight, their metallic blue sheen glowing against the fabric. Stitch by stitch, they grow like tiny fronds, filling the hoop with a forest of shimmer.
As you work, you’ll find the process meditative, the beads falling into place like quiet footsteps on a path.
When finished, the design feels alive, as though a breeze might lift the leaves and make them rustle.
Materials Needed
- Bugle beads in metallic blue (about 80-100 pieces)
- Seed beads in complementary colors (gold, black, or purple, 5 grams)
- Small round beads for accents (optional, 10-15 pieces)
- Beading needle and thread (2-3 yards)
- Sheer fabric (tulle or organza, 8”×8”)
- Embroidery hoop (8” size)
- Scissors
Step-by-step Guide
Step 1: Place your sheer fabric into the embroidery hoop, pulling it firm and even. You should mark small leaf shapes with a fabric pen if you want a guide.
Step 2: Bring the needle through at the base of the leaf. Then thread two or three bugle beads, then stitch them down in a straight line to form the central vein.
Step 3: Continue adding bead rows on each side of the vein. Place them at a slight angle so the shape gradually curves, mimicking real leaflets.
Step 4: Add a cluster of seed beads or crystals at the base for extra sparkle. Then repeat the process to create more leaves across your fabric.
Step 5: Once you’re satisfied with the layout, secure the thread at the back with small knots and trim neatly.
Notes:
If you want variation, try stitching leaves in different sizes. Smaller ones scattered between larger motifs create a more natural and balanced effect.