
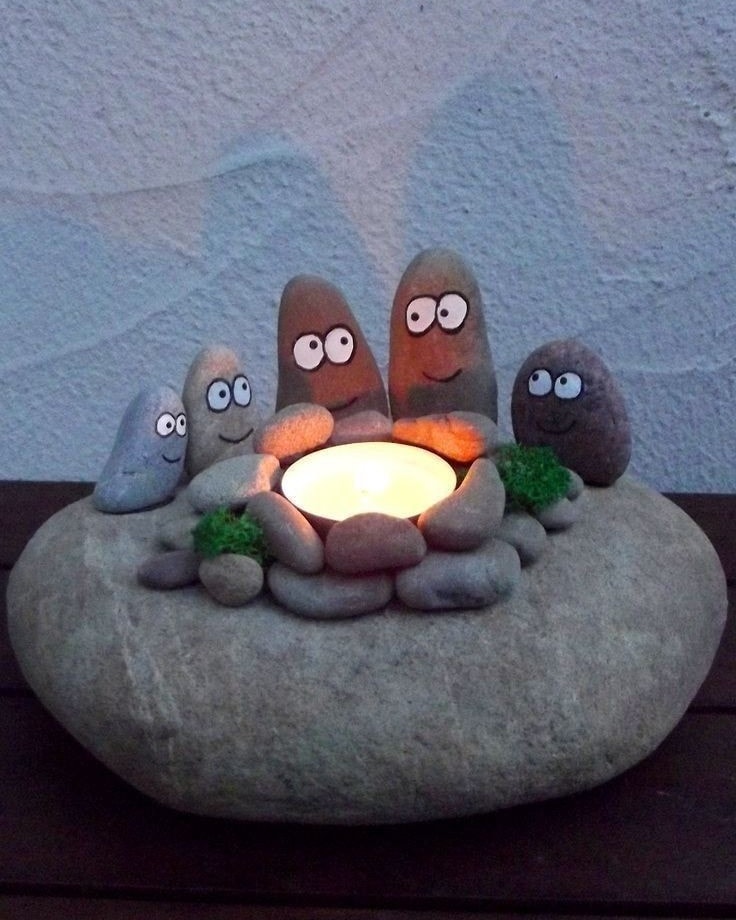
A pebble family candle holder is a sweet handmade craft made with smooth river stones, a flat base rock, small painted faces, moss, and a tea light candle. It looks simple at first, but the tiny pebble “family” around the glowing candle gives it a warm, storybook feeling.
Materials Needed
- 1 large flat stone or wooden base
- Smooth river pebbles in different sizes
- 1 small tea light candle or LED candle
- Strong craft glue or hot glue
- White and black acrylic paint
- Fine paintbrush or paint marker
- Small pieces of faux moss or preserved moss
- Clear sealant spray, optional
- Pencil, optional
Step-by-Step Guide
Step 1: Choose the Base Stone
Pick a large, flat stone that can hold the whole design securely. It should be wide enough for the candle in the center and several pebble figures around it. Wash the stone with water, remove dust, then let it dry completely before gluing anything. A smooth oval stone works best because it gives the candle holder a soft, natural shape.
Step 2: Select Pebbles for the Family Figures
Choose several upright pebbles in different heights to create the little pebble family. Taller stones can become the adults, while smaller ones can look like children. Try arranging them around the candle before gluing so the scene feels balanced. The nicest designs usually mix different colors and shapes, but keep the stones smooth so the faces are easier to paint.
Step 3: Place the Candle in the Center
Set a small tea light candle or LED candle in the middle of the base. Do not glue a real wax candle permanently if you plan to replace it later. Instead, build a small pebble ring around it so the candle can sit safely inside. LED candles are the safer choice for shelves, bedrooms, or homes with kids and pets.
Step 4: Glue the Pebbles in Position
Once you like the layout, glue the standing pebbles around the back and sides of the candle. Hold each stone in place for a few seconds until it feels stable. Add smaller flat pebbles around the candle to create a cozy firepit-style border. Let the glue dry fully before moving to the next step, because loose stones can shift and ruin the shape.
Step 5: Paint Simple Faces on the Pebbles
Use white acrylic paint to make small oval eyes on each standing pebble. After the white paint dries, add tiny black dots for pupils. A simple curved smile can make each pebble look friendly and charming. Keep the expressions minimal, because the handmade look is part of the beauty. If you want extra durability, spray a light coat of clear sealant after the paint dries.
Step 6: Add Moss and Final Details
Tuck small pieces of faux moss near the pebble figures or around the candle ring. This adds a soft woodland touch and makes the piece feel more finished. Check that the candle sits flat and the stones are firmly attached. Place your finished pebble family candle holder on a table, shelf, entryway console, or bedside corner for a gentle handmade glow.
Helpful Tips
Use smooth, clean stones so the glue bonds better. A battery-powered tea light is safer and keeps the craft reusable. Avoid placing moss too close to a real flame. For a gift version, choose pebbles that represent family members and add a small handwritten tag with a warm message.