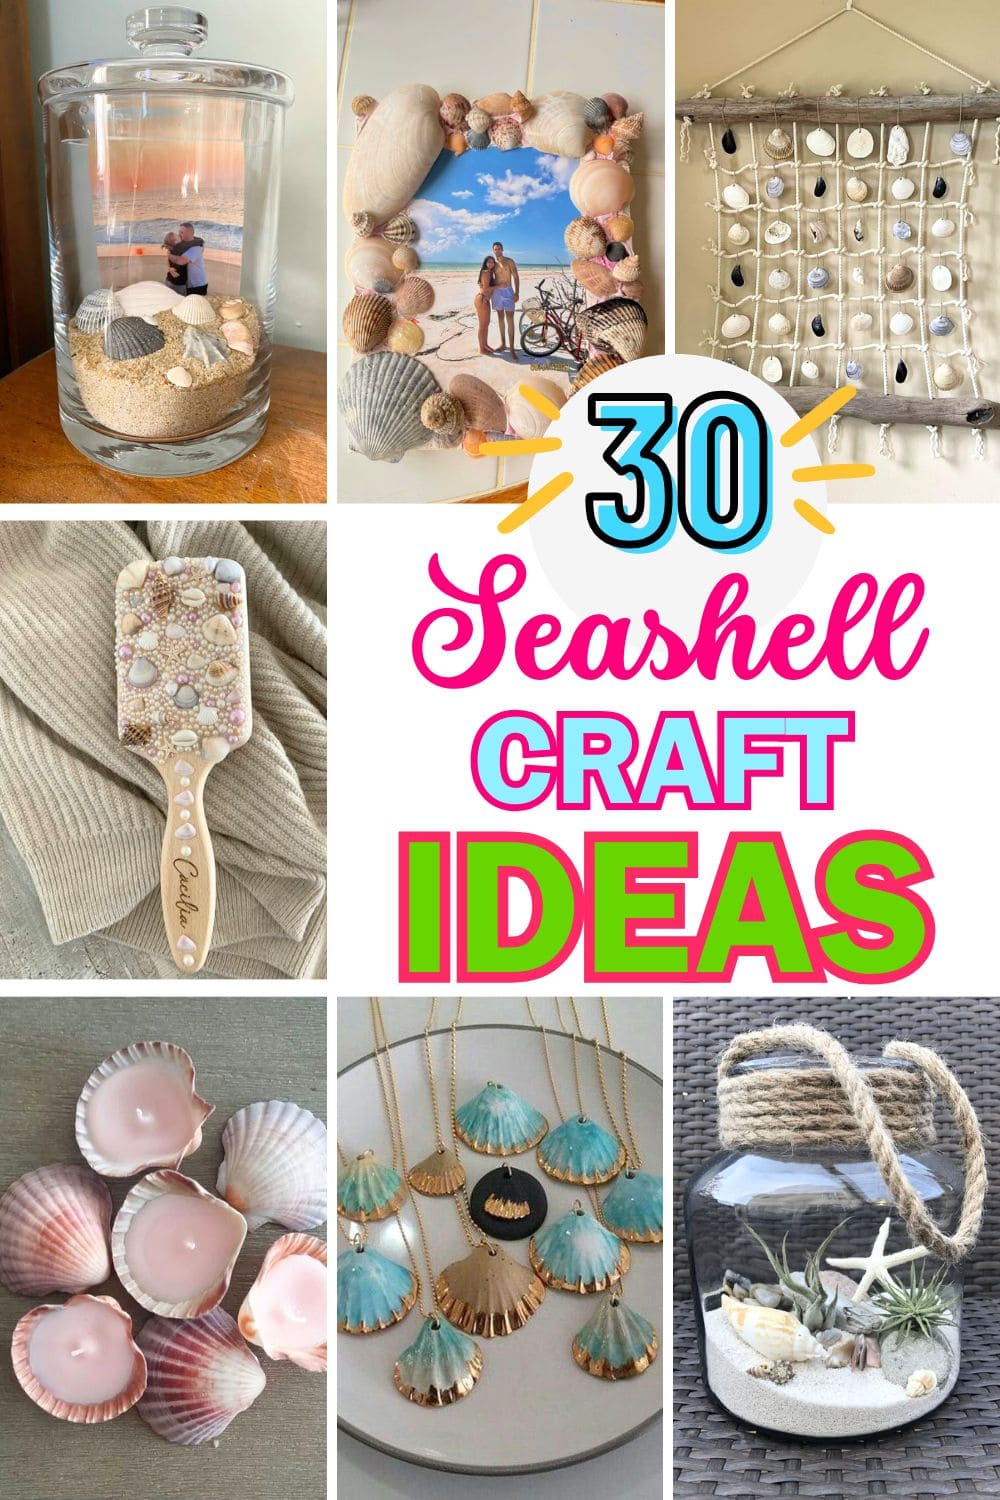
Step onto the sun-drenched shores of creativity as we embark on a captivating journey through “25 DIY Seashell Crafts That Bring the Spirit of Summer to Life.” As the gentle waves of inspiration wash over you, get ready to discover an ocean of possibilities.
This collection is a treasure trove of ingenious ideas that harness the beauty and allure of seashells, transforming them into stunning works of art. From charming home decor accents to wearable creations that evoke the essence of the seaside, these crafts will whisk you away to a world of endless summer.
Each project offers a chance to indulge your imagination, infusing your surroundings with the carefree ambiance of the beach. With the delicate textures, iridescent hues, and intricate shapes of seashells as your artistic palette, the possibilities are as boundless as the ocean itself.
Whether you’re seeking a creative escape or hoping to bring a touch of coastal charm into your everyday life, these DIY seashell crafts are the perfect choice. Join us as we embark on a journey where shells become the building blocks of summer magic.
This article contains affiliate links. If you purchase through them, I may earn a small commission at no extra cost to you. Thank you for your support!
#1. Seashell Wind Chimes
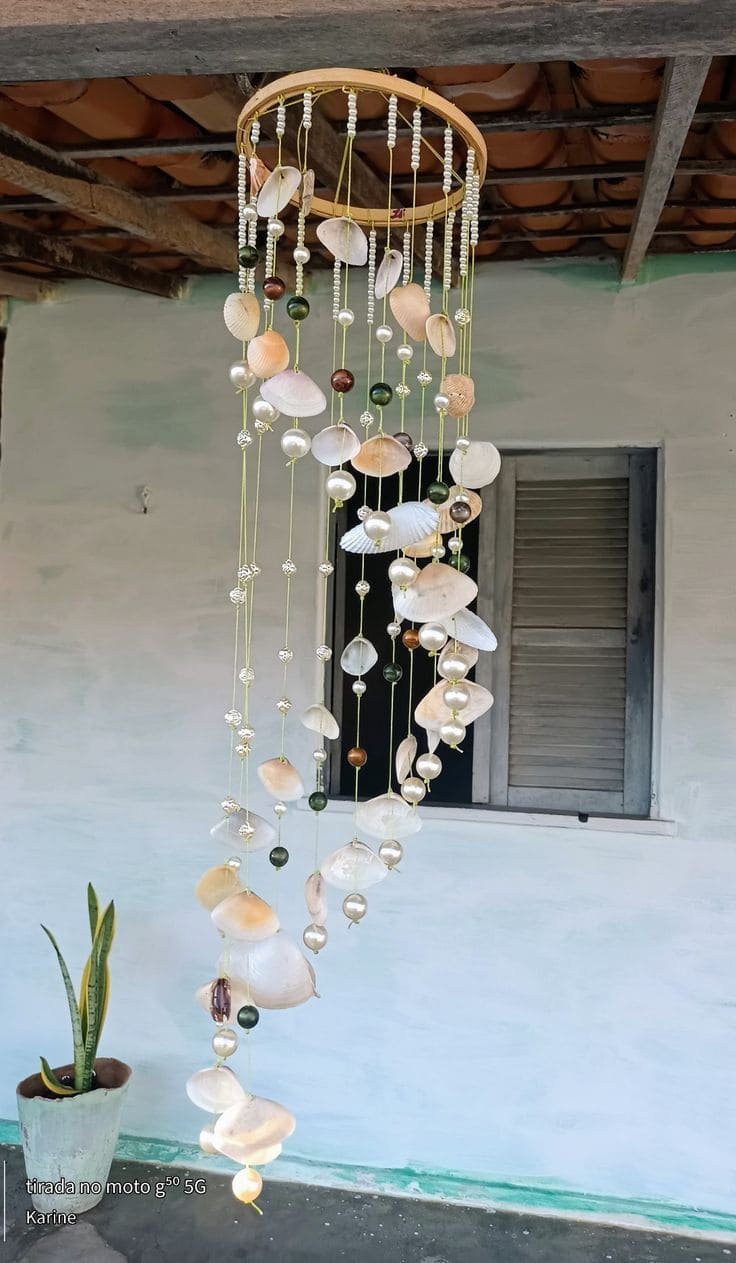
Whether you hang it on your porch, by the window, or in your garden, the soft tinkling sound brings coastal calm into any space.
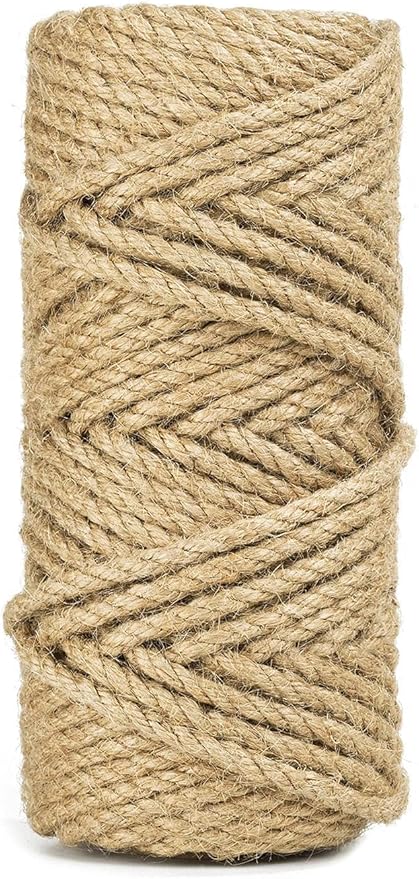
Materials Needed
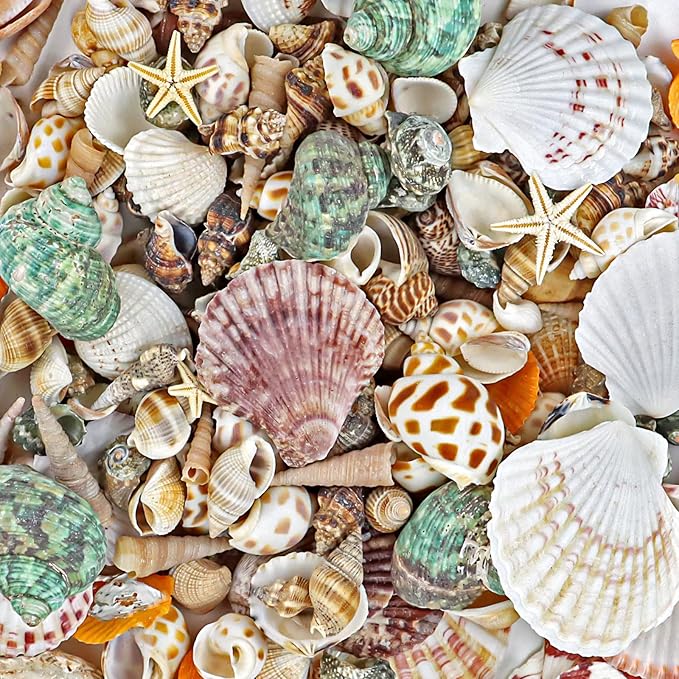
- 35–40 medium-sized natural seashells
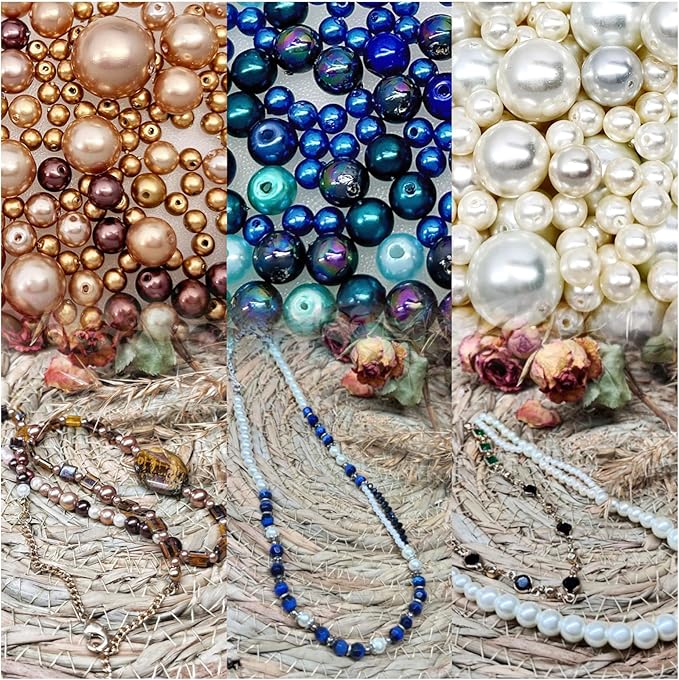
- 60–80 assorted beads (pearl, wood, and metallic mix for texture)
- 10–12 strands of nylon cord or fishing line (each about 28–36 inches)
- 1 wooden hoop (8 to 10 inches in diameter)
- Glue gun
- Scissors and sewing needle
Step-by-step Guide
- Clean and dry your seashells. If needed, drill tiny holes at the tops. Cut nylon cords to desired lengths and tie them to your wooden hoop, spacing them evenly. Secure with a drop of glue.
- Thread beads and shells in a pattern, alternating between textures and colors. Tie a knot after each shell or bead to keep them in place and add visual balance.
- Once all cords are fully decorated, tie three extra cords evenly spaced around the hoop and knot them together at the top to create a hanger.
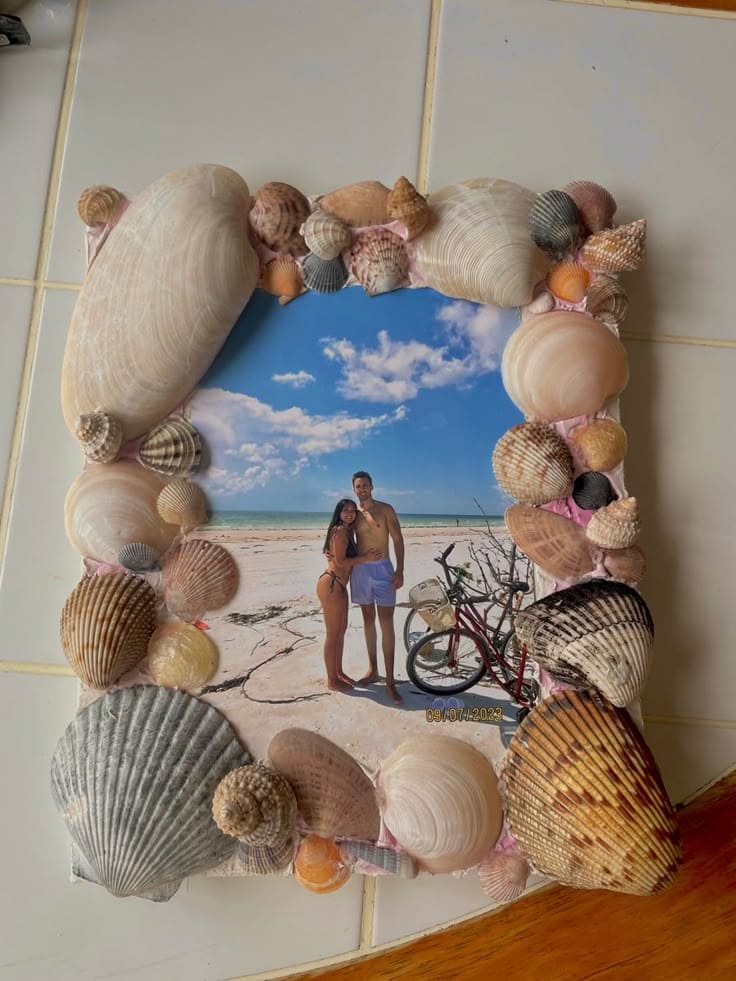
#2. Seashell Picture Frame
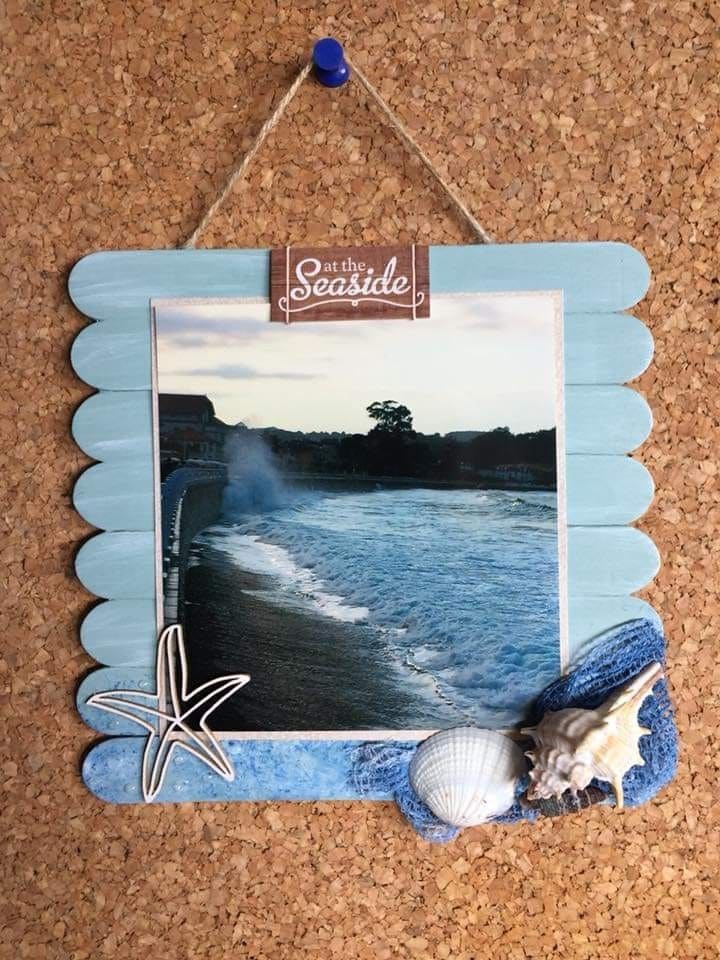
I made mine after a beach trip with friends, every time I glance at it, I remember the sound of the waves and the laughter in the wind.
Materials Needed
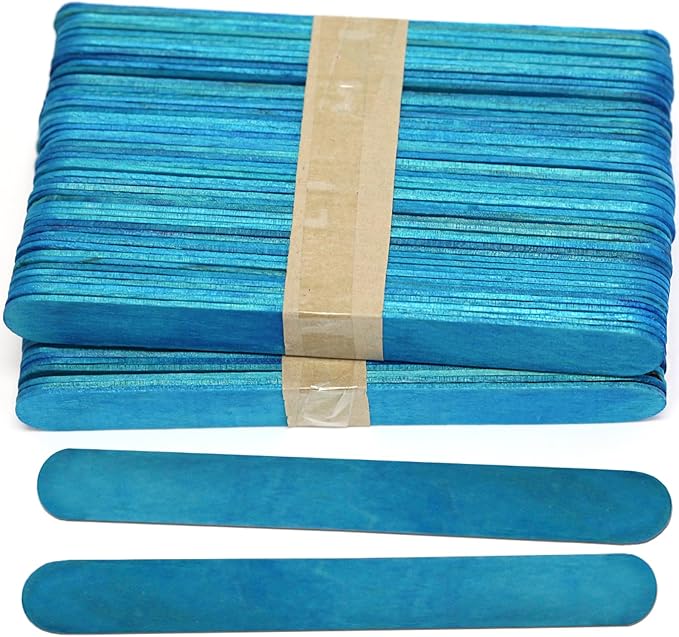
- 6–8 wide craft sticks (painted in coastal blue)
- 1 printed 4×6 photo of your favorite beach memory
- 2 small decorative seashells
- 1 piece of jute twine (about 10 inches)
- Hot glue gun
- Scrap netting fabric
- 1 small wooden label or tag
- Scissors
Step-by-step Guide
- Line up 8 craft sticks horizontally and glue 1 stick across each side on the back to hold them in place. Let dry completely, then glue the last stick across the bottom front as a mini ledge for embellishments.
- Center and glue your photo onto the stick surface. Add the decorative netting fabric to one corner, and place seashells on top using hot glue.
- Glue your wooden tag at the top, add the jute twine to the back for hanging, and you’re done.
#3. DIY Seashell Pendants
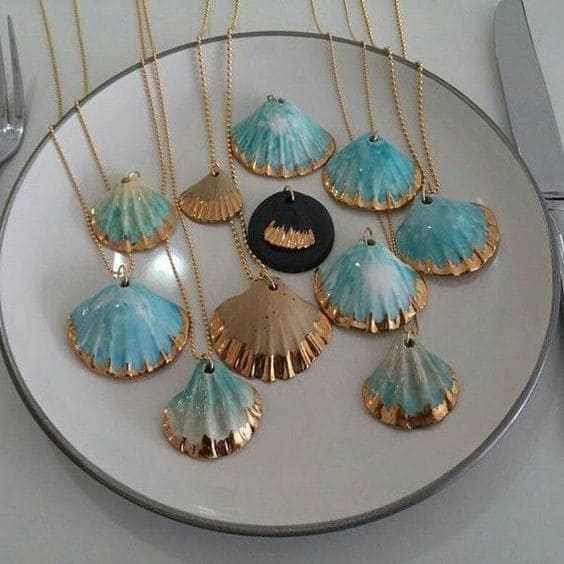
These DIY seashell pendants are perfect for gifts or even as delicate additions to a jewelry line—cheap to make, yet rich with personality.
Materials Needed
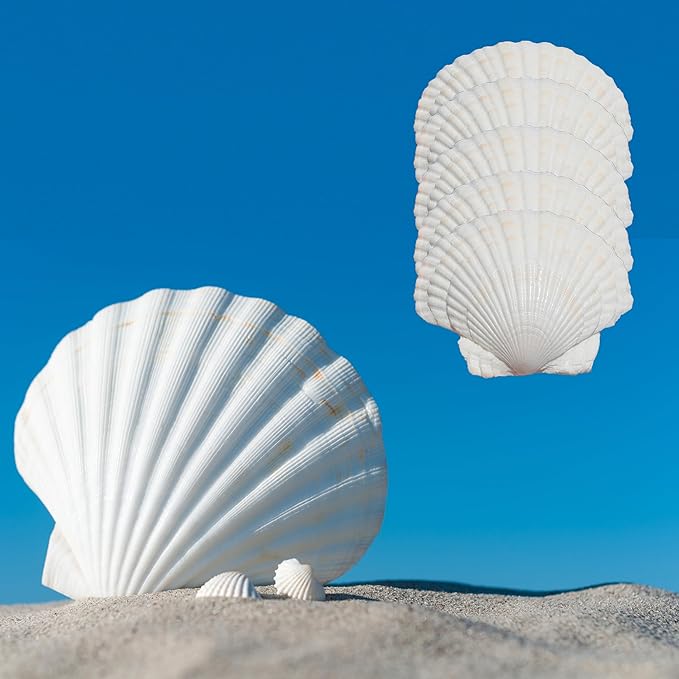
- 10–12 scallop seashells (flat, medium size)
- Gold leaf paint or metallic acrylic paint
- Small paintbrush
- Jump rings (6mm–8mm)
- Handheld rotary tool or small drill
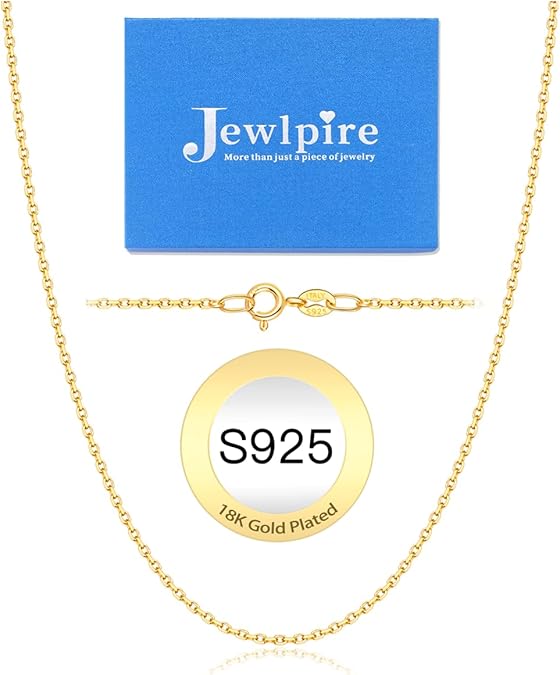
- Gold necklace chains (18–20 inch)
- Jewelry pliers
Step-by-step Guide
- Carefully drill a small hole at the top of each seashell using the rotary tool. Make sure to go slowly and wear protective glasses to avoid cracking the shell.
- Use a fine brush to apply gold paint along the lower edges of each shell. You can dip the shell tip directly or create an ombré effect.
- Insert a jump ring through each drilled hole and attach it to the necklace chain using jewelry pliers.
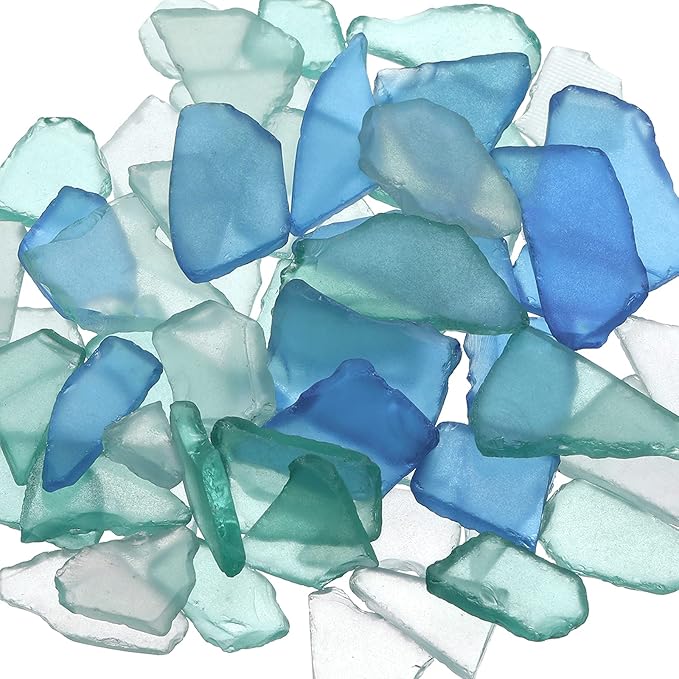
#4. DIY Beach Resin Coasters
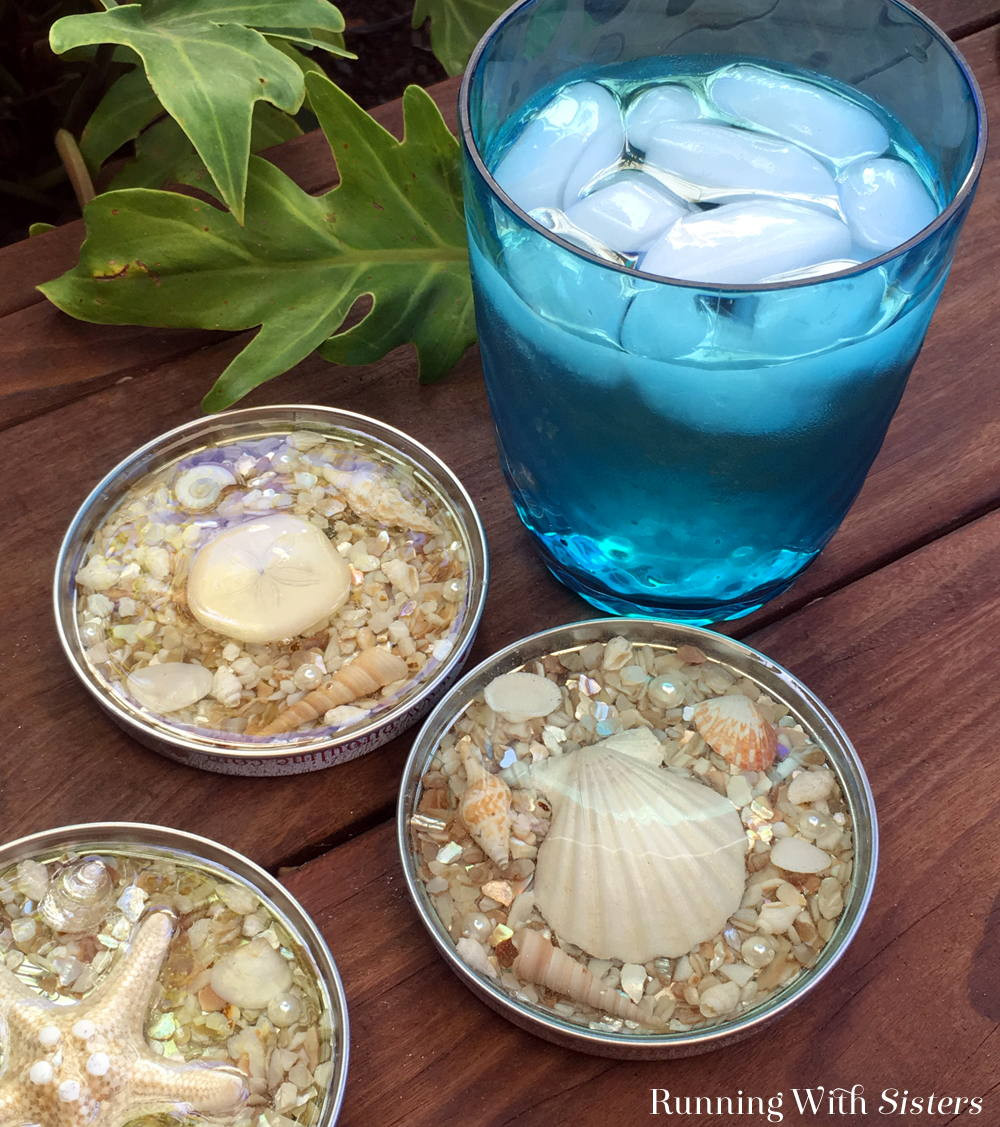
I made a set as a surprise for our patio table, and the way the shells, sand, and sparkle peek through the resin, it’s like holding a tidepool in your hand.
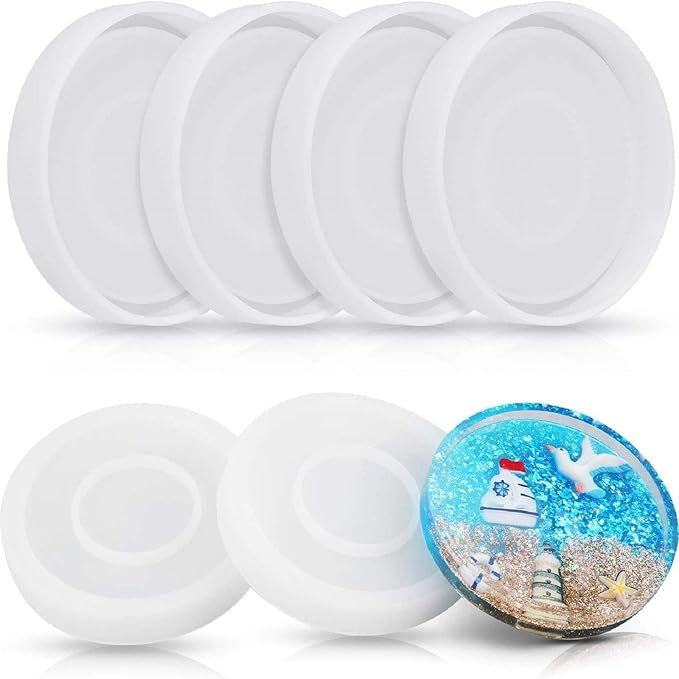
Materials Needed
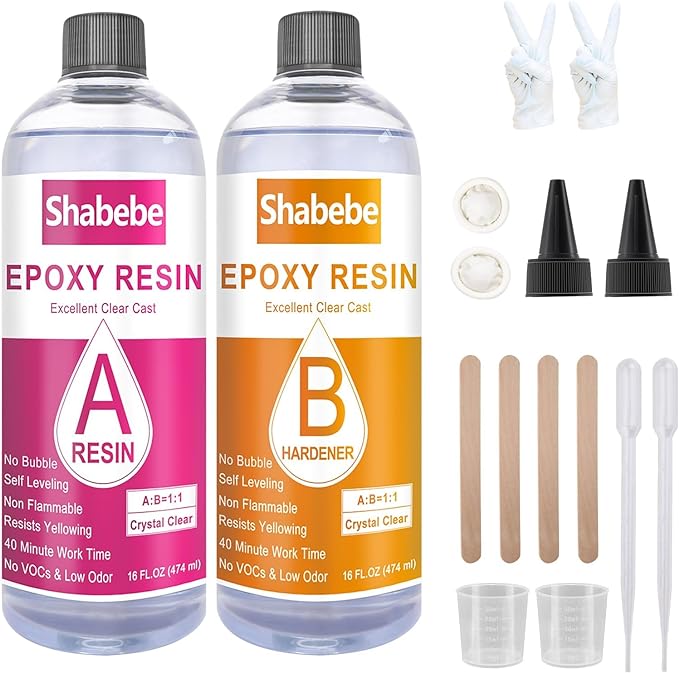
- Clear epoxy resin kit (8–12 oz total for 4 coasters)
- 4 Round coaster molds
- Mini seashells and starfish
- Crushed shells
- Resin-safe glitter
- Mixing cups and stir sticks
- Gloves + respirator mask
Step-by-step Guide
- Prepare your mold by placing a layer of crushed shell or sand at the base. Arrange mini seashells or a starfish on top, keeping the flattest side down to reduce bubbles.
- Mix equal parts resin and hardener according to your kit’s instructions. Stir slowly to avoid bubbles, then pour into the mold over your design.
- Let sit in a dust-free area for 24-48 hours to fully cure. Remove the coaster from the mold once hardened. You can sand the edges if needed or add felt pads to the base.
#5. Seashell Mirror Project
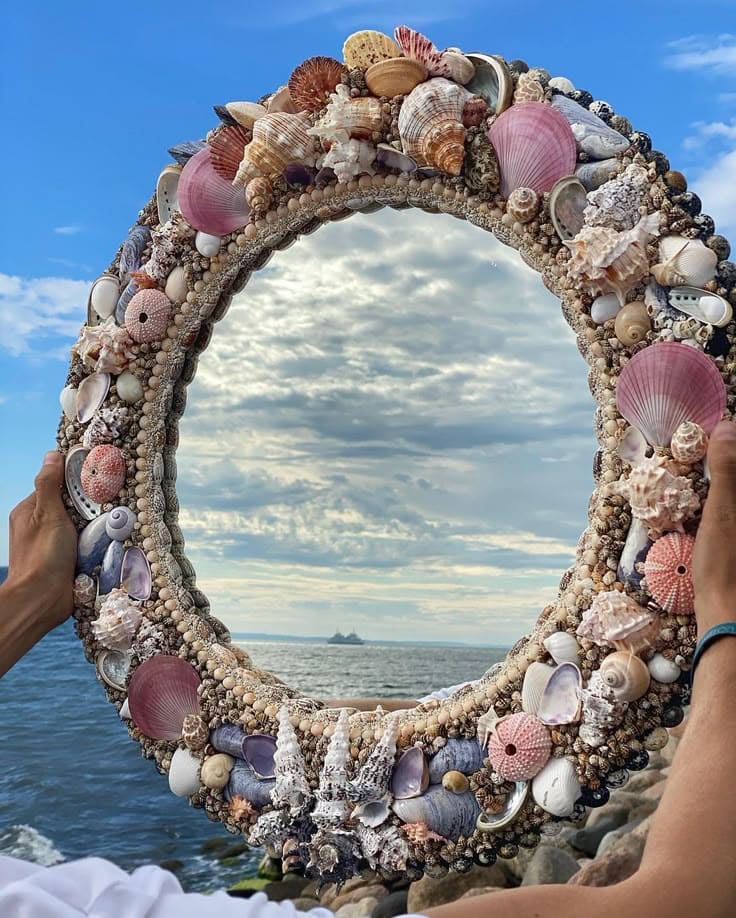
You can use shells collected from your own walks or grab a mixed bag online, either way, it becomes a coastal keepsake with a story.
Materials Needed
- 1 Round mirror with frame (12–18 inches)
- 100+ assorted seashells, large and small
- Hot glue gun and 15–20 glue sticks
- Small pebbles, coral chips, or shell filler pieces
- Protective sheet or cardboard
- Optional: Pearls or beads
Step-by-step Guide
- Lay your mirror on a flat surface covered with a protective sheet. Sort your shells by size and shape before you begin to plan the layout. Start placing your largest shells evenly around the frame to create anchors.
- Begin gluing down the larger shells first, spacing them naturally. Fill in the gaps with medium-sized shells, small pebbles, or coral chips.
- Once your base is covered, add tiny shells or pearl accents to fill gaps and create depth. Let everything dry completely before hanging.
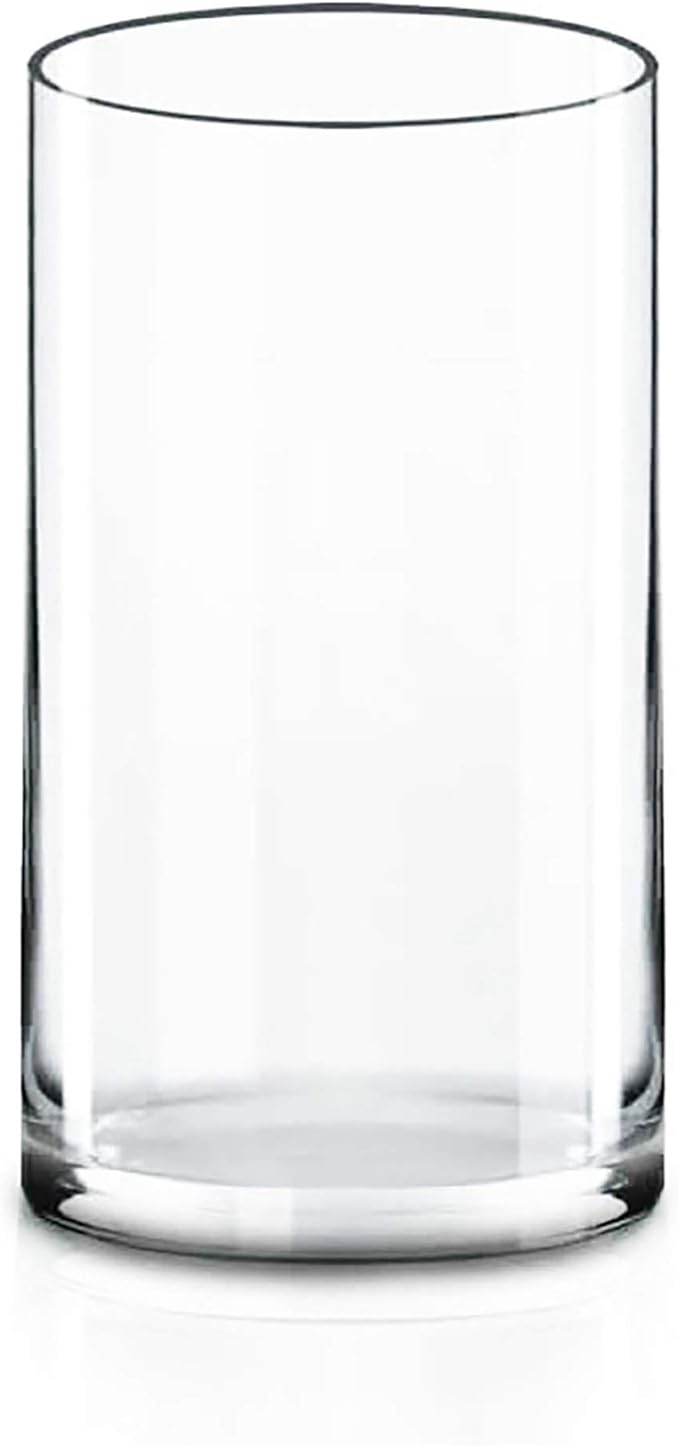
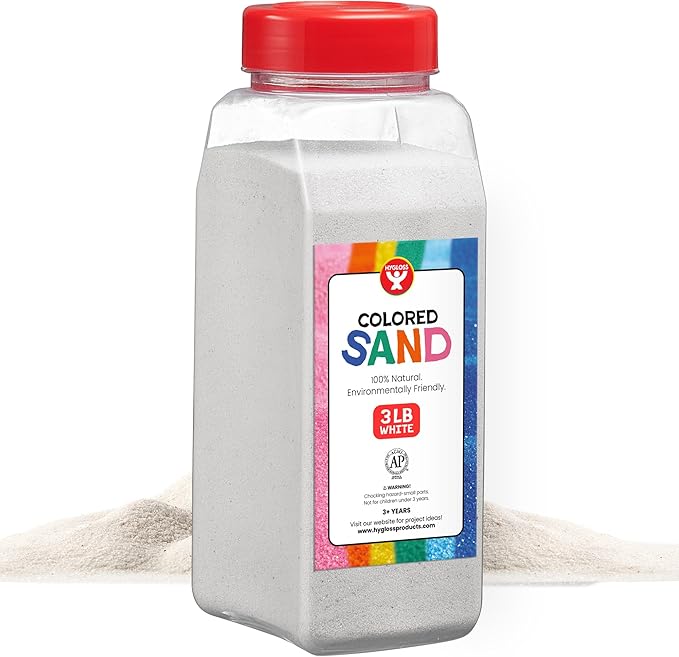
#6. Sun-warmed Coastal Vase

This coastal vase is like bottling up beach memories – sun-warmed shells, the quiet hush of sand, and a treasure hunt wrapped into one.
Materials Needed
- 1 tall clear glass vase (10–12 inches high)
- 2–3 cups of clean craft sand
- 40–60 assorted seashells in varying sizes
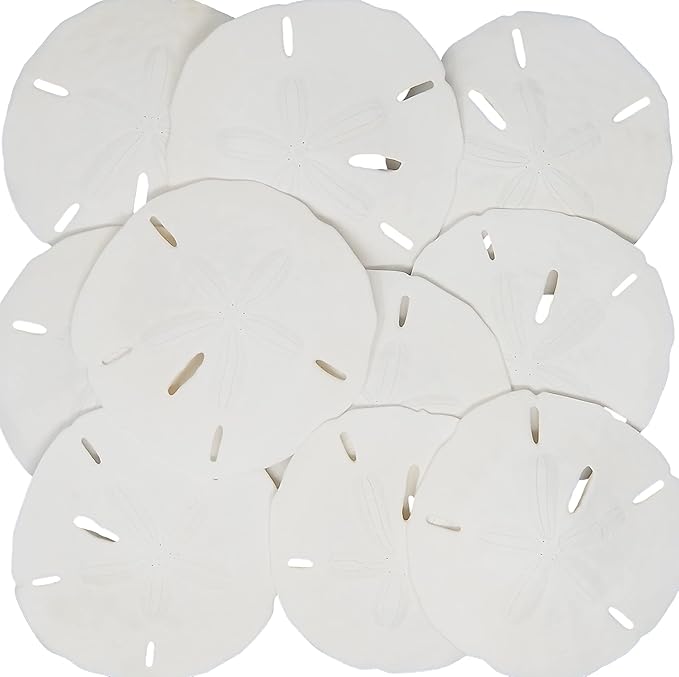
- 1 dried starfish and 1–2 sand dollars (optional)
- Optional: Mini LED fairy lights
Step-by-step Guide
- Pour about 2–3 inches of sand into the base of the vase, gently leveling it out with your hand or a spoon to create a soft foundation.
- Begin layering your shells, starting with the larger ones at the bottom. Nestle them into the sand to stabilize them, then continue filling in with medium and small shells as you go.
- Add a sand dollar or starfish near the top for visual impact. Optional: tuck a few fairy light strands throughout to softly illuminate your piece.
#7. Seashell Terrarium
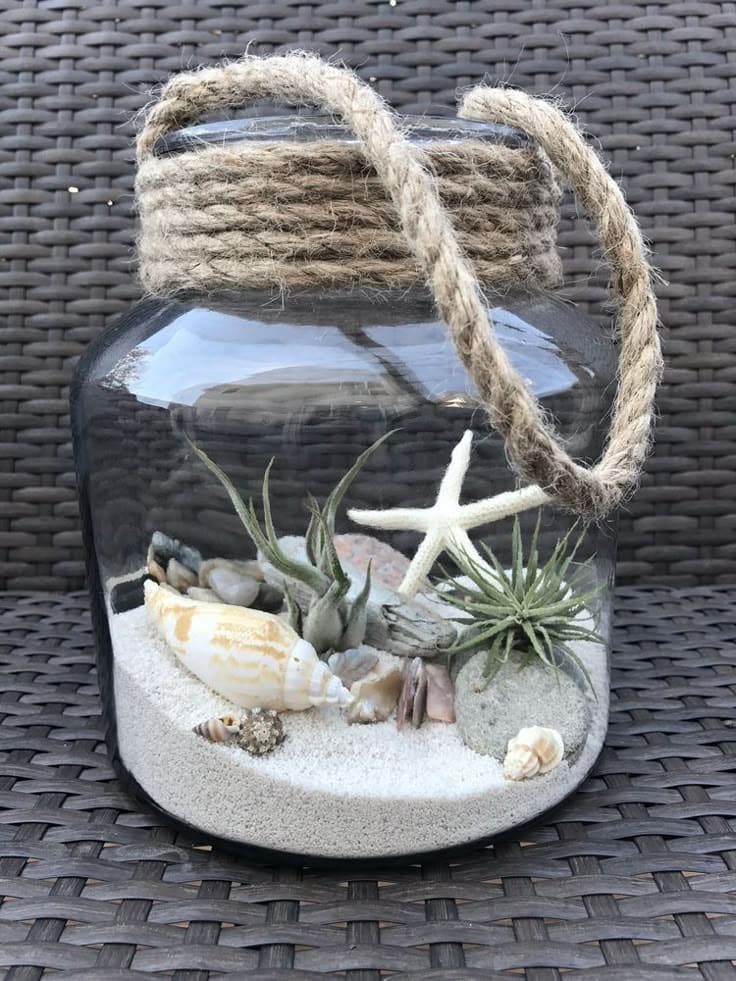
The combination of soft sand, ocean treasures, and greenery adds a natural touch without any maintenance fuss.

Materials Needed
- 1 wide-mouth glass jar (8–10 inches)
- 2 cups fine white craft sand
- 3–5 small air plants
- 8–10 assorted seashells and 1 small starfish
- 1 piece of driftwood (optional)
- Natural jute rope
- Hot glue gun
Step-by-step Guide
- Pour the sand into the base of your jar, creating a smooth layer about 2 inches deep. Gently tap the jar to even out the surface.
- Place your air plants in the sand first, arranging them like a natural garden layout. Nestle the seashells and starfish around the plants, adding in any decorative driftwood or pebbles to balance the design.
- For a nautical finish, wrap the top of the jar with jute rope and secure with a dab of hot glue at both ends.
#8. Driftwood And Seashell Wall Hanging
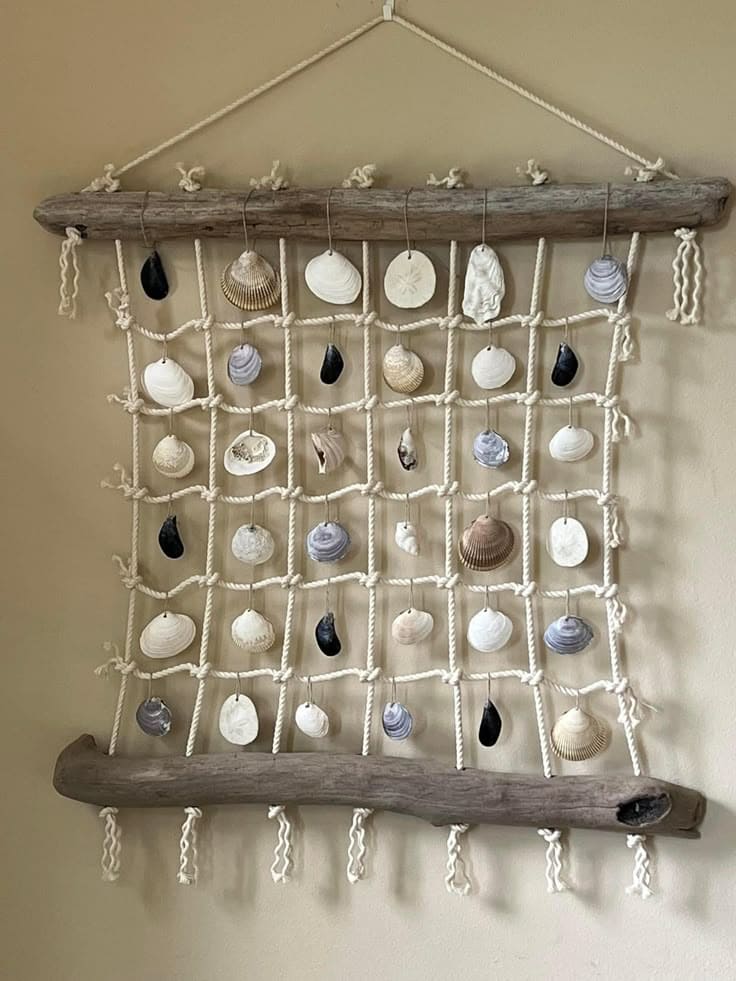
The natural textures, the soft sway, and the way light hits each shell, it’s soothing, stylish, and surprisingly easy to make.
Materials Needed
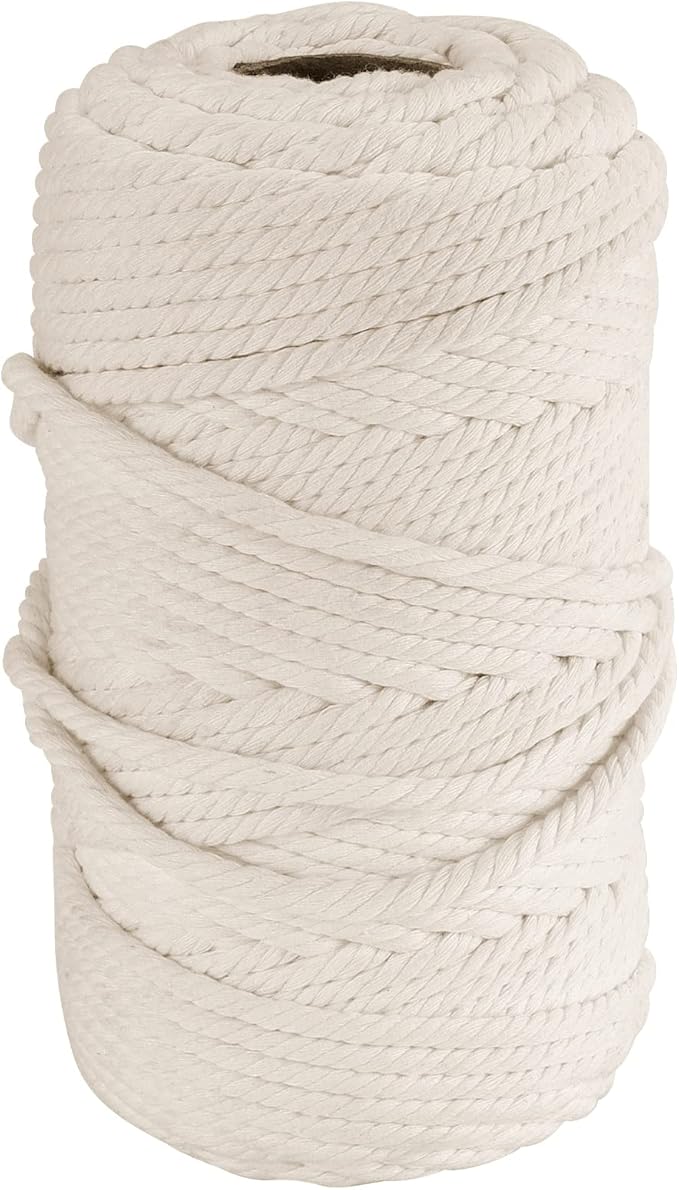
- 2 pieces of driftwood (18–24 inches long)
- 24–30 assorted flat seashells with holes
- 20 feet of cotton rope (1/4 inch thick)
- 24–30 metal jump rings
- Hot glue gun (optional)
- Scissors
Step-by-step Guide
- Cut 10 equal-length vertical strands of rope (around 30 inches each) and tie them securely along the top driftwood piece. Space them evenly.
- Using a simple over-under knotting method, weave and tie horizontal ropes across the verticals, forming a grid. Attach the bottom driftwood the same way as the top for a neat frame.
- Attach shells using jump rings – thread them through the existing shell holes and hook them onto the grid intersections. Secure jump rings with pliers or a dot of hot glue if needed.
#9. Seashell Memory Jar

This seashell memory jar captures a moment of warmth, light, and togetherness in the most tender way. It’s not just decor, it’s a pocket of summer you can hold onto all year long.
Materials Needed
- 1 large glass jar with lid (8–10 inches tall)
- 1 printed photo (4×6 inches or trimmed to fit)
- 1 foam board or cardboard backing (4×6 inches)
- 1–2 cups clean craft sand
- 10–12 small assorted seashells
- Double-sided tape
- Optional: decorative pebbles
Step-by-step Guide
- Print your chosen beach memory photo and glue or tape it to a sturdy foam board backing for support. Trim edges to ensure it fits neatly inside the jar and can stand upright in the sand.
- Pour the craft sand into the jar to form a stable base (about 2–3 inches deep). Gently press the backed photo into the sand at the center back of the jar.
- Decorate the front of the sand layer with seashells, pebbles, and any beachy extras. Arrange them to frame the photo naturally, like the beach reaching out to hold the memory still.
#10. Seashell Bouquet
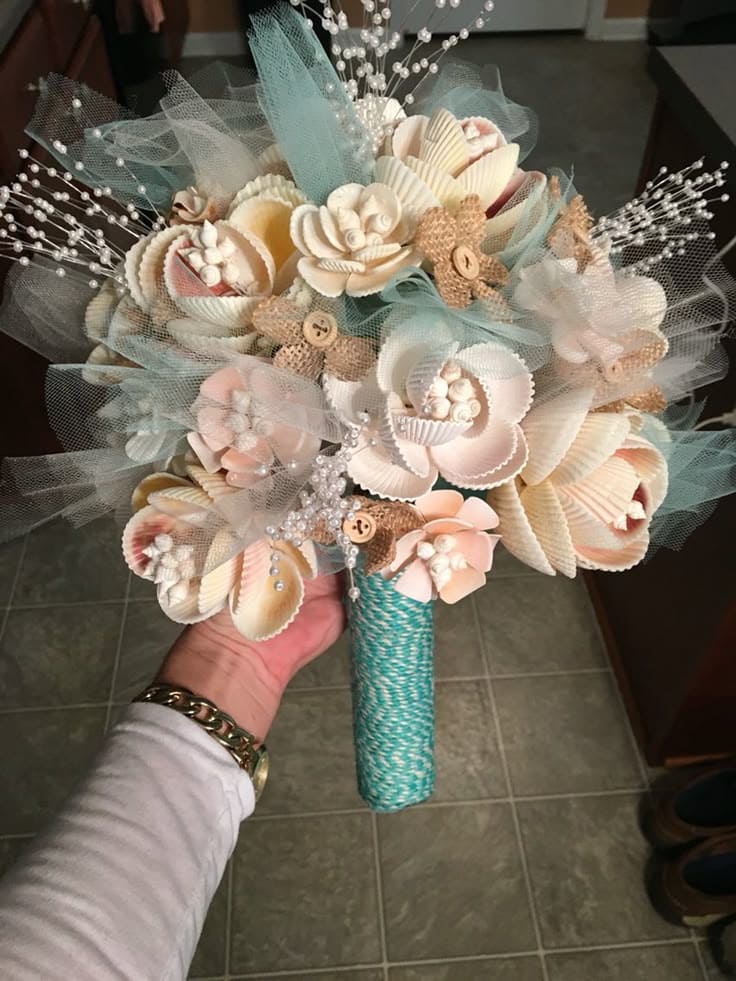
Whether you’re crafting this for a wedding, a beach-themed event, or as a keepsake for your home, it’s guaranteed to hold both beauty and memories.
Materials Needed
- 40–50 medium-sized seashells (scallop, clam, and conch shapes preferred)
- 10–12 small pearl sprays
- 1 roll of soft tulle (light blue or ivory, 6-inch width)
- 1 bouquet foam ball
- Hot glue gun and glue sticks
- Jute twine
- Decorative burlap flowers with buttons
- Floral wire and tape
Step-by-step Guide
- Begin by grouping 4–5 shells in a circular petal formation and glue them onto small tulle squares. Let dry, then attach pearl sprays or tiny bead accents to the center for a blooming effect.
- Insert floral wire into the base of each shell flower and secure it with floral tape. Repeat the process with burlap flowers and other decorative elements.
- Push each wired flower stem into the bouquet foam or holder, arranging as you go to balance color, texture, and shape. Wrap the handle tightly with jute twine or decorative rope, gluing at the ends for a neat finish.
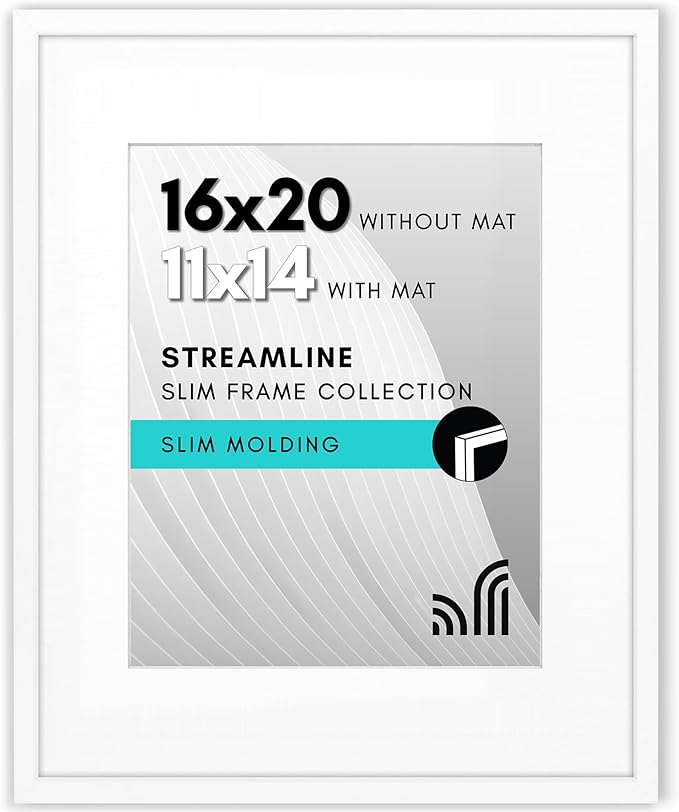
#11. Framed Seashell Mosaic
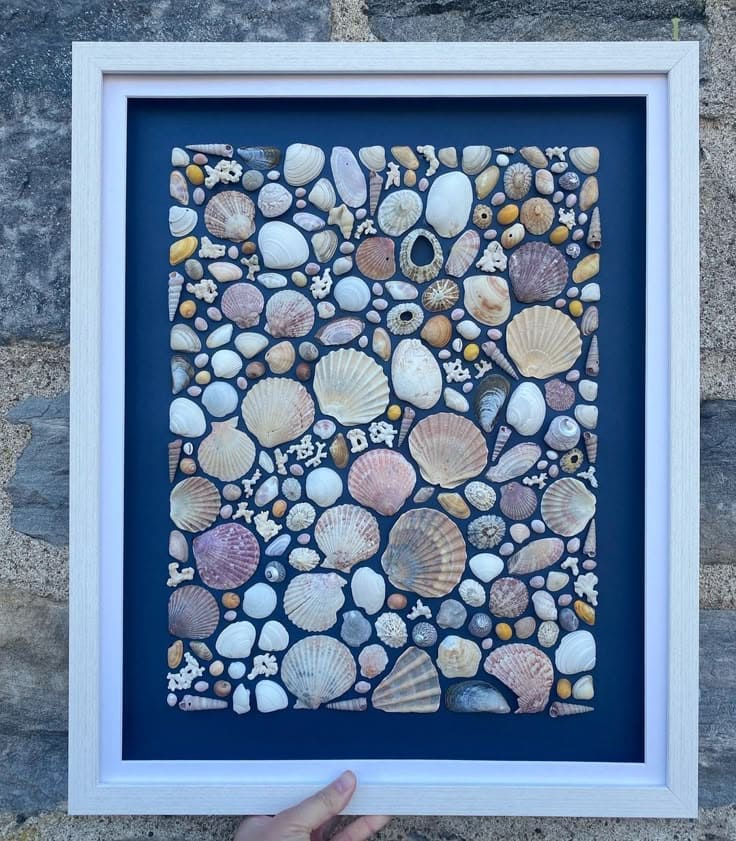
Each shell tells a salty little story, curved by waves, kissed by sun and when you place them together like this, they create a gentle rhythm of texture and memory.
Materials Needed
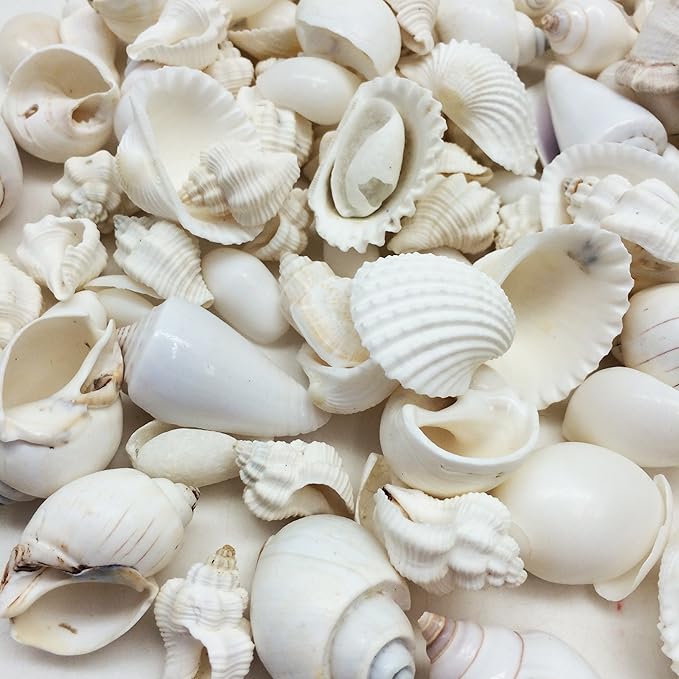
- 50–100 assorted small to medium seashells
- 1 picture frame (16×20 inches, with mat removed)
- 1 foam (cut to frame size)
- 1 sheet of navy blue
- Hot glue gun and glue sticks
- Tweezers
Step-by-step Guide
- Line the frame’s backing board with dark-colored craft paper using glue or tape for a smooth background.
- Lay out your seashells loosely across the paper to plan your layout – balance the larger ones first, then fill gaps with smaller pieces like coral, pebbles, or tiny spirals.
- One by one, glue each shell in place using a hot glue gun. Press gently for a few seconds, especially for heavier shells. Once all shells are set, insert the backing into your frame and secure it tightly.
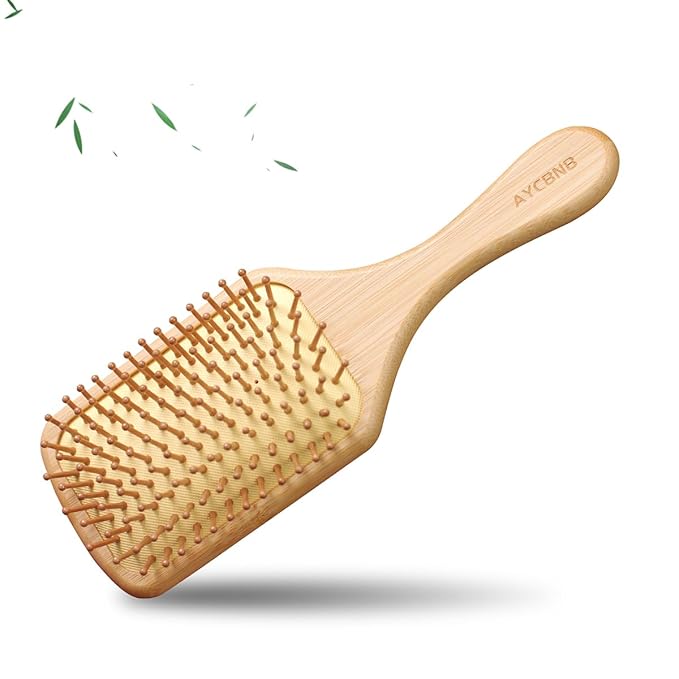
#12. DIY Seashell Hairbrush
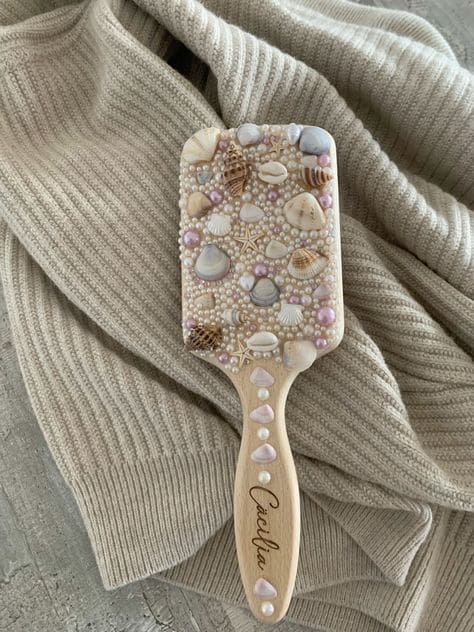
With soft pearls, pastel mini shells, and delicate placement, this becomes more than just a brush, it becomes a memory of ocean air and handmade love.
Materials Needed
- 1 plain wooden hairbrush
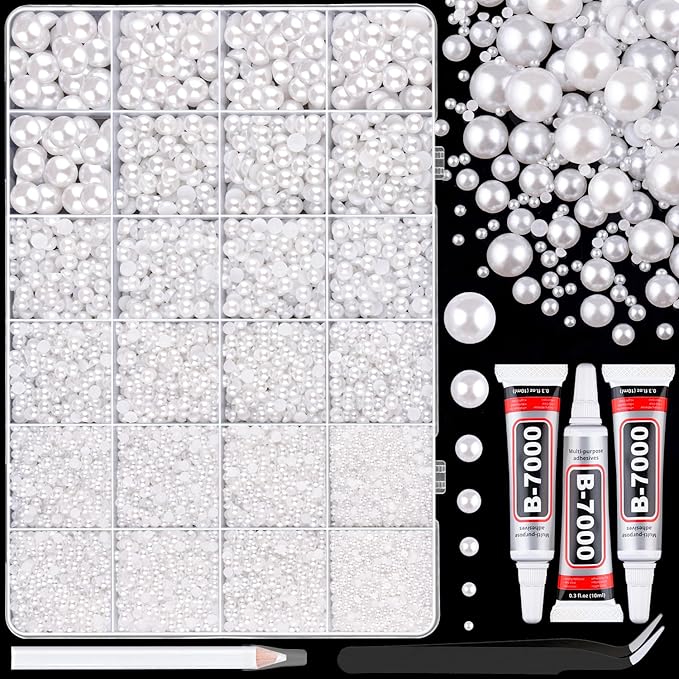
- 20–30 tiny seashells in assorted sizes and tones
- 30–40 pearl half-beads
- Craft adhesive or strong glue (E6000 recommended)
- Tweezers
- Clear resin topcoat (optional)
Step-by-step Guide
- Begin with a clean, dry wooden brush. If your brush has a brand label, sand it off lightly or paint over it to create a neutral base.
- Plan your layout by arranging shells and pearls on the brush surface before gluing. Once you’re happy with the design, start attaching each piece with a dot of glue using tweezers or a toothpick for accuracy.
- Let everything dry for several hours. For durability and shine, you can finish the brush with a layer of clear resin or spray sealant.
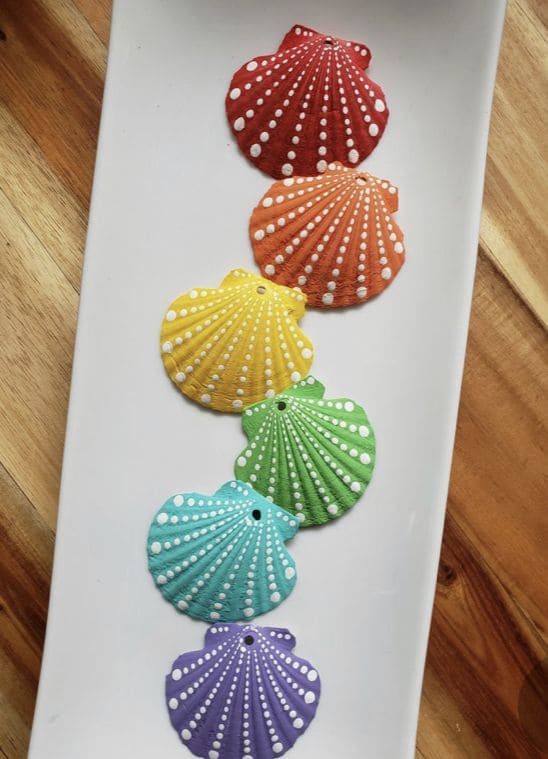
#13. Seashell Jewelry Tray
Each shell is hand-painted with a touch of gold and nestled into a smooth base, turning beach finds into a practical, elegant display for rings, earrings, and bracelets.
Materials Needed
- 12–15 medium-sized half seashells
- 1 block of air-dry clay (about 500g for 6×6 inch base)
- Gold acrylic paint, small tube
- Detail paintbrush set
- Strong adhesive
- Clear gloss sealant spray (optional)
Step-by-step Guide
- Start by gently washing and drying your shells if they’re beach-collected. Paint the edges with gold acrylic using a fine-tipped brush. Let them dry for 15–20 minutes.
- Roll out your air-dry clay into a thick square or oval base, about ½ inch thick. Smooth the edges with damp fingers, and slightly round the corners for a soft look.
- Arrange the painted shells on the hardened clay base in a balanced layout. Once you’re happy with the look, glue them down firmly.
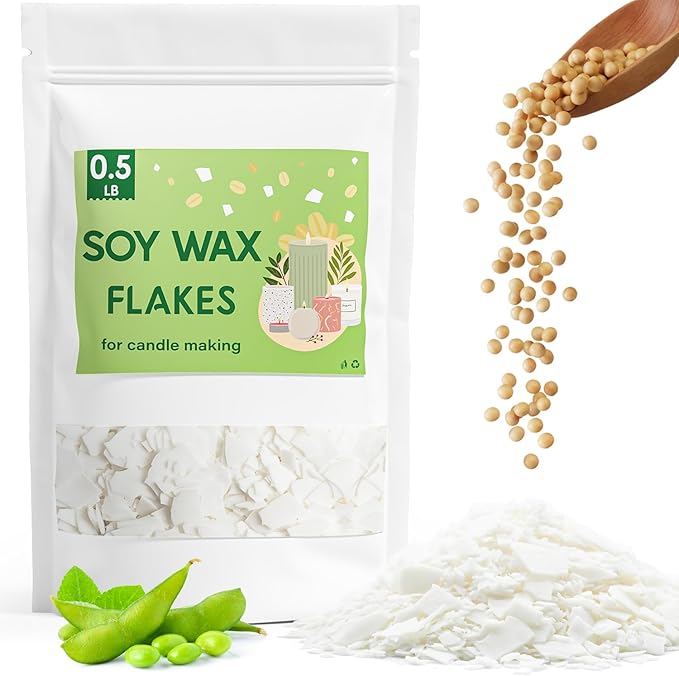
#14. Seashell Candles
These seashell candles are one of those small but soul-stirring projects that make your space glow, literally and emotionally.
Materials Needed
- 6–10 clam shells (medium-sized, 2.5–3 inches wide)
- 1/2 lb soy wax flakes
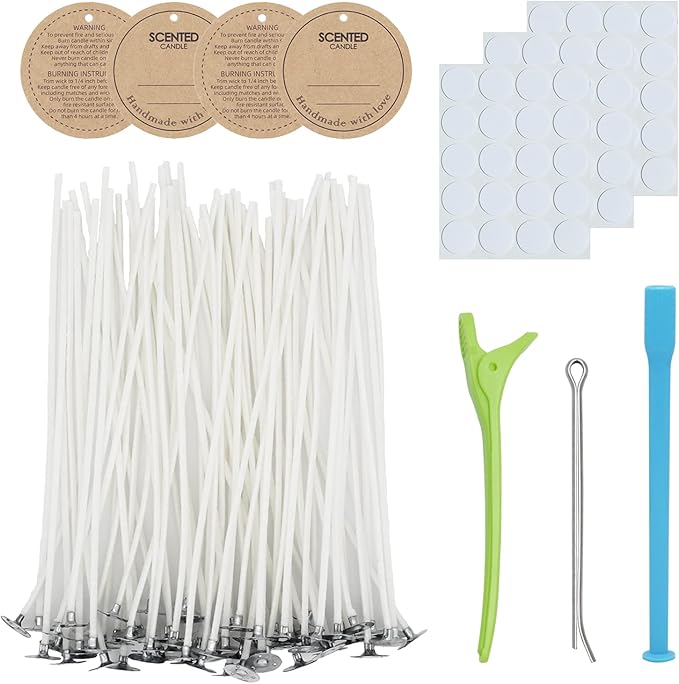
- 6–10 cotton candle wicks
- Small pot + heatproof bowl
- Fragrance oil (optional: lavender, coconut, etc.)
- Candle dye (optional)
- Hot glue gun
Step-by-step Guide
- If your seashells aren’t level on a flat surface, you can use a small dish of sand or a muffin tray to stabilize them. Secure a wick in the center of each shell with a dab of hot glue or wax adhesive.
- In a double boiler setup, melt your soy wax flakes slowly over low heat. Stir gently until completely melted. If using fragrance or dye, stir in a few drops once the wax is fully liquid.
- Carefully pour the melted wax into each shell, filling to just below the edge. Let them sit undisturbed for about 1–2 hours.
#15. Seashell Napkin Rings
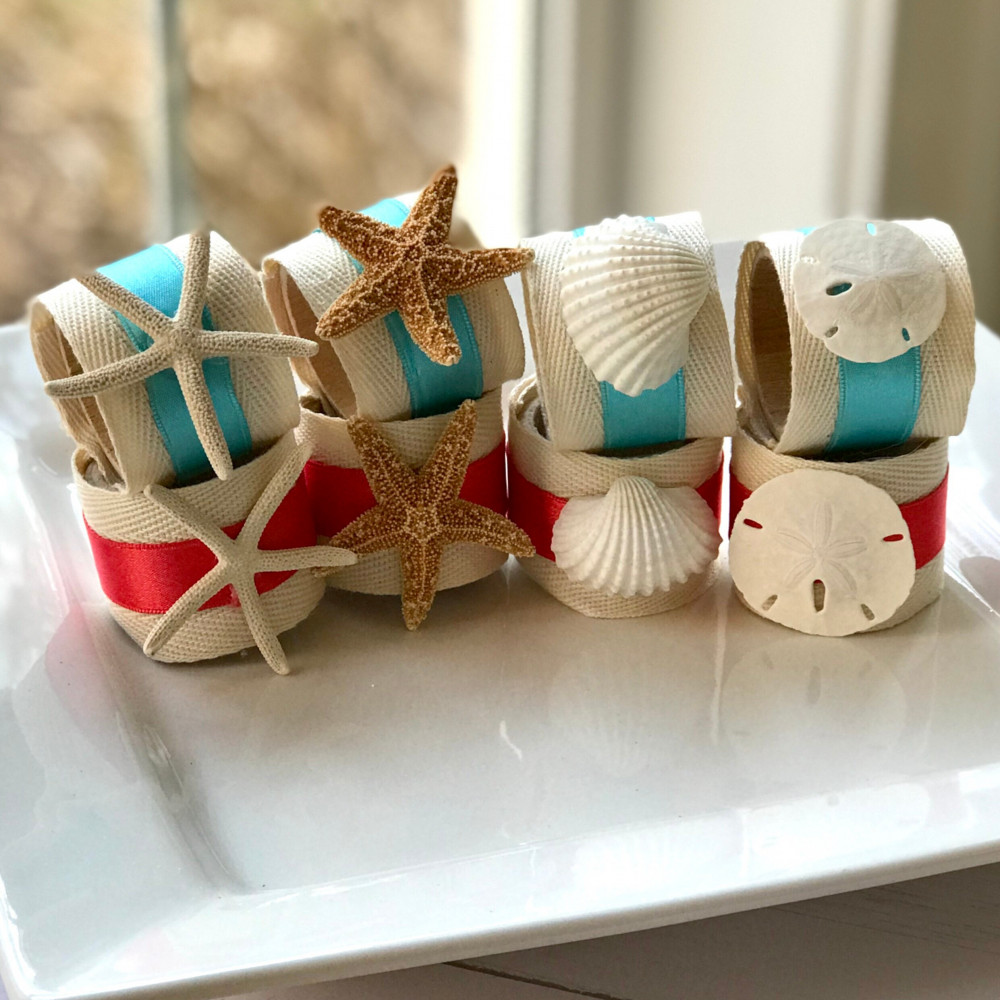
Whether you’re hosting summer guests or just want a subtle ocean vibe at home, these little beauties blend texture, color, and natural elegance.

Materials Needed
- 6–8 plain napkin rings
- 6–8 small sea embellishments (mix of starfish, sand dollars, and seashells)
- 1 roll of ribbon (½ inch wide, red and blue options recommended)
- Hot glue gun with glue sticks
- Scissors
Step-by-step Guide
- Cut the ribbon into strips long enough to wrap around the napkin ring with a slight overlap (about 6 inches each). Use hot glue to secure each ribbon around the ring, pressing firmly to ensure a snug fit.
- Next, choose your embellishment for each ring and position it in the center. Use a small amount of hot glue to attach the seashell, starfish, or sand dollar to the front of the ribbon.
- Let the rings dry for 5–10 minutes. Once the glue is fully set, slide one onto each rolled napkin and place it on your table setting for an instant coastal upgrade.
#16. DIY Seashell Keychains
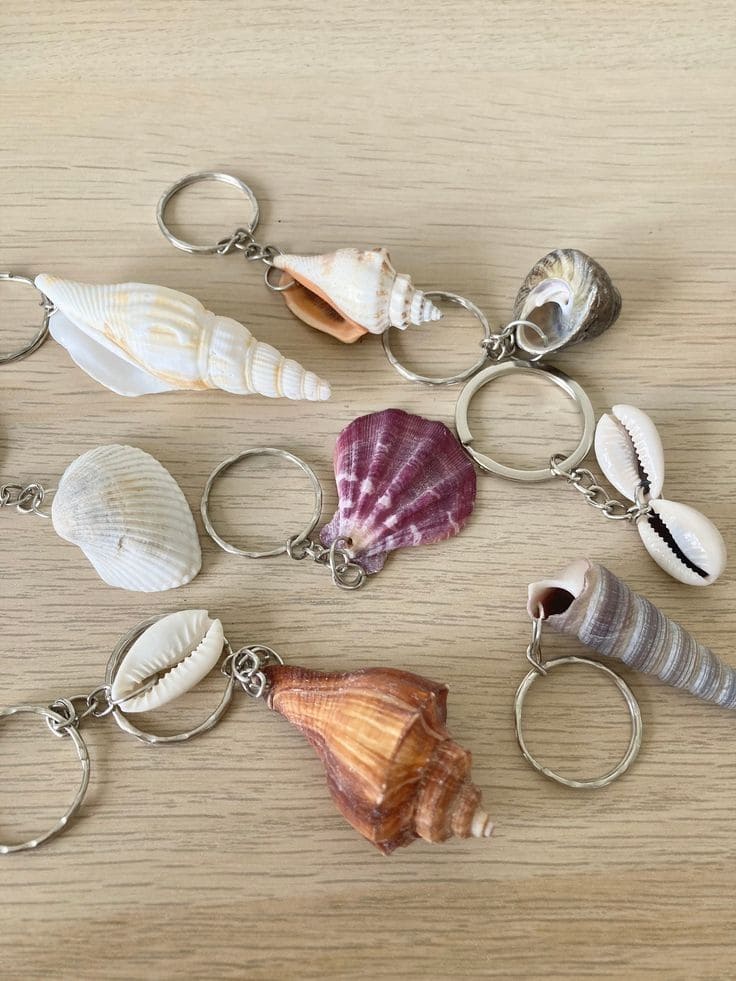
These keychains make meaningful souvenirs, charming handmade gifts, or even coastal-themed party favors. Plus, they’re budget-friendly and honestly, pretty therapeutic to craft.

Materials Needed
- 10–12 assorted medium seashells (about 1.5–2 inches)
- 10 metal key rings with jump rings
- Small drill
- Strong craft adhesive or E6000 glue
- Pliers
Step-by-step Guide
- Clean and dry your seashells thoroughly. Choose shells with smooth backs for drilling, or flat edges if you plan to glue them directly to a jump ring loop.
- Carefully drill a small hole near the top edge of each shell using a rotary tool. If the shell is too fragile, glue the jump ring securely to a stable surface on the shell instead.
- Use pliers to open each jump ring. Slide the shell onto the ring, then attach the ring to a key ring.
#17. Hand-painted Seashell Dish
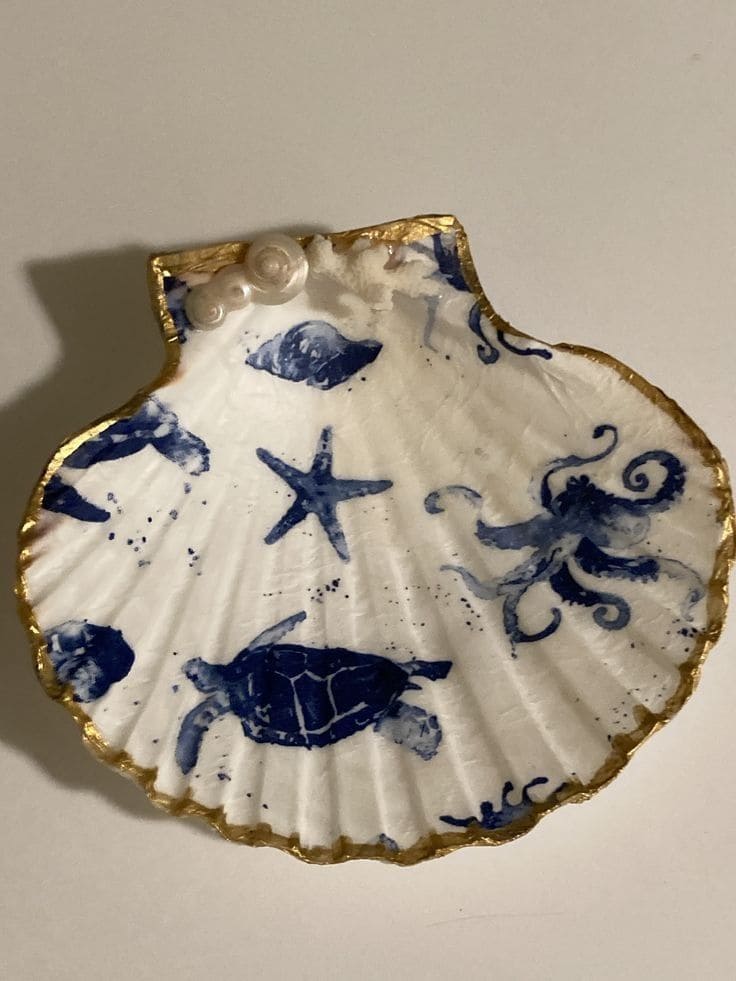
This hand-painted seashell dish captures the quiet wonder of the ocean in a single, elegant piece. It’s perfect for rings, tiny treasures, or simply decorating your desk or dresser.
Materials Needed
- 1 large scallop shell, cleaned and dried
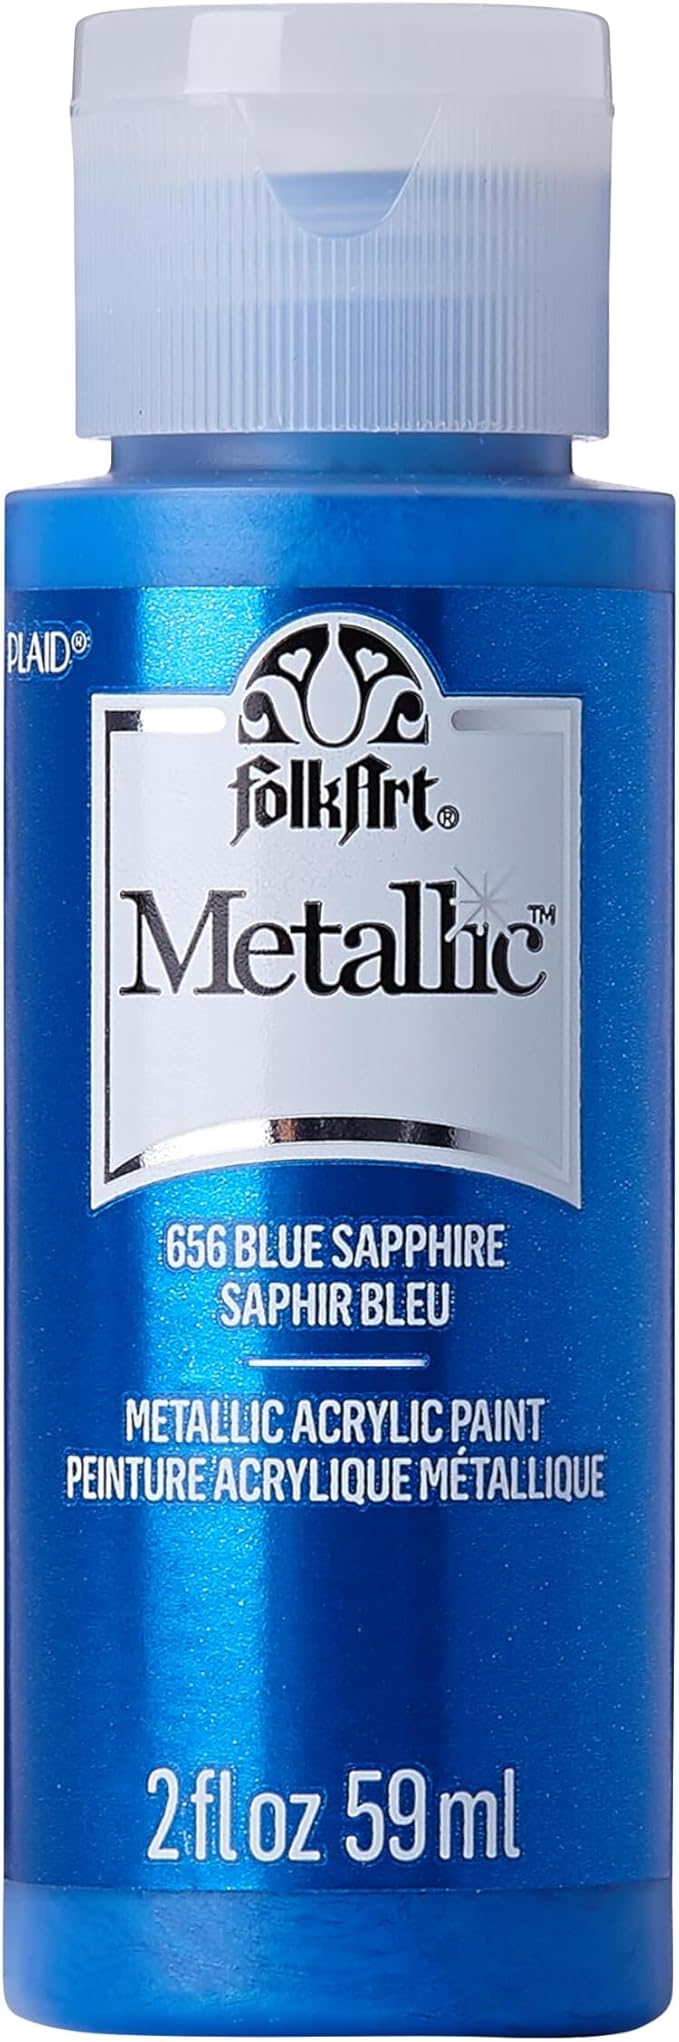
- White and blue acrylic paint
- Gold paint pen
- Detail paint brushes
- Matte Mod Podge
- 2–3 tiny pearls or beads
- Strong craft glue
Step-by-step Guide
- Paint the inside of the scallop shell with a solid layer of white acrylic paint to create a smooth background. Let it dry completely before the next step.
- Use your detail brush to carefully paint ocean-themed motifs (like turtles, octopus, and starfish) in blue.
- Once the artwork is dry, carefully outline the shell’s edge using a gold paint pen or fine brush with gilding paint. Add a couple of pearls near the top for a soft, elegant finish.
#18. DIY Shell-decorated Flower Pot
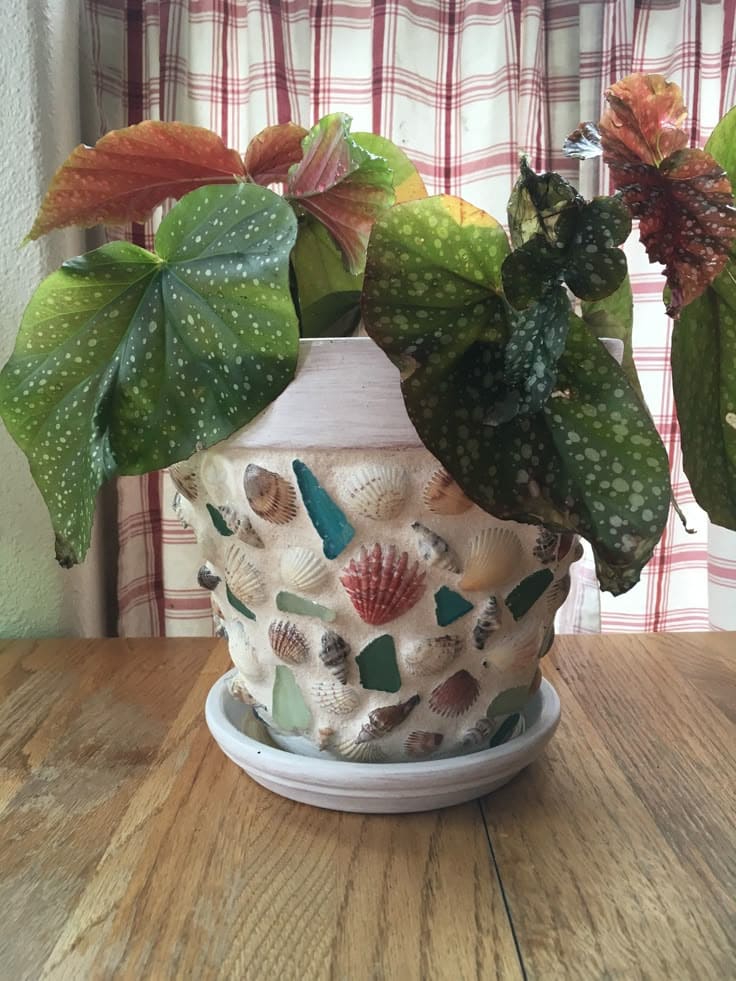
There’s something so satisfying about turning a plain terracotta pot into a beach-inspired statement piece.
Materials Needed:
- 1 medium terracotta flower pot (approx. 6–8 inches tall)
- 25–40 small seashells
- 10–15 pieces of sea glass (assorted colors)
- Strong craft adhesive (such as E6000)
- White acrylic paint (optional)
- Small paintbrush
- Clear sealant spray
Step-by-step Guide:
- Start by cleaning your terracotta pot to remove any dust. If you want a brighter base, give it a coat of white acrylic paint and let it dry completely.
- Begin arranging your seashells and sea glass pieces along the sides of the pot. Once you’re happy with the layout, glue each piece one at a time, pressing firmly and holding for a few seconds.
- Once everything is glued on, allow the adhesive to dry for at least 24 hours. Finish with a light coat of clear sealant spray to protect your design and give it a slight sheen.
#19. Seashell Cocktail Glassware
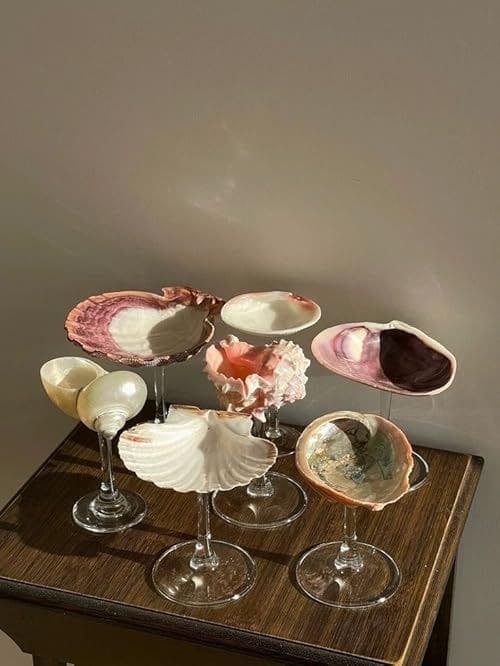
Each seashell is perched like a crown on a stemmed glass base, creating a luxurious yet beachy pedestal bowl.
Materials Needed
- 6–8 clean seashells (2.5–4 inches across)
- 6–8 clear wine or champagne glasses
- Strong epoxy glue or E6000 craft adhesive
- Sandpaper (medium-grit)
- Optional: Pearlescent
Step-by-step Guide
- Start by cleaning and lightly sanding the bottom of each shell and the rim of the glasses where they’ll connect.
- Apply a generous but neat amount of strong epoxy glue to the rim of the glass, then press the shell onto it. Hold for a minute or two to ensure contact, then let it cure fully.
- Once dry, you can leave them natural or add a touch of gold or pearlescent paint to the shell edges for a more elevated look.
#20. Whimsical Scallop Shell Lighthouses
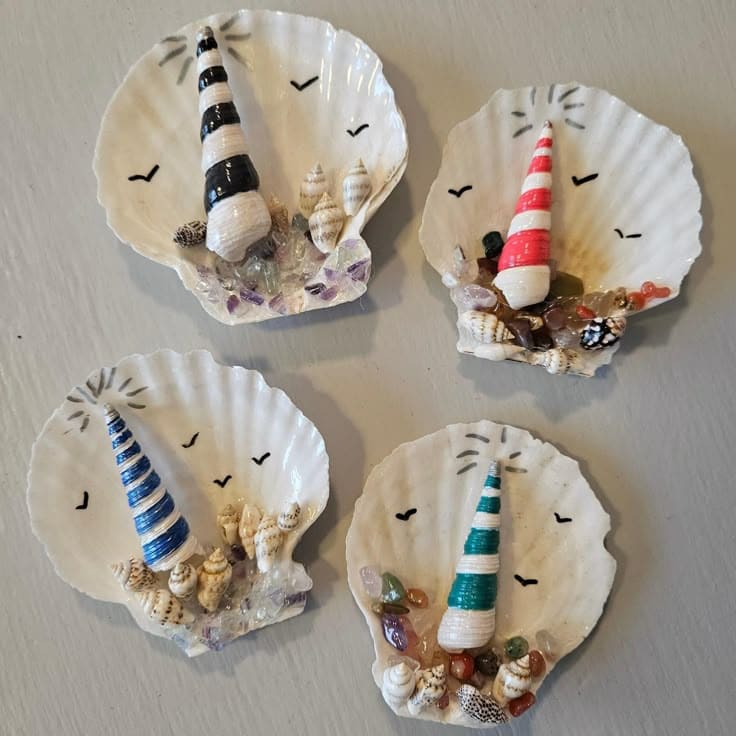
These shell lighthouses are playful and nostalgic, perfect as keepsakes, magnets, or desk ornaments.
Materials Needed
- 4–6 large scallop shells (at least 3.5–4 inches wide)
- Mini cone-shaped shells (1–2 inches)
- Acrylic paints (red, black, blue, green, white)
- Tiny mixed shells, colored gemstone chips
- Hot glue gun
- Black permanent marker
Step-by-step Guide
- Begin by painting stripes around each cone shell to mimic lighthouses. Let the paint dry completely.
- Use the hot glue gun to secure the lighthouse vertically on one side of the scallop shell base.
- Arrange tiny seashells and gemstone chips around the base of the lighthouse like coastal terrain. Glue in place.
- Add small painted birds or waves with a permanent marker for a final whimsical touch.
#21. DIY Seashell Photo Frame
Whether it’s for your own memory shelf or a gift for someone you love, this project is full of sun-soaked joy.
Materials Needed
- 1 plain wooden or plastic photo frame (4×6 or 5×7 inch)
- 20–30 mixed seashells, various sizes (1–3 inches)
- Hot glue gun and glue sticks
- Optional: pink ribbon, glitter, clear sealant spray
Step-by-step Guide
- Begin by cleaning the frame and seashells to ensure everything sticks well. Let all elements dry completely.
- If you want a decorative base (like the pink ribbon in the photo), wrap and glue it around the frame edges before attaching the shells.
- Start with the larger shells first, gluing them in place around the frame’s outer edge. Fill in gaps with smaller shells, overlapping slightly for a natural, layered look.
- Once your design is complete and the glue is set, optionally spray the frame with a clear sealant to protect and enhance the finish.
#22. Tiny Seashell Turtles
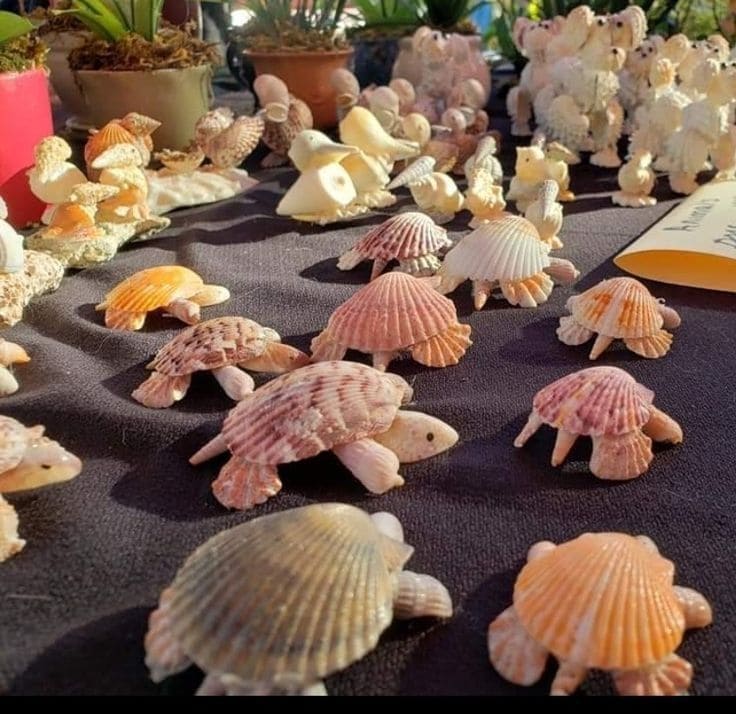
With just a few shells and a dab of glue, you can create a whole whimsical herd of shelled friends that brighten up a desk or windowsill with seaside charm.
Materials Needed
- 1 scallop shell per turtle (approx. 2–3 inches)
- 5 small oval or cone shells per turtle (1 for the head, 4 for legs)
- Black seed beads
- Strong glue gun and glue sticks
- Tweezers (optional)
Step-by-step Guide
- Start by choosing a scallop shell with a round, dome-like shape to serve as the turtle’s shell. Clean and dry all shells beforehand.
- Using hot glue, attach one small shell underneath the front of the scallop shell to form the turtle’s head. Then glue four smaller shells or shell tips in a rectangular layout under the shell to create legs.
- Add two tiny seed beads or googly eyes to the head using tweezers and a tiny dot of glue. Let everything dry thoroughly.
#23. Stunning Seashell Flower
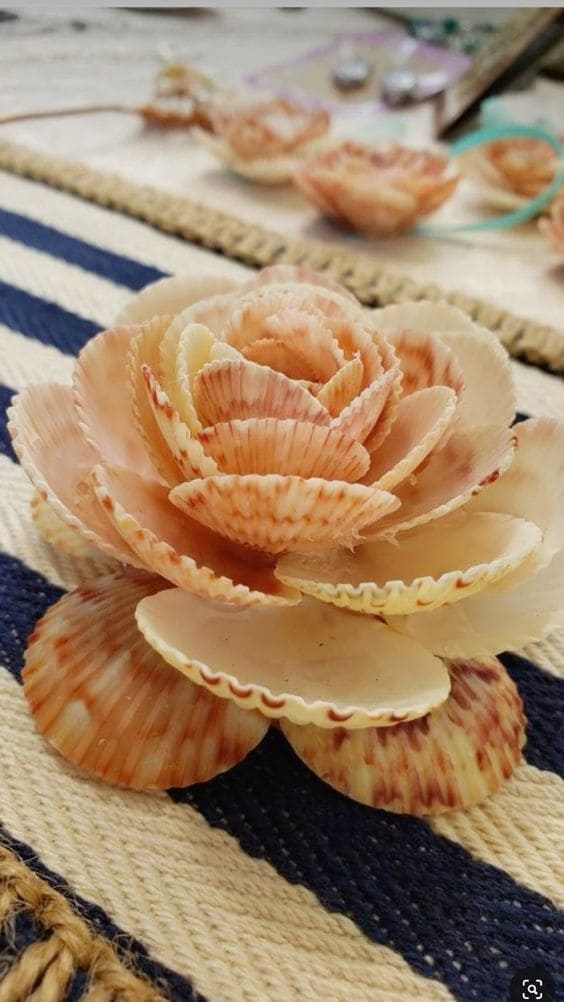
Each layer of shell mimics soft petals, giving it a natural rose-like bloom that lasts forever.
Materials Needed
- 12–18 scallop shells in varying sizes (1″ to 3″)
- Strong hot glue gun and glue sticks
- Small wood round (2–3 inches wide)
- Protective gloves (optional)
- Fine sandpaper (optional)
Step-by-step Guide
- Begin by selecting 3–4 of the largest shells to serve as your outer petals. Glue them around the base evenly, slightly overlapping them in a circle.
- Continue layering shells inward using smaller sizes as you go. Tilt the shells upward slightly and stagger them to create a blooming effect. Use generous glue for each shell to hold angles in place.
- Finish with the smallest shell in the center, placed upright to mimic the bud.
#24. DIY Seashell Candle Holders
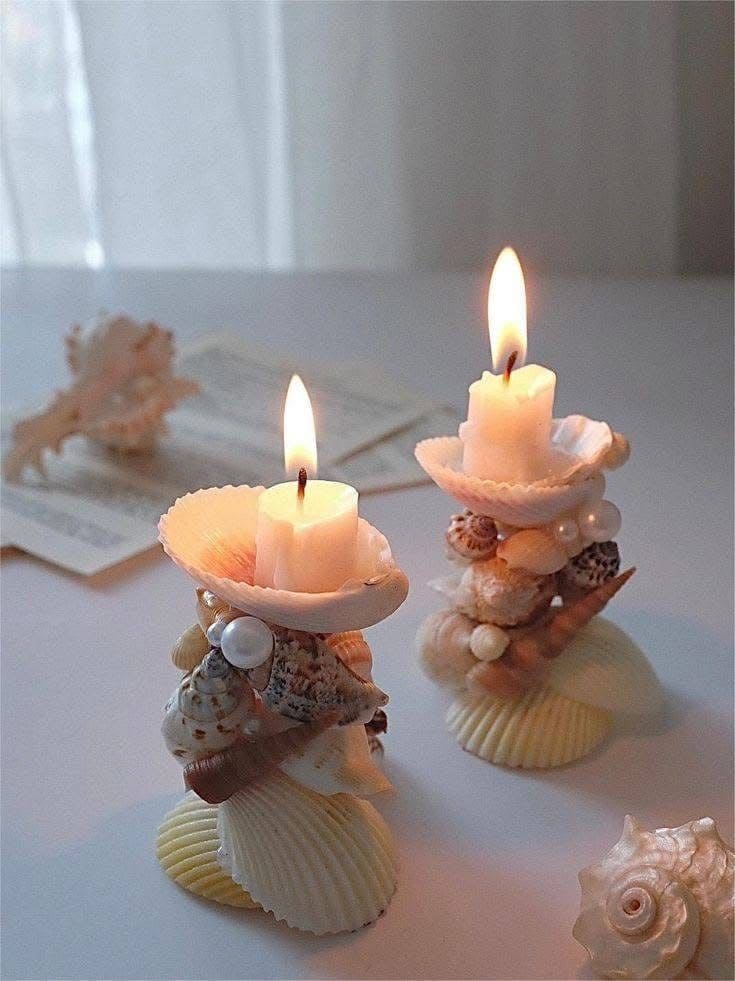
Stacking shells this way brought a sculptural charm to our space. They’re perfect for coastal-themed dinners, romantic ambiance, or a meditative glow during bath time.

Materials Needed
- 15–20 medium to small seashells
- 2 small pillar candles
- 1 tube of strong craft adhesive (E6000 recommended)
- Hot glue gun
- Optional: faux pearls or mini ornaments
- Tweezers
Step-by-step Guide
- Choose a large shell or flat-bottomed shell as the base. Apply a layer of hot glue to anchor the first few shells, then layer others using stronger E6000 adhesive for long-term durability.
- Stack shells carefully in a tapered shape, placing flatter pieces midway and bowl-shaped ones near the top to hold the candle. Press each layer firmly and allow time to partially dry between stacks.
- Once your sculpture is sturdy, glue the candle into the top shell. Add final embellishments like pearls or decorative stones for flair.
#25. Seashell Wall Hanging

I made a similar one after a coastal vacation, using driftwood we collected and shells we found as a family. It instantly added a calming, sea-kissed feel to our entryway wall.
Materials Needed
- Pallet sign
- 20–30 assorted seashells
- Small mesh netting piece (6×8 inches)
- Natural jute rope
- Acrylic paint set (white, teal, navy)
- Glue gun with glue sticks
- Paintbrush set
Step-by-step Guide
- Lightly paint the driftwood pieces with diluted acrylics – teal and white for a weathered coastal look. Let the wood grain peek through, then arrange and glue the pieces together side by side or staggered slightly.
- Cut your jute rope into a hanging loop and glue it securely to the back. Use a small amount of paint to add flying bird silhouettes with a fine brush.
- Begin decorating with shells: glue them in clusters over the mesh netting in one or two corners, layering textures and sizes. Add small driftwood bits or knots of jute as extra details.
#26. DIY Seashell Monogram Letter
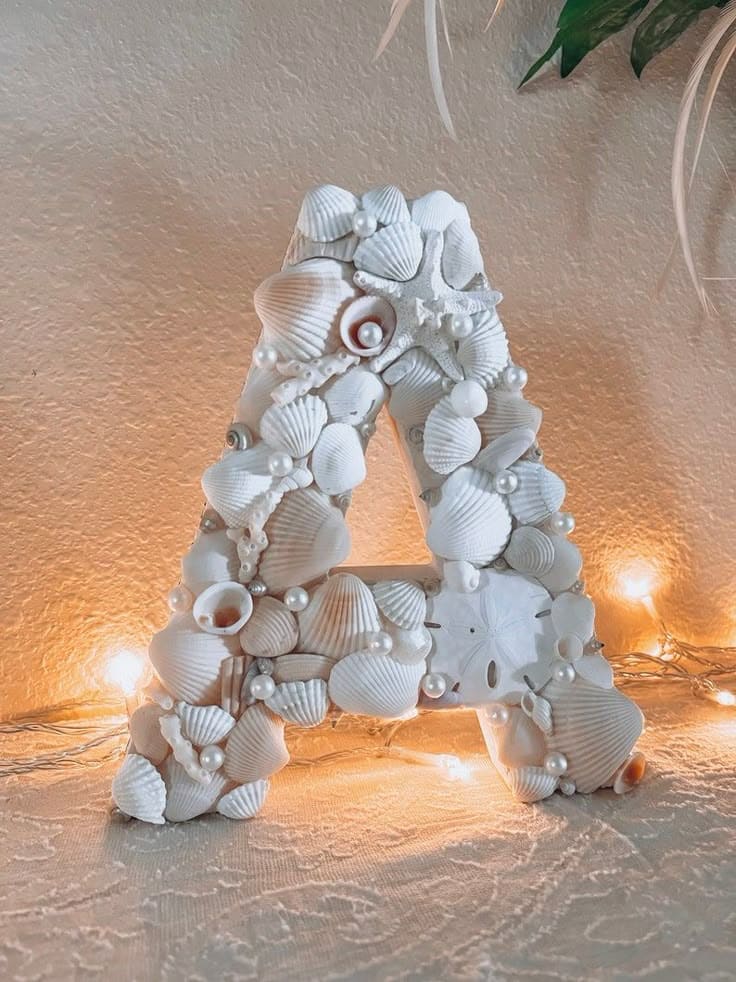
This seashell letter is the kind of handcrafted piece that radiates elegance with a coastal soul, like something you’d find in a dreamy beach cottage.
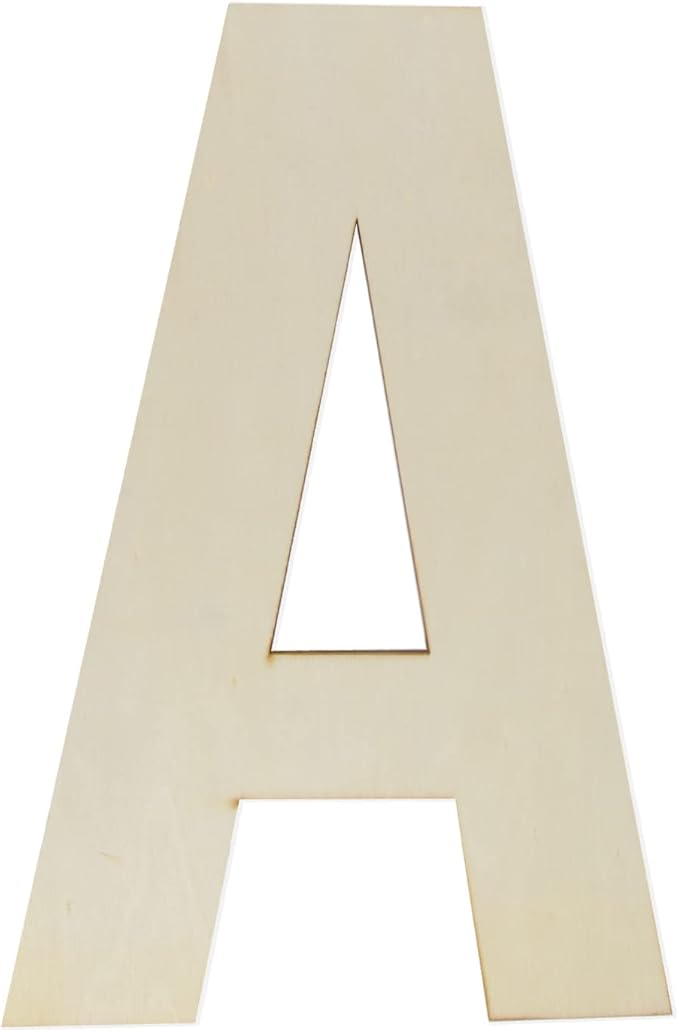
Materials Needed
- 1 Wooden letter A (approx. 8–12 inches tall)
- 40–50 small to medium-sized white seashells
- 1 mini starfish
- 1 sand dollar
- 20–25 flat-back pearl beads (5–10mm in size)
- Hot glue gun with glue sticks
- White acrylic paint (optional)
- Small paintbrush
- LED fairy lights (optional,)
Step-by-step Guide
- If you’d like a clean, cohesive background, start by painting the wooden letter with white acrylic paint.
- Begin placing your largest shells on the letter first – scallops or clam shells work beautifully. Use the hot glue gun to secure them in place.
- Once the base layer is set, tuck in medium and smaller shells around them. Add variation by tilting some shells or layering one atop another.
- Add a starfish and a sand dollar in a standout spot, usually near the center or lower half.
- Finish with flat-back pearl beads to fill in tiny gaps and add a gentle sparkle.
#27. Seashell Clothespin Wreath
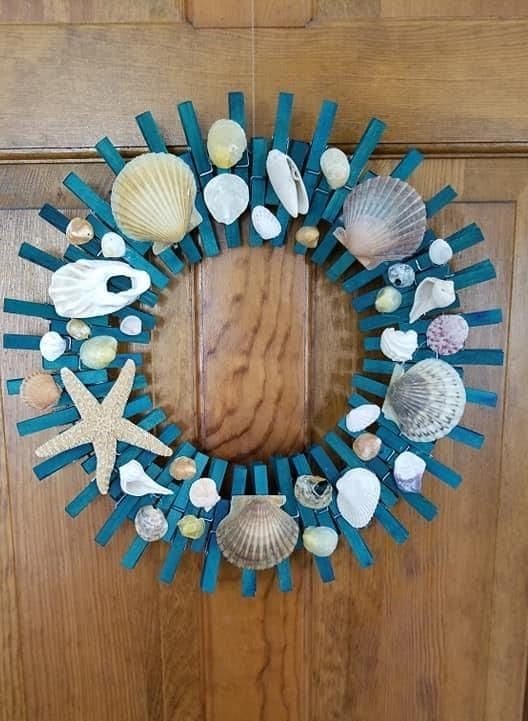
This seashell clothespin wreath captures that essence, combining the charm of found seashells, the warmth of driftwood tones, and a fresh pop of coastal blue.
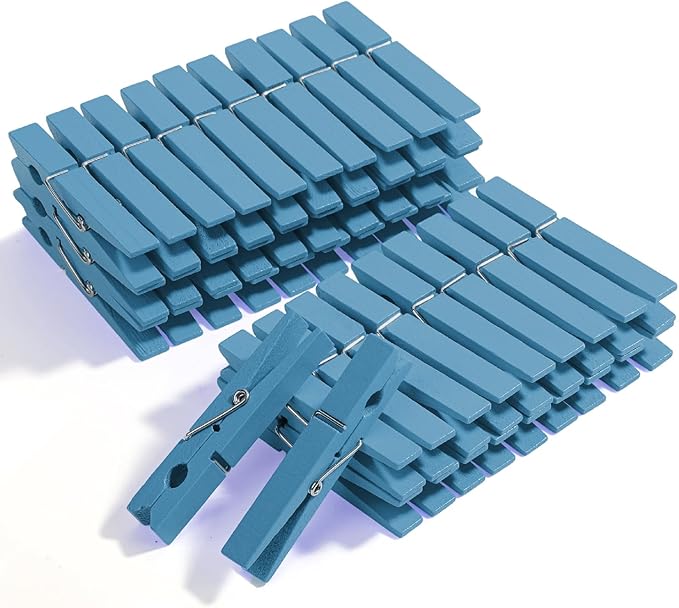
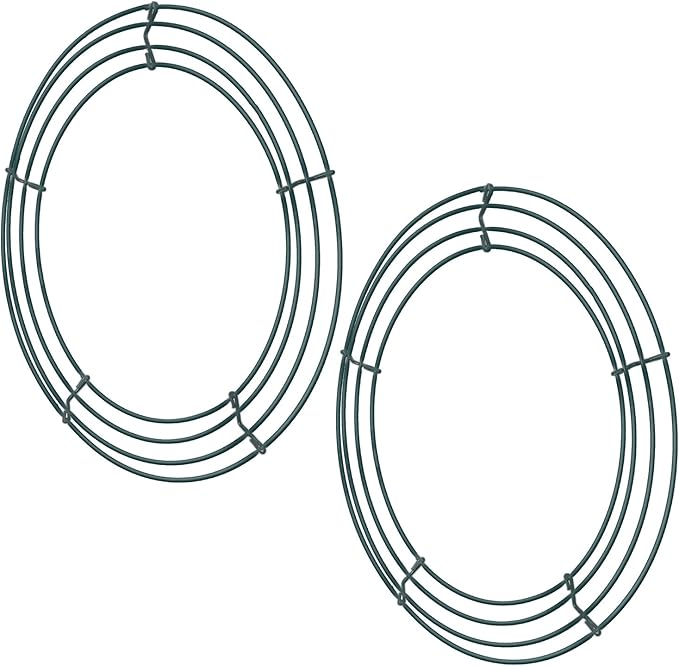
Materials Needed
- 35–40 wooden clothespins
- 1 12-inch wire wreath frame
- Acrylic paint in coastal colors
- Foam brush or paintbrush
- 25–30 assorted natural seashells (sizes between 1″–2.5″)
- 1–2 starfish or sand dollars (optional)
- Hot glue gun and glue sticks
- Twine
Step-by-step Guide
- Paint your clothespins in a color that suits your style. Teal or turquoise gives that breezy beach vibe, then let them dry completely.
- Clip the painted clothespins evenly around the wire wreath frame. You can alternate the direction or space them tightly depending on the look you want.
- Lay out your design – larger shells spaced out, smaller ones in clusters, and accent pieces like starfish or coral at focal points.
- Glue each shell securely to the clothespins using your hot glue gun. Press firmly and hold for 10–15 seconds so they really adhere. Be patient and let each section set before moving on.
- Attach your twine or rope to the back for hanging.
#28. DIY Glowing Seashell String Lights
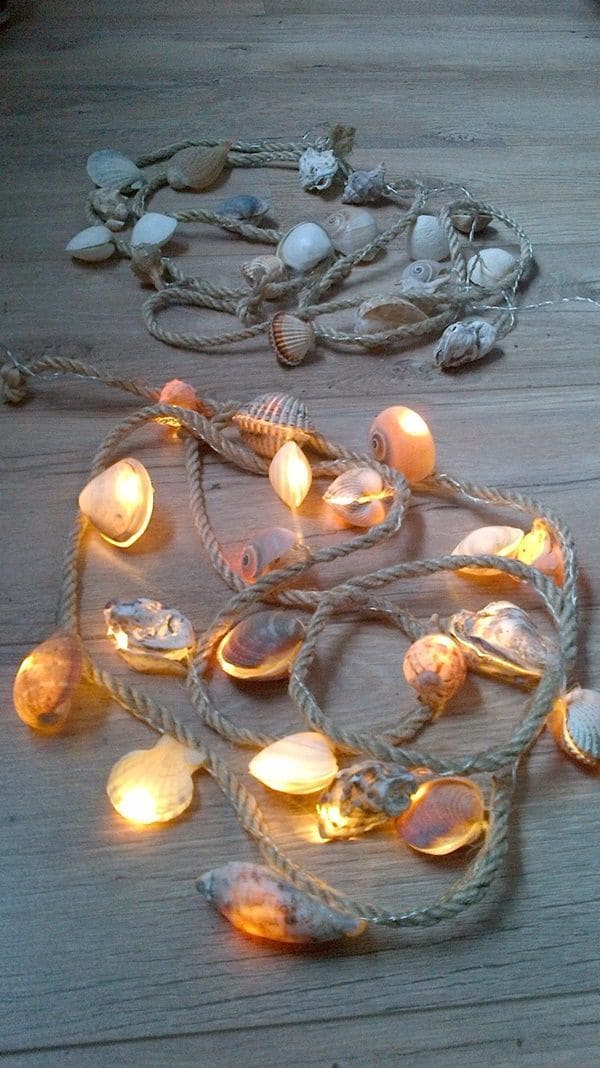
The texture of the natural rope, paired with warm LEDs, creates a magical nautical vibe, perfect for patios or bedrooms.

Materials Needed
- 20–30 medium to large natural seashells (with holes or drilled)
- 1 set of warm white LED string lights (battery-operated or USB, 10–20 feet)
- 10 feet of nautical jute rope
- Glue gun + glue sticks
- Craft drill with a small bit (optional)
Step-by-step Guide
- Lay the jute rope flat and evenly space the string lights alongside it. Secure the lights gently using small dots of hot glue.
- For each LED bulb, attach a shell either over or around the light. You can glue the light inside larger shells or behind flatter ones.
- Alternate shell types, sizes, and angles for a more natural flow. Let everything dry completely before hanging or coiling the garland.
#29. DIY Painted Seashell Craft
I loved the blend of deep ocean blue motifs with a hint of gold that gives each shell a luxurious coastal vibe.
Materials Needed
- 3–5 large clam shells (clean and dry)
- Acrylic paint set (deep blue, white)
- Thin paintbrushes
- Gold leaf
- Sealant spray
- Small sponge
Step-by-Step Guide
- Clean your shells thoroughly with soap and water. Let them dry completely before painting.
- Sketch your design lightly with a pencil if needed, or freehand paint marine shapes like turtles, starfish, and octopuses using blue acrylic paint.
- Add a second coat for vibrancy. Once dry, carefully outline or edge the shell with gold leaf or a gold paint pen for an elegant touch.
- Finish with a clear sealant spray to protect the artwork and add a polished finish.
#30. Seashell Hair Clips
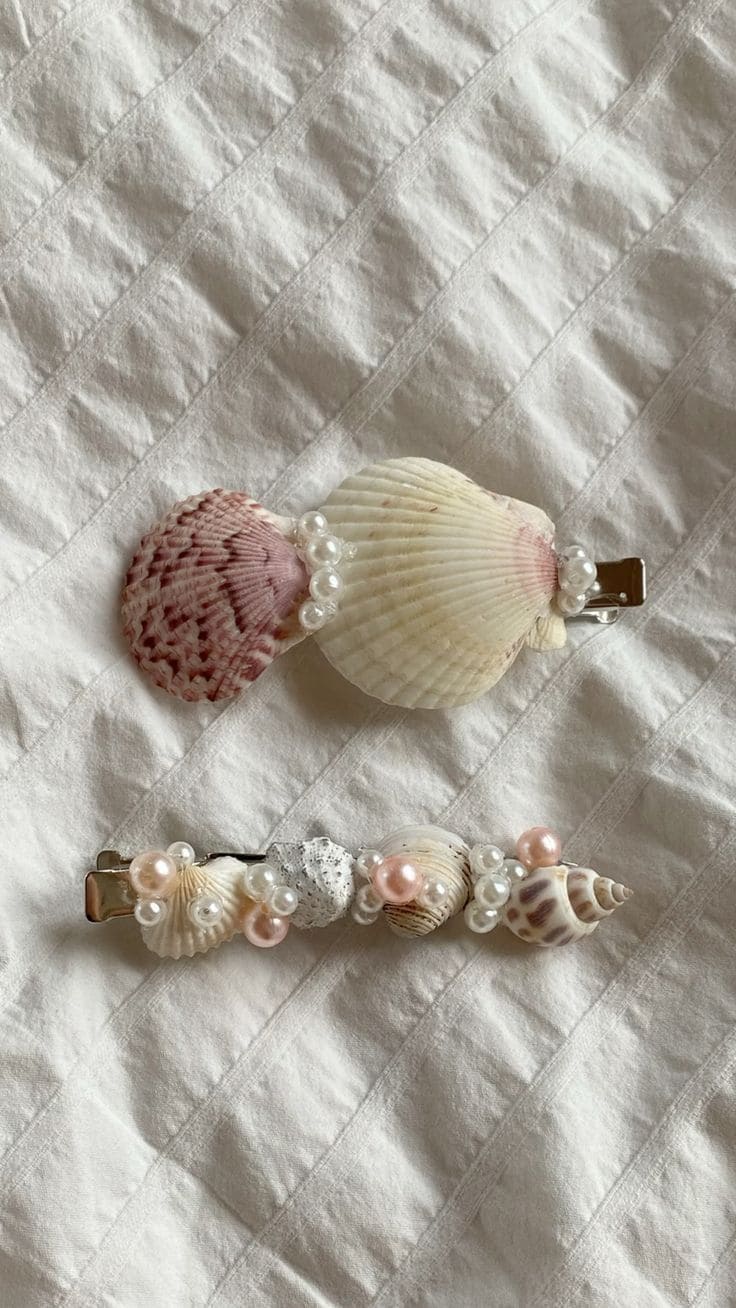
These handmade seashell clips are inexpensive, calming to create, and make such sweet gifts. I’d say under $10 if you already have a shell stash and a glue gun.
Materials Needed
- 2 plain metal alligator clips (2.5 inches)
- 6–8 mini seashells
- 2 large scallop shells
- 20–25 assorted flat-back pearls (3mm–8mm)
- Pink round beads (6–8 mm)
- Hot glue gun and glue sticks
- Tweezers
Step-by-step Guide
- Before gluing, play with the arrangement of your shells and pearls on each clip until the look feels balanced and full.
- Once it’s ready, carefully apply a small dot of glue to the back of the largest shell and press it gently onto the metal clip. Hold for a few seconds to set.
- Continue adding shells and beads one at a time, working from the center outward.
- Using tweezers or steady fingers, fill in any gaps with tiny pearls or pink beads. Layer them slightly over the shells for that clustered, natural shimmer.