Beaded crafts are more than just pretty decorations, they’re miniature works of art that blend color, texture, and creativity into something truly magical.
Whether you’re an expert artisan or just dipping your toes into the world of beadwork, these 31 exotic beaded craft ideas will leave you inspired and eager to create. From dazzling jewelry and intricate wall hangings to adorable keychains and unique home décor, each project showcases the limitless possibilities of beads.
Get ready to spark your creativity and transform simple beads into breathtaking designs that will leave everyone in awe!
This article contains affiliate links. If you purchase through them, I may earn a small commission at no extra cost to you. Thank you for your support!
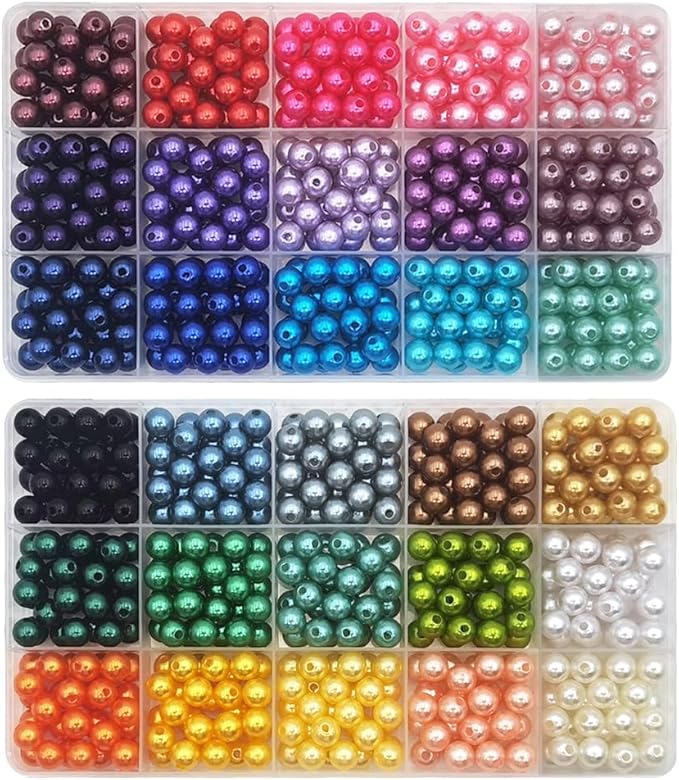
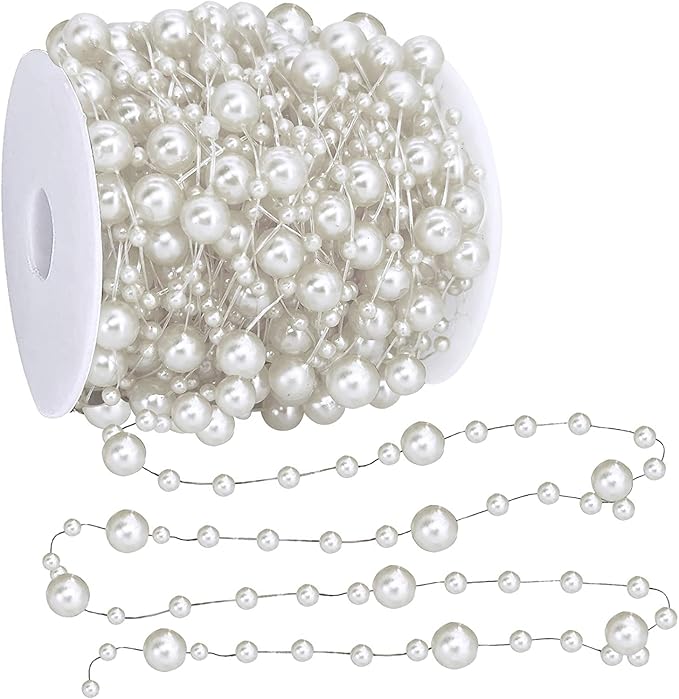
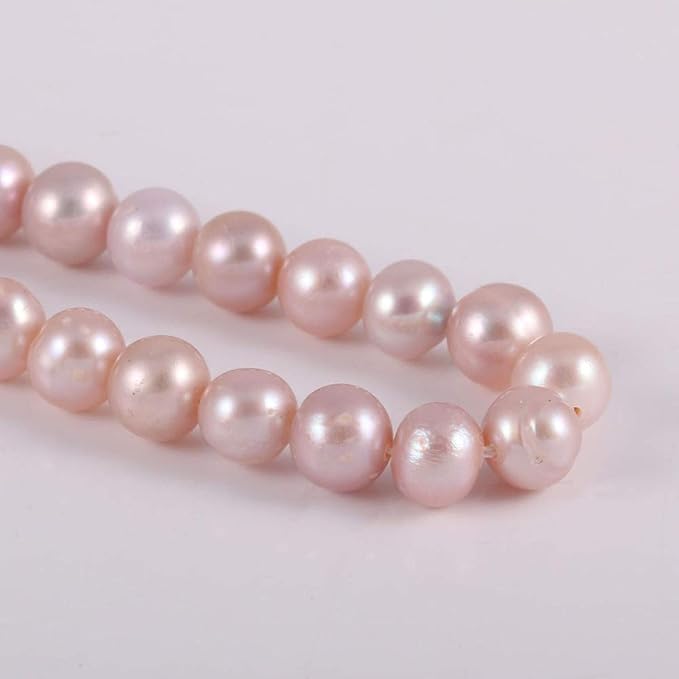
#1. Dazzling Starburst Pearl Bead Necklace

This stunning bead craft masterpiece combines elegance with a playful celestial touch.
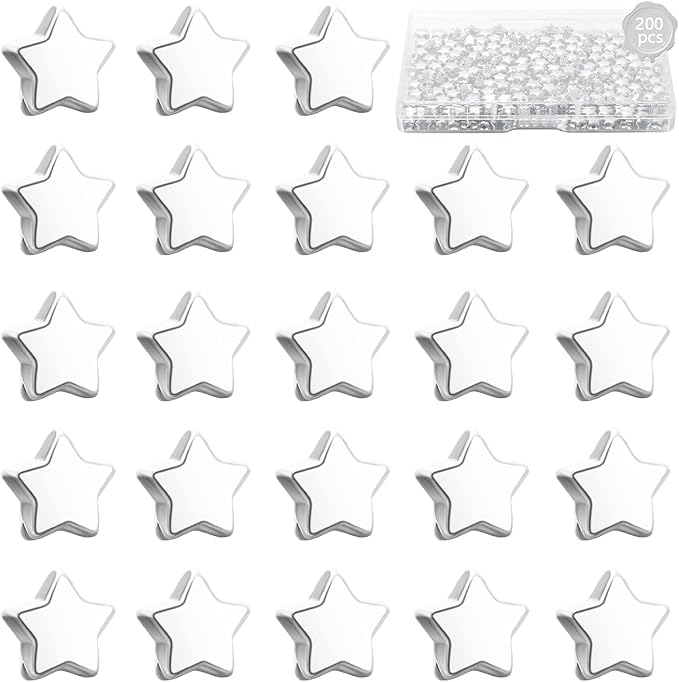
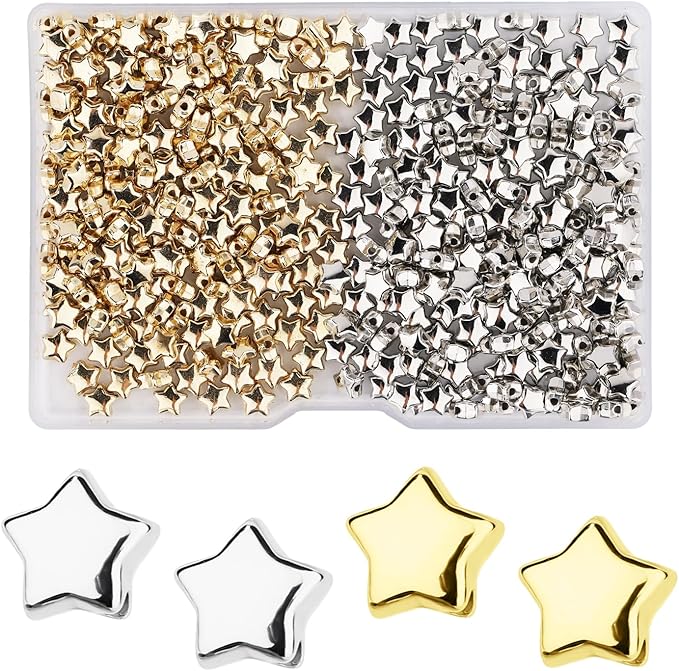 SHOP SILVER STAR CHARM BEAD
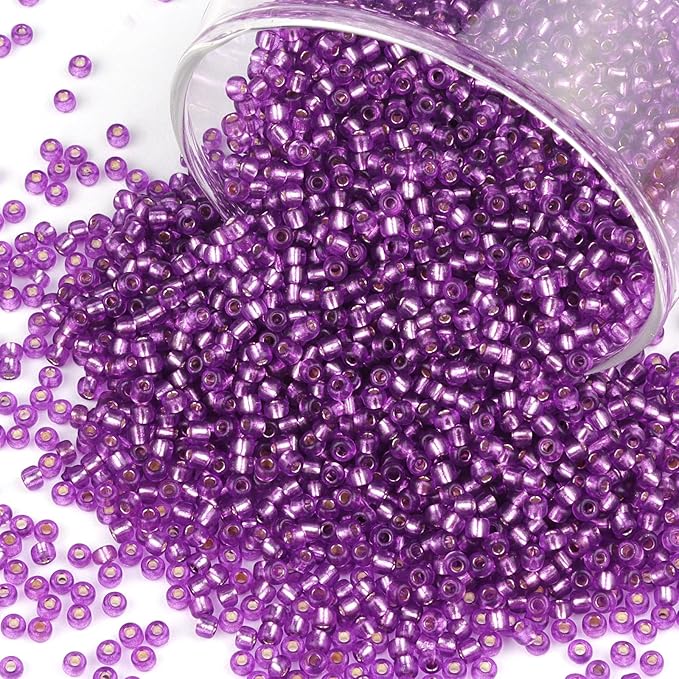
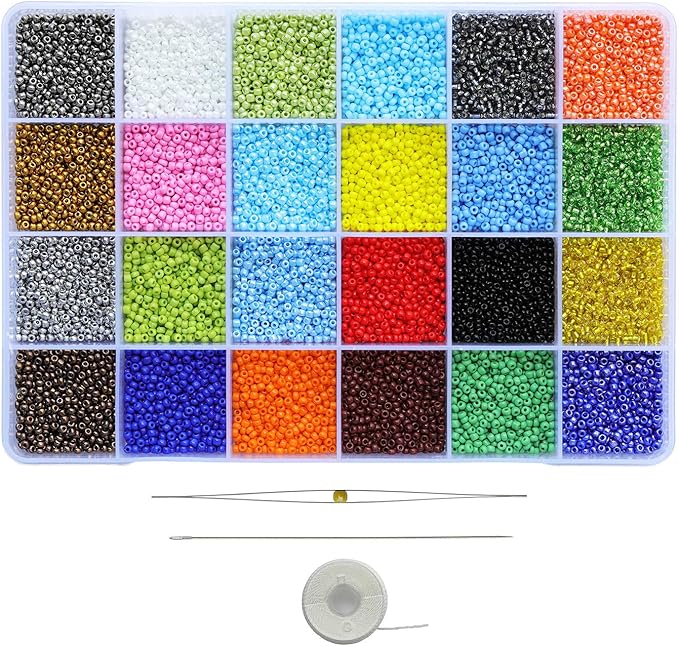 SHOP SEED BEADS SIZE 11/0
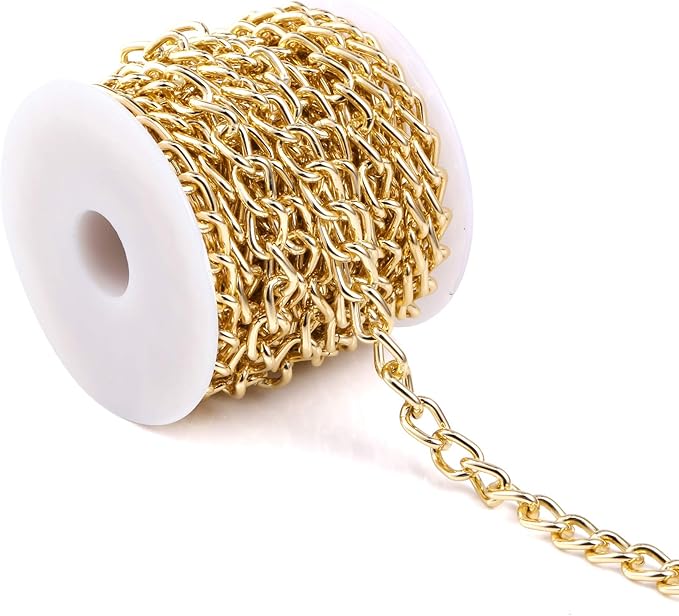
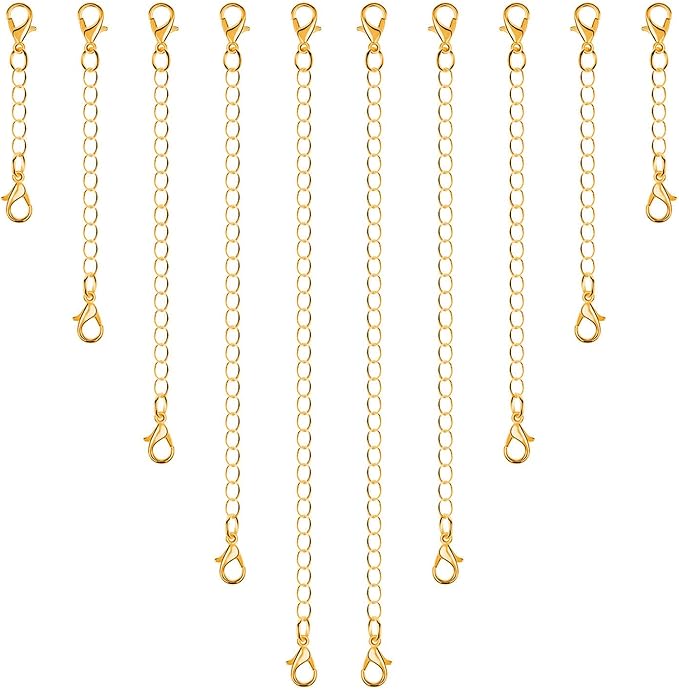 SHOP CLASP AND EXTENDER CHAIN SET
 SHOP TINY PEARL BEADS
Materials Needed
- 1 silver star charm bead (about 6-8 wide)
- Seed beads size 11/0: 80 light blue ; 20 yellow; 10 pink; 10 gray
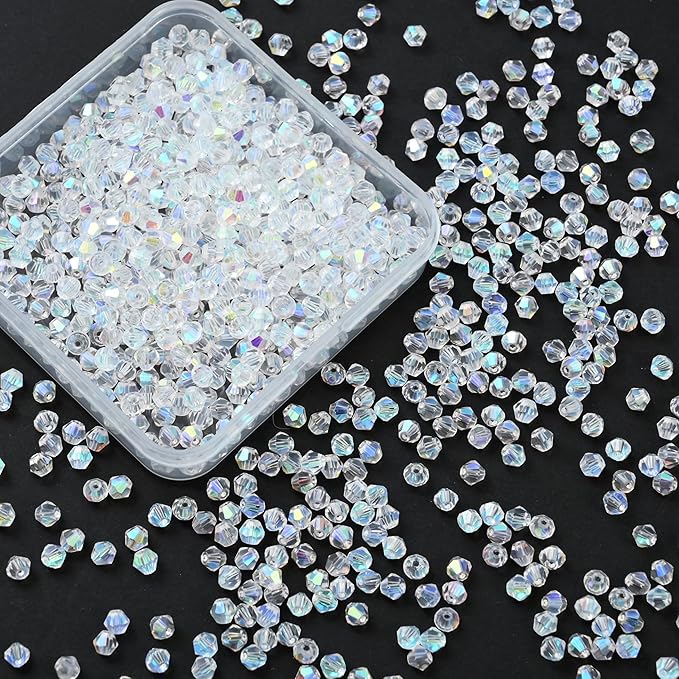
- 250 tiny pearl beads (about 3mm round)
- 1 clasp and extender chain set
- 1 roll of clear beading thread
- Crimp beads and needle-nose pliers
Step-by-step Guide
Step 1: Cut four strands of thread or wire: one 15 inches, one 16 inches, one 17 inches, and one 18 inches long.
Step 2: Thread the blue beads onto the shortest strand first, placing the star charm at the center point.
Step 3: On the longer strands, start with a few gray, pink, or yellow seed beads leading into long rows of tiny pearls, securing each strand neatly with crimp beads.
Step 4: Attach all three strands to a clasp on both ends, layering them to drape naturally and form a graceful cascade around the neckline.
#2. Vibrant Fruit Bead Curtain for Rustic Charm

I believe this handcrafted beaded curtain brings a burst of warmth and nostalgia into any space!
Materials Needed
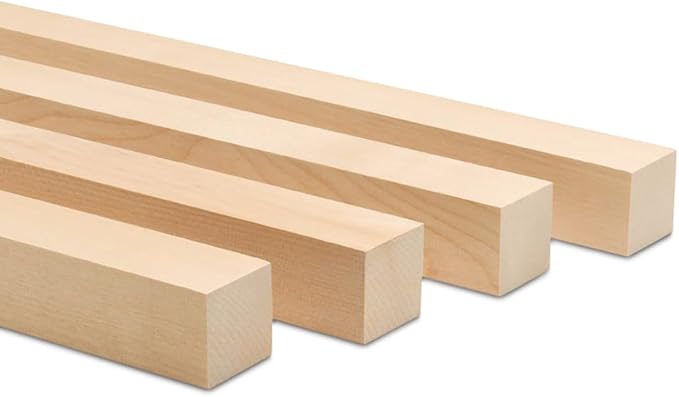
- 1 wooden dowel rod (1.5 inches thick and 36 inches long)
- 1 pack of screw-in hooks
- Round acrylic beads (8–10mm size): 500 red; 400 orange; 200 yellow; 400 green; 200 brown; 300 white
- 1 roll of clear fishing line
- Beading needle
Step-by-step Guide
Step 1: Measure and cut around 50–60 strands of fishing line, each about 5–6 feet long depending on your doorway height.
Step 2: Thread the beads onto each line following your fruit pattern design, tying a small knot after every bead to keep spacing tight and orderly.
Step 3: Once each strand is completed, tie it securely around the wooden dowel rod, ensuring the image forms correctly strand by strand.
Step 4: Install hooks on your doorway or a hanging rod, and carefully mount your beaded curtain, making small adjustments for symmetry.
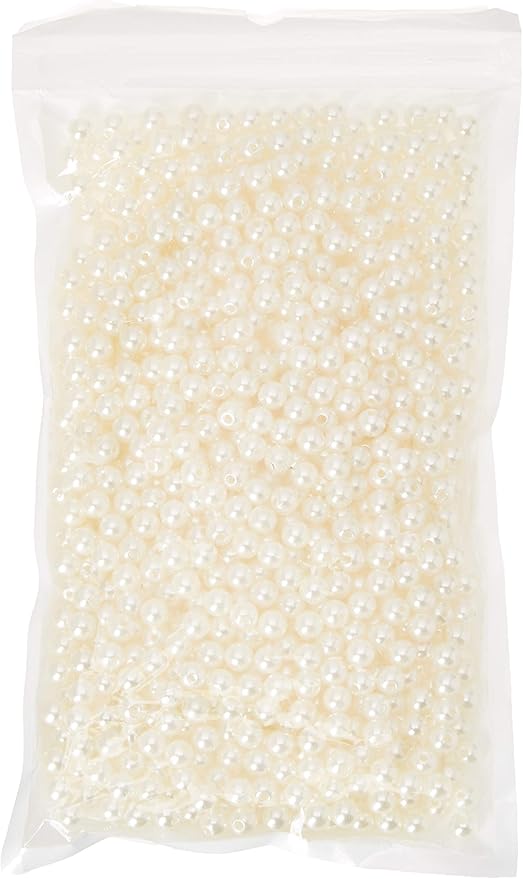
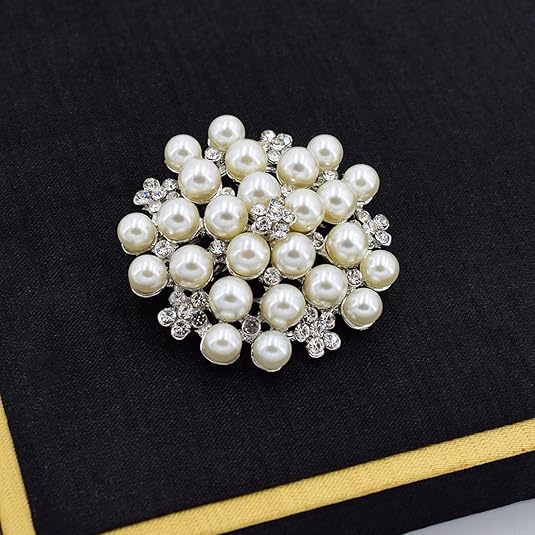
#3. Elegant Pearl Beaded Handbag Magic

To all the lovers of delicate, handmade beauty, this pearl-beaded handbag is pure elegance in every stitch!
Materials Needed
- 1 small fabric purse base (10–12 inches wide, pastel or cream)
- 1000 small faux pearl beads (4mm size)
- 100 medium faux pearl beads (6mm size)
- 5 yards of strong beading thread
- 1 beading needle (size 10–12)
- 1 small tube of fabric glue (optional)
Step-by-step Guide
Step 1: Firstly, using your beading thread and needle, start weaving the pearls in a lattice pattern, combining small pearls for the arcs and medium pearls at each intersection to form flower centers.
Step 2: After completing the main lattice on the body, bead a delicate edging along the top and bottom of the purse for extra elegance.
Step 3: Finally, for the strap, stitch or braid multiple threads, stringing small pearls intermittently, then securely attach both ends to the purse.
#4. Colorful Beaded Mesh Top Wonder

I imagine wearing it layered over a tank or bikini top for that playful, carefree look.

Materials Needed
- 1200 small colorful pearl beads (6mm size)
- 40 yards of clear stretch beading cord (0.5mm thickness)
- 1 beading needle (fine size 10 or 12)
- 1 pair of small jewelry scissors
- 1 white fitted tank top (optional)
Step-by-step Guide
Step 1: Cut long pieces of stretch cord and start threading beads to create individual “diamond” or pentagon shapes, knotting after every small section to secure.
Step 2: Connect the small sections by threading beads and tying knots, gradually forming a flexible net that can stretch over your body.
Step 3: Measure as you go to fit your chest width and desired length; make two shoulder straps by braiding cord or simply beading them too.
Step 4: Once the main body fits, tie off all the ends securely, tuck the knots inside beads where possible, and trim the excess thread neatly.
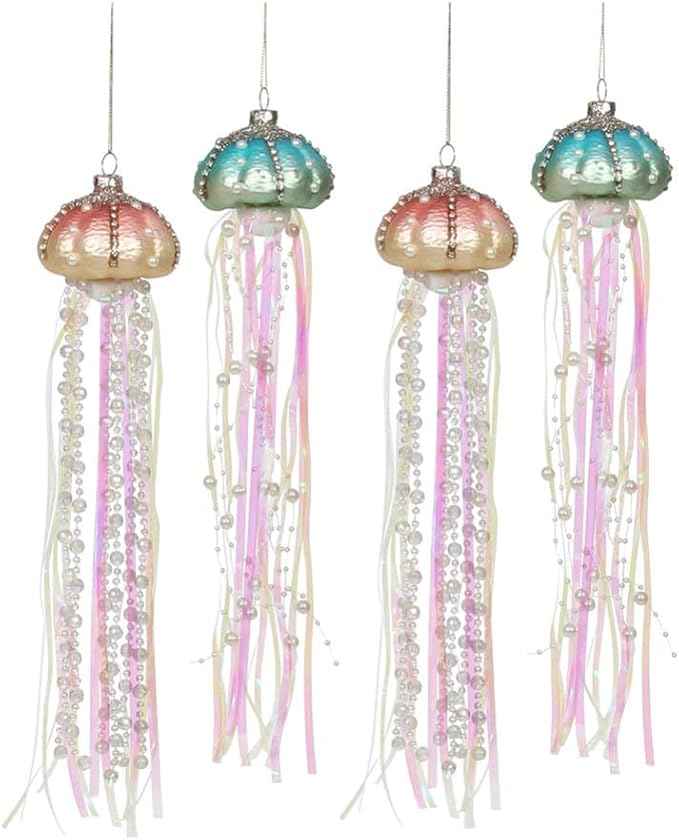
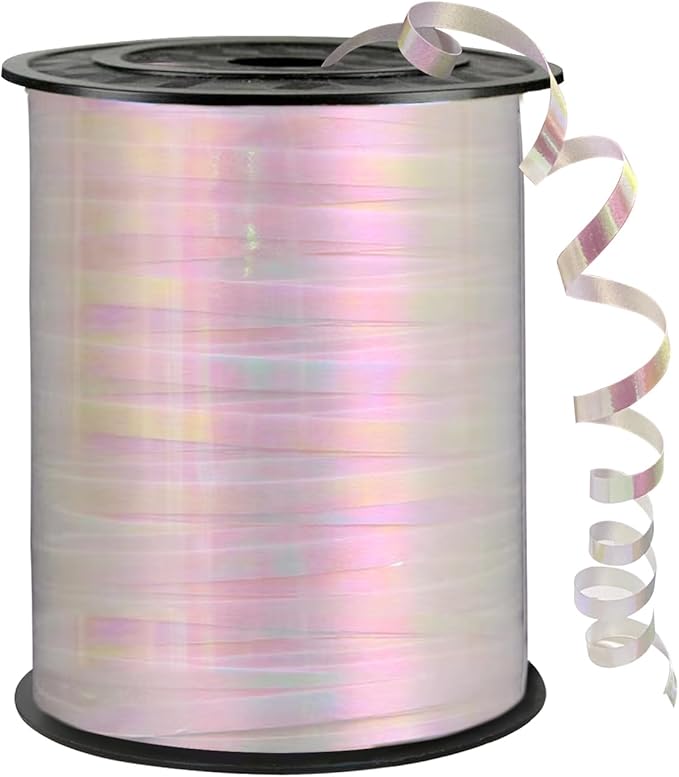
#5. Enchanting Beaded Jellyfish Ornament Design

Creating these felt like capturing a little piece of the ocean. The way the iridescent ribbons shimmer and the pearls dangle makes them feel almost alive.
Materials Needed
- 4 jellyfish plastic ornaments
- 2 yards of iridescent curling ribbon (1/4-inch width)
- 5 feet of pearl bead garland
- 1 pack of clear fishing line
- 1 tube of strong craft glue
- 4 small gold hanging hooks
Step-by-step Guide
Step 1: Cut several pieces of curling ribbon in different lengths (around 12–24 inches each) and curl them slightly with scissors.
Step 2: Glue the ribbon and pearl garlands inside the opening of each ornament to create the jellyfish tentacles, layering them for fullness.
Step 3: Add extra pearls with fishing line to dangle freely and glue tiny pearl accents around the outside of the jellyfish “body.”
Step 4: Attach a hanging hook to the top of each ornament and let everything dry thoroughly before hanging them up.
#6. Beaded Floral Bloom Bracelet Delight

These dainty flower bead bracelets make me think of spring mornings and fresh starts. They’re light, playful, and incredibly satisfying to create.
Materials Needed
- 500 white seed beads (2mm )
- 300 blue glass beads (3mm)
- 300 gold spacer beads (2mm)
- 1 roll of clear elastic beading cord (0.5mm thickness)
- 1 jewelry beading needle
- 1 tube of jewelry glue
Step-by-step Guide
Step 1: Cut a 12-inch piece of elastic cord and thread your needle; string seed beads, one larger blue bead, six seed beads, and repeat to start creating tiny flowers.
Step 2: After every flower cluster, add two gold spacer beads to separate the designs and continue the pattern until you have the length that wraps comfortably around your wrist.
Step 3: Tie the ends of the elastic securely with a triple knot, add a dab of jewelry glue on the knot, trim excess cord, and gently roll the bracelet onto your wrist once dry.
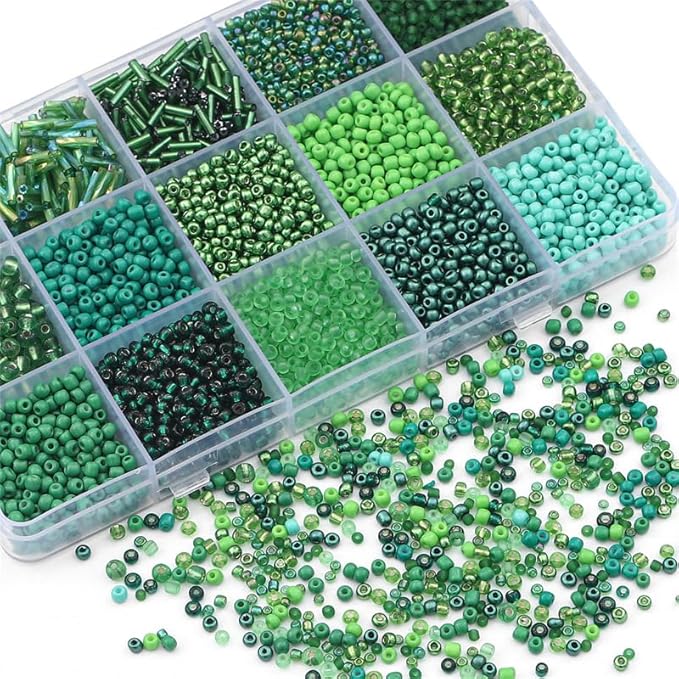
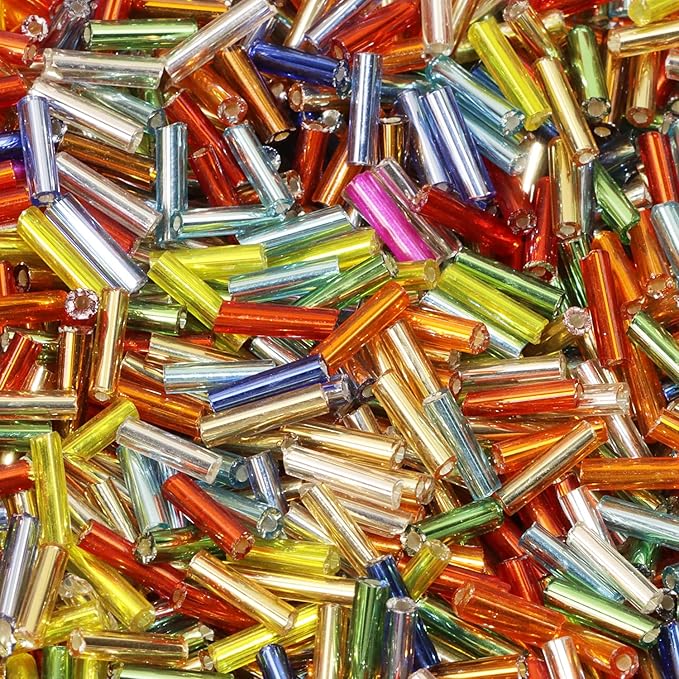
#7. Delicate Beaded Bloom Bouquet

These beaded flower brooches feel like plucking a perfect bloom and freezing it in time.
Materials Needed
- 1000 tiny pink, blue, and purple seed beads (2mm)
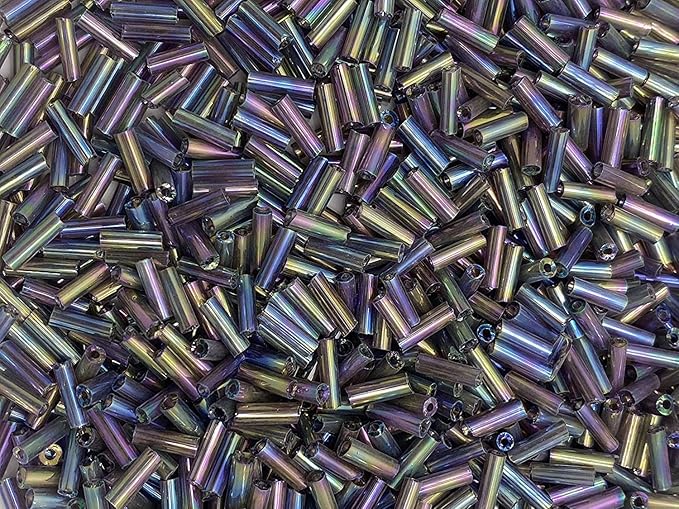
- 500 green bugle beads (20mm long)
- 800 tiny green seed beads (1.5mm)
- 1 roll of silver craft wire (0.3mm thickness)
- 1 roll of thin metallic ribbon
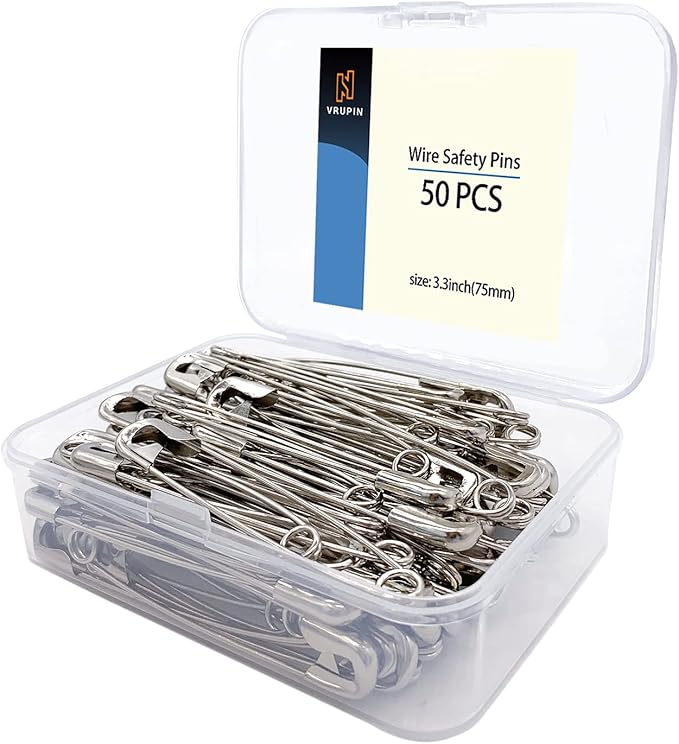
- 1 pack of brooch pin backs (1-inch size)
Step-by-step Guide
Step 1: Cut around 15–20 pieces of 6-inch wire strands and string 6–8 small seed beads onto each, securing them with a small twist at the top to create beaded “flowers.”
Step 2: Bundle the wired flowers together tightly, arranging the colors into a full, rounded bouquet shape, and wrap with a longer wire at the bottom to hold them firmly.
Step 3: Attach the finished bouquet onto a brooch pin back with extra wire, add a tied metallic ribbon bow around the stems, and trim any excess wire neatly.
#8. Colorful Beaded Pom-Poms

I loved how spontaneous it felt stringing random beads together without worrying about a perfect pattern.

Materials Needed
- 2000 assorted seed beads (2–4mm)
- Bugle beads (20mm length)
- Nylon beading thread (0.2mm thickness)
- Small stuffing cotton balls
- Small jump rings and lobster clasps
- 1 fine-tipped beading needle
Step-by-step Guide
Step 1: Thread around 8–10 beads onto the nylon thread, tie a knot to create tiny stems, and repeat until you have 50–70 stems for a full puff ball look.
Step 2: Gather all the stems into a tight bundle, tying securely and inserting a small cotton ball into the center to create a fluffy, rounded shape.
Step 3: Attach a jump ring at the top through the bundle, connect it to a lobster clasp, and trim off any extra threads neatly.
#9. Whimsical Beaded Ocean Scene Brooch

I wanted something simple but full of character, and weaving the little orange fish against the soft blue water background felt almost like painting with beads.
Materials Needed
- 1 pack of size 11/0 seed beads in blue, orange, black, and white (about 50g)
- 1 large silver kilt pin brooch base (7cm wide)
- 1 nylon beading thread (0.2mm thickness, 50 meters)
- 1 beading needle (extra-fine size 12)
Step-by-step Guide
Step 1: Cut about 50cm of beading thread and weave vertical base strands through the brooch holes to set the “loom” foundation.
Step 2: Following a simple pattern, thread the seed beads horizontally row by row, alternating colors to form the fish shape against the blue background.
Step 3: Tie off the thread securely at the edges, add any decorative beads or charms to the sides, and trim the ends neatly for a clean finish.
#10. Charming Pastel Beaded Rings Collection

You can make several rings for less than $5! They’re perfect for stacking, gifting, or just bringing a little sparkle to your everyday.
Materials Needed
- 30-35 seed beads (2mm) per ring
- Small pearl beads 3–4mm size
- 1 roll of clear elastic cord (0.5mm thickness, 5 meters)
- 1 fine beading needle (optional)
Step-by-step Guide
Step 1: Cut about 25cm of elastic cord, thread a mix of seed beads and pearls to create your desired flower pattern.
Step 2: After forming your main design, continue threading filler beads until the strand comfortably wraps around your finger.
Step 3: Tie the ends securely with triple knots, dab a little glue for extra hold, and trim the excess elastic neatly.
#11. Whimsical Beaded Curtain of Dreams

If you’re looking to add a touch of magic to your space, this dreamy beaded curtain is the perfect inspiration!

Materials Needed
- 1000 assorted pastel acrylic beads
- 1 roll of clear beading thread
- 500 small pearl beads (4mm size)
- 1 tension rod adjustable 28–48 inches
- 1 pack of crimp beads
Step-by-step Guide
Step 1: Cut several lengths of clear thread about 1.5 times the height of your window or door.
Step 2: Create patterns by threading beads, mixing pearls, hearts, butterflies, and bows as you like, securing each end with a crimp bead.
Step 3: Tie or crimp each finished strand onto the tension rod, spacing them evenly across the width.
#12. Delicate Floral Beaded Vine Earrings

These elegant, handcrafted beauties mimic the soft curves of a blooming vine, featuring dainty pearl beads, shimmering crystals, and tiny floral accents.
Materials Needed
- Gold jewelry wire
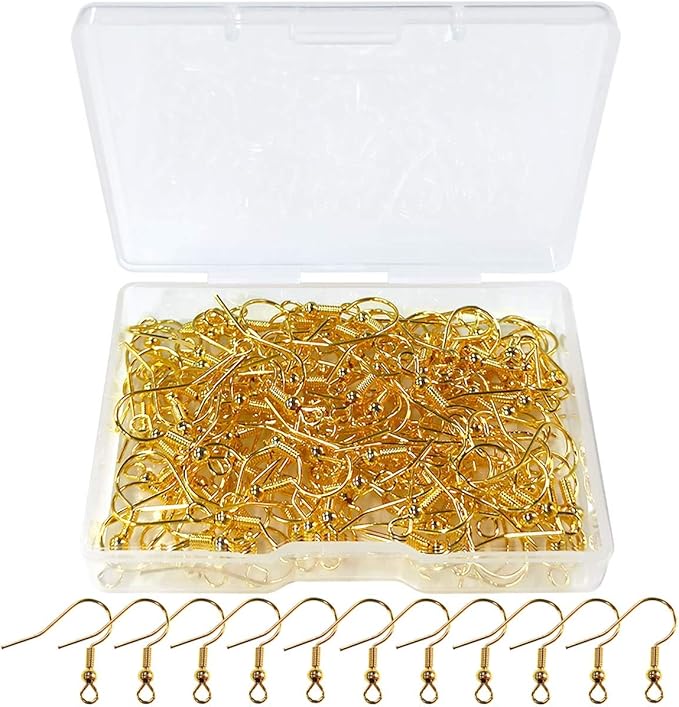
- Gold earring hooks
- 60 white seed beads
- 10 small pearl beads
- 10 tiny faceted crystal beads
Step-by-step Guide
Step 1: Cut a 20cm length of jewelry wire and thread a pearl bead into the center, then twist lightly to secure.
Step 2: Add six small seed beads to one side and loop them back to create a flower petal around the wire, then twist tightly.
Step 3: Continue adding crystals, pearls, and seed bead flowers along the wire, forming gentle curves, then attach the wire to the earring hook and secure with a tight twist.
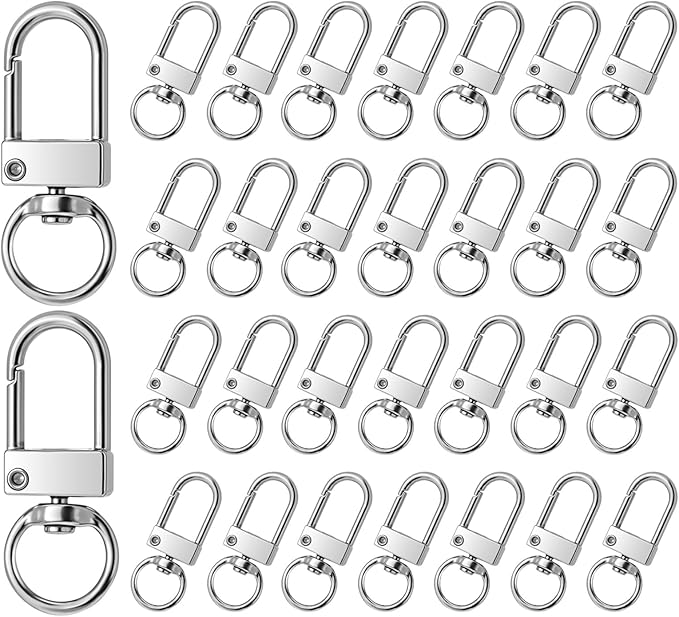
#13. Whimsical Beaded Keychain Collection

The beaded keychain collection is a delightful assortment of handcrafted keychains, each one a unique expression of personality and style.
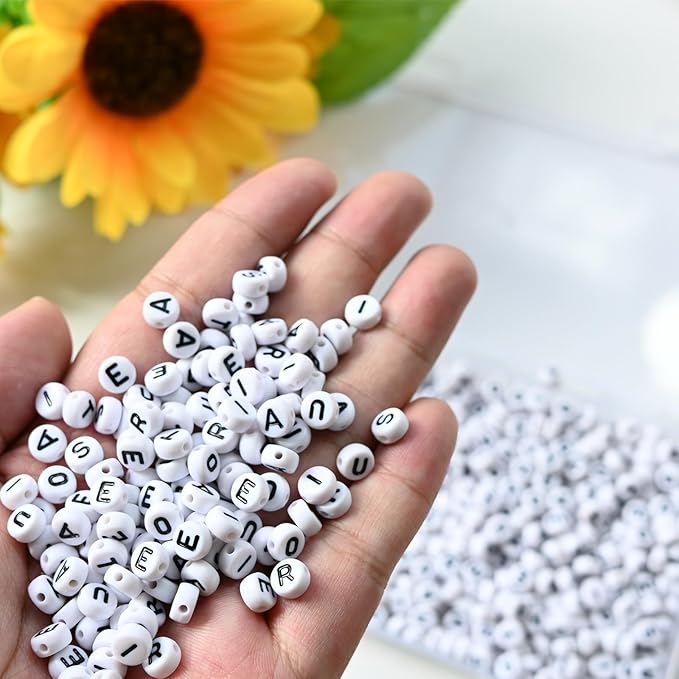
Materials Needed
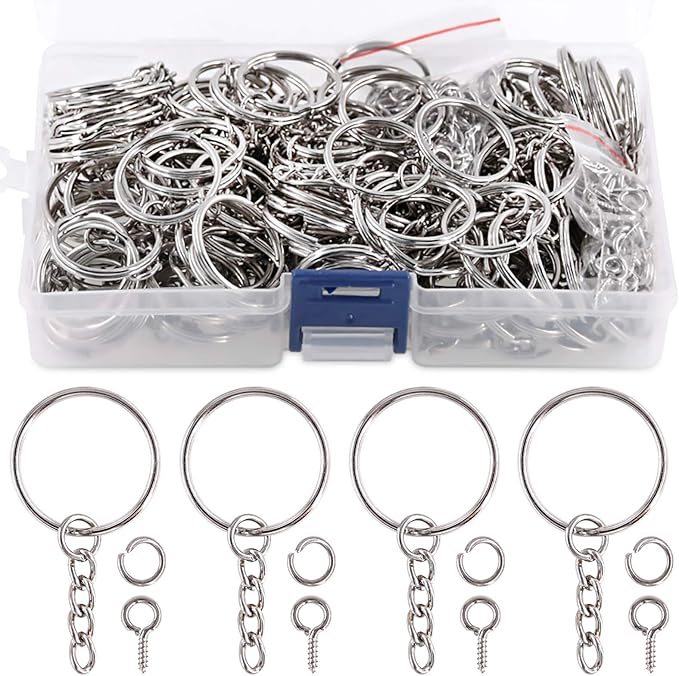
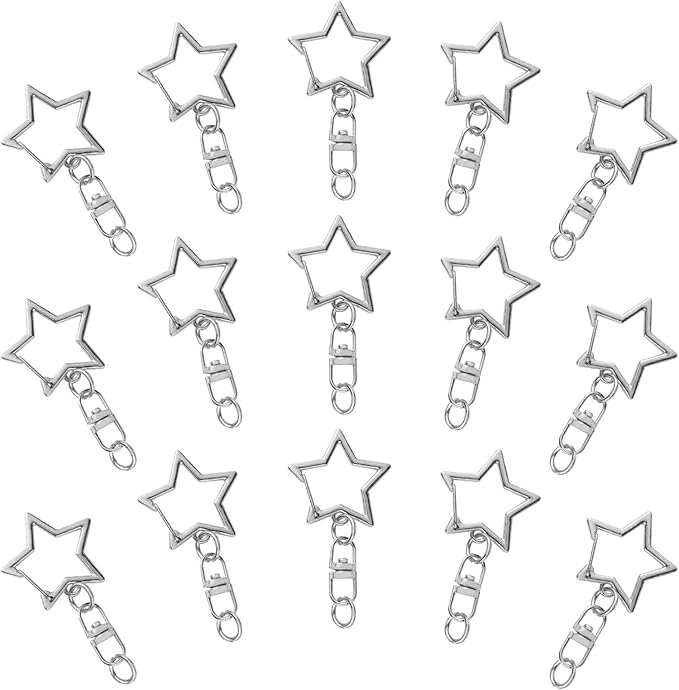
- Keychain rings and star hooks
- 100 Alphabet beads
- 400 acrylic flower and fruit beads
- 0.5mm beading wire
- 500 seed beads
- 300 crimp beads
Step-by-step Guide
Step 1: Cut three strands of wire, about 12cm each, and thread on your chosen beads and alphabet charms to spell your word.
Step 2: Add small colorful beads at the ends for decoration, then crimp each end to secure and attach the strands to the keyring.
Step 3: Mix in flower, fruit, and smiley beads between the words for a cheerful layered look, then close the rings tightly.
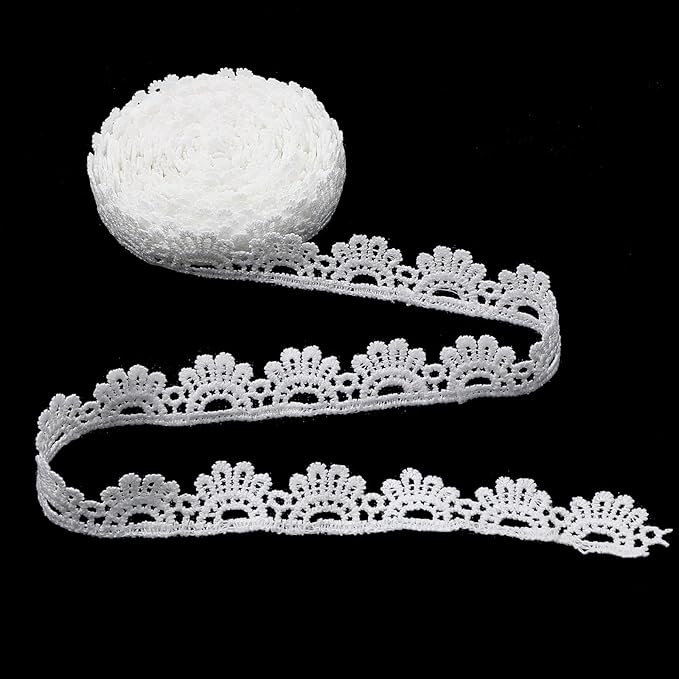
#14. Glamorous Pearl-Embellished Fairy Tale Sneakers

I customized a basic pair of New Balance runners one rainy afternoon, and watching them transform into these princess-worthy kicks was pure magic.
Materials Needed
- 1 pair of white sneakers
- 10 yards pearl trim string
- 2 silver rhinestone appliqués
- 1 roll of lace ribbon (3cm width, 5 meters)
- Pink satin ribbon (1cm width, 10 meters)
- 1 tube of fabric glue
Step-by-step Guide
Step 1: Use fabric glue to attach lace ribbon along the shoe openings and sides, carefully pressing into place as you go.
Step 2: Replace original laces with pink satin ribbon, threading it through the eyelets for a softer look.
Step 3: Glue pearl trim along the sides and tongue area, and finish by placing rhinestone appliqués on the toes, adding satin bows wherever you like for extra cuteness.
#15. Miniature Beaded Bonsai Masterpiece

Have you ever gazed upon a bonsai tree and marveled at its intricate beauty? The beaded bonsai captures that same sense of wonder and tranquility, but in a miniature, handcrafted form.
Materials Needed
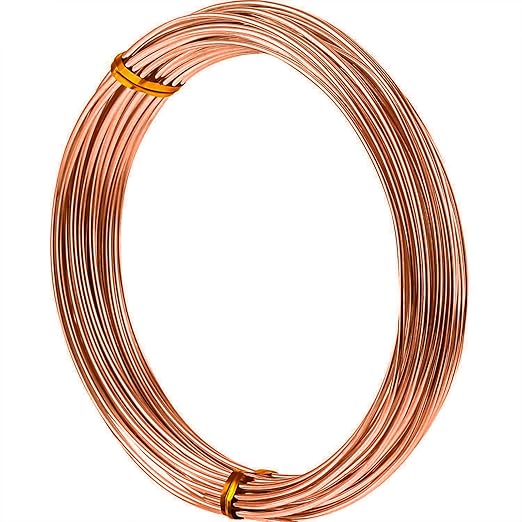
- 20 gauge copper craft wire
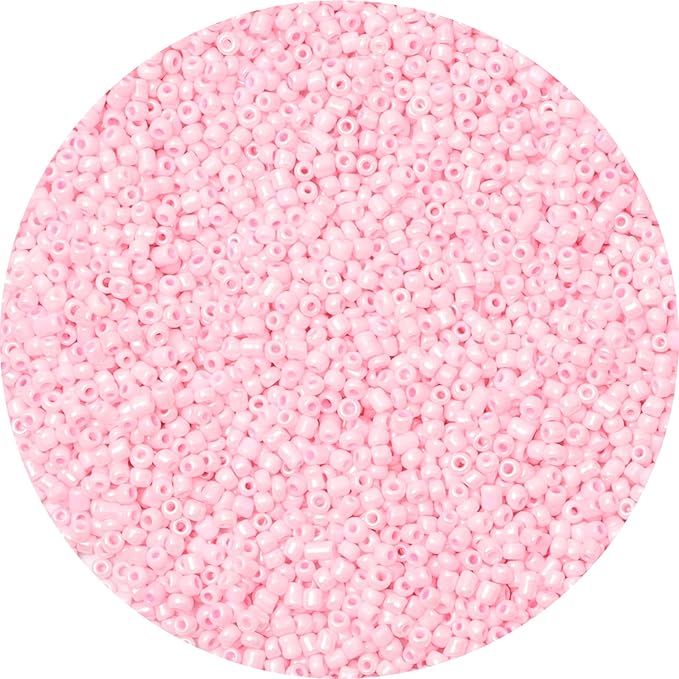
- 500 pink glass seed beads
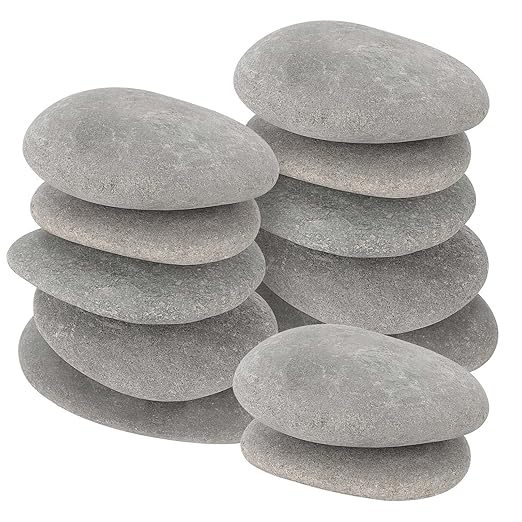
- 1 flat river stone
- Strong jewelry adhesive
- 1 pair of wire cutters
- 1 pair of round-nose pliers
Step-by-step Guide
Step 1: Cut around 30–40 strands of wire, each about 24 inches long. String 3–5 beads onto the end of each wire and twist the wire underneath the beads to form a tiny branch.
Step 2: Bundle several beaded branches together and twist them tightly to create the trunk, shaping the wires as you move upward to form a natural, spreading shape.
Step 3: Attach the finished tree to the stone using strong adhesive, wrapping some of the bottom wires around the stone to form visible roots, and let dry completely.
#16. Beaded Spider Earrings

These shimmering beaded spiders capture that perfect mix of spooky and stunning, making them ideal for Halloween decor or edgy jewelry.

Materials Needed
- 1 pack of bugle beads (6mm)
- 1 bag of small seed beads (size 11/0)
- 1 pack of round faceted beads (8mm and 6mm)
- 1 spool of 26-gauge craft wire (silver or black coated)
- 1 black chain necklace (optional)
- 1 pair of round-nose pliers
- 1 pair of wire cutters
Step-by-step Guide
Step 1: Cut a 20-inch wire piece. Thread a large round bead (body) and a medium bead (head) onto the center, then twist the wire tightly between them to secure.
Step 2: For each leg, cut 8 separate 4-inch wires. On each wire, add 2–3 bugle beads and seed beads, then wrap them onto the body by twisting, positioning four legs on each side.
Step 3: Adjust the legs to curve naturally, secure by wrapping extra wire around the body base, and attach a chain or hook for hanging if desired.
#17. Radiant Beaded Mason Jar Lanterns

The project was surprisingly budget-friendly and the finished look feels like magic for summer nights, garden parties, or even whimsical weddings.

Materials Needed
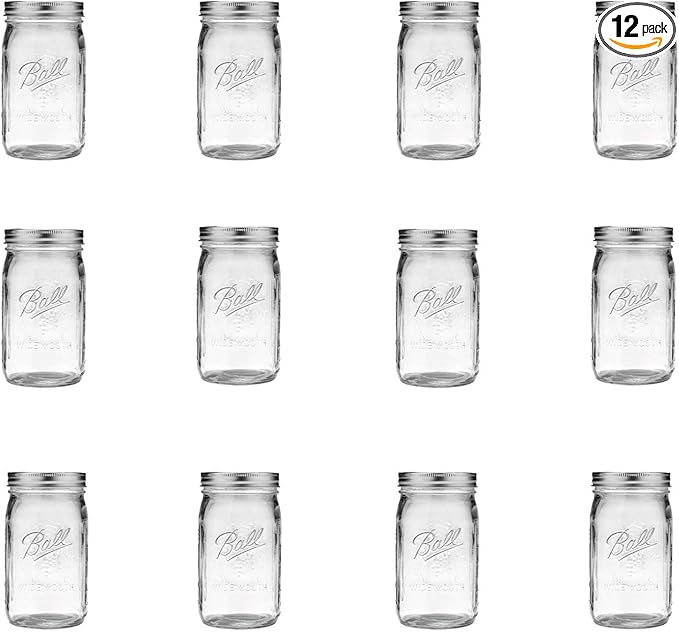
- 3 mason jars with handles (quart size, 32 oz)
- 2 packs of assorted acrylic beads (8–10mm, multicolor)
- 1 roll of clear beading wire (20 gauge, 100 feet)
- 3 battery-operated LED candles (height: about 2.5–3 inches)
- 1 set of sturdy S-hooks
- Scissors and needle nose pliers
Step-by-step Guide
Step 1: Cut four 30-inch pieces of beading wire per lantern. Thread colorful beads onto each wire, leaving 2 inches bare at both ends.
Step 2: Tie two wires tightly around the jar’s neck (opposite sides), and two around the jar’s base. Bring the wires upward and twist them together above the jar to form a hanging loop.
Step 3: Insert a LED candle inside each jar, hang them with an S-hook, and let your garden sparkle with a cheerful rainbow glow.
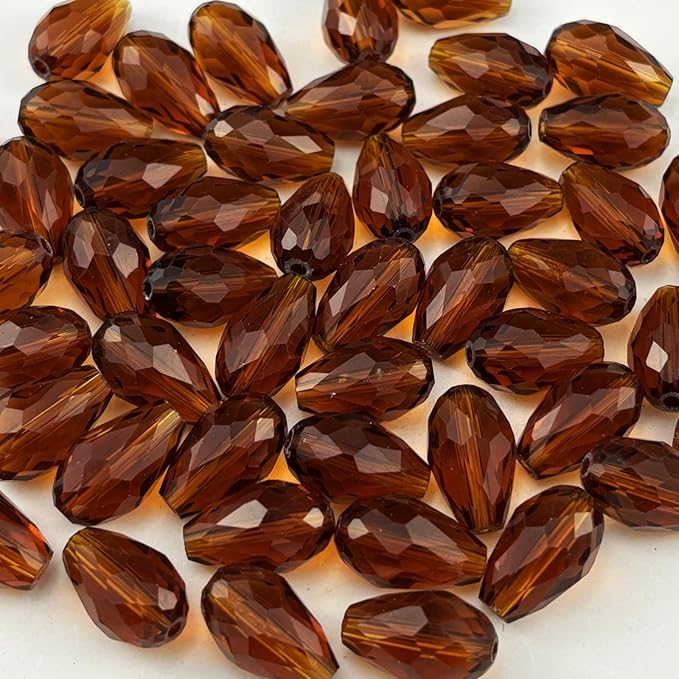
#18. Radiant Beaded Chandelier for Timeless Elegance

How about adding a touch of vintage glamour to your space? This dazzling beaded lampshade instantly became the crown jewel of your cozy reading nook.
Materials Needed
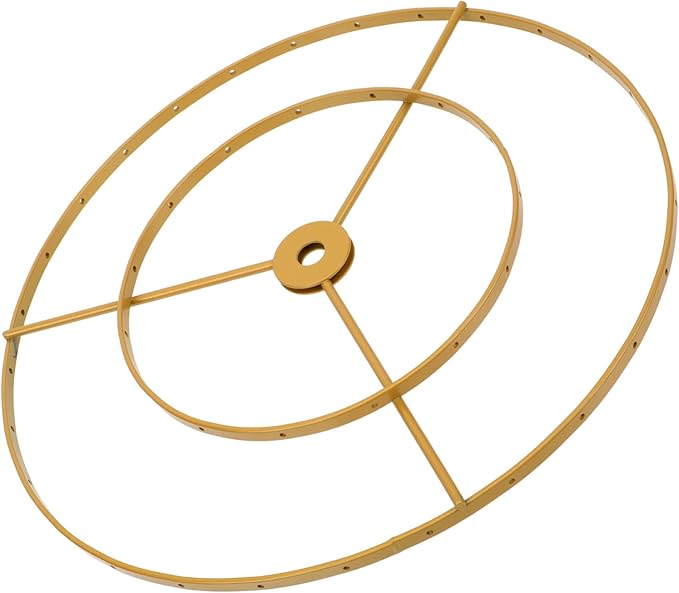
- 1 metal lampshade ring (8–10 inches diameter)
- 1 roll of clear beading thread
- 300 amber crystal teardrop beads
- 200 red glass round beads
- 1000 gold seed beads
- 1 set of beading needles
- Small scissors and measuring tape
Step-by-step Guide
Step 1: Cut dozens of 18-inch lengths of beading thread. Create individual bead strands by stringing a pattern of gold seed beads, red rounds, and amber drops at varying intervals.
Step 2: Knot each strand securely onto the metal ring, layering them to create a cascading curtain effect. Adjust the density so the lampshade looks full but not overcrowded.
Step 3: Attach the completed beaded ring to your existing pendant light or lamp fixture, gently arranging the strands so they catch the light beautifully.
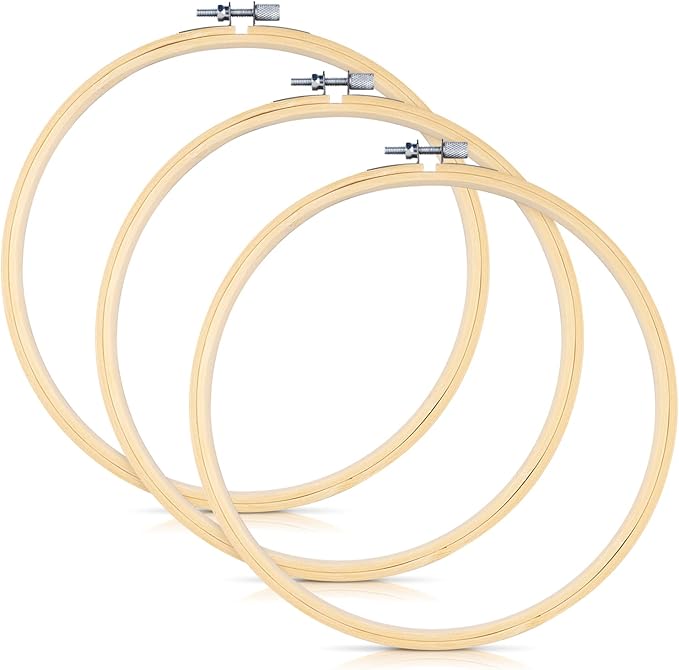
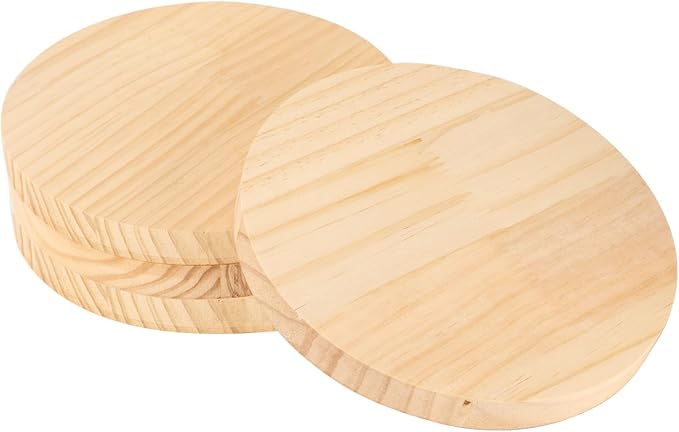
#19. Whimsical Beaded Fairy Tale Castle

Who can resist the magic of a sparkling beaded castle? With pastel hues, dazzling gemstones, and intricate embroidery, this masterpiece brings a dreamy fairy tale to life.


Materials Needed
- 1 8″ wooden embroidery hoop
- 1 piece of pastel tie-dye (10″x10″)
- 3 skeins of embroidery floss in pastel shades (pink, lavender, aqua)
- 100 iridescent seed beads
- 100 flat-back rhinestones and gems
- 30 star and heart-shaped sequins
- Embroidery needles
- Fabric glue
- Embroidery scissors
Step-by-step Guide
Step 1: Stretch your fabric tightly over the embroidery hoop. Lightly sketch your castle design with a water-soluble pen. Begin embroidering base structures with satin stitch, backstitch, and French knots using pastel floss.
Step 2: Once the base is complete, start layering beads and sequins. Use embroidery floss to attach seed beads and sequins securely, especially around borders and rooftops.
Step 3: Add flat-back rhinestones and statement gems using fabric glue. Outline and fill in sections like towers and doors with a mix of embroidery and gems for maximum texture and sparkle.
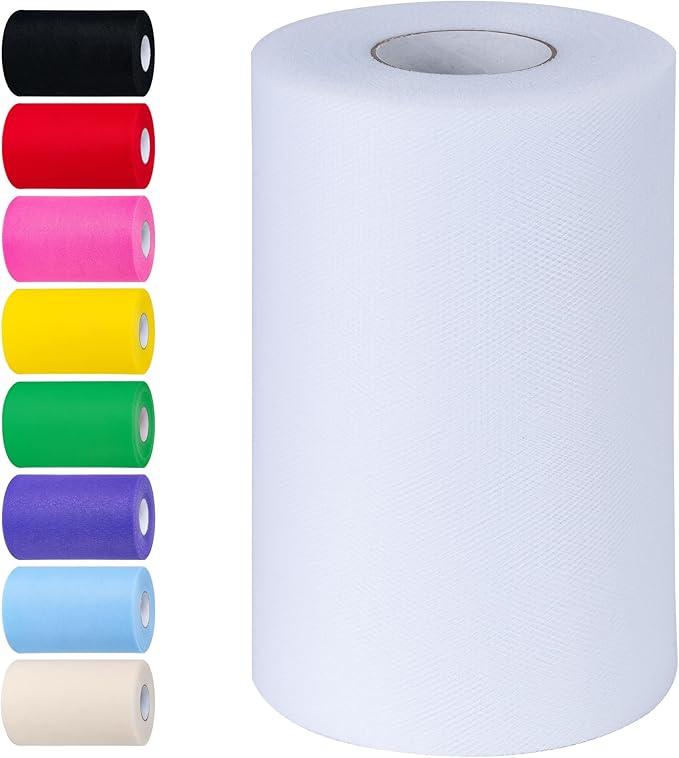
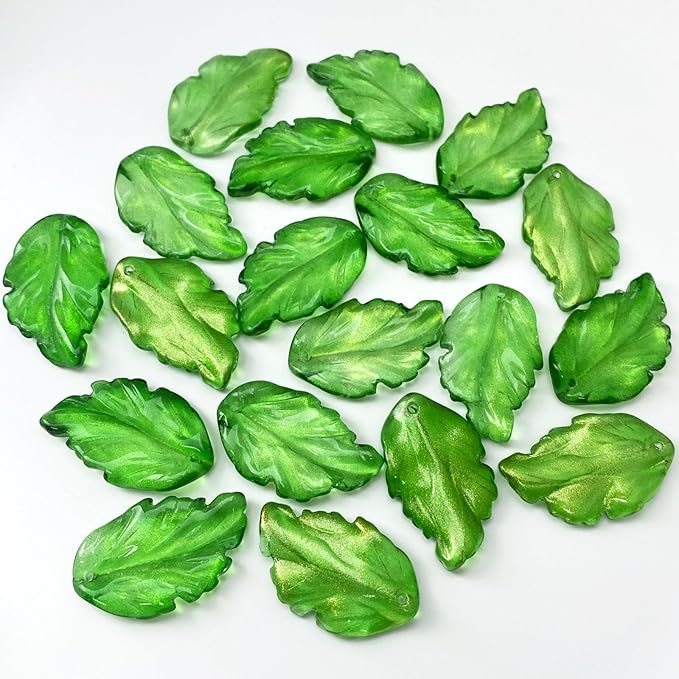
#20. Elegant Beaded Food Cover with Charm

With a touch of elegance and a hint of sparkle, this beaded food cover turns an everyday necessity into a decorative masterpiece.

Materials Needed
- 1 piece of white tulle (approx. 12” x 12” square)
- 1 yard of gold beaded trim
- 12–15 red glass berry beads
- 24–30 green leaf beads
- 60 clear crystal beads
- 100 gold seed beads
- Beading thread and needle
- Hot glue gun
Step-by-step Guide
Step 1: Hem the square fabric by folding over the edge and securing with hot glue or stitching. Then, attach the gold trim around all four edges.
Step 2: Create your beaded dangles: each should include one red berry bead, two green leaf beads (angled outward), and a series of clear and gold seed beads stacked in an alternating pattern.
Step 3: Sew each beaded strand evenly spaced along the trim, about 1 inch apart. Knot thread tightly after each and secure with a dab of glue for durability.
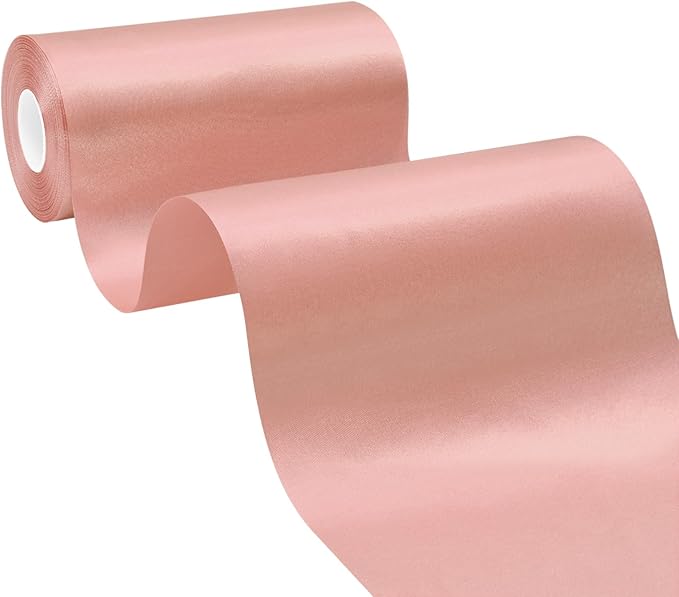
#21. Elegant Ribbon and Pearl Bead Hanging

This dreamy bow and bead hanging garland has a quiet charm that fits into weddings, boutiques, or baby showers with ease.
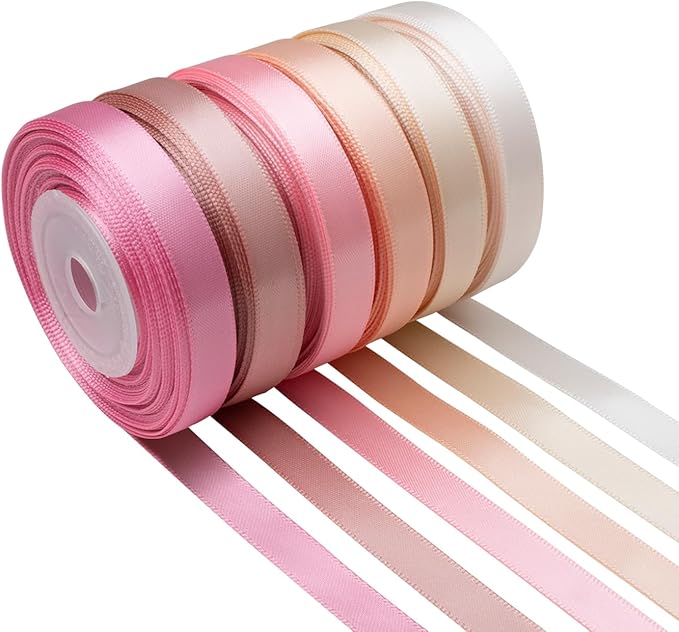

Materials Needed
- 10 yards of satin ribbon (cream, white, pink)
- 10 faux pearl bead strands
- Transparent nylon thread
- Hot glue gun
- Copper pipe
- Clear adhesive hooks
Step-by-step Guide
Step 1: Cut ribbon into 14–20 strips, each around 12–18 inches long, then tie them into loose bows and secure the knots with a dot of glue to hold shape.
Step 2: Attach beads to the transparent thread, spacing them out and alternating between small and medium pearls; tie a bow near every 2–3 beads.
Step 3: Tie or glue each strand of ribbon and bead string to your copper rod, alternating colors and textures. Space evenly and hang the rod from ceiling mounts or hooks.
#22. Captivating Seashell Wind Chime

Crafted with a delicate touch, this handcrafted masterpiece features a harmonious blend of seashells and vibrant beads, creating a visual and auditory spectacle.
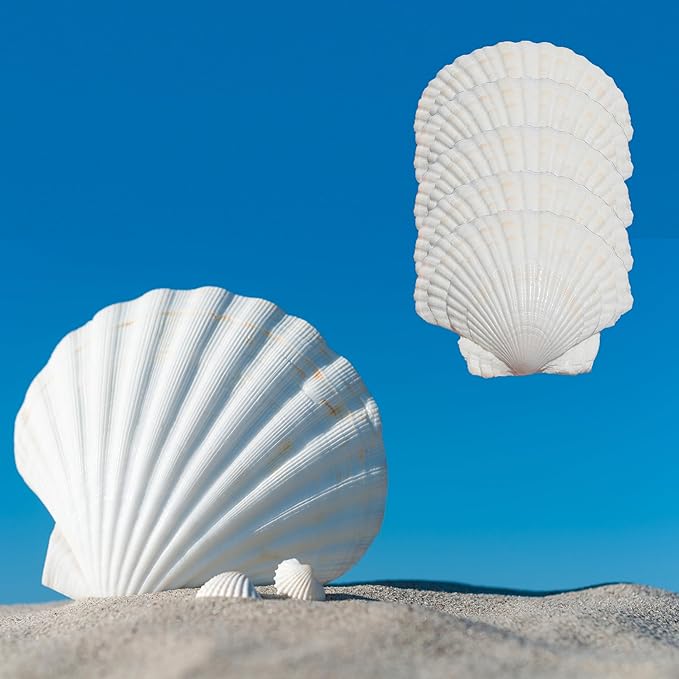
Materials Needed
- 50 seashells with small holes
- 100 colorful round beads
- Strong nylon string
- Wooden circle base (6 to 8 inches)
- Needle
- Hot glue gun
Step-by-step Guide
Step 1: Tie several strands of string (around 12–16 inches long) around the wooden base, spaced evenly; secure knots with glue.
Step 2: Thread beads and shells alternately on each strand. Double knot below each shell to keep it from sliding and add extra beads for weight at the end.
Step 3: Tie three long strings to the top for hanging, knot them together, and test balance. Adjust strand lengths if needed to ensure even hang.
#23. Enchanting Beaded Dragonfly Charm Craft

I made a few to hang in my kitchen window, and the sunlight filtering through their wings still makes me smile.
Materials Needed
- 50 assorted seed beads
- 3 bugle beads (7–10mm long)
- 15 round beads
- Craft wire 24–26 gauge
- Wire cutters and round-nose pliers
Step-by-step Guide
Step 1: Cut a length of wire, fold it in half, and add the first few beads to form the base of the dragonfly’s tail and body, threading up through bugle and round beads.
Step 2: Form one upper wing by threading beads on each side of the wire, looping back to the body and twisting to secure. Repeat for lower wings with slightly fewer beads.
Step 3: Finish by placing 2 red beads as eyes on the head, twisting the wire to secure tightly behind the head, and trim or curl any excess.
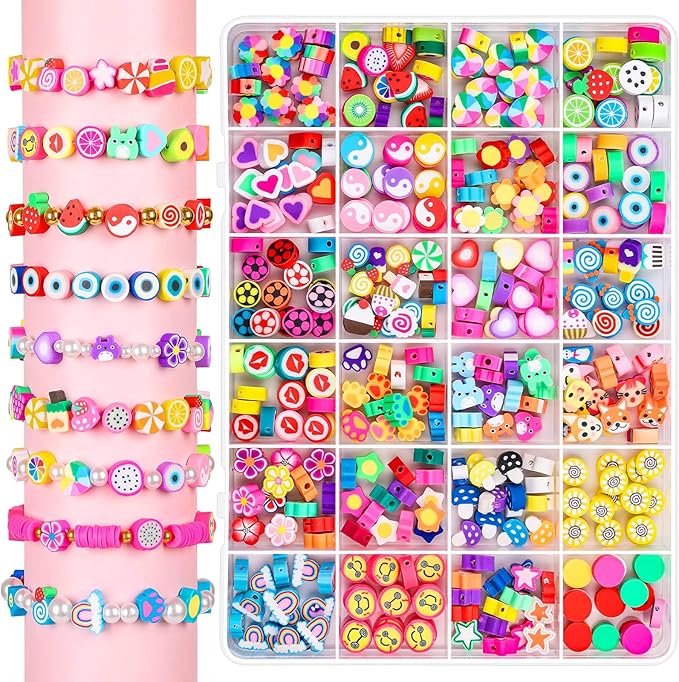
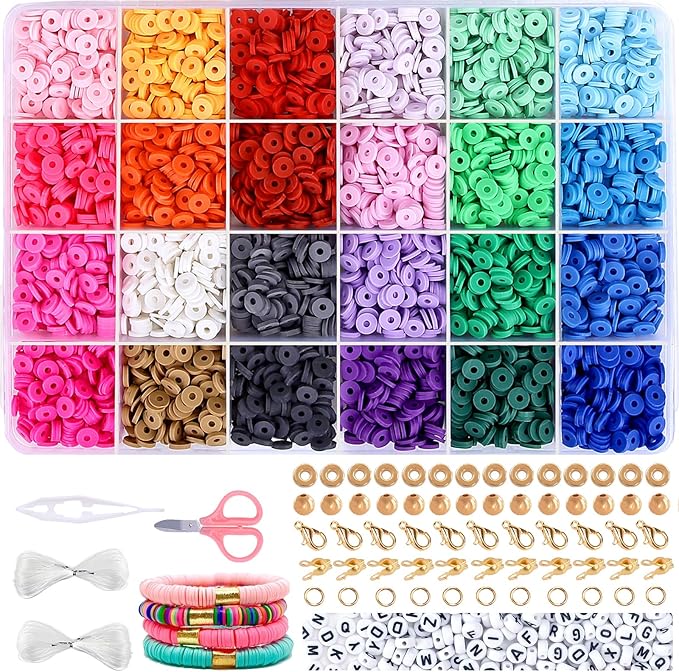
#24. Colorful Beaded Bracelet Collection

These floral and patterned beaded bracelets are great as friendship gifts or spring accessories, and making them can be deeply calming, especially when following a repetitive flower pattern.
Materials Needed
-
- 1000 seed beads size 11/0
- Beading thread 50–60 cm per bracelet
- Beading needle size 10–12
- Clasp findings
- Optional: Crimp beads and pliers
Step-by-step Guide
Step 1: Thread your needle and tie a knot at one end. Start by creating the base with green or neutral seed beads, measuring your wrist as you go.
Step 2: To make flowers, weave five petals in alternating colors, then pass the thread through a center bead and loop it back to the base strand. Repeat as desired.
Step 3: Add your clasp at the ends by looping the thread through the ring or clasp and securing with a knot or crimp bead. Trim excess and lightly seal with glue if needed.
#25. Romantic Beaded Heart with Lace Charm

The cascading beads create a dreamy effect, making it perfect for gifting or decorating.
Materials Needed
- 2 pink satin 5×5 inches
- Lace trim
- 40 assorted beads in red, pink, and gold
- Gold metal cupid charm
- Embroidery thread
- Green ribbon
- Polyester stuffing
- Sewing needle, embroidery needle, hot glue gun, and fabric scissors
Step-by-step Guide
Step 1: Cut two heart shapes from the pink fabric. Embroider one piece first by stitching radiating lines from the center and decorating with beads and the gold cupid charm. Add green vine-like embroidery around the edge.
Step 2: Sew the two heart pieces together, right sides facing, leaving a small gap. Turn right side out, stuff lightly, and hand-stitch the opening closed.
Step 3: Glue lace trim around the outer edge, and attach the olive green ribbon at the top for hanging.
#26. Glamorous Beaded Curtain Tieback Design

By blending pearls, crystals, and a touch of sparkle, this beaded curtain tieback transforms a simple drapery into an elegant décor statement.
Materials Needed
- 35 pink pearl beads (8mm)
- 30 faceted crystal beads (6mm, pink)
- 10 inches rhinestone cup chain
- 10 inches gold curb chain
- Beading wire
- Crimp beads
- Lobster clasp and jump rings
- Jewelry pliers and wire cutters
Step-by-step Guide
Step 1: String the pearl and crystal beads separately on two pieces of beading wire, securing each end with crimp beads, leaving small loops for attaching.
Step 2: Cut your rhinestone chain and gold chain to match the length of your beaded strands. Attach jump rings to their ends.
Step 3: Connect all the strands together onto a large jump ring at each end, adding a lobster clasp to one side for easy fastening around your curtains.
#27. Radiant Red Beaded Bow Keychains

Do you love a touch of elegance with a sparkle of charm? These dazzling red beaded bow keychains instantly remind me of festive holidays, special gifts, or a charm you’d clip on a bag to make it pop with personality.

Materials Needed
- 150 red faceted beads (3mm–4mm)
- 25 small silver star beads
- 15 small silver spacer beads per bow
- Lobster clasp keychain clips (silver)
- Flexible beading wire (0.3mm)
- 30 crimp beads
- Jewelry pliers and wire cutters
Step-by-step Guide
Step 1: Cut three lengths of wire, each about 12 inches long. String red beads, adding silver star and spacer beads intermittently for a playful shine.
Step 2: Form each beaded strand into a loop and secure the ends tightly with a crimp bead, attaching all loops to a central jump ring.
Step 3: Attach the finished bow to a lobster clasp clip with a strong jump ring, adjusting the loops for a full and neat bow shape.
#28. Dazzling Spiral Beaded Suncatcher Design

When I made something similar for my garden last year, every little breeze spun it gently, throwing sparkles across the patio.
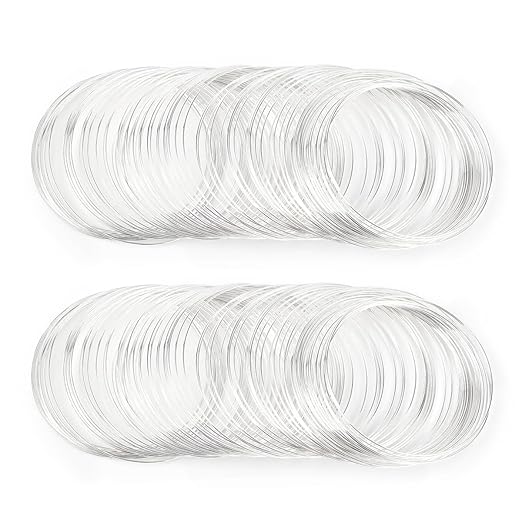
Materials Needed
- 12 inches memory wire
- 100 assorted colorful glass beads
- 2 small crimp beads
- Strong chain
- Round-nose pliers and wire cutters
Step-by-step Guide
Step 1: Cut a piece of memory wire about 12 inches long and form a small loop at one end using round-nose pliers.
Step 2: Start threading beads in your preferred color pattern, mixing sizes and shapes for a whimsical look until about 1 inch of wire remains.
Step 3: Create a final loop to secure the beads, then attach a short chain to the top loop for hanging and gently stretch the wire into a spiral shape.
#29. Enchanting Beaded Wind Chime with Driftwood

Affordable and deeply satisfying to assemble, it’s a project that brings color, texture, and melody to any outdoor nook.
Materials Needed
- Driftwood (about 12–18 inches long)
- 400 mixed glass beads (blue, green, aqua tones)
- Strong beading wire
- 30 crimp beads
- 18 small eye hooks
- Chain
- Wire cutters and pliers
Step-by-step Guide
Step 1: Screw small eye hooks evenly spaced along the driftwood or branch to act as anchors for the beaded strands.
Step 2: Cut beading wire into different lengths (ranging from 10 to 18 inches) for a cascading effect, and string on a random mix of colorful beads, securing each strand with crimp beads at the ends.
Step 3: Attach the strands to the eye hooks, then secure a chain to each end of the driftwood for easy hanging and display in a sunny or breezy spot.
#30. Playful Rainbow Beaded Choker

Whether you’re dressing up for a summer party or adding a pop of color to your everyday style, this choker is sure to make you smile.
Materials Needed
- 100 clear glass beads
- 200 mini disc beads
- Elastic beading cord
- 3 lobster clasps and jump rings sets
- Jewelry crimp beads
- Beading needle (optional)
Step-by-step Guide
Step 1: Cut three lengths of elastic cord: 14 inches, 16 inches, and 18 inches for layering effect. Tie a temporary knot or use a clip at one end of each to prevent beads from slipping.
Step 2: String the beads in a repeating pattern – one clear bead, one mini disc, and so on until the strand reaches the desired length, making sure to keep a soft drape for each necklace.
Step 3: Finish by securing each end with a crimp bead, attach a jump ring and lobster clasp for easy closure, and trim off any excess cord.
#31. Beaded Starry Night Earrings

These earrings honestly feel like you’re wearing a little piece of Van Gogh’s magic! I love how the tiny seed beads create that swirling “Starry Night” feeling, capturing movement, depth, and emotion with every strand.
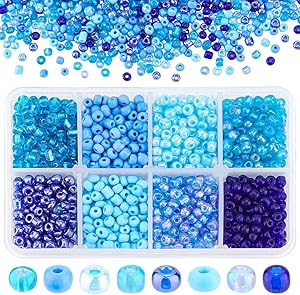
Materials Needed
- 600 czech seed beads size 11/0 in blue, dark blue, yellow, white
- Beading thread
- Beading needle size 10 or 12
- Earring hooks, gold or silver tone
- 2 small jump rings
- Scissors and jewelry pliers
Step-by-step Guide
Step 1: Sketch a basic pixel pattern (or find a simple bead loom pattern) to follow the placement of blue, yellow, and white beads for the swirling “sky” and “stars.”
Step 2: Thread your needle with about 1 yard of beading thread. Begin weaving brick stitch rows across the width, carefully following the color changes, adding fringe at the bottom as you work downward.
Step 3: Once the beadwork is complete, attach the top row to a jump ring, connect it to the earring hook, and repeat the process for the second earring.
#32. Beaded Fairy Garden Stakes
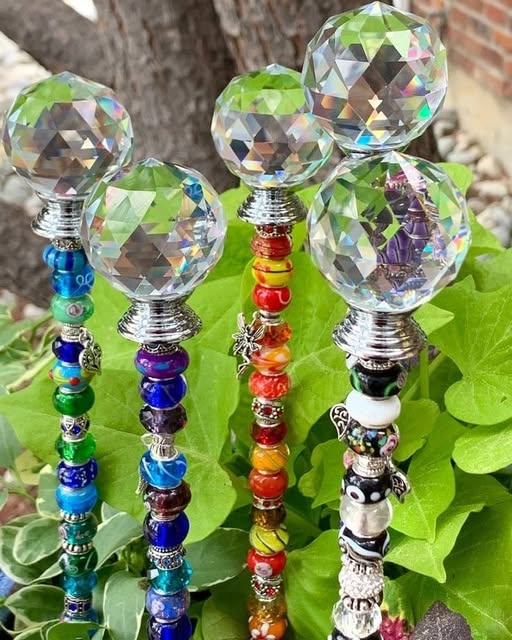
Colorful, beaded garden stakes topped with large faceted crystal balls sparkle brightly among green foliage.
Materials Needed
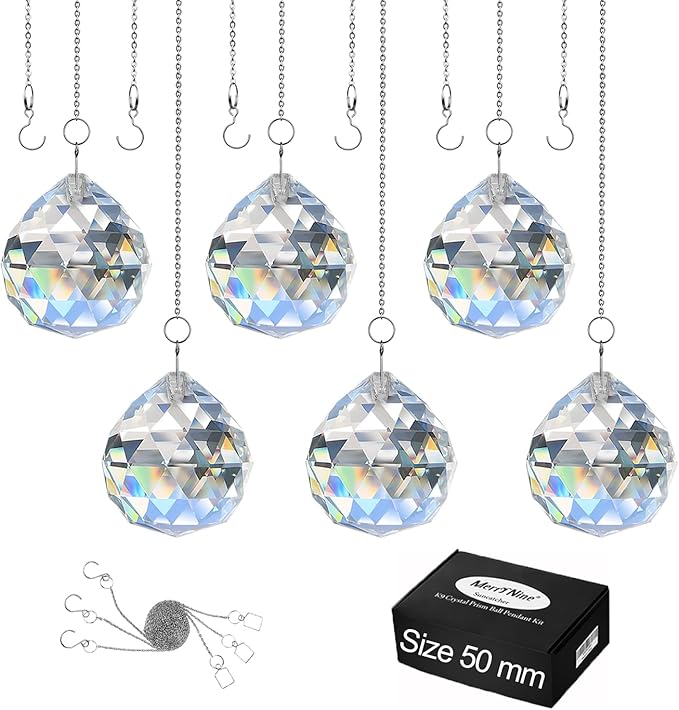
- 5 large crystal prism balls, 50mm
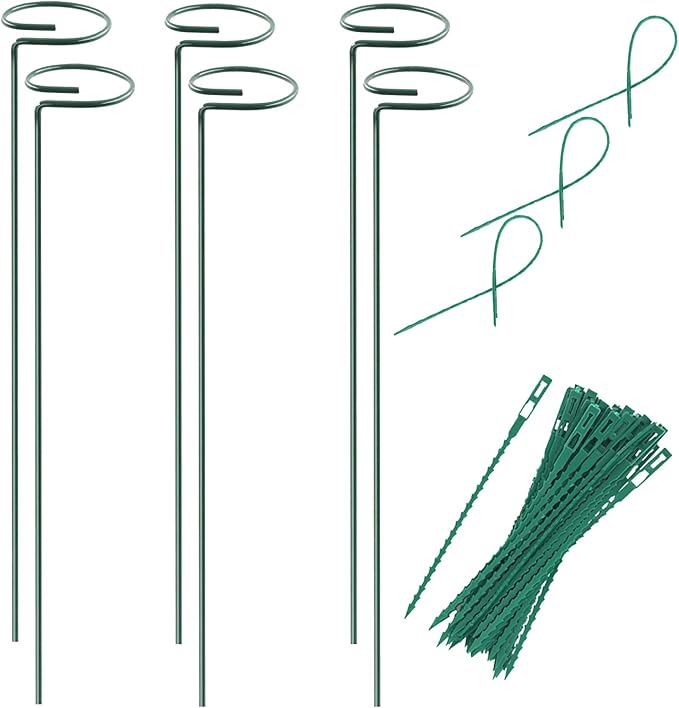
- 5 metal garden stake rods, 1/4 inch thick, 18–24 inches
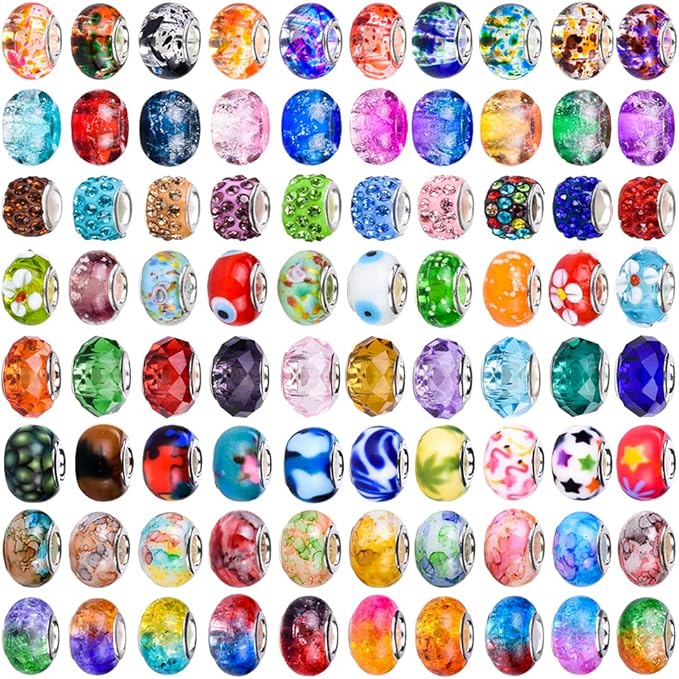
- 100 assorted large-hole beads
- E6000 industrial adhesive
- Optional: Small bead charms
Step-by-step Guide
Step 1: Clean your metal rod with a damp cloth to remove dust and oils. Slide the largest beads onto the rod, alternating colors, textures, and metal spacers for variety.
Step 2: Leave about 2 inches of space at the top. Apply a generous amount of E6000 adhesive and press the crystal prism firmly onto the rod tip. Let it cure for at least 24 hours.
Step 3: If you like, you can add tiny charm dangles between beads by threading them onto the rod while you stack. Once the glue is fully dry, simply plant your new stake among your flowers and watch it sparkle!
