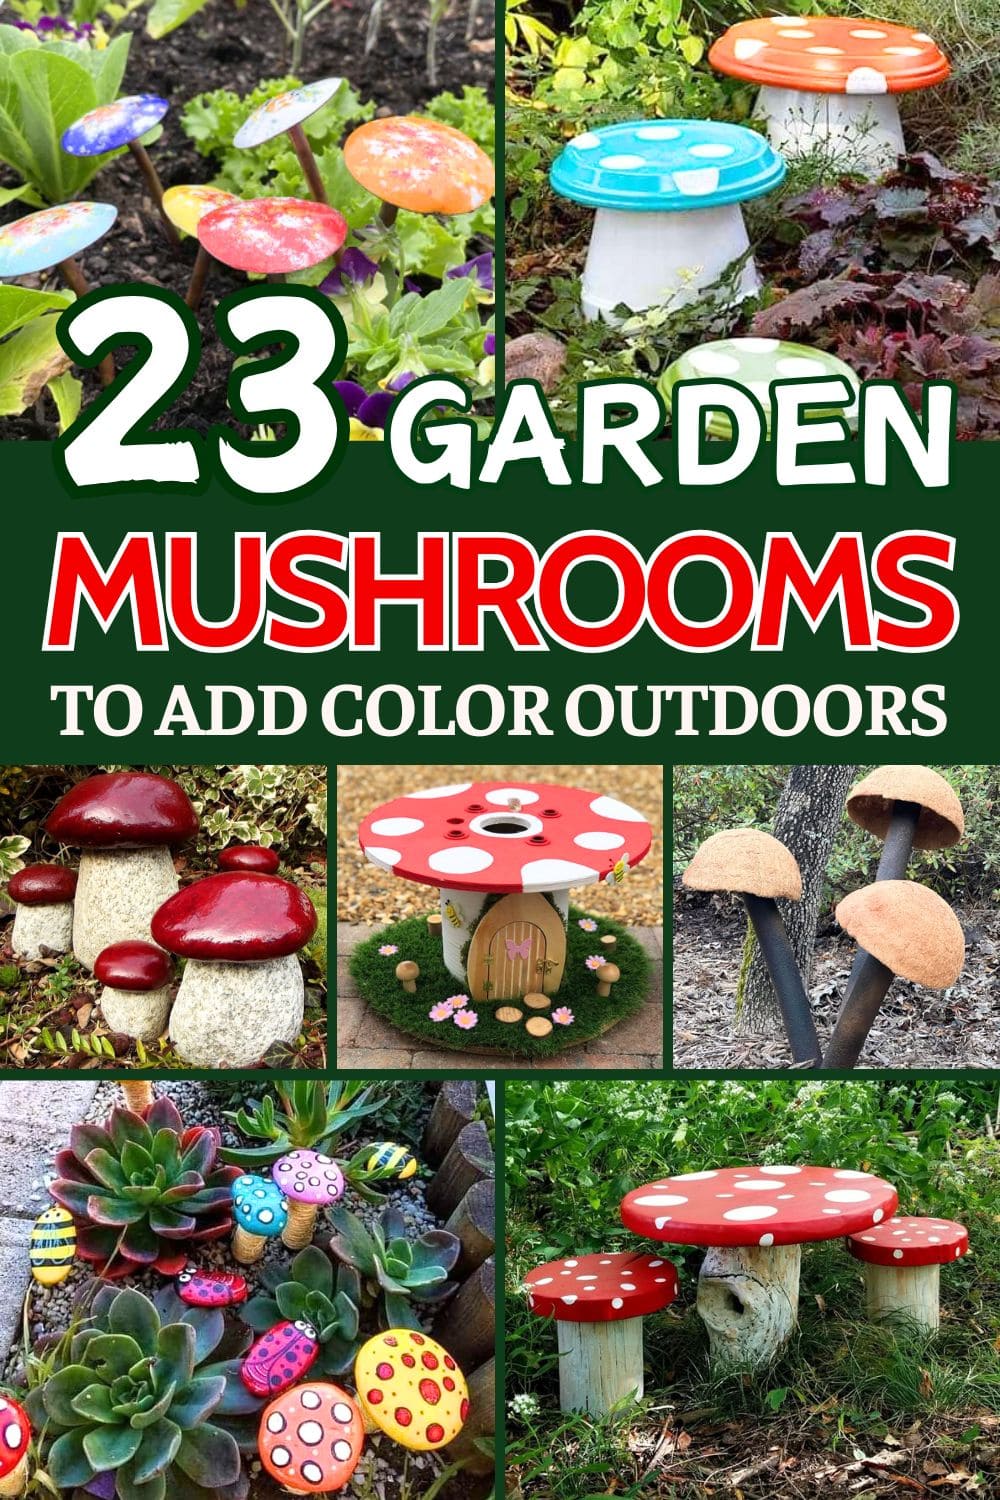
There’s something undeniably enchanting about spotting a mushroom nestled in the garden, it’s like finding a little secret from nature itself. Now, what if you could create that same magic with your own hands?
Whether you’re dreaming of a fairy-tale corner, a playful pop of color, or a whimsical woodland vibe, these DIY mushroom ideas bring charm and creativity to any outdoor space.
From painted rocks and cement sculptures to upcycled wonders made from bowls, logs, and old lampshades, there’s a project here for every style and skill level. Let’s bring a touch of wonder to your garden, one mushroom at a time!
This article contains affiliate links. If you purchase through them, I may earn a small commission at no extra cost to you. Thank you for your support!
#1. Enchanted Toadstool Picnic Table
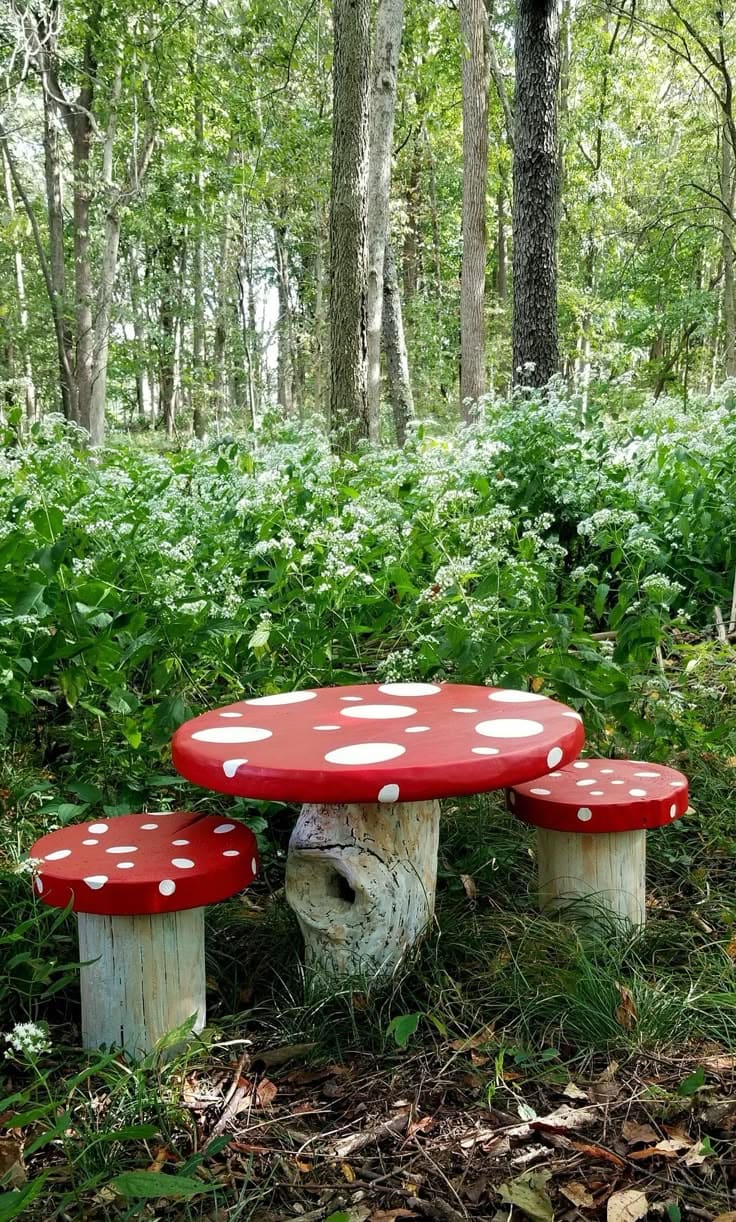
I built this whimsical trio using repurposed wood and tree stumps, and it quickly became my favorite place for tea, sketching, or watching the birds.
Materials Needed
- 2 Wood Rounds for Seats (12” diameter) and 1 Large Round Table Top (24–30”)
- Tree stumps — about 12–16” tall for seats, 18–20”
- Outdoor red acrylic paint (1 quart) and white acrylic paint
- Paint sealer
- Screws and drill set
- Medium-grit sandpaper
Step-by-Step Guide
- Sand down the wood rounds and stumps to remove splinters and prep for paint. Wipe clean.
- Paint the tops of each seat and table round with two coats of red outdoor paint. Once dry, use a sponge or stencil to dab on white circles for the toadstool look.
- Attach each painted round to its respective stump base using screws and a power drill. Seal everything with clear outdoor wood sealant to keep it protected all year round.
#2. Whimsical Painted Tin Can Mushroom Friend
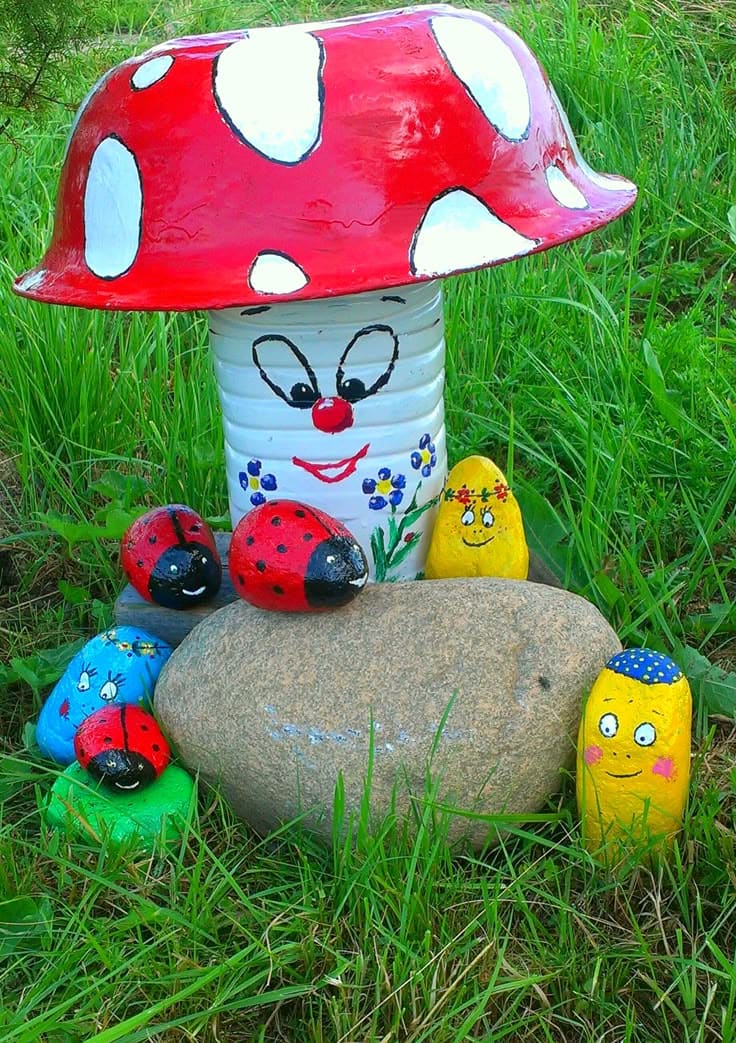
This cheery mushroom and rock critter garden project is an explosion of personality and color.
Materials Needed
- Large Tin Can (28 oz or bigger)
- Plastic Mixing Bowl (10–12″ diameter)
- Acrylic Paint Set (multicolor)
- Outdoor Clear Sealer Spray
- River Rocks and Pebbles
- Paint Brushes (detail + wide)
- Hot Glue Gun + Sticks
Step-by-Step Guide
- Clean and dry your tin can. Paint it white, then add your desired face and floral designs with acrylics. Let dry fully.
- Paint the plastic bowl red and add large white spots for the mushroom cap. Seal both parts with clear spray sealer.
- Glue the cap onto the can upside-down using a glue gun.
- Collect smooth river rocks and paint them as ladybugs, worms, or silly creatures with vibrant colors. Let your imagination go wild!
- Once everything is dry, arrange the mushroom and rocks in a patch of soil or grass. You can cluster them around a central stone or flowerbed.
#3. Painted Pebble Mushroom Patch and Bug Friends
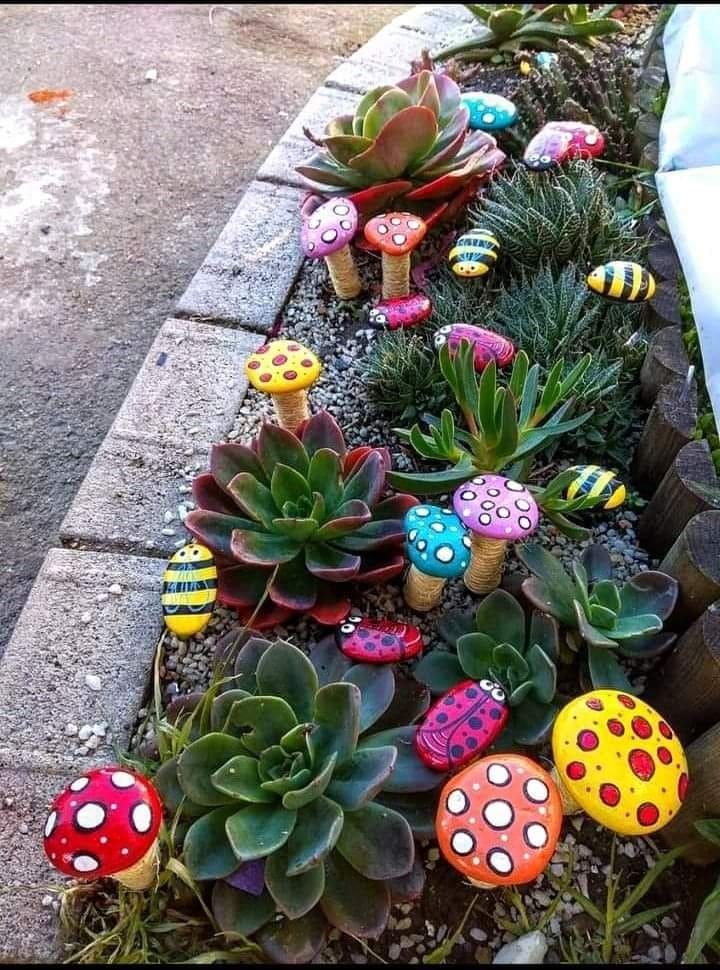
Whimsy doesn’t get cheaper or cuter than this. I made these little mushrooms and bugs from painted rocks and recycled corks over a rainy weekend, and they instantly turned my succulent border into a fairy playground.
Materials Needed
- Smooth painting stones – various sizes, around 1.5–3″ diameter
- Wine corks or craft corks – approx. 2″ tall
- Acrylic paint set (multi-color)
- Paint pens for details
- Outdoor sealant spray
- Hot glue gun
Step-by-Step Guide
- Wash and dry your rocks thoroughly. Paint the tops in bold mushroom colors (red, yellow, teal), ladybug red, or bumblebee stripes. Let dry, then add dots, wings, and faces using paint pens.
- Paint corks in neutral or natural tones to look like mushroom stems. Glue one rock on top of each cork using a hot glue gun.
- Seal everything with an outdoor-safe sealant to keep your colors vibrant for months. Place them among succulents or along garden edges for the ultimate cheerful vibe.
#4. Fairy Toadstool House from a Cable Reel
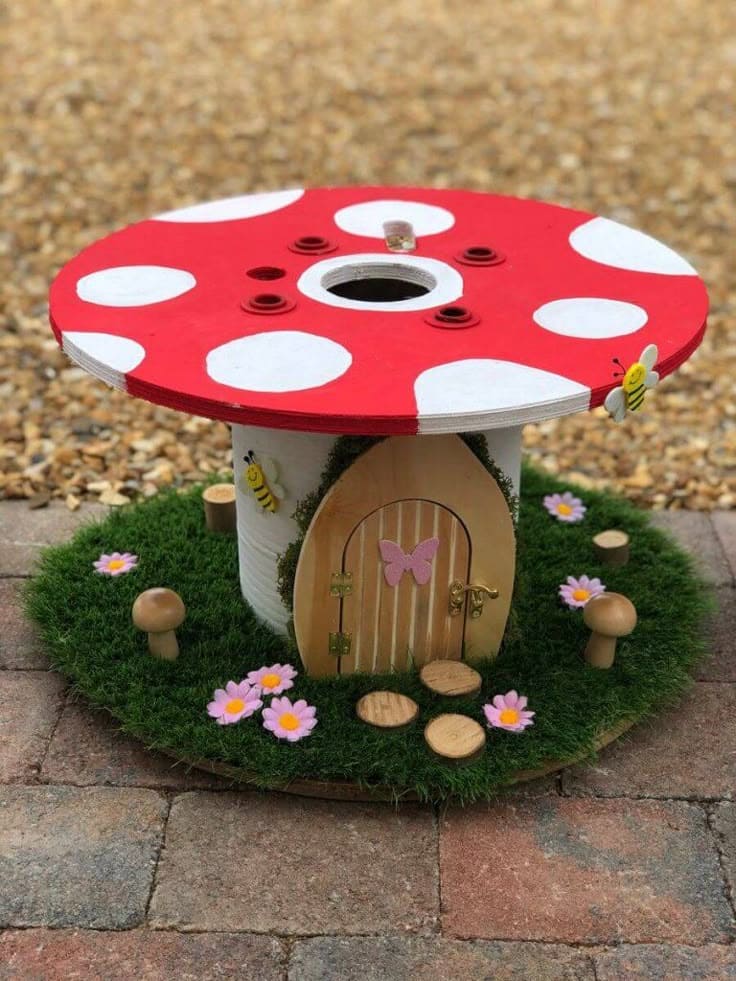
Using an old cable reel as the base, I transformed it into a fairytale mushroom cottage complete with a butterfly door, buzzing bees, and mini mushrooms nestled in a grassy patch.
Materials Needed
- 1 Wooden Cable Reel (16″–24″ diameter)
- Red and White Outdoor Paint
- Artificial Grass Mat (18″ x 24″)
- Miniature Wooden Door with Hinges
- Wooden Slices & Mini Stumps (2″–3″)
- Wooden Peg Dolls or Mushroom Caps
- Bee and Flower Embellishments
- Hot Glue Gun & Weatherproof Glue Sticks
Step-by-Step Guide
- Clean the cable reel thoroughly and paint the top red. Once dry, use a circular sponge or brush to dot white mushroom spots across the surface.
- Paint the center of the reel white to mimic the mushroom stem. You can even texture it slightly to look bark-like for more realism.
- Attach the wooden door to the base using strong glue or tiny screws. Add a small painted rock or button for a whimsical door handle.
- Cut and glue artificial grass mat around the reel’s base platform to simulate a lush forest floor.
- Use wood slices and peg dolls to make tiny mushrooms and stepping stones. Paint them or leave natural for a rustic vibe.
- Decorate with bees and butterflies, or ladybugs for added magic.
- Seal everything with outdoor spray sealant if you’re placing it in the garden.
#5. Alice in Wonderland-Inspired Garden Mushroom Chess Set
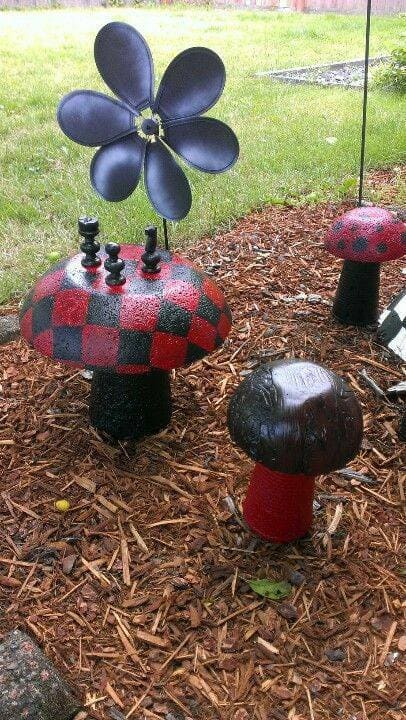
One of the mushrooms even became a mini chessboard with glued-on pieces!
Materials Needed
- Terracotta Flower Pots (6–8 inch tall)
- Plastic or Ceramic Bowls (varied sizes)
- Outdoor Acrylic Paint Set (Black, Red, White)
- Clear Outdoor Sealer Spray (Matte or Gloss)
- Hot Glue Gun & Glue Sticks
- Mini Chess Pieces (plastic or wooden)
- Black Garden Wind Spinner Flower
Step-by-Step Guide
- Paint each terracotta pot in red or black. Let dry completely.
- Flip bowls upside down and paint them with your choice of checkerboards, polka dots, or swirls using outdoor paints. Let dry.
- Attach each bowl to a painted pot using hot glue. Hold until secure.
- For one special mushroom, paint a checkerboard grid on top and glue on a few mini chess pieces as decoration.
- Spray everything with a layer of clear outdoor sealer to protect from rain and sun.
- Add a garden spinner flower or any dramatic garden decor nearby to complete the fairytale aesthetic.
#6. Upside-Down Planter Mushroom Garden Stools
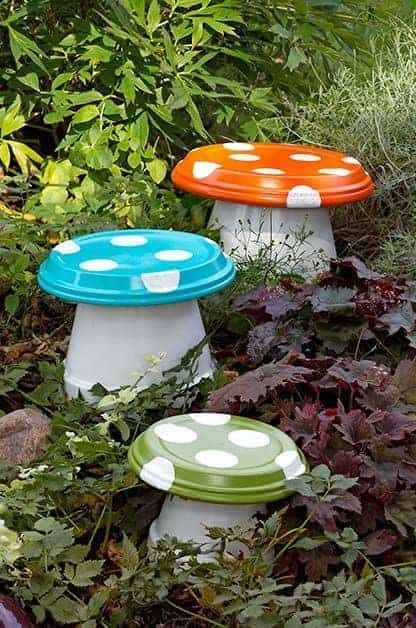
With their polka-dotted caps, these adorable mushrooms look straight out of a whimsical woodland.
Materials Needed
- 3 Plastic Serving Platters with Rims (Orange, Blue, Green – 12″ diameter)
- 3 Large Plastic Planter Pots (10–12″ wide)
- White Craft Paint or Dot Stickers
- Strong Outdoor Adhesive or Gorilla Glue
- Clear Acrylic Sealer Spray
Step-by-Step Guide
- Clean and dry your planter pots and plastic platters thoroughly. Paint or spray the pots white if they aren’t already.
- Add polka dots to the platter tops using white craft paint or stickers. Let dry fully.
- Apply a thin line of strong adhesive around the top rim of each pot and press the platter onto it upside-down to form the mushroom cap.
- Once dry, spray each mushroom with acrylic sealer for water resistance.
- Set them among plants or mulch to create a magical fairy ring effect in your garden!
#7. Whimsical Mosaic Mushroom
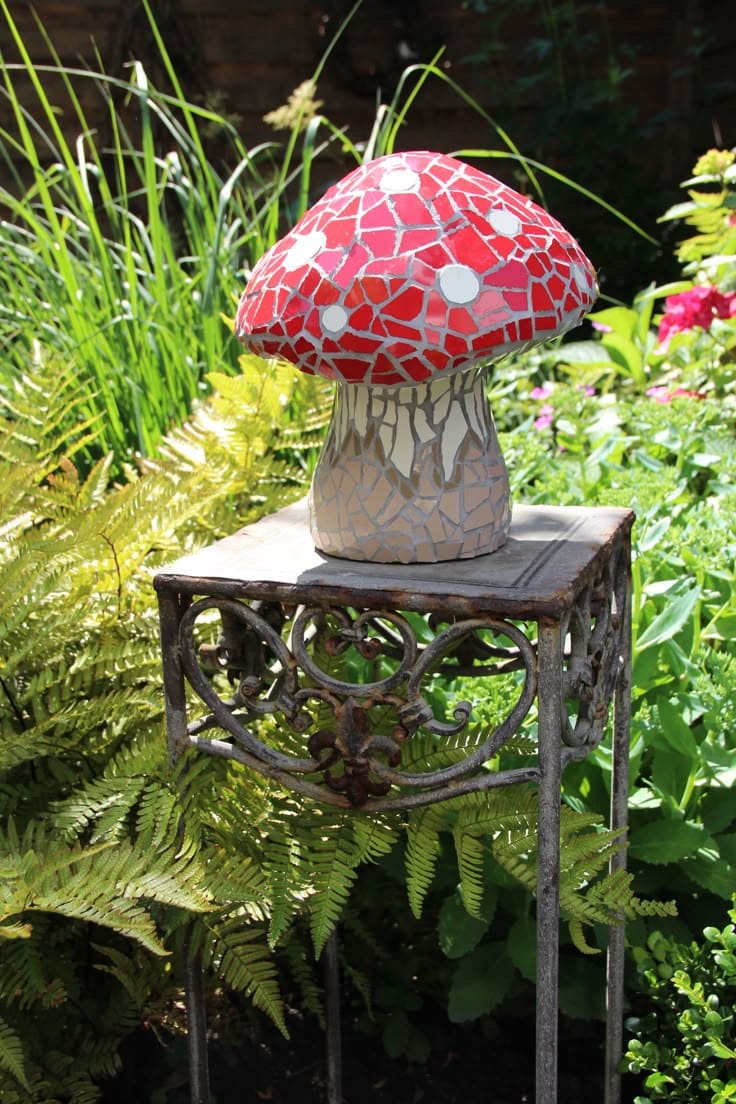
The sparkle from sunlight hitting the glossy tiles is magical. It’s a perfect way to upcycle old dishes or tiles while adding a pop of art to your outdoor space.
Materials Needed
- Concrete mix (10 lbs, quick-set)
- Large bowl or dome-shaped container (10–12 inches wide)
- Plastic bottle or PVC pipe (5–6 inches tall)
- Tile adhesive or thinset mortar
- Grout (sand or non-sanded, white or gray)
- Assorted mosaic tiles or broken ceramic pieces
- Clear sealant spray (outdoor-grade)
- Safety gloves + sponge
Step-by-Step Guide
- Mix and pour concrete into your dome mold and bottle mold to create the cap and stem. Let both cure for 24–48 hours, then carefully remove from molds.
- Use tile adhesive to attach red tiles onto the cap and beige/gray tiles onto the stem. Add circular white tiles or paint for dot details. Let dry completely.
- Grout the entire surface with a sponge, wipe away excess, then allow it to cure. Finish with a coat of clear outdoor sealant for shine and durability.
#8. Polka Dot Bowl Cap Garden Mushrooms
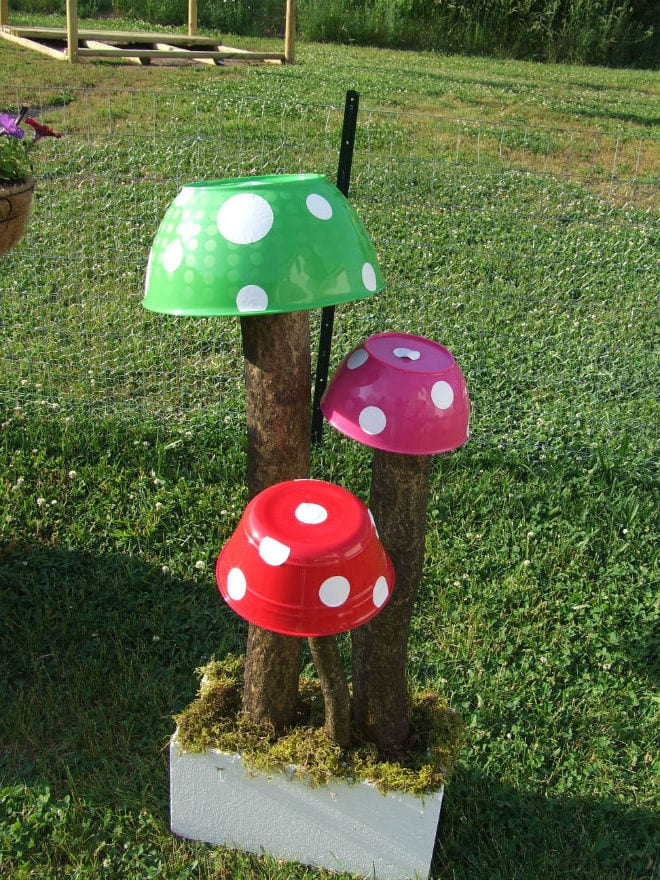
These oversized garden mushrooms add a fun cartoonish vibe to the garden and hold up well in both sun and rain.
Materials Needed
- 3 Plastic Mixing Bowls (Red, Green, Pink – 9 to 11 inches diameter)
- 3 Tree Branches (2–3 feet tall, 3–4 inches thick)
- White Craft Paint
- Wood Base or Planter Box
- Construction Adhesive or Strong Hot Glue
- Optional: Moss Sheet or Spanish Moss
Step-by-Step Guide
- Paint white polka dots on your plastic bowls and let them dry completely. This makes the “mushroom caps” pop and adds charm.
- Drill or glue each branch/stem firmly into the wooden base, spacing them at different angles and heights.
- Use construction adhesive to attach each bowl upside-down on top of a branch to form your mushroom cap.
- Cover the base with moss for a natural look. Place it anywhere outdoors – by the fence, under a tree, or right in your flower bed!
#9. Rustic Coco-Fiber Garden Mushrooms
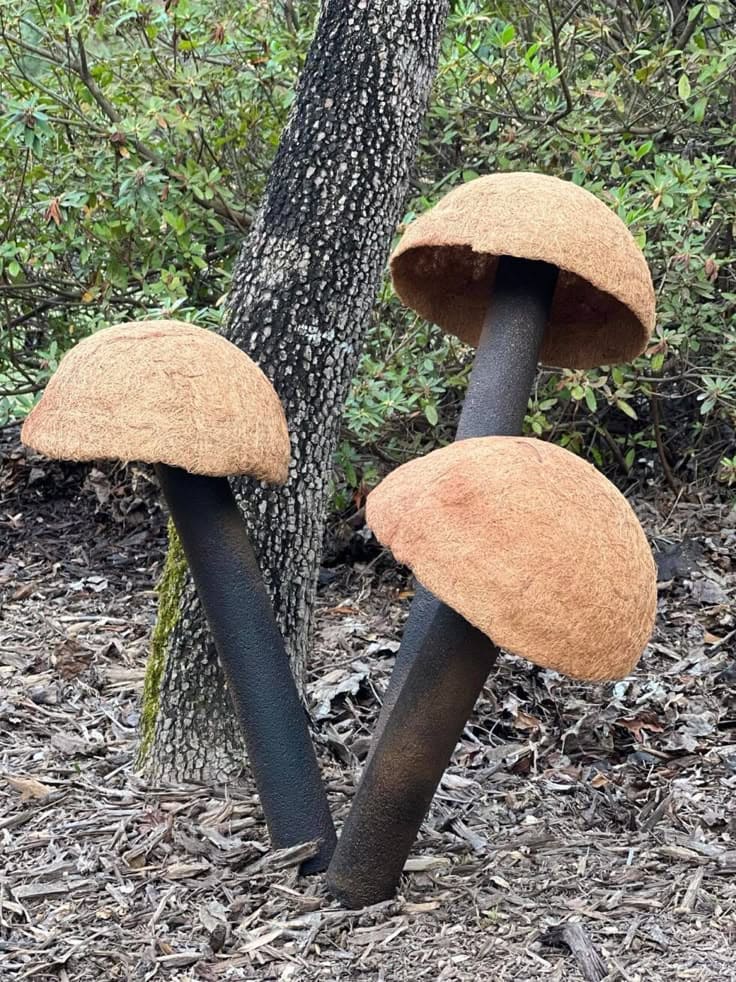
These cozy, woodland-inspired mushrooms were one of the easiest yet most satisfying garden crafts I’ve ever made.
Materials Needed
- 3 Coco Liner Bowls (10″–12″)
- 3 Steel Pipes or Square Tubes (2–3 ft)
- Black Outdoor Spray Paint (Textured)
- Heavy-Duty Outdoor Epoxy or Gorilla Glue
- Rubber Mallet
Step-by-Step Guide
- Paint the metal pipes with black textured spray paint and let them dry completely. The rough texture gives them a tree-like look.
- Flip the coco liner bowls upside-down and apply strong outdoor glue around the center. Firmly press the top of each pipe onto the inside of the bowl and allow to cure overnight.
- Using a rubber mallet, insert each mushroom stem into your garden soil at a slanted angle for a more organic, natural effect.
#10. Stardust Garden Mushrooms
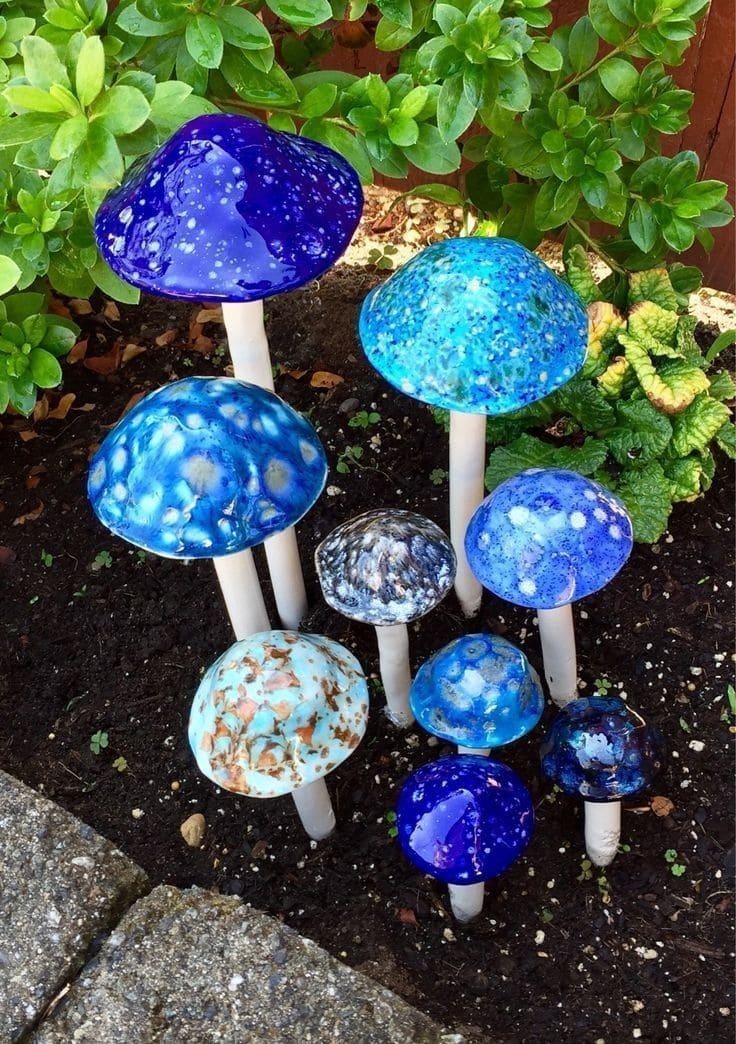
These stunning blue-hued garden mushrooms look like they landed straight from another galaxy.
Materials Needed
- 8–10 Assorted Ceramic or Glass Bowls (6–10″ wide)
- 10 Wooden Dowels (1-inch thick, 12–24” long)
- White Outdoor Spray Paint
- Heavy-Duty Waterproof Adhesive
- Rubber Mallet or Drill
Step-by-Step Guide
- Paint the wooden dowels using white outdoor spray paint and let them dry fully. These will be your mushroom stems.
- Flip each ceramic or glass bowl upside-down and use heavy-duty adhesive to glue the top of each dowel to the center of a bowl. Allow to cure overnight.
- Spray a clear outdoor sealant over the finished mushrooms for long-term shine and protection. Then, insert each mushroom into the soil by gently hammering in the dowels.
#11. Enchanted Glow Mushroom Pathway
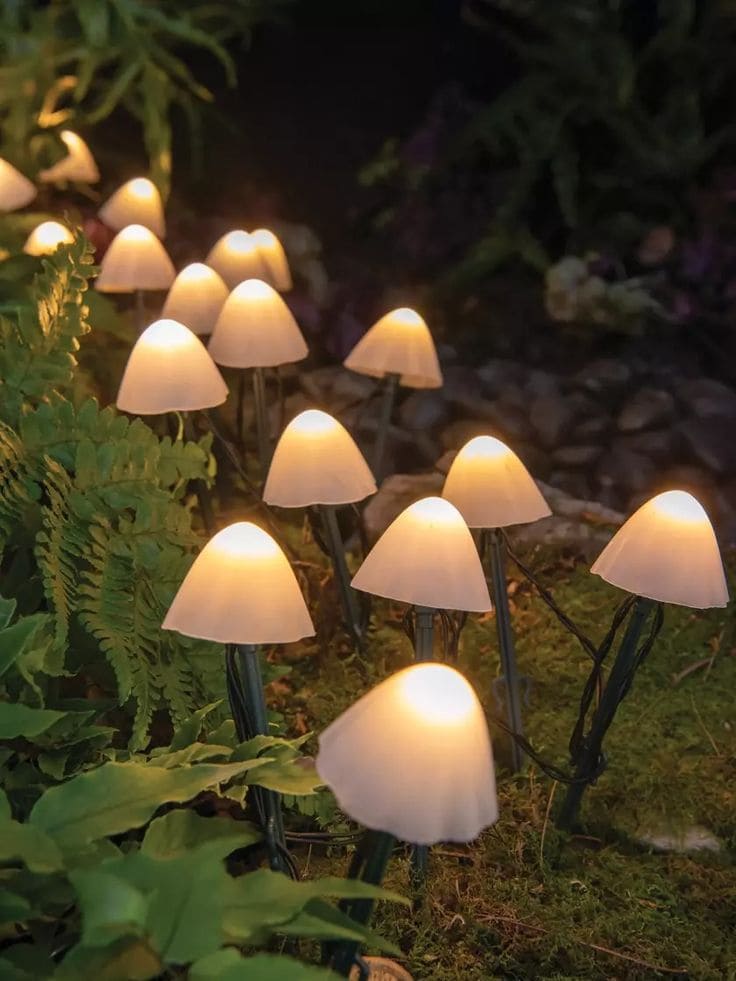
I made these for my shaded garden path, and honestly, the soft light makes it feel like a magical forest at dusk.
Materials Needed
- Warm white LED string lights (solar-powered, 50+ bulbs)
- Plastic spoons or disposable white shot glasses (50 pcs)
- Black or green floral wire (22 gauge)
- Hot glue gun and glue sticks
- Wire cutters or strong scissors
- Optional: garden stake lights
Step-by-Step Guide
- Cut and bend floral wire to your desired mushroom height (6–10 inches works well). Use hot glue to attach a plastic spoon bowl (cut off the handle) or a shot glass over each LED bulb to form the mushroom cap.
- Twist or wrap the wire stems around the light strand spacing evenly, adjusting the height for a natural cluster effect. Glue the LED into the cap if needed for secure fit.
- Place the entire set along garden borders, moss beds, or under shrubs. Secure each wire stem into the soil, and hide the solar panel where it receives light.
#12. River Rock Garden Mushroom
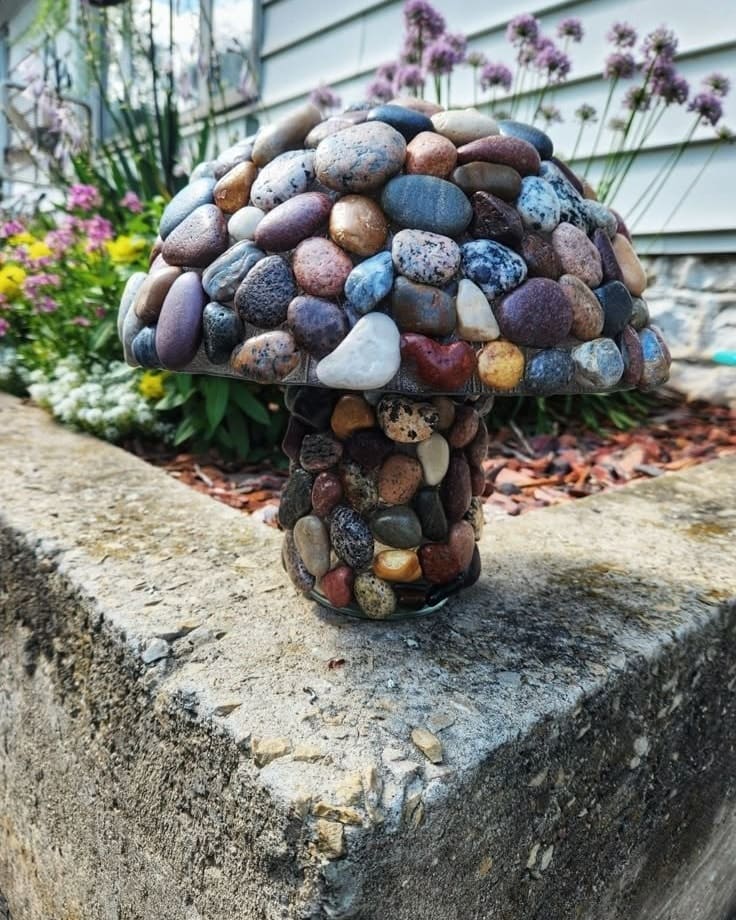
If your garden’s missing a little magic, this stone mushroom might be exactly what it needs.
Materials Needed
- 1 medium glass bowl (8–10 inches diameter)
- 1 glass vase (6–8 inches tall)
- 3–4 lbs assorted polished river rocks (1–2 inches)
- Waterproof adhesive (E6000 or similar)
- Rubbing alcohol and lint-free cloth
Step-by-Step Guide
- Begin by wiping the bowl and vase thoroughly with rubbing alcohol. This removes dust and oil so the stones stick securely.
- Flip the bowl upside down and glue river stones one by one starting from the bottom edge, slowly working toward the top. Do the same with the vase, placing smaller stones near the top and larger ones near the base for a natural look.
- Once both are dry and set (allow 6–8 hours), attach the vase (stem) to the center of the upside-down bowl (cap) with a generous bead of glue. Let cure overnight.
#13. Painted Stone Toadstool Family
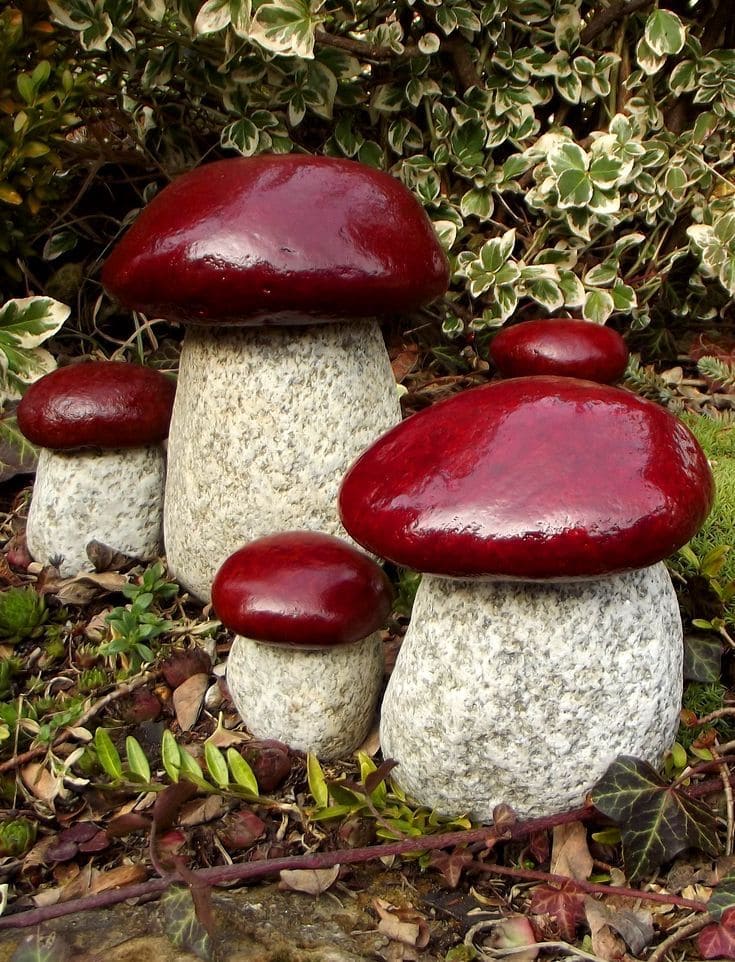
The contrast between the bold red tops and the natural stone texture is so satisfying.
Materials Needed
- 5–6 smooth flat stones (4–8 inches wide)
- 5–6 rounded upright stones or bricks (6–10 inches tall)
- Outdoor acrylic paint in deep red
- Clear weatherproof sealer spray
- Strong construction adhesive or epoxy glue
- Paintbrushes (1 medium flat + 1 detail tip)
Step-by-Step Guide
- Rinse and dry all rocks thoroughly. If needed, lightly sand flat surfaces where the top and base will join for better adhesion.
- Paint only the tops of the cap stones with red acrylic paint. You may need 2–3 coats for full coverage. Let each coat dry fully before applying the next. Once dry, spray with clear sealant and allow to cure for 24 hours.
- Using strong outdoor adhesive, attach the painted “cap” to the flat side of the “stem” stone. Press and hold firmly, then let it cure for at least 6 hours before moving.
#14. Shimmering Glass Mushroom Pair
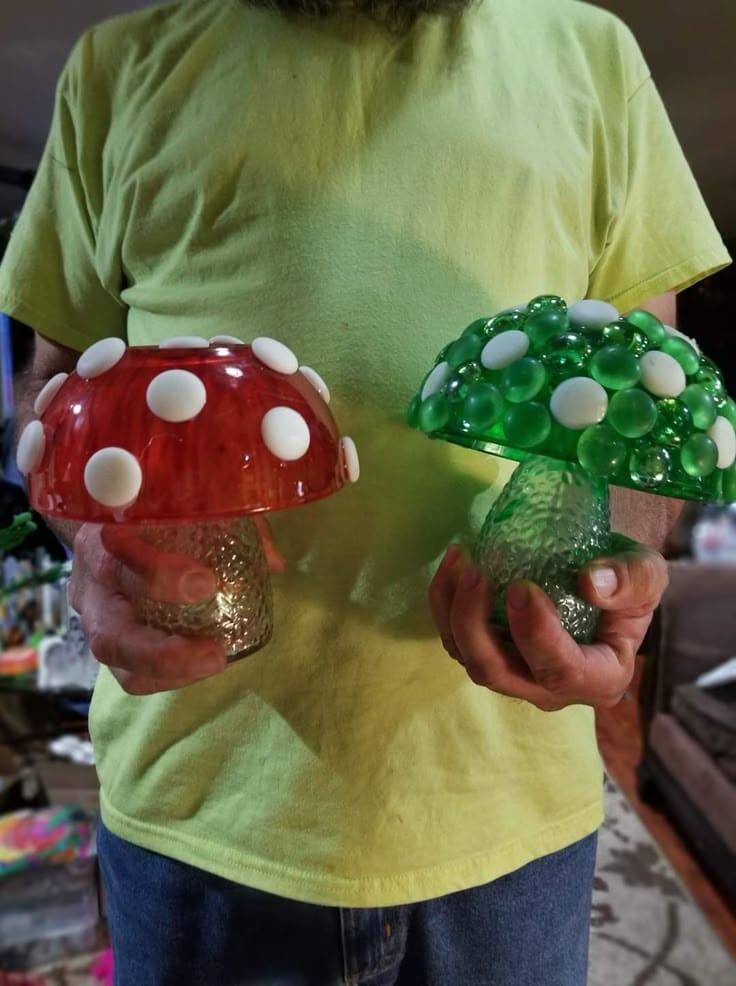
These glowing glass mushrooms are pure joy to make and they light up your garden with a whimsical, fairy-tale feel.
Materials Needed
- Glass bowls (6–8 inches wide)
- Textured glass vases (4–5 inches tall)
- Flat glass marbles or cabochons (1 lb, assorted sizes)
- Acrylic paint set (glass-safe)
- E6000 glue or strong glass adhesive
Step-by-Step Guide
- Clean and dry the bowls and vases. Paint the inside of each bowl with a glass-safe acrylic paint. Let it dry completely – 2–3 coats may be needed for vibrancy.
- Using strong adhesive, attach glass marbles evenly around the top of each bowl, and dots or spots if desired. Let cure overnight.
- Attach the bowl to the upside-down vase using E6000 glue. Center it carefully for balance.
#15. Glass Garden Mushroom Sculptures
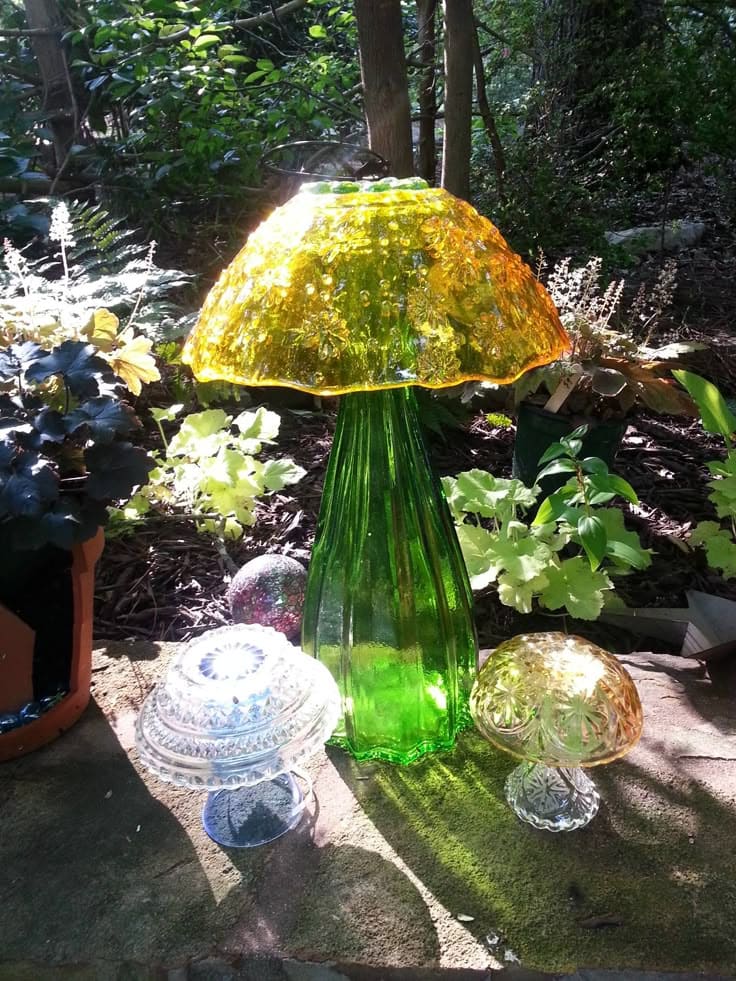
These dazzling glass mushrooms are weather-resistant, low-maintenance, and budget-friendly if you shop secondhand or raid your kitchen! No power tools needed, just a bit of glue and a creative eye.
Materials Needed
- Colored glass bowls – one per mushroom
- Glass bud vases
- Strong waterproof adhesive like E6000
- Optional: solar garden lights
Step-by-Step Guide
- Clean your glassware thoroughly, removing any labels or residue. Let them dry completely before assembling.
- Apply a generous ring of E6000 glue around the rim of the vase, then gently press the bowl upside down on top to form the mushroom cap. Let it cure for 24 hours.
- Place your mushrooms directly into garden beds, rock corners, or use as patio art.
#16. Cute Wooden Toadstool Garden Marker
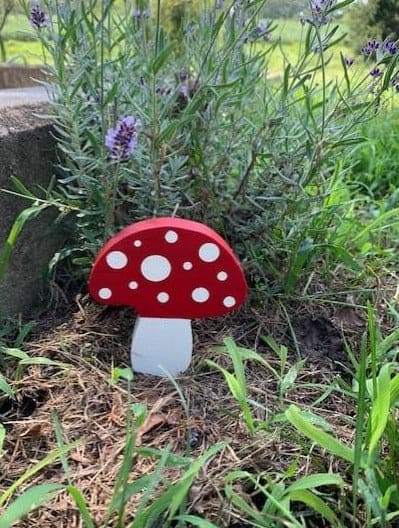
This charming little wooden toadstool is weather-resistant, easy to customize, and perfect for lining pathways, hiding among herbs, or adding to fairy corners.
Materials Needed
- Wooden Mushroom Cutout (6–8 inch)
- Red Outdoor Acrylic Paint
- White Outdoor Paint or Paint Pen
- Fine Sandpaper (120 grit)
- Weatherproof Clear Sealant Spray
- Small Craft Paintbrushes (Detail Set)
Step-by-Step Guide
- Start by lightly sanding your wooden mushroom cutout to remove rough edges and splinters. Wipe clean with a dry cloth.
- Paint the cap portion red, and the base/stem white. Let dry for about 30 minutes or until fully set.
- Using a detail brush or white paint pen, add dots of various sizes to the red cap. Go freehand for a whimsical look or use a round sponge brush for perfect circles.
- Once dry, apply a generous coat of clear weatherproof sealant to make sure your mushroom lasts through rain and shine.
#17. Forged Copper Spoon Mushrooms
These vibrant garden mushrooms are made from upcycled copper spoons, and I’ll be honest—they might be my favorite little accents in the whole garden.
Materials Needed
- Vintage Copper Spoons (5–10)
- Metal Paint – Outdoor/Rust-Resistant
- Clear Outdoor Sealer Spray
- Fine Grit Sandpaper (400–600 grit)
- Hammer and towel
Step-by-Step Guide
- Prep your copper spoons by gently scrubbing off any oxidation with fine sandpaper. You can leave some patina if you want that aged look to peek through.
- Use a hammer to shape the spoon bowls into dome-like mushroom caps. Some can stay rounded; others can be gently flattened for variety.
- Paint the tops of the caps with outdoor metal paint. Think vivid colors—red, orange, cobalt, even a bit of gold! Add speckled white dots for a whimsical feel.
- Let everything dry completely, then apply a layer of clear matte sealer. This protects your paint and lets the copper develop its natural patina slowly.
#18. Whimsical Paper Mâché Mushroom Garden
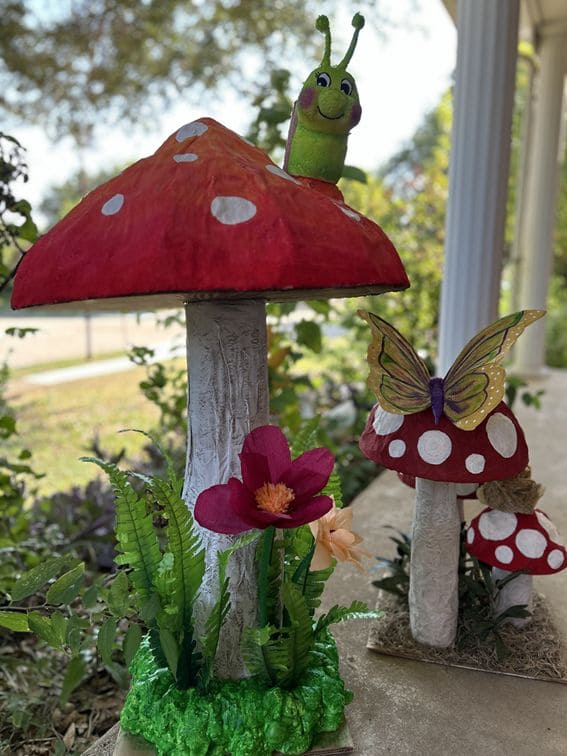
Whether you’re building a fairy tale scene for kids or just love playful art, this project offers color, joy, and a little personality to your garden.
Materials Needed
- Paper Mâché Paste (or homemade with flour + water)
- Newspaper Sheets or Brown Kraft Paper
- Balloon or Plastic Bowl (12″ diameter)
- Cardboard Mailing Tube (12–18″ tall)
- Acrylic Paints (red, white, green, brown)
- Hot Glue Gun and Glue Sticks
- Decorative Add-ons: Caterpillar Toy, Faux Flowers, Butterfly Decoration
- Floral Foam Base or Wooden Plaque (10″ square)
- Clear Acrylic Spray Sealer
Step-by-Step Guide
- Inflate a balloon or flip a bowl upside down. Layer it with strips of paper and paste to form the mushroom cap. Apply 3–4 layers, letting each dry fully.
- Use a mailing tube or thick roll as the stem. Cover it with paper mâché for texture and strength.
- Once dry, paint the cap red and the stem white. Add signature white dots using a sponge or round brush.
- Mount both parts together using hot glue, and secure them onto a foam or wooden base.
- Attach decorative elements: a smiling caterpillar peeking from the cap, a butterfly on a side mushroom, and plenty of faux greenery and flowers.
- Seal the whole sculpture with a coat of clear outdoor spray to weatherproof it.
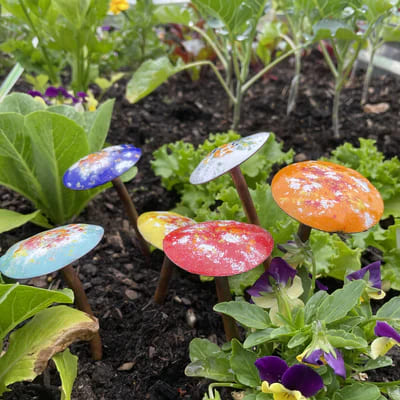
#19. Whimsical Tie-Dye Garden Mushrooms
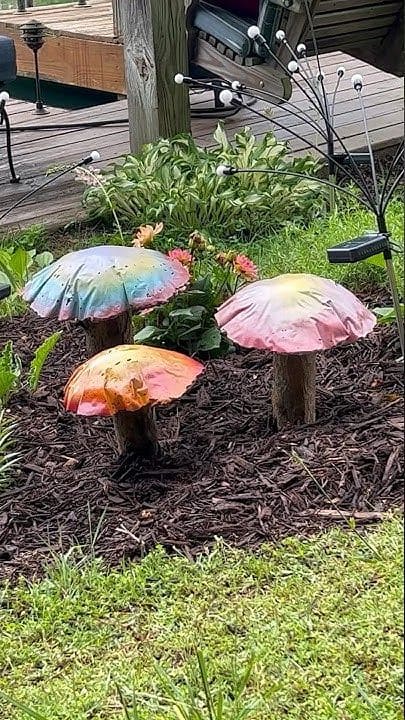
If you love a little magic in your garden, these colorful mushrooms bring all the fairytale charm you could want.
Materials Needed
- 3 Metal Mixing Bowls (8–12 inches wide)
- 3 Tree Limb Pieces or Wooden Posts (8–12 inches tall)
- Assorted Spray Paints (pastel, rainbow, or neon)
- Clear Outdoor Sealant Spray
- Outdoor Construction Adhesive
- Drill & Screws (optional)
Step-by-Step Guide
- Clean and dry your metal bowls, then flip them over and spray paint each one with layered bursts of color. Try holding cans at various angles for a soft blend.
- Once dry, coat the bowls with clear sealant spray to protect against rain and sun damage.
- Attach each bowl to a wooden post or log using construction adhesive. You can also drill and screw from inside the bowl into the wood for extra hold.
- Press the wooden stems into the soil at various angles for a natural look.
#20. Glowing Fairy Mushroom Lamps
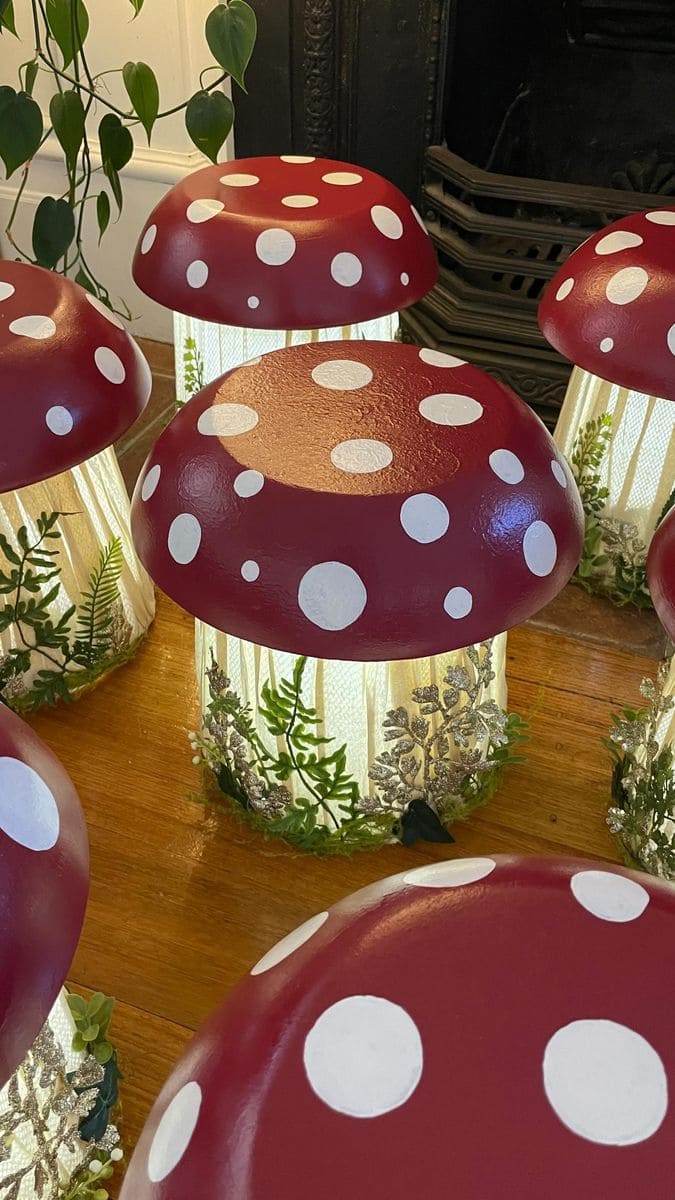
I made mine using plastic bowls, sheer curtain fabric, and battery-powered lights, and the soft ambient lighting they give off at night is honestly magical.
Materials Needed
- Plastic Mixing Bowls (10–12″ diameter)
- Battery-Powered LED Fairy Lights
- Sheer Curtain Panel or Tulle Fabric (white, 2 yards)
- Heavy-Duty Clear Plastic Sheet or Large Mason Jar (6–8″ tall)
- Acrylic Paint Set (red & white)
- Artificial Moss or Decorative Ferns
- Glue Gun & Sticks
- Double-sided tape or adhesive hooks
- White Poster Board or Foam Sheet (optional)
Step-by-Step Guide
- Flip the plastic bowl upside down and paint it red with large white spots to mimic a toadstool cap. Let it dry thoroughly.
- Wrap a clear container or a plastic cylinder in sheer fabric, securing it with a glue gun to create the mushroom stem.
- Insert LED fairy lights inside the stem cylinder, taping them to the inner wall or tucking between layers of fabric.
- Place the cap on top, either gluing it on or making it removable for battery access.
- Decorate the base edge with moss or faux greenery for that forest-floor look.
#21. Giant Cement Toadstools
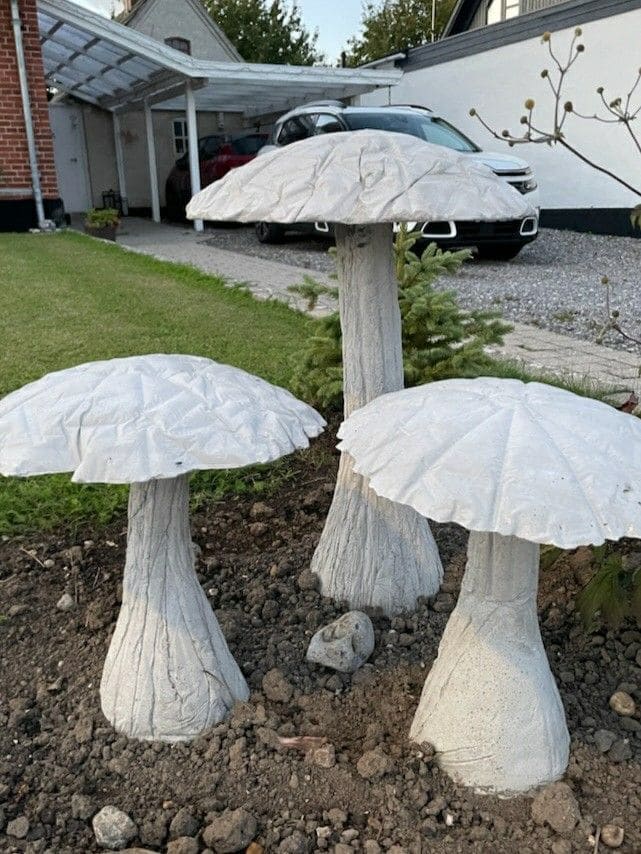
These oversized white mushrooms look like they sprouted right out of a fairytale forest. I made a trio using cement and a few upcycled items from my garage.
Materials Needed
- Quick-set concrete mix (10–15 lbs per mushroom)
- Plastic mixing bucket – 8–12 inches wide
- PVC pipe (2–3 feet long, 3-inch diameter)
- Plastic wrap or old towel
- White outdoor acrylic paint or masonry paint
- Concrete bonding adhesive (optional)
- Work gloves + mixing stick
Step-by-Step Guide
- Mix the quick-set concrete according to instructions. Spray your bucket and PVC pipe lightly with cooking spray or rub with oil so the molds release easily.
- Pour the concrete into the bucket (cap) and the upright pipe (stem). Cover the top of the cap mold with plastic wrap and gently press to create ridges and wrinkles like a mushroom. Let cure 24–48 hours.
- Once set, remove molds. Use strong concrete adhesive if attaching caps to stems. Then, paint the entire mushroom with white weatherproof paint. Let it dry fully before placing outdoors.
#22. Mini Stick and Clay Garden Mushrooms
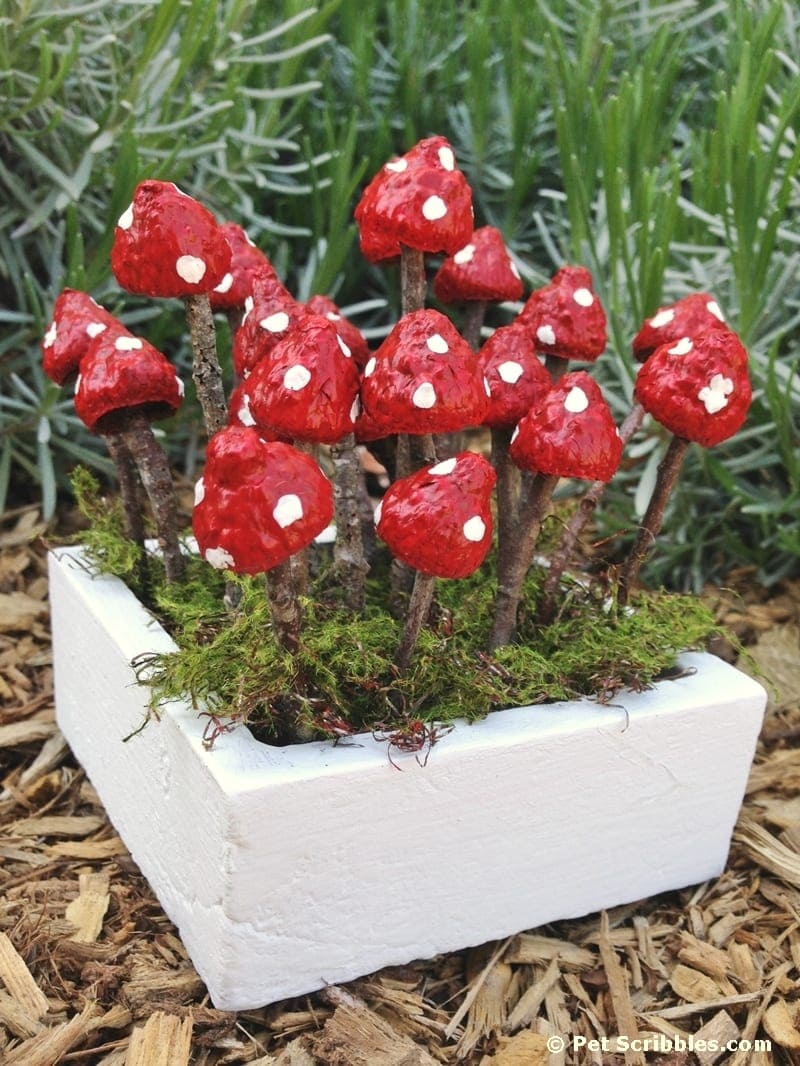
I placed mine in a wooden planter box, and now it looks like a tiny enchanted grove that fairies might visit at night.
Materials Needed
- Air Dry Clay (White or Red, 1 lb)
- Acrylic Paint Set (Red, White)
- Twigs (about 3–5 inches long)
- Small Wooden Planter Box (6–8 inches)
- Reindeer Moss or Decorative Moss Mat
- Hot Glue Gun + Glue Sticks
- Paint Sealer Spray (optional)
Step-by-Step Guide
- Roll small pieces of air dry clay into dome shapes for the mushroom caps. Make 10–15 in varying sizes. Let them dry for 24 hours.
- Once dry, paint the caps red and add white dots using acrylic paint. Seal with clear sealer spray if you plan to place them outdoors.
- While the paint dries, gather your twigs and cut them to similar lengths. Use hot glue to attach the caps onto the top of each twig.
- Fill your wooden box with moss, then press each mushroom into the moss base. Secure with hot glue underneath if needed.
#23. Whimsical Mosaic Garden Mushroom
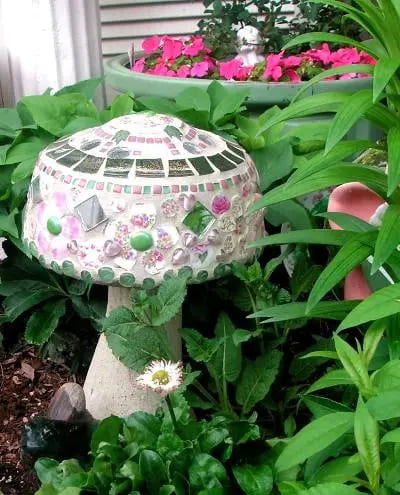
The way the glass reflects sunlight and catches raindrops? Pure magic. If you have a few odds and ends from past craft projects, this is the perfect way to use them.
Materials Needed
- 6–8 inch Glass or Ceramic Bowl
- Quick-Setting Concrete Mix (1–2 lbs)
- Mosaic Tile Pieces or Glass Gems (assorted colors)
- Tile Adhesive
- Grout (pre-mixed preferred)
- Disposable Gloves + Grout Sponge
- Sealer Spray (Outdoor-Safe)
Step-by-Step Guide
- Mix and pour quick-setting concrete into a tall plastic container or mold to form the mushroom stem. Let it fully cure, usually 24 hours, then remove and set aside.
- Clean your bowl thoroughly. Use tile adhesive to attach your mosaic tiles, gems, or mirror pieces around the outer surface.
- Once the adhesive dries (give it at least 12 hours), apply grout across the surface, pressing it into all the cracks. Wipe off the excess with a grout sponge and let dry.
- Spray the entire piece with an outdoor-safe sealer to protect it from the elements and fading.