Have you ever wondered what to do with old, rusty hand tools collecting dust in your workshop? Instead of tossing them away, why not transform them into stunning, one-of-a-kind creations that add character to your home, garden, or workspace?
Repurposing old tools is not just an eco-friendly way to reduce waste, it’s a fantastic opportunity to craft something truly unique while preserving a bit of history. From eye-catching wall art and functional furniture to quirky sculptures and home décor, the possibilities are endless.
Whether you’re a seasoned DIYer or just love giving new life to forgotten items, these 25+ brilliant ideas will inspire you to look at your old tools in a whole new way. Let’s get started!
This article contains affiliate links. If you purchase through them, I may earn a small commission at no extra cost to you. Thank you for your support!
#1. Vibrant Screwdriver Sunburst for Garden Decor
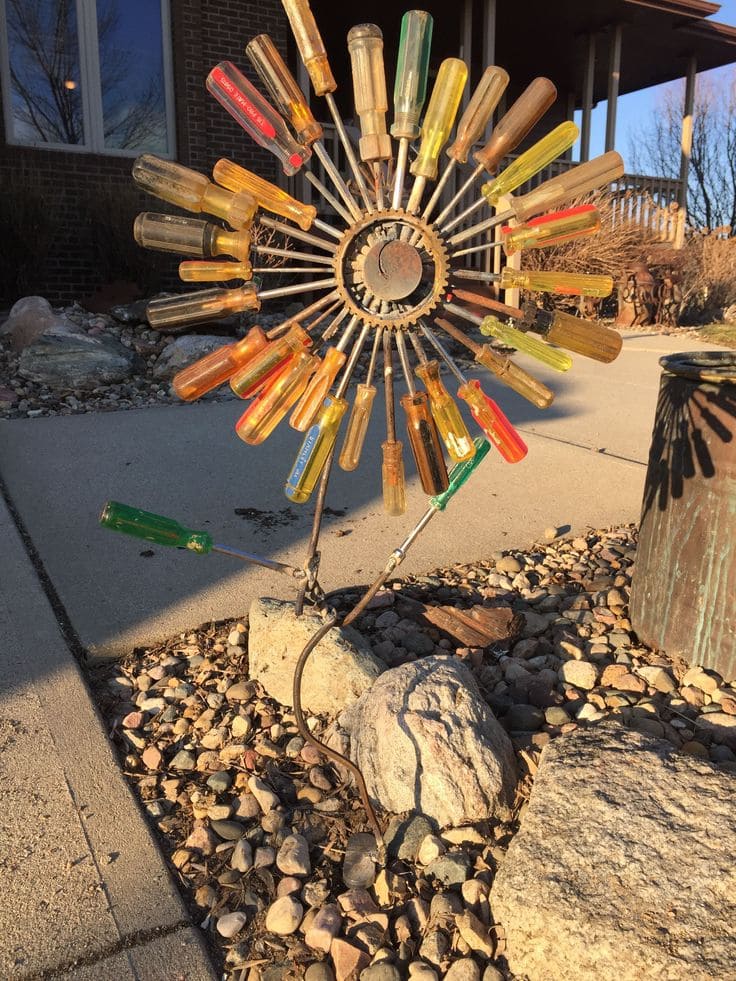
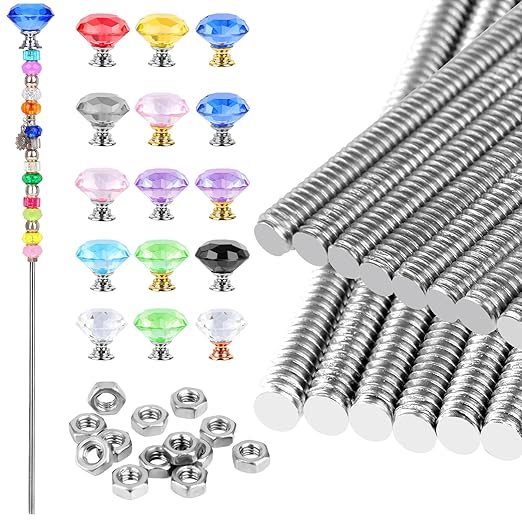
This ingenious upcycled masterpiece turns old screwdrivers into a dazzling sunburst sculpture! With a metal gear center and colorful handles radiating outward, it creates an industrial-inspired statement piece.
Perfect for outdoor spaces, this eye-catching display repurposes forgotten tools into a whimsical, mechanical flower.
 SHOP SCREWDRIVERS
 SHOP CIRCULAR SAW BLADE
 SHOP WELDABLE METAL ROD
 SHOP JB WELD
Materials Needed
- 40 old screwdrivers
- 1 large circular saw blade
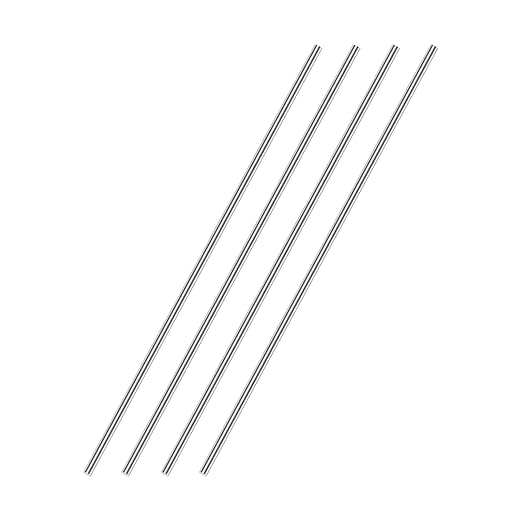
- Weldable metal rod (about 3 ft tall)
- Strong adhesive like JB Weld or epoxy
- Clear weatherproof spray sealant
- Optional: wire
Step-by-step Guide
Step 1: Clean all the old screwdrivers. Remove any grease, rust, or dust to make sure they adhere well later. Sand off rough spots if needed.
Step 2: Lay the gear or blade flat on a solid surface. Arrange the screwdrivers around the circle with handles facing outward like sun rays.
Step 3: One at a time, glue or weld each screwdriver securely in place. Try to keep spacing even to form a balanced, radial look.
Step 4: Attach the back of the gear to a metal rod using welding, brackets, or heavy-duty clamps. Insert the rod into the ground or drill it into a rock base for extra stability.
Step 5: Once everything is set, spray the entire sculpture with a clear weatherproof sealant to protect it from rust and fading.
#2. Quirky Brush-Head Robot
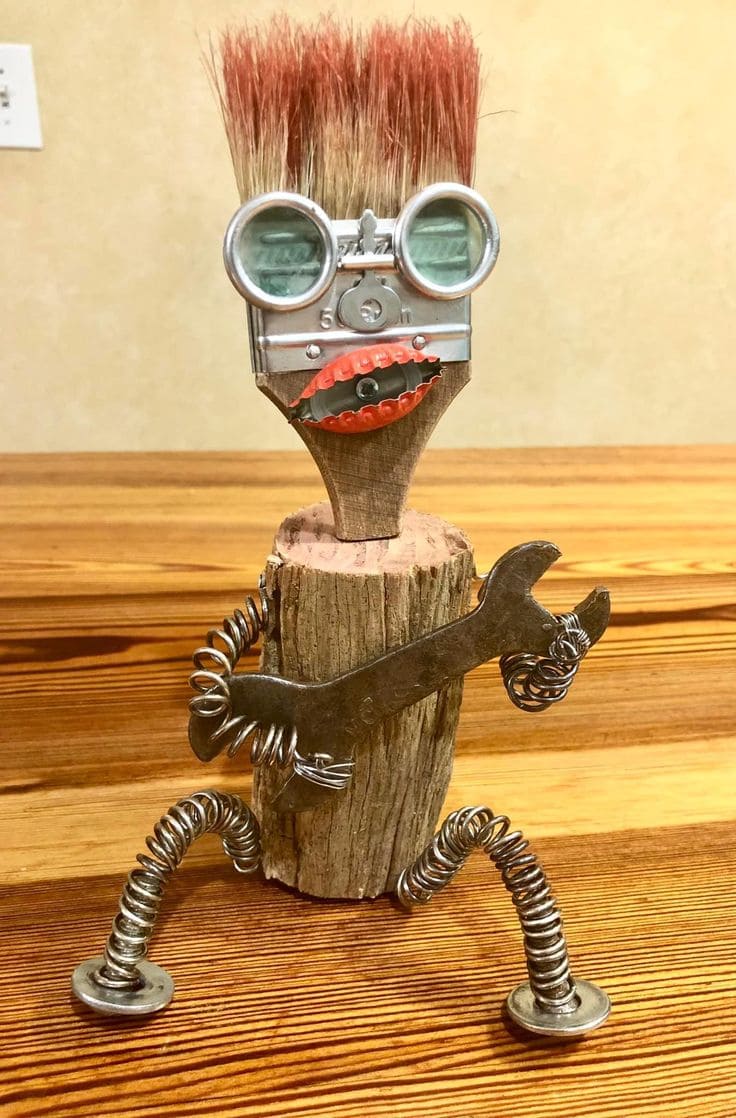
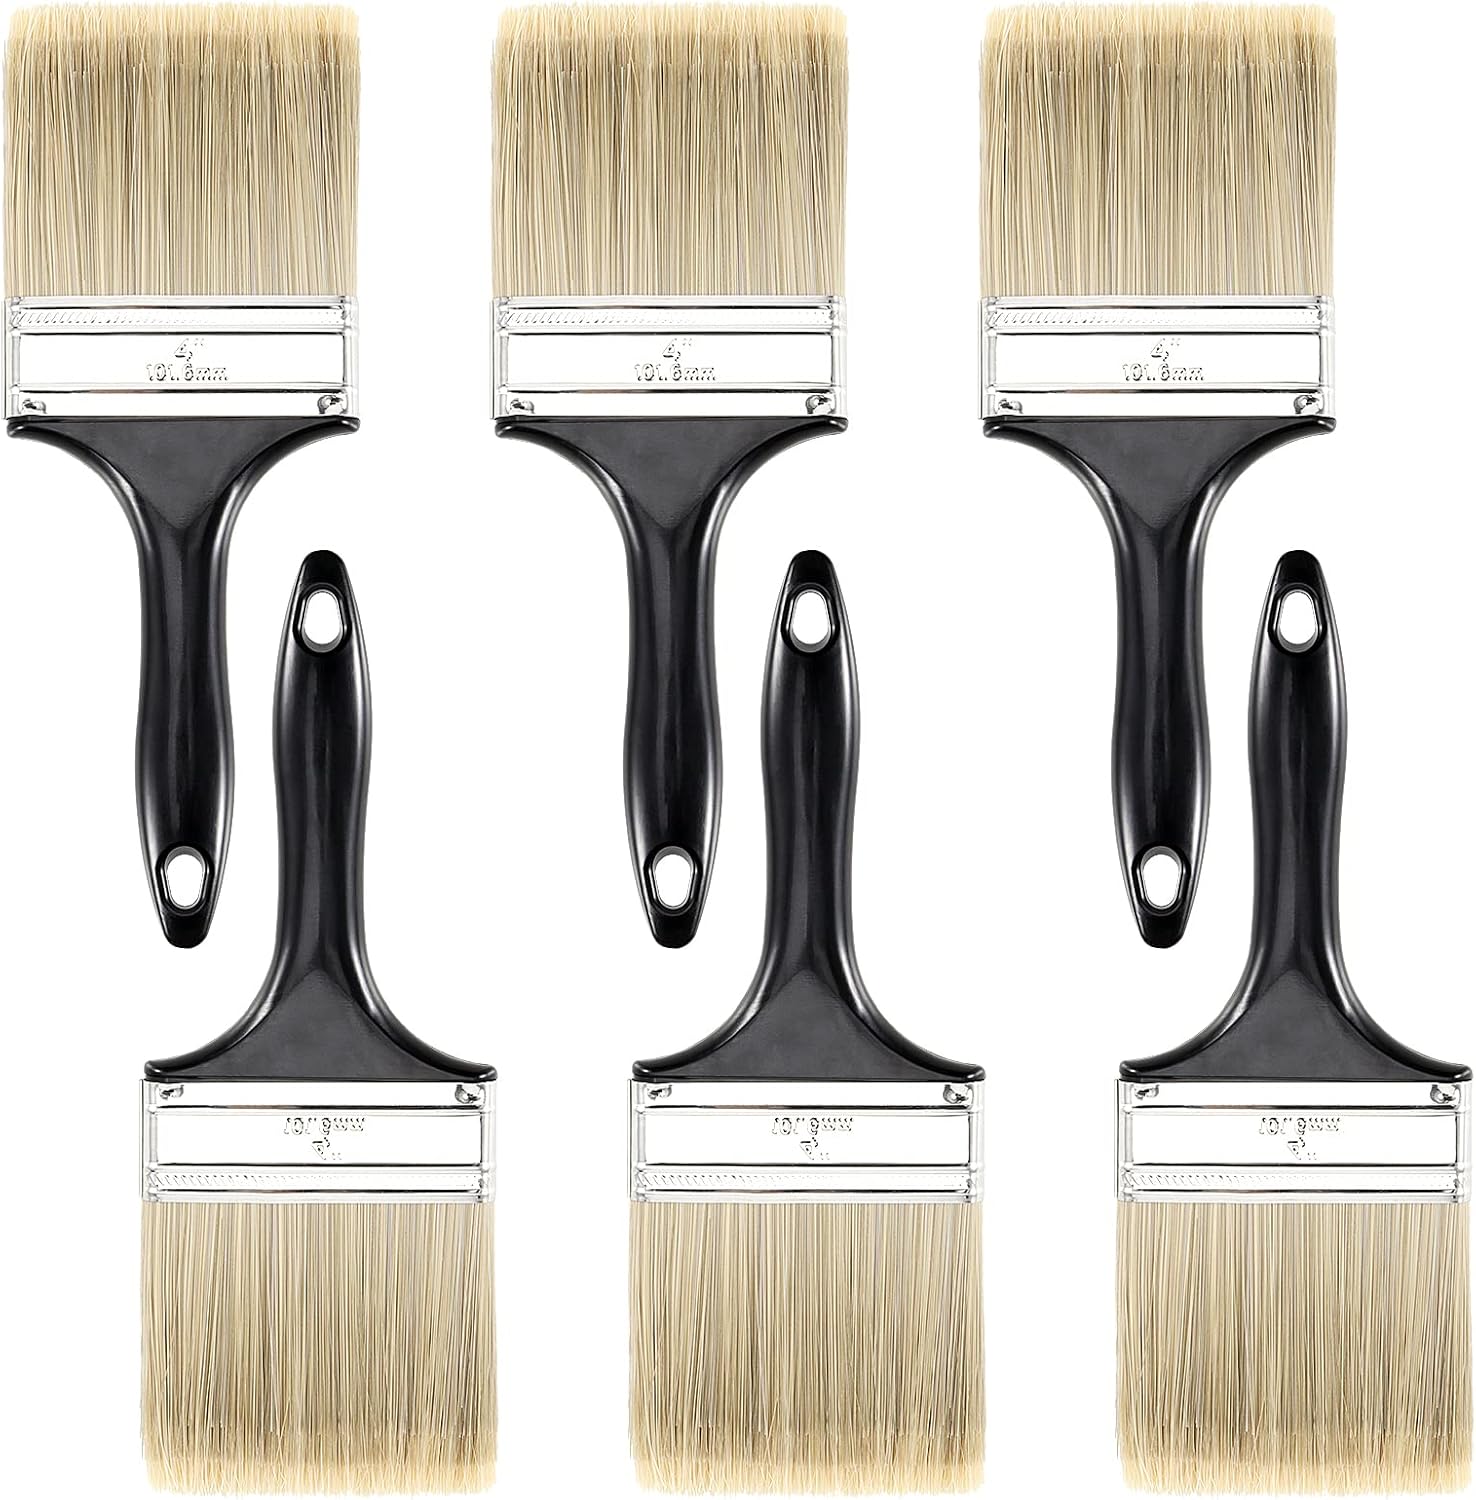
Haha, this funky, recycled robot is a showstopper! Made from an old paintbrush, coiled metal wires, a wrench, and a block of wood, it brings personality to any space.
The goggles and gear mouth give it a steampunk edge, making it both amusing and artistic.
 SHOP PAINTBRUSH
 SHOP DRIFTWOOD
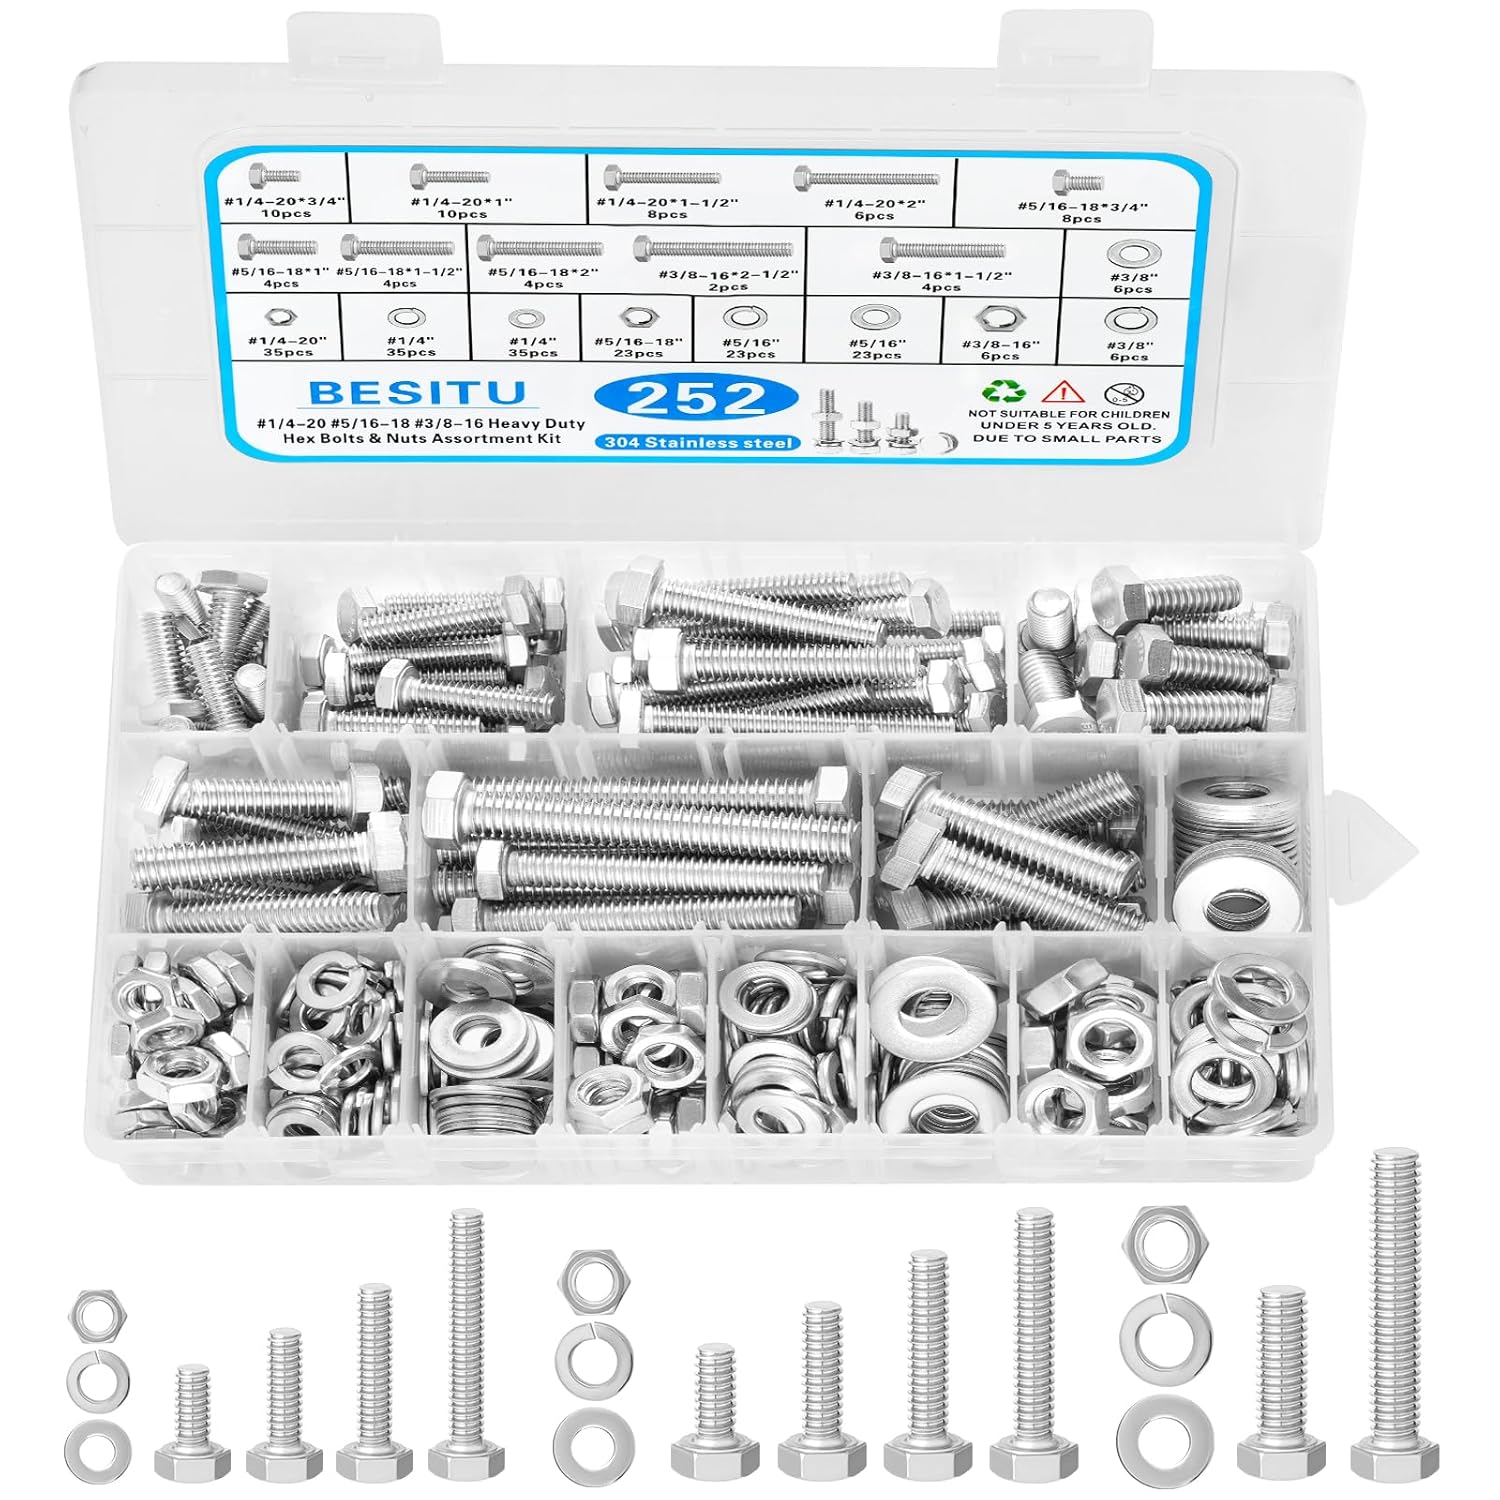 SHOP BOLTS NUTS AND WASHERS
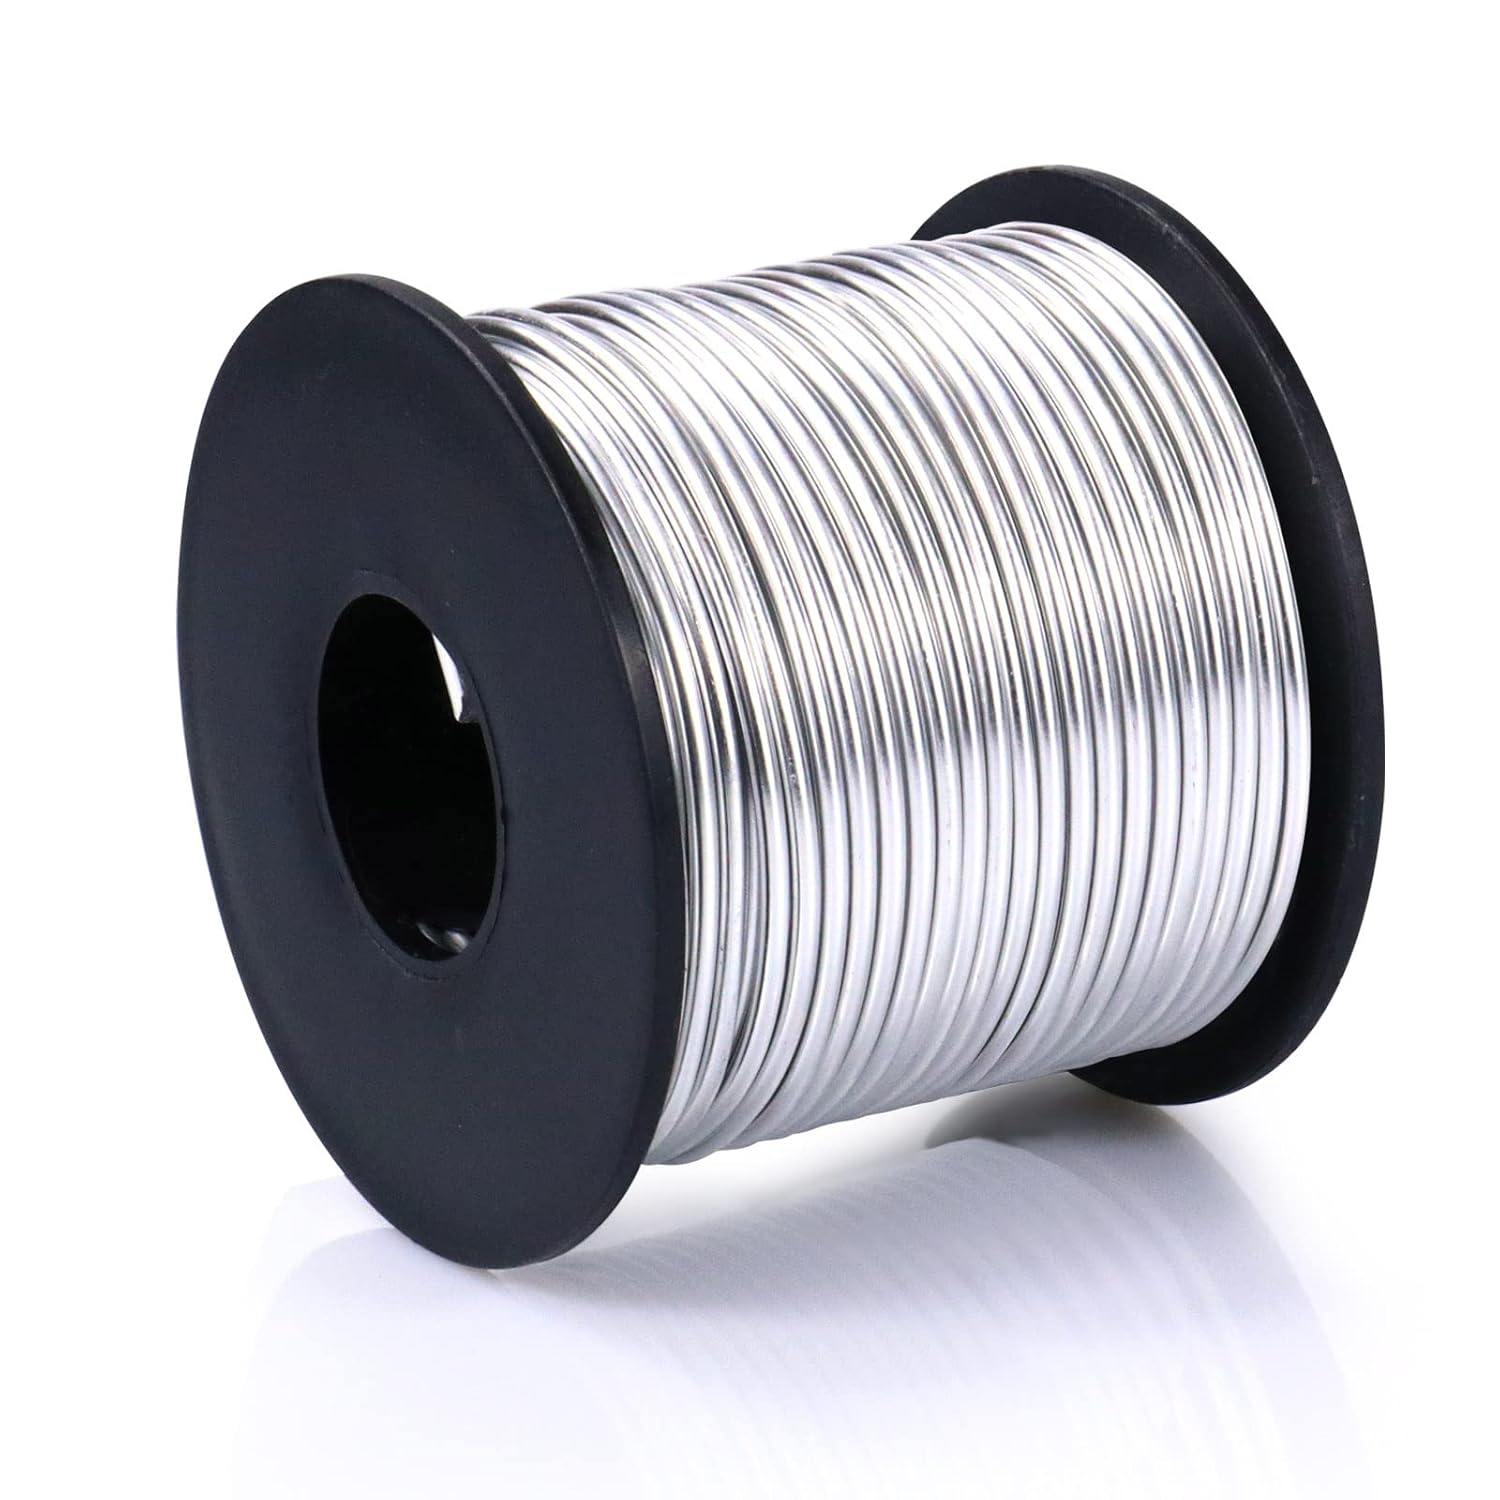 SHOP METAL WIRE
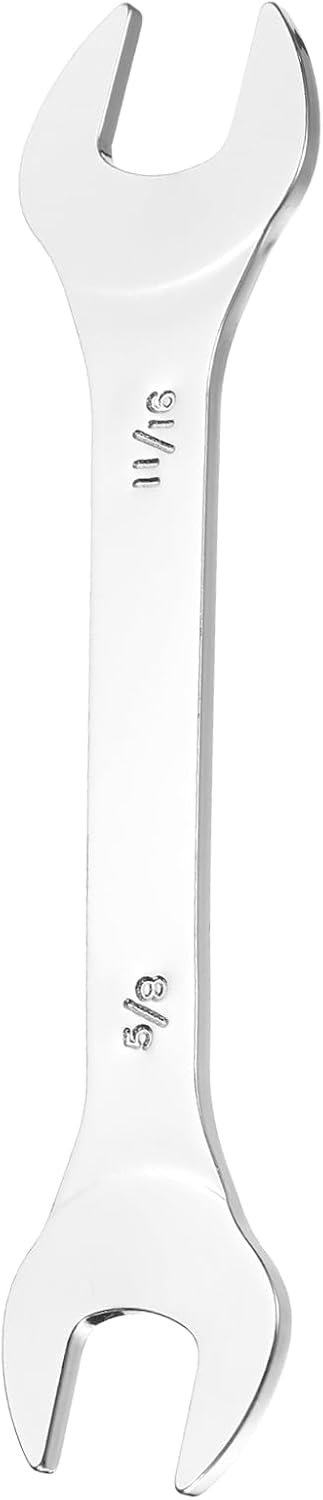 SHOP SMALL WRENCH
 SHOP METAL GEARS
 SHOP BOTTLE CAP
Materials Needed
- 1 large worn paintbrush
- Small block of driftwood (about 5–6 inches tall)
- 2 bolts or nuts + washers
- Metal wire
- 1 small wrench
- Metal parts (gears, bottle cap, springs, screws, etc.)
- Hot glue gun
Step-by-step Guide
Step 1: Clean the paintbrush, wrench, and scrap metal thoroughly. Remove old paint, grease, or rust to ensure everything sticks properly.
Step 2: Drill a snug hole in the top of the wooden base to insert the paintbrush. Secure it with strong glue or epoxy.
Step 3: Create arms and legs with coiled wire. Wrap the wire tightly to form limbs, then attach washers as feet by twisting the ends through the holes and gluing them down.
Step 4: Glue on the wrench across the body for that rocker-guitar look. Twist or glue wire hands around it to “hold” it in place.
Step 5: Decorate the brush handle to create a face: use old goggles or screws for eyes, a bottle cap and a saw blade or gear for the mouth.
#3. Unique Industrial Wrench Nest Art Piece
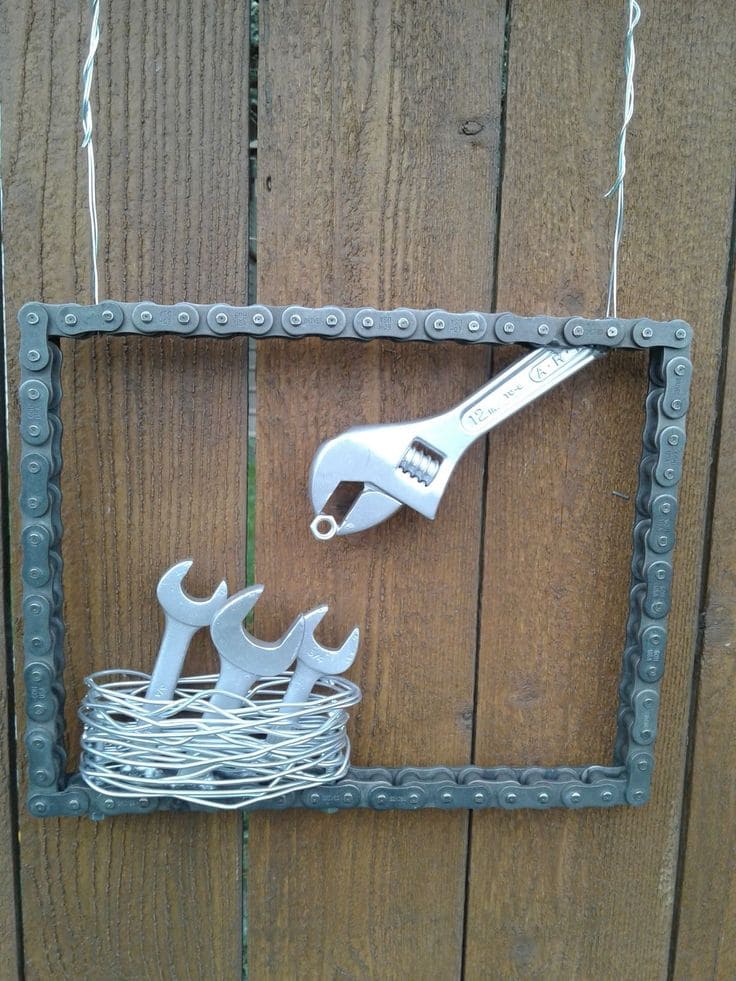
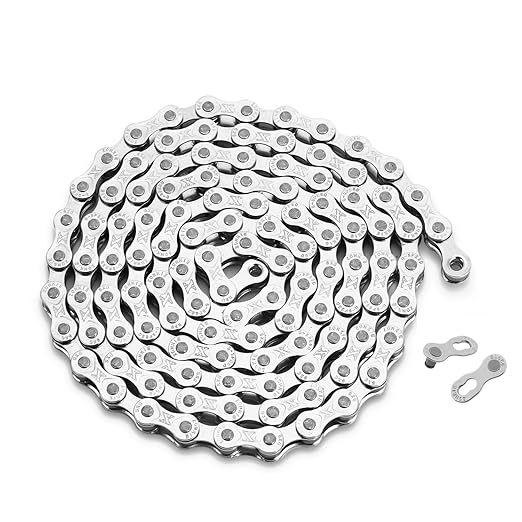
Inspired by nature but built from metal, this ingenious wrench nest is a perfect blend of craftsmanship and creativity. The bike chain frame, twisted wire nest, and wrench “birds” make it a standout wall décor piece.
Materials Needed
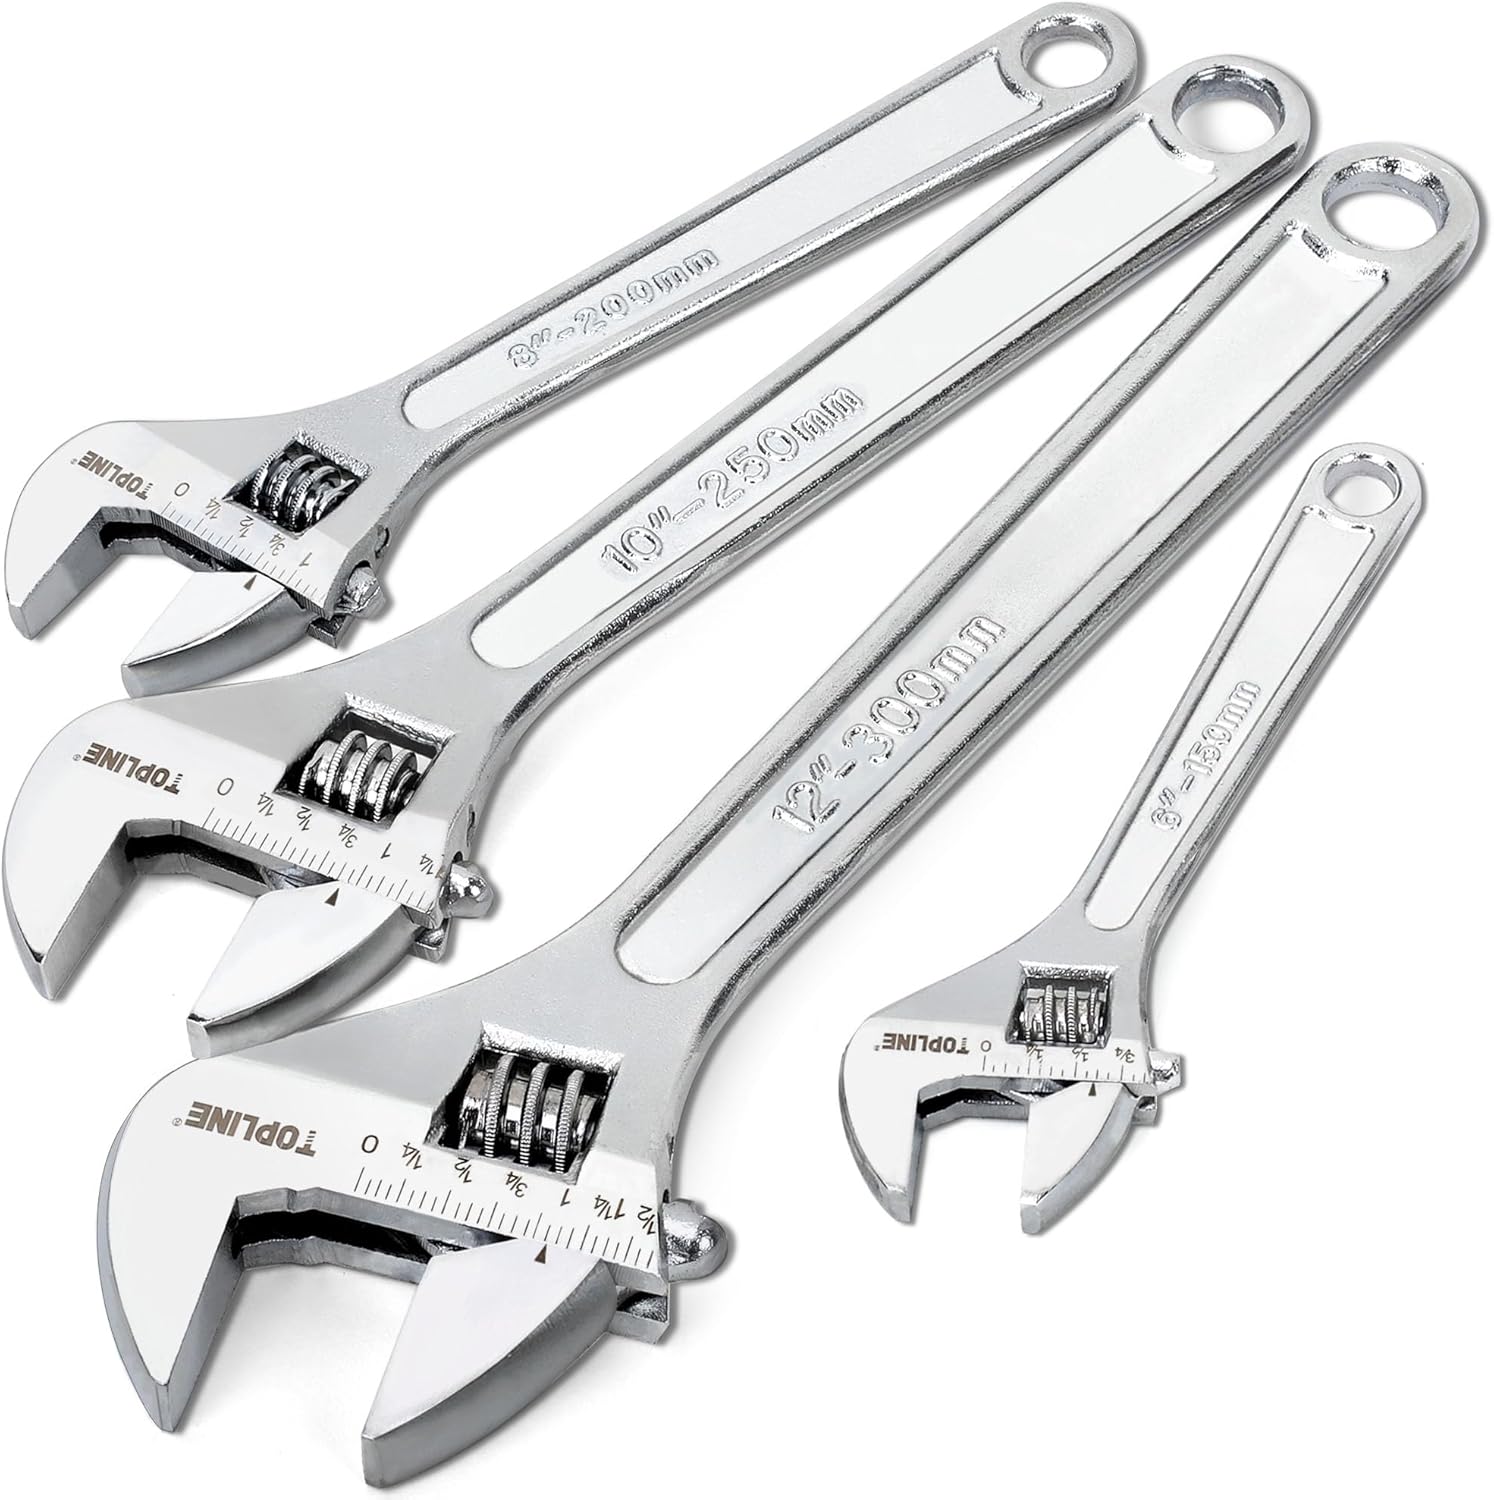
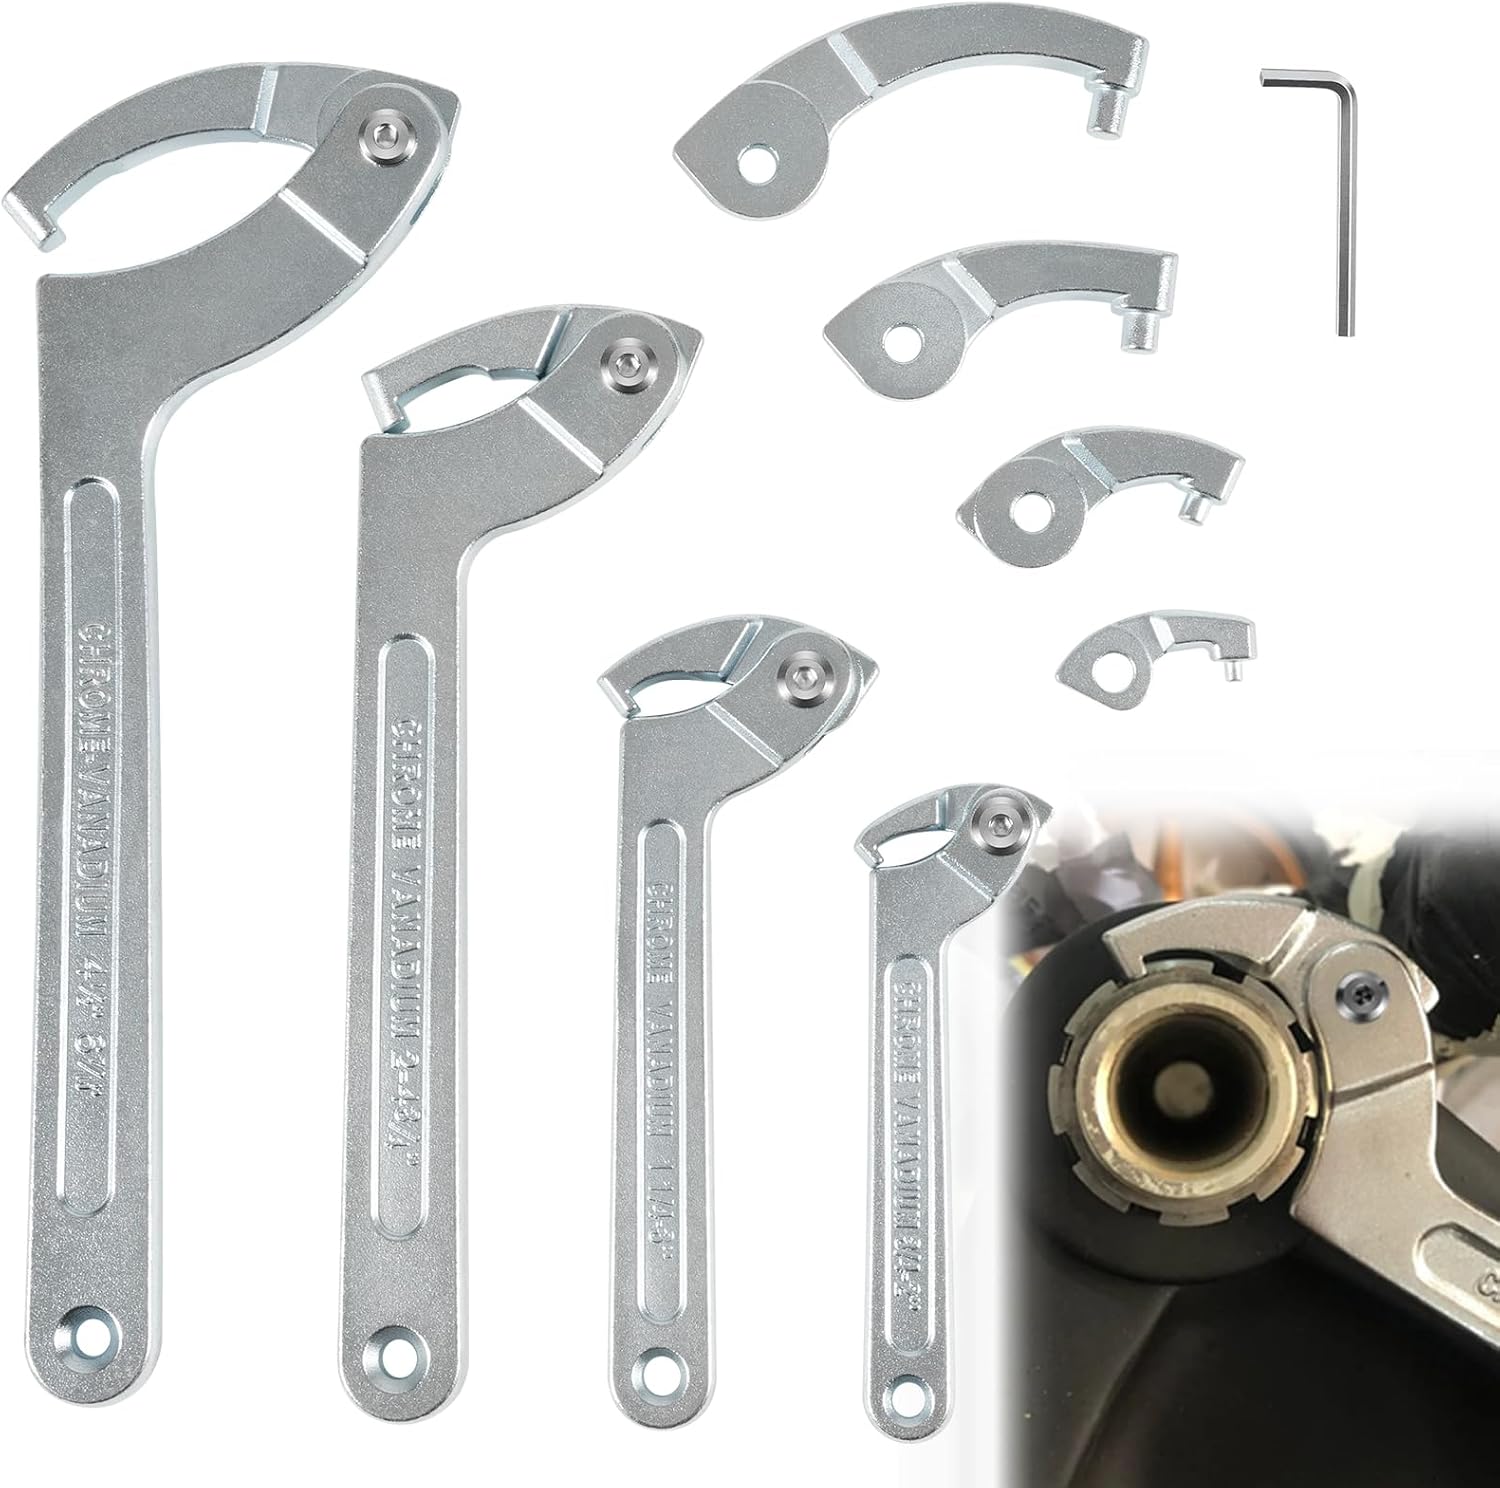
- 1 old adjustable wrench
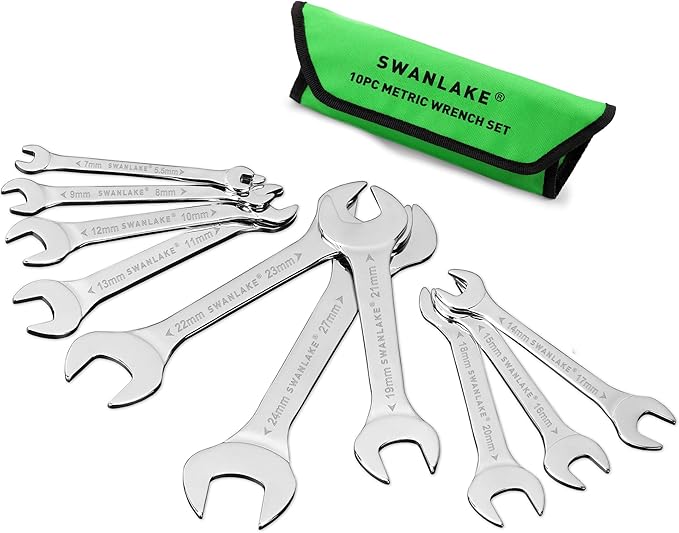
- 4 small open-end wrenches
- Bike chain (at least 3 feet long)
- Thick galvanized wire (8–10 ft)
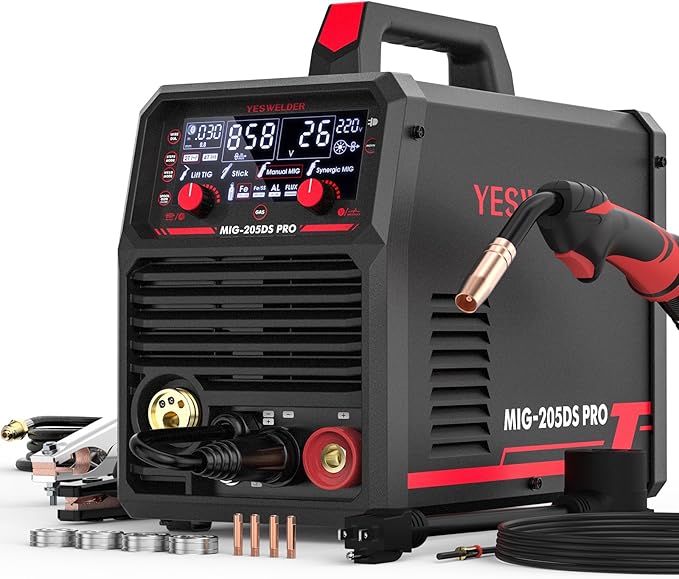
- Welding machine
- Hanging wire
Step-by-step Guide
Step 1: Clean all the tools and chain. Remove any grease or rust so the pieces are safe to handle and adhere better.
Step 2: Shape the bike chain into a rectangular frame. You can weld the corners or use epoxy for a secure hold. Let it cure completely.
Step 3: Twist your galvanized wire into a loose, nest-like structure. Interweave in a random but secure pattern to form a nest shape.
Step 4: Nestle the small wrenches inside. Use more wire to keep them in place so they won’t shift when hung.
Step 5: Attach the adjustable wrench to the side or top of the frame like a bird peeking into the nest. Use strong glue or a bolt through one of the chain links.
#4. Artistic Hand Tool Makeover
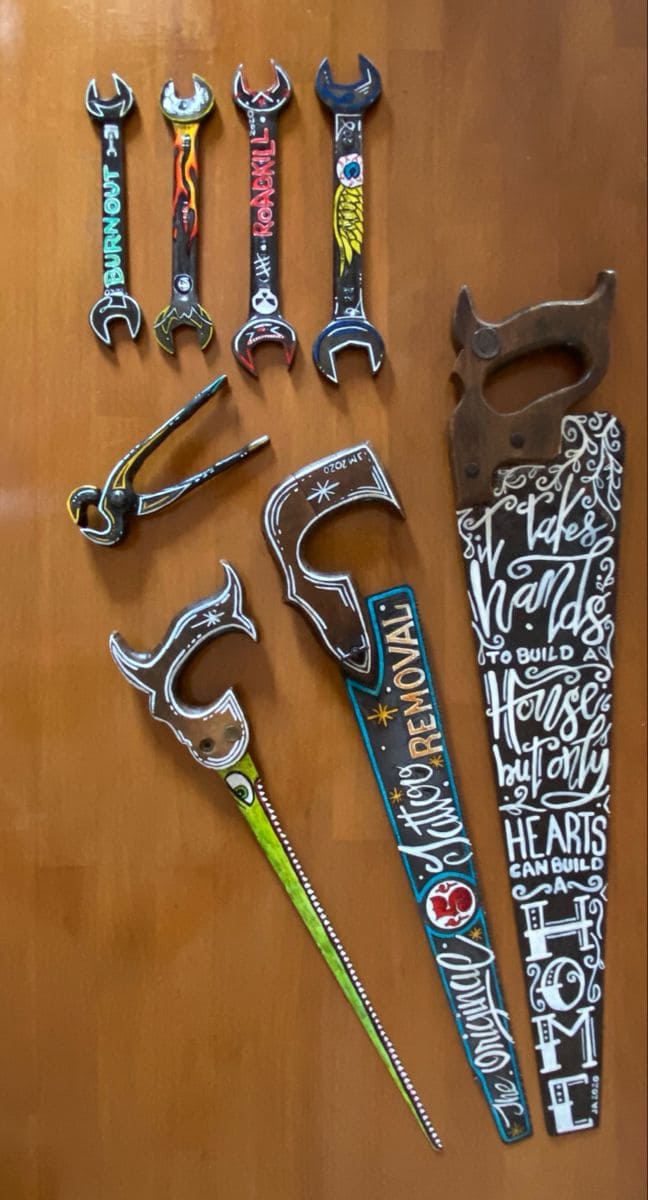
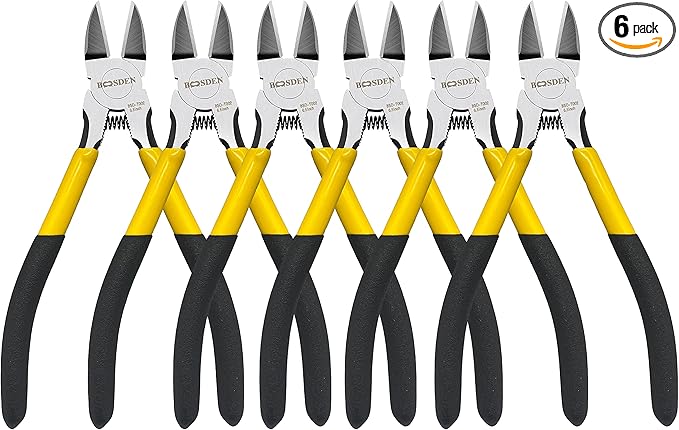
Who said old hand tools have to be dull? This brilliantly upcycled collection turns wrenches, saws, and pliers into eye-catching, hand-painted masterpieces.
With bold colors, lettering, and intricate designs, each tool becomes a unique statement piece.

Materials Needed
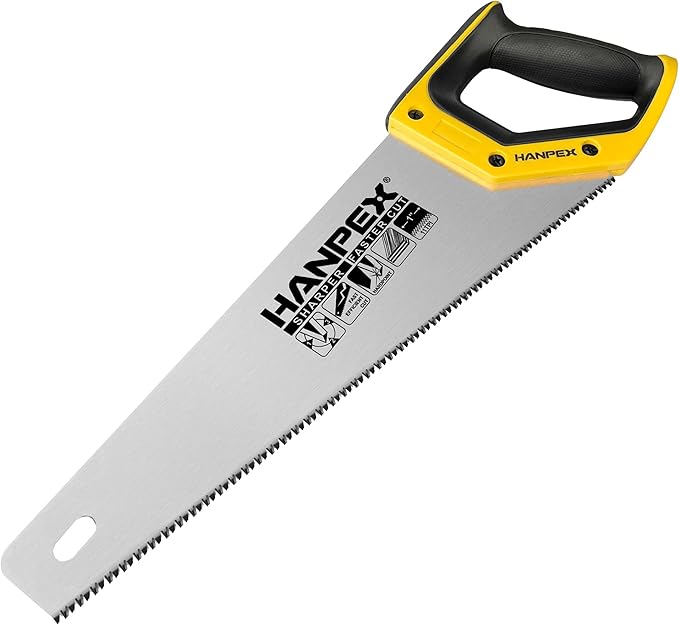
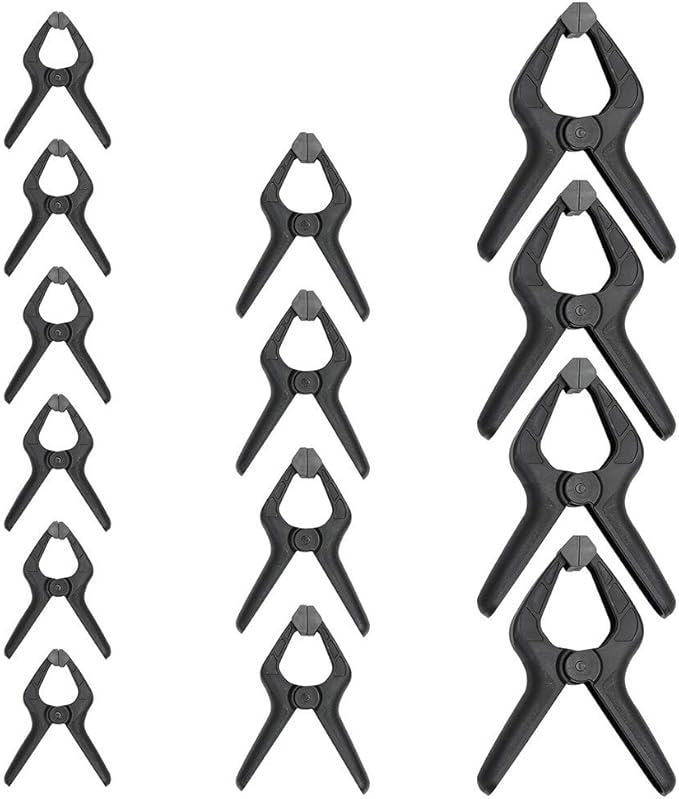
- Old tools (wrenches, saws, pliers, clamps)
- Acrylic paint set
- Paint markers
- Clear matte spray sealant
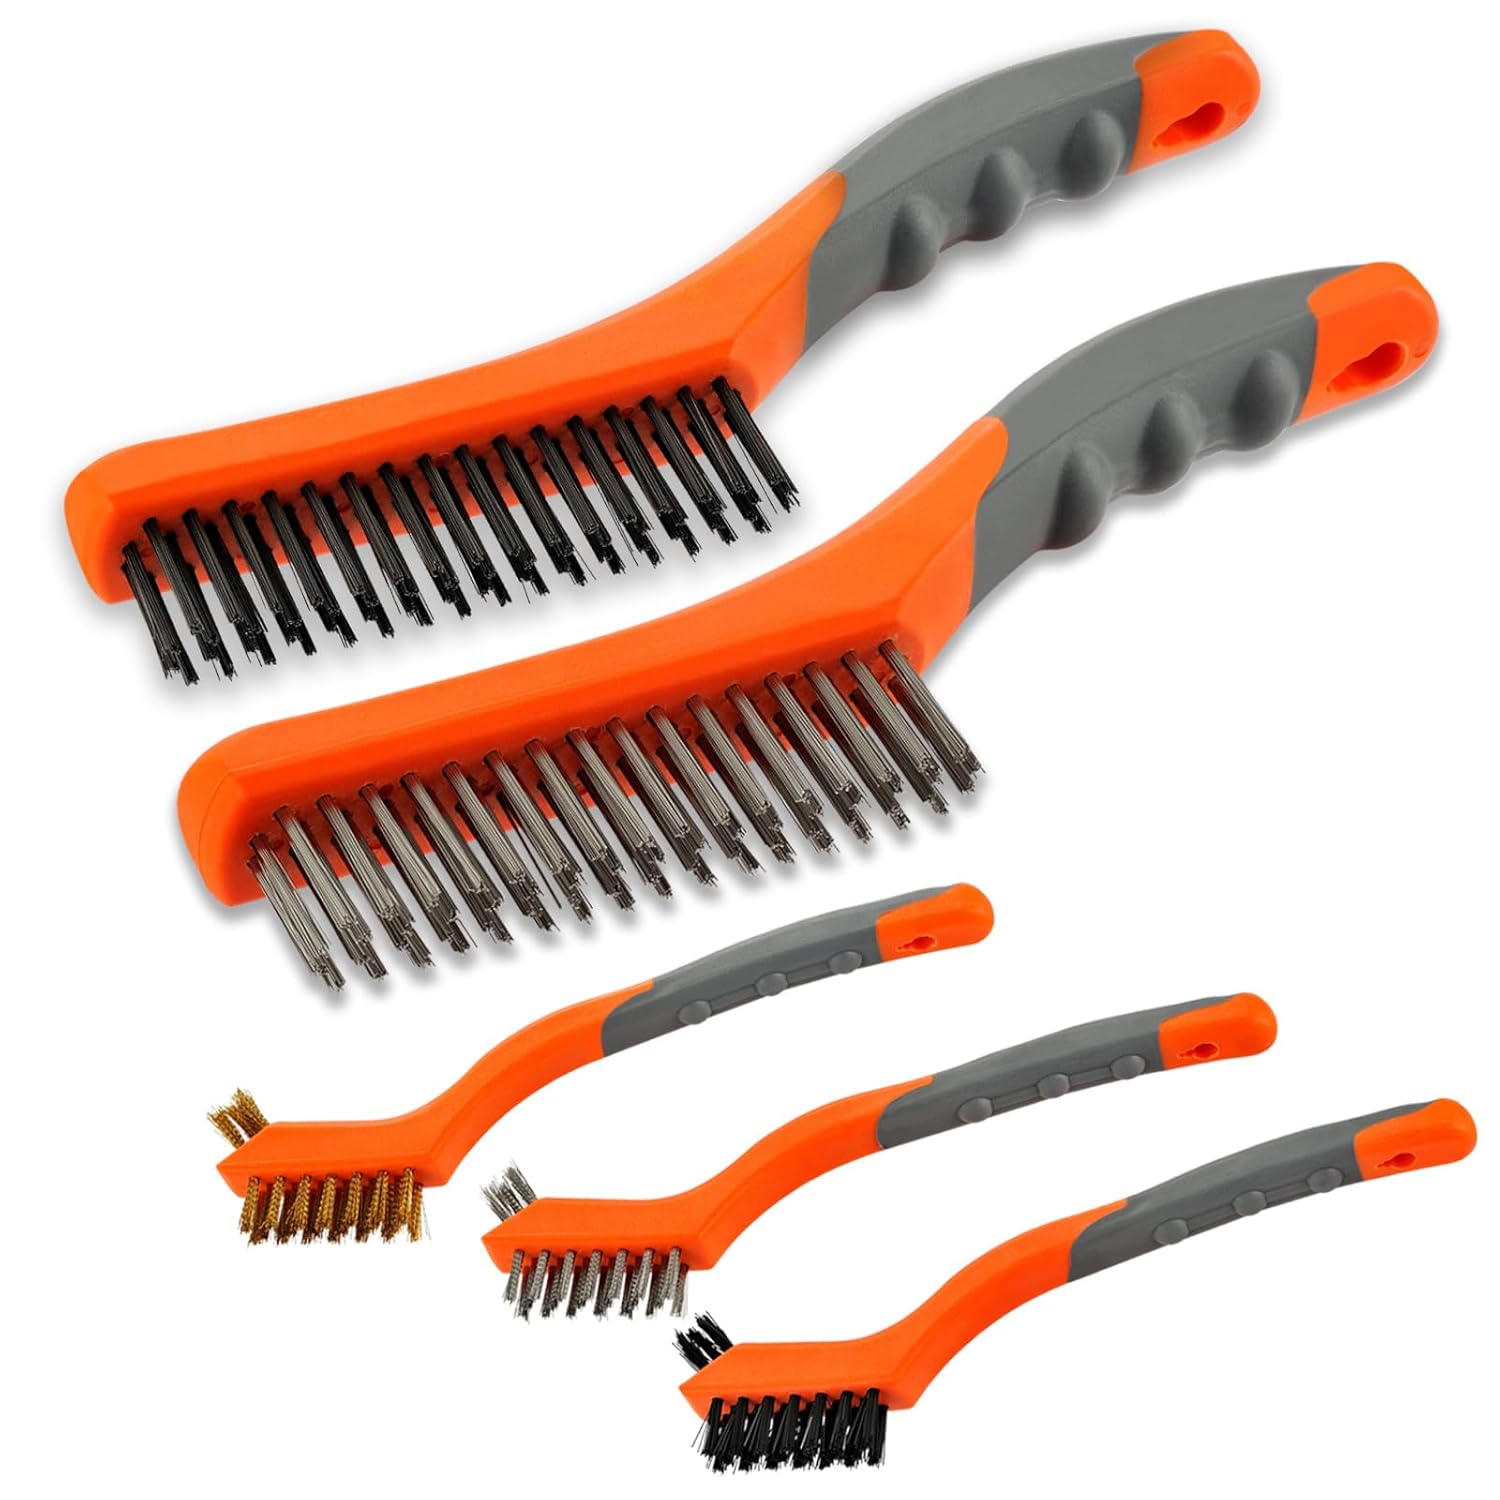
- Wire brush
Step-by-step Guide
Step 1: Sand down the tools to remove rust, dirt, or flaking paint. You want a clean, slightly rough surface so the paint adheres properly.
Step 2: Sketch your design ideas directly on paper first whether it’s flames, feathers, typography, or abstract lines.
Step 3: Use acrylic paints or markers to paint the tools. Start with the base color first. Let each layer dry before adding highlights, outlines, or lettered quotes.
Step 4: Once your art is fully dry, spray it with a clear matte sealant to lock in the colors and protect it from scratches or fading.
#5. Upcycled Tools into Rustic Garden Bird Art
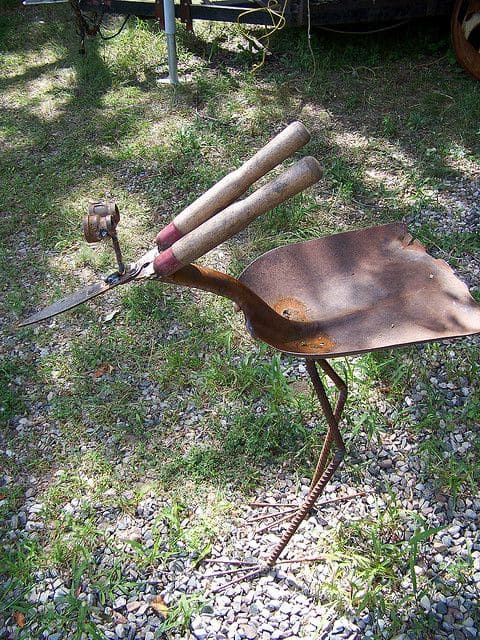
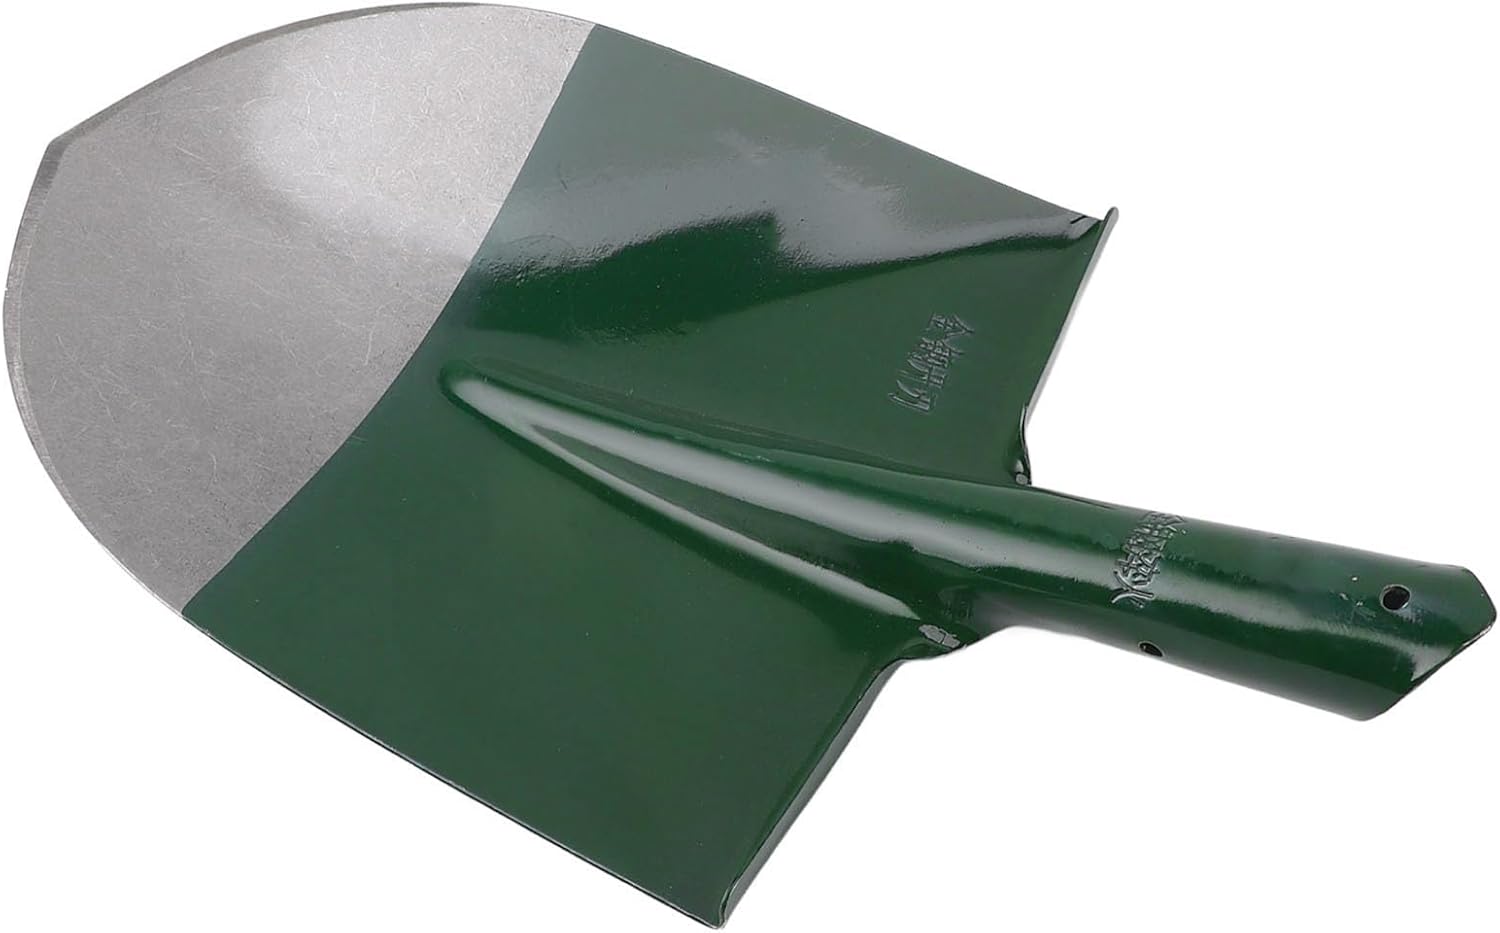
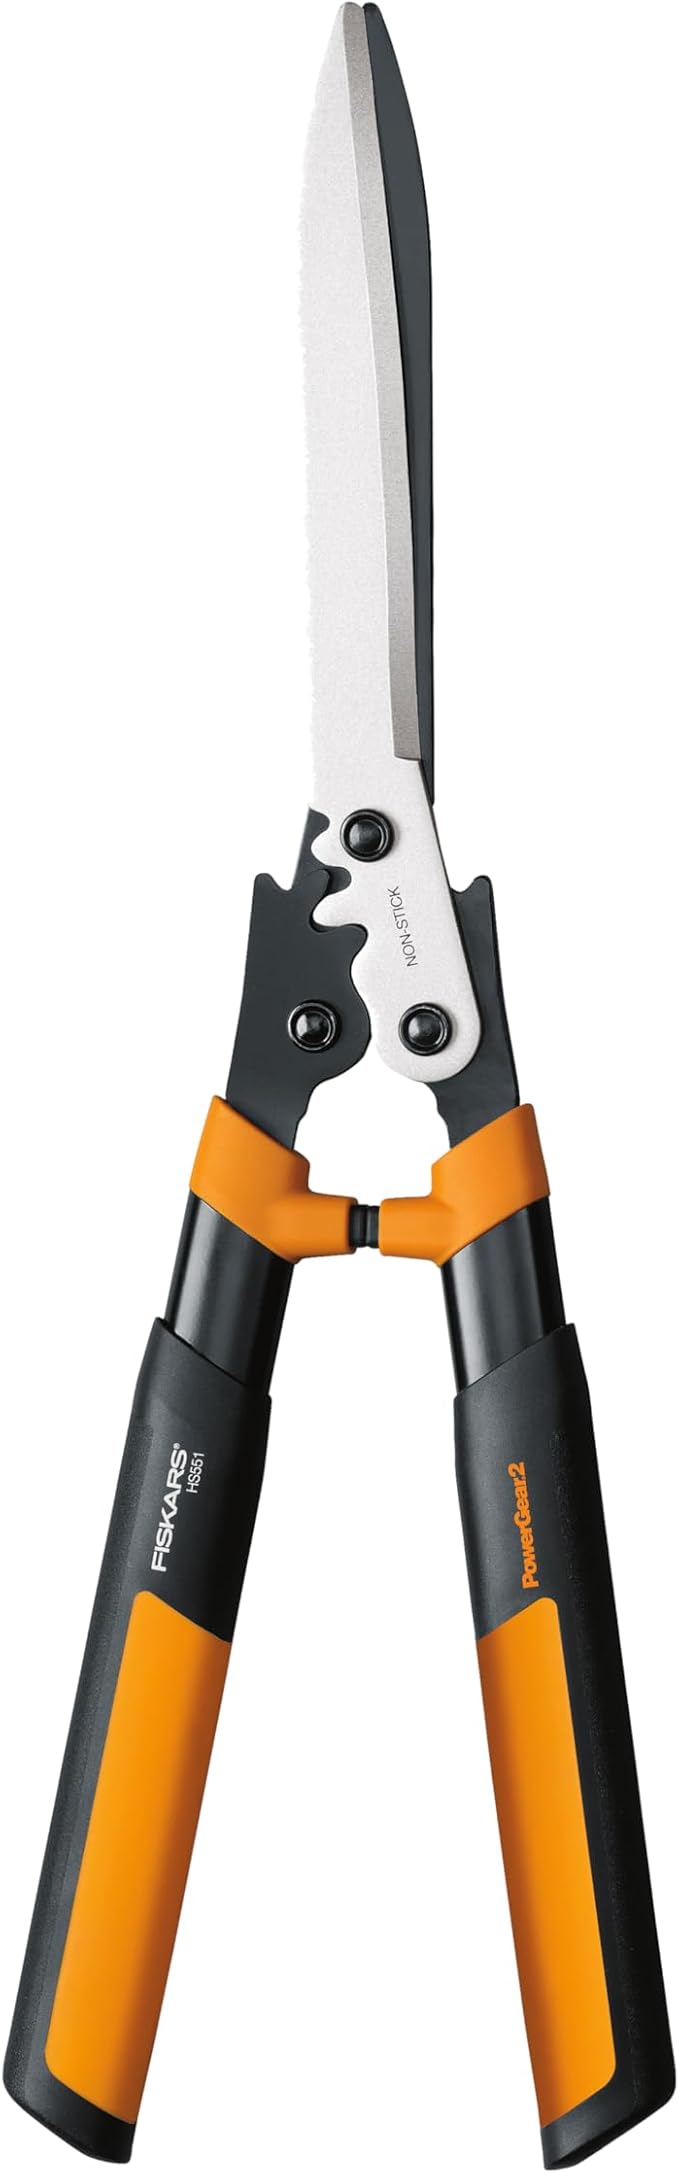
Like a hidden treasure from the scrapyard, this inventive garden sculpture transforms old hand tools and metal scraps into a charming bird. A rusted shovel forms the body, while shears and wooden handles create the beak and neck.
Materials Needed
- 1 old metal shovel head
- 1 pair of rusty hedge clippers
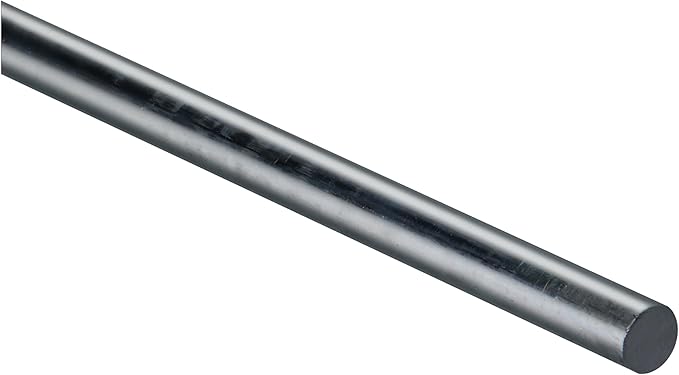
- Scrap metal rods (approx. 3ft long)
- Wire
- Welding machine
- Safety gear: gloves, goggles, and a mask
Step-by-step Guide
Step 1: Clean all metal parts with a wire brush to remove rust flakes and prepare surfaces for welding or epoxy bonding. Test fit each part like puzzle pieces.
Step 2: Position the shovel head as the body. Weld or attach the hedge clippers angled forward to mimic a bird’s neck and beak. Let them overlap slightly with the shovel handle hole for a natural curve.
Step 3: Attach two bent rebar rods for legs. Angle them back slightly to give the sculpture balance. Weld springs or curved scrap at the base for claw-like feet that hold the piece steady on the ground.
Step 4: Add a small round gear, knob, or bolt as the eye. Weld it right where the blades connect to create that expressive, curious bird stare.
Step 5: Spray a clear coat over the entire sculpture if you want to prevent future rusting.
#6. Creative Wrench Fish Sculpture for Rustic Decor
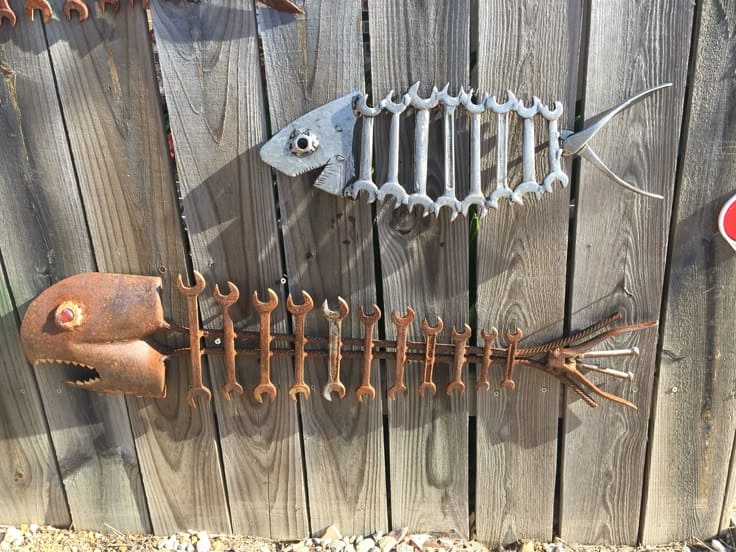
If you love industrial-style art with a rustic twist, this wrench fish sculpture is a masterpiece of upcycling. Old wrenches form the ribcage, pliers create the tail, and a repurposed metal piece brings the head to life.
Mounted on a wooden fence, this piece adds character to outdoor spaces, proving that scrap metal can become a stunning, artistic display.
Materials Needed
- 10–15 open-end wrenches
- 1 metal gear
- Scrap metal spanner
- Long steel rod (approx. 3 ft)
- Old tongs, pliers
- Welding machine
- Screws
Step-by-step Guide
Step 1: Lay out your design flat on the ground first. Position the long rod as your fish spine and line up the wrenches perpendicular along it to resemble ribs. Adjust spacing for visual balance.
Step 2: Clean your metal parts, but don’t strip all the rust as some patina adds character. Use a wire brush or grinder to prep areas for welding.
Step 3: Weld each wrench across the spine at the center notch. Start with the middle rib and work outward to ensure symmetry. If you don’t weld, use wire bindings for a more rustic, steampunk look.
Step 4: Attach your “head” using a welded plate, gear, or large jaw tool. Add a bold gear for the eye and optionally weld some scrap saw blade for teeth or texture.
Step 5: For the tail, weld in old pliers, forks, rake parts, or curved rebar to fan out like bones. Shape them wide enough to balance the proportions of the head.
Step 6: Spray a protective sealant to preserve the rusted charm without letting it corrode further. Use screws to mount the sculpture on your wooden fence, metal wall, or trellis.
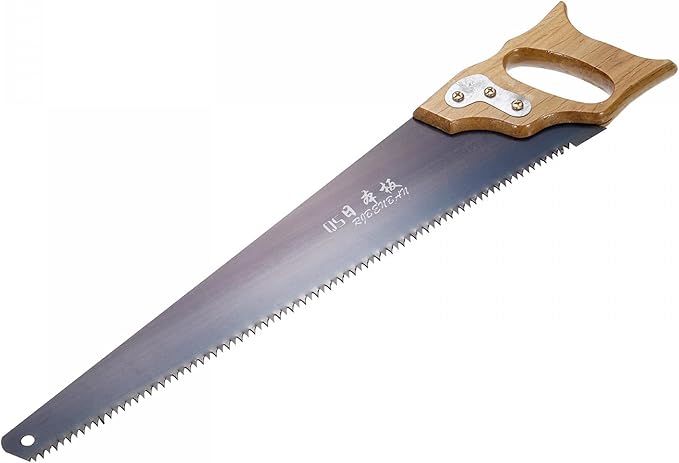
#7. Rustic Hand-Painted Saw Tribute for Dad
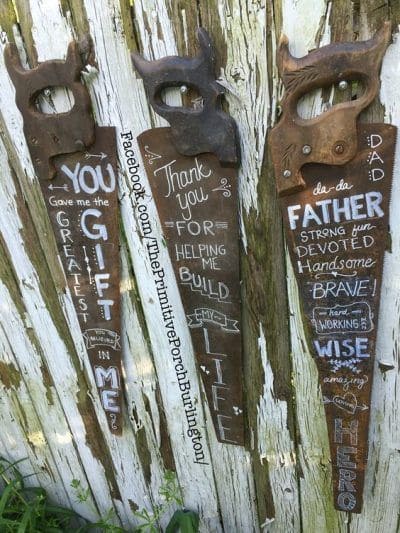
On Father’s Day, instead of a typical gift, why not transform old saws into heartfelt keepsakes? These rustic hand-painted saws feature touching messages, turning worn-out tools into meaningful wall art.
With a little creativity and white paint, you can create a thoughtful tribute that celebrates hard work, love, and craftsmanship.

Materials Needed
- 1–3 old hand saws
- White paint marker
- Pencil and ruler
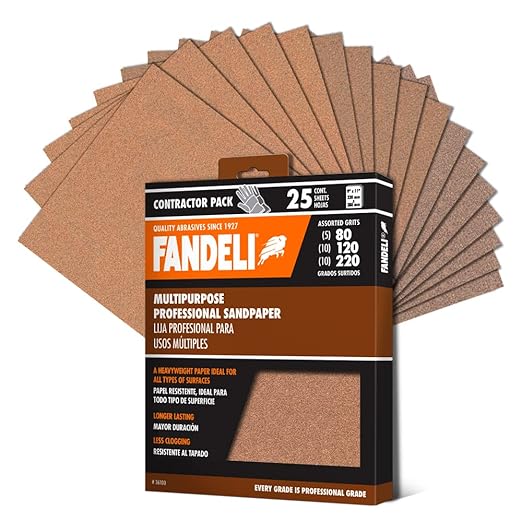
- Optional: sandpaper
- Matte sealer spray
Step-by-step Guide
Step 1: Lightly clean the surface of each saw. Use a rag and some vinegar or steel wool to remove loose dirt while keeping the aged look.
Step 2: Use a pencil to sketch your layout. Plan the main word (like “FATHER” or “GIFT”) vertically, and smaller phrases around it. Balance fonts and spacing.
Step 3: Carefully write over your pencil sketch using a white paint marker. For bold words, go over them twice. Add small doodles like hearts, hammers, or arrows to fill awkward gaps.
Step 4: Once dry, lightly spray with a matte sealer to protect your work from smudging or fading.
#8. Vintage Saw Blade Wall Art Decor
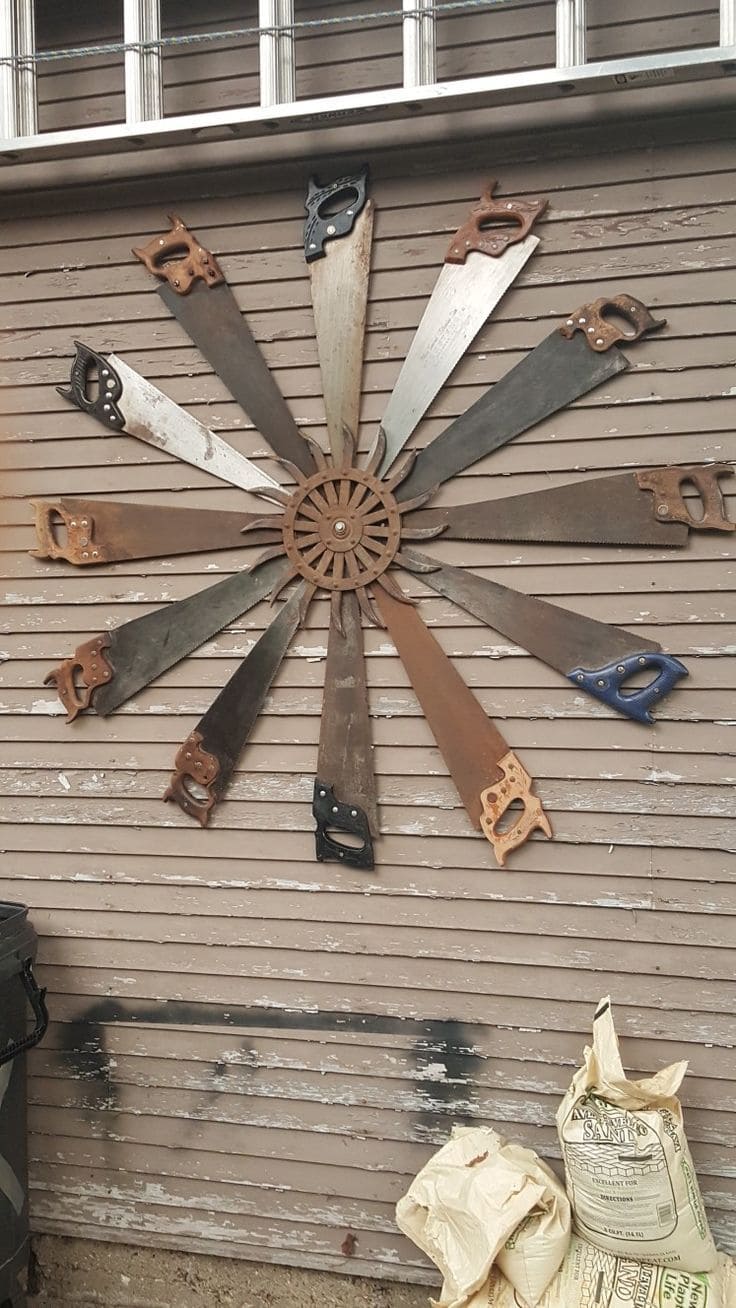
Have you ever thought of turning old hand saws into a stunning outdoor display? This rustic saw blade wall art transforms discarded tools into a striking sunburst design.

Materials Needed
- 12 vintage hand saws
- 1 round metal wheel center hub (approximately 12–16 inches diameter)
- Screws and washers
- Power drill and screwdriver
- Outdoor screws
- Optional: sandpaper, metal brush
Step-by-step Guide
Step 1: Clean the saws thoroughly. Remove loose rust with a wire brush or sandpaper.
Step 2: Place your circular hub on a flat surface. Arrange the saws around it like sun rays, handles pointing outward. Overlap them slightly to check spacing and visual balance.
Step 3: Once you’re happy with the layout, start attaching each saw to the hub with screws and washers. Drill slowly through the base of each saw’s blade into the wheel.
Step 4: After assembly, lift the whole piece and secure it to your wall with heavy-duty anchors or long outdoor screws, depending on surface type.
#9. Rustic Wrench Frame for Handy Memories
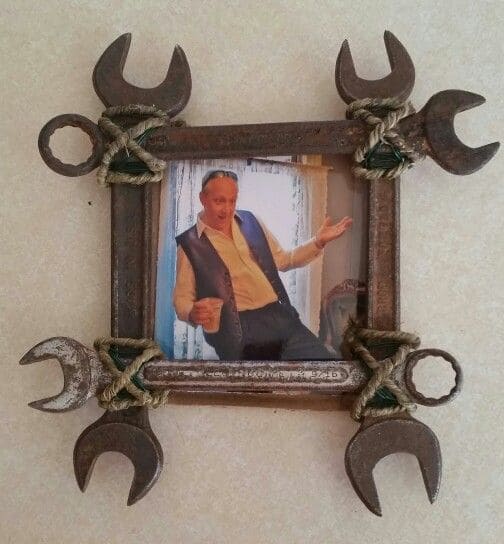
Even old wrenches and metal scraps can be transformed into a bold and unique picture frame! This DIY recycled tool idea gives a rugged, industrial touch to your cherished photos.
By fastening vintage wrenches to a square frame with twine, you create a one-of-a-kind keepsake.
Materials Needed
- 4 small to medium open-end wrenches
- 4 small steel bars (around 6–8 inches each)
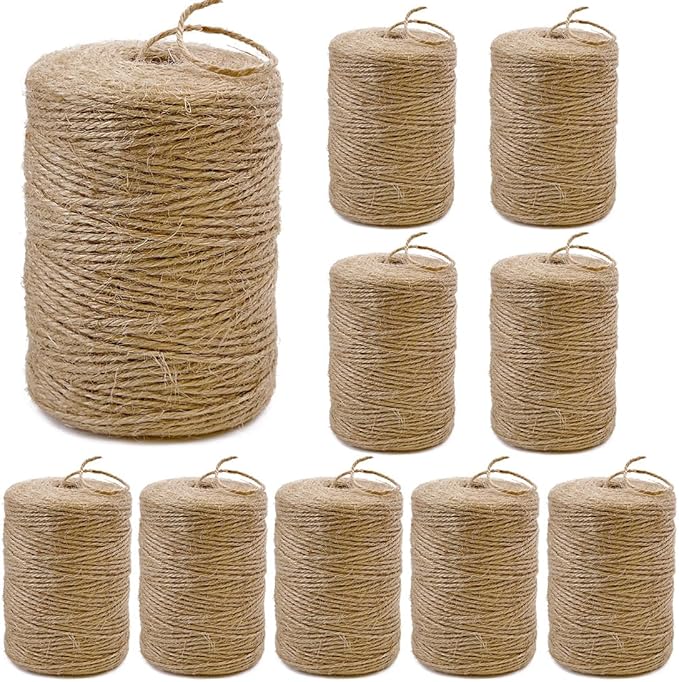
- Twine
- Epoxy glue
- Sandpaper
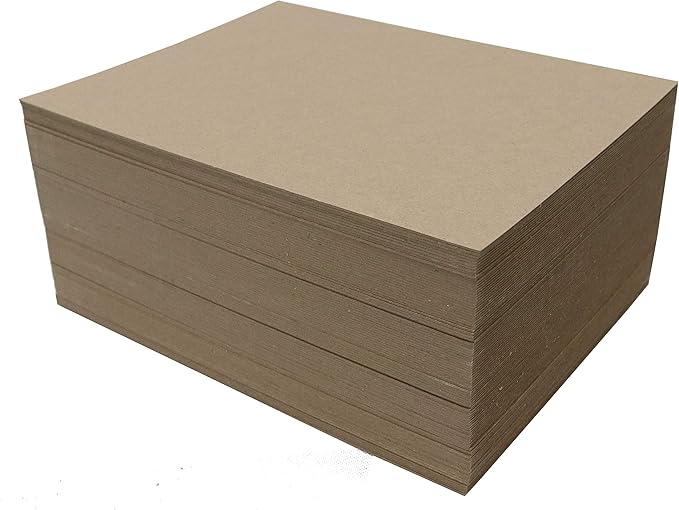
- Backing cardboard
- Hot glue gun
Step-by-step Guide
Step 1: Clean all your metal parts. You don’t have to strip away all the rust, just make sure surfaces are dirt-free and rough enough for adhesive to hold.
Step 2: Lay out your four bars in a square shape. Glue each joint with epoxy and clamp or tape them until cured.
Step 3: Once the square is set, attach a wrench to each corner by tying them tightly with twine and reinforcing with glue underneath. Criss-cross the twine to form a wrapped effect that’s secure and stylish.
Step 4: Cut a piece of cardboard to size, attach your photo to it, then hot glue it to the back of the metal frame.
#10. Rustic Longhorn Wall Art from Old Tools
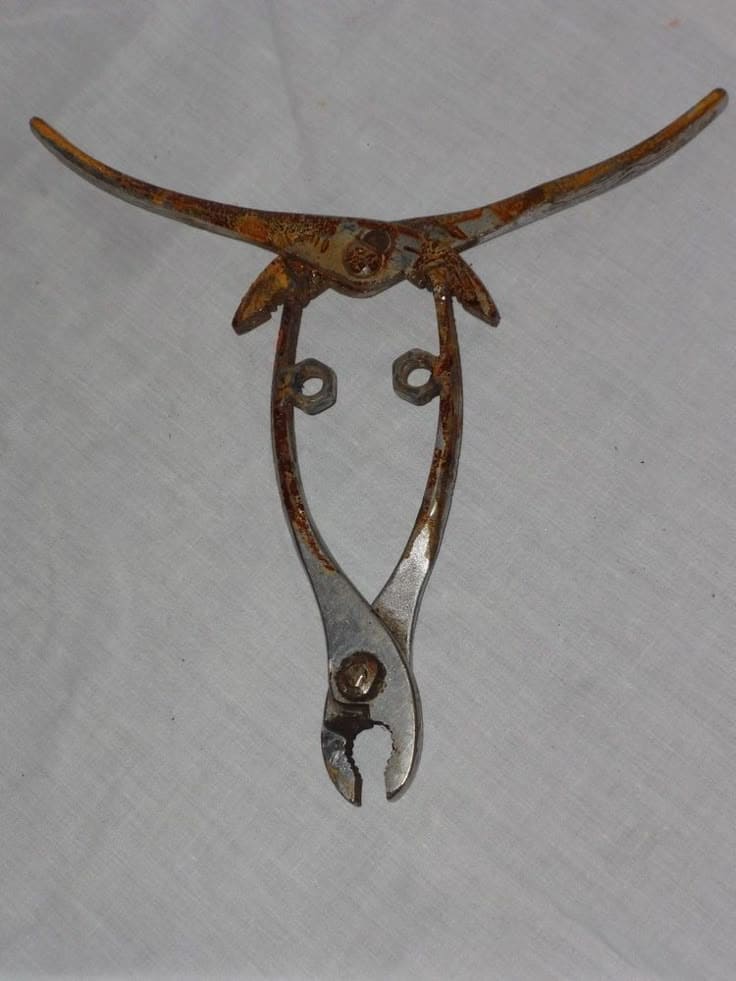
For someone who loves Western decor, this creative DIY longhorn sculpture is a must-try! By repurposing old pliers, metal rods, and bolts, you can shape a unique bull head that adds a rugged, rustic charm to any space.
Materials Needed
- 1 old pair of pliers
- 1 large open-end wrench
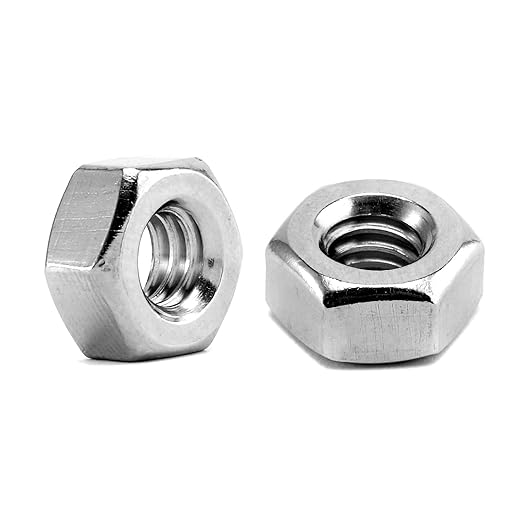
- 2 medium hex nuts
- Strong epoxy
- Wall hook
- Optional: fine grit sandpaper and spray sealant
Step-by-step Guide
Step 1: Clean all tools. Use sandpaper or a wire brush to remove dirt and rust.
Step 2: Position your pliers vertically with the handles facing down. This forms the base and snout of your bull.
Step 3: Attach the wrench across the top of the pliers, creating a wide horn span. If using a rod, bend it into a slight curve before fixing it in place.
Step 4: Glue the two hex nuts inside the opening of the pliers as eyes. Add a hanging hook to the back to mount it securely.
#11. Personalized Name Sign from Old Wrenches
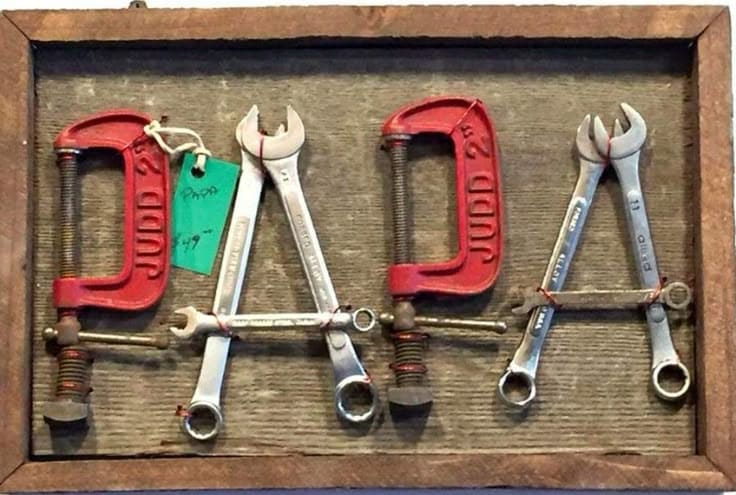
You can turn vintage hand tools into a bold and unique wall sign that spells out a meaningful word! Using old wrenches, clamps, and bolts, this DIY project is perfect for garage decor, workshops, or a man cave.
Whether it’s a Father’s Day gift or an accent for a rustic space, this idea showcases creativity with a touch of industrial charm!
Materials Needed
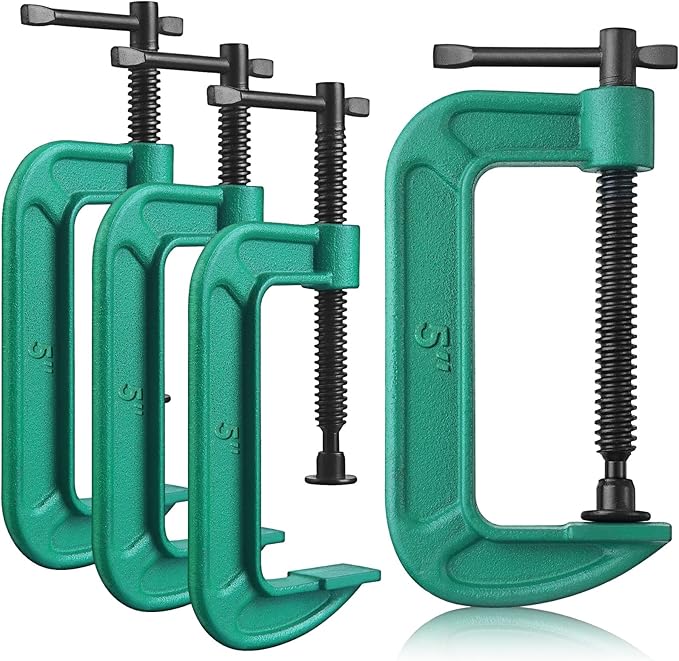
- 2 vintage C-clamps
- 6 assorted wrenches
- 2 small nuts/bolts
- Wooden board (approx. 12″x18″)
- Epoxy
- Optional: metal labels
Step-by-step Guide
Step 1: Clean all the tools. Wipe off grease, dust, or rust unless you like the patina. Light sanding will help glue grip better.
Step 2: Arrange tools on your board to spell “D-A-D.” Use C-clamps as the curved parts of each “D.” Use two wrenches angled into an “A” and a smaller one horizontally across the middle.
Step 3: Once satisfied with the layout, attach each tool using either heavy-duty glue or by securing them with screws through hidden spots.
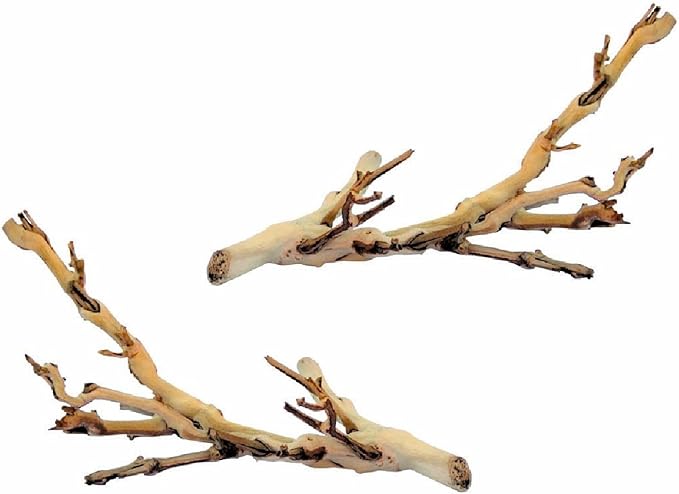
#12. Rustic Owl Sculpture from Recycled Tools

What about transforming old saws, washers, and bolts into a magnificent rustic owl sculpture?
This creative DIY project repurposes a worn-out saw blade as wings, a wooden plank for the face, and screws for intricate details, bringing an industrial yet charming touch to any space.
Materials Needed
- 1 vintage handsaw
- 2 large washers and 2 nuts
- 1 short, thick tree branch (about 12–14″)
- Screws, bolts, nails, or washers
- 8 Twisted screws
- Strong epoxy
Step-by-step Guide
Step 1: Clean and lightly sand the saw. Then attach the eyes. Use a combo of washers and nuts layered to create a wide-eyed look. Secure them with epoxy or small screws.
Step 2: Arrange additional bolts or screws as beak, feathers, or whisker marks. This adds charm and personality.
Step 3: Twist thick wire into claw shapes and screw them into the base of the saw. Adjust until they grip the branch securely.
Step 4: Secure the saw upright against the branch so it looks like the owl is perched. Attach the branch to a base, or mount it to the wall.
#13. Vintage Saw Blade Photo Display
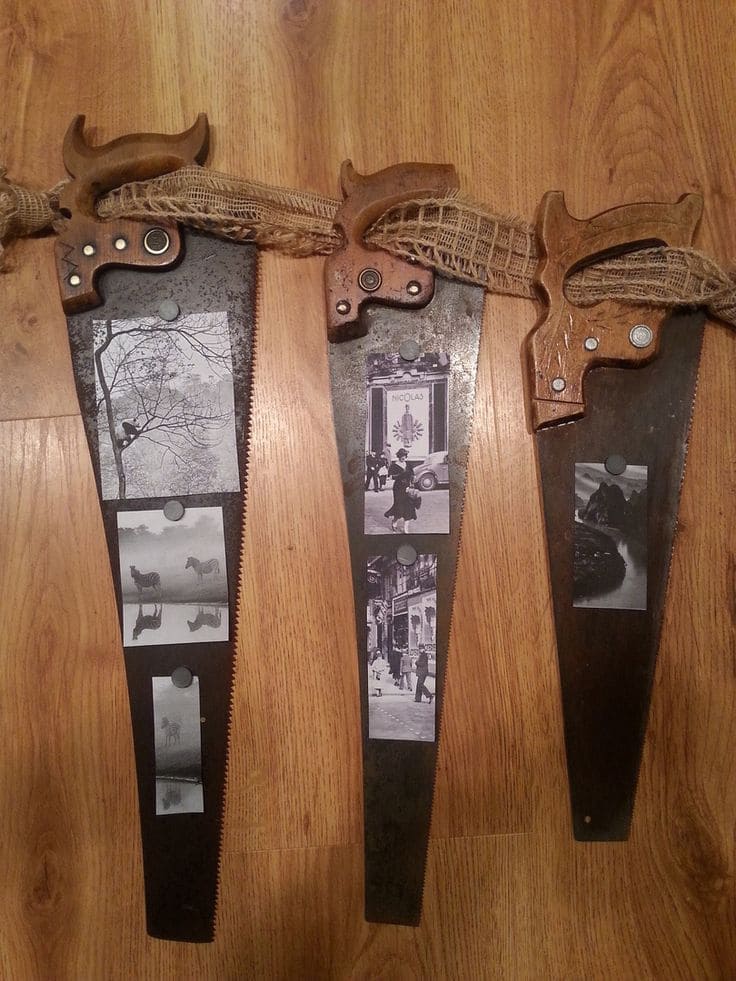
I bet you’ve never thought of turning old saw blades into a creative photo display! This unique DIY project repurposes vintage handsaws into a rustic, industrial-style photo hanger.
Simply attach burlap for a farmhouse touch and use magnets or clips to hold your favorite memories.

Materials Needed
- 3–5 vintage handsaws
- Small magnetic buttons
- Printed photos (3x5s)
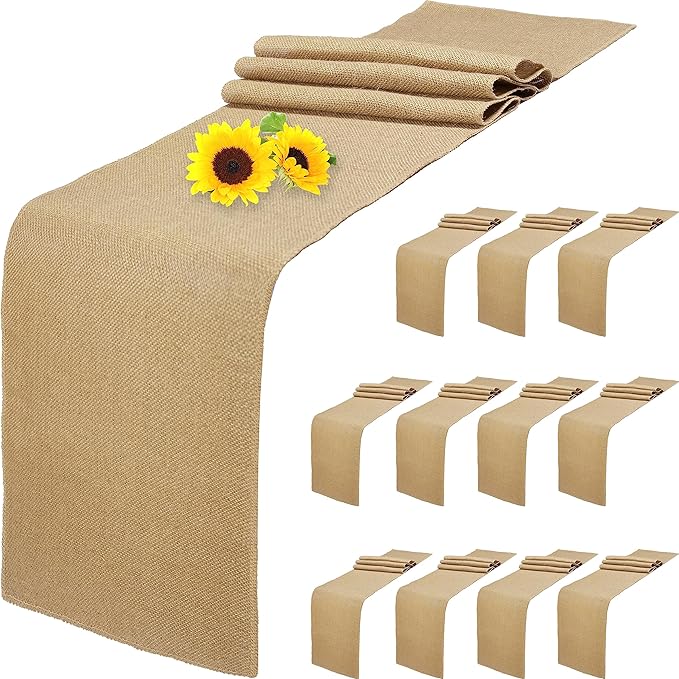
- Burlap
- Heavy-duty wall hooks
- Optional: clear sealant spray
Step-by-step Guide
Step 1: Clean and lightly sand the saws. Leave most of the rust for that aged charm, but make sure they’re safe to handle.
Step 2: Arrange the saws side-by-side with space in between. Thread burlap or jute through the handles like a garland, knotting or looping for support.
Step 3: Select a few black-and-white or vintage-style prints. Attach each with small magnets or adhesive clips, aligning vertically down the blade.
Step 4: Mount the entire display on the wall with nails or screws. Make sure the weight is balanced.
#14. Rustic Tool Workshop Wall Art Display
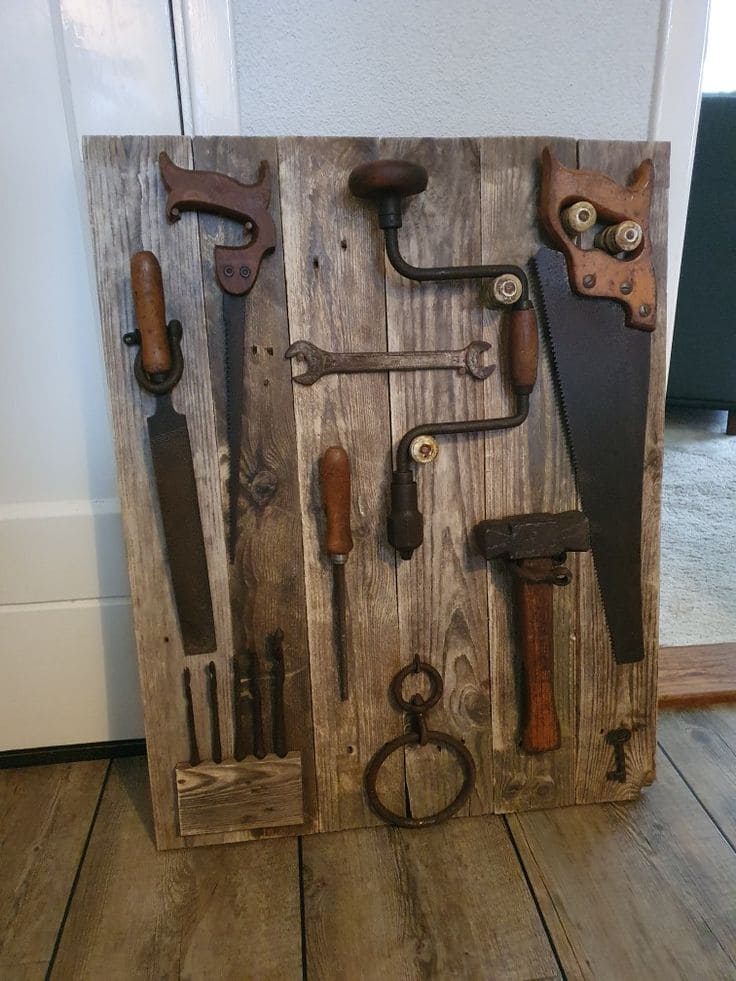
Just by arranging old, weathered tools on reclaimed wood, you can create a striking vintage display that tells a story of craftsmanship.
This DIY project preserves the legacy of hardworking hands while giving your space an authentic workshop aesthetic.
Materials Needed
- 6–8 vintage hand tools (saws, augers, braces, chisels)
- 1 large wooden board (at least 24×36 inches)
- Heavy-duty mounting screws
- Optional: wood stain
- Hanging hardware
Step-by-step Guide
Step 1: Lay your tools on the board first to plan the layout. Mix vertical and angled lines to keep it visually interesting.
Step 2: Wipe down tools gently with a rag. Don’t remove all the rust—just enough to prevent flaking and keep the vintage character intact.
Step 3: Mount each piece using screws or nails through existing holes when possible. For delicate items, consider using clamp brackets or zip ties on the back side for security.
Step 4: Finish by adding a coat of clear wood sealant if desired, especially if you plan to display outdoors or in a humid area.
#15. Vintage Saw Shelf Statement
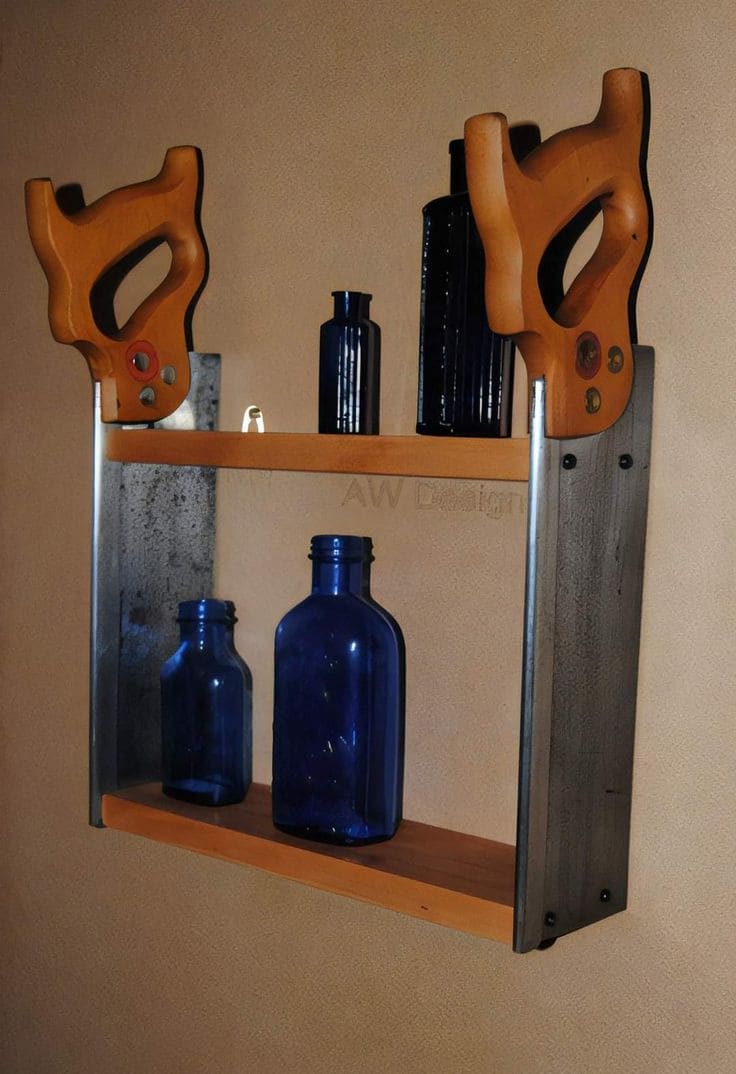
With old saws as side supports, this unique and stylish DIY shelf brings a rustic, industrial edge to your space. The wooden planks blend seamlessly with the sturdy saw handles, offering a perfect way to display decorative bottles or keepsakes.

Materials Needed
- 2 vintage hand saws with wooden handles
- 2 solid wood planks (length: ~18–24″, width: ~4–6″)
- Wall mounting screws and anchors
- Optional: wood stain
- Drill and level
Step-by-step Guide
Step 1: Place the saws upright with the handles facing up, they’ll serve as the shelf sides. Test-fit the wood planks between the blades to check alignment and spacing.
Step 2: Pre-drill pilot holes through the saw blades where the shelves will attach. Be careful not to crack the metal.
Step 3: Insert and screw the wooden planks securely to the blades using small but sturdy screws. Make sure everything is level and symmetrical.
Step 4: Mount the entire piece to your wall using screws through the saw handles.
#16. Industrial Wrench Clock
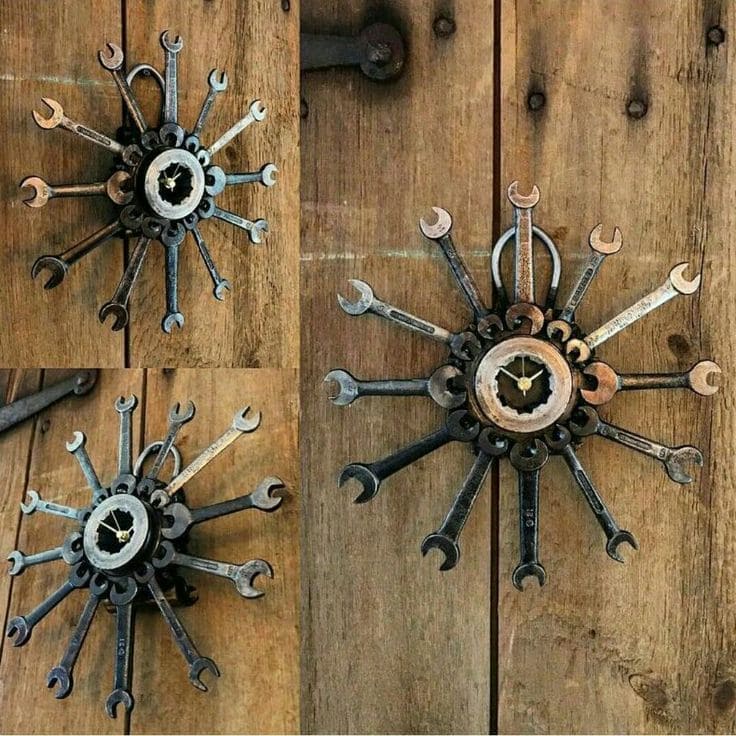
Whether you’re a mechanic, a DIY enthusiast, or just love industrial aesthetics, this wrench clock is the perfect statement piece.
Crafted from old wrenches arranged like clock hands, it blends functionality with creativity. The center gears give it a raw, mechanical charm, making it a stunning conversation starter for workshops, garages, or man caves!
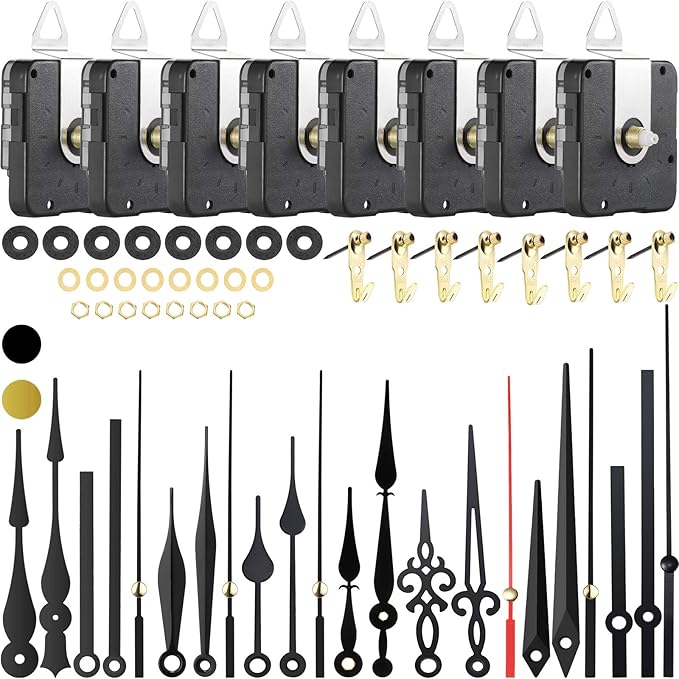
Materials Needed
- 12 old wrenches
- 1 working clock mechanism with hands
- 1 sturdy gear
- Industrial-strength adhesive
- Optional: Spray paint
- Wall hanger bracket
Step-by-step Guide
Step 1: Clean and degrease all the wrenches thoroughly. Sand off any heavy rust or flaking for a smoother finish. Let them dry completely.
Step 2: Arrange the wrenches in a radial pattern like clock hours, using the round metal hub or washer as your center. Space them evenly for balance.
Step 3: Attach each wrench to the center base using strong epoxy. Hold each one in place for a few minutes to let it set, or use clamps if necessary.
Step 4: Once all wrenches are fixed and dry (let it cure 24 hours), install the clock mechanism in the center. Attach a wall mount or bracket to the back and hang it proudly.
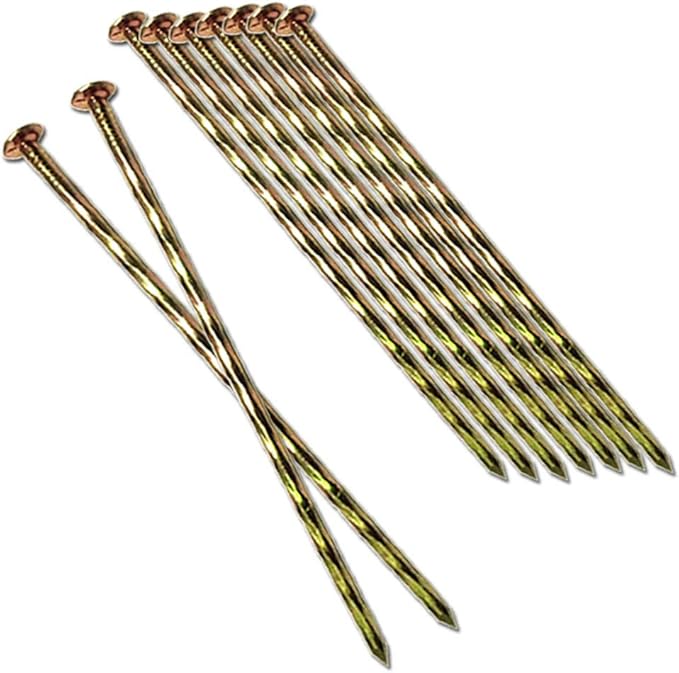
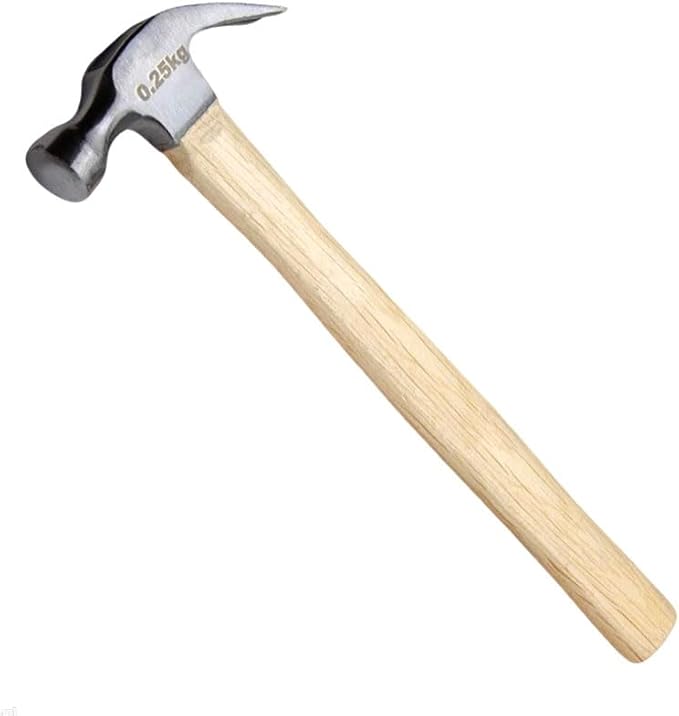
#17. Forged Metal Hammer Sculpture
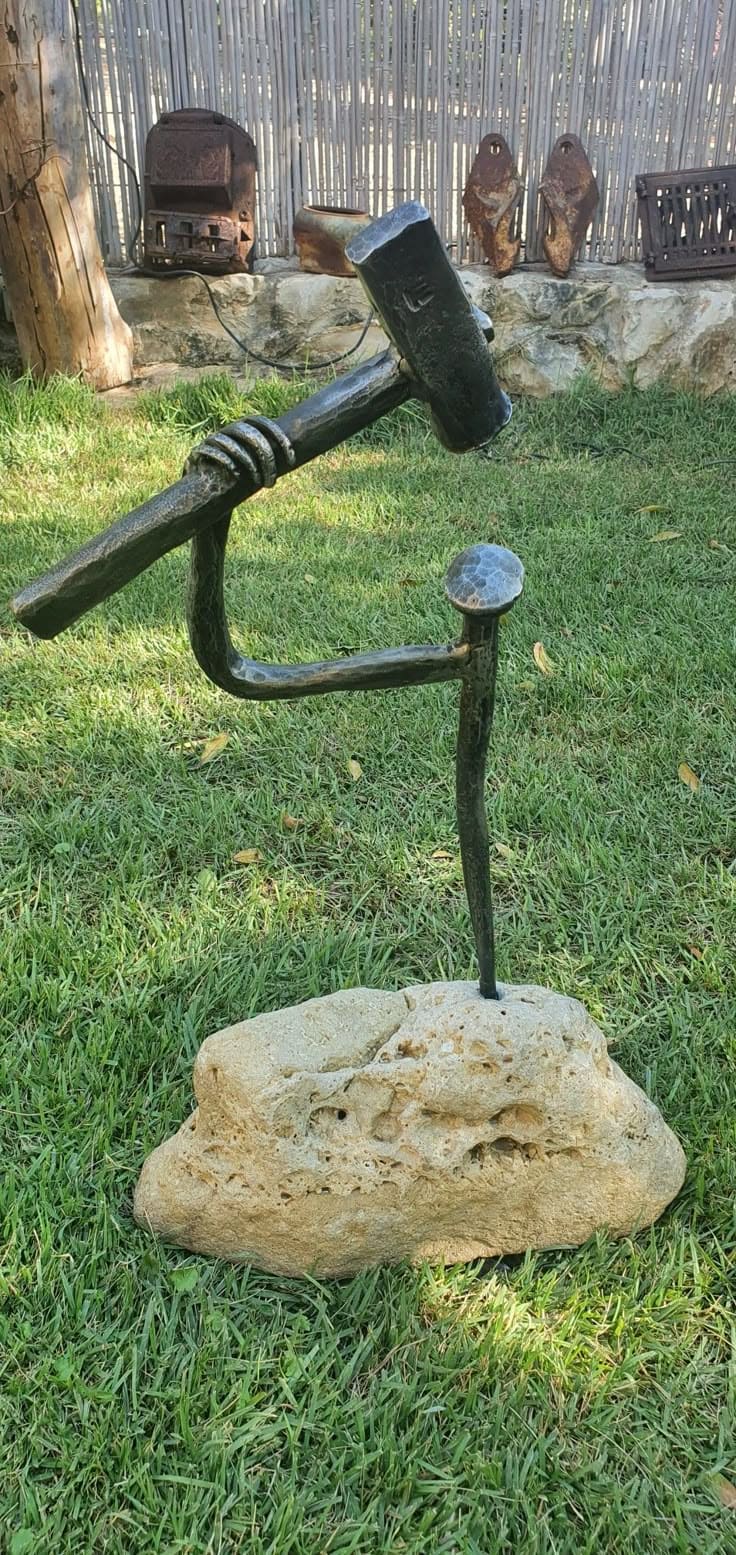
This ingenious metal sculpture transforms an old hammer and bent rebar into a striking piece of industrial art. Anchored on a rugged stone base, it creates the illusion of a hammer striking a nail mid-air.
Materials Needed
- 1 large nail
- 1 solid hammer
- 1 thick metal rod (approx. 12″–16″)
- 1 natural stone (10–15 lbs)
- Industrial-strength epoxy
- Optional: Black metal spray paint
Step-by-step Guide
Step 1: Clean off all rust, dirt, and grease from the hammer, nail, and metal rod. Use a wire brush and sandpaper for smoother bonding.
Step 2: Drill a small hole in your stone base (or use epoxy if it’s porous) to insert and secure the nail upright. This forms the “body.”
Step 3: Position the bent metal rod so it wraps around like an arm and meets the hammer at an angle that looks like it’s mid-swing. Glue and clamp it in place until fully dry.
Step 4: Attach the hammer securely to the top of the “arm” using adhesive or welding. Make sure the pose feels natural and animated.
Step 5: Once dry, coat the whole sculpture in a matte black spray or leave it raw for a rusted, weathered finish.
#18. Rustic Wrench Wall Rack for Storage Solution
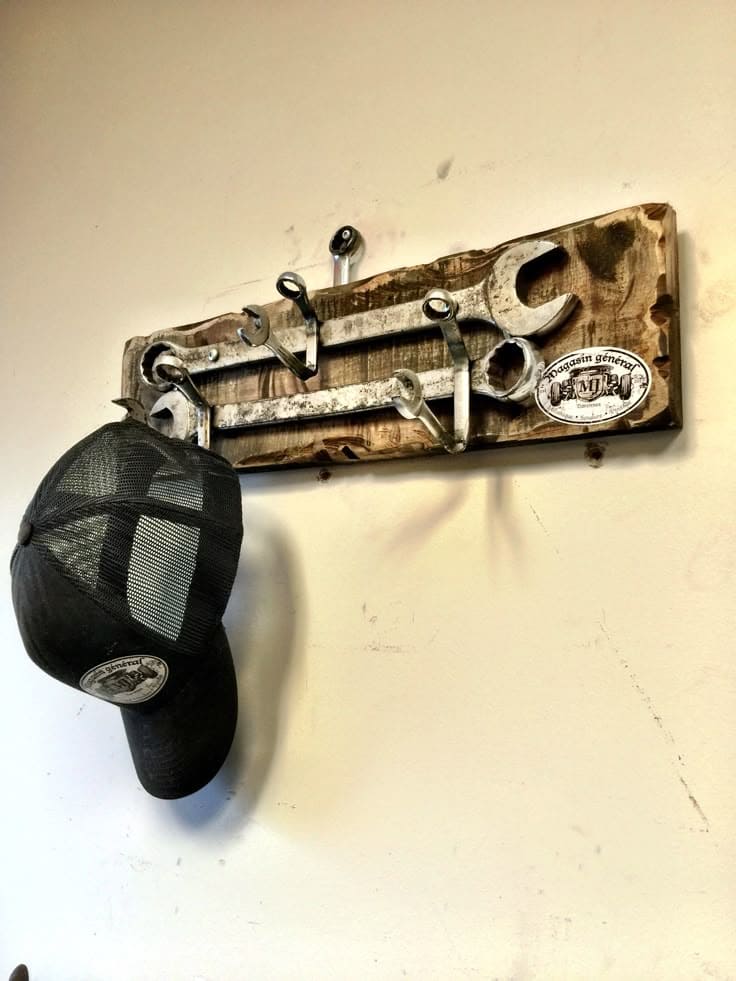
Instead of letting old wrenches rust away, turn them into a rugged and functional wall rack! Mounted on reclaimed wood, these repurposed tools become sturdy hooks for hats, coats, or shop essentials.
Perfect for a garage, workshop, or farmhouse-style entryway, this project blends industrial charm with practical design.
Materials Needed
- 1 reclaimed wooden board (approx. 18″ x 6″)
- 5–7 used metal wrenches, mixed sizes (at least 6″)
- 5–7 metal screws
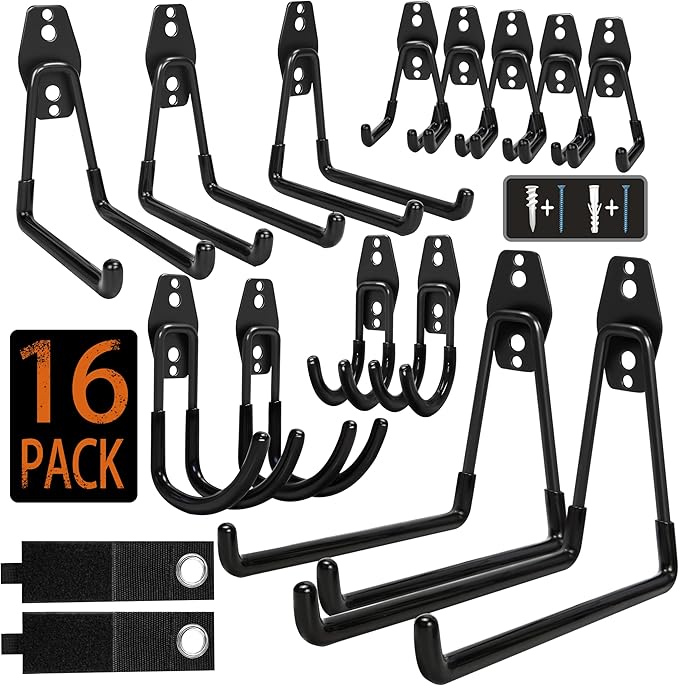
- 2 mounting hooks
- Optional: clear polyurethane finish
Step-by-step Guide
Step 1: Clean off your wood and tools. Lightly sand the wood to remove any splinters or grime, and degrease the wrenches for better adhesion and a polished look.
Step 2: Arrange the wrenches in a design that feels balanced and functional. Angle some for hat hooks, others flat just for visual weight. Use a pencil to mark where they’ll go.
Step 3: Drill pilot holes through the wrenches and into the board. Secure each wrench with heavy-duty screws. Make sure they’re tight—these hooks are going to hold weight.
Step 4: (Optional) Seal the entire board with a coat of polyurethane to lock in the rustic look and prevent wear.
Step 5: Attach picture frame hangers or heavy-duty D-rings to the back for wall mounting. Choose anchors appropriate for drywall or wood depending on your wall.
#19. Industrial Hammer Door Handle
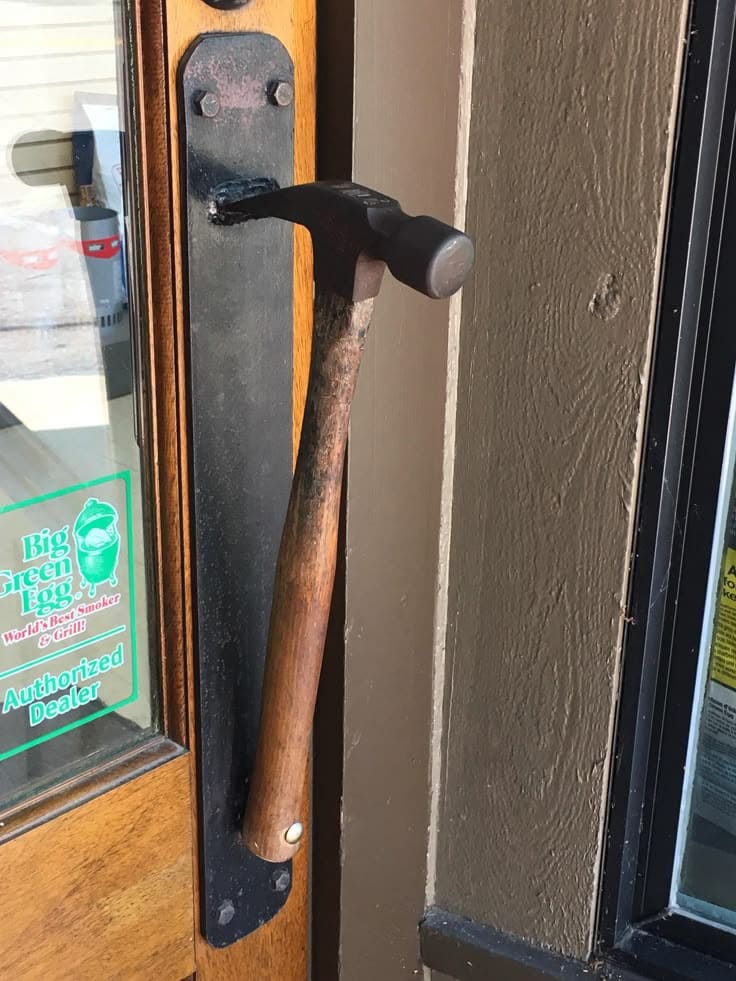
You can give your door an unforgettable entrance with this rugged yet creative hammer handle. By repurposing an old hammer and securing it as a functional grip, this DIY upgrade adds a workshop-style aesthetic to any space.

Materials Needed
- 1 old hammer
- 1 steel mounting plate (approx. 12″ x 2″)
- Heavy-duty bolts
- Industrial-grade epoxy
- Optional: matte black spray paint
Step-by-step Guide
Step 1: Clean the hammer thoroughly. Sand down the handle lightly, and remove any rust or oil buildup on the head. You want it looking vintage but not greasy.
Step 2: Position the hammer horizontally on your steel plate. Mark the attachment points, where the claw and handle will make contact.
Step 3: Secure the hammer to the plate using a strong metal epoxy or weld. Make sure it’s centered and angled for an ergonomic grip. Let cure fully as per product instructions.
Step 4: Drill pilot holes through the plate and into your door. Use bolts or long screws to attach the plate securely.
Step 5: Optionally, coat the entire handle and plate with matte black to protect against rust and wear.
#20. Rustic Handyman Wreath Welcome
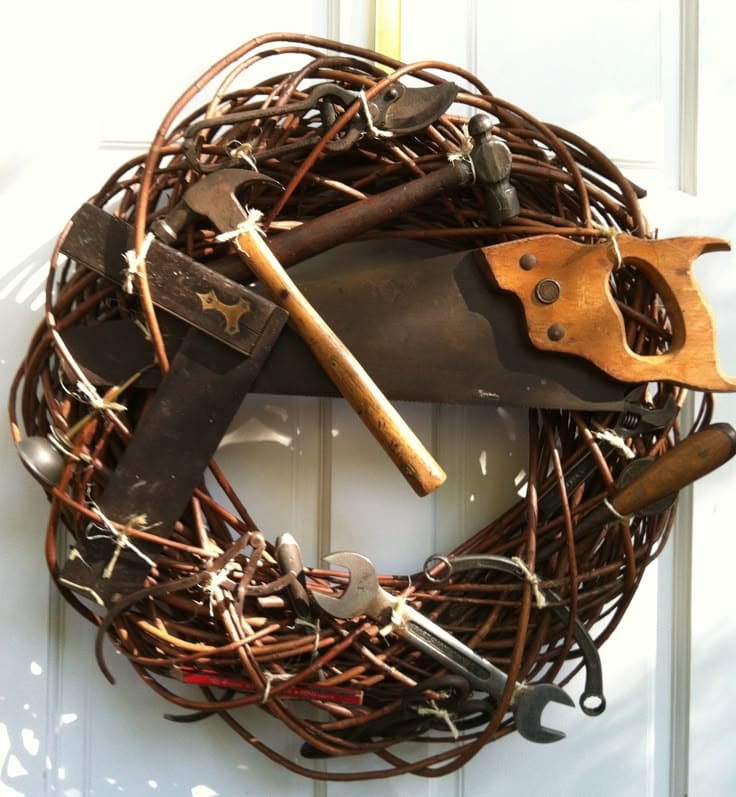
Adding a rugged, vintage touch to your front door, this handyman wreath is perfect for anyone who loves woodworking or DIY projects.
Made from intertwined metal wires, old saws, hammers, and wrenches, it brings craftsmanship to life in a unique way.
Materials Needed
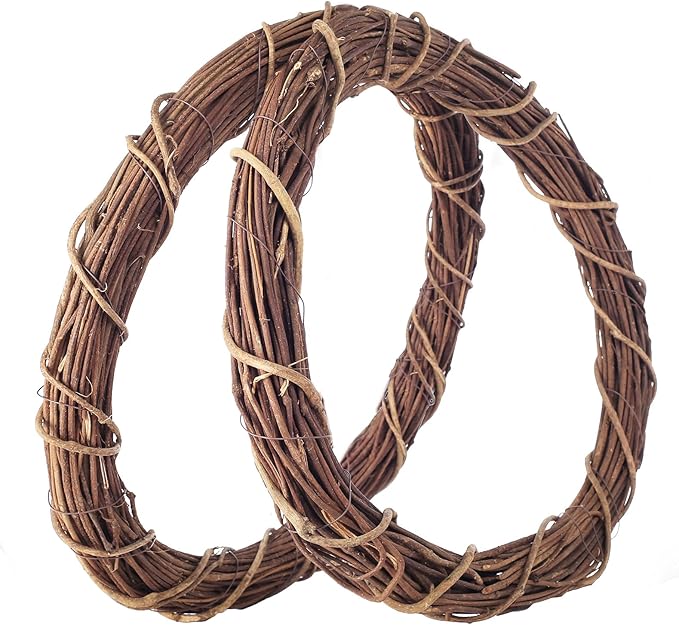
- 1 grapevine wreath form (16″–20″)
- 4–6 vintage hand tools (hammers, wrenches, pliers, saws)
- Jute twine
Step-by-step Guide
Step 1: Lay your grapevine wreath on a flat surface. Arrange your tools in a balanced, circular pattern. Place larger tools like saws or squares at angles across the middle for impact.
Step 2: Use jute twine to tie tools securely to the grapevine base. Wrap several times and knot tightly, this ensures durability while keeping the rustic look intact.
Step 3: For smaller tools, consider hot-gluing them in place if the wreath weave doesn’t hold them snugly. Test by lifting and shaking lightly.
#21. Rustic Wrench Door Handles
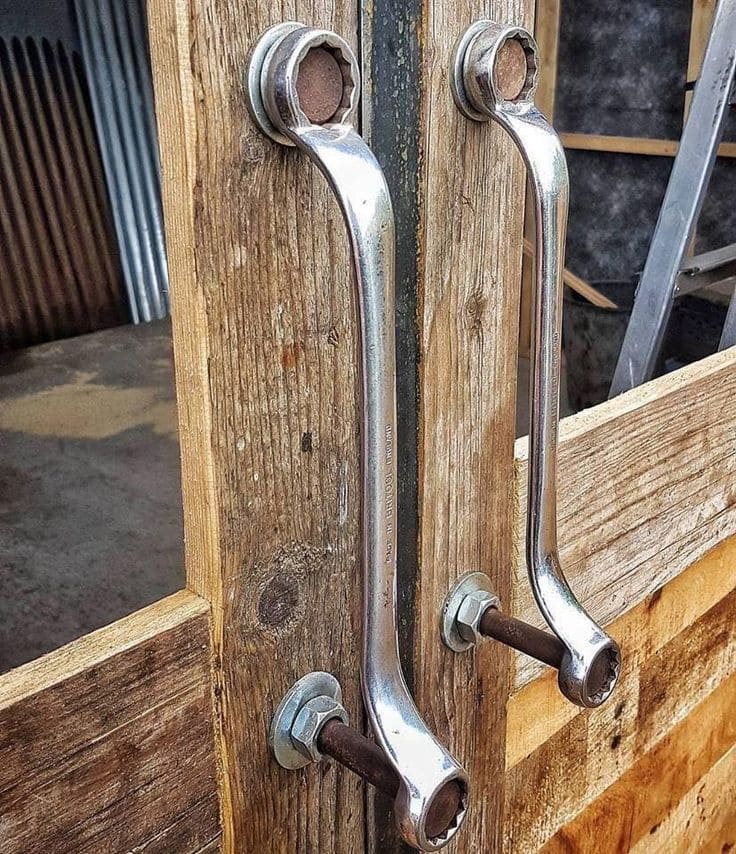
From ordinary wrenches to extraordinary handles, this DIY project adds an industrial edge to any barn, shed, or workshop door. Repurposing old tools into sturdy, metallic door pulls gives off a rugged, handcrafted charm.
Simply mount wrenches with bolts for a functional and eye-catching upgrade that blends rustic and mechanical aesthetics seamlessly.
Materials Needed
- 2 box-end wrenches (approx. 6–8” long)
- 4 lag bolts
- 4 flat washers and 4 locknuts
- Drill with metal and wood bits
- Optional: Rust-proof spray clear coat
Step-by-step Guide
Step 1: Choose two matching wrenches. Clean them thoroughly and lightly sand any rust or grease.
Step 2: Mark the mounting points on your door. Drill through holes where the wrench ends will sit.
Step 3: Insert bolts through the wrench ends, then thread them through the door from the back side. On the inside of the door, secure each bolt with a washer and a locknut.
Step 4: Tighten everything firmly. Make sure the wrenches sit evenly and do not wobble. You want a snug, ergonomic grip.
#22. Vintage Saw Sign to Welcome
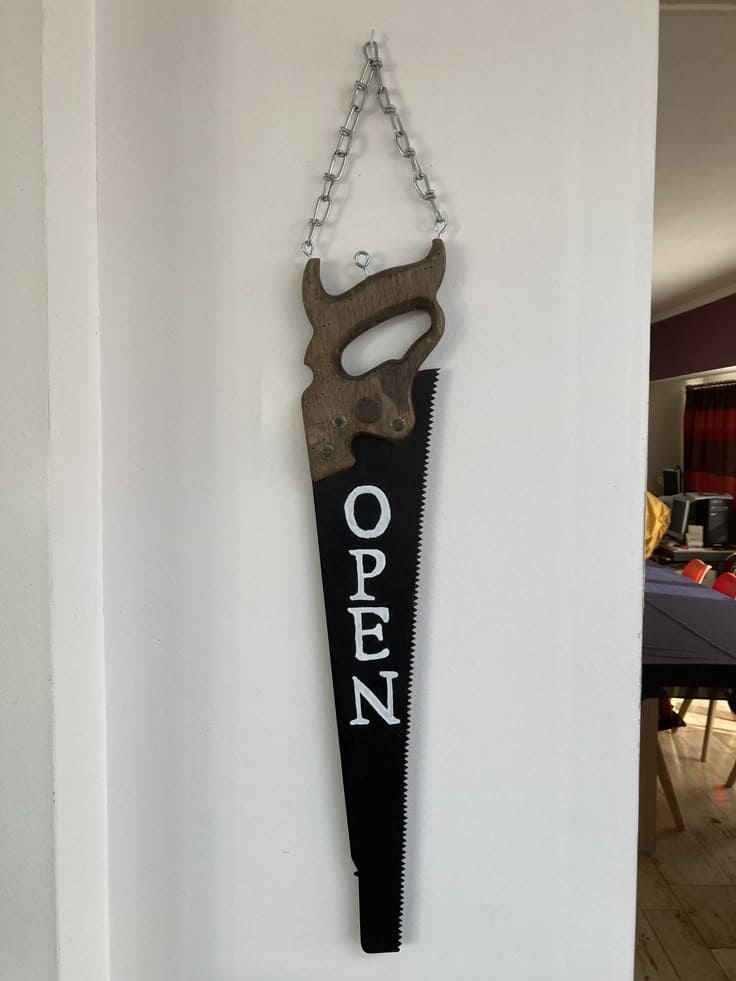
To add a rustic touch to your space, transform an old handsaw into a creative OPEN sign. Painted black with crisp white lettering, it hangs proudly with a sturdy metal chain, making it perfect for a workshop, café, or craft room.
Materials Needed
- 1 old hand saw
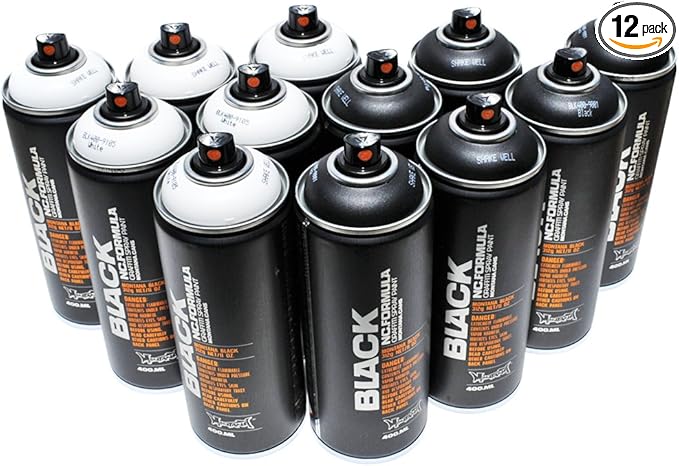
- Black spray paint
- White acrylic paint
- Medium-grit sandpaper
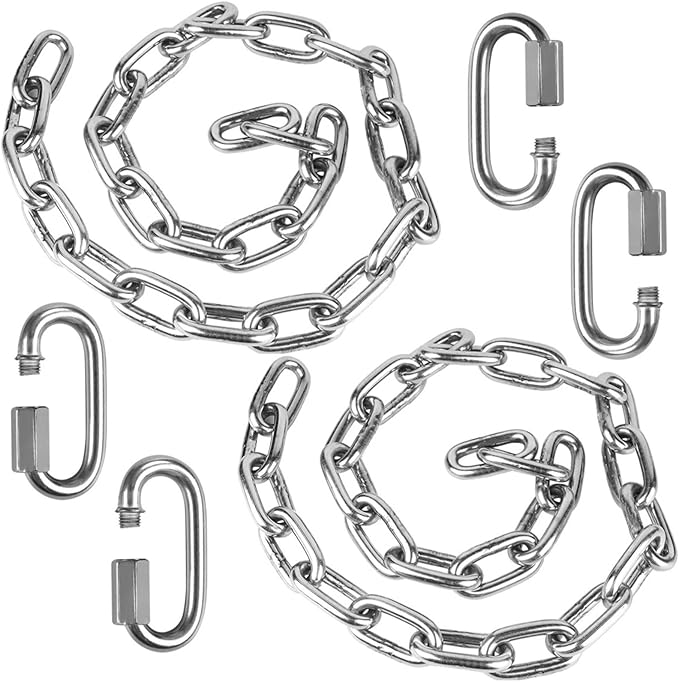
- 1–2 feet of metal chain and 2 eye hooks
Step-by-step Guide
Step 1: Lightly sand the blade to remove rust, dirt, or grease. Focus on the area where you’ll be painting the text.
Step 2: Spray paint the blade black and let it fully dry. A matte finish works best for contrast and vintage charm.
Step 3: With a stencil or freehand, write “OPEN” vertically in white. You can use acrylic paint or a white paint pen for clean lines.
Step 4: Drill a hole through the handle or insert eye hooks. Attach your chain for easy hanging.
#23. Functional and Stylish Rustic Wrench Coat Rack
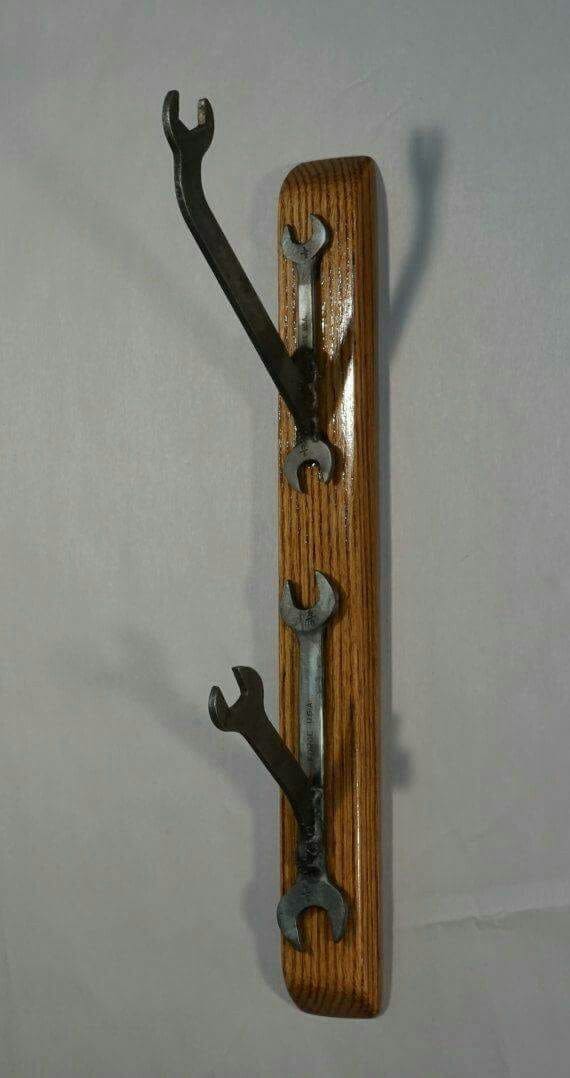
If you love unique, industrial-inspired home decor, this DIY wrench coat rack is the perfect blend of creativity and function.
Repurpose old wrenches by bending and mounting them onto a sturdy wooden base. It’s a rugged yet practical way to keep coats, hats, and tools organized while adding a bold, handcrafted touch to your space!
Materials Needed
- 4 old metal wrenches (approx. 5–7 inches)
- 1 wooden board (approx. 2.5″ x 12″)
- Strong epoxy adhesive
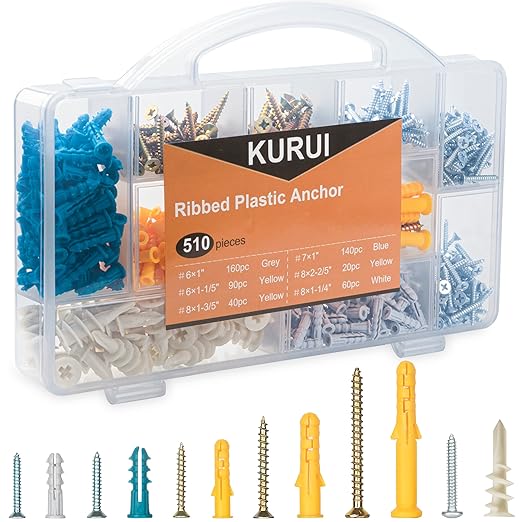
- Screws and wall anchors
- Sandpaper (optional)
Step-by-step Guide
Step 1: Sand and clean both the wood and wrenches. Make sure all surfaces are dry and smooth.
Step 2: Arrange the wrenches on the board. Angle each one upward so it can serve as a hook. Leave even spacing for practical use.
Step 3: Attach each wrench to the board using heavy-duty epoxy or weld them securely in place. Let it set according to product instructions.
Step 4: If desired, coat the wood with a stain or sealant. Let it dry fully.
#24. Industrial Wrench Handle DIY Upgrade

I believe functional design meets rugged charm in this handcrafted industrial wrench handle. Repurposing an old wrench into a sturdy, eye-catching drawer or door handle adds a bold, mechanical touch to any space.
Mounted on a hammered metal plate, this unique piece enhances durability while exuding rustic appeal.
Materials Needed
- 1 steel wrench (approx. 6–8 inches)
- 2 large hex bolts
- 1 steel or iron backing plate
- Welding tool
- Drill & screws
Step-by-step Guide
Step 1: Clean all components thoroughly with a wire brush or sandpaper. Wipe away grease, rust, or dust.
Step 2: Position the wrench horizontally. Attach one bolt to each end to serve as support legs. Weld or bond them securely.
Step 3: Attach the legs to the backing plate, centering the handle evenly. Make sure the bolts are aligned vertically for balance.
Step 4: (Optional) Texturize or patina the plate using a hammer or dark metal stain for a vintage look.
#25. Scrap Metal Dinosaur DIY Creation
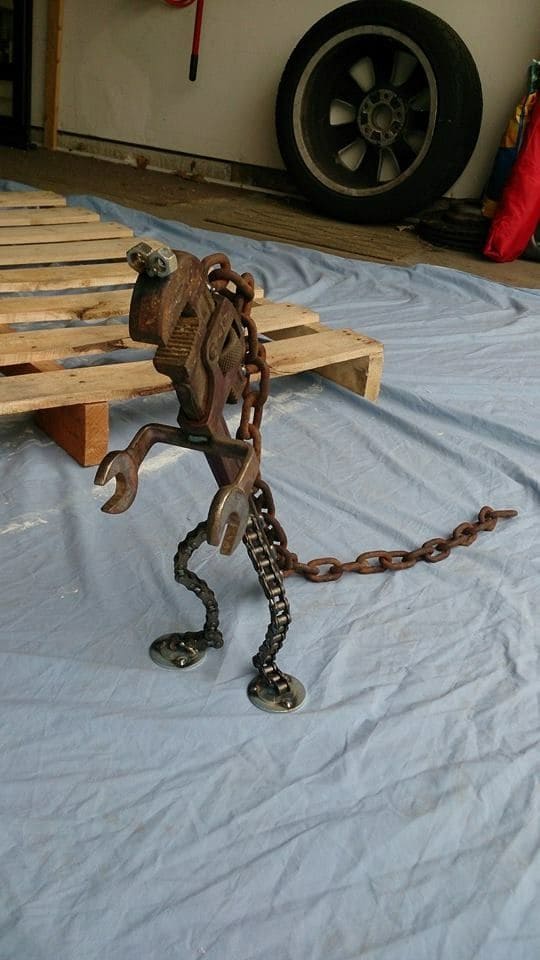
Kids and adults alike will love this bold, mechanical dinosaur sculpture made entirely from repurposed hand tools and chains! With wrench hands, chain legs, and a plier head, this scrap metal beast brings creativity and craftsmanship together.
Materials Needed
- 2 small open-end wrenches
- 1 large adjustable plier
- Nuts, bolts, and washers
- 3 feet of metal chain
- 2 large washers
- 1 short metal rod
- Welding machine
- Optional: clear coat spray
Step-by-step Guide
Step 1: Clean and sand all components. Remove rust, grease, and grime for a clean weld and polished finish.
Step 2: Weld or fasten the plier upright to form the head. Use bolts for eyes, secure into the pivot holes or glue into place.
Step 3: Attach the wrenches at angles for short, iconic T-Rex arms. Bend the thinner chains to shape legs. Weld each to a washer “foot” and attach them to the torso/spine component.
Step 5: Attach a heavy chain for the tail, balancing it with the posture to ensure stability. Then touch up with paint or sealant if desired, or leave it raw for a rustic, industrial vibe.
#26. Vintage Drill Shadow Box Display
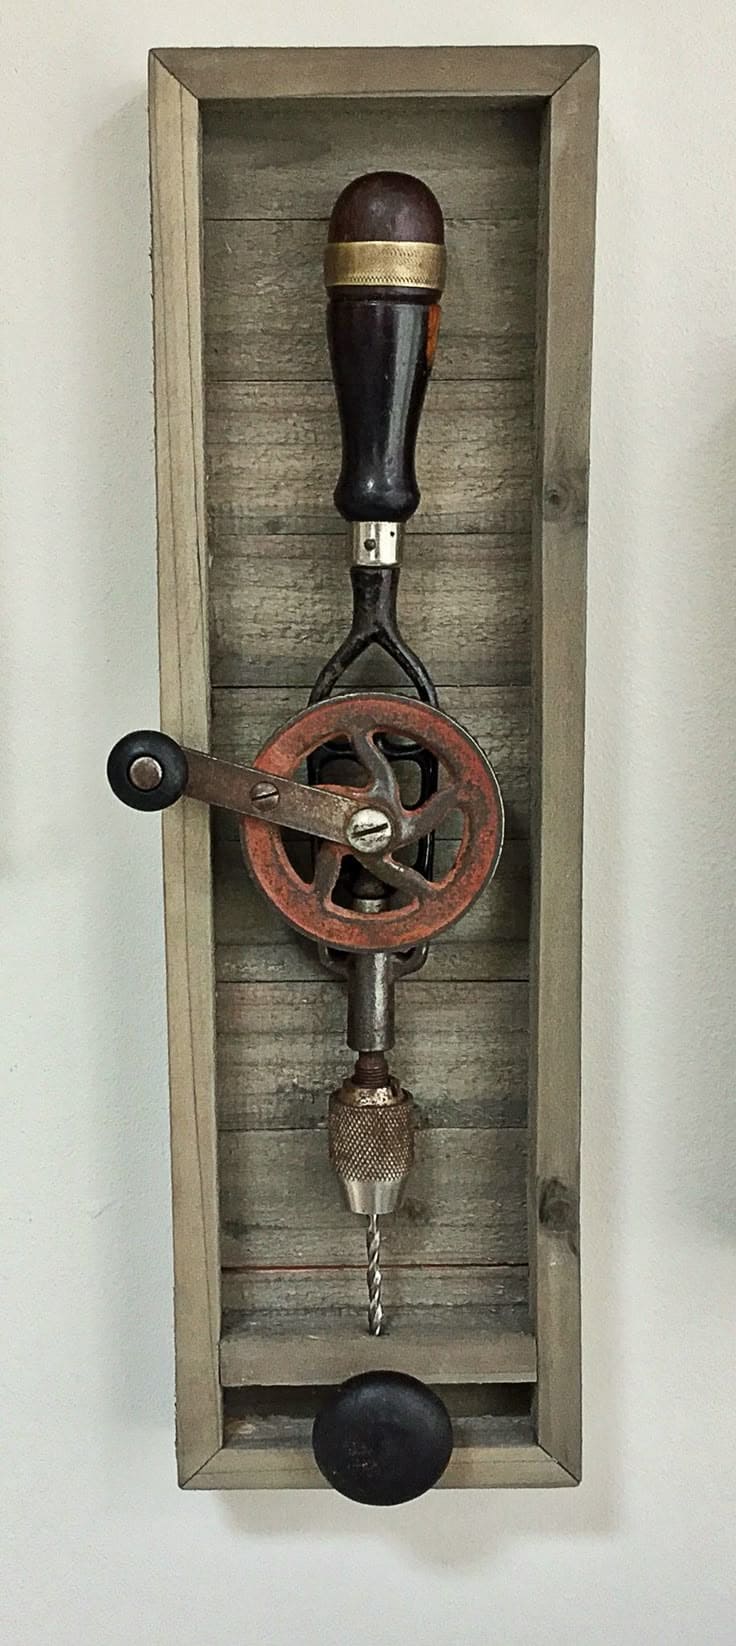
Nothing captures the essence of old-school craftsmanship like a beautifully framed antique hand drill. Mounted within a rustic wooden shadow box, this piece transforms a simple tool into an eye-catching industrial décor.
Whether placed in a workshop, study, or living space, this repurposed drill celebrates the artistry of manual work in a uniquely creative way.

Materials Needed
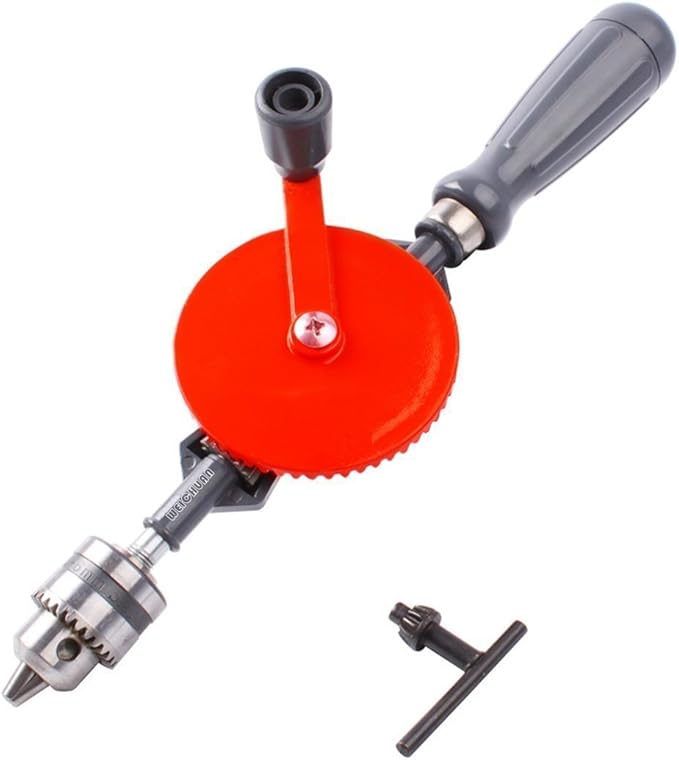
- 1 vintage hand crank drill
- 1 wooden shadow box (approx. 16″ x 6″ x 2″)
- 1 screw
- 1 small L-bracket
- Optional: clear matte sealant spray
Step-by-step Guide
Step 1: Wipe down the hand drill to remove any loose dust or cobwebs, but don’t scrub off the beautiful rust and wear—it’s part of the charm.
Step 2: Position the drill vertically inside the box and mark the contact points where it will rest securely.
Step 3: Drill a small pilot hole and screw a support (like a peg or short wood screw) into the bottom area of the frame to cradle the drill bit.
Step 4: Add a small L-bracket or strong hook near the top to anchor the handle. This ensures the drill doesn’t wobble or fall forward.
Step 5: If desired, lightly coat the entire setup with a matte clear sealant to freeze the aged look in time.