Have you ever looked at a pile of fabric scraps and wondered if they could become something truly beautiful? With just a needle, thread, and a little imagination, quilted fabric crafts can transform even the smallest remnants into stunning, heartfelt pieces.
Whether you’re a lifelong quilter or just starting to sew, these 30 fabric quilt craft ideas will inspire you to cut, stitch, and create with joy.
From cozy home decor to charming handmade gifts, each project blends color, texture, and creativity in the most delightful way. Get ready to fall in love with fabric all over again and yes, you’ll want to make every single one.
This article contains affiliate links. If you purchase through them, I may earn a small commission at no extra cost to you. Thank you for your support!
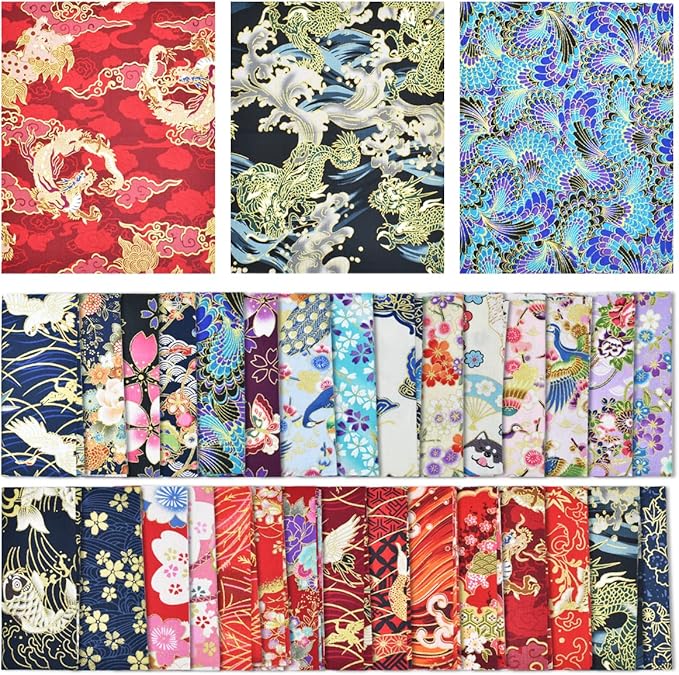
#1. Ocean Stones Fabric Mosaic Quilt
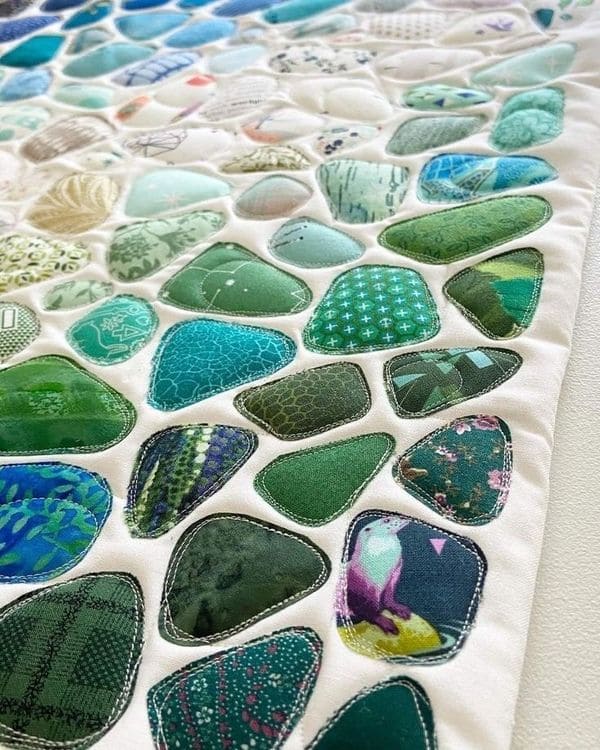
This quilt instantly reminded me of walking barefoot on a pebbled beach, smooth, scattered stones beneath the waves, every one unique. Creating it was like building a tiny shoreline on fabric.

Materials Needed
-
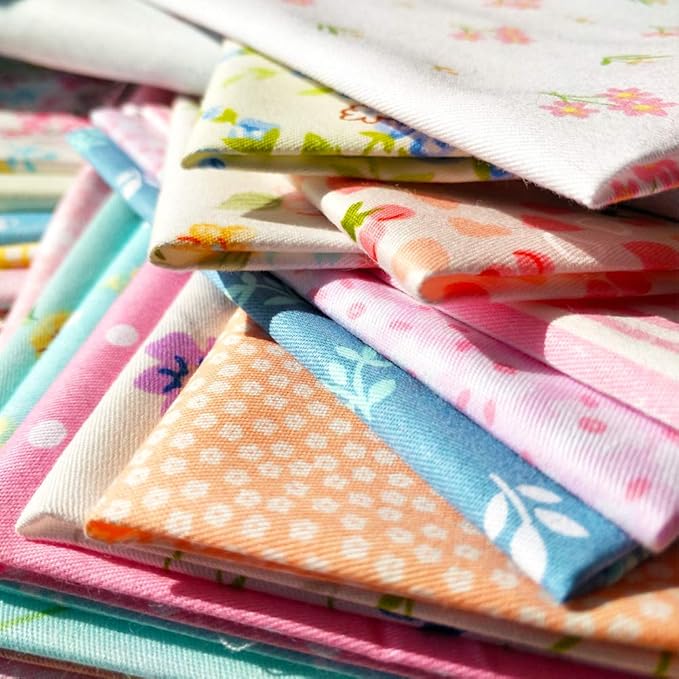
- 100 Fabric scraps in gradient blues, greens, and neutrals (3″ x 4″ each)
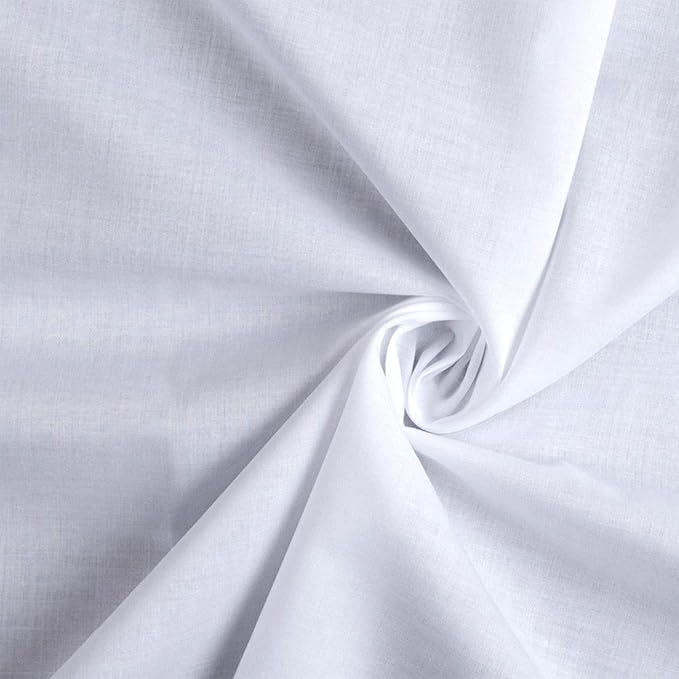
- 1 yard of white cotton fabric
- 1 yard of fusible web
- Quilting thread
- Fabric scissors
- Iron and pressing cloth
- Sewing machine
Step-by-step Guide
Step 1: Start by cutting your fabric scraps into rounded, pebble-like shapes,irregular and soft-edged is the goal. Sort them roughly from blues to greens to pale neutrals.
Step 2: Iron fusible web to the backs of all fabric pieces, then trim cleanly along the pebble shapes. Arrange them on the white fabric base in a mosaic layout, overlapping slightly or leaving tiny spaces like natural grout.
Step 3: Once satisfied with the layout, fuse them in place with a hot iron and press cloth. Then stitch around each shape for texture or a tight zigzag for a defined edge.
#2. Boho Patchwork Flare Jeans
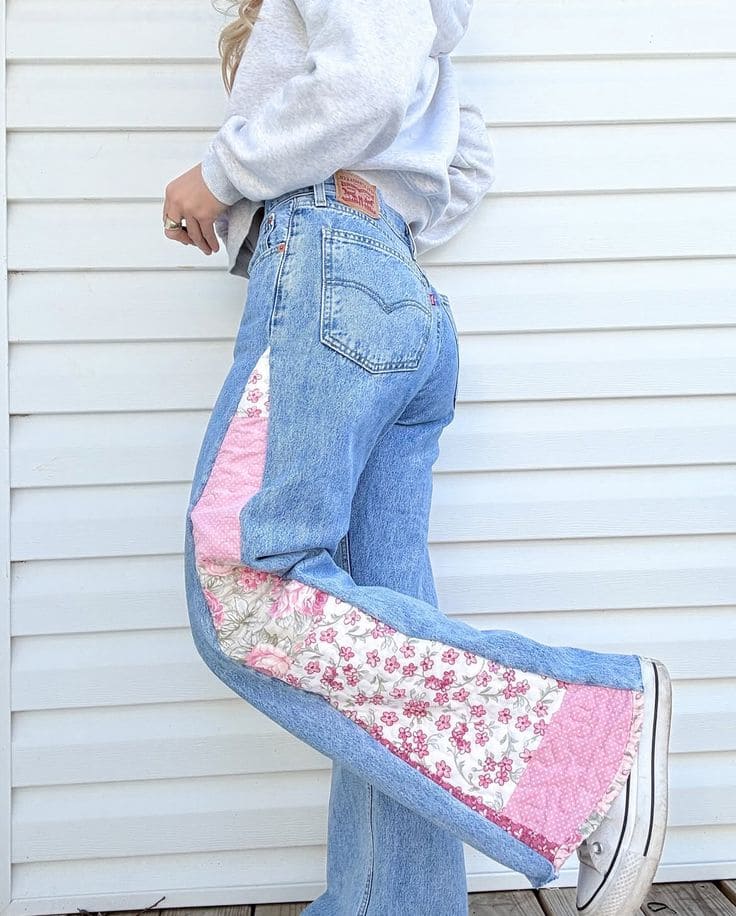
There’s something wildly satisfying about giving your favorite old jeans a new soul. I made this patchwork insert after splitting the seams on my favorite thrifted Levi’s.

Materials Needed
- 1 pair of straight jeans
- Cotton quilt scraps in assorted prints (approx. 7” wide x 24” long per leg)
- Fusible interfacing (optional)
- Coordinating thread
- Sewing machine
- Fabric scissors and pins
- Measuring tape and chalk
Step-by-step Guide
Step 1: Use scissors to cut up the side seams of your jeans, from hem to just above the knee then set jeans aside and measure the triangular space you’ve opened.
Step 2: Cut your patchwork pieces, either one large triangle per leg or sew small squares/rectangles together quilt-style.
Step 3: Pin the patchwork triangle into the open seam with the right sides facing in. Sew carefully along both sides of the insert, press the seams, and topstitch for strength and style. Repeat for the second leg and enjoy your new boho-chic vibe.
#3. Vintage Hankie Quilt Tote Bag
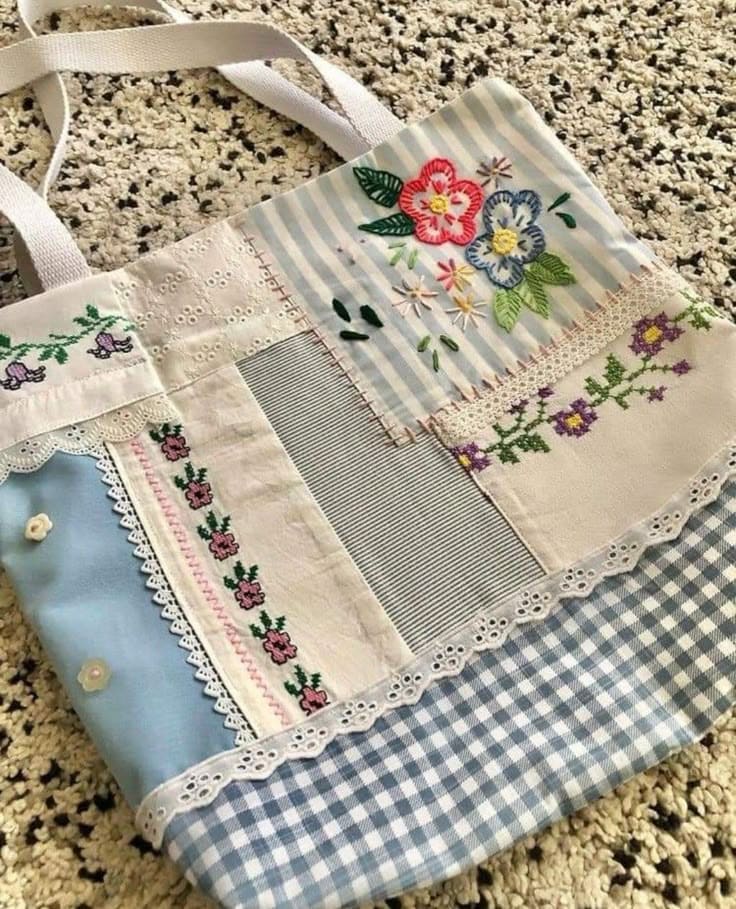
I made this one after finding a stack of vintage handkerchiefs at a thrift shop, and now it carries everything from books to blooms from the market.
Materials Needed
-
- 4 vintage handkerchiefs (8″x8″), 2 quilt scraps
- 2 backing fabric pieces (14″x16″)
- Lining fabric (14″x32″)
- 2 lightweight fusible interfacing pieces (14″x16″)
- 2 canvas straps (22″)
- Sewing machine, matching thread, iron
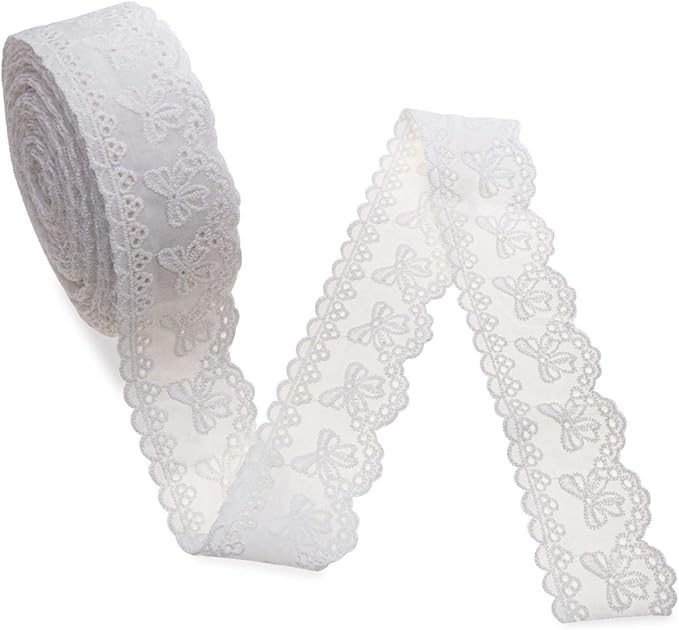
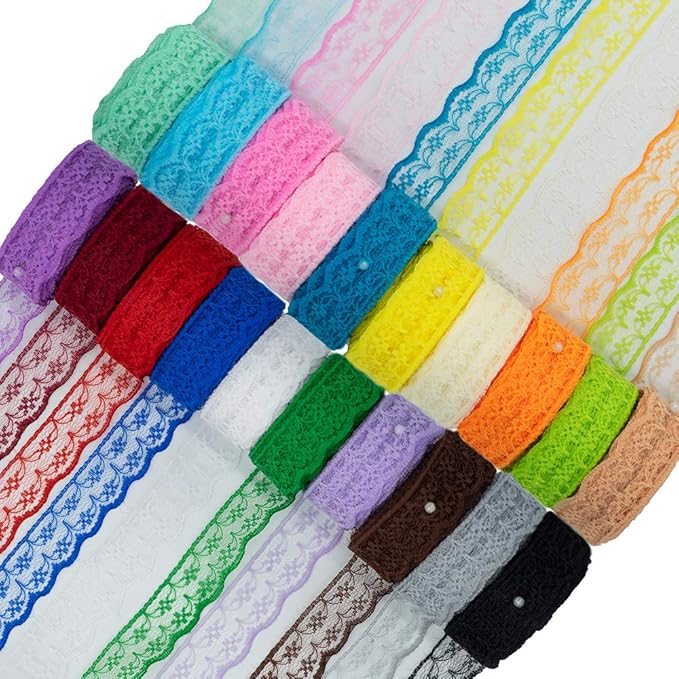
- Optional: Decorative lace trim, buttons, embroidery floss
Step-by-step Guide
Step 1: Arrange your handkerchiefs and quilt scraps into a pleasing patchwork layout to fit the front and back panels. Trim and sew pieces together with ¼” seams. Iron flat, then fuse interfacing to the back of each finished panel for strength.
Step 2: With right sides together, sew the patchwork front and back along the sides and bottom. Repeat with the lining fabric, leaving a 4″ opening at the bottom for turning.
Step 3: Turn the outer bag right side out, insert the lining and pin the top edge.
Step 4: Finally, insert the strap ends between the layers 4″ from each side seam. Sew all the way around the top.
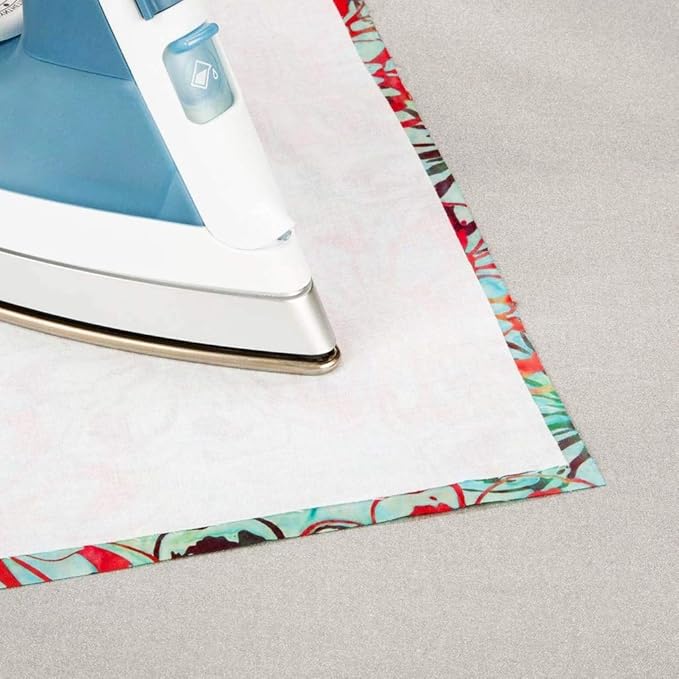
#4. Quilted Cord Wraps for Irons And Appliances

If you’ve ever wrestled with tangled iron cords or clunky appliance wires, these little quilted wraps are a game-changer.

Materials Needed
- 2 Quilting cotton fabric (each 3″ x 10″)
- Batting fleece (2.5″ x 9.5″)
- Sew-on hook and loop tape 1″ x 3″ strip per wrap
- Coordinating thread, sewing machine, scissors, ruler
Step-by-step Guide
Step 1: Sandwich the batting between your fabric layers (right sides out). Quilt diagonal lines or fun patterns through all layers for texture and structure.
Step 2: Stitch around the edges with a zigzag or bind them if preferred.
Step 3: Place the hook and loop tape on opposite ends of the wrap and sew in place securely.
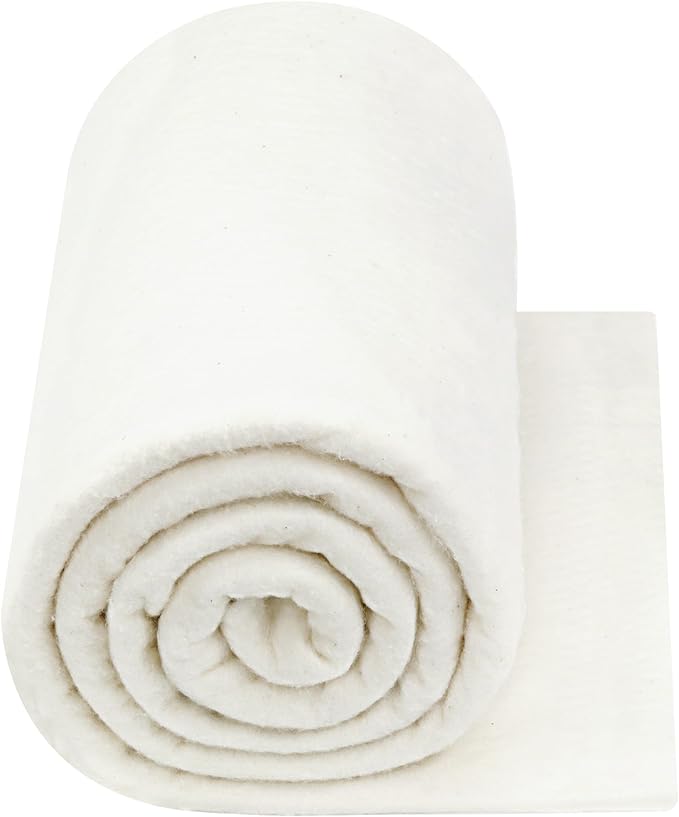
#5. Whimsical Quilted Mini Books
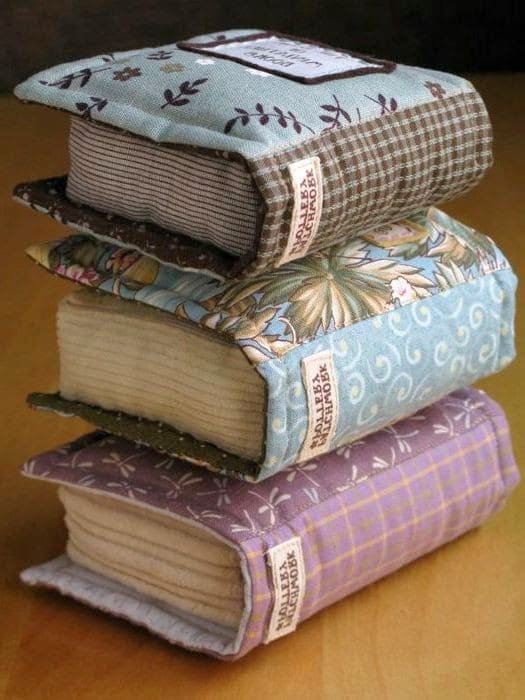
These charming fabric “books” are pure joy to sew and make the perfect decor for a cozy reading nook or bookshelf.

Materials Needed
- 3 Cotton fabric scraps (each approx. 6″ x 8″)
- 3 Quilt batting sheets (4″ x 6″ each)
- Stuffing (½ cup per book)
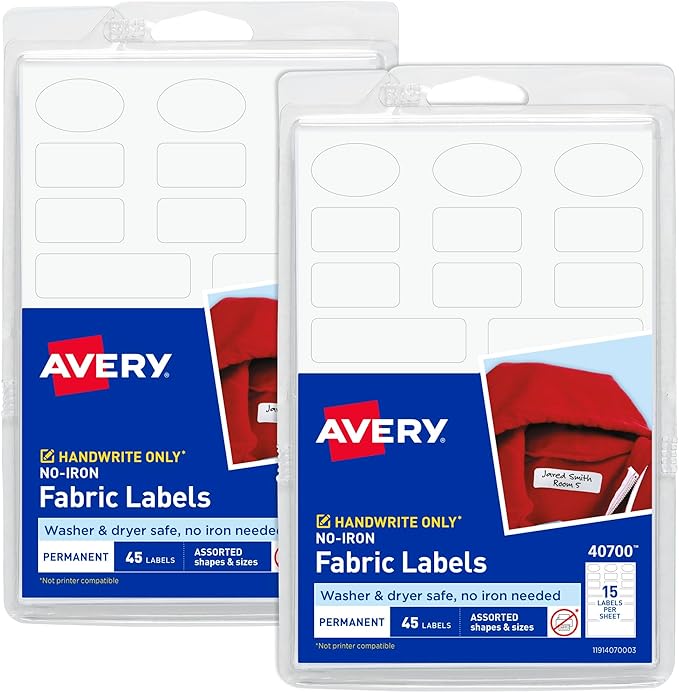
- Label fabric
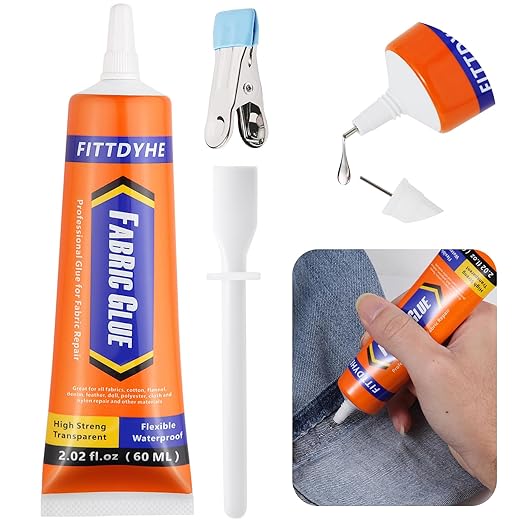
- Fabric glue
- Thread, sewing machine, hand needle, scissors, pins
Step-by-step Guide
Step 1: Cut the fabric pieces: one for the book cover (6″ x 8″), one for the spine (3″ x 6″), and one for the “pages” (5″ x 6″).
Step 2: Sew the spine fabric to the long edge of the cover piece, right sides together, then attach the “pages” fabric on the opposite side.
Step 3: Fold the sewn piece in half lengthwise and stitch the sides, leaving a small gap. Turn inside out and stuff it firmly, shaping it like a book.
Step 4: Optional: You can also sew a fabric label to the front cover to mimic a book title.
#6. Tooth Fairy Pocket Pouch
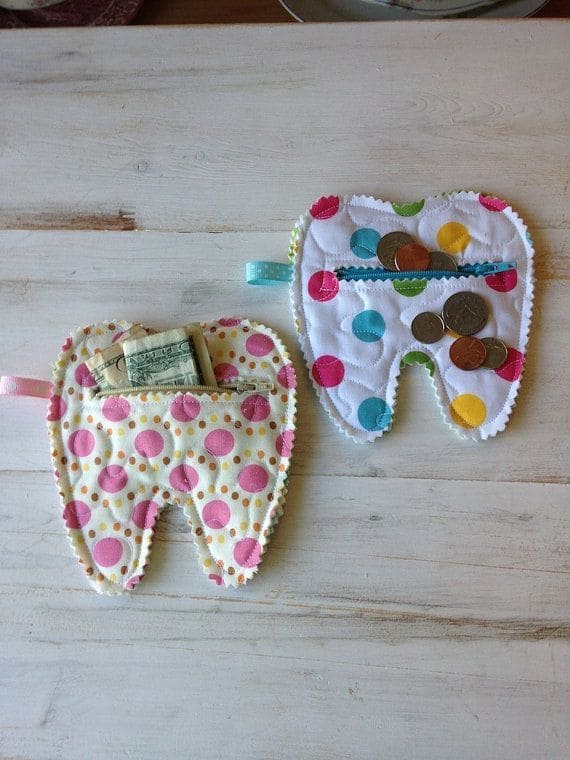
I made one of these tooth-shaped quilted pouches for my niece, and the way her eyes lit up was worth every stitch.
Materials Needed
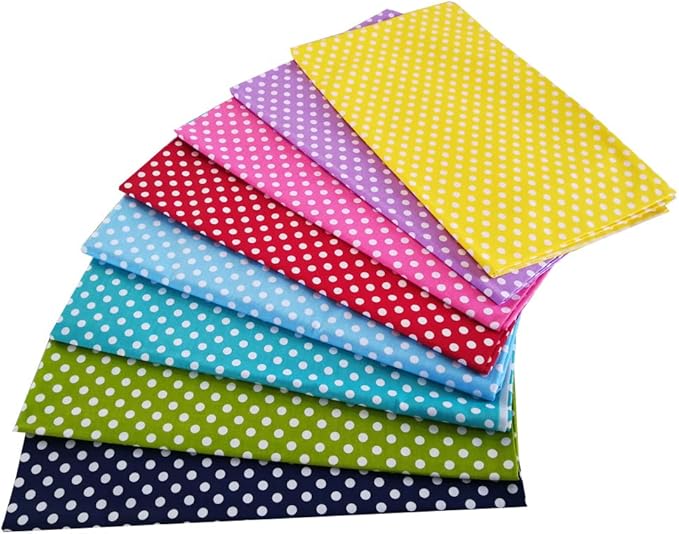
- 2 Polka dot cotton fabric (approx. 5″ x 6″)
- Fusible interfacing
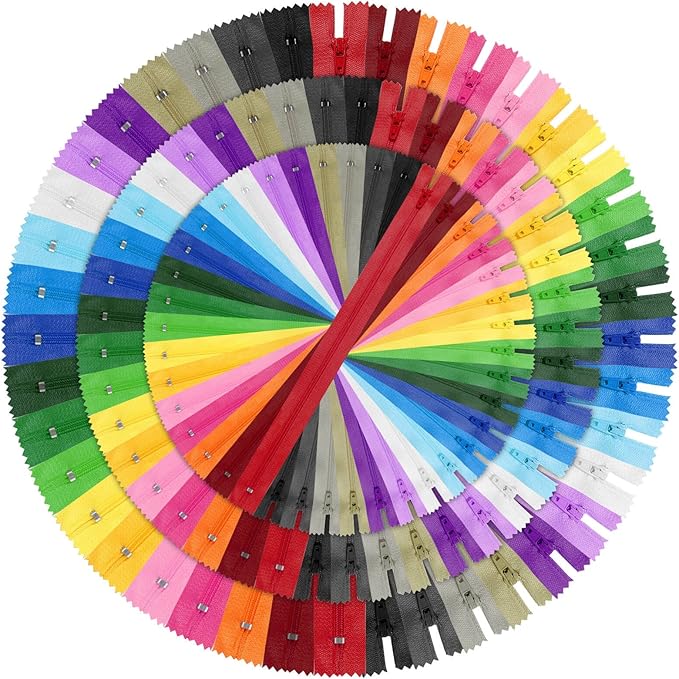
- Small zipper 4″ length
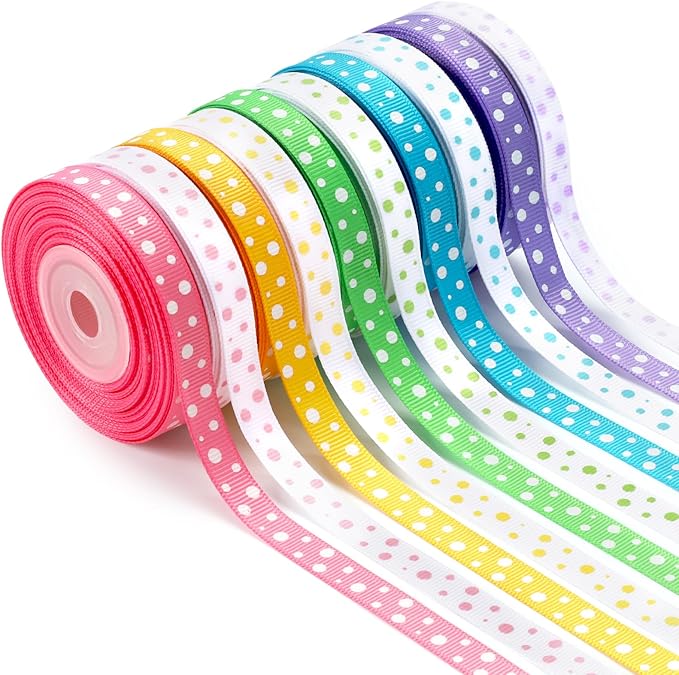
- Coordinating ribbon
- Thread, scissors, pins
Step-by-step Guide
Step 1: Use a tooth-shaped template to trace and cut out two identical pieces of fabric and one piece of interfacing. Fuse the interfacing to the back of the front fabric.
Step 2: Insert the zipper into the front piece horizontally by cutting across the center, sandwiching the zipper between the top and bottom, then topstitch for durability. Add the ribbon loop at the top corner.
Step 3: Place front and back fabric pieces right sides together, sew all around leaving a small opening, then turn inside out.
#7. Quilted Heart Coasters
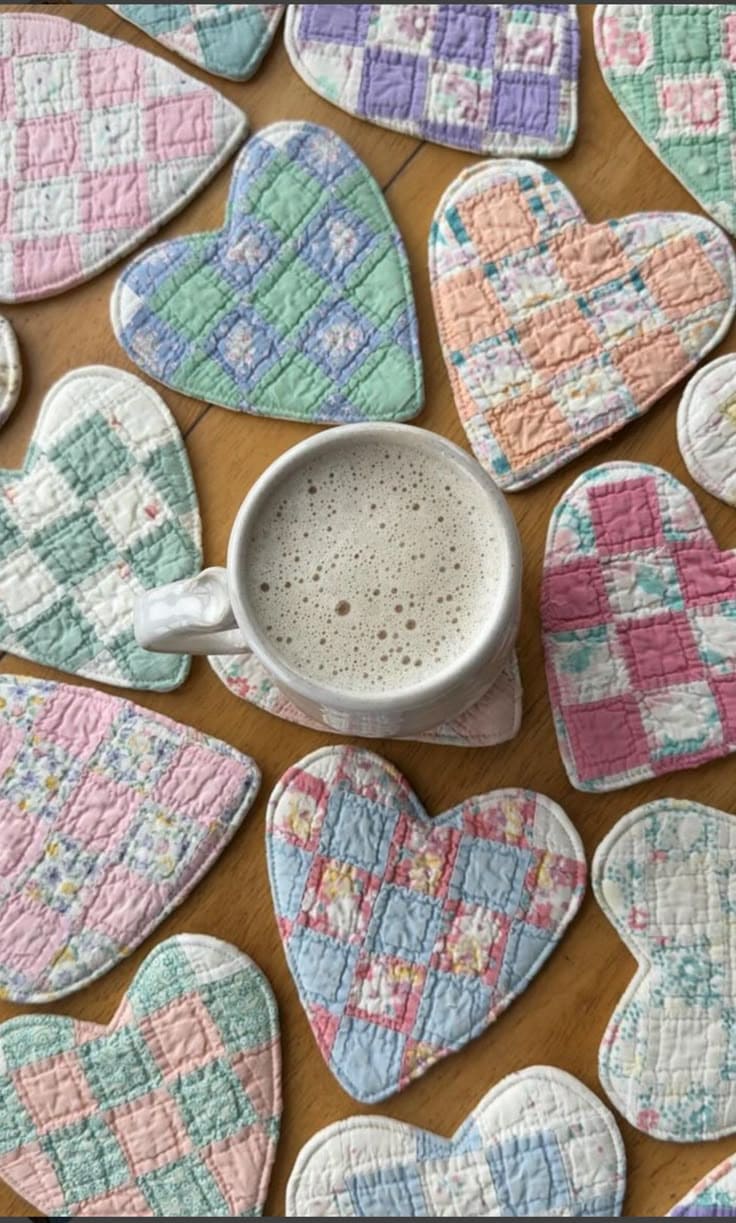
You can see something wonderfully nostalgic about sipping coffee while resting your cup on a soft, quilted heart.
Materials Needed
- 2 Vintage quilt fabric scraps (5″x5″)
- Cotton batting
- Thread to match or contrast
- Sewing machine
- Scissors
- Pins
Step-by-step Guide
Step 1: Cut two heart shapes from your fabric and one matching piece of batting. Sandwich the batting between the two fabric pieces, with right sides facing out.
Step 2: Pin in place and sew around the edges using a straight stitch or decorative stitch, leaving about 1/8″ seam allowance. Optional: add extra quilting lines across the surface for more texture.
Step 3: Trim the edges with pinking shears if desired, then press flat.
#8. Quilted Bunny Cutouts
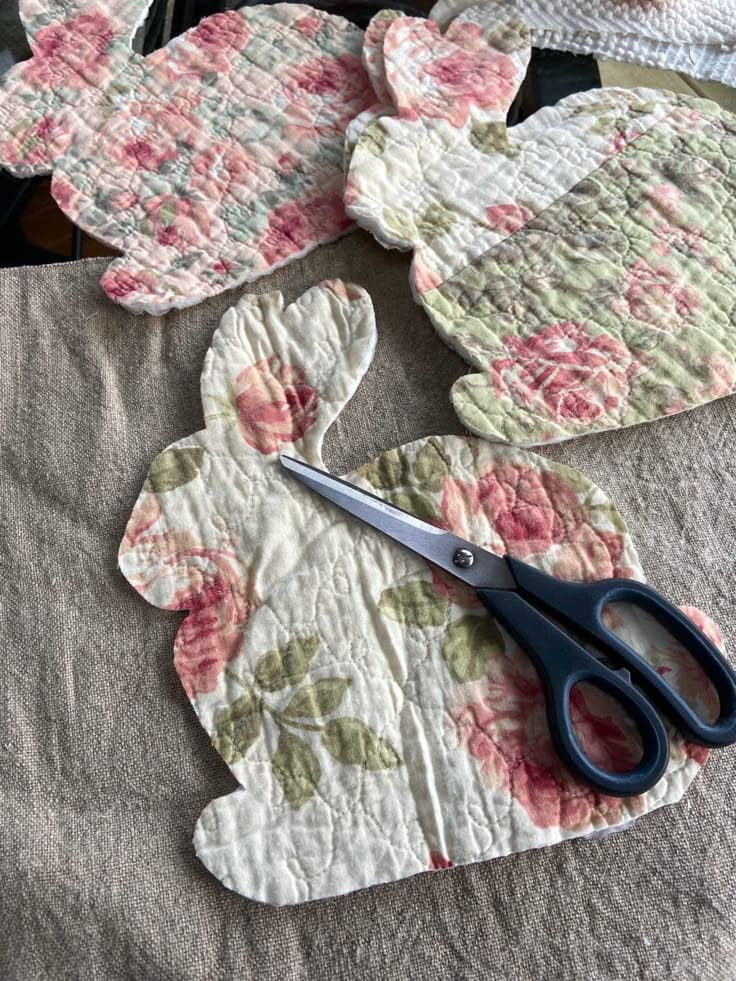
These quilted bunny shapes are a sweet, vintage-style nod to spring and Easter.
Materials Needed
- 2 Quilted floral fabric pieces (12″ x 12″)
- Sharp fabric scissors
- Lightweight interfacing
- Needle and thread
Step-by-step Guide
Step 1: Trace your bunny template onto the back of the quilted fabric and cut out as many as you’d like. Add interfacing behind if needed.
Step 2: Use a zigzag stitch (or straight stitch close to the edge) around the bunny shape to secure layers and prevent fraying.
Step 3: Add optional details like ribbon bows, pom-pom tails, or embroidery for personality.
#9. DIY Soft Fabric Butterfly Ornament
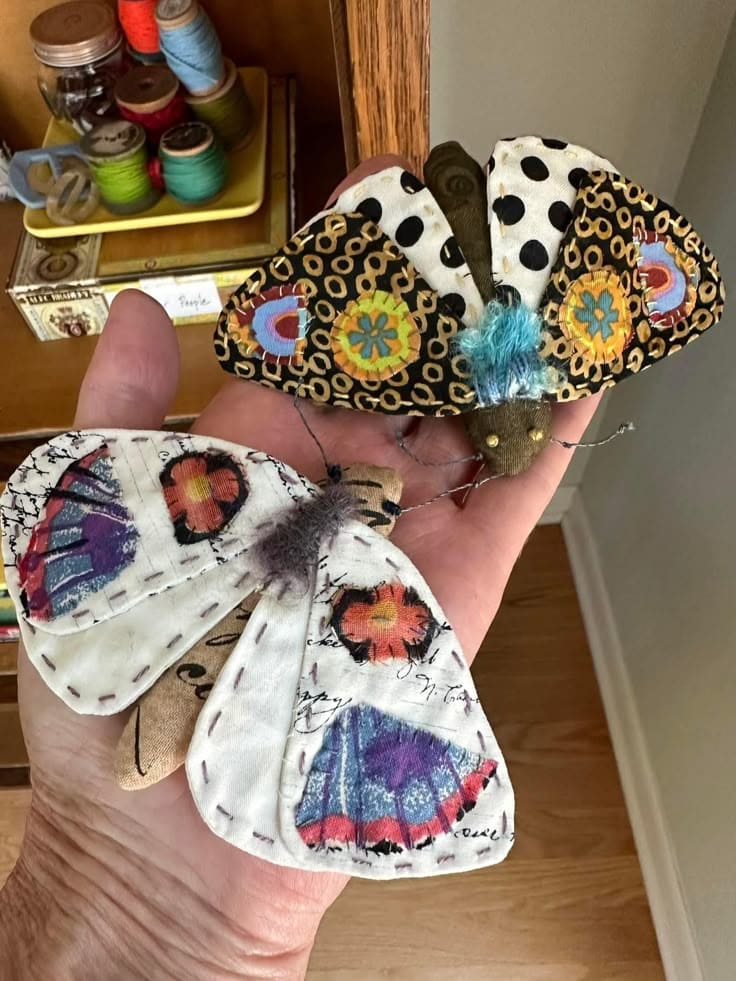
These sweet fabric butterflies are soft, lightweight, and perfect to hang from branches, gift packages, or doorknobs.
Materials Needed
- 2 Quilted fabric scraps (approx. 4″ x 6″ each)
- Printed fabric (3″ x 3″)
- Felt (2″ x 4″)
- Embroidery floss
- Stuffing
- Wire 5″
- Fabric glue
Step-by-step Guide
Step 1: Cut two symmetrical butterfly wing shapes from quilted fabric then add accent fabrics to the top wing layer using fabric glue or by hand-stitching them in place.
Step 2: Place the two wing pieces wrong sides together. Stitch around the edges with a running stitch, leaving a small gap, then lightly stuff the wings through the gap and close it with a hidden stitch.
Step 3: Cut a felt piece in a narrow oval (around 2″ long) for the body. Fold it lengthwise, stuff it gently, and whipstitch the edges closed.
Step 4: Finally, insert wire for antennae and twist the tips. Secure in place with a tiny stitch or glue.
#10. Quilted Bunny Keepsakes

The soft, cuddly quilted bunnies make perfect Easter gifts or nursery decor, while the bibs offer timeless charm with their classic star pattern.
Materials Needed
- Vintage quilt fabric or scraps (¼ yard)
- Quilt batting
- Cotton backing fabric
- Poly-fill stuffing
- Scissors, pins, thread, machine
Step-by-step Guide
Step 1: Trace the bunny onto your quilted fabric and cut two identical pieces.
Step 2: Sew around the edges (right sides together), leaving a 2″ gap. Turn inside out, stuff with poly-fill, then hand-stitch the gap closed.
#11. Patchwork Puff Seat Cushion
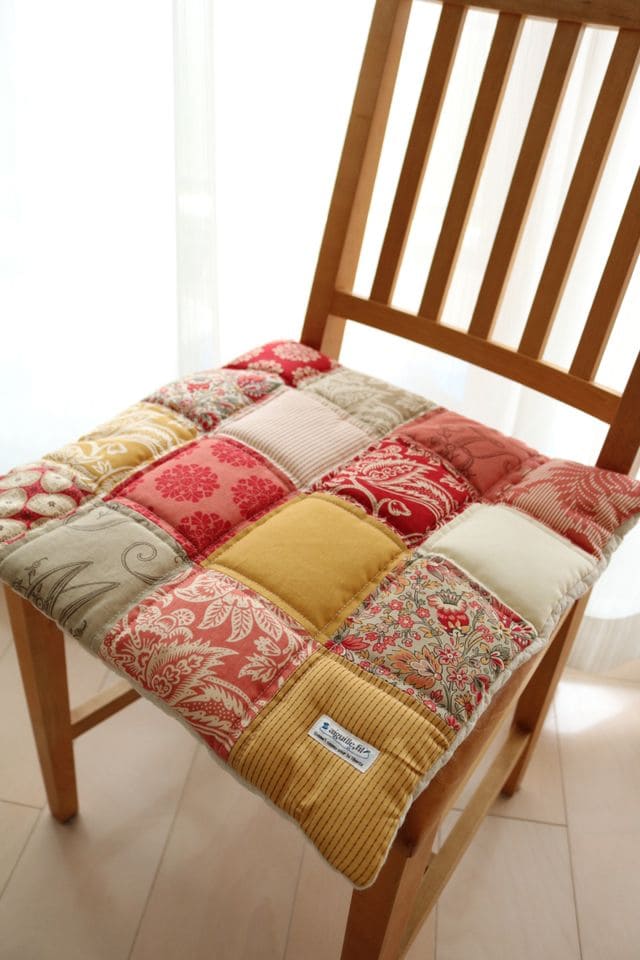
The mix of warm reds, golds, and floral prints brings a comforting, almost vintage café feel to any chair.
Materials Needed
- 16 squares of patterned cotton fabric (6″ x 6″)
- 16 squares of plain cotton (5″ x 5″)
- Polyester fiberfill stuffing (10 oz)
- 1/2 yard of cotton fabric
- Thread
- Sewing machine
- Scissors and pins
- Optional: label tags
Step-by-step Guide
Step 1: Sew each patterned 6″ square to a 5″ backing square, right sides together. As you sew, gather the top fabric slightly to create a puff shape, leaving a 2-inch gap. Turn right side out and fill with fiberfill.
Step 2: Arrange your puff squares in a 4×4 grid. Sew them together row by row, then join the rows. You’ll now have a 4×4 grid of plush squares forming the seat pad top.
Step 3: Cut a piece of backing fabric to match the size of your cushion top. Pin them right sides together, sew around the edges leaving a gap, turn right side out, then close with an invisible stitch.
#12. Quilted Happy Birthday Banner
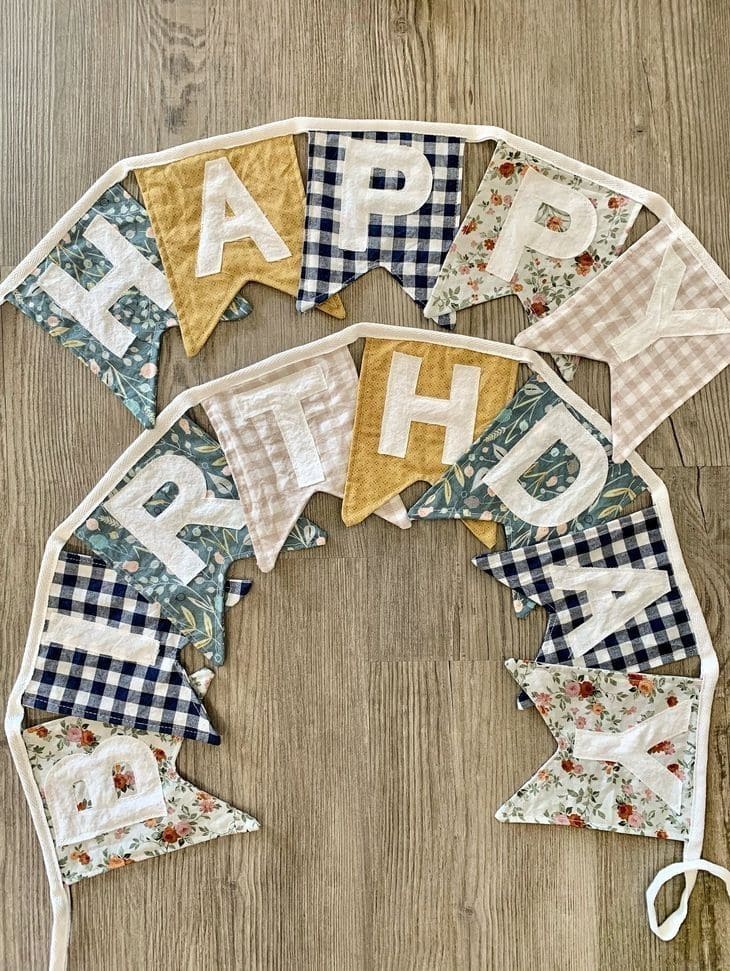
This banner is not only eco-friendly but also so much more special than a disposable banner. Each letter gets its own patchwork personality!
Materials Needed
- 13 fabric scraps in assorted prints (6″ x 8″)
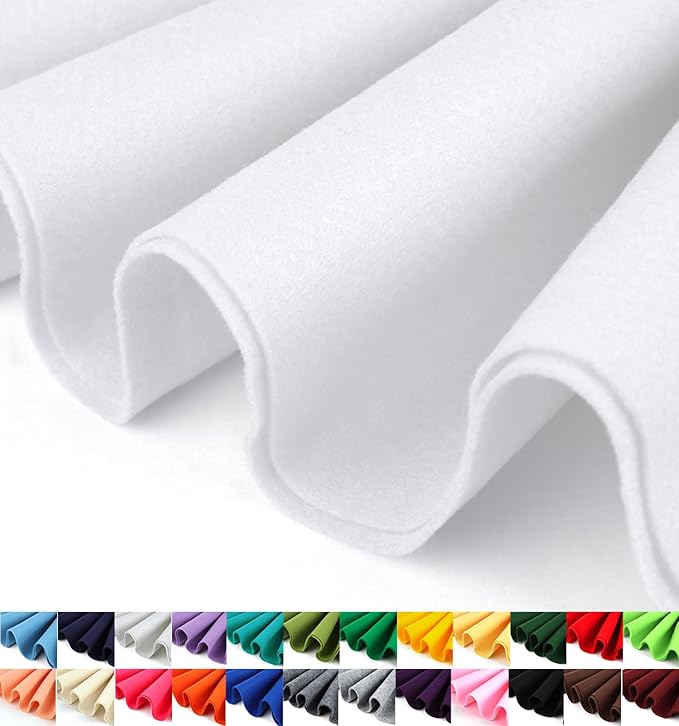
- Plain white fabric
- Quilt batting
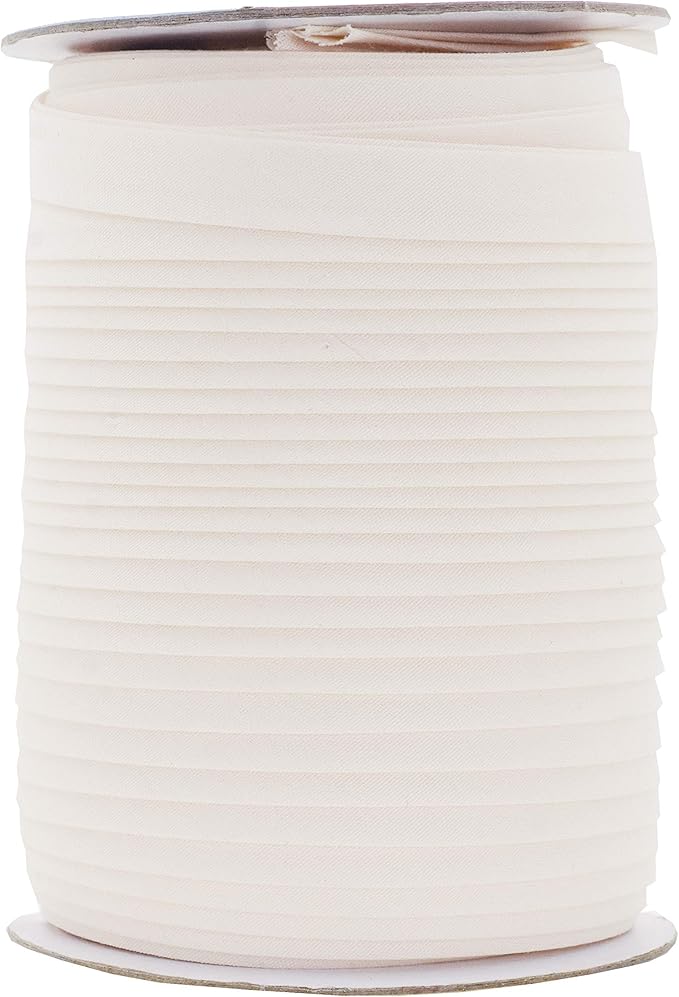
- Double-fold bias tape
- Fusible web
- Sewing machine, scissors, iron, pins, and white thread
Step-by-step Guide
Step 1: Cut 13 swallowtail banner shapes (about 6″ wide at top, 8″ long). Add quilt batting and a backing fabric for each flag, then quilt or top-stitch them for texture.
Step 2: Cut out letters from white fabric and applique each one onto a flag. Secure with a zigzag.
Step 3: Arrange the flags in order, sandwich the tops inside the folded bias tape, then stitch across the full length to secure them. Leave extra tape at each end for tying or hanging.
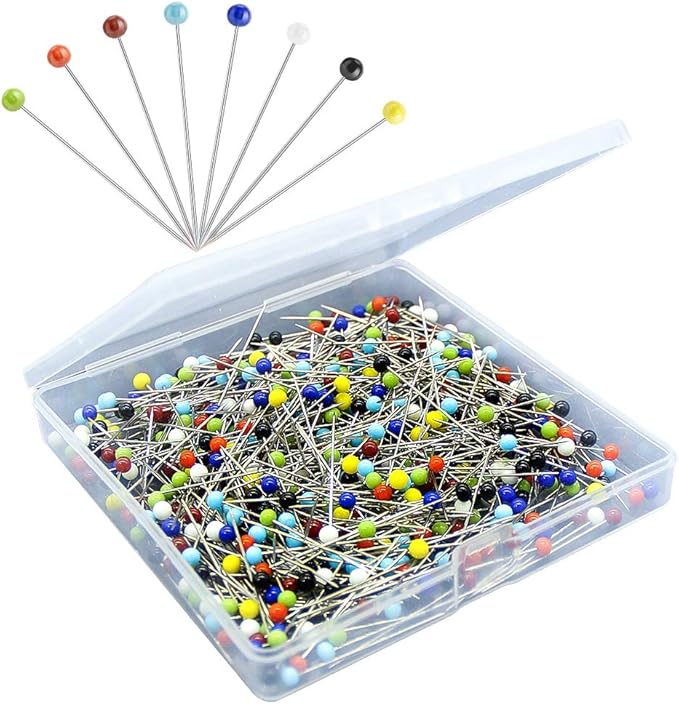
#13. Hand-Stitched Fabric Needle Book
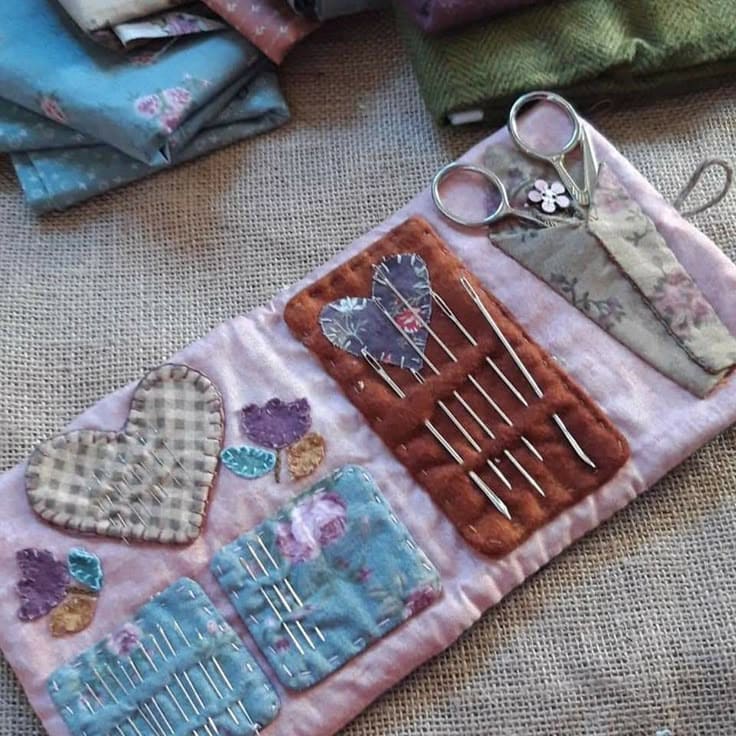
This cozy little fabric needle book is perfect for anyone who hand-sews often, everything from needles to embroidery scissors stays neat and right where I need them.
Materials Needed
- 8 Quilting cotton scraps (approx. 5″x5″ each)
- Base fabric (6″x12″)
- Batting (6″x12″)
- Embroidery floss
- Needles and fabric scissors
- Sewing pins and iron-on fusible web (optional)
- Elastic loop
- Button
Step-by-step Guide
Step 1: Cut your main base fabric and batting to 6″x12″. Quilt them together using basic stitching or hand quilting.
Step 2: Stitch down your interior fabric patches in neat rows: some for pins, others as a pocket for embroidery scissors.
Step 3: Add decorative appliqués like hearts or leaves using raw-edge or turned appliqué. Hand-stitch around them for a charming, rustic look.
#14. Charming Patchwork Bookmarks
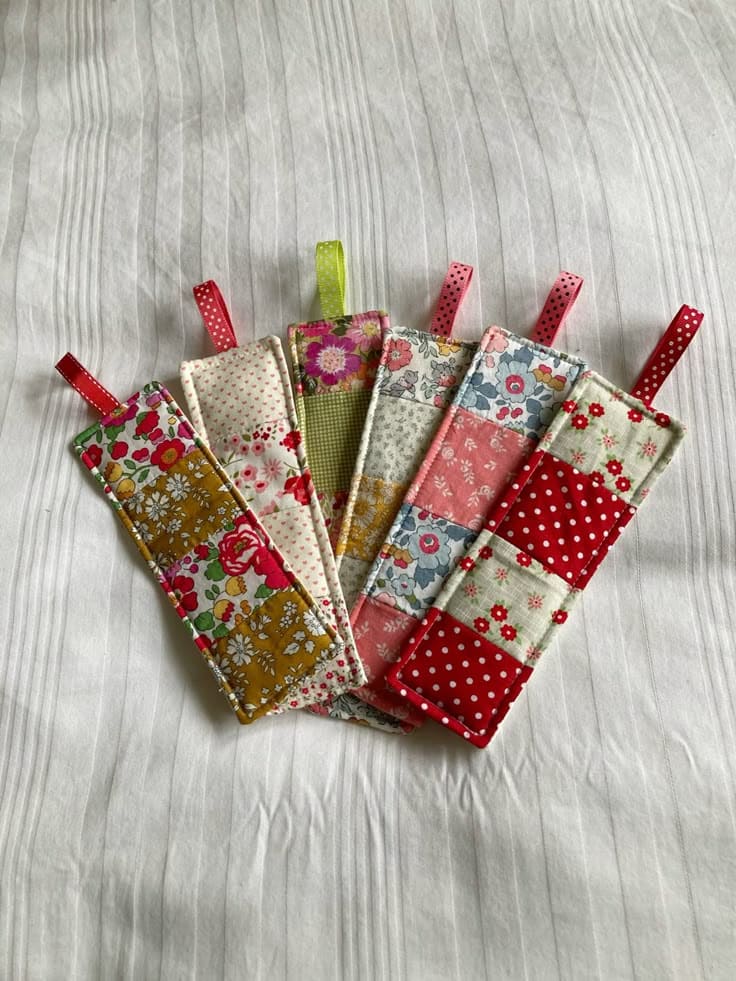
These quilted bookmarks are like holding a little hug inside your favorite book.
Materials Needed
- 2 Quilted cotton fabric rectangles (2″ x 6″)
- Batting (1.75″ x 5.75″)
- Ribbon
- Scissors, sewing machine, pins, and fabric marker
Step-by-step Guide
Step 1: Create a patchwork top by sewing 1″ wide fabric strips together. Trim to a 2″ x 6″ rectangle. Cut a matching back piece from solid or coordinating fabric.
Step 2: Sandwich the batting between the front and back fabric pieces, right sides facing out. Insert the folded ribbon loop at the top edge.
Step 3: Pin layers together and topstitch around all sides using a 1/8″ seam allowance. Make sure to reinforce the ribbon area with a backstitch.
#15. Patchwork Quilt Block Dress
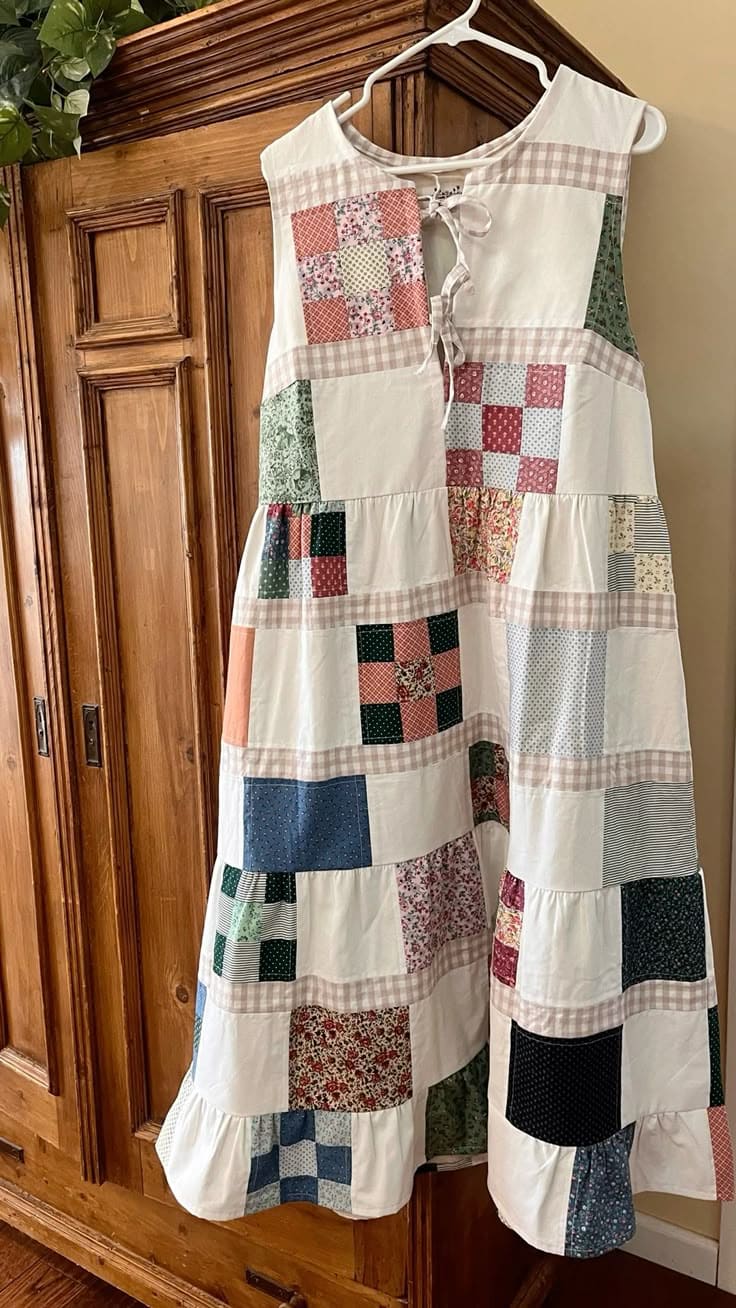
Perfect for lounging, picnicking, or adding a homemade touch to your everyday style. It’s surprisingly light, breezy, and totally beginner-friendly if you’ve got basic sewing skills.

Materials Needed
- 50 Cotton quilt blocks (6″ x 6″)
- White cotton fabric (1.5 yards)
- Light interfacing (optional)
- Bias tape
- Matching thread
- Scissors, pins, sewing machine, iron, ruler
- Simple dress pattern
Step-by-step Guide
Step 1: Lay out your quilt blocks, then piece them together in vertical strips, alternating with solid fabric if needed.
Step 2: Use your dress pattern trace the front and back bodice over your patchwork. Cut out and sew shoulder seams and side seams. Add interfacing around neckline if desired.
Step 3: Attach skirt panels using gathered strips or more patchwork rows. Hem the bottom, add neckline bias tape or sew in ties.
#16. Quilted Sleep Masks
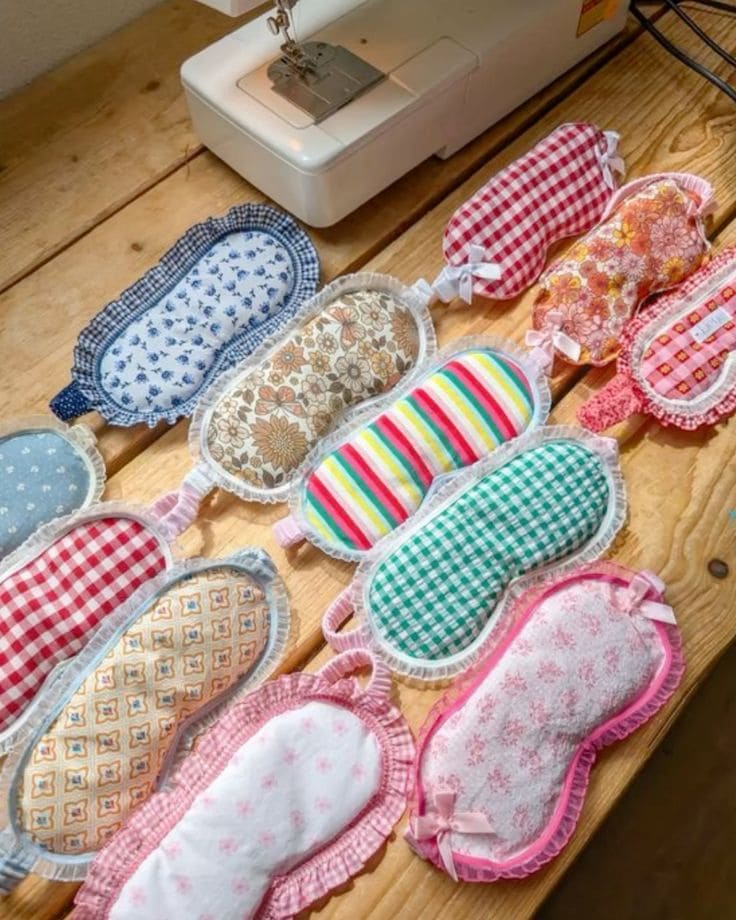
Whether for yourself or as a sweet handmade gift, they’re perfect for peaceful naps and dreamy nights and incredibly fun to customize with trims and textures.
Materials Needed
- 2 Cotton fabric scraps (8″ x 4″)
- Quilt batting
- Elastic band (12″–14″)
- Lace trim (optional)
- Thread and pins
- Sewing machine and scissors
Step-by-step Guide
Step 1: Cut two fabric pieces, then place one fabric right side up, layer the elastic ends on each side, then batting, and finally the second fabric piece right side down.
Step 2: Pin or clip around the edge, leaving a 2″ gap at the top. Sew around with a ¼” seam, reinforcing where the elastic attaches.
Step 3: Turn inside out, press, and stitch the gap closed. Add decorative trim or topstitch if desired.
#17. Quilted Star Garland

These puffy quilted stars bring back memories of handmade ornaments from my childhood with soft, rustic, and charmingly imperfect.
Materials Needed
- 2 Assorted fabric scraps (6″ x 6″)
- Thin quilt batting
- Embroidery floss
- Embroidery needle set
- Fabric scissors and pins
- Twine
Step-by-step Guide
Step 1: Use your star template to trace and cut out two fabric pieces per ornament. Cut out batting or grab a puff of stuffing to sandwich in between.
Step 2: Layer the two star pieces with the batting inside. Use blanket stitch to sew around the edges by hand, leaving a small opening to insert extra stuffing if needed. Finish closing the seam.
Step 3: Stitch a small loop of twine, ribbon, or thread to the top of each star for hanging or string several together into a garland using a long piece of twine.
#18. Fabric-Covered Stool Topper with Pom-Pom Trim
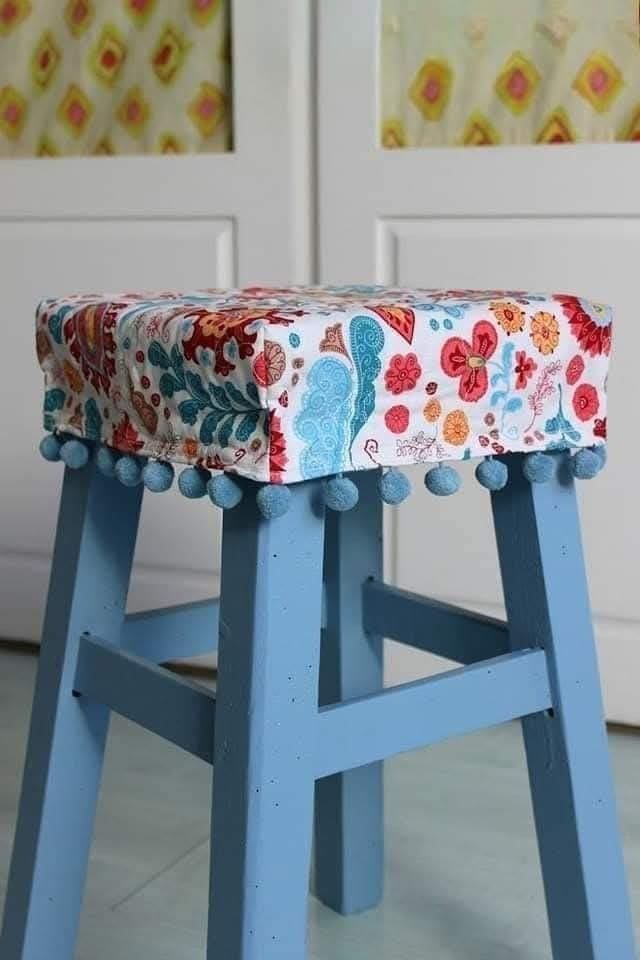
I love how this simple quilted stool cover instantly brought color and joy to my plain workshop seat.
Materials Needed
- Cotton quilting fabric (20″ x 20″)
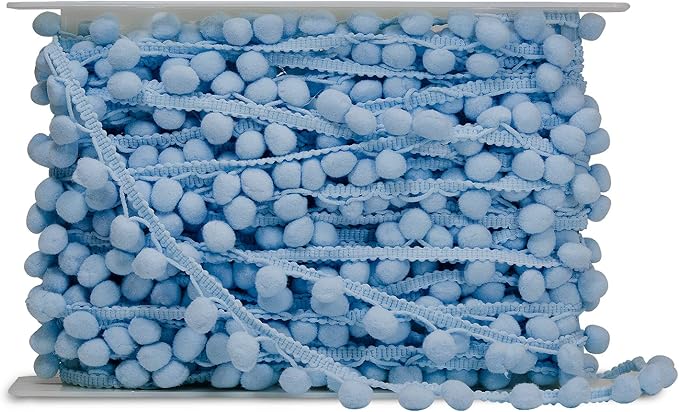
- Pom-pom trim (48″ long)
- Sew-in interfacing
- Sewing thread
- Measuring tape, pins, scissors, sewing machine
Step-by-step Guide
Step 1: Measure your stool’s top and add 2–3″ to each side for seam allowance and corner shaping. Cut your fabric to size, and optionally iron interfacing on the back for stability.
Step 2: Stitch the pom-pom trim around the fabric’s edge, aligning the balls to hang below the seam. Then sew the corners into boxed pleats to fit snugly over the stool top.
Step 3: Slip the cover over your seat and secure with a few hand stitches, elastic bands, or leave it removable to wash.
#19. Soft Patchwork Ball Pillow
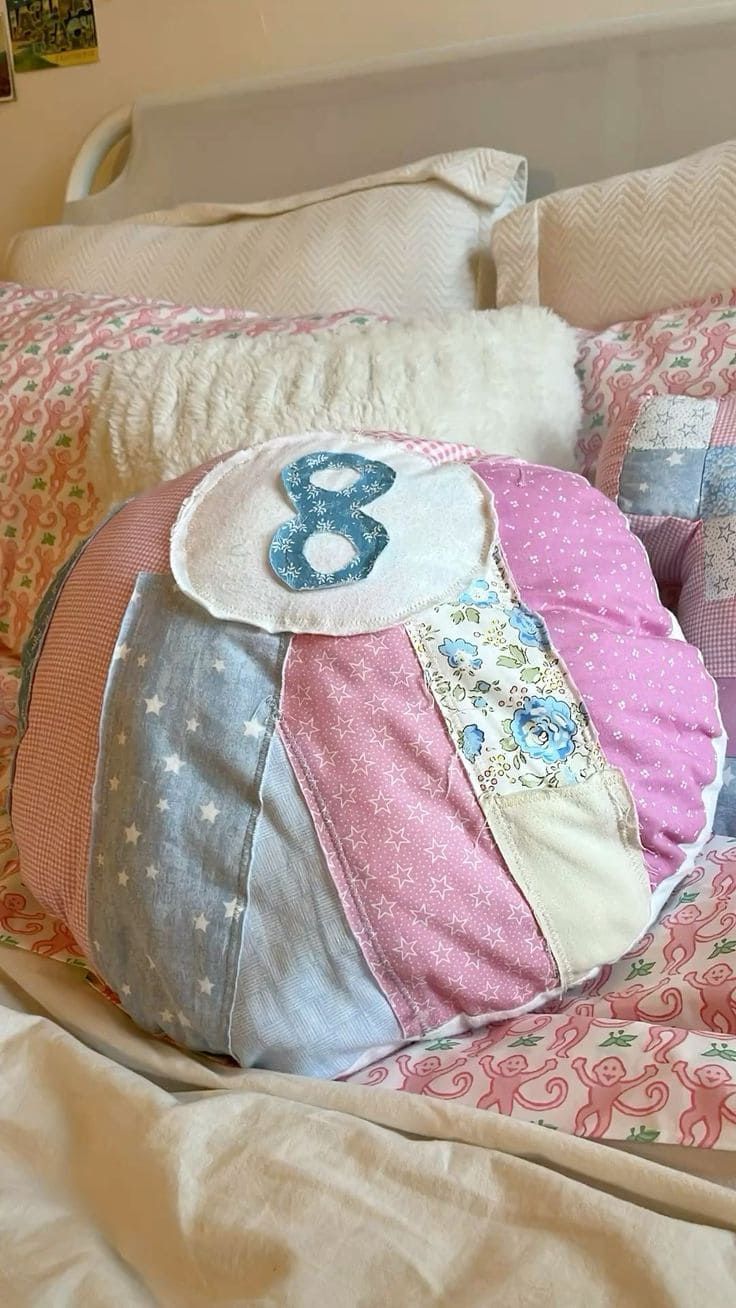
This cozy round patchwork pillow is squishy, sweet, and nostalgic, perfect for bedrooms, reading nooks, or as a playful gift.
Materials Needed
- 8 Cotton fabric scraps (5″ x 14″)
- Matching thread
- Stuffing fiberfill
- Fusible interfacing (optional)
- Felt fabric (approx. 4″ x 4″)
- Scissors, pins, sewing machine
Step-by-step Guide
Step 1: Cut 8 equal-sized panels in a curved shape and sew them together lengthwise to form a round tube. Use ¼” seam allowances and press open as you go.
Step 2: Trace and cut two circles for the top and bottom ends of the ball, pin them right sides together with the tube, and sew around, leaving a small gap for stuffing.
Step 3: Turn the pillow right side out, fill it tightly with polyfill, and hand-sew the opening closed.
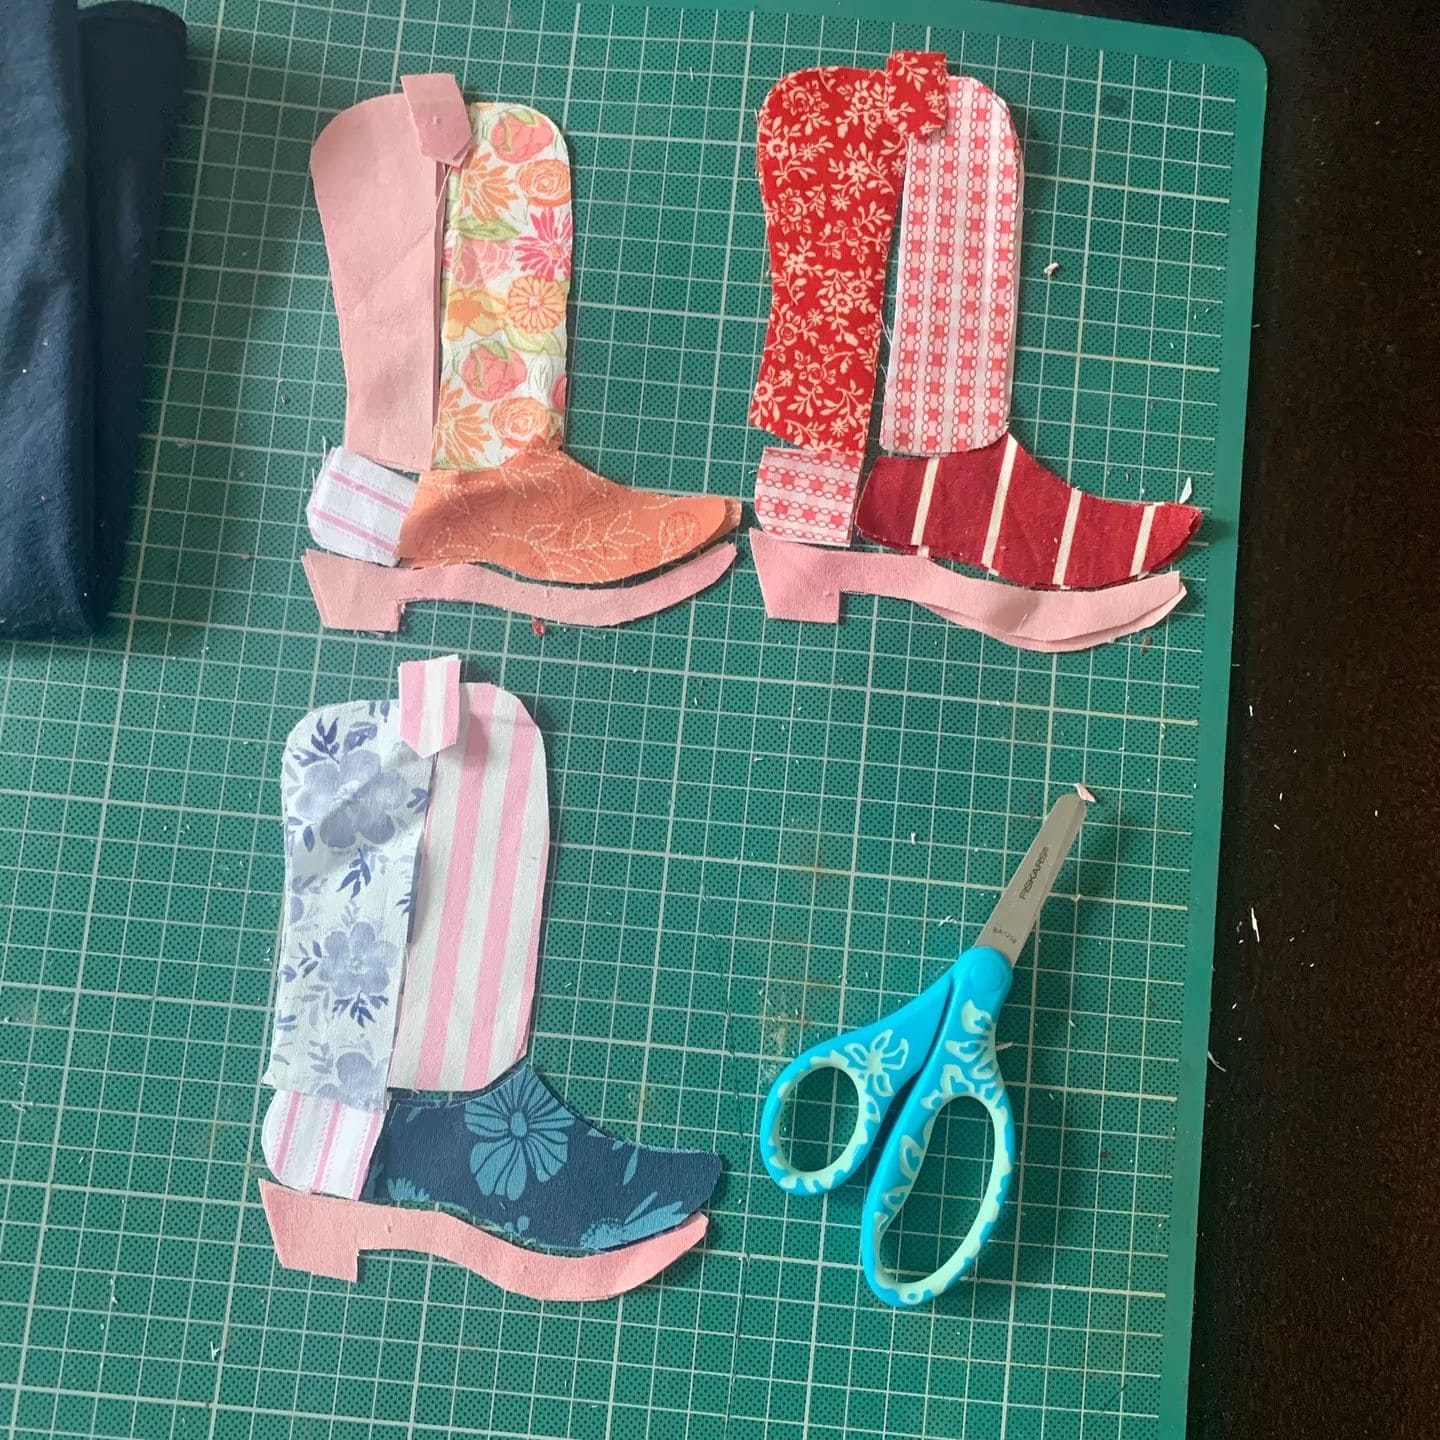
#20. Patchwork Boot and Cowboy Ornament
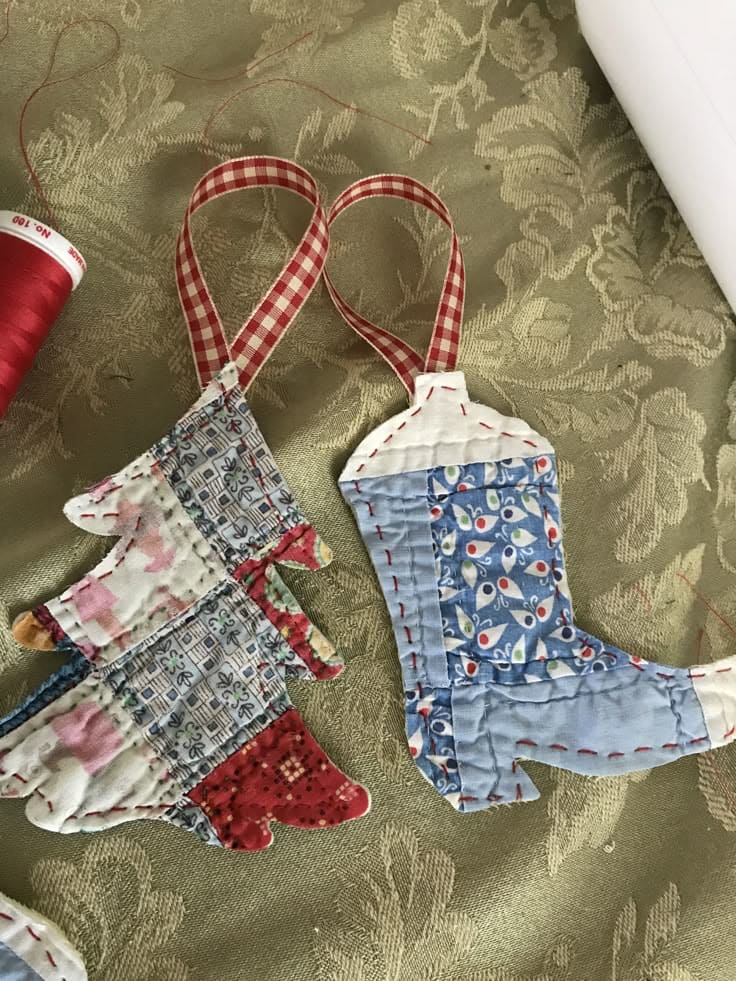
Whether it’s the cowboy boot or the patchy horse, they bring rustic, prairie-inspired joy to holiday trees, gift toppers, or wall garlands.
Materials Needed
- 4 Scrap cotton fabrics
- Quilt batting
- Gingham 5–6″
- Embroidery floss
- Needle, pins, scissors
Step-by-step Guide
Step 1: Trace a boot and horse shape onto cardboard or parchment. Keep them about 4–5″ tall, then prepare two mirrored fabric pieces per ornament, plus batting.
Step 2: Layer and stitch. Place one fabric wrong side up, add batting, and top with the second fabric (right side up). Hand-stitch around the edge with embroidery floss using a visible running stitch.
Step 3: Attach the loop. Fold ribbon into a loop and stitch it securely into the top corner of the boot or horse.
#21. Quilted Pie Pot Holder
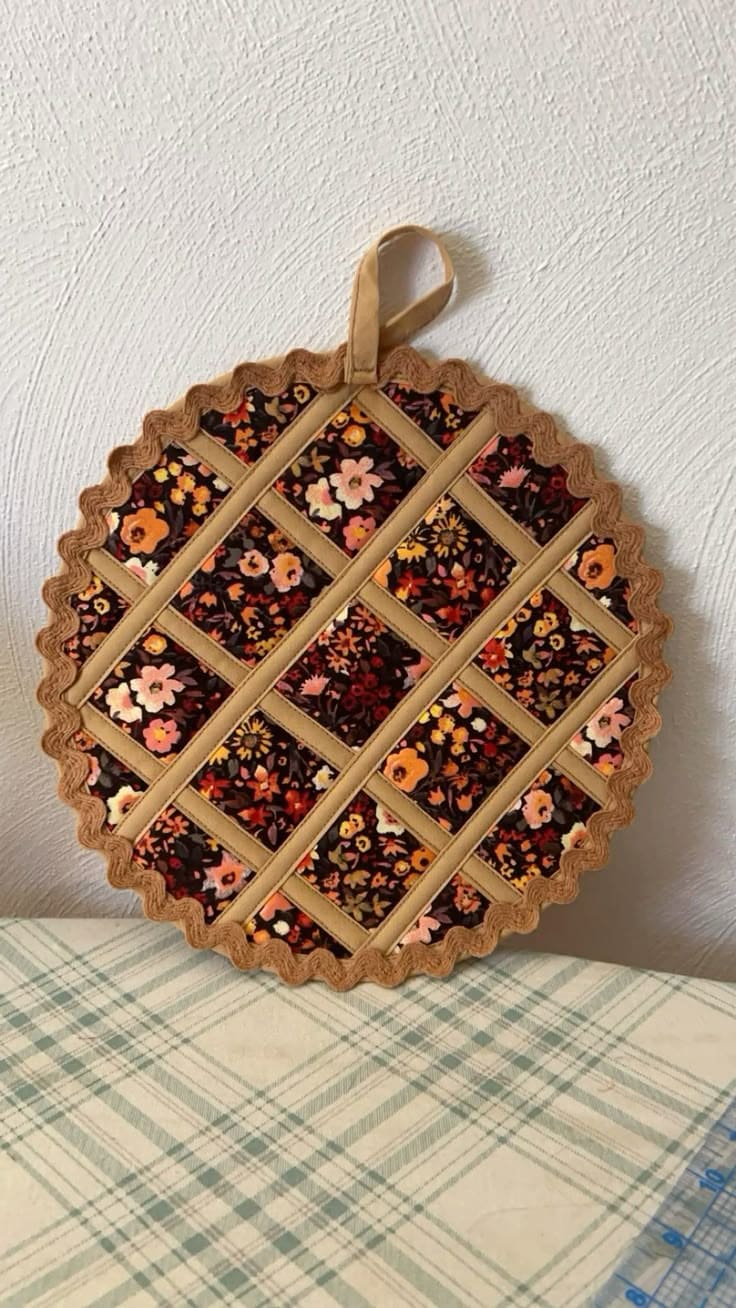
With floral filling, crisscrossed crust strips, and a scalloped ric-rac edge, this holder brings vintage charm and whimsy to any kitchen.
Materials Needed
- 2 circle quilted fabrics (8″ diameter)
- Scrap floral fabric (8″ square)
- Bias tape
- Ric-rac trim (about 28″)
- Heat-resistant batting (optional)
- Thread and sewing supplies
- Loop (about 5″)
Step-by-step Guide
Step 1: Cut two circles (8″) – one quilted backing, one floral fabric for the filling. Place the floral circle on batting or interfacing if needed.
Step 1: Lay out the six crust strips on top of the floral circle, three vertically and three horizontally. Pin and topstitch each one down.
Step 1: Baste ric-rac trim along the edges of the top piece. Place the backing circle right side down, pin, and stitch all the way around, leaving a 2″ gap.
Step 1: Turn inside out, press, and close the gap with a hidden stitch. Add the loop to the top with a secure hand stitch or tuck it into the seam before stitching.
#22. Patchwork Memory Angels
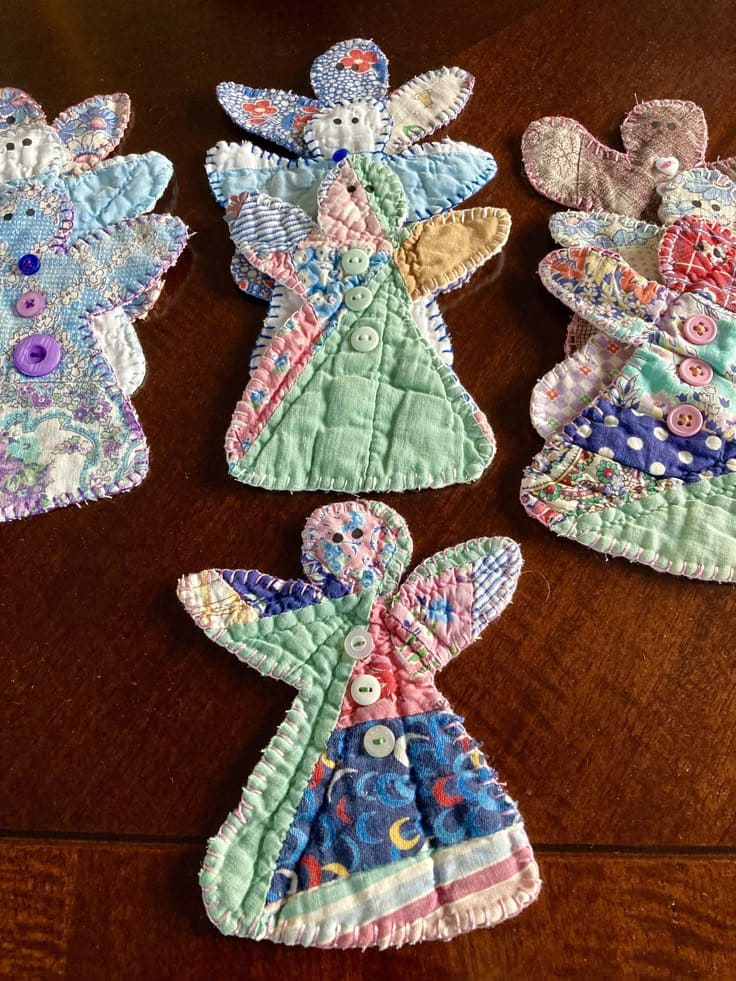
Whether you hang them at Christmas, gift them as keepsakes, or use them as gentle reminders of loved ones, they carry warmth and spirit.
Materials Needed
- Assorted vintage quilt fabric pieces (5″ x 5″)
- Backing fabric (6″ x 6″)
- Lightweight batting
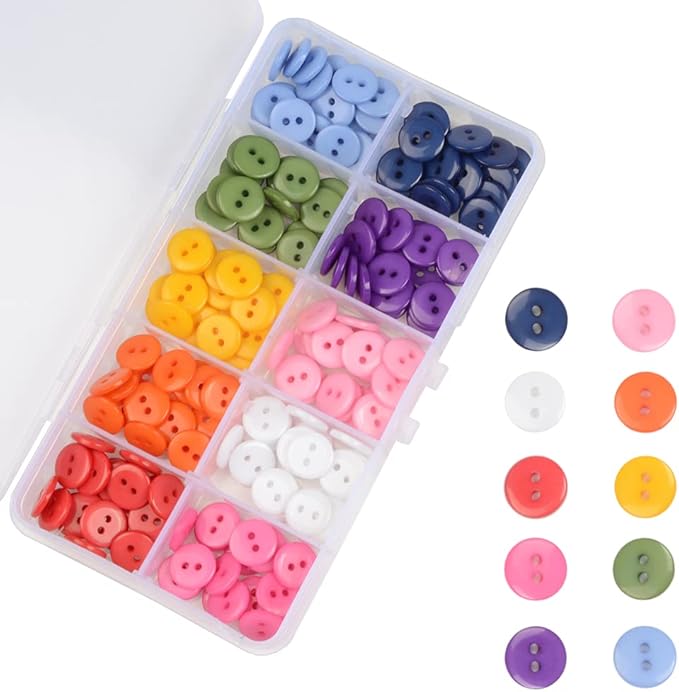
- 3 Buttons
- Embroidery floss
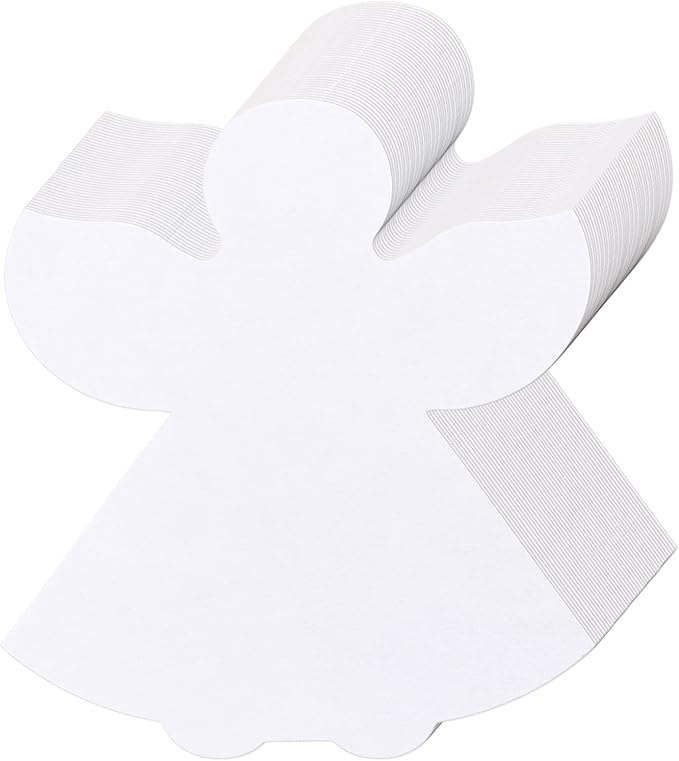
- Angel template
- Scissors, pins, needle, sewing machine (optional)
Step-by-step Guide
Step 1: Print or draw your angel pattern. Cut two angel shapes – one from patchwork or quilted fabric, one from backing fabric. Cut a third shape from batting.
Step 2: Stack pieces with backing face-down, batting in the middle, and patchwork on top. Pin together and hand stitch or machine stitch around the edges using a blanket stitch or zigzag.
Step 3: Add buttons to the front for decoration. Embroider facial features or a heart if desired.
#23. Front Door Quilted Bow
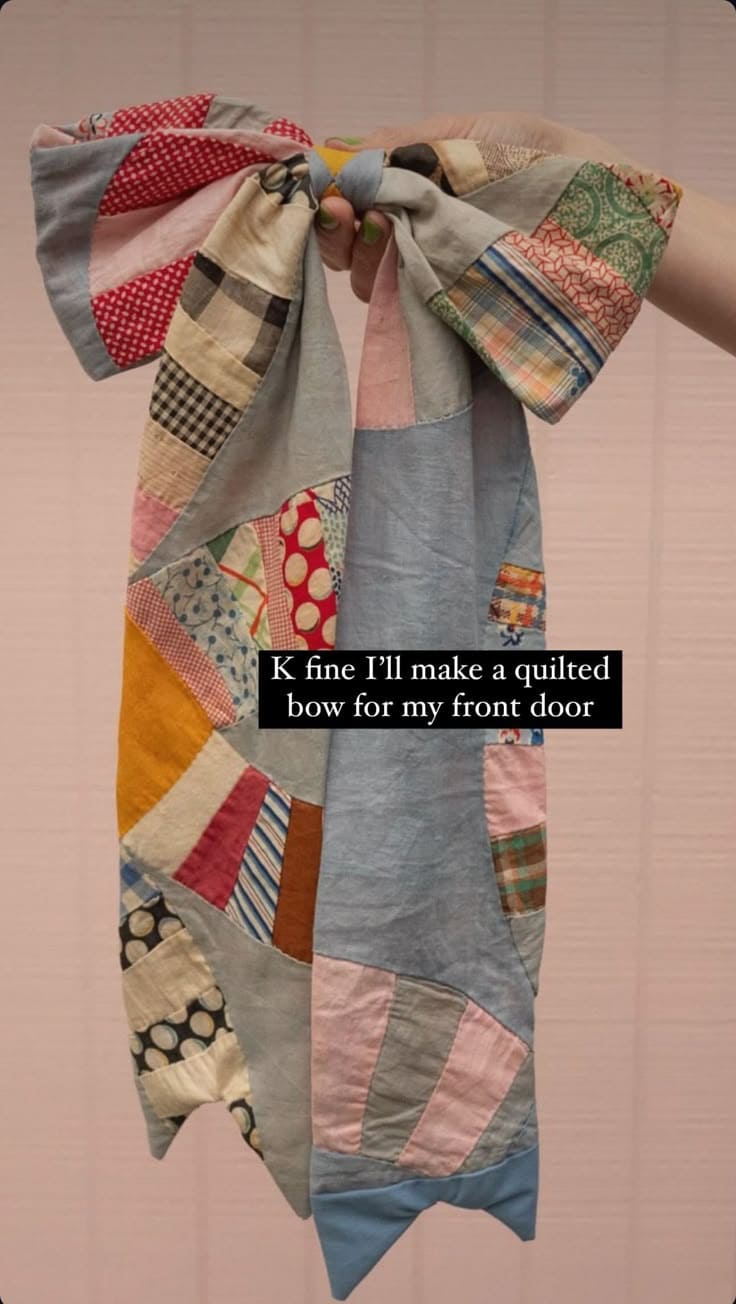
This project turned out to be one of the most unexpectedly joyful things I’ve sewn all season. It’s like giving your home a hug from the porch like warm, homespun, and bursting with character.
Materials Needed
- Quilt top scraps (at least 18″ x 24″ total)
- Lightweight interfacing (optional)
- Cotton backing fabric(18″ x 24″)
- Thread
- Fabric scissors
- Iron and sewing machine
- Hot glue gun
Step-by-step Guide
Step 1: Stitch your quilt scraps together into one large piece. Layer with backing (and interfacing if desired), right sides together. Sew around the edge, leaving a 2″ gap. Turn right side out and press flat.
Step 2: Fold the quilted panel into a bow shape, gather the center tightly and secure with hand stitching or hot glue. Add an extra fabric strip to cover the center and tie neatly around.
Step 3: Snip the bottom into a classic “V” shape or leave square. Hang it using a hook or a loop on the back.
#24. Framed Teacup Applique Art
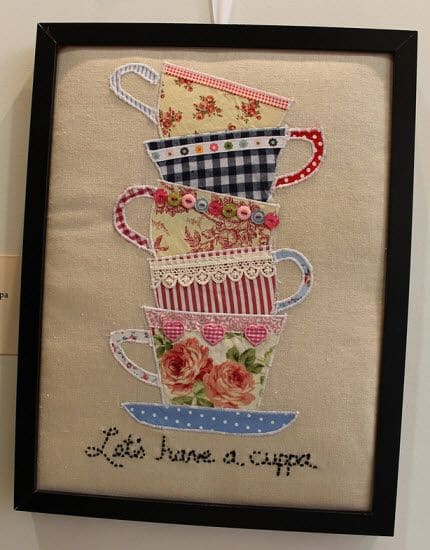
Using some of my favorite vintage florals and trims, I stacked a cheerful pile of patchwork teacups to capture the spirit of teatime and stitched the charming phrase beneath.

Materials Needed
- Canvas fabric (12″ x 16″)
- 6 Fabric scraps (4″ x 6″ each)
- Iron-on fusible web (12″ x 16″)
- Decorative trims – lace, buttons, ric-rac (optional)
- Black embroidery thread
- Needle and embroidery hoop
- Black frame (12″ x 16″)
- Fabric scissors and iron
Step-by-step Guide
Step 1: Iron the fusible web to the back of each teacup fabric scrap. Sketch and cut out five teacup shapes and one saucer shape. Peel and fuse them, one by one, onto your background fabric, stacking carefully.
Step 2: Add embellishments like lace trims, tiny buttons, or stitched flowers to the teacup edges. Use a small zigzag or blanket stitch to appliqué around each cup.
Step 3: With embroidery thread, hand-stitch the phrase “Let’s have a cuppa” underneath in a playful script. Press the entire piece gently, then frame it without glass for texture, or with glass for a sleek finish.
#25. Quilted Tablet Sleeve

With its snug fit and easy flap, it’s both practical and a little piece of comfort you can carry anywhere.
Materials Needed
- 2 Quilted fabric blocks (10″ x 7″)
- 2 Cotton lining fabric pieces (10″ x 7″)
- 2 Fusible fleece sheets (10″ x 7″)
- Binding bias tape
- Hook and loop tape
- Sewing machine, thread, pins, scissors
Step-by-step Guide
Step 1: Layer one quilt top with batting and a lining piece, wrong sides together. Quilt as desired with straight-line stitching or crosshatch. Repeat for the second panel. Trim edges if needed.
Step 2: Round the top corners of one panel to create the flap. Fold and stitch bias tape around the flap’s edge. Add the hook-and-loop tape to the flap underside and match placement on the front panel.
Step 3: Place the front and back right sides together. Stitch along the sides and bottom, leaving the flap open.
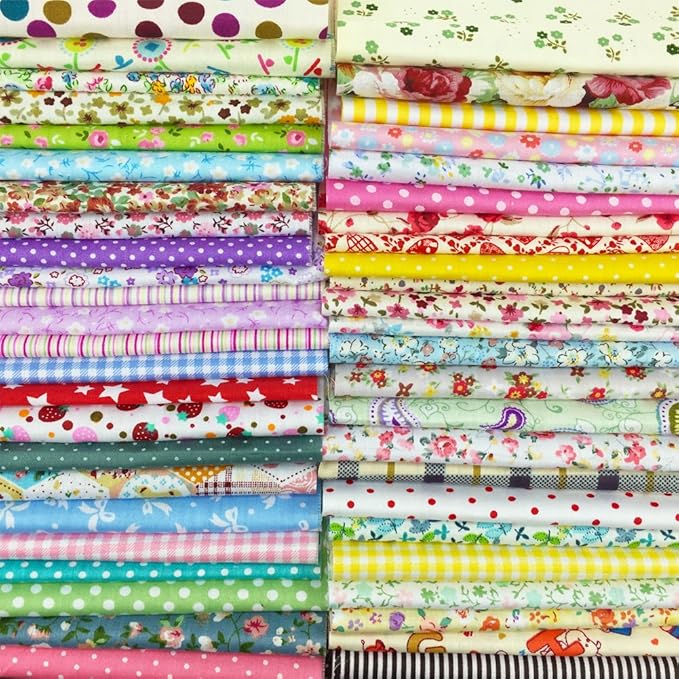
#26. Color Burst Circle Quilt
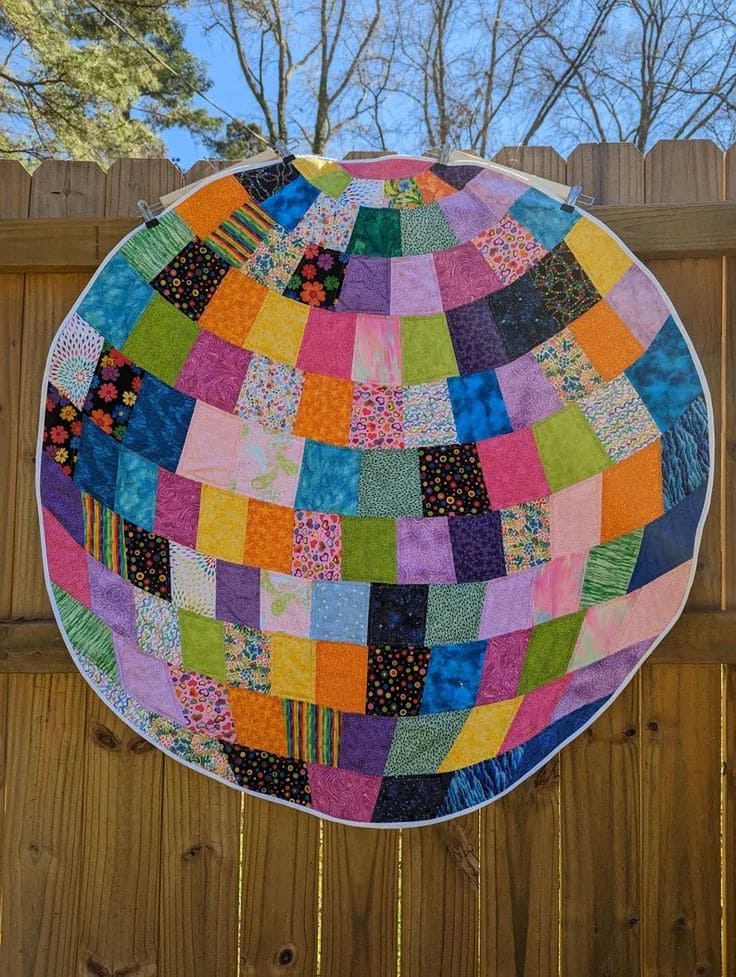
This quilt feels like sunshine stitched into fabric.
Materials Needed
- 120-130 Assorted fabric scraps (5″ x 5″)
- Backing fabric (42″ x 42″)
- Batting (42″ x 42″)
- Bias binding tape (140″ length)
- Rotary cutter & mat, ruler, pins, thread
- Large round template
Step-by-step Guide
Step 1: Arrange the 5″ squares in rows that create a curved or radiating design. You’ll need about 12 rows to fill the 45″ diameter. Sew rows together with a ¼” seam, pressing each one as you go.
Step 2: Sew the rows together, creating a large square or rounded patchwork block. Use a large compass or tape a pencil to string and draw a 45″ circle over the center. Cut the full circle out of your quilt top.
Step 3: Sandwich the quilt top, batting, and backing. Pin layers well, then trim edges, then attach bias tape all the way around for a smooth, finished look.
#27. Patchwork Door Curtain
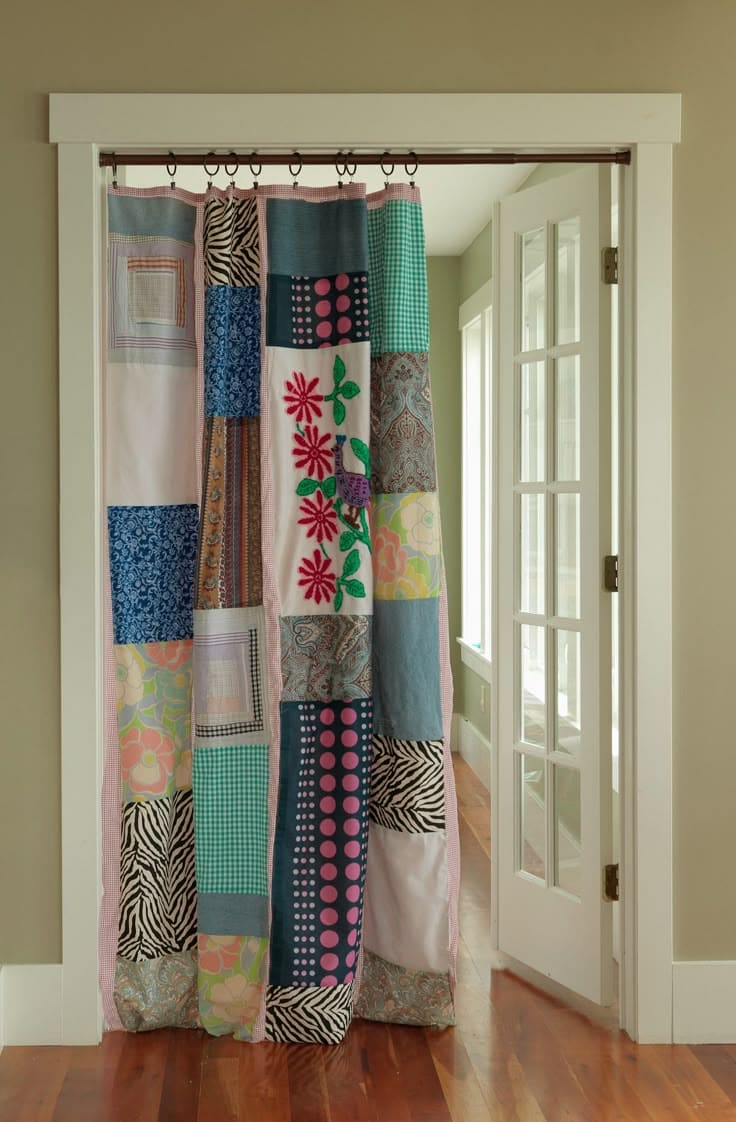
Every panel is stitched with meaning, and trust me, it makes walking from room to room feel like stepping through a memory.
Materials Needed
- 40 Fabric scraps (10″ x 10″)
- Backing fabric (36″ x 84″)
- Lightweight batting (36″ x 84″)
- Bias tape
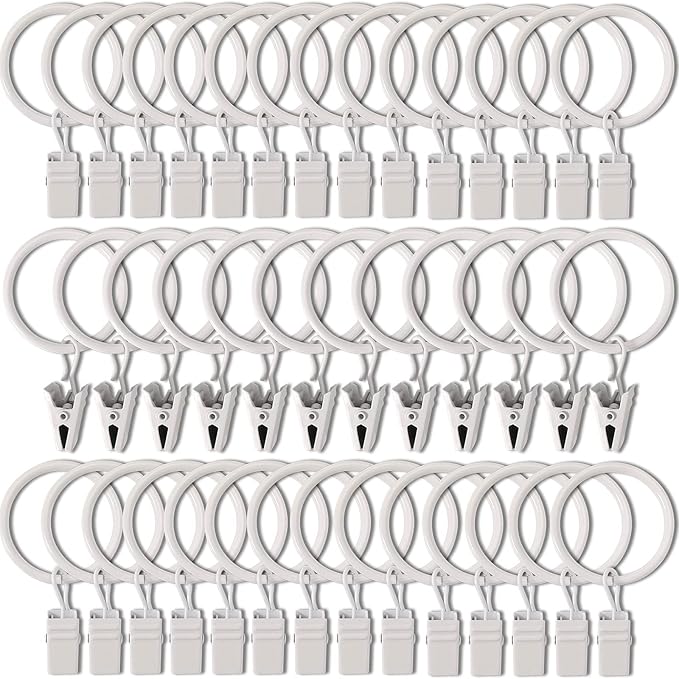
- 10 Curtain grommets
- Sewing thread and supplies
Step-by-step Guide
Step 1: Cut and arrange your fabric pieces into vertical panels, each about 10″ wide and 80–84″ long when joined. You can sew 8–9 pieces in a column, then create 3–4 columns for the full width.
Step 2: Sew each column, then join them side-by-side. Press all seams open.
Step 3: Lay your patchwork panel on batting and then backing (right sides out). Pin and quilt straight vertical or random wavy lines to secure all three layers.
Step 4: Trim the edges neatly. Bind all sides with bias tape. Attach clip rings along the top edge every 5–6 inches. Hang from a standard tension rod or curtain rod.
#28. Road Trip Quilt Playmat

This quilt was one of my favorite afternoon projects to stitch for a little explorer in my life. It’s a mix of soft textures, fun applique shapes, and interactive design.
Materials Needed
- Grey cotton fabric (1.5 yards)
- Green patterned fabric (1.5 yards)
- 10-12 Scrap fabric (8″ x 8″)
- Iron-on adhesive (like HeatnBond)
- Backing fabric (1.75 yards)
- Quilt batting (45″ x 60″)
- Bias tape
- Matching thread, iron, pins, sewing machine
Step-by-step Guide
Step 1: Cut a large rectangle 40″ x 60″ each of the green and grey fabrics. Cut grey into 3.5″ strips and lay them diagonally and horizontally to form roads and intersections across the green background, then stitch them in place.
Step 2: Draw and cut car, house, and tree shapes from scrap fabric using HeatnBond to iron them in place. Use a zigzag to secure all appliqués to the quilt top.
Step 3: Make a quilt sandwich: backing (wrong side up), batting, and quilt top (right side up). Pin thoroughly. Quilt using straight-line stitching along road seams and a spiral or grid at the intersections.
Step 4: Trim the edges neatly and bind using bias tape.
#29. Quilted Fabric Crosses

Whether gifted as keepsakes, hung as wall decor, or used in moments of quiet reflection, each one carries a tender handmade touch.
Materials Needed
- 2 Vintage quilt pieces (9″ x 12″ rectangles)
- Quilt batting (9″ x 12″)
- Cardstock cross template
- Matching thread and hand-sewing needle
- Optional: Stuffing
Step-by-step Guide
Step 1: Cut two rectangles of fabric and one batting layer. Place the fabric pieces right sides together, layer the batting underneath, and trace your cross shape onto the top fabric using your template.
Step 2: Pin the layers together securely. Stitch directly along the traced cross outline with a 1/4″ seam allowance, leaving a small opening (1.5″) at the bottom or side for turning.
Step 3: Trim excess fabric around the stitched cross, clip the corners and curves for clean edges, and turn right side out. Lightly stuff with polyfill if desired.
#30. Folded Pinwheel Quilted Pillow
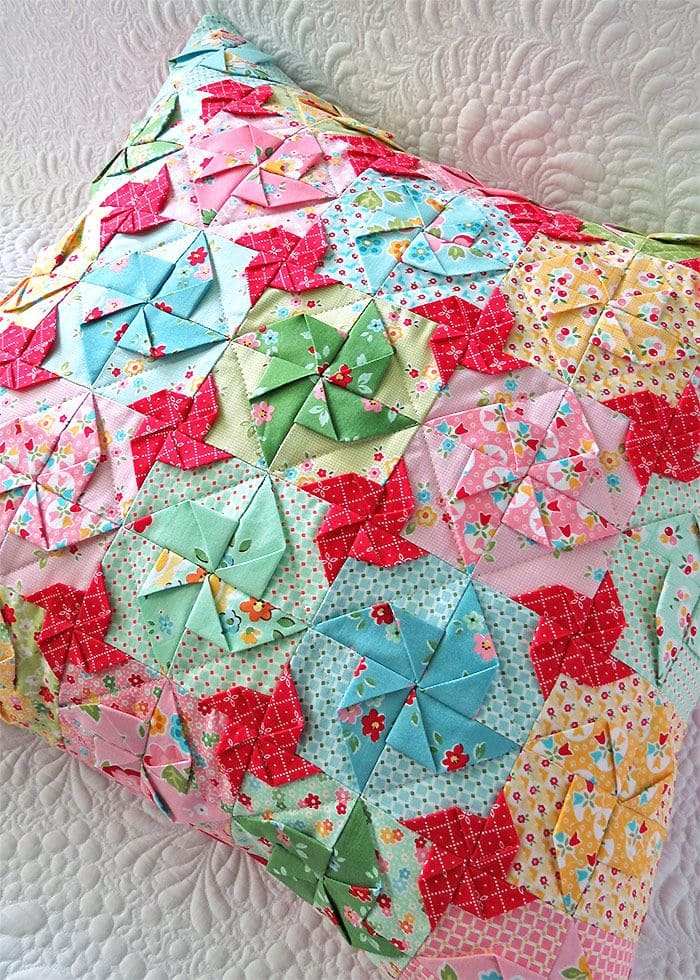
I used a mix of vintage scraps and modern florals, and every pinwheel practically dances off the fabric. It’s a fantastic project if you want a 3D quilt look with texture and movement.

Materials Needed
- 40 Assorted quilting cotton scraps (5” x 5” squares)
- Solid fabric backing (18″ x 18″)
- Lightweight interfacing (optional)
- Pillow insert (16″ or 18″)
- Thread
- Sewing machine
- Zipper (optional)
Step-by-step Guide
Step 1: Fold each 5” square diagonally twice to form a triangle with two folded edges. Lay them into pinwheel shapes (4 folded units per block), layering them over a 4.5” fabric square as the base. Pin and stitch in place along the raw edges.
Step 2: Arrange the finished pinwheel blocks in a 5×5 grid. Stitch each block together row by row, then sew the rows together to form the full pillow top.
Step 3: Layer the pillow top with interfacing or batting if needed. Add a backing (zippered style), right sides together, and stitch around the edges, leaving an opening if necessary.
Step 4: Turn right side out, insert your pillow form, and close the gap if needed.
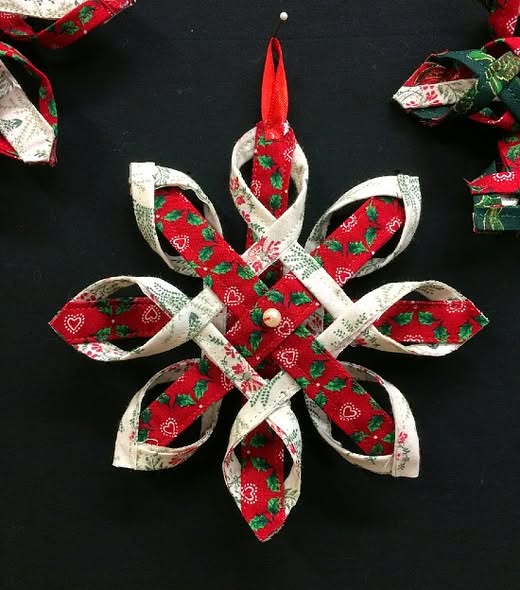
#31. Quilted Ribbon Snowflake Ornament
#32. Patchwork Quilted Boot Appliqués