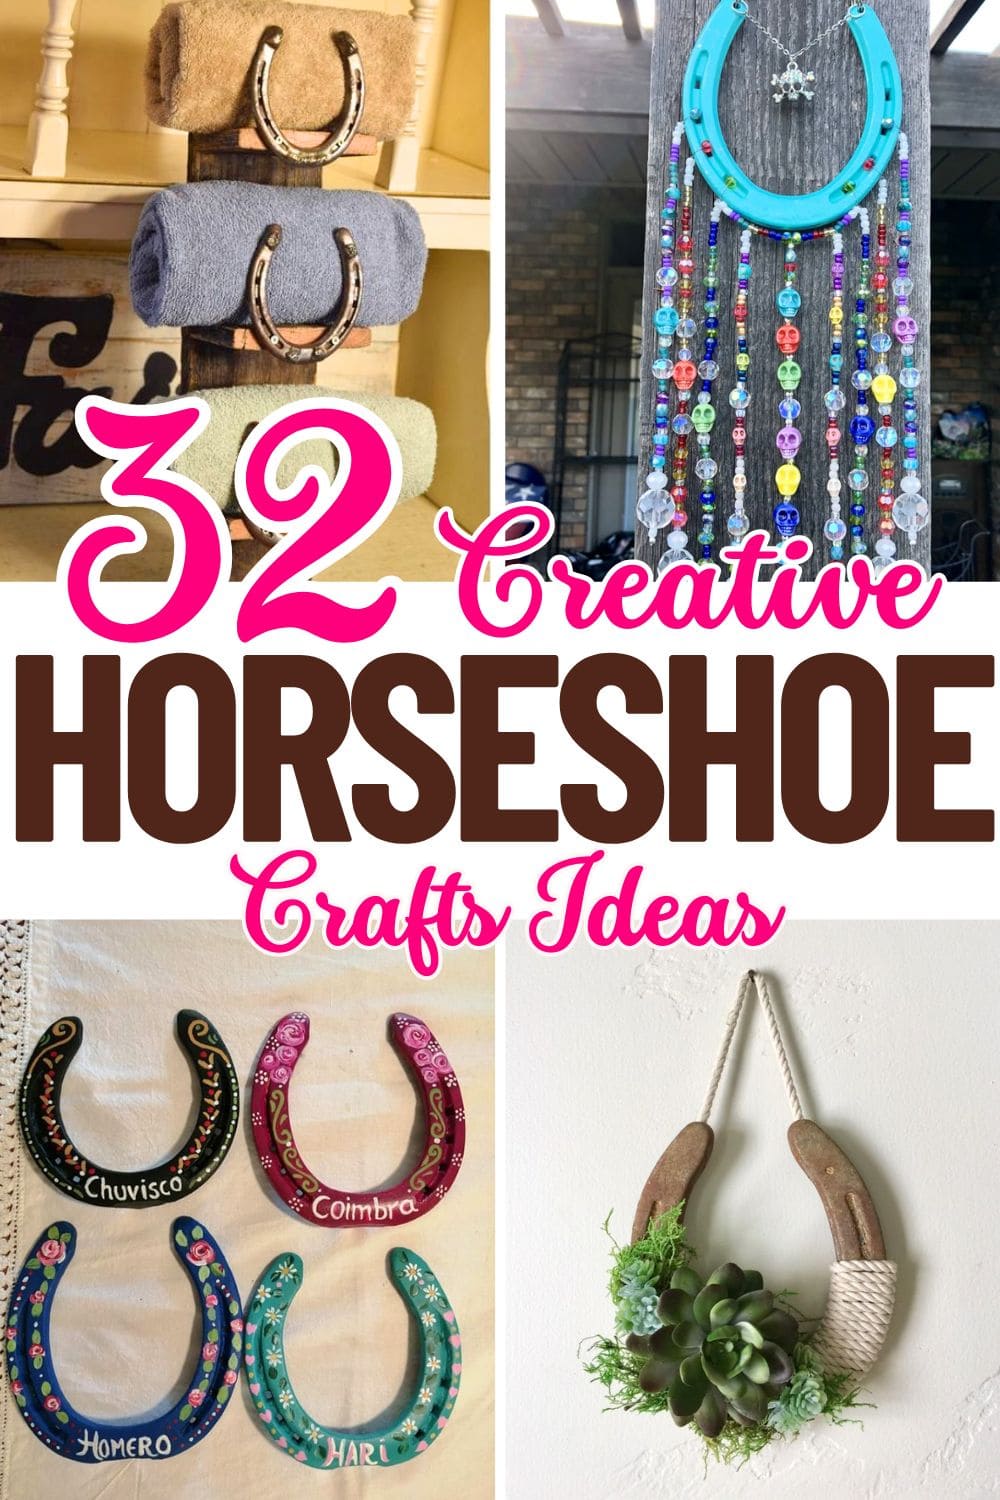
Ever looked at an old horseshoe and wondered if it could be more than just a lucky charm? Turns out, it absolutely can, and in the most unexpected, eye-catching ways.
Whether you’ve got a few rusty ones lying around or love the rustic charm of Western-inspired decor, these horseshoe DIYs will inspire you to create something unforgettable. From farmhouse-style wine racks to whimsical garden art, these 32 ideas prove that even the most overlooked scraps can become stunning statement pieces.
This article contains affiliate links. If you purchase through them, I may earn a small commission at no extra cost to you. Thank you for your support!
#1. Mini Succulent Horseshoe Wreath
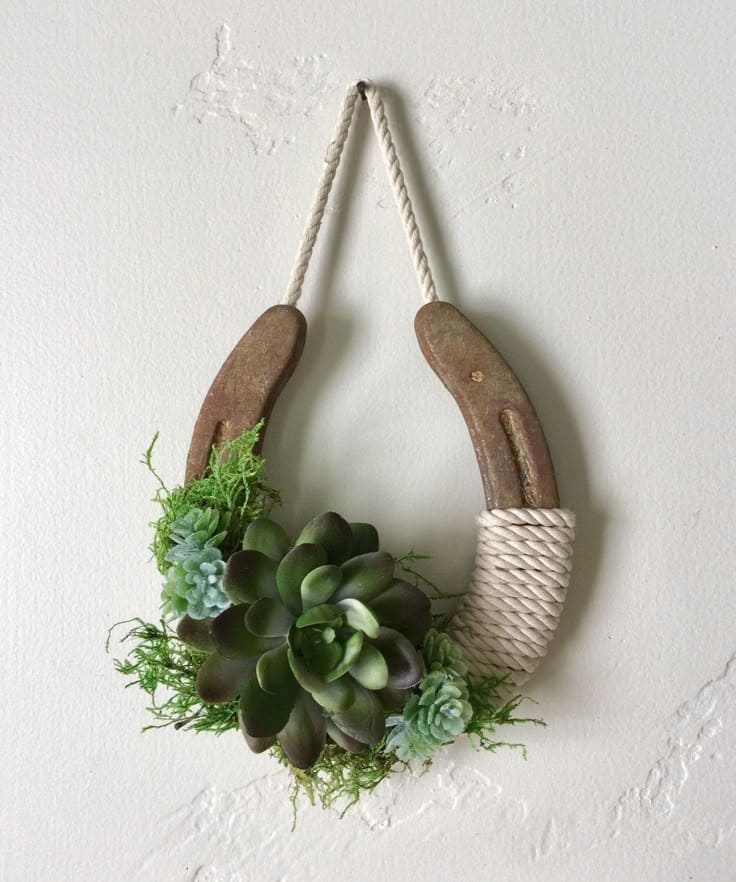
With faux succulents and natural jute twine, this wreath is a peaceful blend of farmhouse and boho, plus, it only takes about 30 minutes to create.
Materials Needed
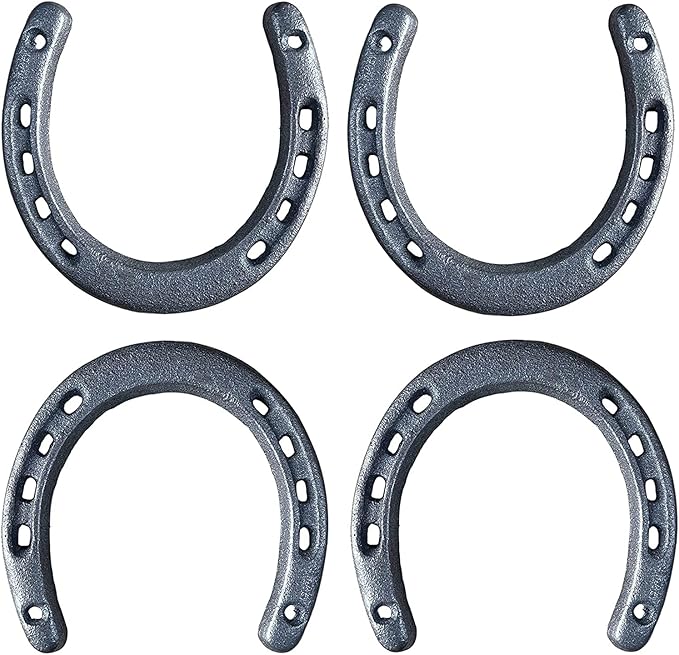
- 1 horseshoe
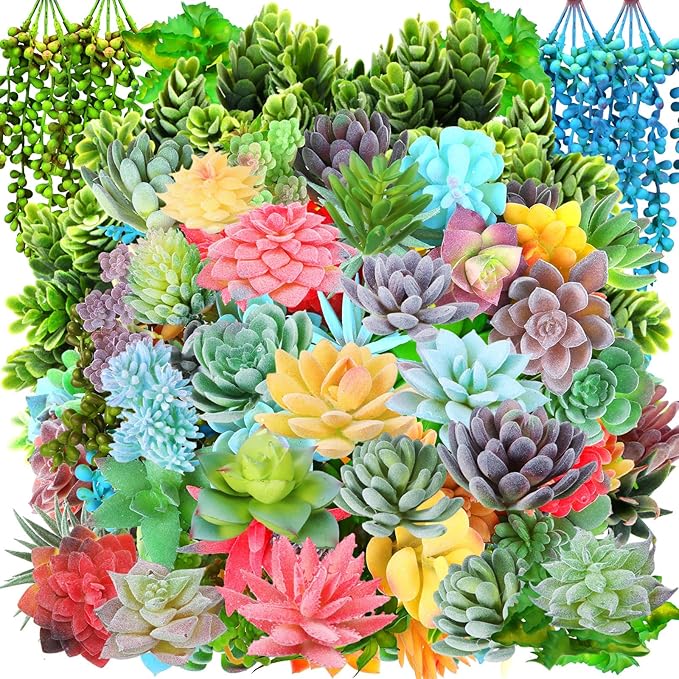
- Mini succulent set
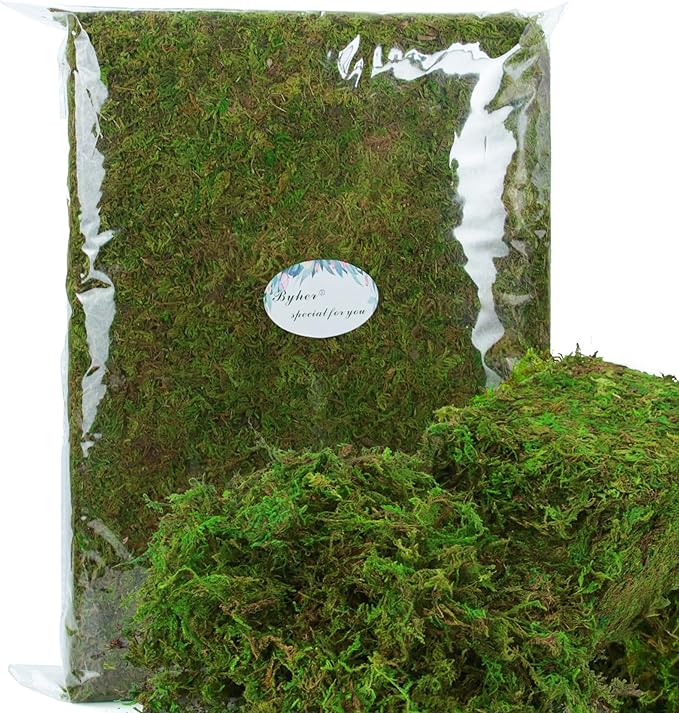
- Decorative moss
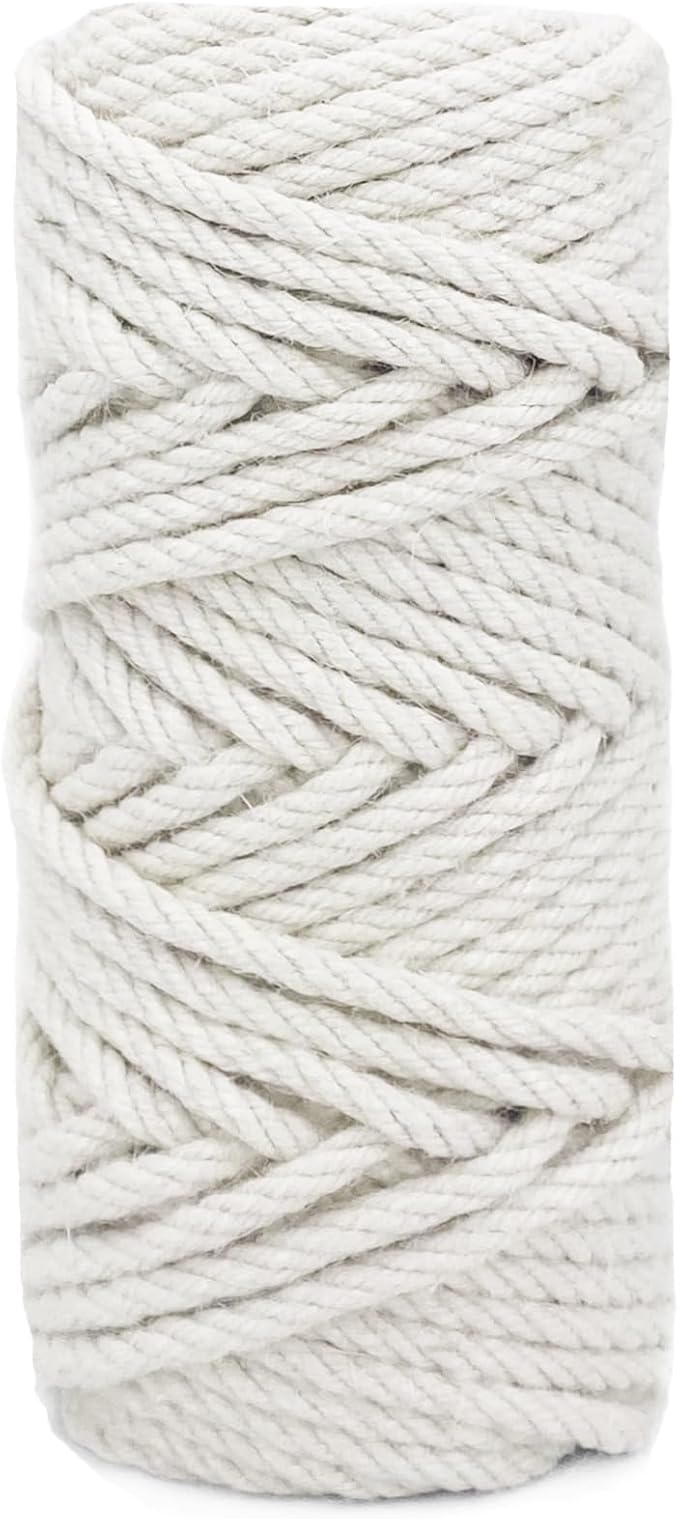
- Natural jute
- Hot glue gun and sticks
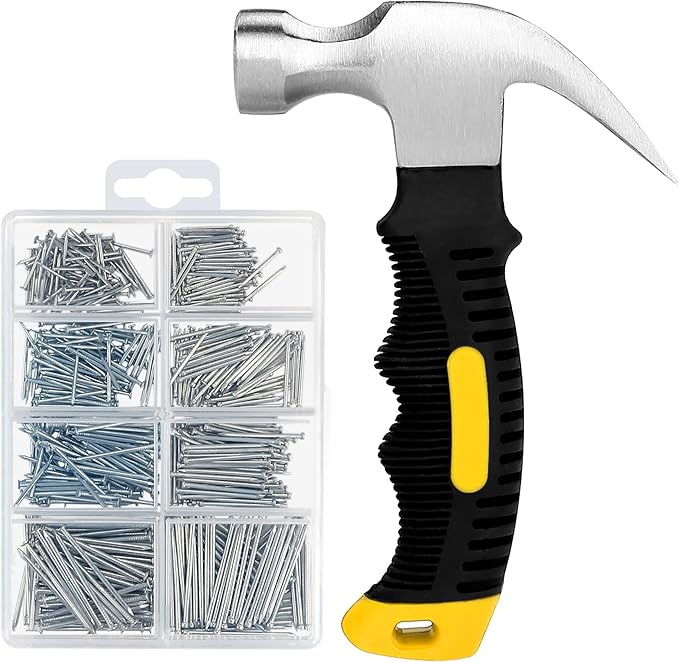
- Optional: nail
Step-by-step Guide
Step 1: Wrap one side of the horseshoe with rope, starting just below the curve and working your way down. Use hot glue at the beginning and end to secure it tightly.
Step 2: Arrange your succulents and moss on the lower half of the horseshoe. Start with the largest succulent in the center and balance smaller ones and moss around it.
Step 3: Once you’re happy with the layout, hot glue each piece into place firmly. Tie a piece of rope through the horseshoe holes on the back.
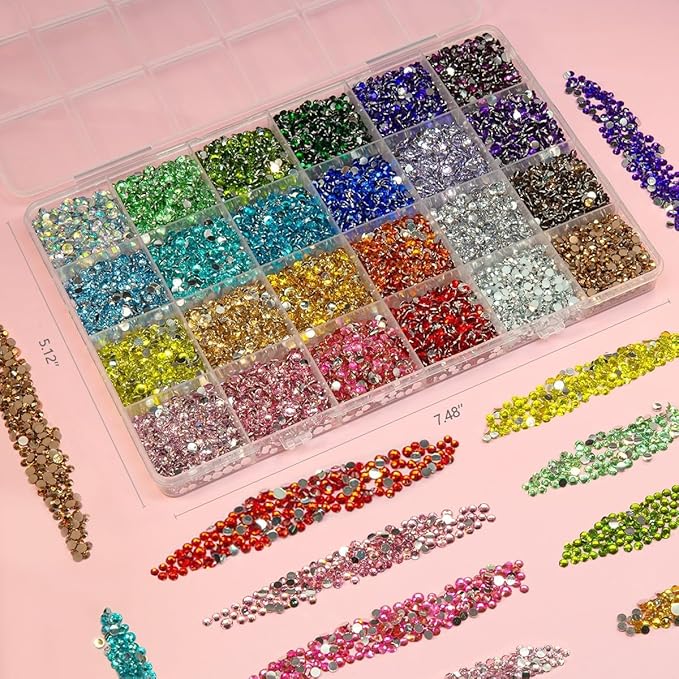
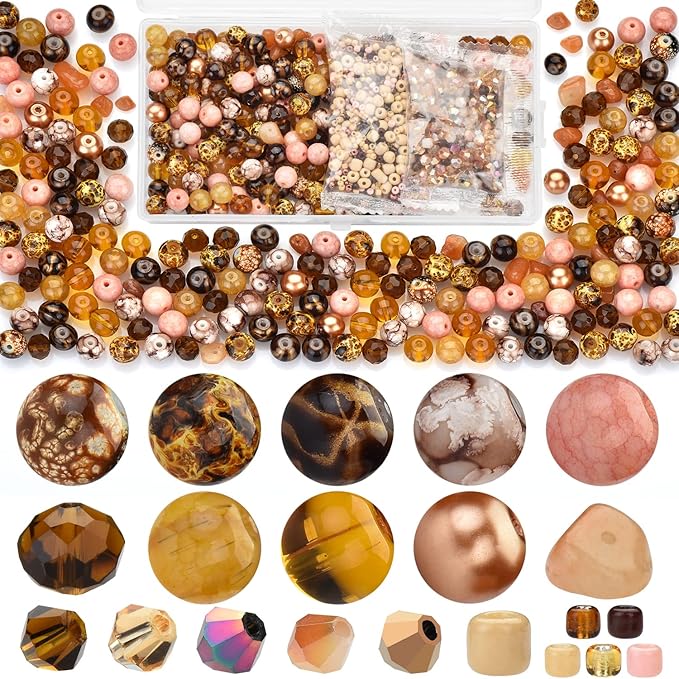
#2. Colorful Beaded Horseshoe Sun Catcher
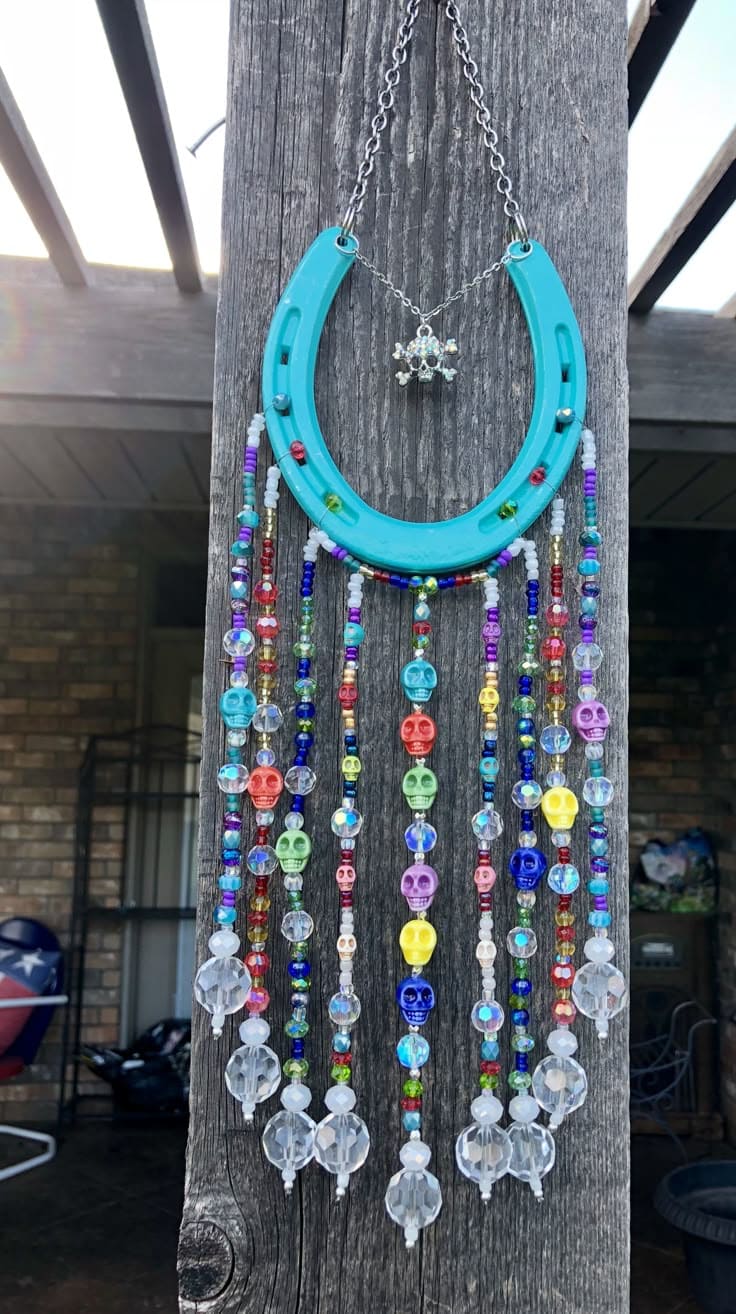
A mix of rustic charm and bohemian energy, this vibrant sun catcher brightens any porch, window, or garden corner.
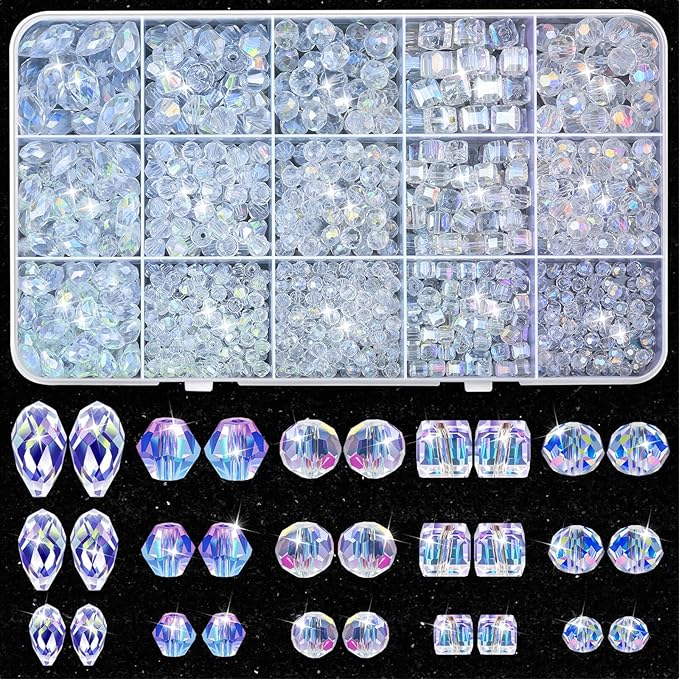 SHOP CRYSTAL BEADS
 SHOP ACRYLIC BEADS
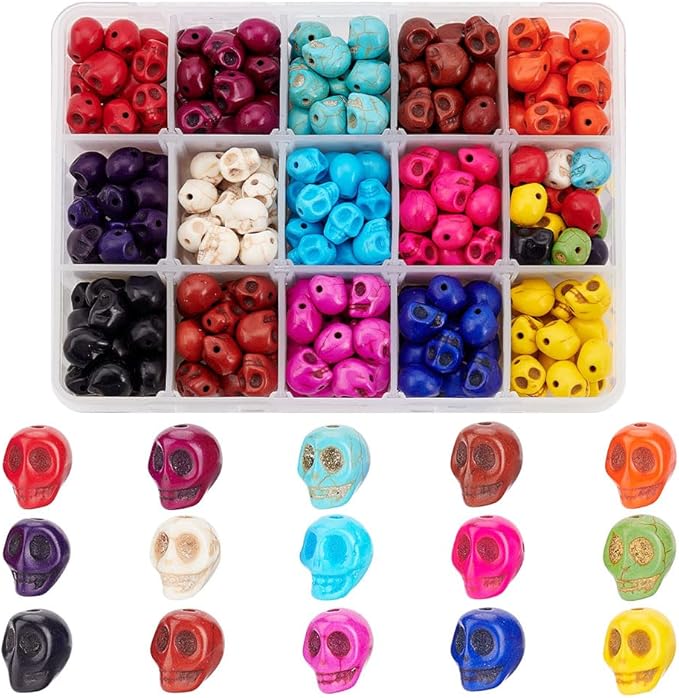 SHOP SKULL BEADS
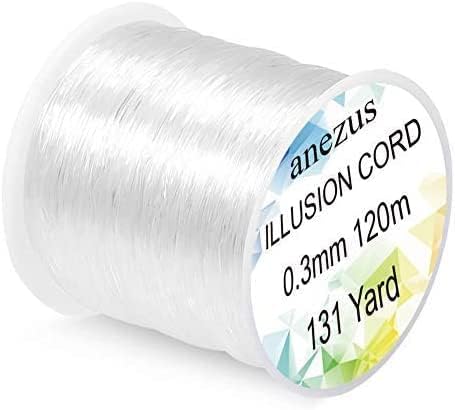 SHOP FISHING LINE
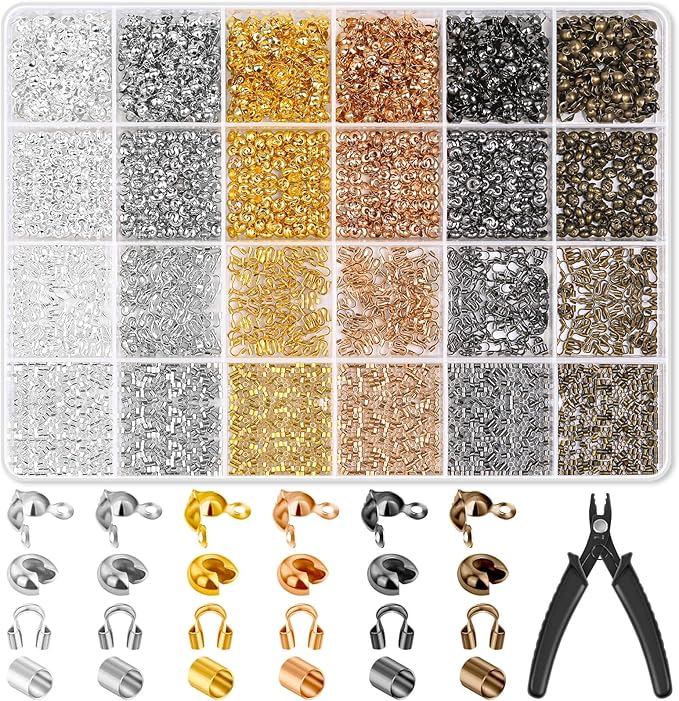 SHOP SMALL JEWELRY CRIMPS
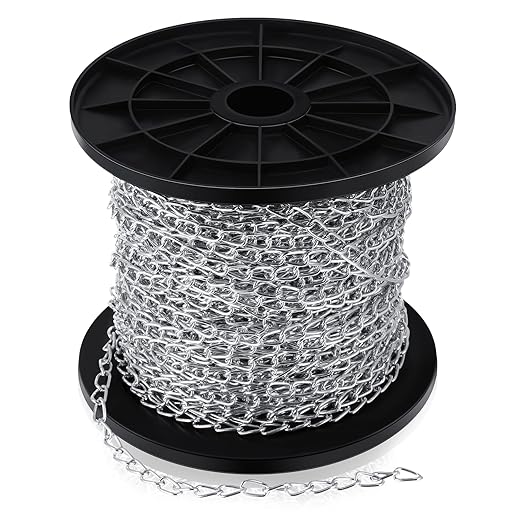 SHOP HANGING CHAIN
Materials Needed
- 1 horseshoe
- 100 assorted crystal, acrylic beads
- 20 skull beads
- Fishing line, 0.5mm
- Small jewelry crimps
- Hanging chain
- Small hand drill
- Strong craft glue (optional)
Step-by-step Guide
Step 1: Clean the horseshoe thoroughly and spray-paint it in a vibrant or pastel color of your choice. Let it dry fully.
Step 2: Cut 9-10 lengths of nylon line. Arrange your beads on a flat surface first to plan your pattern. String the beads in rows, alternating colors and accents.
Step 3: Attach each beaded strand to the holes in the horseshoe using crimps. Apply a dab of craft glue if needed for extra hold.
Step 4: Attach a chain to the top two holes for hanging.
#3. Hand-Painted Decorative Horseshoes
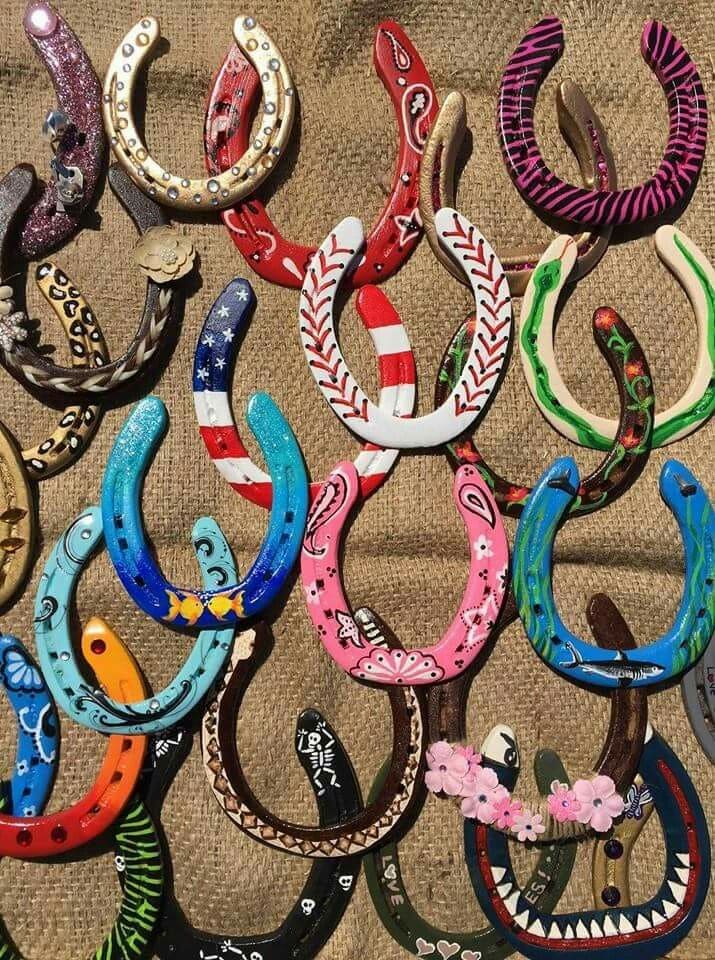
These painted horseshoes can be personalized for holidays, names, themes, or just pure fun.
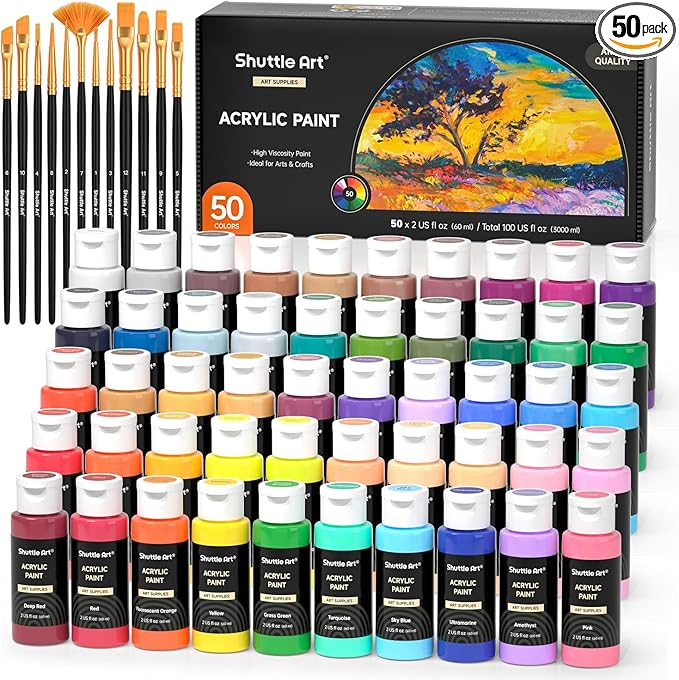
Materials Needed
- 10-15 horseshoes
- Acrylic paints and paintbrushes
- Clear sealant spray
- Embellishments: rhinestones, charms, glitter, flowers (optional)
- Strong adhesive
Step-by-step Guide
Step 1: Clean your horseshoes thoroughly using a wire brush, then paint each horseshoe with a base color and add decorative elements like stars, flowers, flags, or custom patterns.
Step 2: Allow paint to dry, then seal with a coat of clear spray to protect the finish.
#4. Rustic Horseshoe Photo Frames
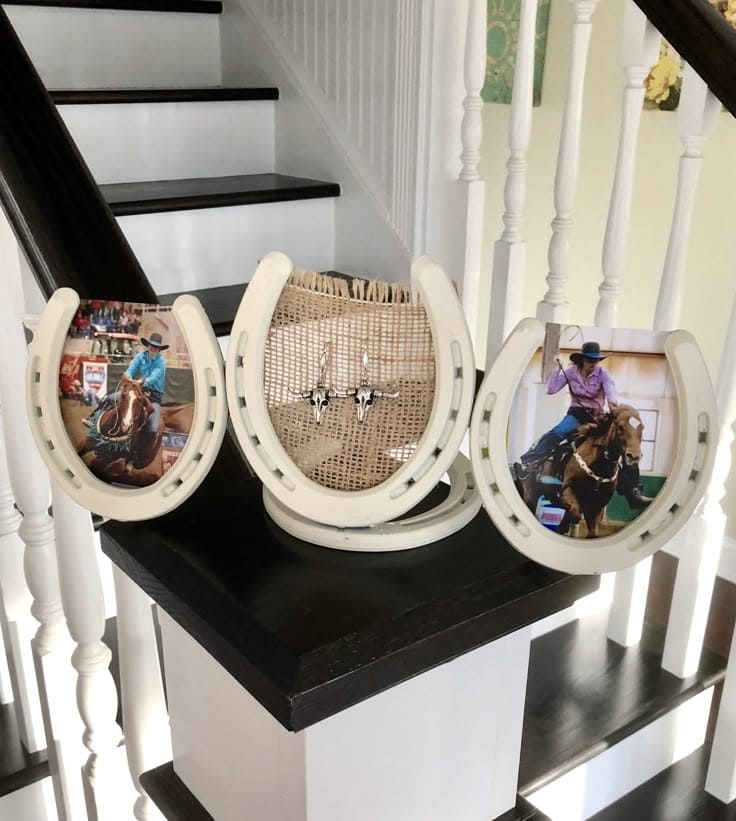
These Western-style photo holders made from white-painted horseshoes bring a personal and heartfelt charm to any shelf or stair ledge.
Materials Needed
- 3 horseshoes (size 0 or 1)
- Small wooden base
- Hot glue gun
- Small pieces of burlap
- Printed photos
Step-by-step Guide
Step 1: Paint the horseshoes if desired (white or off-white gives it a clean, rustic look). Let them dry completely.
Step 2: Attach each horseshoe upright to a wood base using epoxy glue. Hold in place until set.
Step 3: Cut burlap to size and glue behind the horseshoe as a backing. Add embellishments like charms or small studs if you’d like.
Step 4: Glue photos inside each horseshoe frame. These make beautiful mantel or stair-step décor pieces.
#5. Rustic Horseshoe Christmas Tree

The blend of cold metal and winter greenery feels just right for a farmhouse or rustic cabin vibe.
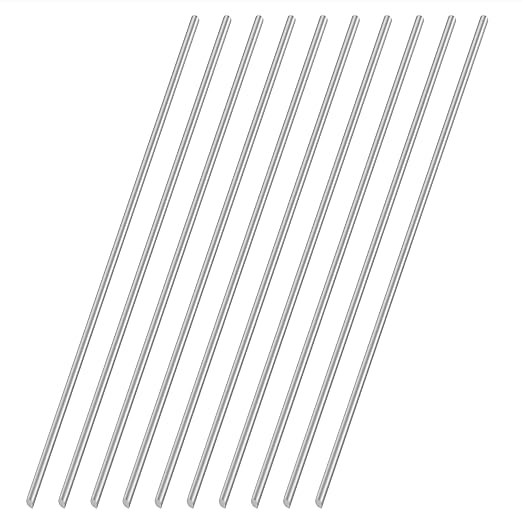 SHOP METAL ROD
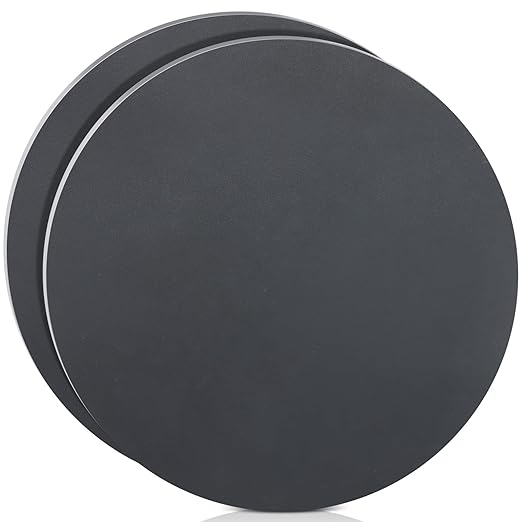 SHOP CIRCULAR STEEL BASE PLATE
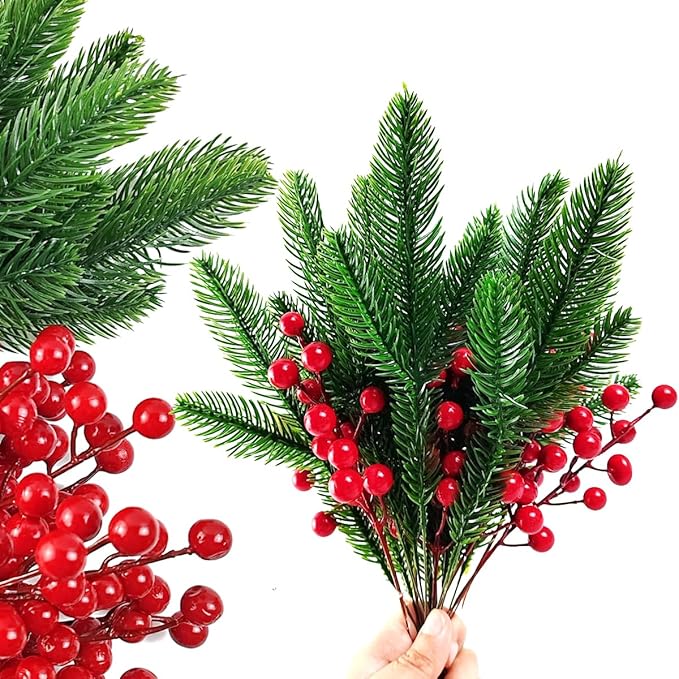 SHOP BERRY STEM
 SHOP RIBBON
 SHOP METAL STAR TOPPER
 SHOP WELDING MACHINE
Materials Needed
- 9 horseshoes
- 1 metal rod (approx. 14–18 inches long, ½ inch diameter)
- Circular steel base plate
- Decorative evergreen picks
- Red berry embellishments
- Large ribbon
- Optional: metal star topper, hot glue, clear sealant, spray paint
- Welding machine
Step-by-step Guide
Step 1: Start by welding three horseshoes at the base in a tripod formation to create a stable stand. Attach the metal rod vertically to the center of this base.
Step 2: Weld horseshoes up the rod in a spiral pattern, slightly angling them outward to give the shape of a tree. Use about 3–5 rows depending on the height of your piece.
Step 3: Spray paint the whole piece in a rustic bronze or matte black finish. Let it dry completely.
Step 4: Once dry, glue faux greenery and red berries along the sides of the horseshoes. Tie a large festive bow near the top, and affix a star topper if desired.
#6. Horseshoe Wine Rack
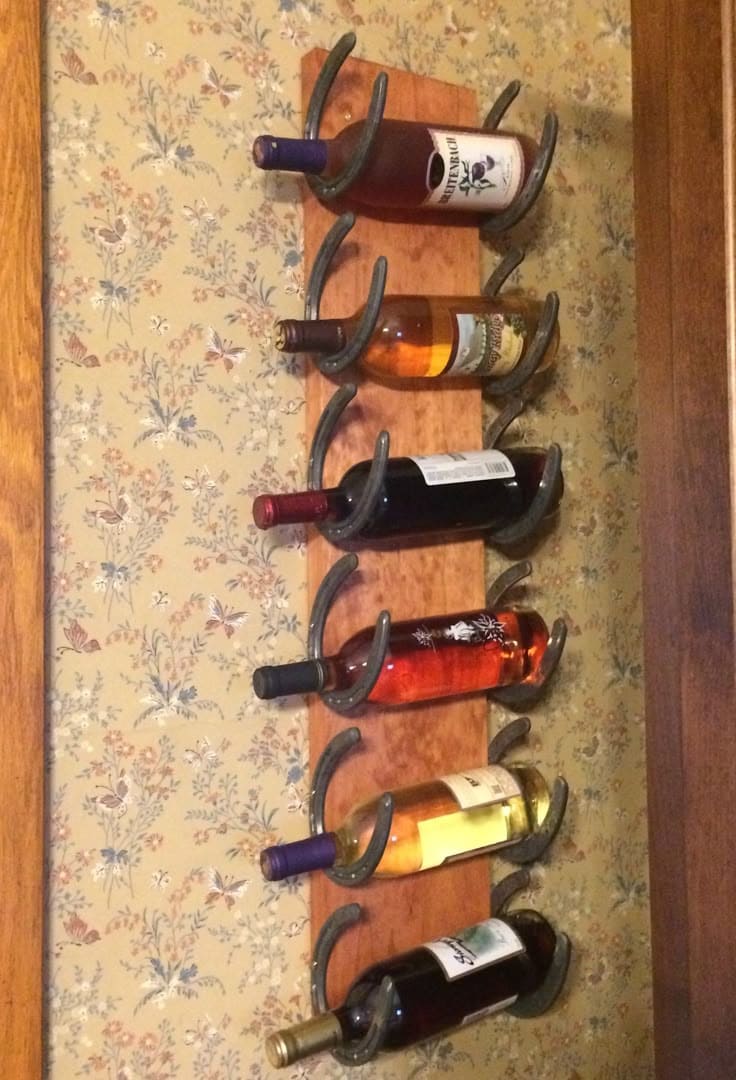
Whether you’re upcycling old shoes from the barn or buying a fresh set online, the results feel warm, lived-in, and uniquely yours.


Materials Needed
- 12 horseshoes
- 1 wood board (approx. 36″ x 8″ x 1″)
- Wood stain and sealer
- Sandpaper (80 and 220 grit)
- 1 ½” wood screws and washers
- Drill with metal bit
- Wall anchors and mounting screws
- Optional: clear coat spray
Step-by-step Guide
Step 1: Lightly sand the wood board and apply your chosen stain. Once dry, seal it to protect against wine drips or condensation from bottles.
Step 2: Lay horseshoes out in pairs, forming cradles for the wine bottles, curve inward and spaced about 3″ apart to fit the neck and base of each bottle.
Step 3: Drill holes through each horseshoe and screw them onto the board securely. Space them evenly down the plank, allowing about 6–8″ vertical clearance between bottles.
Step 4: Mount the finished rack to the wall using heavy-duty anchors and screws. Make sure it’s level and secure before displaying your bottles.
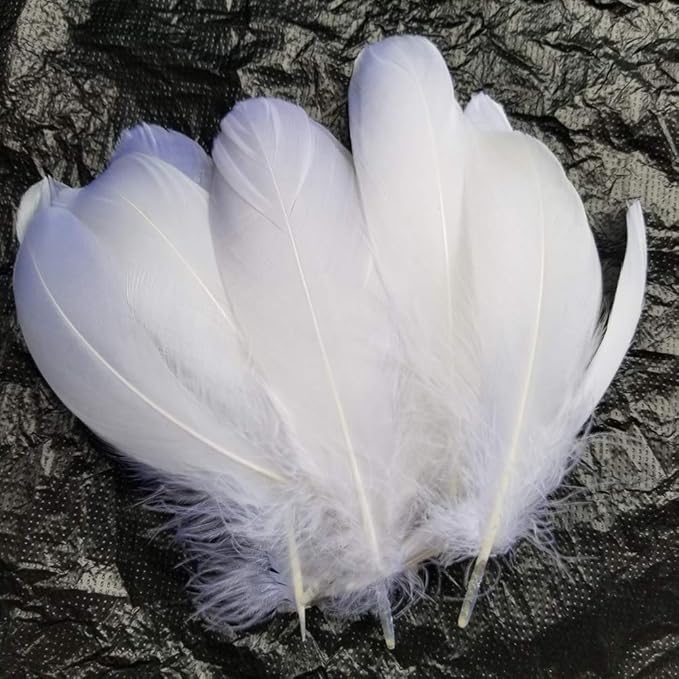
#7. Horseshoe Dreamcatcher
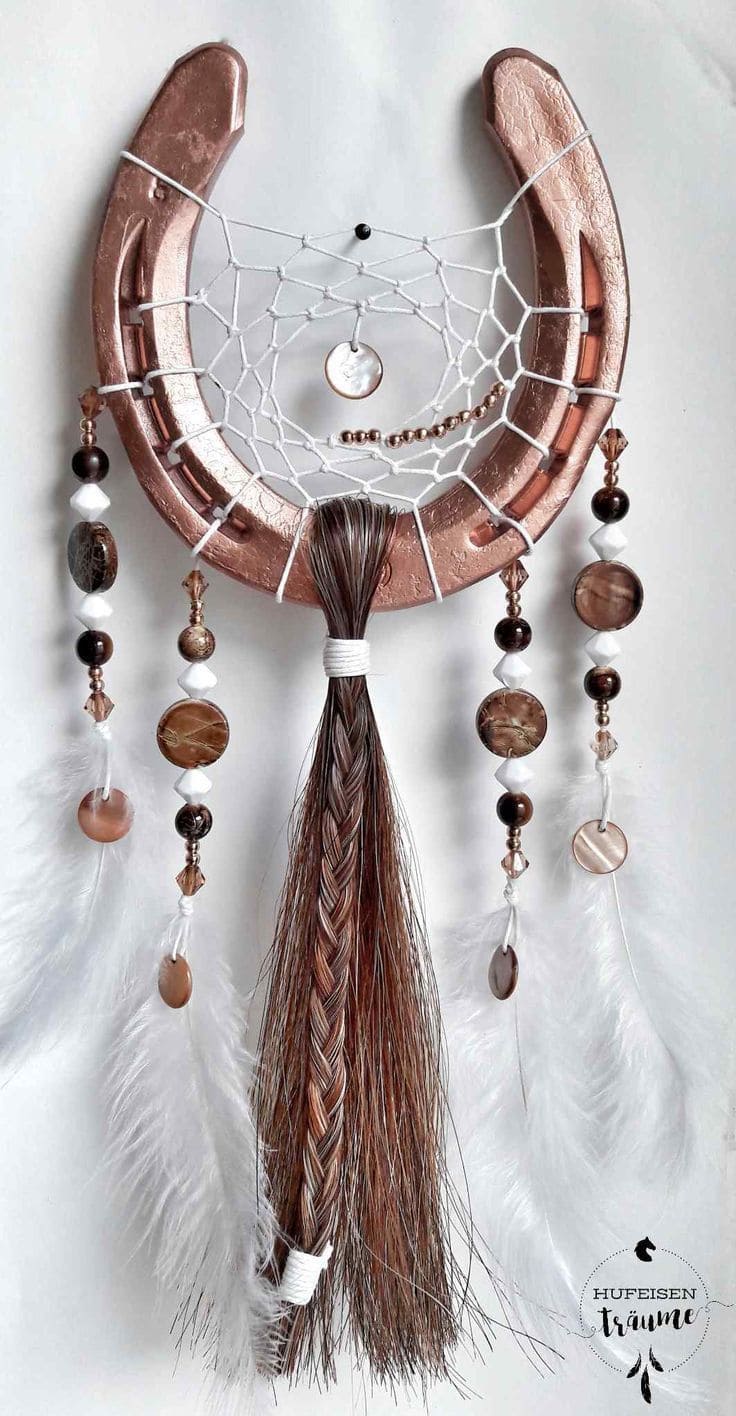
I crafted mine with a strand of my old horse’s mane, and now it hangs above my bed like a soft whisper from the past.
Materials Needed
- 1 horseshoe
- White string
- A strand of braided horsehair
- 60 mixed beads
- 4 white feathers
- Hot glue gun and glue sticks
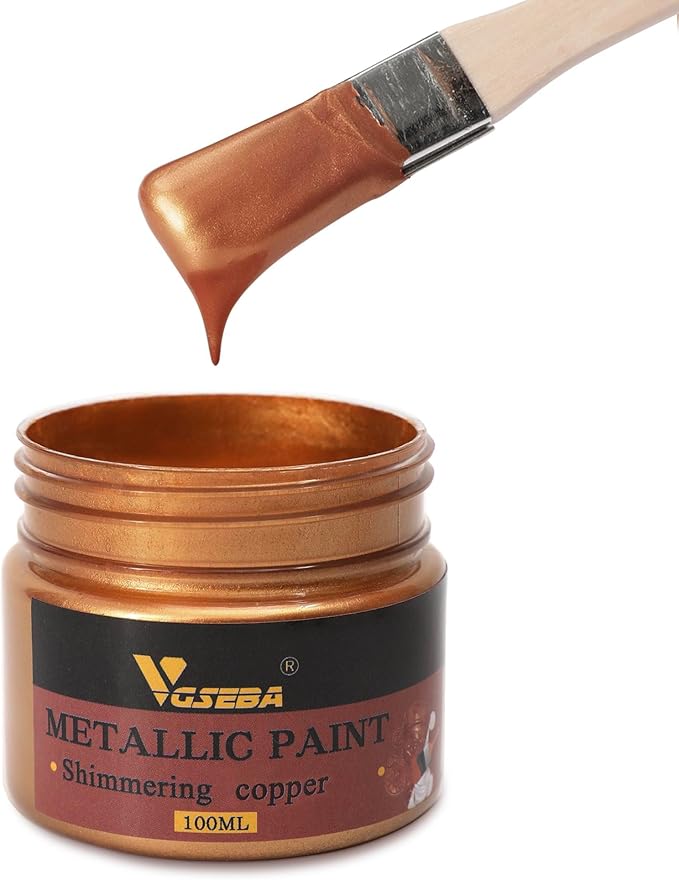
- Rose gold or antique bronze spray paint
Step-by-step Guide
Step 1: Spray-paint your horseshoe and let it dry completely. Soft metallic tones like rose gold or antique bronze work beautifully.
Step 2: Weave a web-like pattern in the center using white thread, tying each loop securely around the horseshoe’s inside edge.
Step 3: Attach your horsehair braid to the bottom center. Use strong glue or wrap it with cord and secure the tail ends tightly.
Step 4: Thread a mix of natural-toned beads and pearls onto string. Add feathers to the ends and glue or tie these strands to both sides of the horseshoe.
#8. Horseshoe Jewelry Stand
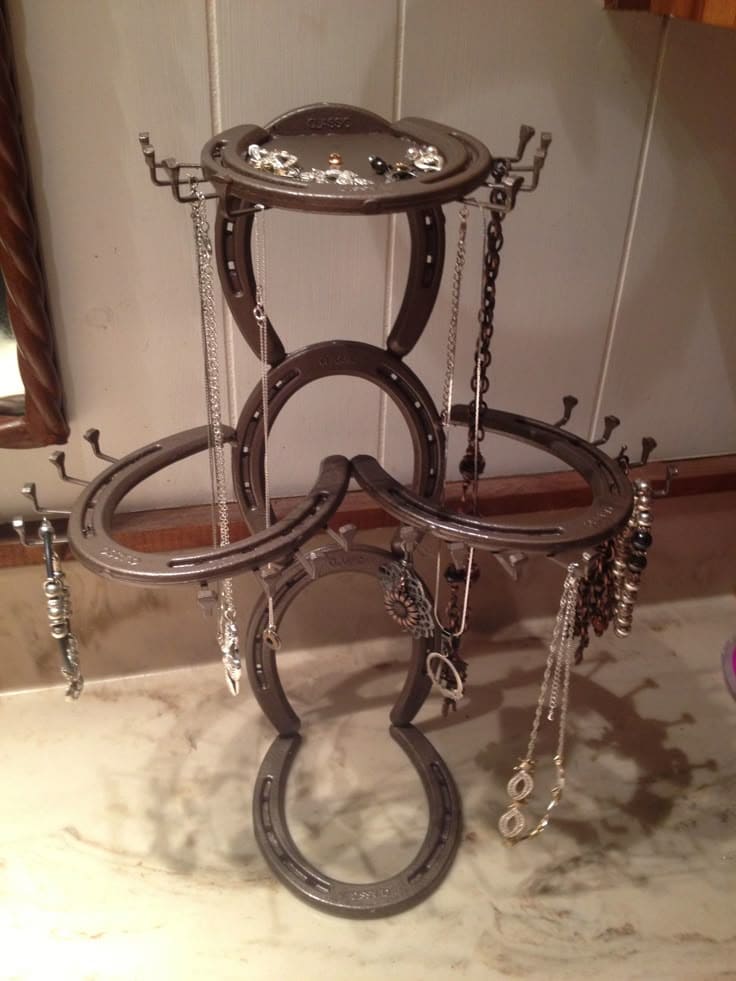
If you’re like me and your necklaces end up in a tangled mess in a drawer, this rustic organizer is a total game-changer.
Materials Needed
- 7 steel horseshoes
- 20 small metal hooks
- Weldable steel rod (approx. 12–14 inches long)
- Optional: lazy Susan bearing base
- Spray paint
- Welding machine
Step-by-step Guide
Step 1: Arrange the horseshoes in a tiered shape, use two to form the base, three for the middle support level, and two on top. Secure each layer with welds or strong epoxy if you’re going weld-free.
Step 2: Add small metal hooks along the edges of the horseshoes, spacing them evenly to hold necklaces, bracelets, or rings.
Step 3: Spray-paint the entire structure in your preferred finish like matte black, bronze, or rustic steel look. Let it dry fully.
#9. Rustic Horseshoe Towel Rack
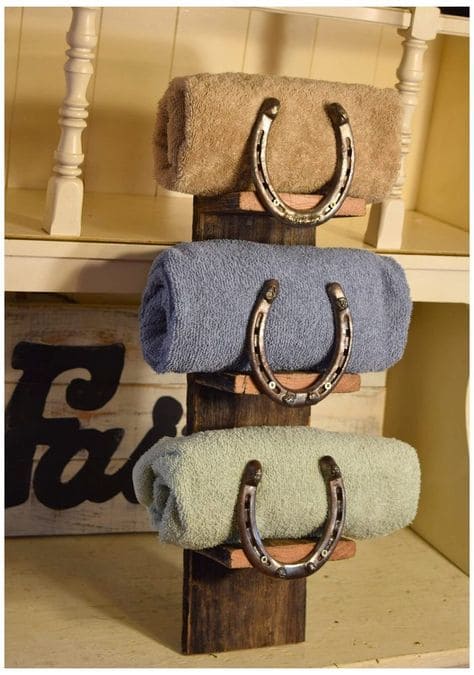
Perfect for a bathroom, mudroom, or even the barn tack room, this towel rack keeps things tidy while giving off cozy, country vibes.

Materials Needed
- 3 horseshoes
- 1 wood board (approx. 24″ H x 6″ W)
- 3 small wooden slats
- Screws and drill
- Wall mount hardware (D-ring)
Step-by-step Guide
Step 1: Attach the small wood slats horizontally along the center of the board, spaced evenly apart. These will act as bases for each towel roll.
Step 2: Center and secure a horseshoe over each slat with screws, creating a cradle for each towel.
Step 3: Mount hanging hardware on the back of the board. Hang the rack on your wall and place rolled towels into each horseshoe bracket.
#10. Pink Flamingo Garden Statues from Horseshoes
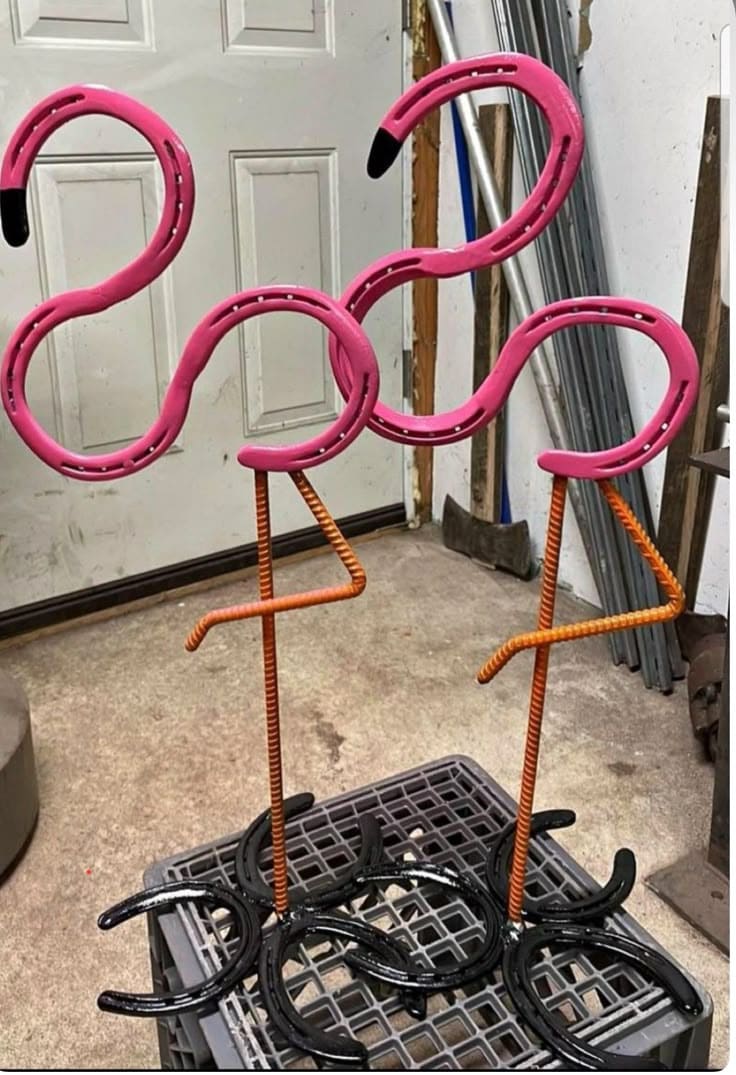
Shaped from bent horseshoes and welded rebar legs, they’ve held up through rain and heat with zero fuss.

Materials Needed
- 6 standard horseshoes (size 0 to 1)
- 6 bent horseshoes
- 2 pieces of rebar, 36″ long each (½” thick)
- 2 short rebar rods (~10″)
- Welding machine (J-B Weld)
- Pink, orange, and black spray paint
- Wire brush
- Protective gloves, mask, and eyewear
Step-by-step Guide
Step 1: Clean all horseshoes and rebar with a wire brush or grinder to remove rust and grime. Use a torch and vise to bend the horseshoes into flamingo neck shapes.
Step 2: Weld the bent horseshoes to create the neck and body shape. Then attach to a vertical rebar rod for the main leg. Weld two regular horseshoes at the base to form stable feet.
Step 3: Bend small rebar pieces into an L shape for wings, then weld them to the torso. Repeat the entire process for the second flamingo.
Step 4: Paint all parts: pink for heads/necks, orange for legs, black for beaks and feet.
#11. Horseshoe Boot Rack for the Mudroom
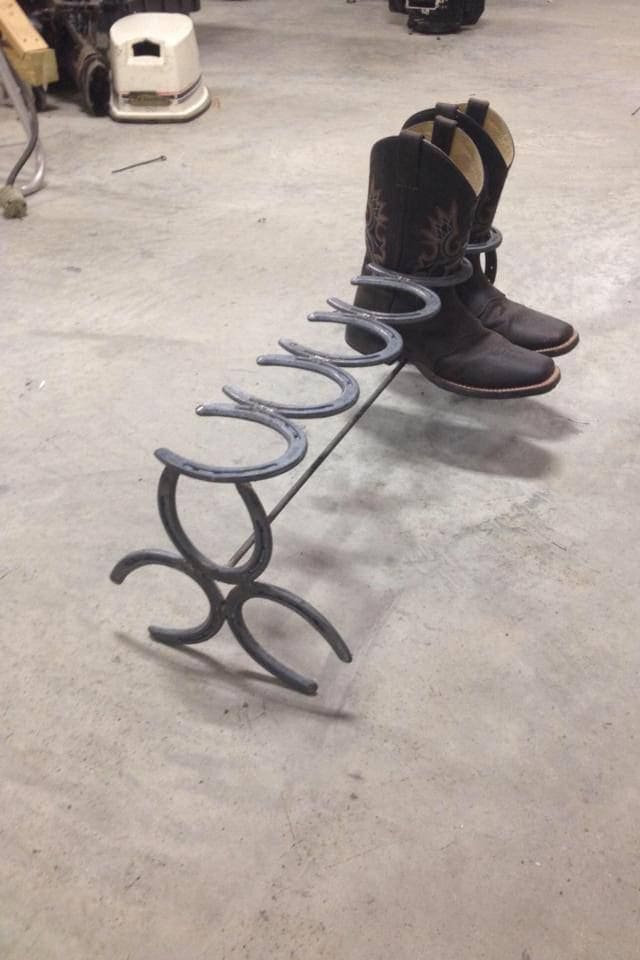
Built to air out your boots and keep the soles upright, it makes cleaning and drying easier while adding a rustic, welded charm to your entryway or mudroom.
Materials Needed
- 12 steel horseshoes
- 1 flat steel bar, approx. 36″ long x 1″ wide
- Welding machine
- Wire brush
- Black spray paint (optional)
- Heat-resistant gloves and eye protection
Step-by-step Guide
Step 1: Clean all horseshoes using a wire brush to remove rust and debris. Arrange 3 horseshoes upright in sets of two to form stable side bases.
Step 2: Weld two pairs of horseshoes together to make the end supports. Weld the flat steel bar horizontally between these supports.
Step 3: Weld the remaining 6 horseshoes across the bar evenly, curving up to hold each boot inverted.
Step 4: Touch up with paint for a cleaner finish and added protection. Let it cure fully before placing boots.
#12. Horse Memorial Shadow Box
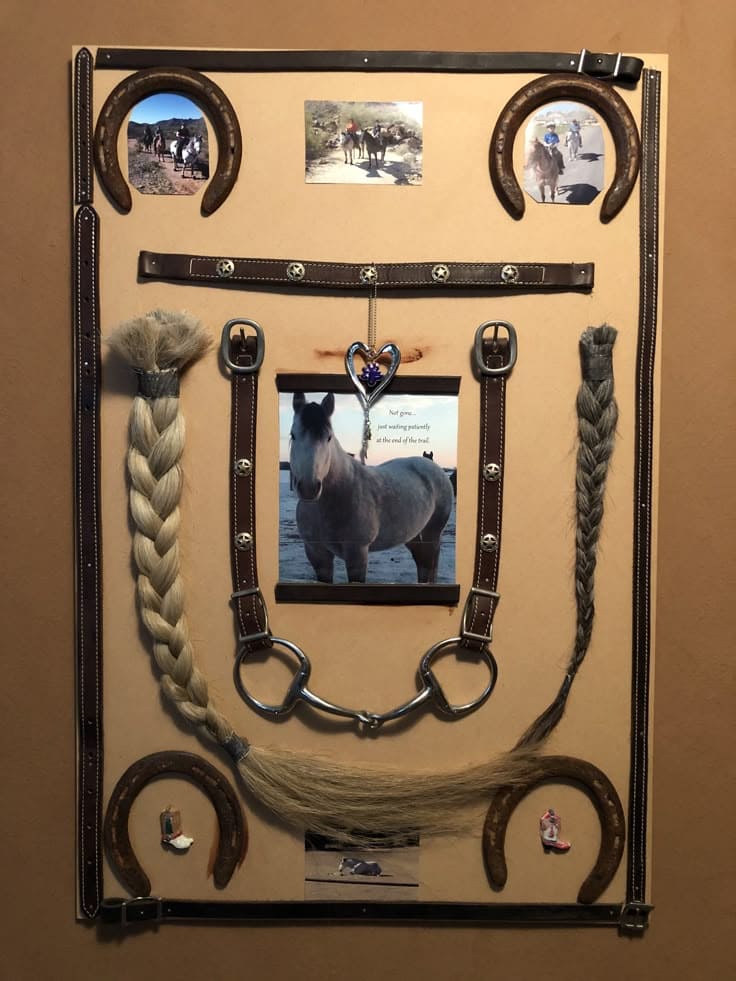
I made this tribute shadow box after losing a beloved horse, and it still brings me comfort every time I pass by it.

Materials Needed
- 4 horseshoes
- 1 sturdy cardboard (approx. 24″ x 36″)
- Leather tack pieces
- Braided horsehair keepsakes
- Metal snaffle bit
- Photos (printed 4×6)
- Super glue
- Small hanging hooks
- Optional: engraved plaque, heart charm
Step-by-step Guide
Step 1: Begin by arranging all your elements loosely on the backing of the cardboard. Plan the layout so that the photos, horseshoes, tack, and mane are balanced without overcrowding.
Step 2: Attach horseshoes using heavy-duty glue or screws through the shadow box base. Use hooks for heavier items like the snaffle bit or buckled leather.
Step 3: Secure the braided mane or tail using hot glue and tuck the ends behind decorative tack. Tape or glue photos directly or place them in mini frames. Add any special mementos, charms, or custom tags.
#13. Rearing Metal Horse Sculpture
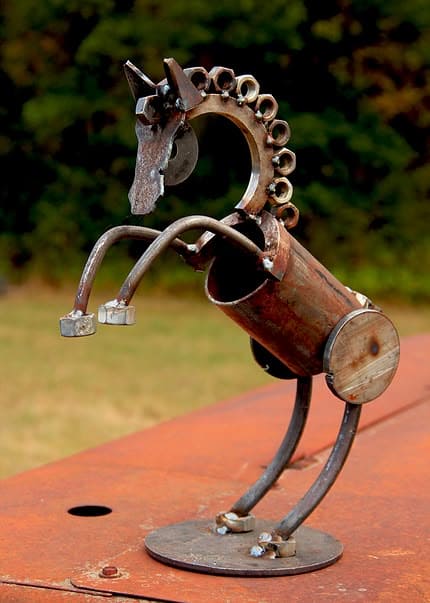
Perfect for a garden centerpiece or workshop decor, it proudly stands with attitude and grit.

Materials Needed
- 1 small metal pipe (6–8″ long)
- 2 horseshoes
- 2 large washers
- 2 curved metal rods
- 1 heavy-duty bolt and 12 small washers
- 1 small steel nut
- Flat round metal plate
- Welding machine and safety gear
Step-by-step Guide
Step 1: Weld the metal pipe body at a tilted angle onto the base plate. Attach the side discs as hips using small weld tacks.
Step 2: Position and weld the horseshoes as the rear legs, keeping them slightly bent to create a rearing pose. Adjust balance to ensure it stands.
Step 3: Weld curved rods as front legs to the chest, ending with square nuts for hooves.
Step 4: Create the head using scrap metal or a shaped nut and bolt piece. Add bolts for ears and washers/loops for the flowing mane. Attach securely on top of the body with an arched neck made of welded washers or a shaped rebar.
#14. Horseshoe Christmas Ornament Wreaths

I love using them to decorate barn doors or gift them to horse-loving friends, each one carries a bit of warmth, metal, and greenery.

Materials Needed
- 2 horseshoes
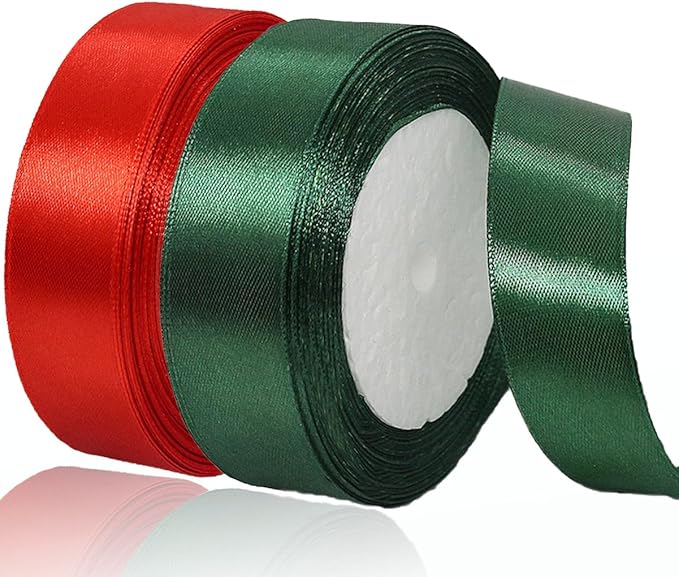
- Red and green satin ribbon (approx. 2 feet of each)
- Mini pine branches
- Red berry stems
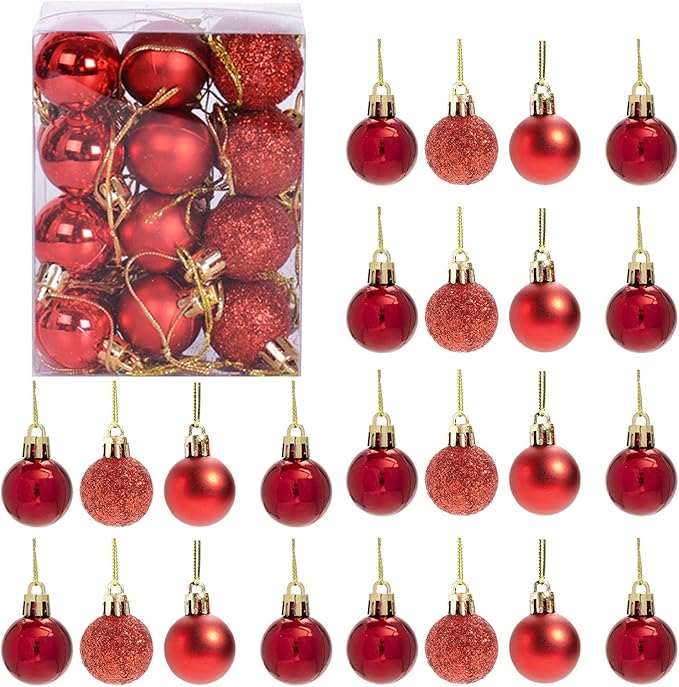
- Mini Christmas ornaments
- 2 small wooden stars (optional)
- Hot glue gun and glue sticks
Step-by-step Guide
Step 1: Cut two long strips of ribbon. Wrap one around the horseshoe’s arms and tie the other to form the hanging loop with a bow at the top.
Step 2: Arrange pine sprigs, berry picks, and small accents like stars or bells at the base of the horseshoe. Hot glue each piece in place, layering for depth.
Step 3: Hang a small ornament from the center using a bit of thread or ribbon. Adjust for balance, then hang your wreath on a hook or door knob.
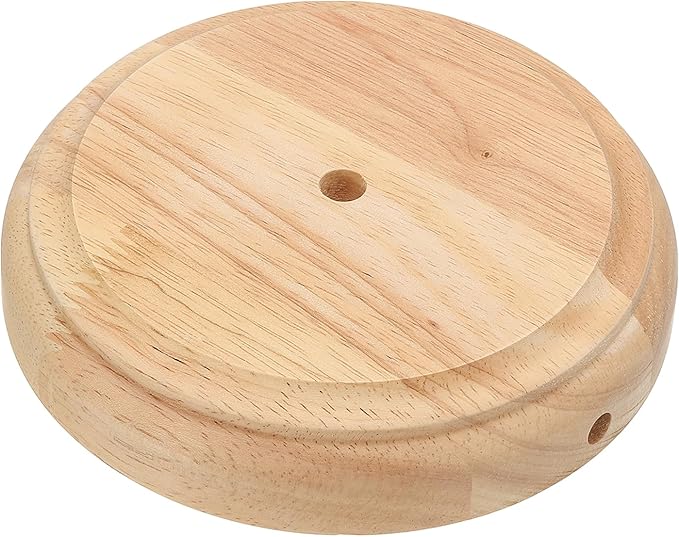
#15. Rustic Horseshoe Log Candle Holder
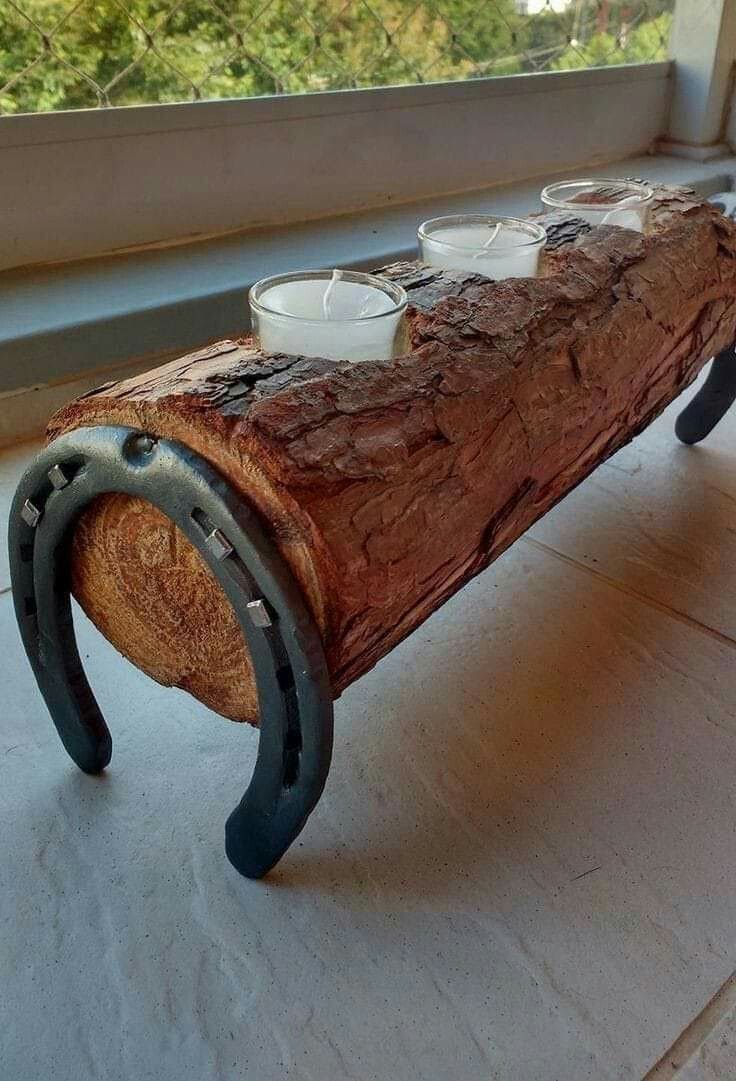
With only basic tools and a bit of care, you can make a similar piece that brings warmth and handcrafted soul to any table or porch shelf.

Materials Needed
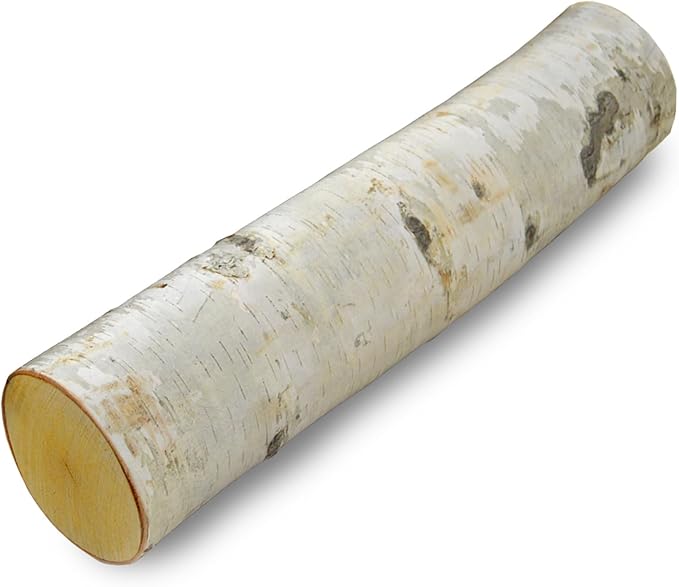
- 1 log, approx. 16–20″ long and 4–6″ in diameter
- 2 steel horseshoes
- 3 glass votive candle holders
- Drill with Forstner bit (2″ diameter)
- Wood glue (optional)
- Sandpaper and a wire brush
- Black spray paint
- Safety gloves and goggles
Step-by-step Guide
Step 1: Mark three evenly spaced spots along the top of the log and drill candle-sized holes about ½” deep using the Forstner bit. Test fit the glass votives for a snug seat.
Step 2: Paint or seal the horseshoes, let them dry, then attach them to each log end using strong epoxy or by welding if you want a permanent hold.
Step 3:Insert the votive glasses, add candles, and you’re done.
#16. Horseshoe Stall Name Sign
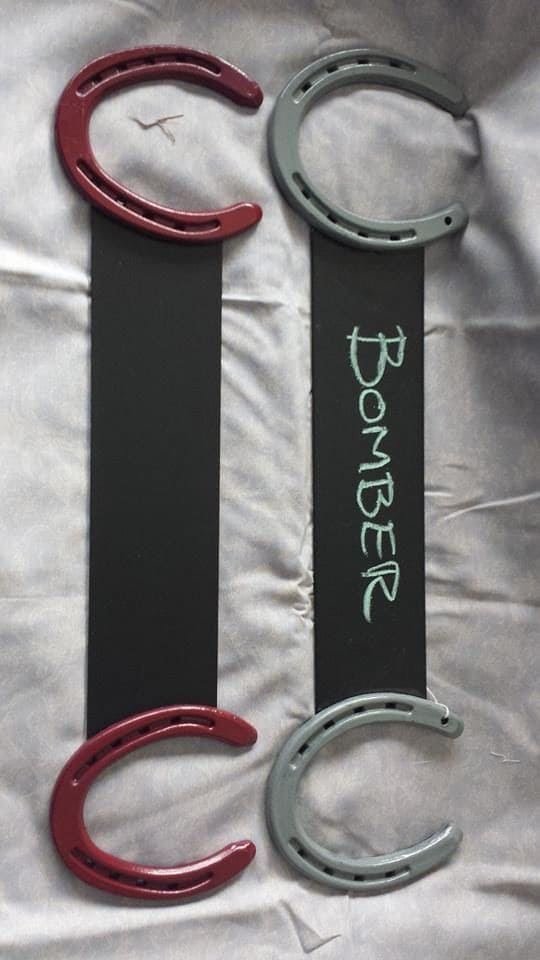
The horseshoe ends give it rustic charm, while the chalkboard center makes switching names or adding fun messages super easy.
Materials Needed
- 4 horseshoes
- Red and gray spray paint
- 1 chalkboard plank (approx. 4″ x 18″)
- Chalk marker
- Screws
Step-by-step Guide
Step 1: Paint the horseshoes in your preferred color. Let them dry completely before attaching.
Step 2: Center the chalkboard vertically and screw one horseshoe at the top and one at the bottom, open-end facing outward.
Step 3: Write your horse’s name or a custom message in the center with a chalk marker. Let it dry if using paint.
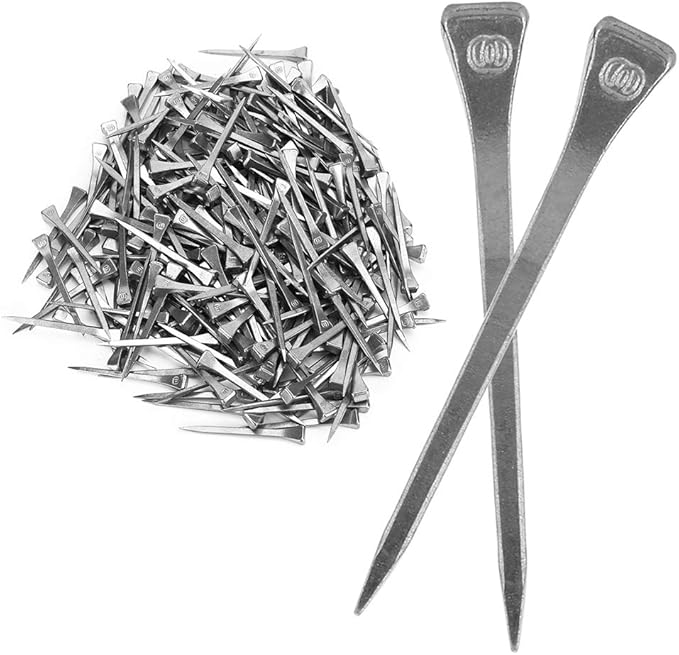
#17. Horseshoe Nail Mandala Wall Art
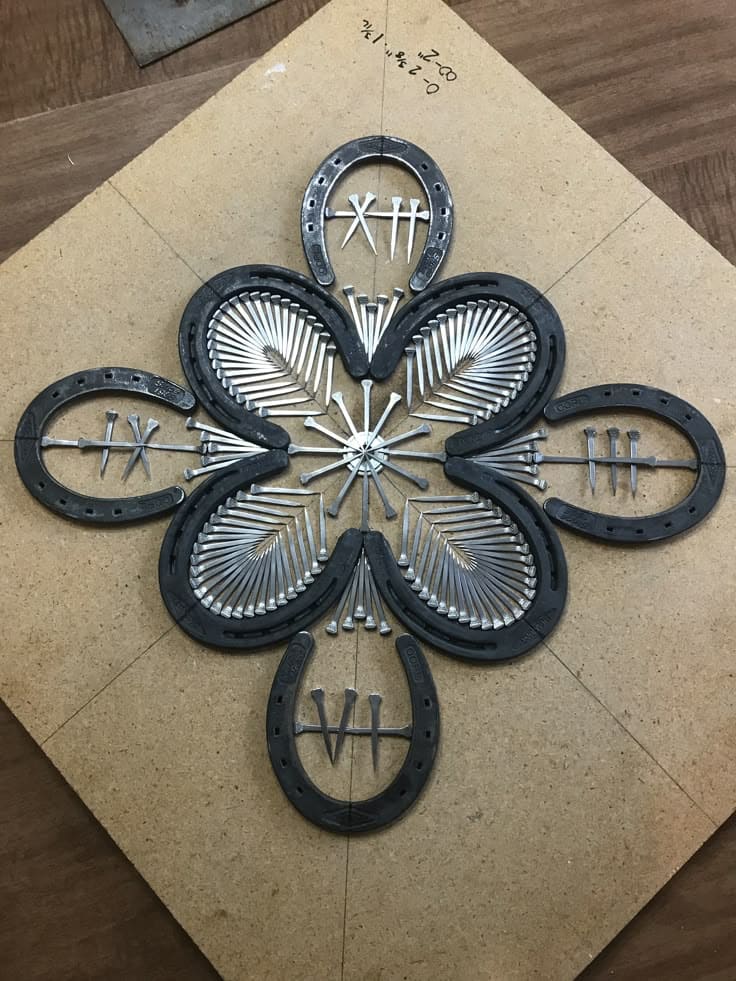
I made this wall decor on a rainy afternoon in the workshop, combining old horseshoes and farrier nails into a symmetrical mandala that almost hums with structure.
Materials Needed
- 8 steel horseshoes
- 120+ farrier nails (sizes 4.5 to 6)
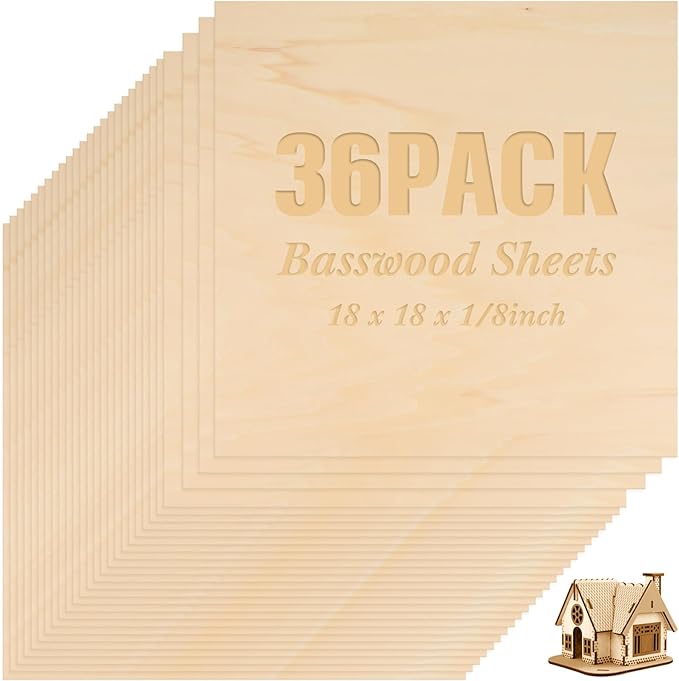
- 1 piece of ¾” plywood (18″ x 18″)
- Metal epoxy adhesive (optional)
- Measuring tape
- Pencil, chalk, or center guide
- Mounting hardware
Step-by-step Guide
Step 1: Lay out the horseshoes into a symmetrical flower-like pattern on the board. Lightly mark the center and divide the surface into quadrants to help with nail alignment later.
Step 2: Secure each horseshoe in place using epoxy or weld, starting from the top and working around. Let dry completely before continuing if using adhesive.
Step 3: Begin placing the nails in mirrored, radial formations inside each shoe. You can use a dab of epoxy on the base of each nail, or simply wedge them tightly for a dry-fit design. Vary the angle and spacing to achieve the layered petal look.
Step 4: Finish by creating a starburst in the center with tightly arranged nails and secure all final placements.
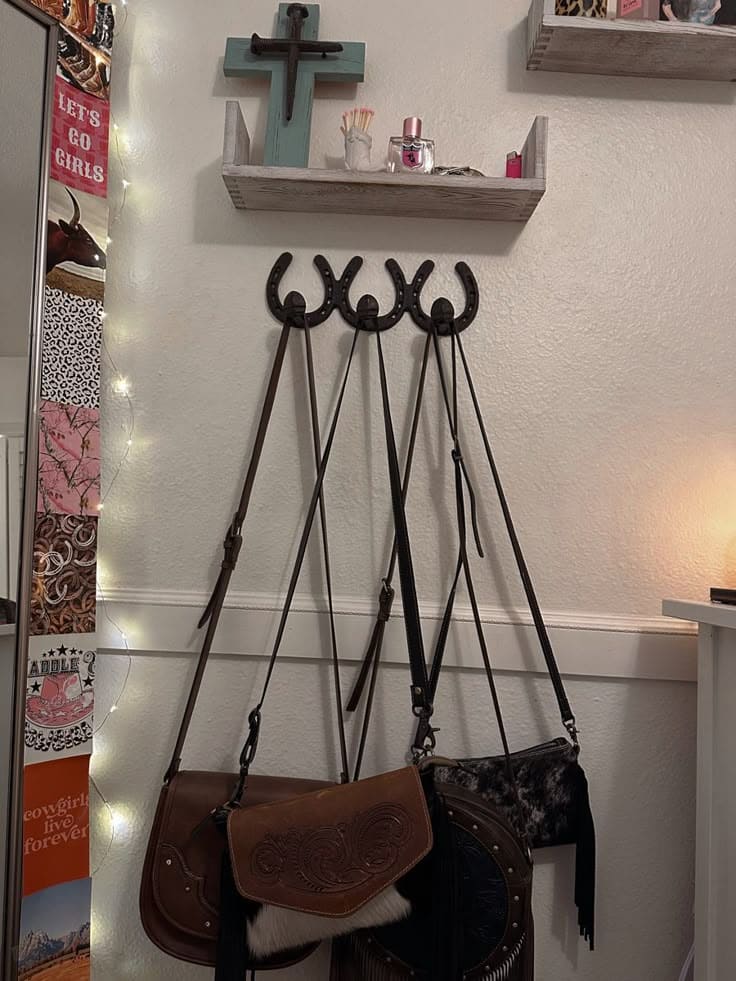
#18. Horseshoe Key Holder
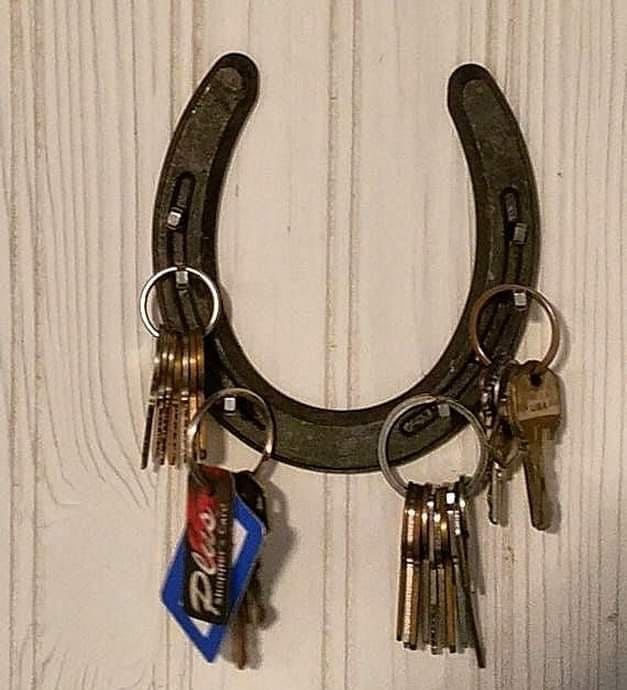
I made this horseshoe key holder after misplacing my keys one too many times. Now, it’s not just useful, it’s a small symbol of luck and rustic style right by my front door.
Materials Needed
- 1 standard horseshoe
- 4–5 small metal key rings
- 2 small screws and wall anchors
- Drill
Step-by-step Guide
Step 1: Drill two small holes in the horseshoe, one on each upper side, for mounting.
Step 2: Use screws to attach the horseshoe to a wooden plank or directly to the wall at eye level or near your entryway.
Step 3: Slide metal key rings into the horseshoe’s open slots. Adjust spacing so each key ring hangs freely.
#19. Horseshoe Fire Pit Bowl
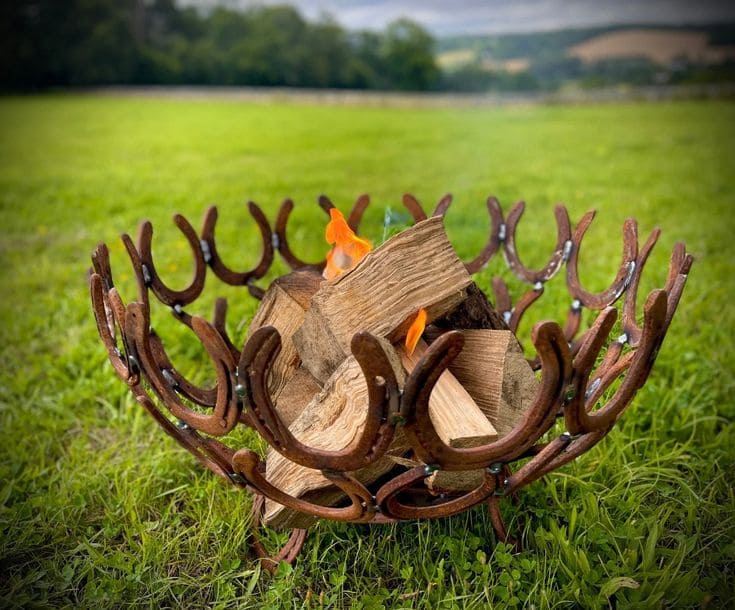
This horseshoe bowl delivered that, raw steel, a little rust, and a whole lot of charm. It’s a centerpiece on cool evenings, perfect for stories, sparks, and silence.
Materials Needed
- 30–36 horseshoes (standard 4.5″ size)
- Welding machine and gloves
- High-temp resistant spray paint
- Fireproof base
- Heat-resistant primer (optional)
- High-temp clear coat spray
Step-by-step Guide
Step 1: Lay out the first ring on a flat surface. Weld 10–12 horseshoes in a circle, slightly overlapping the ends to form a base ring.
Step 2: Stack and weld the next layer, slightly angling the horseshoes upward to form a bowl shape. Continue layering upward and inward until the bowl feels deep enough (3 or 4 tiers).
Step 3: Add small legs underneath the bottom ring to lift the pit slightly off the ground for airflow and safety.
Step 4: (Optional) Spray a coat of heat-resistant primer and finish with a high-temp clear coat. Let dry thoroughly before use.
#20. Rustic Horseshoe Purse Hook Rack
It’s perfect for small spaces or entryways where you want to keep things tidy but still show off a little Western flair.
Materials Needed
- 3 horseshoes
- Black matte spray paint
- Heavy-duty wall anchors or screws
- Drill and metal screws
- Optional: clear matte sealant
Step-by-step Guide
Step 1: Spray-paint the horseshoes in black. Let them dry fully. You can also distress them slightly with sandpaper for a more vintage vibe.
Step 2: Lay the horseshoes flat on the wall to determine spacing, leave at least 3-4 inches between each for larger bag straps. Mark the holes using a pencil or awl.
Step 3: Drill pilot holes through the horseshoes and into the wall, then secure them tightly with screws.
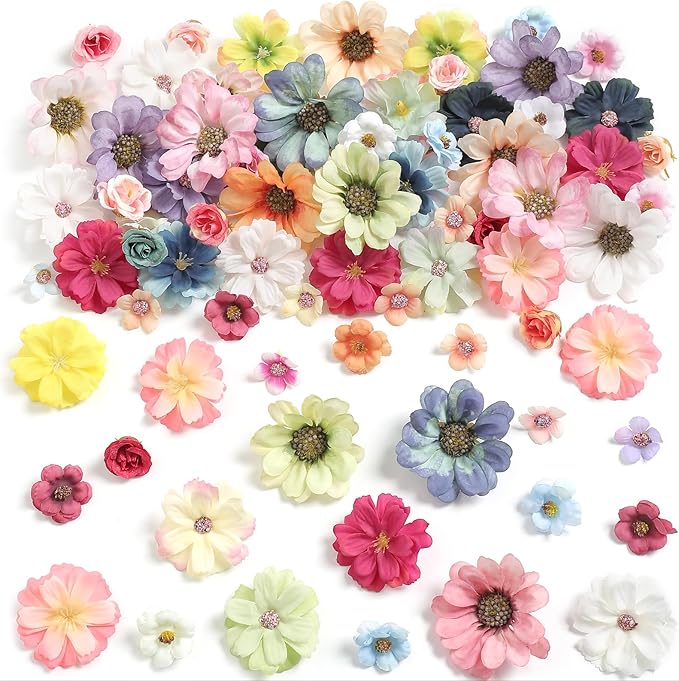
#21. Custom Name Horseshoes with Hand-Painted Floral Designs
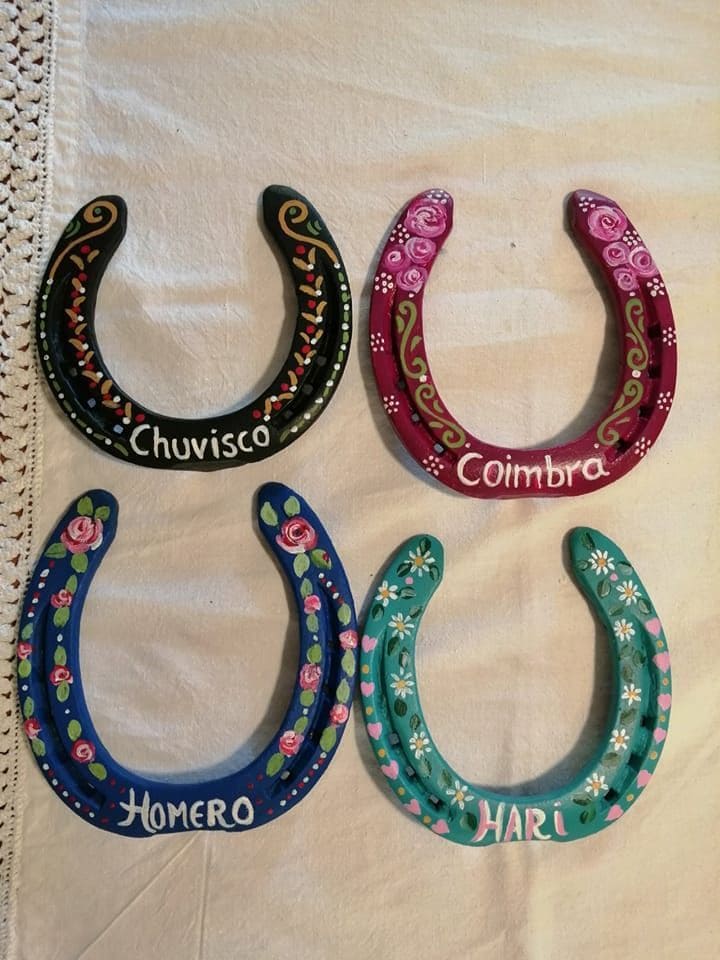
These personalized horseshoes are a heartfelt gift or keepsake, each one telling its own story with names and flowers.
Materials Needed
- 4 horseshoes
- Acrylic paint set and fine brushes
- Clear sealer spray
Step-by-step Guide
Step 1: Clean and lightly sand the horseshoes to remove rust and give the paint a good grip.
Step 2: Base-coat each horseshoe with your chosen background color. Let dry fully.
Step 3: Use fine paintbrushes to add floral patterns and personal names. Let your creativity guide you like roses, daisies, vines, or hearts.
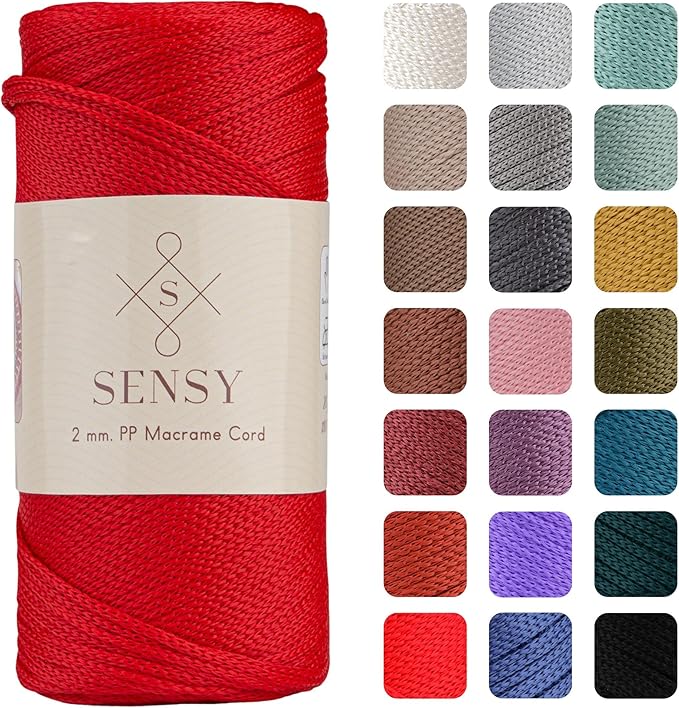
#22. Horseshoe Macrame Hat Hanger
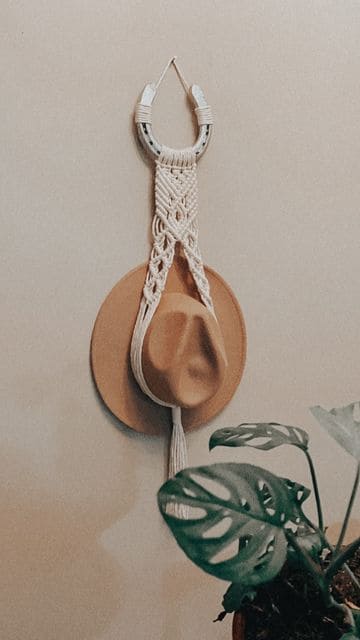
The horseshoe at the top adds rustic charm, while the hand-knotted cord gives it that earthy, boho vibe I always fall for.
Materials Needed
- 1 horseshoe
- 2 small eye hooks
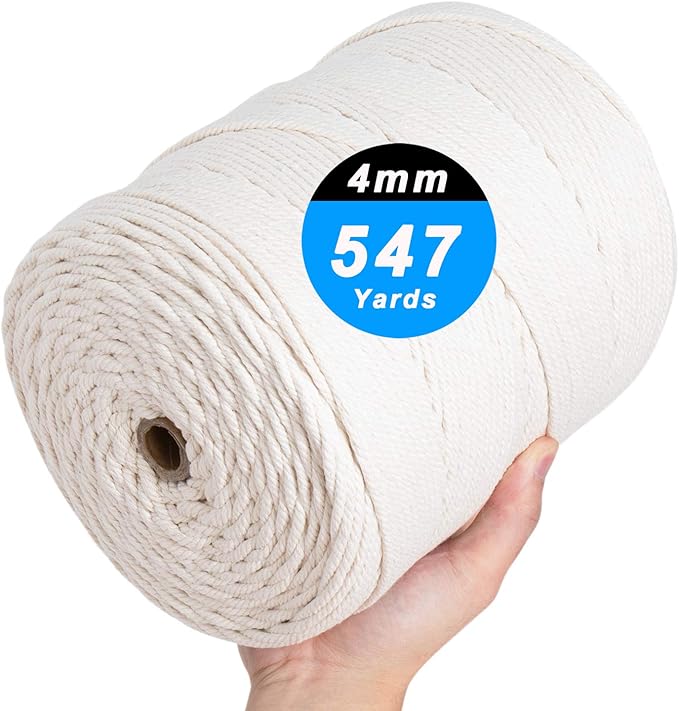
- 25–30 ft of 4mm macramé cord
- Scissors
- Comb
- Wall hook
- Optional: white acrylic paint
Step-by-step Guide
Step 1: Attach eye hooks to each end of the horseshoe to create the hanger base.
Step 2: Cut your macramé cords and use a lark’s head knot to secure them onto the bottom of the horseshoe. Begin your macramé pattern (square knots, half-hitches, etc.) down the length of the cords. Adjust the width and length depending on how low you want the hat to hang.
Step 3: Tie off the ends with a gathering knot and leave a long tassel if desired. Comb out the fringe for a fuller, polished look. Hang the finished piece on a wall hook and slip your favorite hat through the middle knot support.
#23. Painted Horseshoe Cactus Garden Sculpture
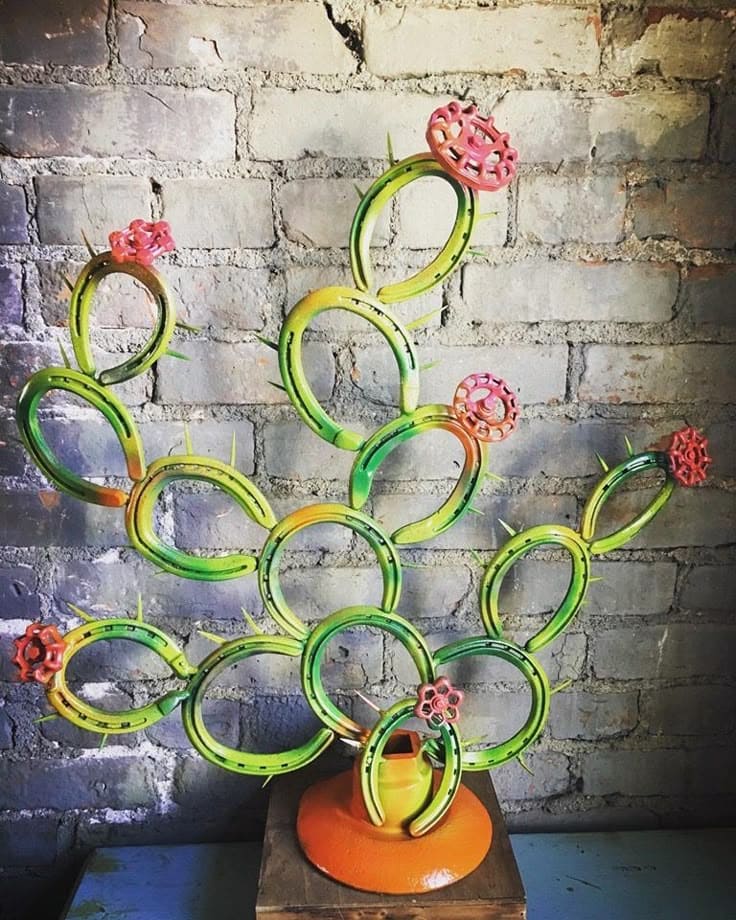
The blend of bright colors and unexpected materials gave it a desert-meets-industrial personality that just works.
Materials Needed
- 14 horseshoes
- 1 sturdy metal base (minimum 10” x 10”)
- 7 outdoor faucet handles
- 1 can green, yellow, pink, red and orange spray paint
- 1 tube strong metal adhesive
- Optional: small metal spikes
- Protective gloves and mask
- Welding tool
Step-by-step Guide
Step 1: Lay out your horseshoes in a branching cactus shape. Start with a wide base and build upward, curving out the arms for balance. When you’re happy with the layout, mark your joining points.
Step 2: Attach the horseshoes together using either a welder or high-strength epoxy. Let each connection fully cure before adding another row.
Step 3: Prime the entire structure if your paint requires it. Then spray-paint the body green, blending yellow highlights across edges and joints for a sun-touched effect. Paint the base orange and each flower handle in vibrant pink or red.
Step 4: Once dry, attach the flower handles to various ends of the horseshoe arms. Use epoxy or weld in place. Add tiny spikes for a fun thorn detail.
#24. Horseshoe Bee Garden Stake
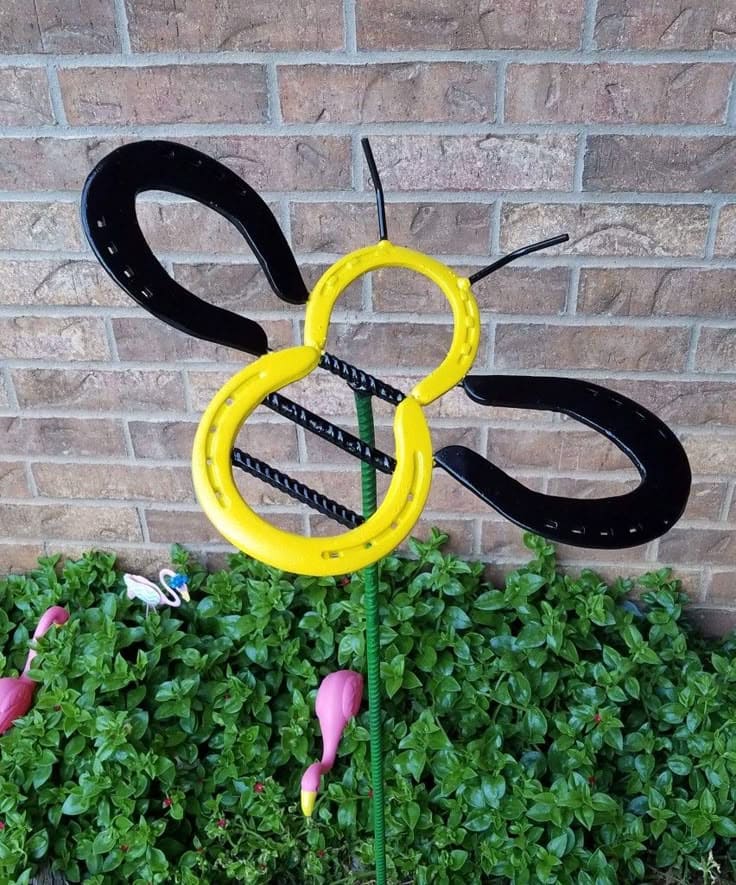
A touch of whimsy, a pop of color, and a whole lot of personality, this horseshoe bee makes any garden feel playful and full of life.
Materials Needed
- 4 standard horseshoes (roughly 5” wide)
- 3 metal rebar rods (1 at 12″, 1 at 14″, 1 at 18″)
- 1 metal rod (36″–48″ long)
- 2 short wire pieces (about 5″ each)
- Yellow and black spray paint
- Clear coat sealant
- Welding machine
- Safety gear (gloves, mask, goggles)
Step-by-step Guide
Step 1: Lay out the bee shape on a flat surface: one horseshoe for the body, one for the head, and the remaining two spread sideways as wings.
Step 2: Weld the horseshoes together at the contact points. Then weld the two rebars diagonally across the body section to mimic bee stripes.
Step 3: Attach the wire antennae to the top horseshoe, bending them slightly for shape. Secure the entire bee sculpture to the top of the metal garden stake.
Step 4: Spray the wings with black paint and the body with yellow. Let dry completely, then add a coat of clear sealant to protect from rust and fading.
#25. Upcycled Horseshoe Cow Face Wall Art
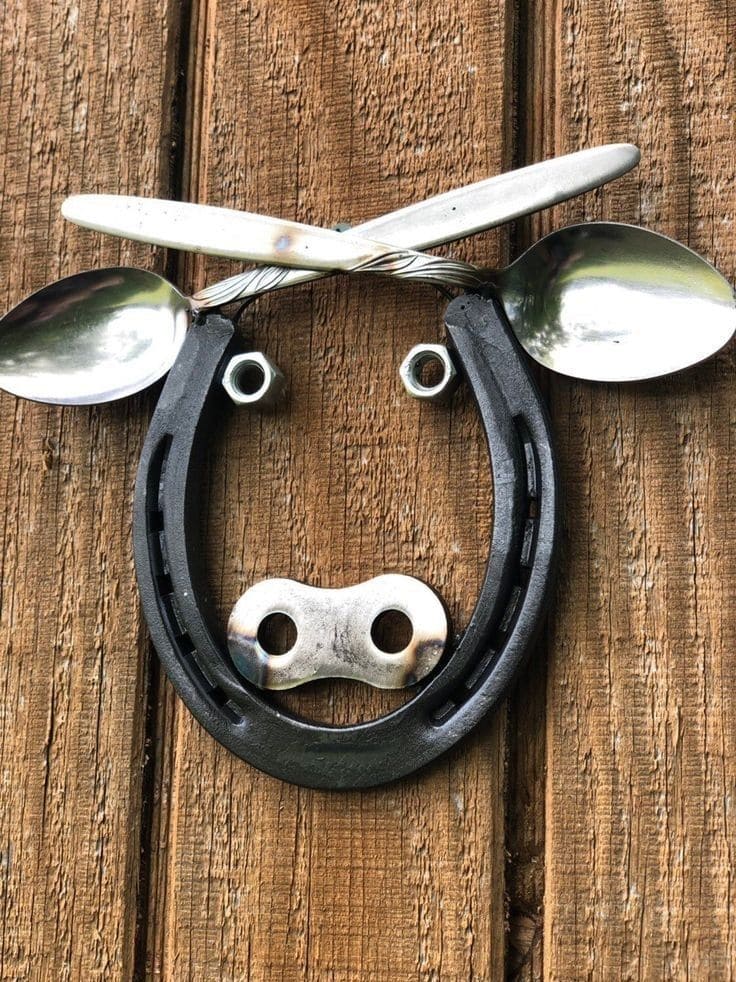
The perfect blend of rustic farm charm and whimsical creativity, this cow face wall décor uses scrap metal in the most playful way.
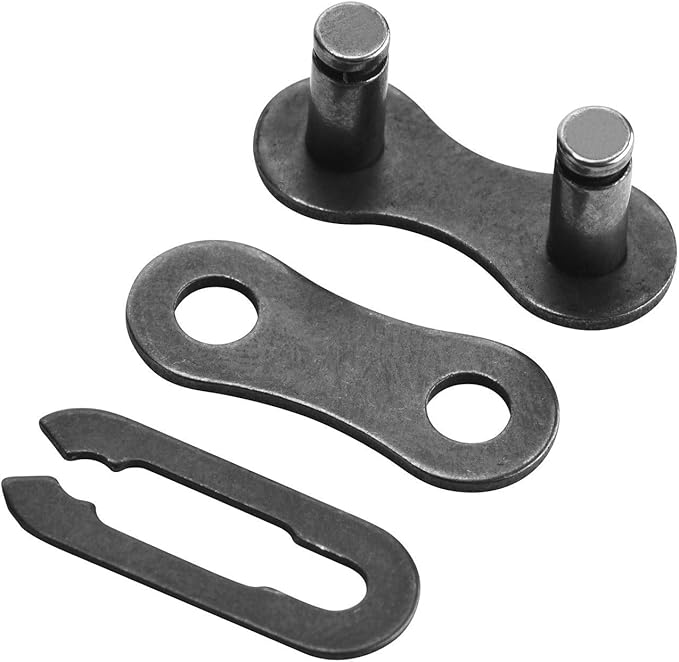
Materials Needed
- 1 horseshoe
- 2 matching metal spoons
- 2 hex nuts
- 1 bicycle chain link plate
- Strong epoxy
Step-by-step Guide
Step 1: Clean all metal pieces thoroughly to remove rust and dirt. Paint the horseshoe black or any finish of your choice for contrast.
Step 2: Lay out the design on a flat surface: spoons as ears, hex nuts as eyes, and the bike link as nostrils. Adjust until balanced.
Step 3: Secure all items using epoxy glue or weld them if you want a long-term outdoor piece. Let the glue cure fully according to the instructions.
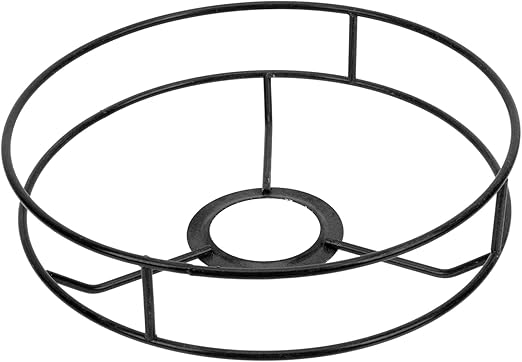
#26. Horseshoe Chandelier Light Fixture
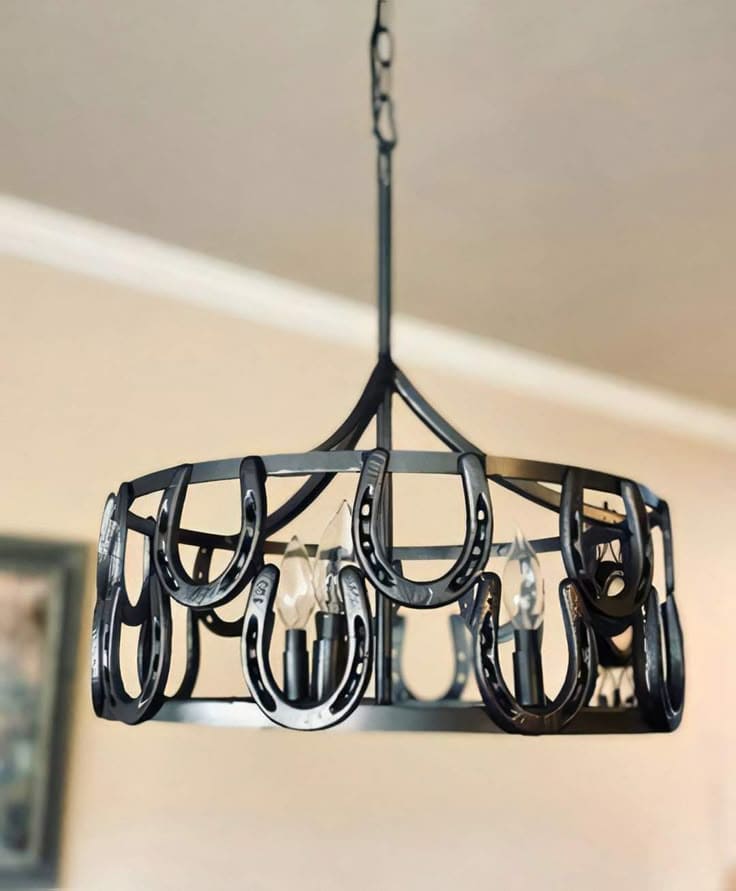
Made from real horseshoes, this rustic-industrial centerpiece brings authentic ranch charm right into your dining room or barn-style kitchen.
 SHOP METAL CHANDELIER FRAME RING
 SHOP VINTAGE-STYLE LED BULBS
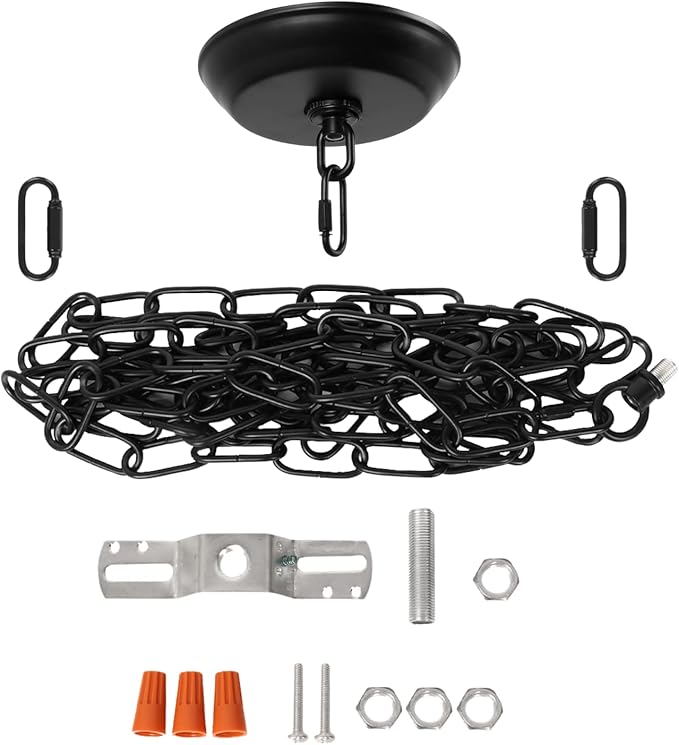 SHOP ELECTRICAL CHANDELIER KIT WITH CHAIN
Materials Needed
- 16 horseshoes
- 1 metal chandelier frame ring (14–18 inches diameter)
- 6 small vintage-style LED bulbs
- Electrical chandelier kit with chain
- Welding gear
- Optional: matte black spray paint
Step-by-step Guide
Step 1: Lay out your horseshoes evenly around the chandelier ring. Alternate directions or align uniformly depending on your design vision.
Step 2: Secure each horseshoe to the metal ring using a welder. If welding isn’t an option, drill pilot holes in the frame and use screws with epoxy for added strength.
Step 3: Install the light sockets inside the ring frame, ensuring wiring passes safely through the center rod and connects to a hanging chain kit.
#27. Festive Yarn-Wrapped Horseshoe Ornament
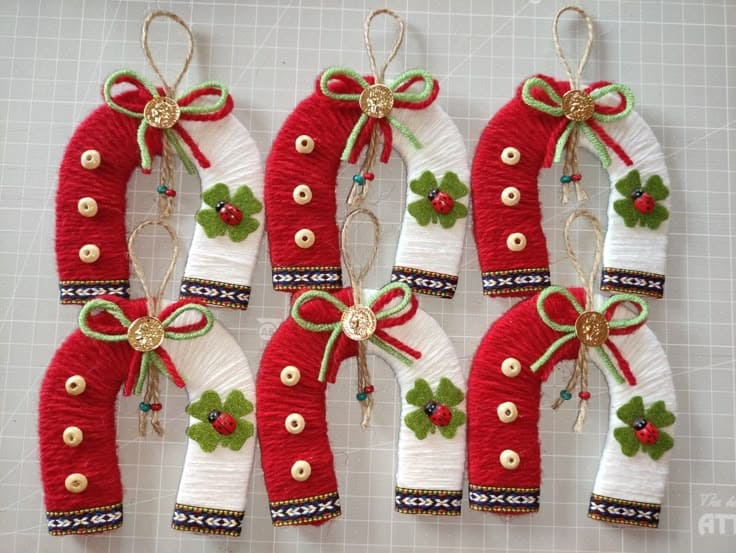
It’s amazing how some yarn and tiny details can completely transform a basic horseshoe into something so heartfelt and festive.
 SHOP RED AND WHITE YARN
 SHOP SMALL WOODEN BUTTONS
 SHOP HOLIDAY RIBBON
 SHOP GREEN FELT
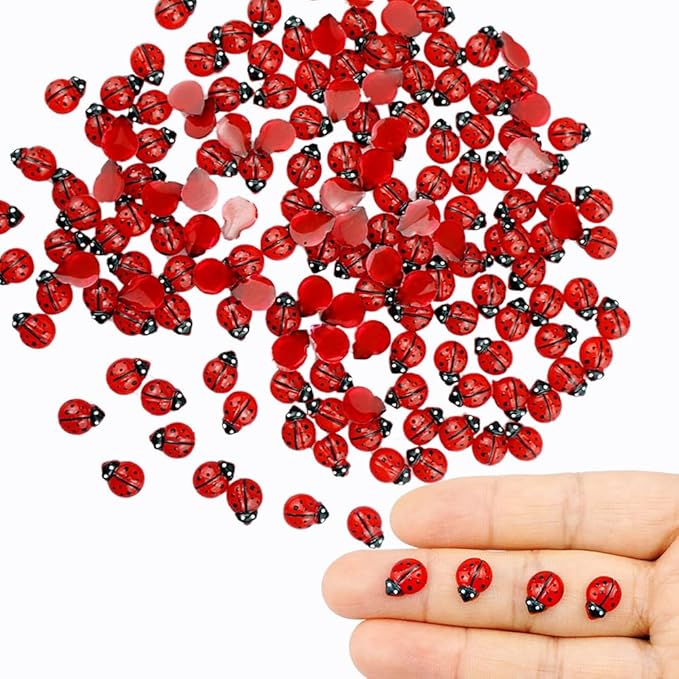 SHOP MINI LADYBUG EMBLISHMENTS
Materials Needed
- 1 horseshoe
- Red and white yarn
- 3 small wooden buttons
- Holiday trim/ribbon
- Green felt
- Mini ladybug embellishments
- Jute twine
- Hot glue gun
Step-by-step Guide
Step 1: Wrap one half of the horseshoe in red yarn and the other in white yarn. Glue the starting and ending points securely.
Step 2: Attach small wooden buttons evenly along the red yarn side using hot glue. On the white side, glue a pair of green felt leaves and add a mini ladybug for a festive touch.
Step 3: Add a decorative ribbon bow at the top center. Tie a piece of jute twine behind the bow for hanging.
Step 4 (Optional): Glue a strip of decorative trim along the bottom of the horseshoe to tie everything together and give it a polished finish.
#28. Rustic Horseshoe Wind Chime Mobile
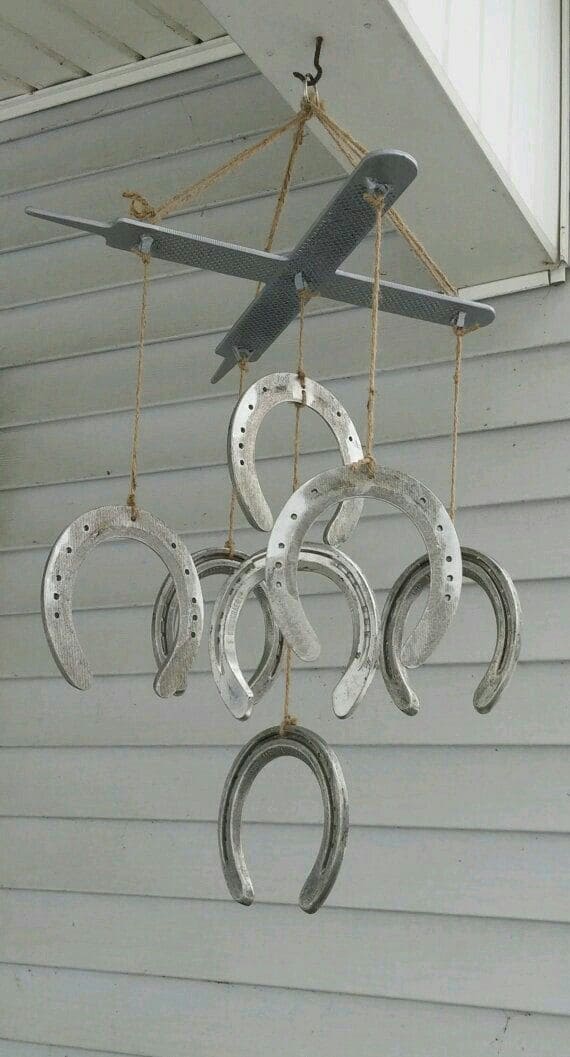
It sways gently with the wind, creating the softest clink of metal that makes me feel like I’m out on a quiet ranch porch at sunset.
Materials Needed
- 7 horseshoes
- Twine
- 2 cut files
- Spray paint in silver (optional)
- Hook
- Drill
Step-by-step Guide
Step 1: Paint all the horseshoes and the metal base with a silver spray paint (optional). Let dry completely.
Step 2: Drill small holes into the cut file base at balanced points for stringing the ropes.
Step 3: Cut several lengths of jute rope and tie one end to the horseshoes. Adjust each to different heights for a layered effect.
Step 4: Tie the top ends of the ropes through the drilled holes in the cut file base and knot them securely. Add a main loop at the top for hanging.
#29. Western Horseshoe Hat Rack Display
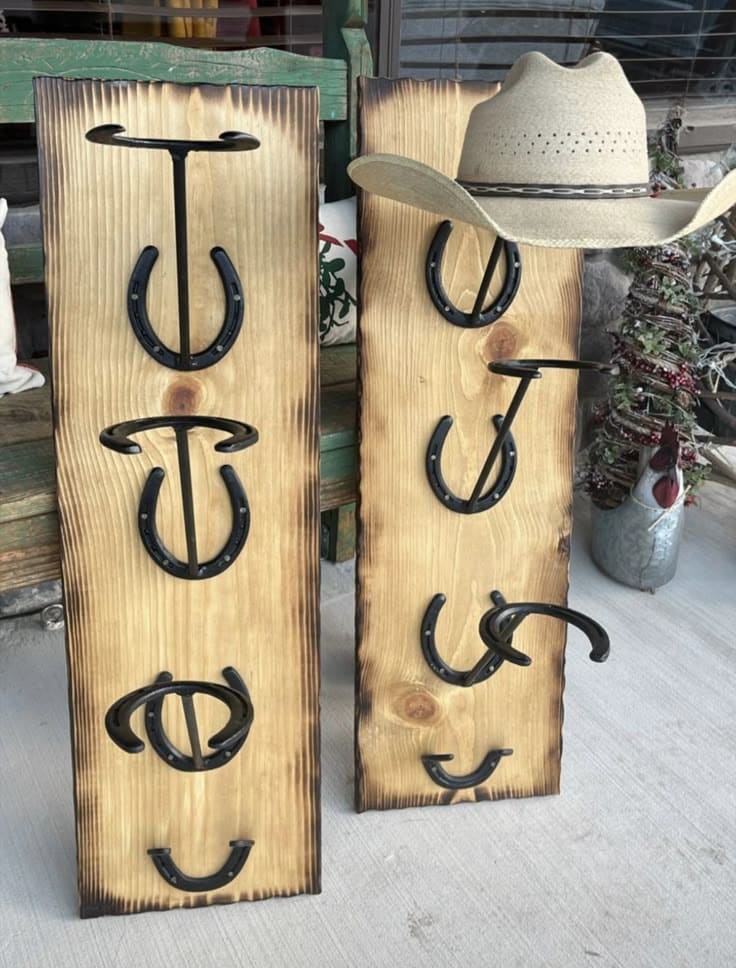
The burnt pine adds such warmth and authenticity, turning a slab of wood and old horseshoes into something personal and iconic.

Materials Needed
- 1 pinewood board (36″ x 12″)
- 6 steel horseshoes per rack
- Black matte spray paint
- Wood screws and washers (1.25” size)
- Power drill and screwdriver bit
Step-by-step Guide
Step 1: Spray paint the horseshoes in black (or your choice of color). Apply at least two coats and let them cure.
Step 2: Position the horseshoes evenly along the board in a staggered pattern, with one turned outward for each hat slot. Mark where each screw will go.
Step 3: Drill pilot holes into the wood. Then screw the horseshoes into place using washers for a firmer hold.
#30. Shabby Chic Horseshoe Luck Charms
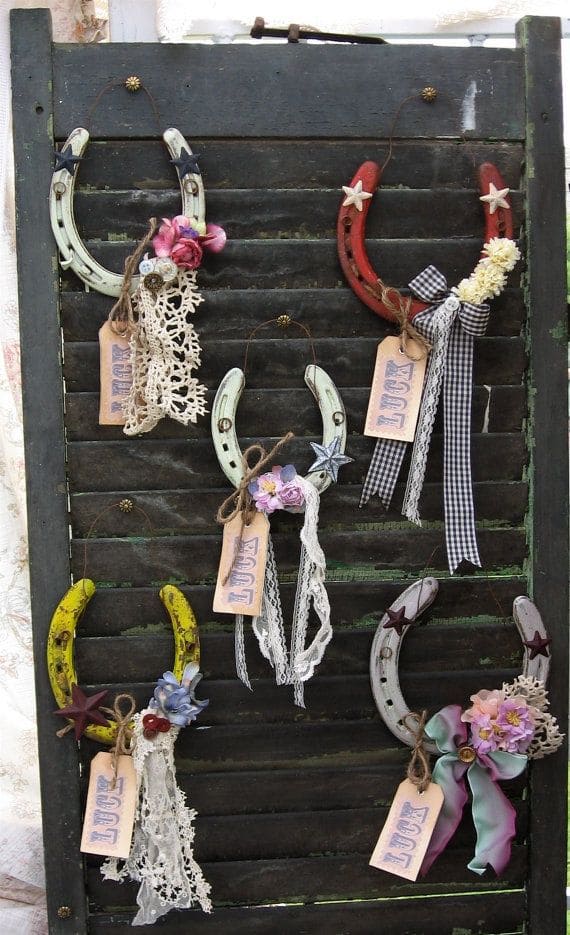
These horseshoe charms feel like little blessings hung in lace and ribbon. Each one tells a story, rustic, soft, and filled with intention.

Materials Needed
- 5 horseshoes
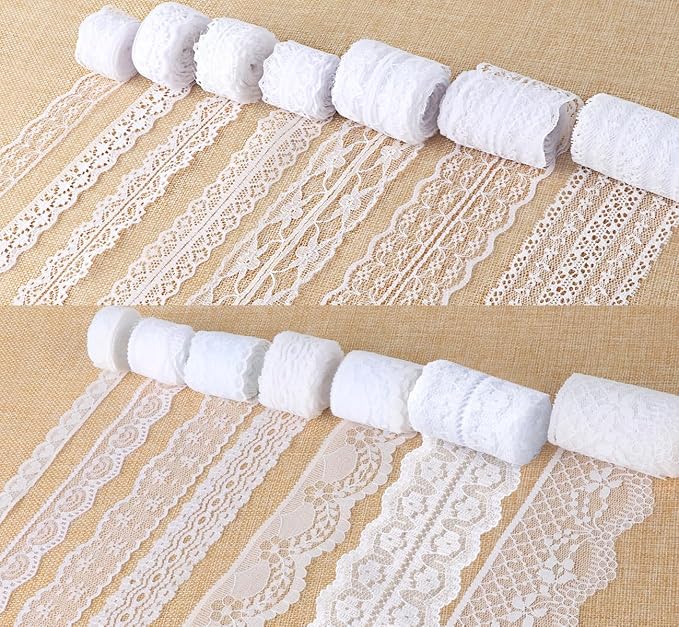
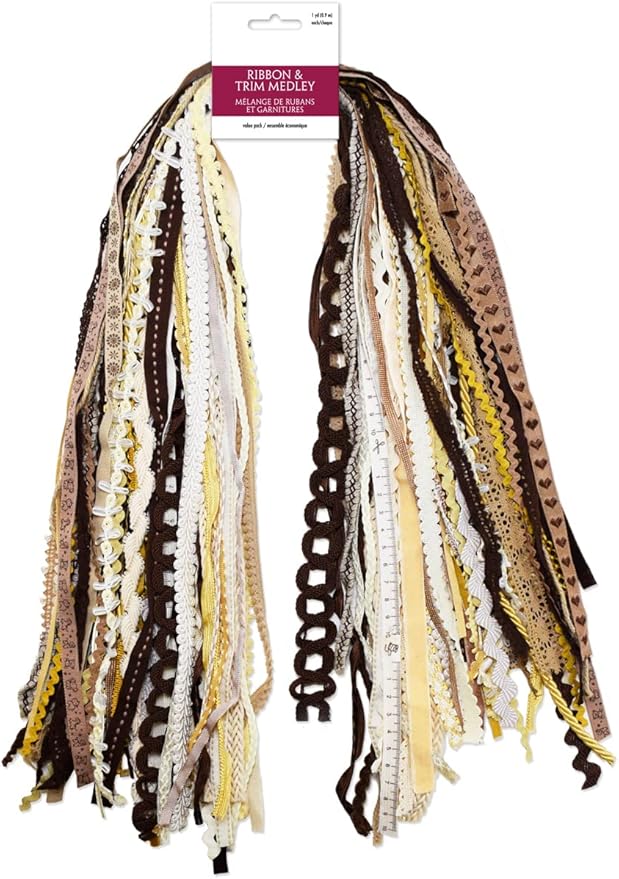
- Mixed ribbons and lace strips (24″)
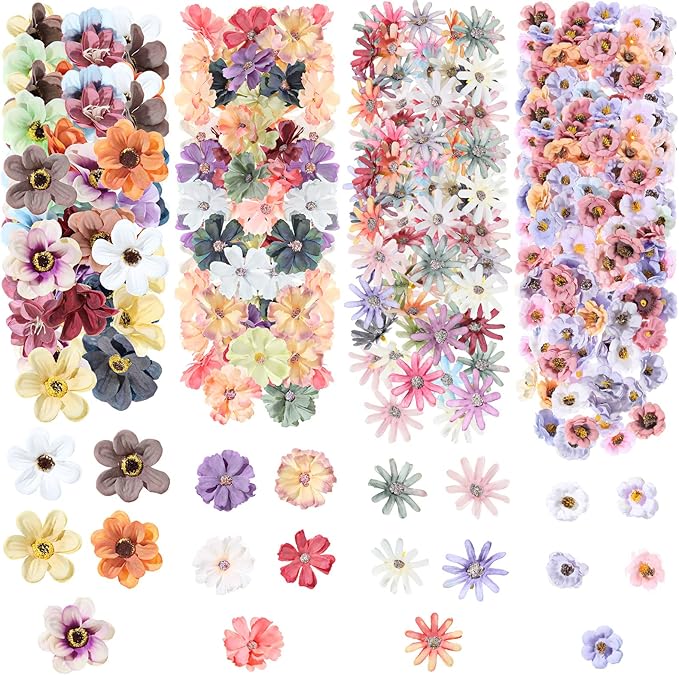
- Small faux flower heads and stars
- Twine
- Kraft paper tags with “LUCK” stamped
- Hot glue gun and glue sticks
- Optional: acrylic paints
Step-by-step Guide
Step 1: Wrap or tie lace and ribbon around the lower arms of each shoe. Layer textures and colors for a dreamy, vintage feel.
Step 2: Glue flowers, buttons, or stars near the top or middle as decorative accents. Personalize each with its own style.
Step 3: Attach a paper tag labeled “LUCK” to each charm using twine, then loop a twine through the top holes and hang on hooks window shutters.
#31. Rustic Horseshoe Door Handle
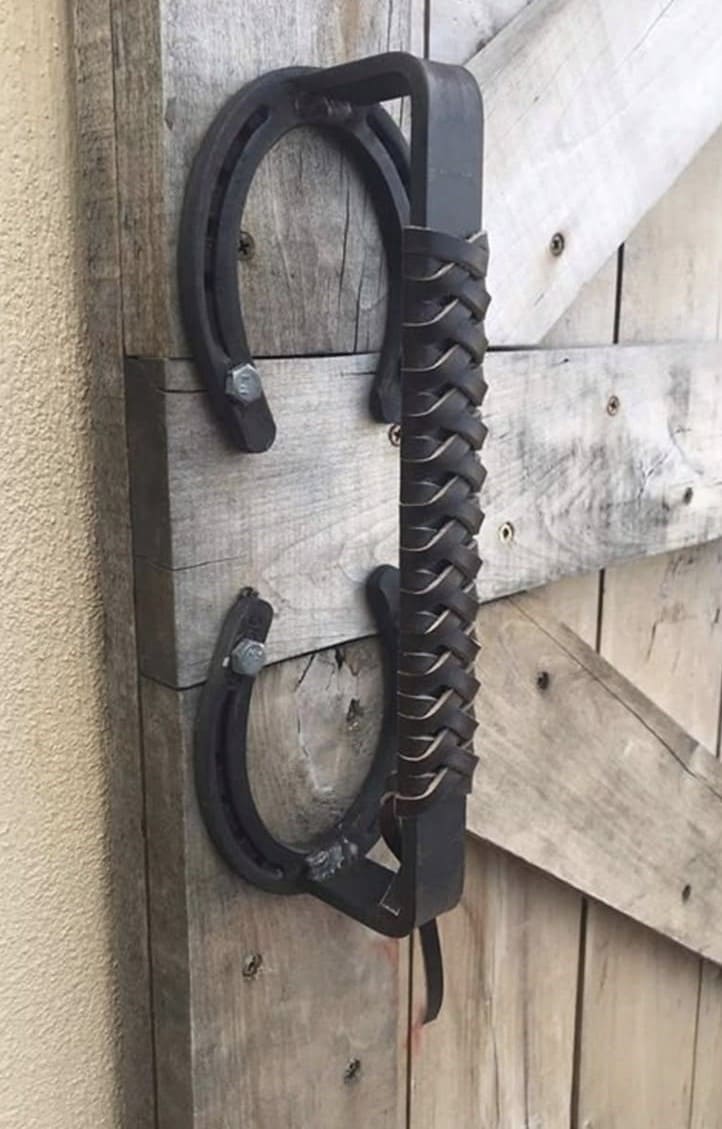
There’s something deeply grounding about grabbing a door handle that feels like it belongs on a ranch gate. This piece blends steel and leather in a way that feels both raw and refined.
Materials Needed
- 2 horseshoes (steel, approx. 5″ diameter)
- 1 forged iron handle (approx. 10″–12″)
- 4 bolts and washers (⅜”)
- Optional: black or oil-rubbed spray paint
Step-by-step Guide
Step 1: Secure the horseshoes vertically onto the wooden surface using bolts. These act as both the decorative base and anchor points for the handle.
Step 2: Attach the metal handle across the horseshoes at equal spacing. Drill and bolt it in tightly to prevent wiggle.
#32. Rustic Horseshoe Paper Towel Holder
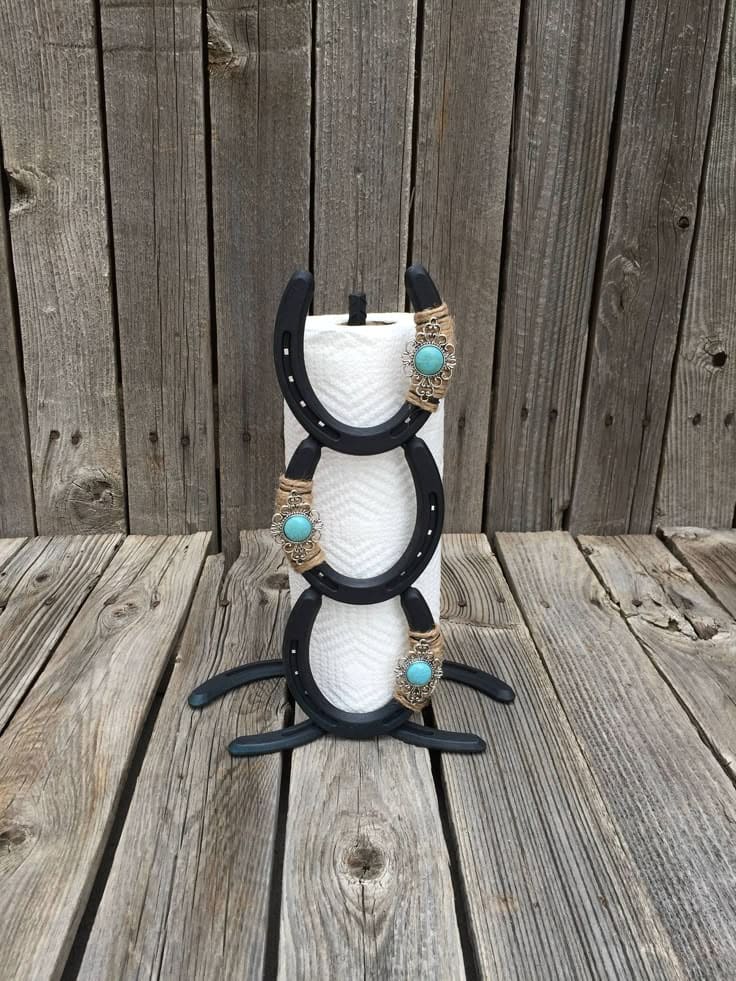
With wrapped twine, turquoise conchos, and a solid stance, it brings a western flair to the most ordinary kitchen chore.
Materials Needed
- 9 horseshoes
- 1 threaded rod (½” diameter, 10–12″ tall)
- Jute twine
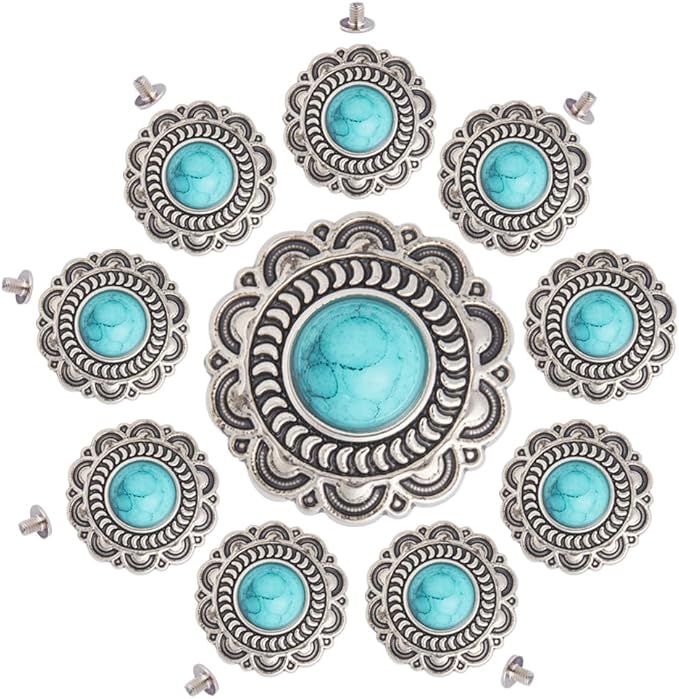
- Decorative turquoise conchos
- Black spray paint
- Welding tools
- Optional: Clear coat sealant spray
Step-by-step Guide
Step 1: Clean all metal components thoroughly. If desired, paint the horseshoes and base pieces with black spray paint and allow them to fully dry.
Step 2: Weld the three horseshoes vertically, one above the other, aligned in a cylindrical shape to form the towel holder’s body. Repeat this step one more.
Step 3: Attach the base. Weld the three horseshoes for stability.
Step 4: Insert the rod through the center to act as the spine that holds the paper towel roll. Secure the rod at the base and optionally add a cap or stopper at the top.
Step 5: Wrap jute rope around the joint areas where horseshoes meet, securing with glue. Finish by gluing on turquoise conchos or embellishments for that Western charm.