Building a brick barbecue is a fun and rewarding project that can add a lot of charm to your backyard. Whether you’re a seasoned DIYer or a beginner, this guide will walk you through the steps to create your very own brick barbecue.
We’ll keep it simple, with clear instructions and easy-to-find materials. By the end, you’ll have a sturdy and stylish barbecue where you can cook up delicious meals for family and friends. Let’s get started!
Materials:
- Cinder blocks or bricks: These will form the structure of your barbecue.
- Metal grates: You’ll need two metal grates, one for cooking and one to support the wood or charcoal.
- Metal rods or rebar: These will support the metal grates.
- Concrete or mortar (optional): If you want to make the structure more permanent and sturdy.
- Wood or charcoal: For burning and cooking.
Tools:
- Trowel: For spreading concrete or mortar.
- Level: To make sure everything is even.
- Tape measure: For accurate measurements.
- Gloves: To protect your hands.
- Safety glasses: To protect your eyes.
Step-by-Step Instructions:
1. Choose a Location:
Pick a flat, stable spot in your yard for the barbecue. Ensure it’s away from any flammable materials like trees or bushes.
2. Lay the Foundation:
If you want a more permanent barbecue, you can create a concrete base. If not, make sure the ground is level and firm.
3. Arrange the First Layer of Blocks:
Start by laying the first row of cinder blocks or bricks in a rectangular shape. The size depends on how big you want your barbecue to be. Make sure they are evenly spaced and level.
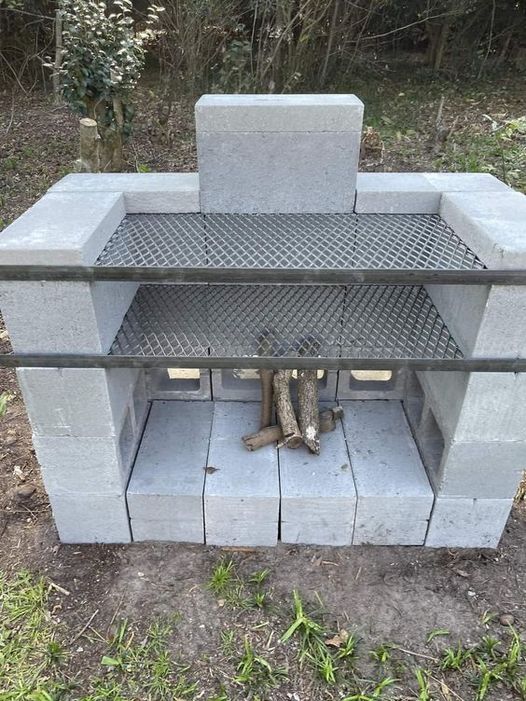
4. Build Up the Walls:
Continue stacking the blocks or bricks on top of each other to create the walls. For the barbecue in the picture, there are three layers of blocks for the main structure.
5. Install the Support for the Grates:
Insert the metal rods or rebar horizontally into the structure at the desired height. These will support the metal grates. The first set of rods should be near the bottom, for the wood or charcoal, and the second set should be higher up for the cooking grate.
6. Place the Metal Grates:
Lay the metal grates on top of the rods. The lower grate will hold the burning wood or charcoal, and the upper grate will be used for cooking.
7. Finish the Structure:
Add any additional blocks to finish off the barbecue. You can add a back wall or leave it open like in the picture.
8. Optional:
Mortar the Bricks: If you want the structure to be more permanent, apply mortar between the blocks. This will hold them together more securely.
9. Test Your Barbecue:
Once everything is in place, give your barbecue a test run. Light a small fire to make sure everything is stable and safe.
10. Enjoy Your Barbecue:
Now that your barbecue is built, you can start grilling! Make sure to keep safety in mind and never leave the fire unattended.
Tips:
- Plan the size according to your needs, considering the size of the grill grate.
- Use firebricks for better heat resistance in the cooking area.
- Consider adding a chimney or vent to help with airflow and smoke control.
And that’s it! With these steps, you’ll have a sturdy, homemade brick barbecue ready for your next cookout.