
Orchids are among the most elegant and rewarding houseplants to grow. With their striking flowers and glossy leaves, they can brighten any room. Many gardeners shy away from propagation, thinking it’s complicated or risky. However, with a few simple steps, it’s possible to grow a new orchid from a healthy stem cutting at home. This method saves money and allows you to expand your orchid collection naturally.
Propagating orchids not only creates new plants but also gives a sense of accomplishment when you watch tiny roots and leaves emerge. By following this clear, six-step guide, even beginners can successfully nurture a cutting into a thriving potted orchid. All you need are some basic materials and a bit of patience.
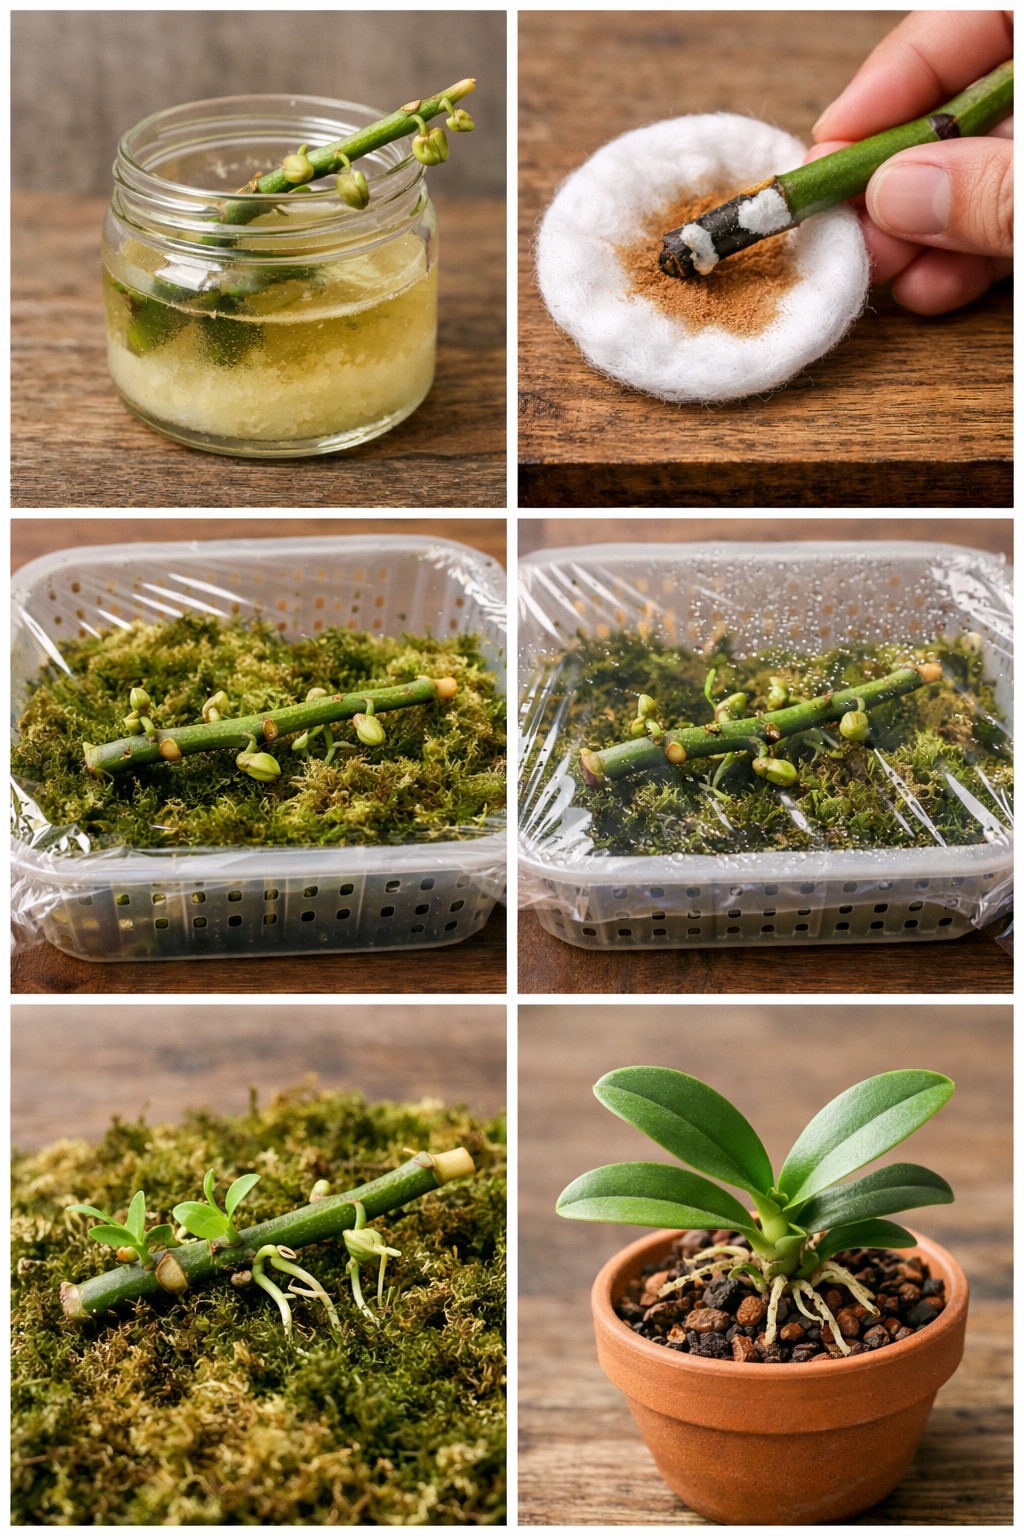
Materials Needed
- Healthy orchid stem with nodes
- Sterile knife or scissors
- Cinnamon powder or fungicide
- Clean cotton pad
- Plastic container or propagation tray
- Sphagnum moss
- Clear plastic wrap
- Small pot with orchid bark or mix
Step-by-Step Guide
Step 1: Prepare the Cutting
Select a healthy orchid stem with visible nodes. Using a sterile knife or scissors, cut a segment that is 3–4 inches long. Remove any damaged leaves or flowers to reduce stress on the plant.
Step 2: Apply Antifungal Treatment
Dip the cut end of the stem in a cotton pad sprinkled with cinnamon powder or a mild fungicide. This prevents infection and encourages root development.
Step 3: Prepare the Moss Bed
Fill a clean plastic container or tray with damp sphagnum moss. Make sure the moss is moist but not soggy, creating a nurturing environment for root growth.
Step 4: Place the Cutting
Lay the treated cutting onto the moss, ensuring nodes are in contact with the moss. Cover the container with clear plastic wrap to retain humidity while still allowing some air circulation.
Step 5: Monitor Root Growth
Keep the moss consistently moist and place the container in bright, indirect light. Over several weeks, small roots and shoots will emerge from the nodes. Gently mist if necessary to maintain humidity.
Step 6: Transfer to Pot
Once roots are established and a few leaves have grown, carefully transplant the new orchid into a small pot filled with orchid bark or a suitable orchid mix. Water lightly and continue to provide bright, indirect light.
With this method, a single orchid stem can become a thriving new plant. By keeping conditions consistent and practicing patience, you can enjoy the satisfaction of growing orchids from cuttings and watching them flourish in your home.