Instead of watching movies for hours on TV or on smartphones, let’s tend your children to the interesting things around life. These creative crafts today are cool and fun projects that will help your kids be more active, at the same time promote discovery and exploration of the nature around them.
They are for those who love creativity at the weekend and are easy to make. Most of them just need a short of time on making with a little effort. Seed starter pots, wreaths, binoculars, bird feeders, train craft, pen holders…these are practical ways to upcycle your toilet paper rolls.
With these ideas, they are easy to make. All you need is a skillful hand and your creativity. Besides, you will have support items to finish, but most of them are available in your house or you can buy them in any store. If you are interested in them, save and try some.
This article contains affiliate links. If you purchase through them, I may earn a small commission at no extra cost to you. Thank you for your support!
#1. Toilet Paper Wreath
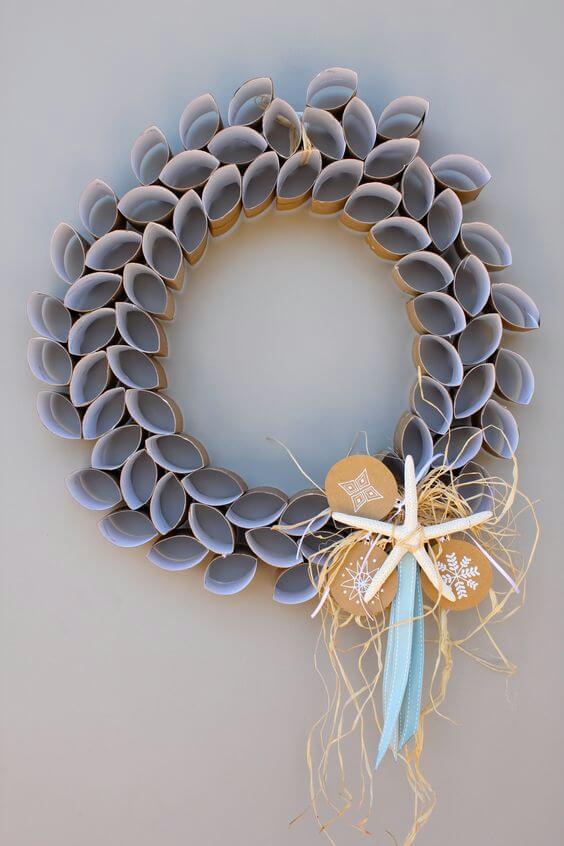
Made entirely from upcycled toilet paper rolls, it turns what most of us toss out into an eye-catching seasonal accent.
Materials Needed
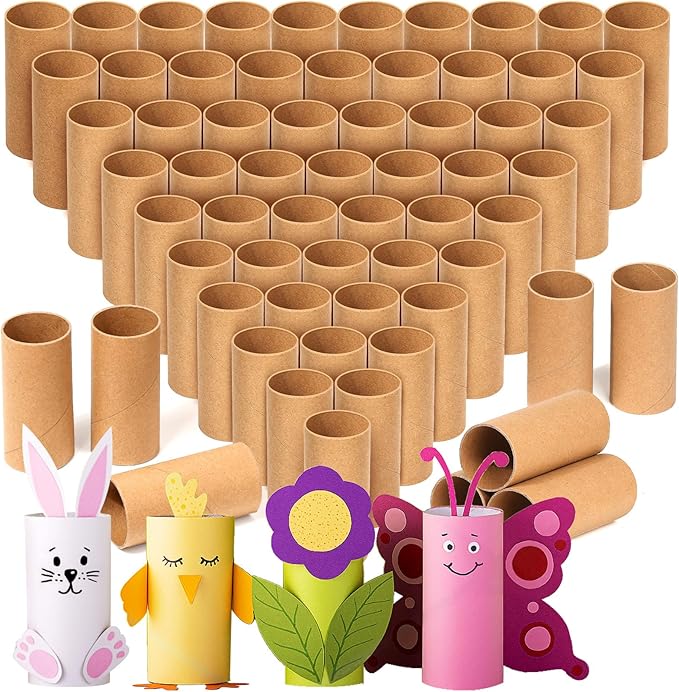
- 12–15 toilet paper rolls
- Scissors
- Hot glue gun and glue sticks
- White or pastel acrylic paint and a sponge brush
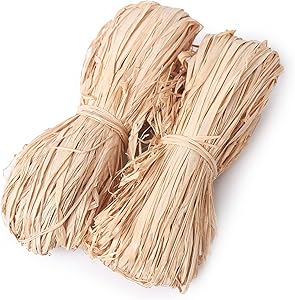
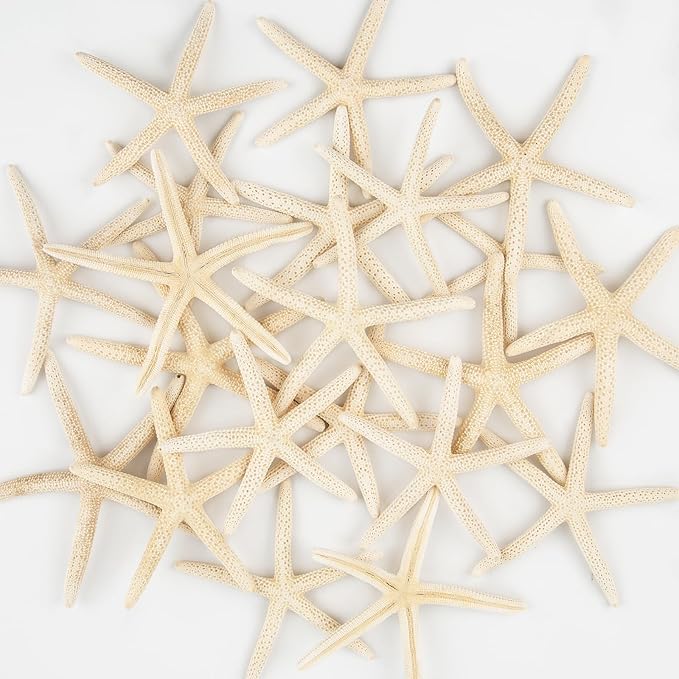
- Optional decorations: raffia, wooden tags, ribbon, starfish or button
- Cardboard base (around 10–12 inches)
Step-by-step Guide
Step 1: Flatten each toilet paper roll and cut into evenly sized rings, about 1/2 inch wide. You’ll need 70–90 pieces depending on how full you want your wreath.
Step 2: Lightly paint the outer surface of each piece with white or pastel acrylic paint. Let them dry fully, then begin arranging them into overlapping petal-like layers on a cardboard base, securing with hot glue as you go.
Step 3: Once the shape is complete, add decorative touches at the bottom – tie raffia into a bow, attach wooden tags, and hot-glue a small starfish or button in the center for a coastal or rustic flair.
#2. Toilet Paper Roll Butterfly Sun Catcher

When the sun hits it just right, it casts a bright stained-glass butterfly shadow on the ground, making it pure magic.
Materials Needed
- 3–4 toilet paper rolls
- Scissors
- Glue or hot glue gun
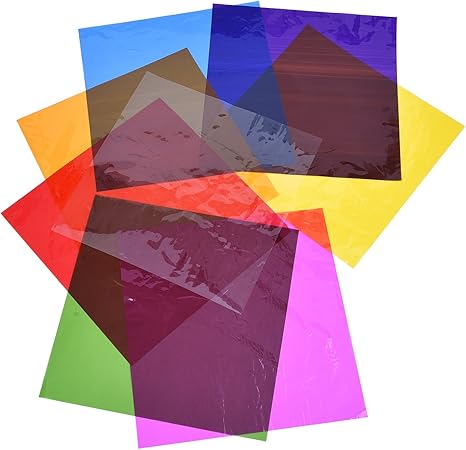
- Colorful cellophane wrappers
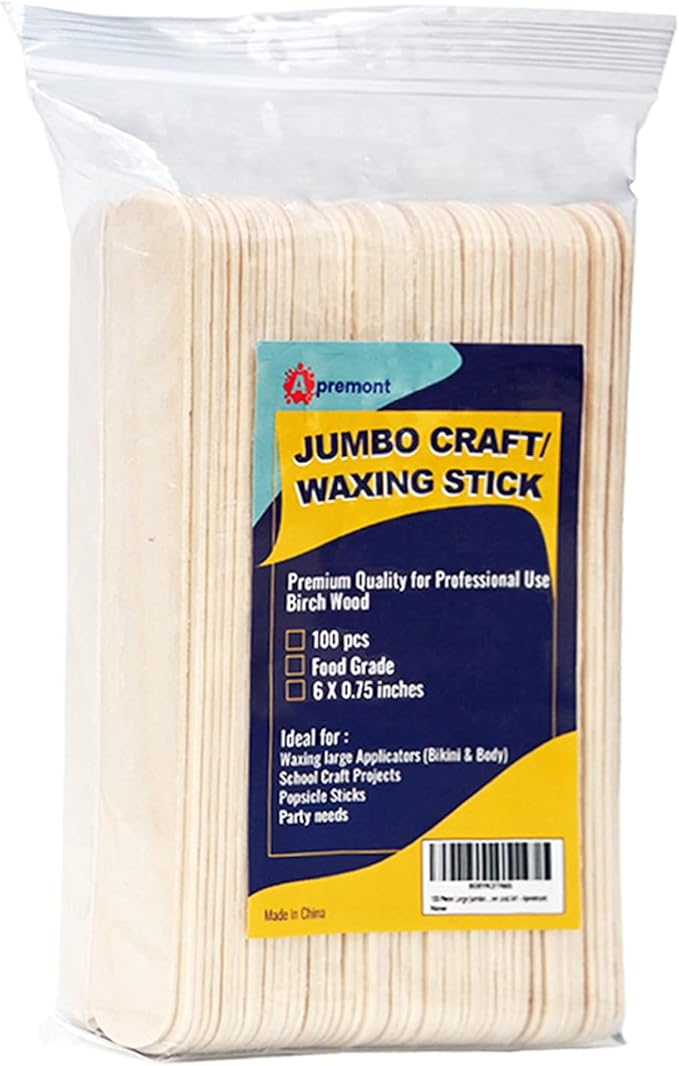
- 2-3 craft sticks
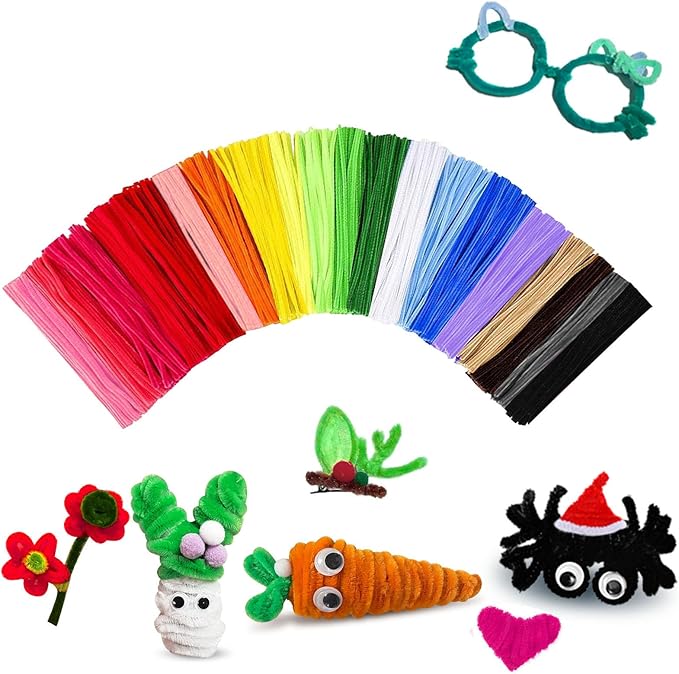
- 2 Pipe cleaners per butterfly
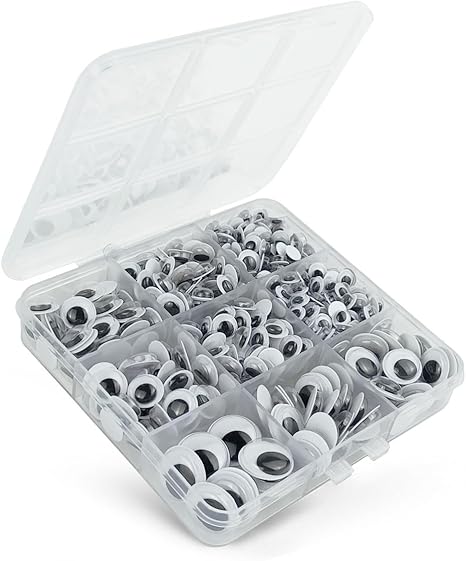
- 2 Googly eyes per butterfly
- Black marker
Step-by-step Guide
Step 1: Flatten each toilet paper roll and cut into ½ inch rings. You’ll need around 4 per butterfly. These form the wings.
Step 2: Cut colored cellophane into petal shapes and glue behind each ring. Let dry fully, then arrange the rings in a wing pattern and glue them together. Attach to a craft stick body.
Step 3: Add googly eyes, a smile, and antennae made from pipe cleaners to the stick. Once complete, hold your butterfly in the sun to admire the rainbow shadow it casts!
#3 Green Cactus
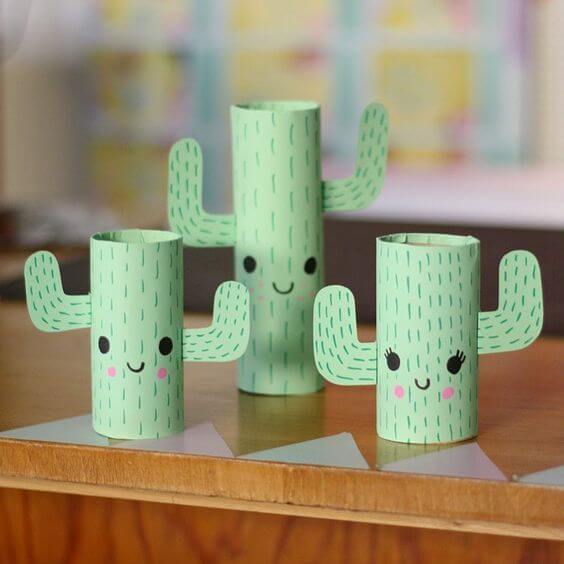
These happy little cactus friends are a perfect upcycle craft for kids or for grownups who want a touch of joy on their desk or windowsill.
Materials Needed
- 3 toilet paper rolls
- Green construction paper
- Black and pink marker
- Glue stick
- Scissors
Step-by-step Guide
Step 1: Cover each toilet paper roll with green construction paper. Let them dry if painted.
Step 2: Cut out cactus arms from extra green paper and glue them to the sides. Use a black marker to add tiny cactus “spikes,” draw faces, and create smiles.
Step 3: Add pink cheeks with a marker or crayon, and glue on googly eyes if you’d like.
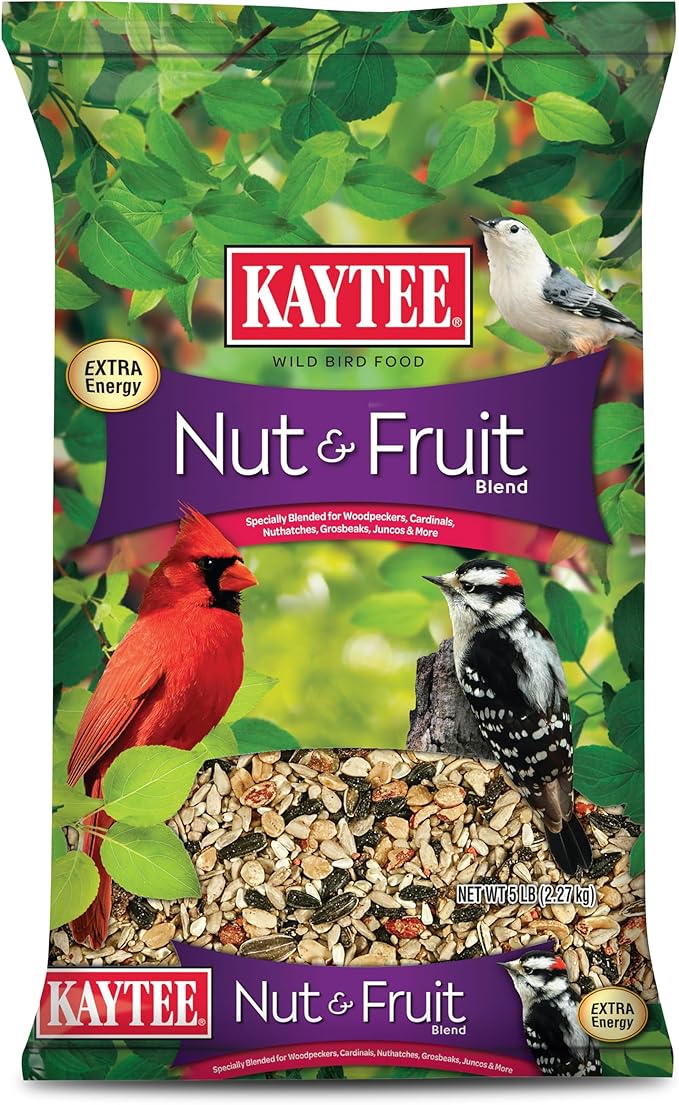
#4. Toilet Pape Bird Feeder
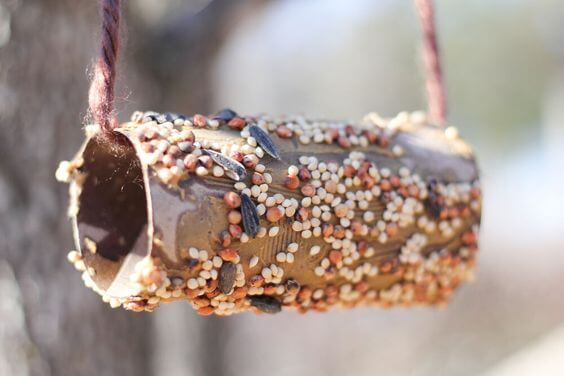
This toilet paper roll bird feeder is quick, affordable, and makes your backyard a little friendlier for birds.
Materials Needed
-
- 1 toilet paper roll
- Peanut butter
- Bird seed mix – about ½ cup
- Twine
- Plastic spoon
- Paper plate
Step-by-step Guide
Step 1: Spread a generous, even layer of peanut butter all over the outside of the toilet paper roll using a plastic knife or spoon.
Step 2: Roll the peanut butter-covered tube in bird seed placed on a plate or tray. Gently press to ensure the seeds stick well and coat evenly.
Step 3: Thread a piece of yarn through the tube, tie a knot to create a loop, and hang your feeder from a tree branch.
#5. Adorable Toilet Paper Roll Binoculars
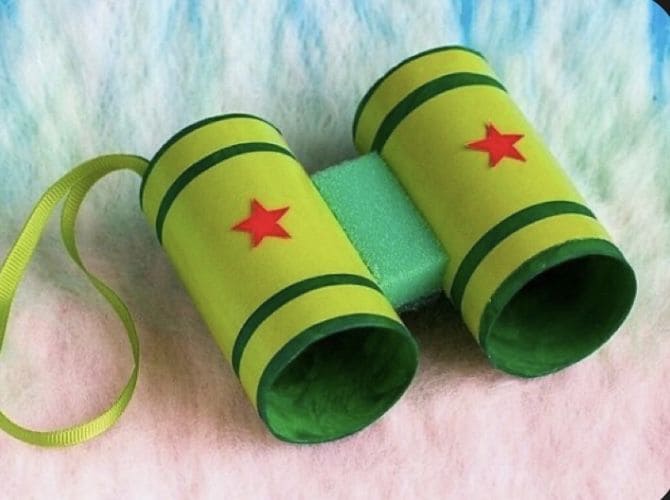
I made a set like this for my nephew, and he wore them for days—pretending to be a spy, a birdwatcher, and even a space commander.

Materials Needed
- 2 toilet paper rolls
- Green craft paper
- Glue stick
- Red star stickers
- Black marker
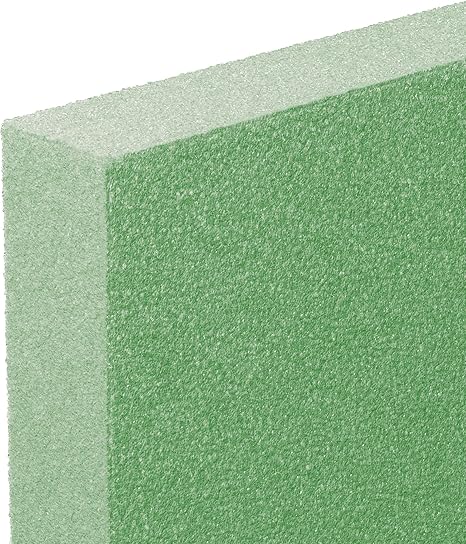
- Small foam block (approx. 2″ x 1.5″)
- Hole punch
- 20″ ribbon
Step-by-step Guide
Step 1: Wrap the toilet paper rolls in green paper or paint them green and let dry. Add black stripes with a marker or glue on strips of paper.
Step 2: Glue the two rolls side by side with the foam piece in between them to create the binocular bridge.
Step 3: Decorate with red stars or other themed stickers. Punch holes on either side and tie a ribbon so they can be worn around the neck.
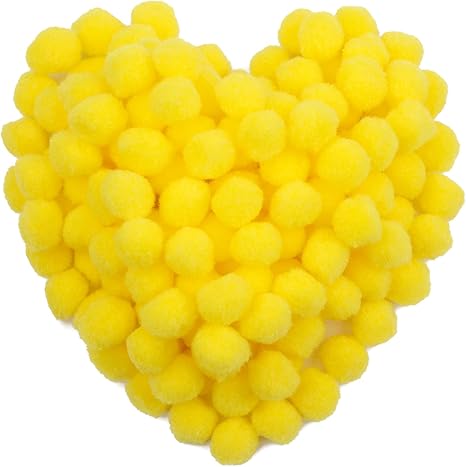
#6. Toilet Paper Roll Beehive
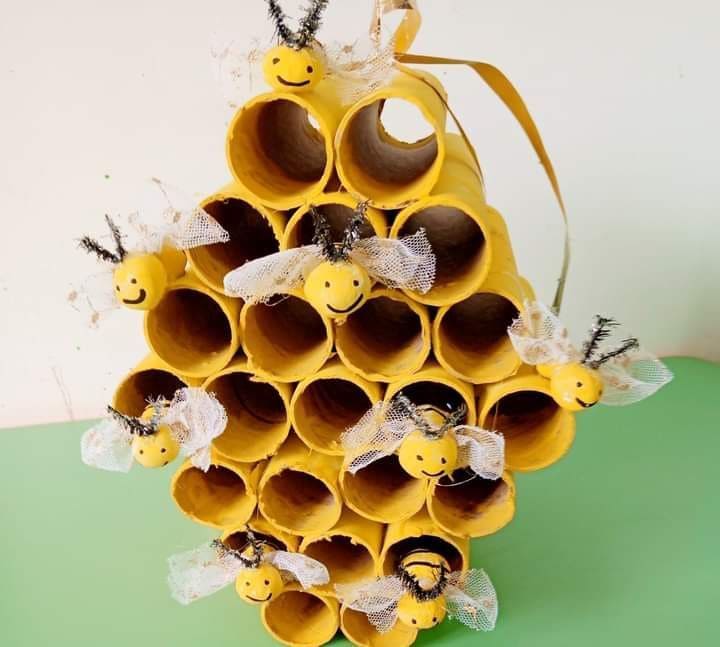
This cheerful toilet paper roll beehive is a sunshine-filled project that’s fun for all ages.
Materials Needed
- 23-25 toilet paper rolls
- Yellow acrylic paint
- Hot glue gun
- 20 Yellow pom-poms (1 inch)
- Black pipe cleaners
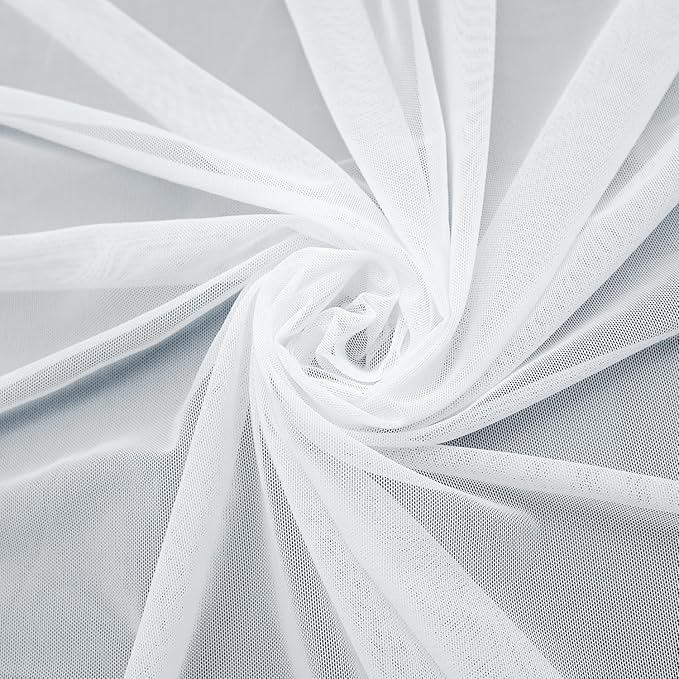
- White mesh
- Black marker
- Yellow ribbon
Step-by-step Guide
Step 1: Paint all the toilet paper rolls yellow, inside and out. Let them dry completely. Arrange them in a hexagonal honeycomb shape and glue them together firmly.
Step 2: Create bees by drawing on eyes, smiles, and twisting small pieces of pipe cleaner for antennae. Add mesh wings with glue.
Step 3: Attach bees to the honeycomb with glue, and finally, tie a ribbon through the top for hanging.
#7. Toilet Paper Roll Tiki Mask Craft
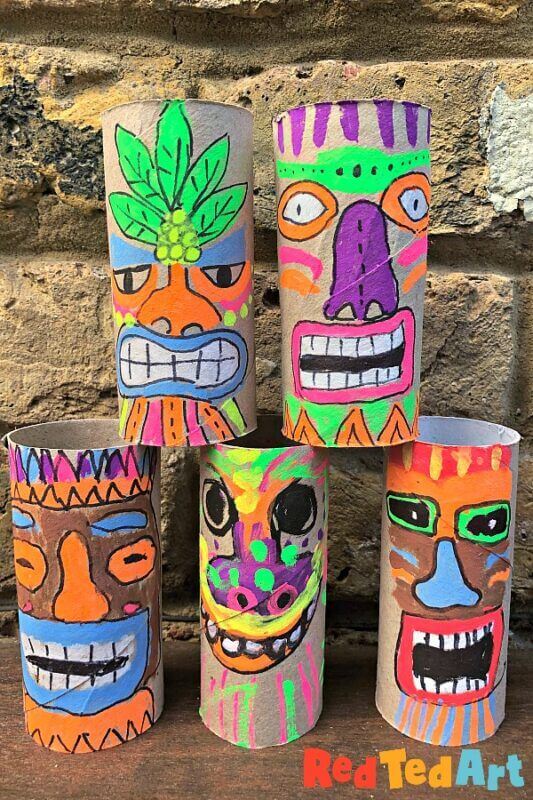
They’re an amazing hands-on art project for older kids or teens, especially fun for learning about colors, expression, and symbolism.
Materials Needed
- 5 empty toilet paper rolls
- Neon paint pens
- Black permanent marker
- Craft sealant (optional)
Step-by-step Guide
Step 1: Lightly sketch facial shapes directly onto the toilet paper rolls including eyes, noses, mouths, and borders. You can get playful with exaggerated features and patterns.
Step 2: Fill in the sketches with neon paints. Use contrasting colors and bold lines for that striking tribal-inspired look. Outline details with a black marker once dry.
Step 3: Let dry completely. Spray with a light craft sealant if you want to preserve the designs.
#8. DIY Toilet Paper Roll Christmas Tree Forest
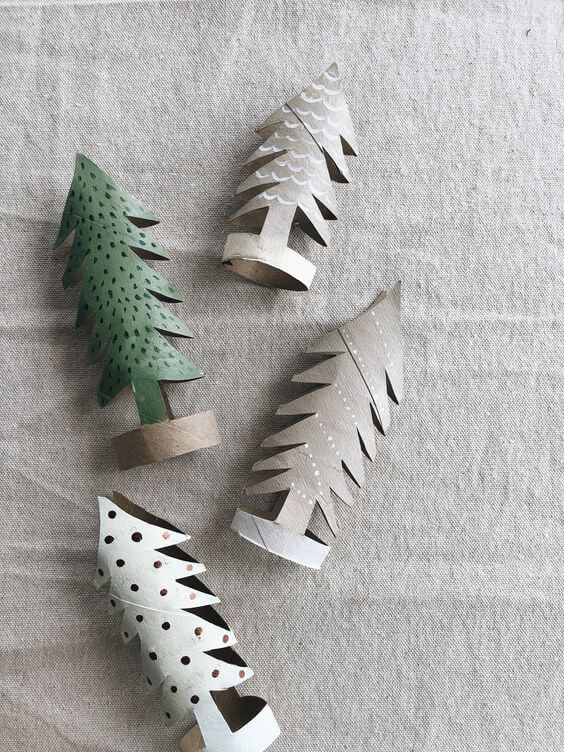
Made from just toilet paper rolls, they’re easy enough for kids to try and stylish enough to use in a Scandinavian-style centerpiece.
Materials Needed
- 1 empty toilet paper rolls per tree)
- Acrylic paint set in white, green, brown, or beige
- Small detail brush
- Scissors
- Pencil
Step-by-step Guide
Step 1: Flatten the toilet paper roll slightly and draw a tree shape with a narrow trunk and layered branches. Make sure the base circle remains intact for standing support.
Step 2: Cut along the outline carefully, including little slits along the edges to resemble branches. Gently shape the roll back to its round form.
Step 3: Paint your tree – solid, striped, polka-dotted, or with little snowflakes. Once dry, fan out the branches slightly and display them standing on a shelf or tabletop.
#9. Toilet Paper Roll Snowflakes
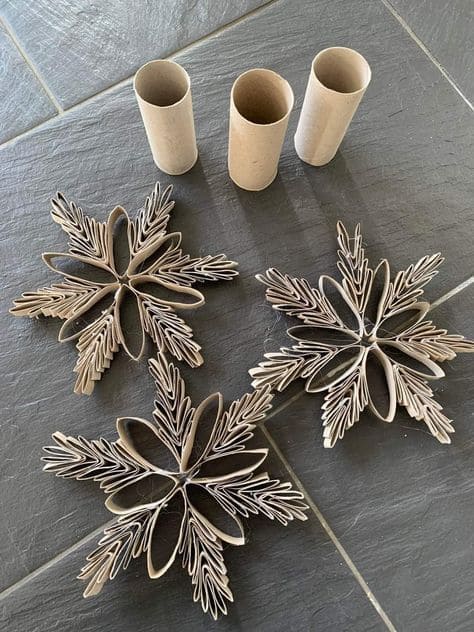
These snowflakes are the kind of winter decor that makes you pause and smile—natural, detailed, and absolutely budget-friendly.
Materials Needed
- 2 toilet paper rolls per snowflake
- Sharp scissors
- Hot glue gun
- Ruler and pencil
- Optional: White spray paint, glitter, string
Step-by-step Guide
Step 1: Flatten each roll and cut into strips about 1.5 cm (½ inch) wide, these will form the oval petals of the snowflake. You’ll need about 12–18 pieces depending on your design.
Step 2: For the fern-like edges, take additional strips and snip small cuts along one edge to create a fringed effect. Slightly fan them outward for a natural branch look.
Step 3: Begin assembling the main snowflake shape by gluing six oval pieces into a circular flower. Then, attach the fringe pieces in a symmetrical pattern between and around the petals.
#10. Ocean-themed Toilet Paper Roll Crafts
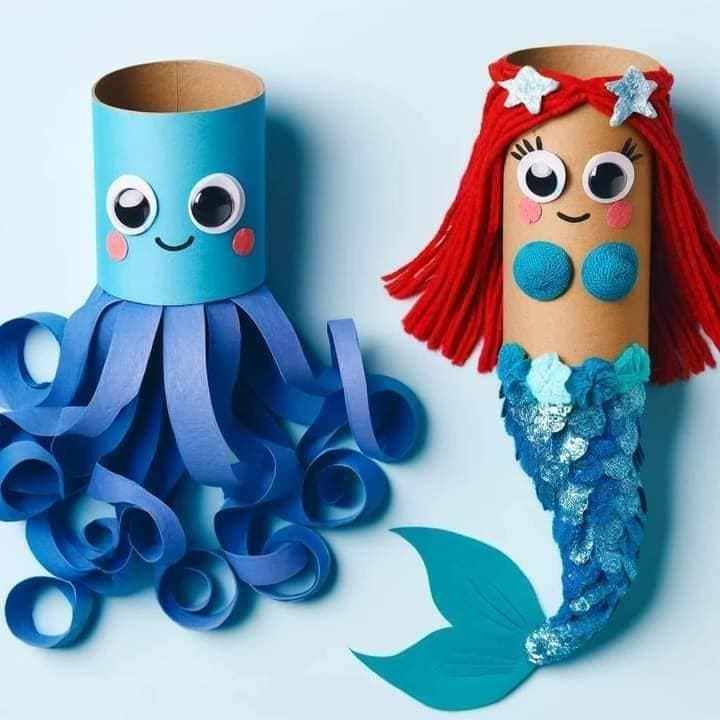
These crafts including an octopus and a mermaid are pure magic for kids’ playrooms or summer camp projects.
Materials Needed
For Each Figure
- 2 toilet paper rolls
- 2 googly eyes per figure
- Glue stick
- Markers
- Blush paper
For Octopus
- 1 sheet of blue construction paper
- Optional: curling tool (pencil)
For Mermaid
- Small amount of red yarn
- 1 sheet of turquoise
- 2 blue bottle caps
- Optional: glitter
Step-by-step Guide
Step 1: Wrap the toilet paper roll with colored paper or leave it plain depending on the character. Glue on the googly eyes and draw a smiling face, cheeks, and lashes if you like.
Step 2: For the octopus, cut eight strips of blue paper (about 1 x 6 inches), curl the ends with a pencil, and glue them to the inside of the roll to form tentacles.
Step 3: For the mermaid, glue red yarn strands around the top as hair. Add two bottle caps or buttons for the top, then cut fish scales and a tail from blue paper. Glue them around the bottom half of the roll in overlapping layers for a shiny fin look.
#11 Easy Train Craft
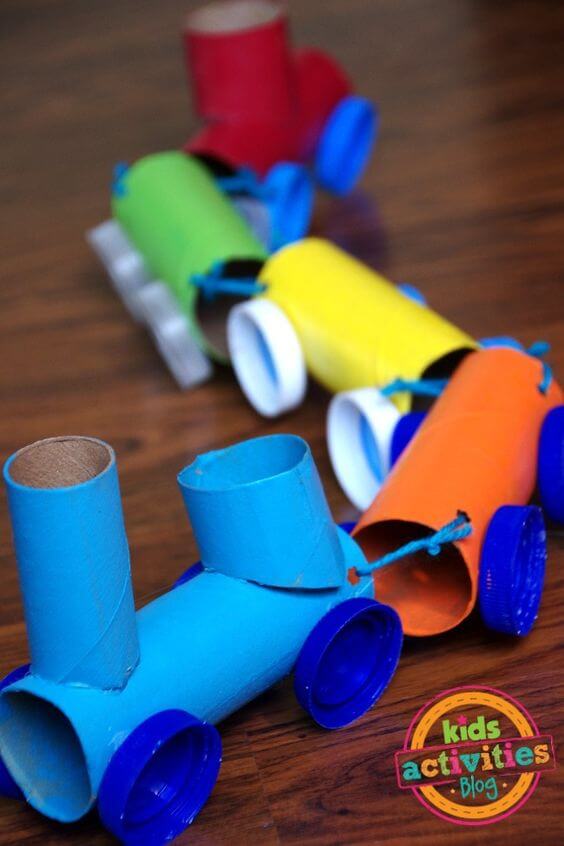
Great for rainy afternoons, preschool lessons, or birthday party activities. And the best part? You can keep adding cars as long as you have more tubes!
Materials Needed
- 7 empty toilet paper rolls
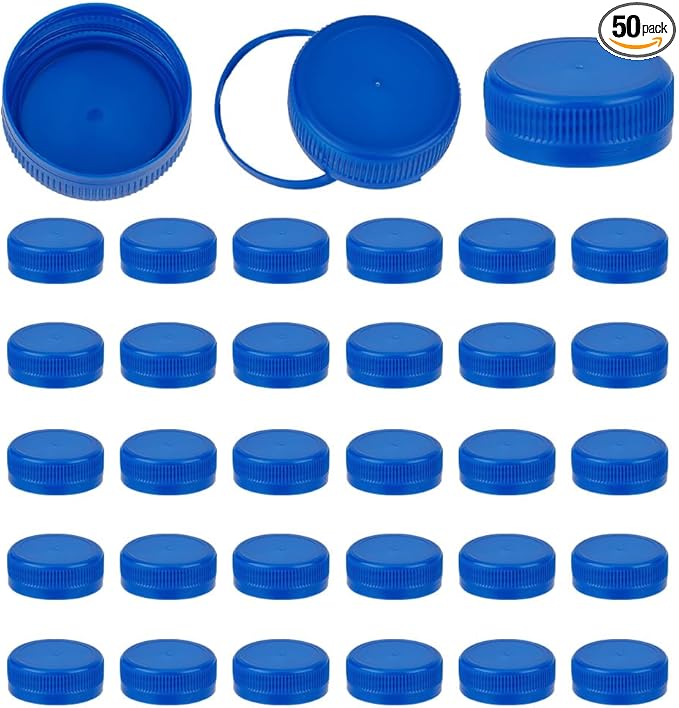
- 20 small plastic bottle caps
- Acrylic paint set
- Craft glue
- Hole puncher
- Yarn 30 inches per train
- Optional: Paintbrushes, scissors, black marker
Step-by-step Guide
Step 1: Paint each toilet roll in a different bold color and set them aside to dry. Paint the inside of the tubes too, if you like a cleaner finish.
Step 2: Cut two toilet paper rolls in half lengthwise, curl them into a small cylinder, and glue them vertically on the top of the front roll to create the smokestack for the engine.
Step 3: Glue four plastic caps to the sides of each roll as wheels. Use a strong adhesive and let dry fully.
Step 4: Punch small holes in the front and back of each roll and use yarn to connect them. Tie knots inside the tubes to secure them and create a train chain.
#12. Toilet Paper Roll Tassel Garland
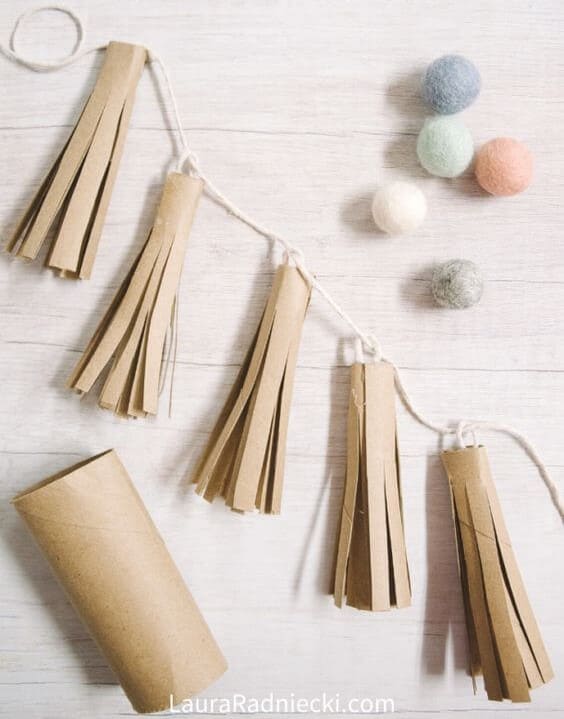
Perfect for decorating a kids’ room, a birthday party, or even a cozy reading corner, it gives off cozy boho vibes without spending more than a few dollars!
Materials Needed
- 5 empty toilet paper rolls
- Sharp scissors
- Yarn
- Craft glue
- Optional: Felt balls, paint, or markers
Step-by-step Guide
Step 1: Flatten each toilet paper roll slightly, then use scissors to make even vertical cuts about 2/3 of the way up from the bottom to create fringe strips.
Step 2: Roll each fringed tube tightly into a cylinder and secure with a dab of glue at the edge to hold the shape, forming the tassel body.
Step 3: Thread the twine through the top of each tassel using a small hole punched or glued loop, spacing them evenly to form your garland.
#13. Toilet Paper Roll Wall Art
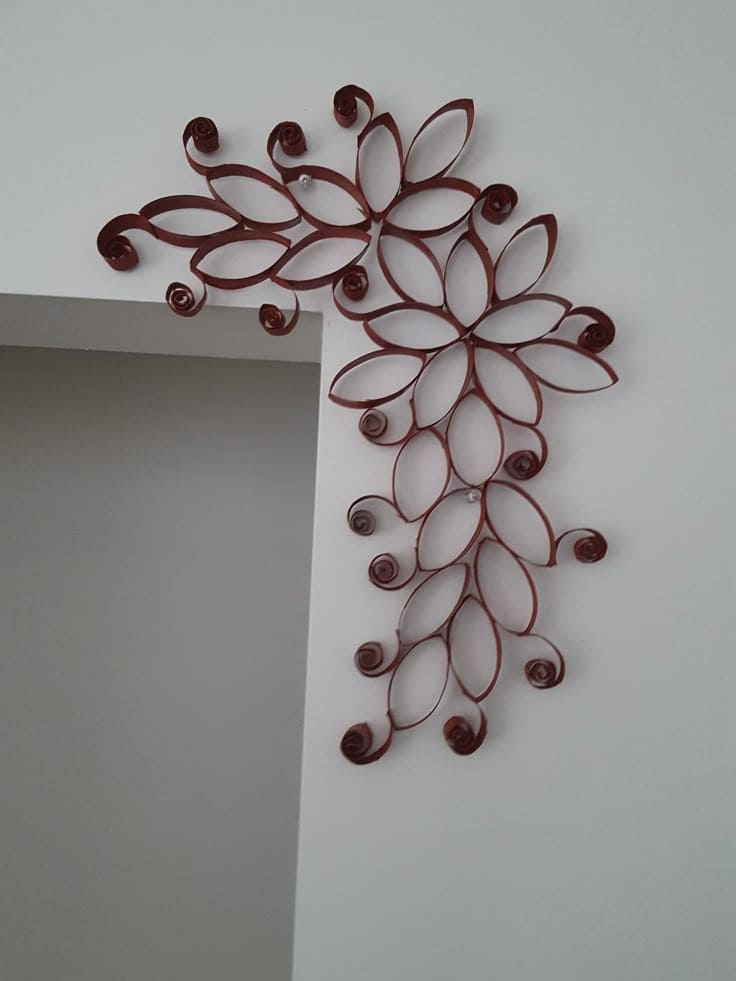
I created a similar piece for my hallway corner, and guests are constantly surprised to learn it’s made from cardboard!
Materials Needed
- 6–8 empty toilet paper rolls
- Craft scissors
- Acrylic paint
- Paintbrush
- Strong glue
- Push pins
- Optional: Clear sealer spray
Step-by-step Guide
Step 1: Flatten each toilet paper roll and cut them into equal strips about 1.5 cm wide. For spiral accents, cut thin strips and roll them tightly around a toothpick or skewer.
Step 2: Paint all the strips in your chosen color and let them dry completely. If desired, apply a clear sealer spray for durability or shine.
Step 3: Arrange the pieces into a floral pattern with petal loops and spiral curls, then glue them together in sections before mounting them directly onto the wall with pins or adhesive.
#14. Colorful Floral Collages
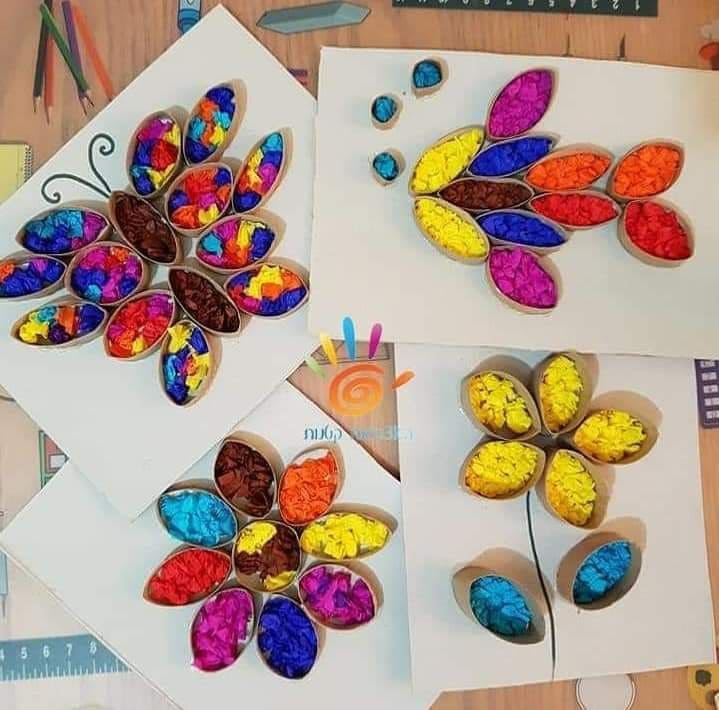
The tactile fun of crumpling tissue paper and gluing it inside each petal makes this perfect for sensory play, and the vibrant result is always fridge-worthy.
Materials Needed
- 4–5 empty toilet paper rolls, cut into 1–1.5 cm petal-shaped sections
- Cardstock (A4 or larger)
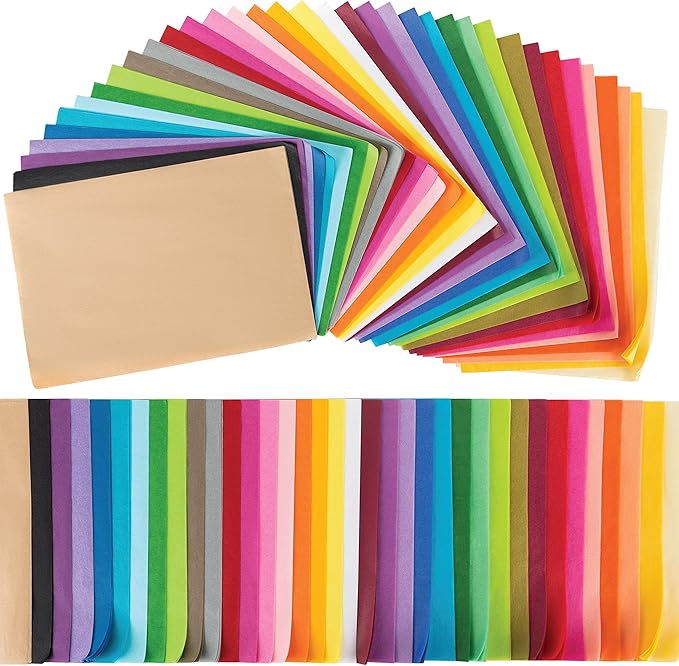
- Colored tissue paper
- White glue
- Scissors
- Optional: Black marker
Step-by-step Guide
Step 1: Flatten and cut the toilet paper rolls into equal oval strips to form your “petals.” Arrange and glue them onto your cardstock in flower or butterfly shapes.
Step 2: Tear tissue paper into small pieces and crumple them into mini balls. Fill each petal with one or two colors, pressing the tissue balls inside with glue.
Step 3: Let everything dry flat. Once dry, use a marker to add finishing touches like stems, outlines, or insect antennae to complete your colorful nature scene.
#15. Charming Bird Nest
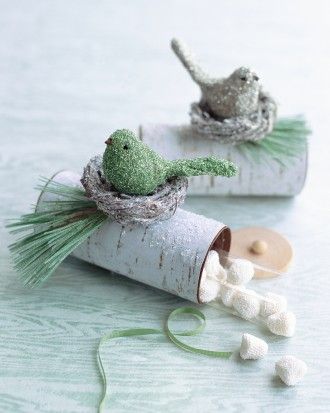
These charming bird nest treat holders are the perfect nature-inspired party favor or spring decoration!
Materials Needed
- 2 empty toilet paper rolls
- White acrylic paint and light gray
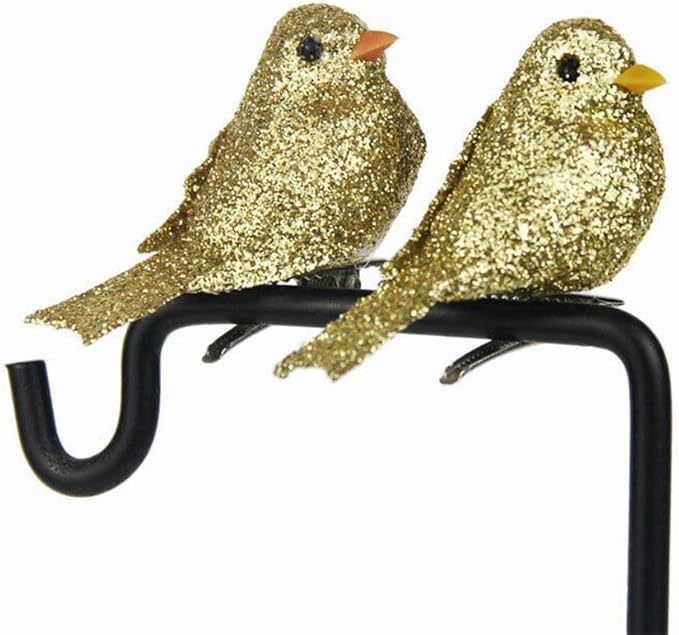
- Mini artificial birds (about 2–3 inches long)
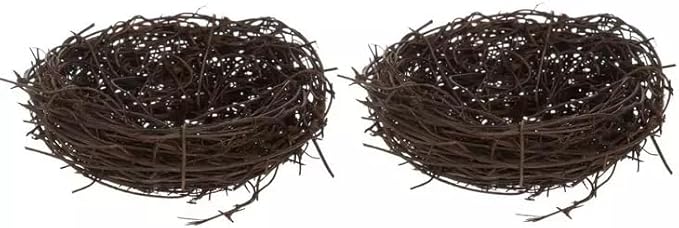
- Mini bird nests
- Wooden discs (1.5″–2″ diameter)
- Hot glue gun and glue sticks
- Green paper
- Mini marshmallows, candy, or small trinkets
Step-by-step Guide
Step 1: Paint the toilet paper rolls white and let dry. Add horizontal gray strokes or speckles for a birch tree effect. Once dry, hot glue a wooden disc to one end of each roll.
Step 2: Attach the bird nest to the top center using hot glue, then place the bird on the nest. Tuck in strands of raffia grass or green paper strips beside the nest for a natural touch.
Step 3: Fill the open side of the tube with treats or notes. Seal with a second wooden disc or leave it slightly open for guests to peek inside. Optionally tie with ribbon to secure.
#16. Toilet Paper Roll Fish
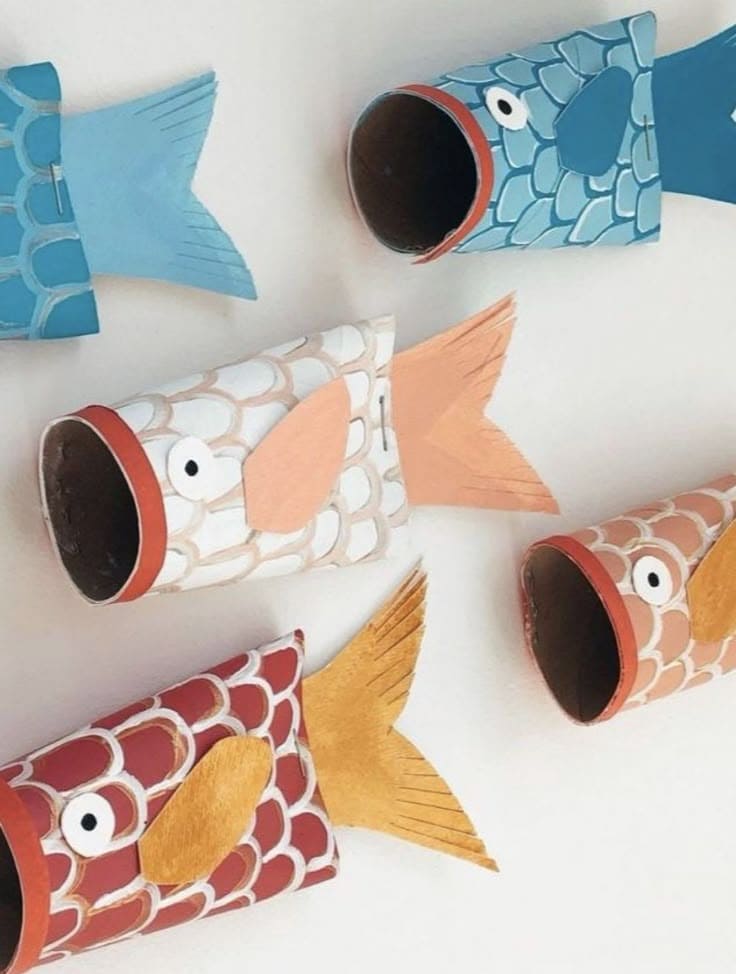
Inspired by the Japanese koinobori (carp streamers), they bring good luck and playful charm to any classroom, bedroom wall, or kid’s party decor.
Materials Needed
- 5 empty toilet paper rolls
- Acrylic paint in assorted bright colors
- White cardstock
- Black marker or googly eyes
- Craft glue
- Paintbrush set
- Scissors
Step-by-step Guide
Step 1: Paint each toilet paper roll in your chosen base color and let it dry. Then, using a small brush, paint scale patterns in a contrasting color (like white or gold). Let dry completely.
Step 2: Cut out fish fins and tails from cardstock. Use textured scissors or add small fringe cuts to the tail for detail. Glue them to the back and sides of each roll.
Step 3: Finish by adding eyes, either draw them on circles of paper or glue on googly eyes. Use a black marker for pupils and details.
#17. Little Toilet Paper Roll Birdies
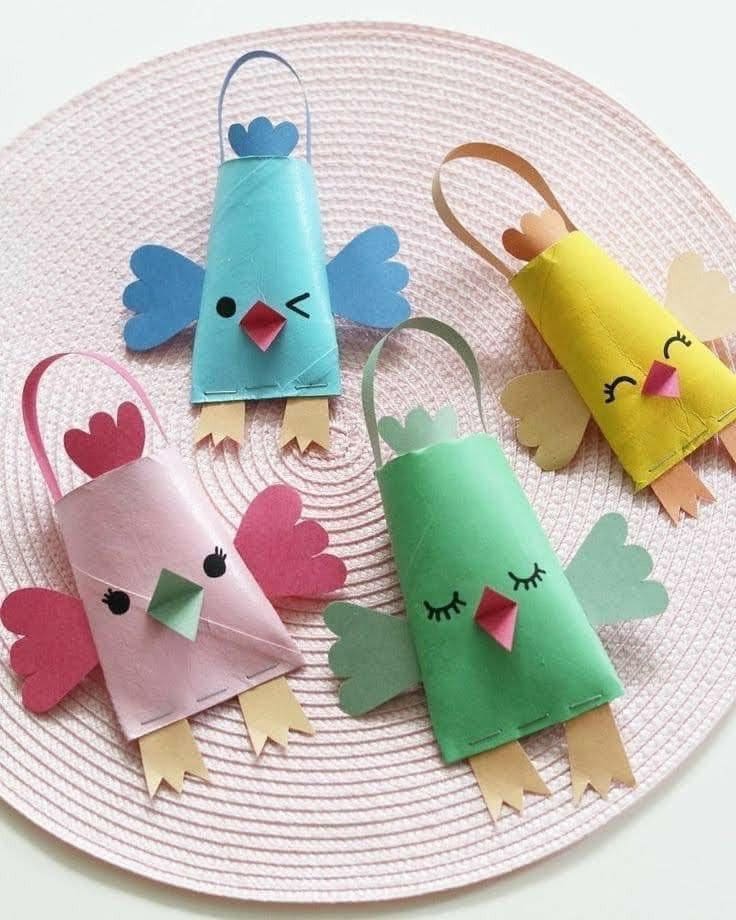
With a mix of soft pastel colors and cheerful paper details, this project brings out smiles and creativity for less than a dollar each.
Materials Needed
- 4 toilet paper rolls
- Acrylic paint set in pastel colors
- Colored craft paper
- Black marker
- Glue stick
- Scissors
- Mini stapler (optional)
- Optional: treats or notes
Step-by-step Guide
Step 1: Flatten the toilet paper roll and paint each one a different pastel color. Let them dry completely. Then gently fold the bottom inward and staple or glue it closed to form a pouch.
Step 2: Cut out shapes for wings, feet, beaks, and combs from colorful craft paper. Glue the wings to the sides, feet underneath, and the beak and comb onto the front.
Step 3: Draw cute eyes with a marker – open, winking, or sleepy expressions all work then add a paper strip loop at the top for a handle, and you’re done!
#18. Toilet Paper Tube Trees
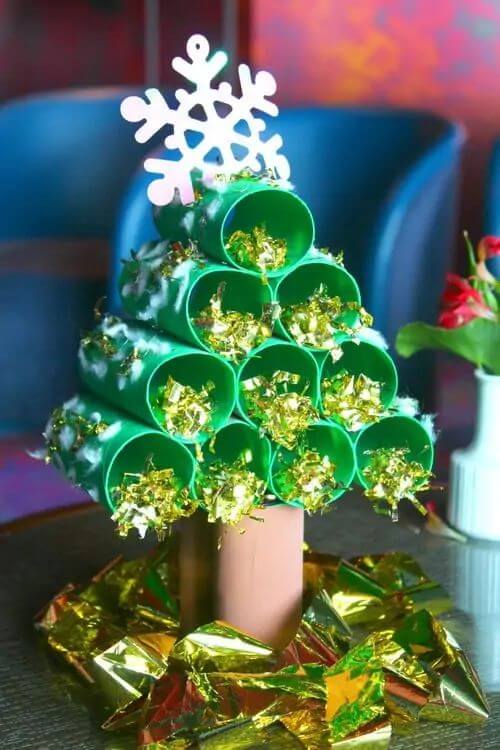
This festive toilet paper roll Christmas tree is a cheerful, upcycled project that instantly brightens up any holiday table or classroom corner.

Materials Needed
- 12 toilet paper rolls
- Green acrylic paint and brown acrylic paint
- 10 gold tinsel pom-poms
- Cotton balls
- White foam snowflake topper
- Hot glue gun
- Gold gift wrap
- Scissors
Step-by-step Guide
Step 1: Paint 10 toilet rolls green and 2 roll brown. Let them dry fully. The brown ones will be the trunk that holds the tree upright.
Step 2: Stack and glue the green rolls in a pyramid shape – 4 on the bottom, 3 in the next row, then 2, and 1 on top. Glue the brown rolls underneath the base for support.
Step 3: Fill each green roll with a golden tinsel pom-pom. Add cotton around the edges to mimic snowy trim, and top the tree with a foam or handmade snowflake. Wrap the base with golden paper to complete the festive look.
#19. Hanging Owl Towers
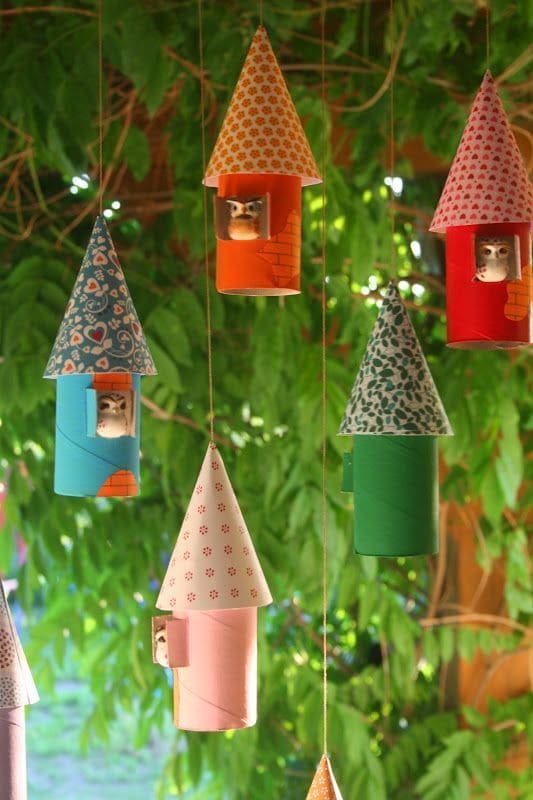
Whether you’re decorating for autumn or just want to add some playful magic to a child’s room, this project is full of color, personality, and movement in the breeze.
Materials Needed
- 6 toilet paper rolls
- Colored cardstock
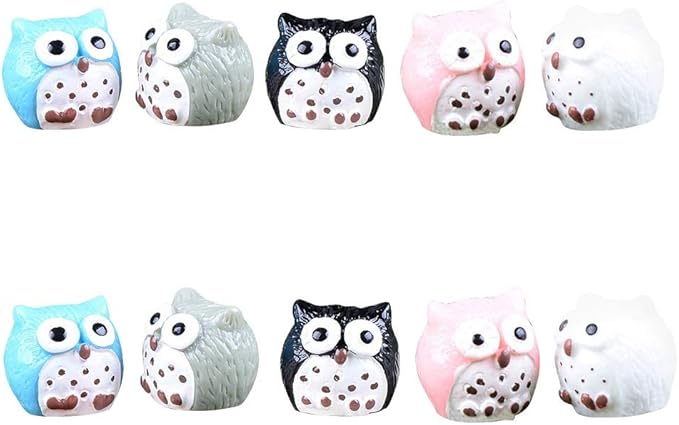
- Mini toy owls
- Craft glue
- Scissors
- Twine
- Optional: patterned scrapbook paper
- Hole punch
Step-by-step Guide
Step 1: Wrap each toilet paper roll with colored paper to create the tower base. Cut a window into the roll before gluing on the paper if you want your owl to peek out.
Step 2: To make the roof, cut a circle about 5 inches in diameter from your patterned paper, then cut a slit from the edge to the center. Overlap the cut edges to form a cone shape and glue in place. Attach the cone to the top of the tube.
Step 3: Glue a small owl figure inside the window or opening. Punch a small hole through the top of each cone, thread string through it, and tie securely.
#20. Toilet Paper Roll Tulips
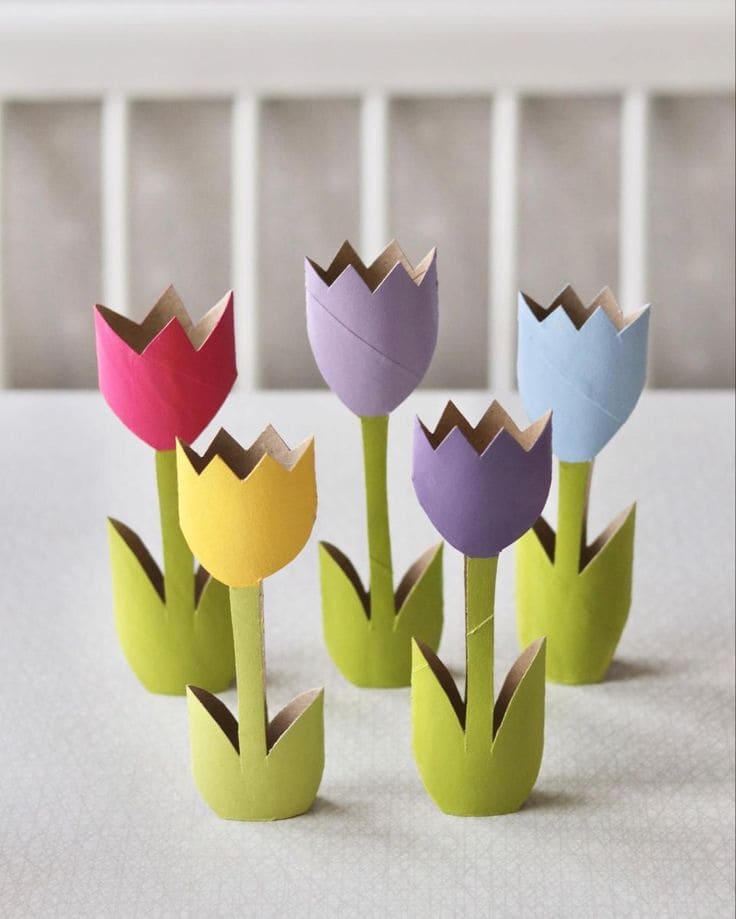
I made a batch last April to decorate our windowsill, and they turned out so adorable that I had to make extras for gifts.
Materials Needed
- 5 empty toilet paper rolls
- Acrylic paint in assorted colors
- Paintbrushes
- Craft scissors
- Craft glue
- Optional: clear sealant spray
Step-by-step Guide
Step 1: Flatten each toilet paper roll and cut one into three tulip tops with pointed edges (about 2 inches high). Use another roll to cut strips for the stems and petal-style leaf shapes.
Step 2: Paint the tulip tops in bright pastel colors and the stems and leaves in green. Let everything dry completely before assembly.
Step 3: Glue each tulip top onto a stem, then attach the leaves around the bottom so the flower can stand.
#21. Toilet Paper Roll Crab

This adorable toilet paper roll crab is the perfect beachy craft that brings a smile to your face.
Materials Needed
- 1 toilet paper roll
- 2 white pipe cleaners – 30 cm each
- 1 sheet of brown cardboard
- 2 toothpicks
- 2 small googly eyes
- Craft glue
- Scissors and hole punch (optional)
Step-by-step Guide
Step 1: Poke two small holes at the base of the toilet paper roll to insert bent pipe cleaners as legs. Thread one through the left side and one through the right, shaping them into a crab-like stance.
Step 2: Cut two claw shapes out of the cardboard – half circles with a wedge removed and glue them to the ends of short pipe cleaner pieces. Attach these claws to the top sides of the roll by poking small holes or gluing in place.
Step 3: Glue googly eyes onto toothpicks and insert them into the top of the roll to create eye stalks. Let everything dry.
#22. Charming Hanging Chickens
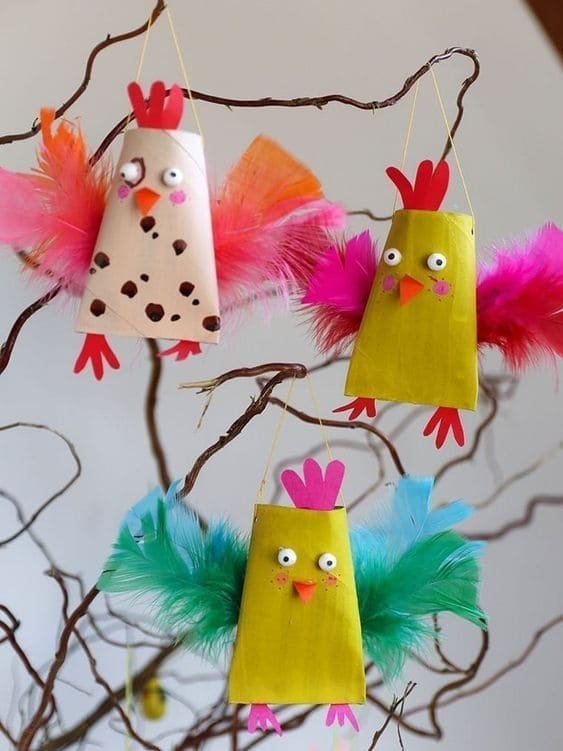
These chickens are bursting with color and personality, perfect for Easter trees, spring window displays, or cheerful party decor.
Materials Needed
- 3 toilet paper rolls
- Acrylic paint
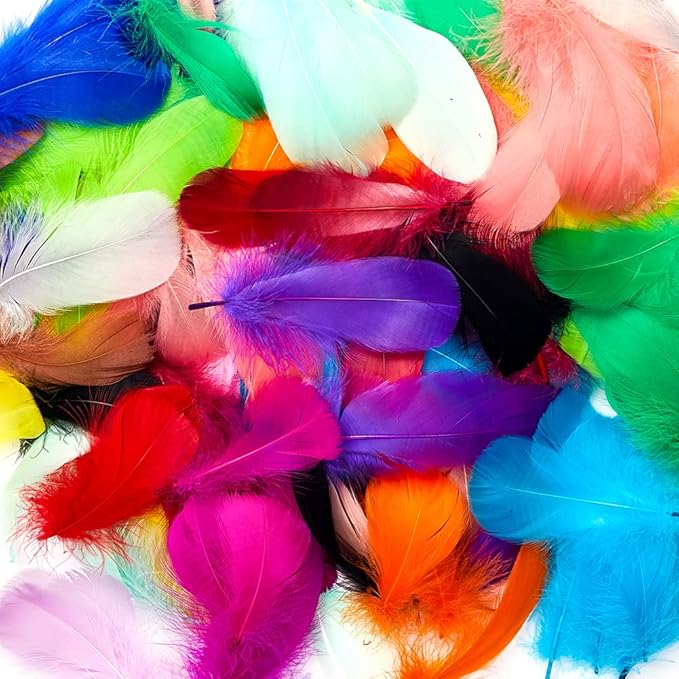
- Colorful feathers – about 6–8 per bird
- Googly eyes
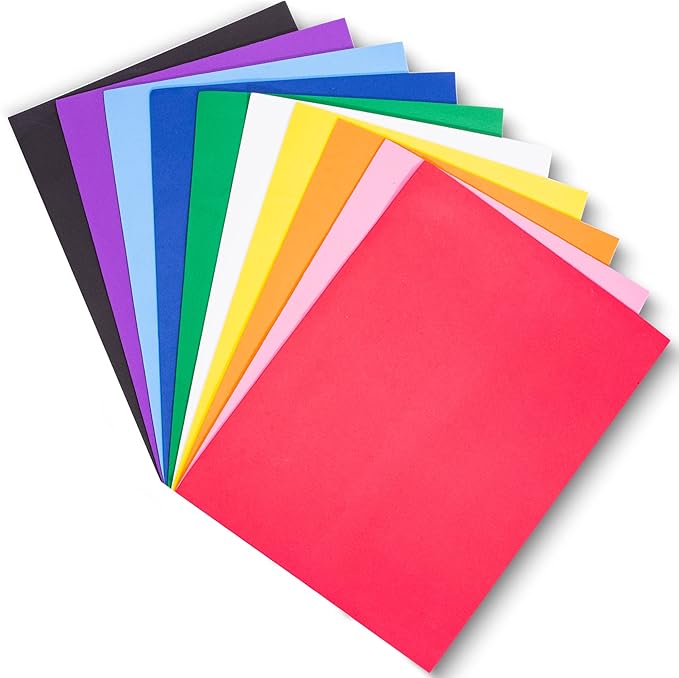
- Pink and red craft foam
- Hot glue gun
- Scissors
- Hole punch + string (optional)
Step-by-step Guide
Step 1: Flatten each toilet roll and cut two small slits at the top to help attach the comb. Paint each roll your chosen color and let it dry completely.
Step 2: Cut out combs, beaks, and feet from foam or colored paper. Glue the comb into the top slit, the beak in the center, and feet under the roll. Add googly eyes and tiny pink dots for cheeks using paint or marker.
Step 3: Glue colorful feathers to each side to create wings. Punch a small hole at the top, thread a string through, and hang your happy hens proudly on a twig or wreath!
#23. Pretty Gift Card Holder
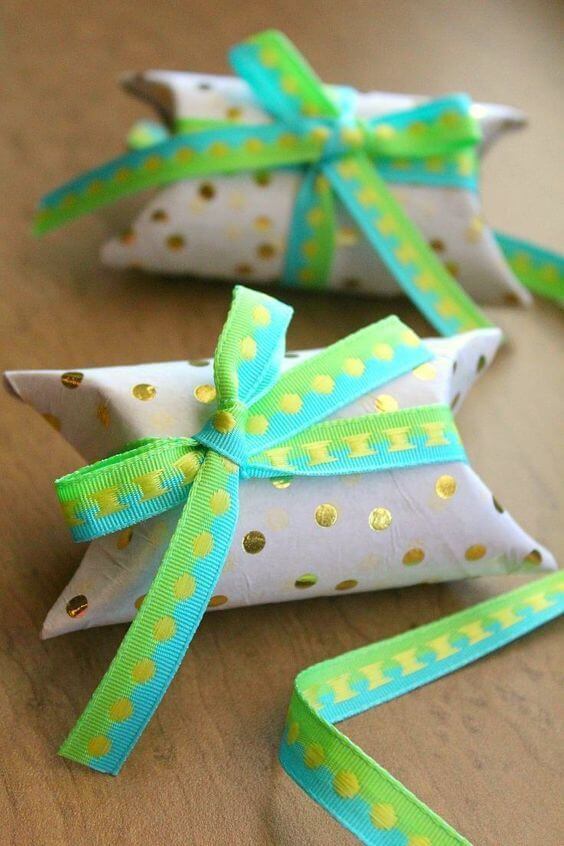
I love using them as eco-friendly packaging for jewelry, small candies, or surprise notes during the holidays.

Materials Needed
- 2 empty toilet paper rolls
- Gift wrap paper (approx. 6×6 inches per box)
- Double-sided tape
- Decorative ribbon
- Scissors
- Optional: hole punch + tag
Step-by-step Guide
Step 1: Start by gently pressing each toilet roll flat to create two creased edges. Use your fingers to curve in the edges on both sides, forming two half-moon flaps that meet in the center.
Step 2: Wrap the roll in your chosen gift wrap. Apply a thin layer of glue or use double-sided tape to secure it in place. Make sure the paper is tight enough to hold shape but not too tight that the flaps won’t close.
Step 3: Tie a ribbon around the center, just like you would with a present. You can finish it off with a bow, a charm, or a name tag for gifting.
#24. Toilet Paper Roll Hairstyling Dolls
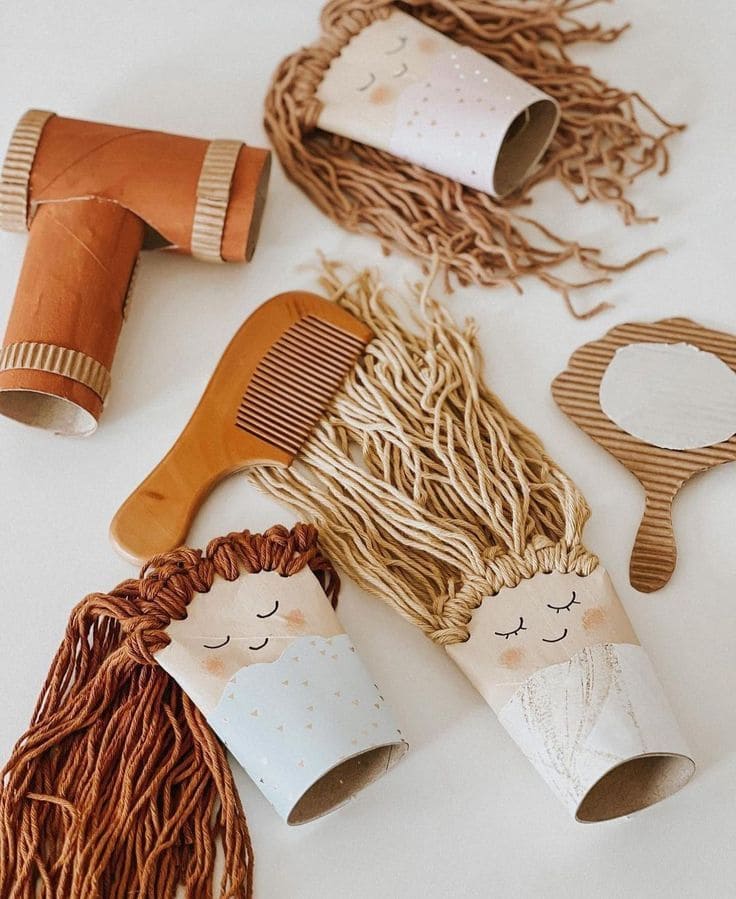
These toilet paper roll hairstyling dolls let your child “style” their yarn hair with brushes or clips, and they’re also wonderful for practicing fine motor skills.
Materials Needed
- 3 empty toilet paper rolls
- Acrylic paints – beige, pink, white, and any soft pastels
- Yarn – 1 color per doll
- Glue gun
- Scissors
- Black marker
- Optional: fabric scraps
Step-by-step Guide
Step 1: Paint the top half of each toilet roll a soft peach or beige tone for the face. Let it dry, then add closed eyes, rosy cheeks, and a sweet smile using paint or a marker.
Step 2: Cut strands of yarn approximately 10–12 inches long. Apply glue to the inner edge of the top roll opening and start attaching strands, row by row, until the head is full of “hair.”
Step 3: Style the hair! Braid it, twist it, or leave it loose.
#25. Sparkling Toilet Paper Roll Rockets
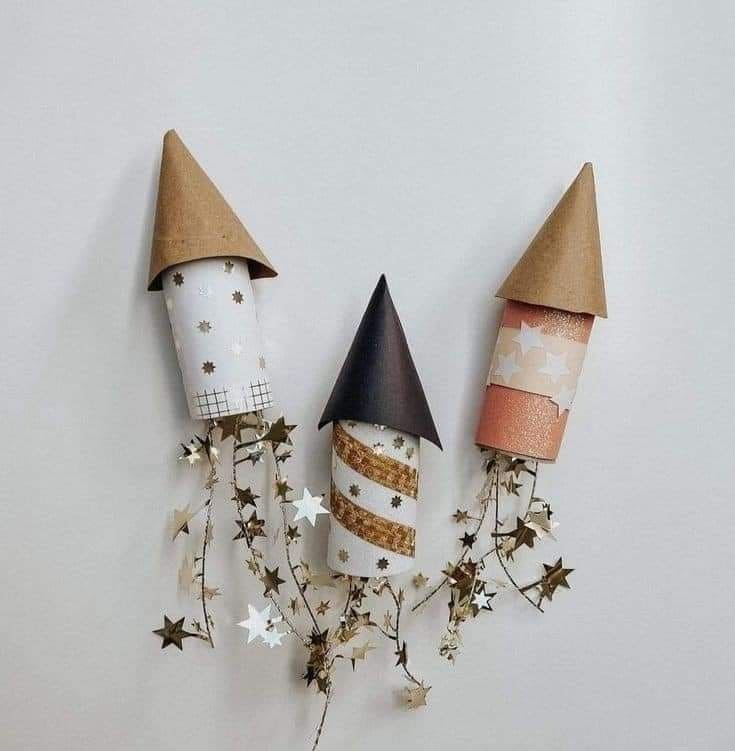
They look so festive with metallic streamers trailing like shooting stars, and they’re surprisingly quick to make.
Materials Needed
- 3 empty toilet paper rolls
- Decorative paper (approx. 5×6 in per rocket)
- Construction paper
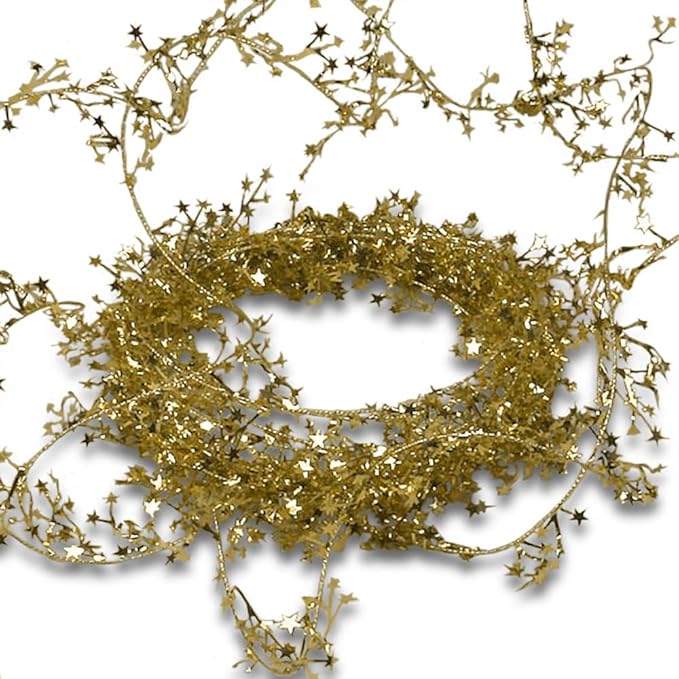
- Gold star garland
- Glue stick
- Scissors
- String or thread (optional)
Step-by-step Guide
Step 1: Wrap each toilet paper roll with decorative paper and secure it with glue or tape. Feel free to mix patterns, glitter, or washi tape stripes to add flair.
Step 2: Create a cone for the rocket top by cutting a 4-inch circle from cardstock, cutting a slit to the center, and forming a cone shape. Glue it to the top of the roll.
Step 3: Attach your metallic garland, star ribbon, or tinsel strands inside the bottom of the roll to simulate a sparkling rocket trail. Let them hang freely.
#26. Charming Cardboard Boat
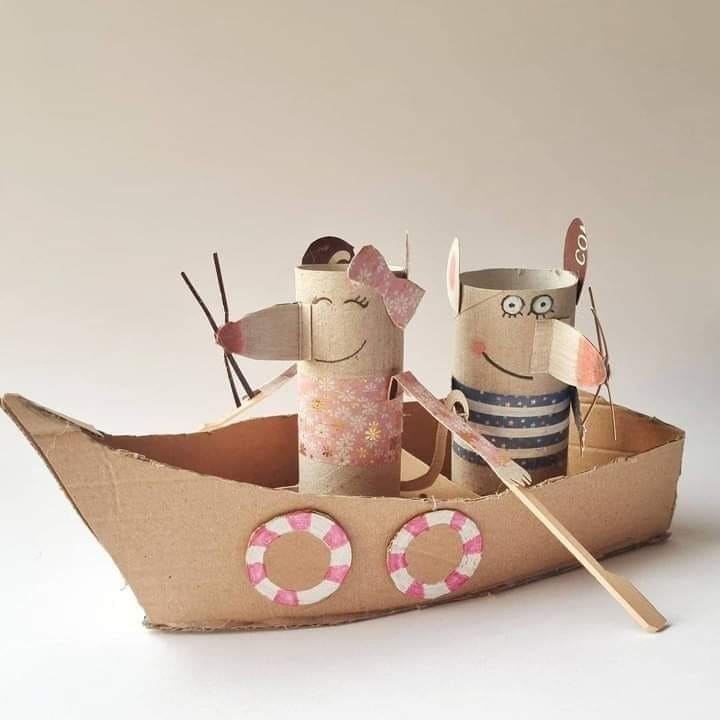
It’s one of those crafts that makes kids imagine adventures, not just admire the cuteness.
Materials Needed
- 2 toilet paper rolls
- Cardboard sheet (approx. 10×6 in)
- Scrapbook paper
- Craft sticks
- Black pen
- Glue, scissors, and a hot glue gun
- Optional: yarn or twine, pink paint, pipe cleaners
Step-by-step Guide
Step 1: Start by cutting a long oval for the boat bottom and tall curved sides from cardboard. Glue the edges to create a shallow, sturdy structure. You can curve the front tip upward for that “sailboat” shape.
Step 2: For the mice, decorate two toilet paper rolls using patterned paper or paint. Add small ears made from paper or felt, glue on googly eyes, and draw their noses and smiles. Pipe cleaners make fun whiskers, and don’t forget a tail curled at the back!
Step 3: Attach the mice inside the boat and glue craft sticks across as paddles. Add details like paper life rings, names, or even little flags if you’d like.
#27. Cardboard Castles
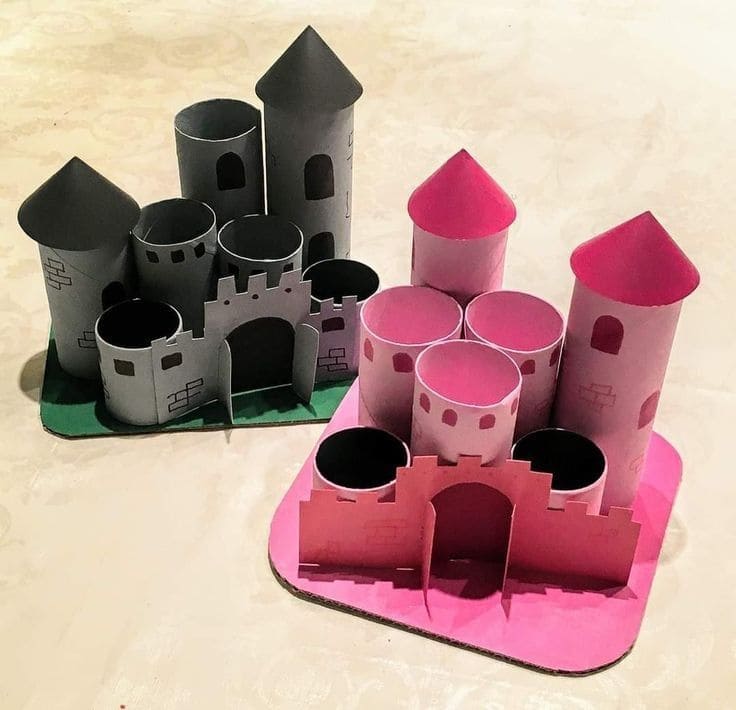
Whether you go with a knightly gray or a royal pink, these toilet paper roll castles are the perfect DIY for kids who love imaginative play.
Materials Needed
- 6–8 toilet paper rolls (per castle)
- Colored cardstock
- Cardboard base – about 8″ x 8″
- Glue stick
- Scissors
- Black marker
- Optional: Glitter, stickers, sequins
Step-by-step Guide
Step 1: Wrap each toilet paper roll in colored paper and glue it in place. For towers, cut small door and window shapes using scissors or draw them on with a marker.
Step 2: Cut rounded or square battlements from extra cardstock and attach them around the top of each tower. Use cones made from paper to create turret tops and glue them to the tops of the tallest rolls.
Step 3: Glue all towers onto the cardboard base in your preferred layout. Add a paper drawbridge, flags, or embellishments to make it look like a real castle.
#28. Toilet Paper Letter
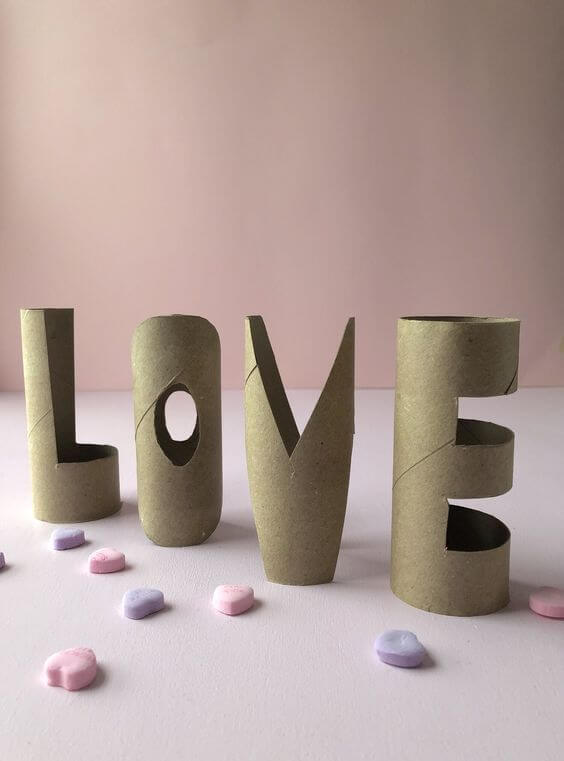
This minimalist LOVE sign made from toilet paper rolls is one of those simple projects that speaks volumes, especially around Valentine’s Day or for a handmade anniversary gift.
Materials Needed
- 4 empty toilet paper rolls
- Precision craft knife
- Cutting mat
- Pencil and ruler
- Optional: acrylic paint
- Optional: glue and embellishments like hearts or glitter
Step-by-step Guide
Step 1: Start by lightly sketching each letter L, O, V, and E on the surface of four separate toilet paper rolls. Adjust the shapes so they’re bold enough to cut out but still leave the roll sturdy.
Step 2: Carefully use a craft knife or scissors to cut out the negative space of each letter. For curved letters like “O” or “E,” go slowly and keep your blade angled inward for cleaner edges.
Step 3: Stand each roll upright on a flat surface and adjust as needed. If you’d like, spray paint them or add decorations like mini heart stickers or pastel touches for a seasonal finish.
#29. Toilet Paper Roll Rockets
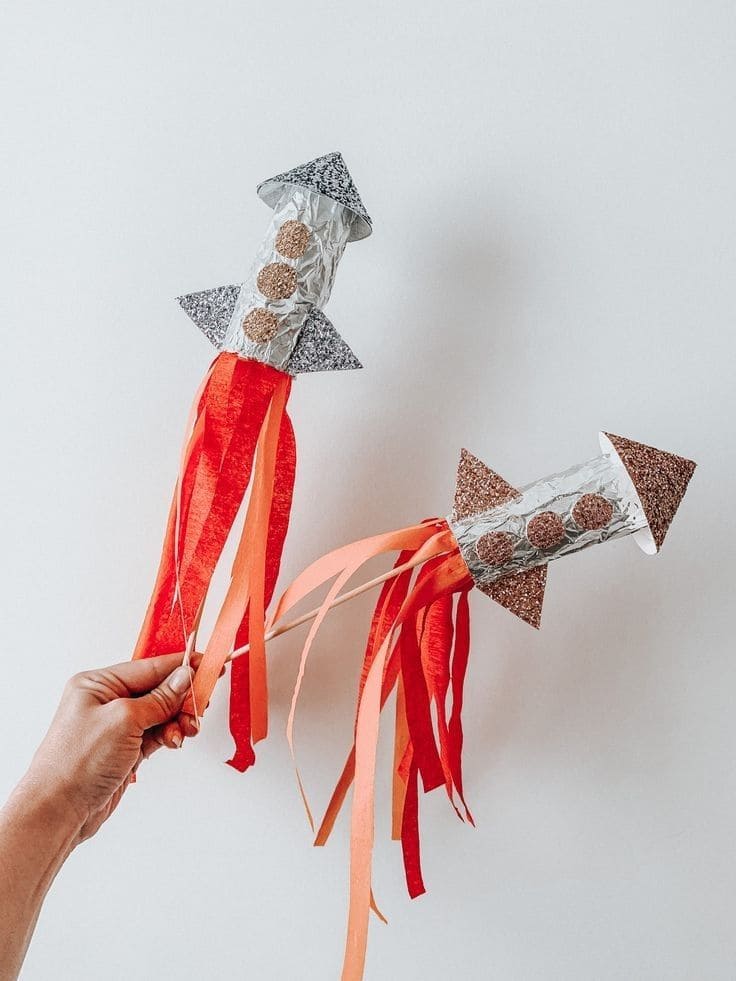
Made with shiny foil and blazing paper flames, they’re perfect for space-themed parties or New Year’s Eve crafts.
Materials Needed
- 2 empty toilet paper rolls
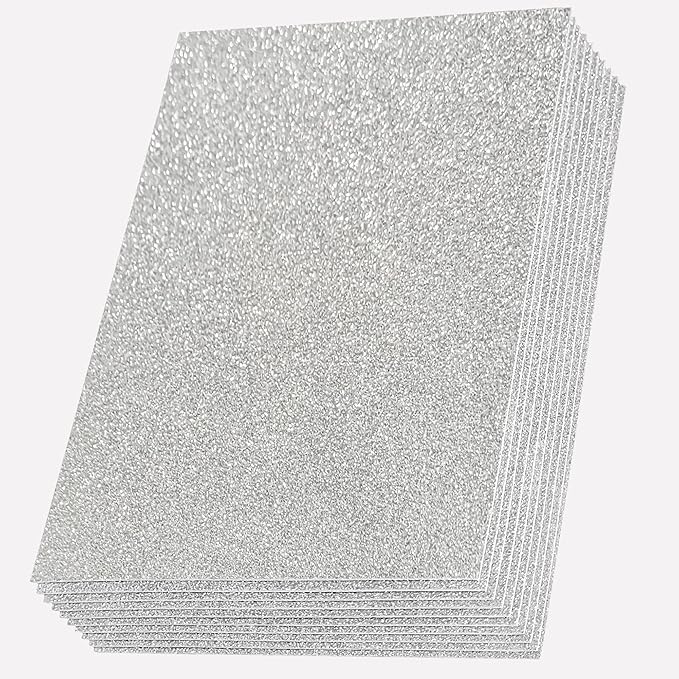
- Aluminum foil – about 12″x12″ per rocket
- Crepe paper streamers in red cut into 10–12 strips of 10″ each
- Glitter foam paper
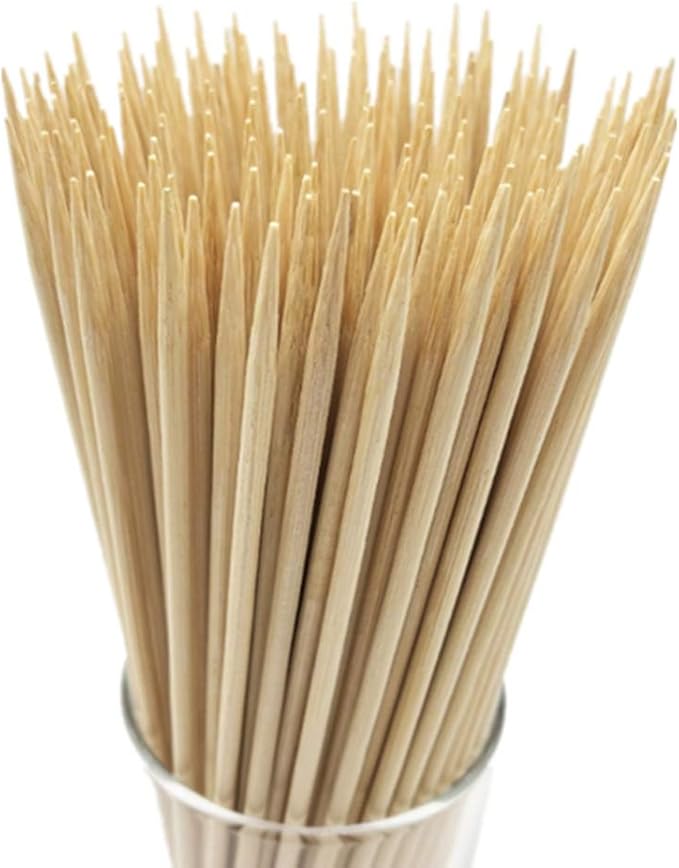
- Wooden skewers
- Glue gun
- Scissors
Step-by-step Guide
Step 1: Wrap each toilet paper roll completely in aluminum foil, folding the edges inside to secure. Glue the end flap down so it stays tight and smooth.
Step 2: Cut out two triangles for side fins and a circle that you turn into a cone for the top from glitter foam paper. Attach the fins on each side and glue the cone to one end of the rocket.
Step 3: Glue the crepe paper strips inside the bottom of the rocket so they hang like flames. Insert a skewer into the bottom (use a small dot of glue if needed).