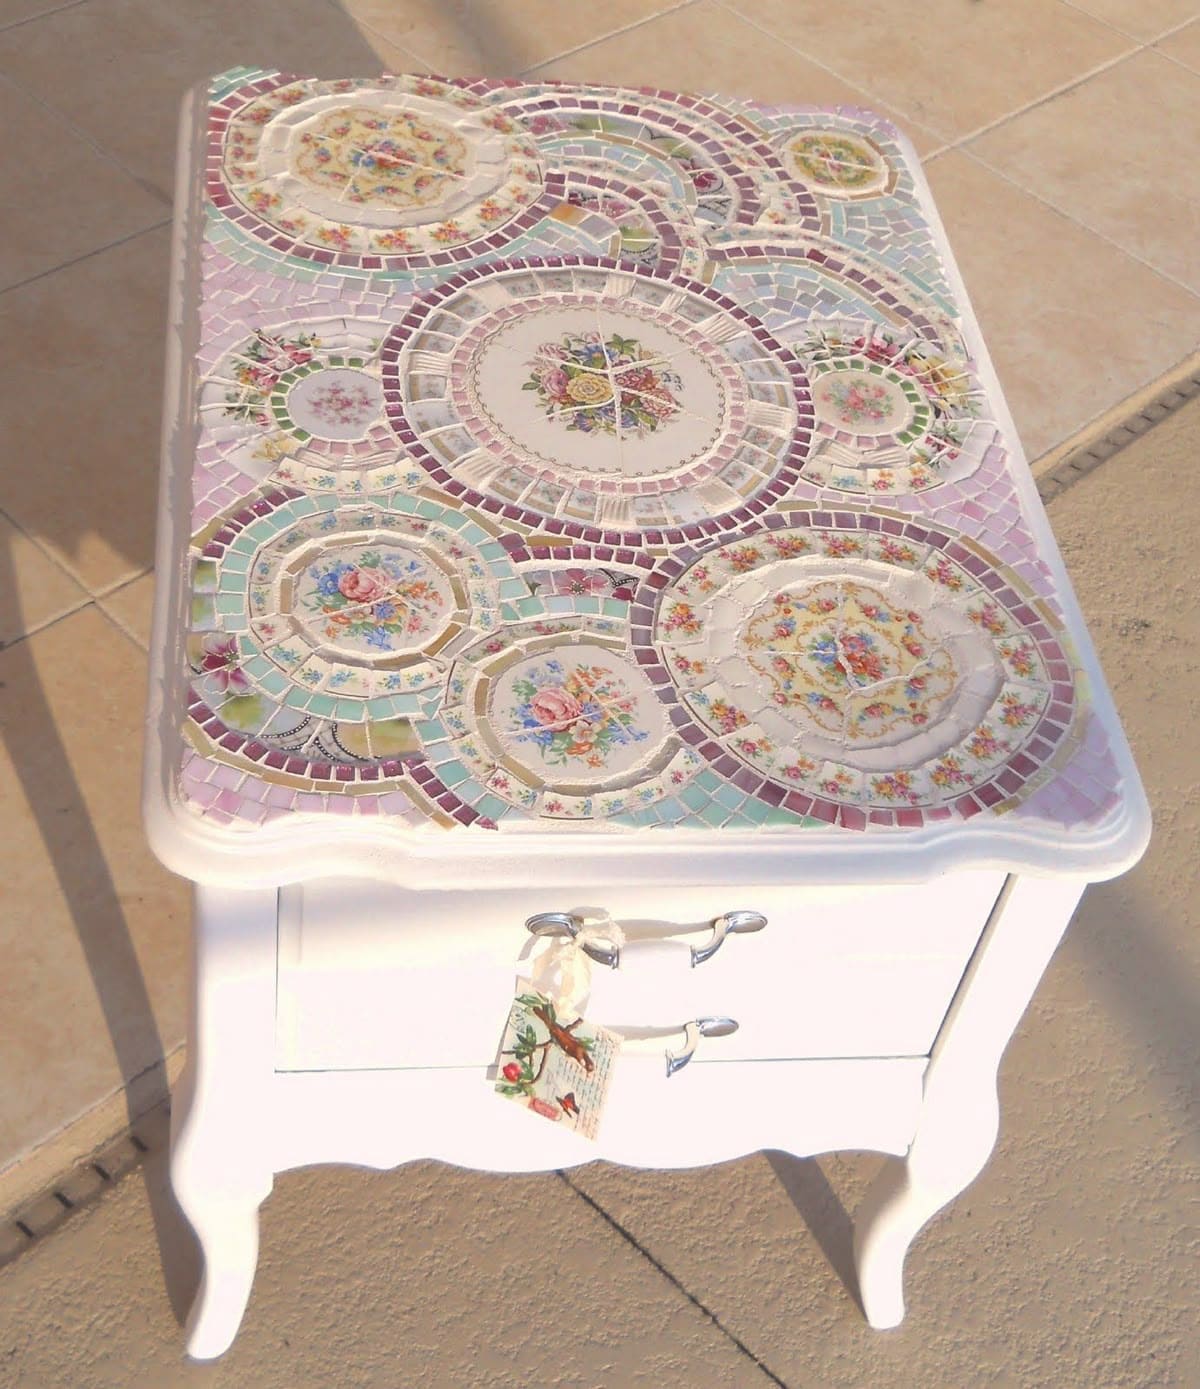
Wow, this mosaic dresser makeover transforms ordinary furniture into functional art. By using salvaged china plates and colored glass tiles, the surface gains durability and visual impact.
The mix of floral patterns with soft pastels creates a romantic yet practical design that resists wear and scratches. It’s a wonderful project for reusing old heirloom dishes that may no longer serve their original purpose.
The best part is how customizable it is, you can choose any color palette, plate style, or pattern arrangement to suit your décor. Once sealed, this mosaic top is as strong as it is charming, perfect for daily use.
Materials Needed
- 1 small wooden dresser or side table, approx. 20-30″ tall with a flat top
- 5-7 vintage china plates (floral patterns recommended, 6-9″ diameter)
- 1 lb colored mosaic tiles (glass or ceramic, mixed pastel tones)
- 1 sheet 120-grit sandpaper
- Tile adhesive or thin-set mortar (approx. 1 lb for a small top)
- 1 notched trowel (1/4″)
- Tile nippers for cutting china and glass
- Safety goggles and gloves
- Grout (white or light grey, 1 lb)
- Grout float and sponge
- Sealer for grout and tiles (clear, 8 oz)
- Drop cloth and painter’s tape
Step-by-step Guide
Step 1: Prep your dresser by sanding the top lightly to ensure adhesion. Then wipe clean. If the body of the dresser needs painting, do it first (white or pastel shades complement mosaics beautifully).
Step 2: Break your china plates into large central pieces (to use as medallions) and smaller shards for filling spaces. Always wear goggles and gloves when cutting with tile nippers.
Step 3: Lay out your design before gluing. You place large plate centers first, then surround them with colorful glass tiles and smaller china shards. Aim for a balanced, circular flow.
Step 4: Apply tile adhesive with a notched trowel to a small section at a time. Then press pieces firmly into place, leaving a small gap (1/8″) for grout. Let the adhesive set for 24 hours.
Step 5: Mix grout according to package instructions. Spread over the surface with a float, pressing into gaps. You should wipe away excess with a damp sponge and allow grout to cure 24-48 hours.
Step 6: Seal the mosaic with a clear grout sealer to protect from stains and moisture.
Step 7: Once cured, style your dresser with simple décor like a small vase of flowers or a vintage lamp so the mosaic remains the star.
Tips: Use pastel glass tiles for a soft, vintage feel and don’t skip sealing as it makes cleaning easier and prevents grout discoloration.