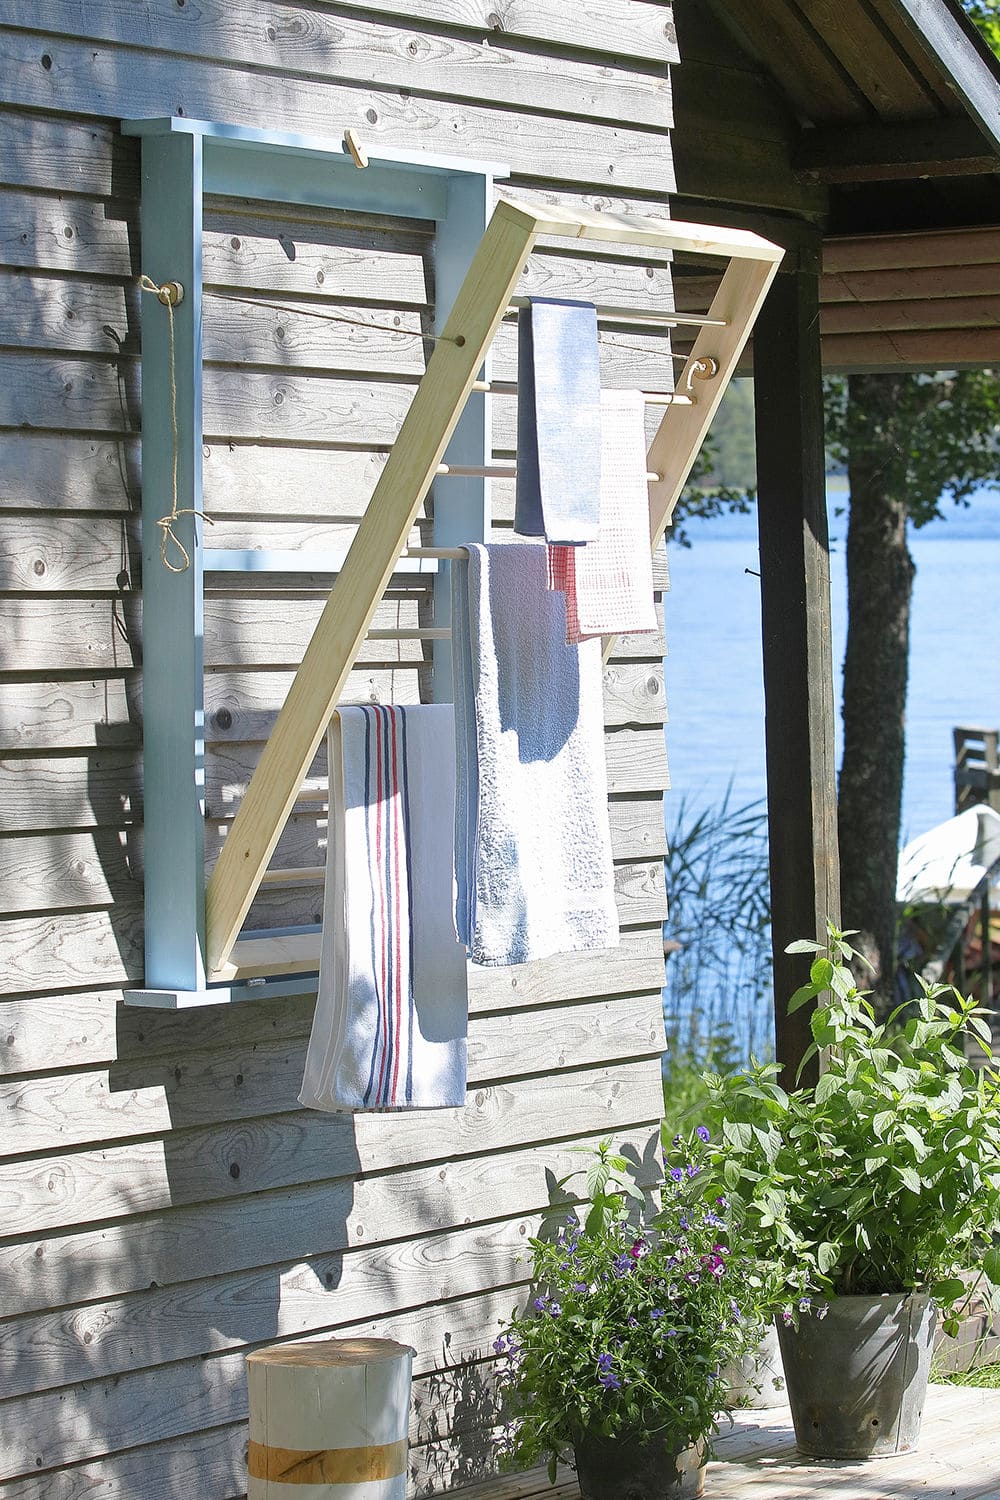
Imagine stepping outside with freshly washed linens and flipping down your very own drying rack, ready to catch the breeze.
This project feels a bit like opening a window for your laundry, giving each piece its moment in the sun.
And when the work is done, the rack tucks away, leaving your space open and tidy again. It’s a simple project, yet it brings a sense of ease and rhythm to everyday life.
Materials Needed
- 2 side panels (each 24” × 4” wooden boards, painted or sealed for outdoor use)
- 6-8 wooden dowels (¾” diameter, cut to 26” length each)
- 2 support arms (20” long, 1” × 2” lumber)
- 2 sturdy wall hinges (3” each, outdoor-rated)
- 2 rope or chain supports (18” each)
- Wood screws (1½” size, galvanized)
- Sandpaper (medium grit)
- Outdoor paint or wood sealant
- Measuring tape and drill
Step-by-step Guide
Step 1: Decide on a sunny, well-ventilated wall for mounting. Then mark the rack’s width and height with a pencil.
Step 2: Prepare the two side panels and drill evenly spaced holes (about 4” apart) for the dowels. You also sand edges smooth.
Step 3: Insert dowels into the side panels and secure with wood glue plus screws for durability. This creates your drying ladder.
Step 4: Attach hinges at the bottom of the side panels and mount the entire frame to your wall. Make sure it swings down freely.
Step 5: Add support arms or chains to hold the rack at a usable angle when opened. Adjust length so the rack sits slightly slanted outward, helping airflow.
Step 6: Finish by painting or sealing the wood for weather protection. Once dry, hang your first load of towels and let the sun do the rest.
Tips:
I discovered that spacing the dowels closer together at the top and wider near the bottom helps airflow between fabrics.
If you want extra charm, paint the rack in a cheerful color, something that brightens your wall as much as your laundry.