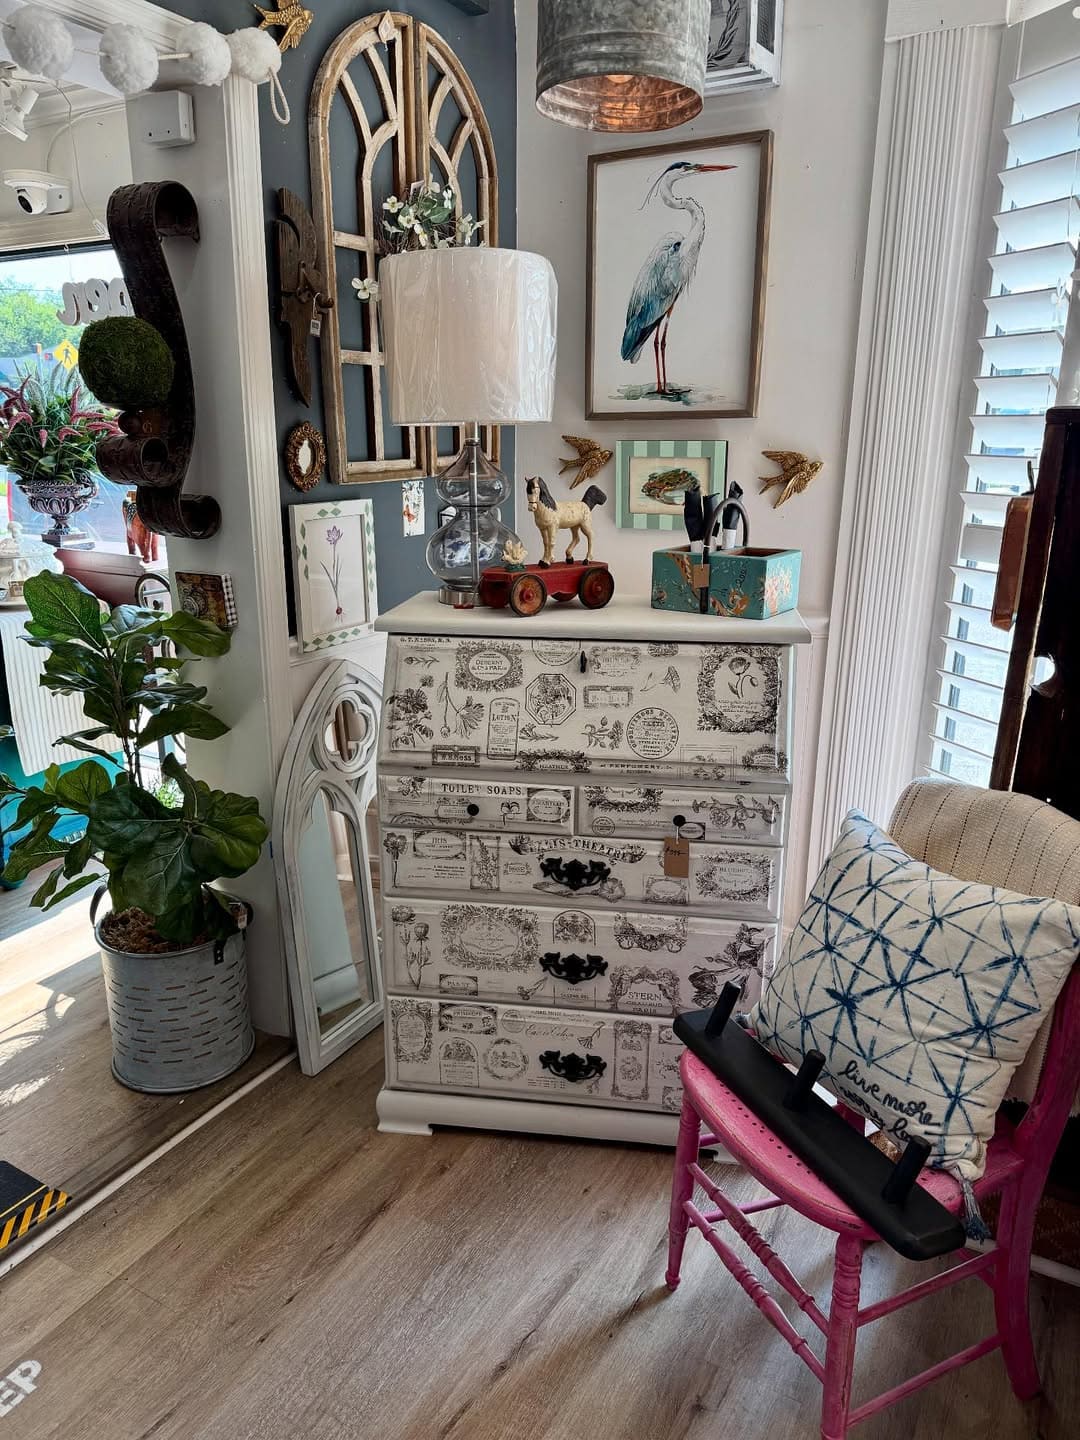
This makeover is proof that even a tired dresser can become a stylish centerpiece with the right touch. Using decoupage paper featuring postcards, stamps, and handwriting, the drawers transform into a canvas of travel-inspired art.
You can see a crisp white coat of chalk paint refreshes the frame, while the monochrome scheme keeps the look elegant.
This DIY is beginner-friendly, budget-conscious, and durable with a protective sealer. Perfect for bedrooms, entryways, or even a creative studio, this dresser combines storage with artistry.
Materials Needed
- 1 medium wooden dresser, approx. 35-40″ tall with 3-4 drawers
- 1 sheet 120-grit sandpaper & 1 sheet 220-grit sandpaper
- 1 quart primer (water-based, white)
- 1 quart white chalk paint
- 6-8 sheets decoupage paper or printed tissue paper (A3 size, vintage postcard/stamp designs)
- 1 bottle decoupage glue (Mod Podge 8 oz or equivalent)
- 1 foam brush (2″) & 1 fine bristle brush (1″)
- Sharp craft knife or scissors
- Clear matte or satin topcoat spray (12 oz) or brush-on sealer
- Painter’s tape & drop cloth
- Optional: replacement knobs or handles (black or brushed metal, 1.5-2″)
Step-by-step Guide
Step 1: Remove all knobs and handles from your dresser. Place it on a drop cloth to protect your floor.
Then sand the entire piece lightly with 120-grit to remove shine or old finish, then smooth with 220-grit. You can wipe away dust using a damp lint-free cloth.
Step 2: Apply one coat of primer evenly across the dresser. Allow at least 2 hours to dry before painting. This helps the paint and decoupage paper adhere better.
Step 3: Paint the body and drawer edges with two coats of white chalk paint, allowing each coat to dry fully (1-2 hours between coats). The crisp white base will make the postcard designs stand out beautifully.
Step 4: Measure each drawer front and cut your decoupage papers to size.
You can also dry-fit them on the drawers before applying glue to check alignment of the designs. If needed, overlap patterns slightly for a natural collage effect.
Step 5: Using a foam brush, apply a thin layer of decoupage glue directly onto a drawer front.
Carefully place the paper, starting from the center and smoothing outward with a clean cloth or plastic scraper to avoid air bubbles. Let it dry for 20-30 minutes. Repeat for each drawer.
Step 6: Once all papers are glued, brush another thin coat of decoupage glue over the top of each design to seal. Let this dry overnight for durability.
Step 7: Apply a clear topcoat (spray or brush-on) over the entire dresser to protect the finish from scratches and daily wear. Satin topcoat adds a soft sheen, while matte keeps the look rustic.
Step 8: Reattach the knobs or update them with black or brushed metal ones for contrast. Step back and admire your postcard dresser, a timeless reminder of journeys past and future.
Tips: If bubbles form in the paper, gently prick them with a pin and smooth down before sealing.