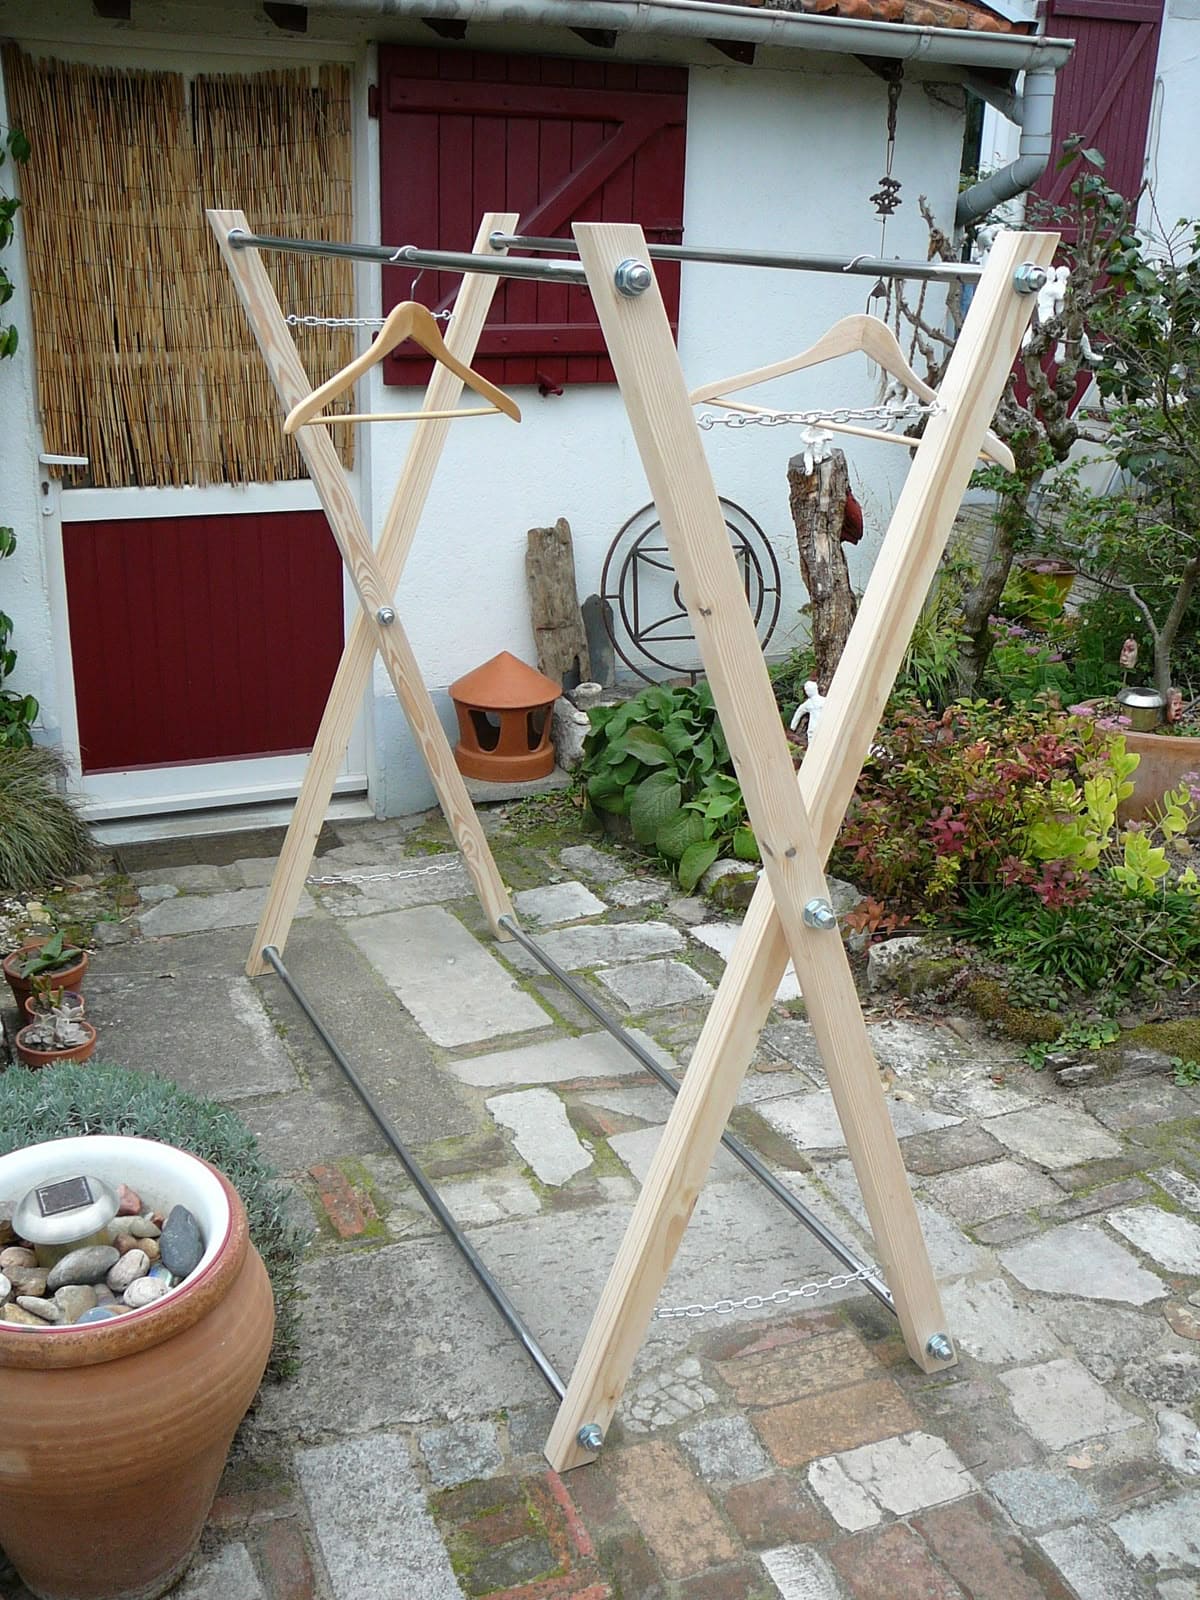
There’s something beautifully old-fashioned about a wooden X-frame rack. It feels like something you’d see in a charming countryside home and simple, reliable, and built to last.
Once you set it up, you’ll notice how it naturally fits into the garden, blending wood and metal into a design that’s both rustic and modern.
Materials Needed
- 4 wooden planks, 1.5” × 2.5” × 5 ft (for the X-frames)
- 2 metal rods or steel pipes, 1” diameter × 4 ft long (for drying bars)
- 4 long bolts with washers and nuts
- 2 chains, 24” each
- Drill with 1” bit
- Sandpaper and outdoor wood finish/sealant
- Optional: wood screws
Step-by-step Guide
Step 1: Sand down your wooden planks and seal them with an outdoor wood finish to protect against moisture.
Step 2: Drill holes about 12” from the top of each plank where the bolts will join the legs into an X-shape.
Step 3: Cross two planks to form an X and secure with a bolt, washer, and nut. You want to repeat for the second pair to make two X-frames.
Step 4: Attach the metal rods across the top and bottom of the X-frames. Then tighten them securely to act as drying bars.
Step 5: Connect the lower ends of the frames with the chains to keep the rack from spreading too far apart.
Tips:
I love that this design can double as a clothing rack for hangers, you can dry delicates without stretching them out.
If you want it to be collapsible, leave the rods detachable so you can store the frame flat when not in use.