No one wants to think about losing an animal, but if you raise livestock long enough, it’s something you’ll eventually face. When that time comes, the question becomes: what do you do with the body?
Burying might seem like the obvious choice, but it’s not always practical, especially in winter when the ground is frozen or if you have limited land.
Rendering services can be costly or unavailable, and burning is often prohibited. That’s why many experienced homesteaders have turned to an alternative that’s both natural and surprisingly efficient: mortality composting.
This isn’t about turning a goat into fertilizer for your vegetables. It’s about safely returning organic matter to the earth in a way that’s clean, odor-free, and respectful.
Understanding Mortality Composting
At its core, mortality composting uses the same biological process that breaks down garden waste, just on a larger scale. Microbes, heat, and oxygen work together to transform the carcass into stable, organic matter.
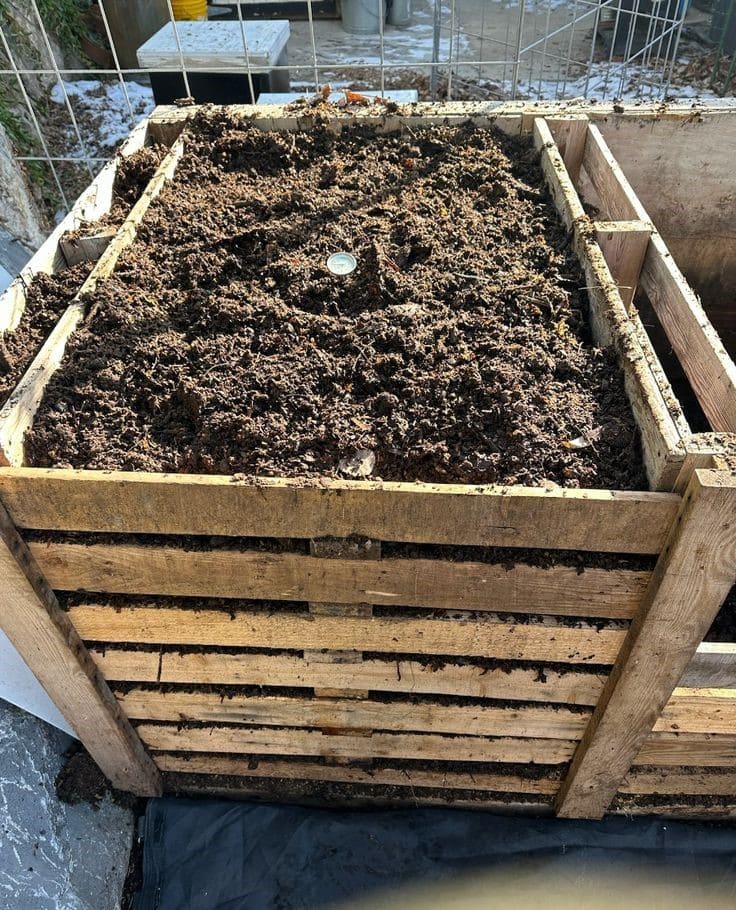
When done correctly, the compost pile gets hot enough (above 131°F or 55°C) to destroy most harmful bacteria and viruses. Over time, what’s left is a crumbly, nutrient-rich compost that can safely be used around trees, ornamentals, or pastures.
It’s a closed, self-contained system, no smell, no pests, and no contamination if you set it up properly.
However, it’s important to note: you should never compost animals suspected of prion diseases like scrapie or chronic wasting disease. Those pathogens can’t be destroyed by heat.
Why Compost Instead of Burying or Burning?
Burying an animal may feel traditional, but it carries risks. Decomposition below ground is slower and can lead to groundwater contamination, especially if your soil drains poorly.
Burning, while effective for small carcasses, is often impractical for larger animals. It takes a tremendous amount of fuel to reduce a goat’s body to ash, and it’s rarely complete.
Composting, on the other hand, works with nature. It’s cleaner, faster, and doesn’t require special tools or energy. It’s also recognized by agricultural agencies as an approved method of livestock disposal.
For small farms and homesteads, it’s the most sustainable option—recycling nutrients instead of wasting them.
Preparing the Site
Before you start, pick a location carefully. You want a well-drained, elevated area far from wells, streams, or drainage ditches, at least 200 feet away is ideal. Also, avoid low spots where water could pool or runoff might occur.
A shaded area can help regulate temperature, but make sure it’s accessible year-round. The compost pile will stay in place for months, so choose a discreet spot that won’t attract attention or predators.
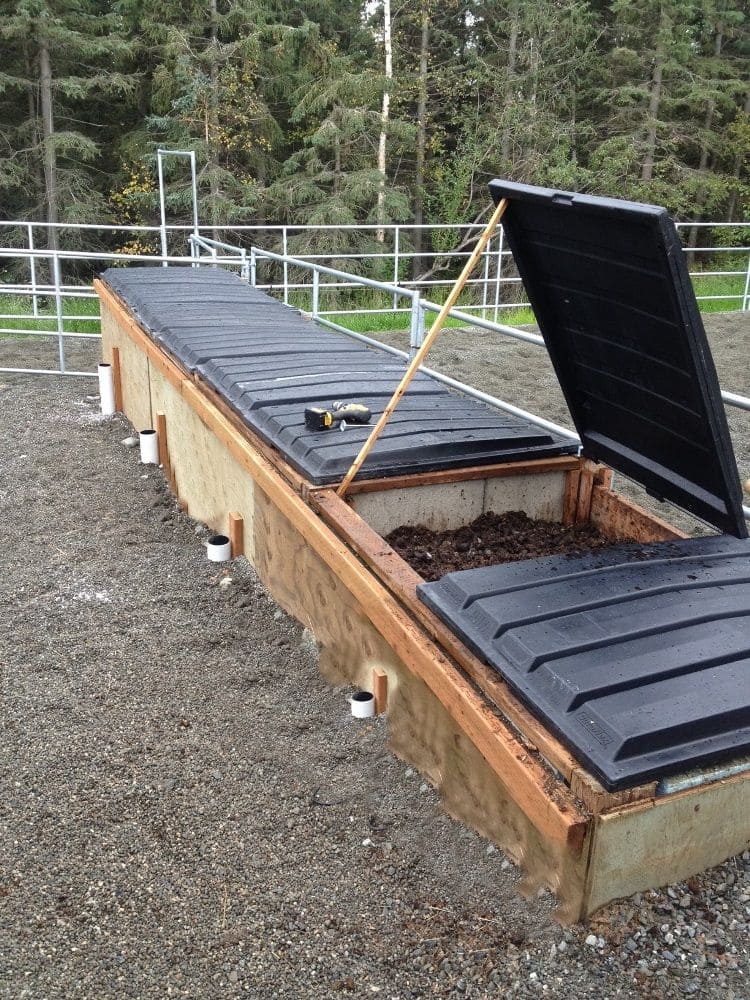
If you have multiple animals, designate a permanent composting site with a simple bin made from wooden pallets or fencing.
Materials You’ll Need
Composting relies on carbon-rich materials to balance the nitrogen-heavy carcass. These “browns” absorb moisture, prevent odor, and provide structure for airflow.
You’ll need:
- Wood chips or coarse sawdust (best choice for large animals)
- Straw, hay, or dry leaves as filler
- Optional: finished compost or manure to add beneficial microbes
You need to avoid using fine sawdust or materials that mat down easily, they can restrict oxygen and slow the process. The goal is to keep the pile fluffy enough for air circulation.
Building the Compost Pile
Step 1: Create a Base
Lay down a thick base of carbon material, about two feet deep. This layer will absorb fluids and insulate the carcass as it begins to break down.
Step 2: Place the Carcass
Lay the goat in the center of the pile. If possible, puncture the abdomen with a shovel or knife to release gases, this prevents bloating and helps the compost heat up faster.
Step 3: Cover Generously
Add at least two more feet of carbon material over the top and sides. Make sure every part of the carcass is fully covered. You shouldn’t see or smell anything once you’re done.
If you skimp on the cover, you’ll risk odors, leaching, or scavengers digging in. So, when in doubt, add more.
Step 4: Shape the Pile
Shape it into a gentle mound to help shed rainwater. If you’re in a wet area, you can cover the top with a tarp to prevent the pile from getting soaked.
Managing the Compost
The best part about this method is that it’s almost hands-off. You don’t need to turn the pile or add anything else. Nature will take care of the rest.
As the microbes get to work, the internal temperature of the pile will rise, often within a few days. It may stay hot for several weeks, gradually cooling as decomposition progresses.
If your pile is properly insulated, there should be no strong smell. In cold weather, the process may take longer, but it will still work, even with frozen animals. The composting material will thaw and break down the carcass slowly over time.
How Long It Takes
A medium-sized goat usually breaks down within three to six months, depending on the season and moisture. In warm weather, it can happen faster. In winter, it might take closer to a year.
Soft tissue disappears first, leaving only bones, which continue to crumble as the compost ages. Large bones may remain intact for longer, but they’ll become brittle and eventually turn to mineral dust, enriching the soil.
The finished compost should look dark and crumbly with no visible remains. You can use it under trees, in non-edible landscapes, or return it to a compost bin to finish curing.
Safety and Environmental Considerations
Always check your local agricultural or environmental regulations before starting. Many regions allow mortality composting, but some require specific distance limits or ground conditions.
Keep the pile contained with fencing if you have dogs or wildlife nearby. You also need to avoid placing it downhill from wells, gardens, or water sources.
And remember, this is not compost for food crops. It’s meant for safe decomposition and soil enrichment, not for growing vegetables.
Dealing with the death of a farm animal is never easy, but mortality composting offers a way to handle it naturally and respectfully.
Final Thoughts
By choosing to compost, you’re returning nutrients to the earth instead of sending them to waste. The process is quiet, contained, and surprisingly odorless when done right.
Refer to: How I Built a Budget-Friendly Walkthrough Shelter for Just $300
