Ever find yourself scrolling aimlessly, searching for something, anything to spark your creativity? We’ve all been there.
Whether it’s a lazy afternoon, a rainy weekend, or just one of those days when everything feels meh, crochet has the power to turn your mood around stitch by stitch.
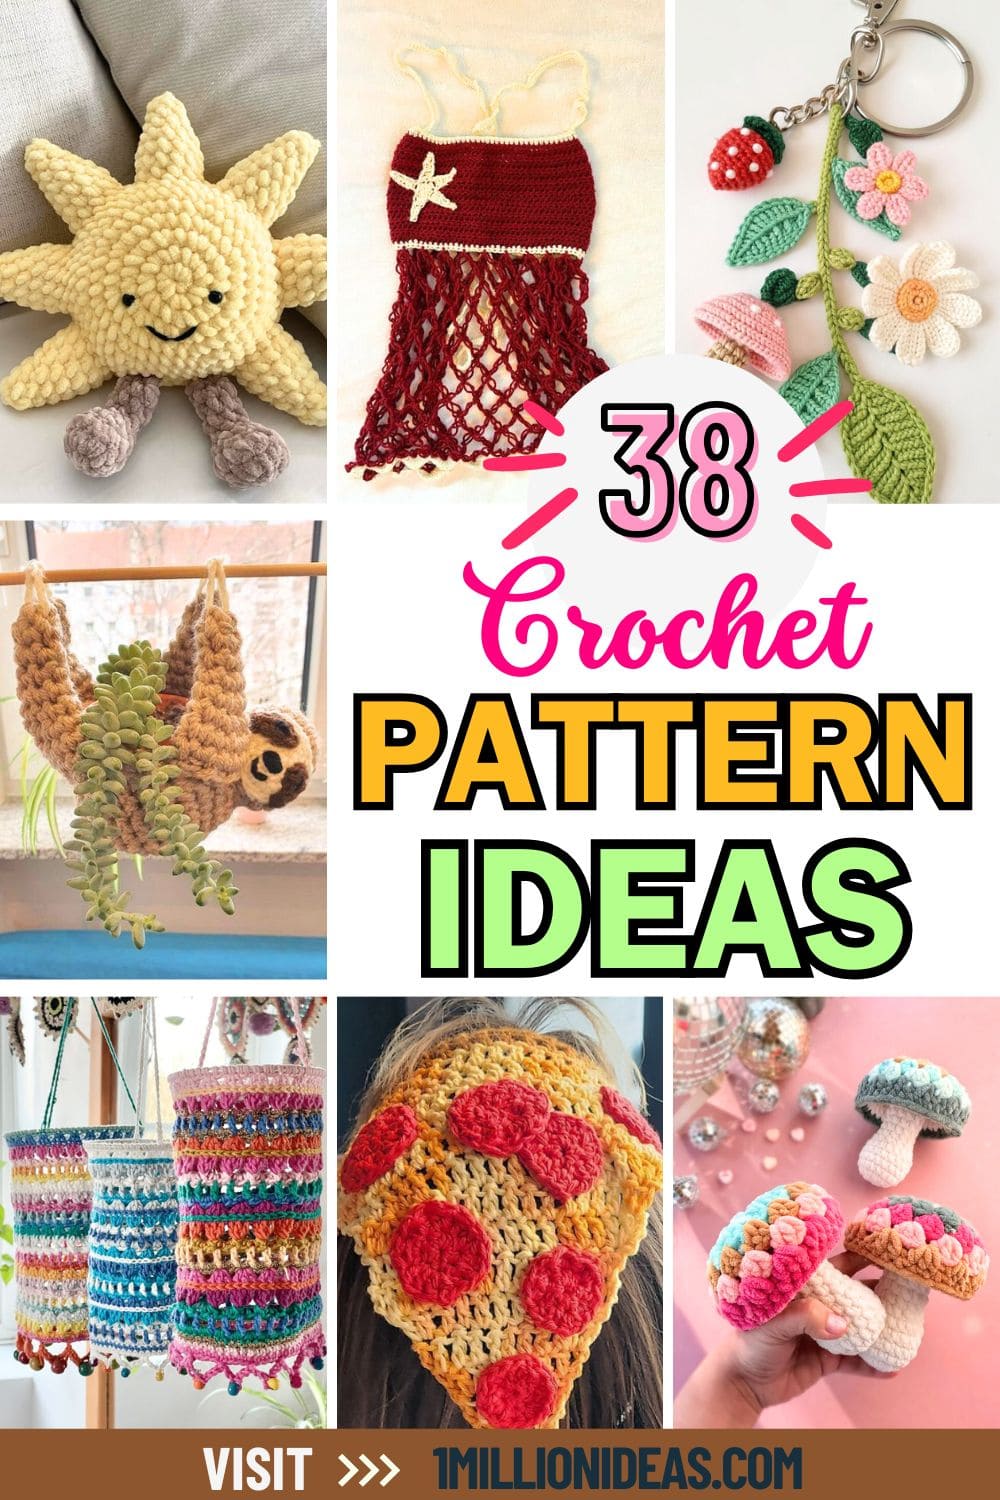
In this article, we’ve gathered 38 stunning crochet projects that aren’t just beautiful, they’re addictive in the best way. From cozy decor to quirky accessories, each one offers a satisfying escape from boredom and a reason to pick up your hook again.
This article contains affiliate links. If you purchase through them, I may earn a small commission at no extra cost to you. Thank you for your support!
#1. Crochet Cat Hammock
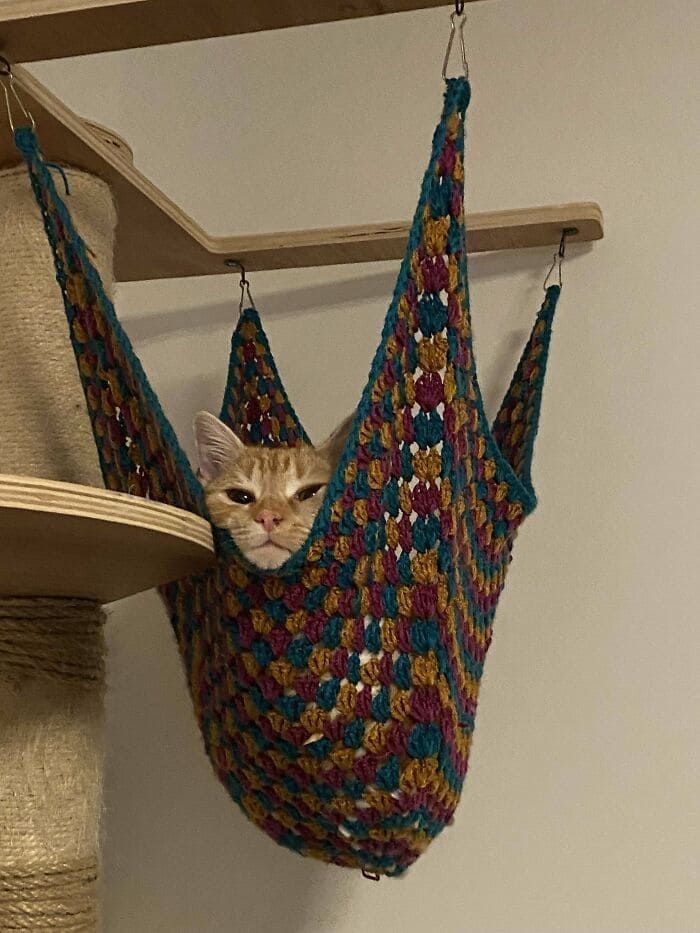
Cozy, colorful, and snug enough to cradle a perfectly curled nap, this crochet creation isn’t just a cat bed, it’s a personal throne.


Materials Needed
- Worsted weight yarn (Size 4): 300g total in three contrasting colors (100g teal, 100g mustard, 100g burgundy)
- 4.5 mm crochet hook
- 4 steel hooks
- Yarn needle
- Scissors
Step-by-step Guide
Step 1: Create a magic ring. Crochet 12 double crochets into the ring. Pull tight and join with a slip stitch.
Step 2: Begin working in the round using the granny stitch (3 double crochets in one space, chain 1, skip one). Increase each round by adding extra clusters at each corner to shape the base into a wide bowl.
Step 3: Continue expanding the base until it reaches about 14 to 16 inches across. Then, work even rounds without increasing to build up the sides of the hammock, around 6 to 8 inches in height.
Step 4: Crochet three long triangular flaps from the rim, each tapering down to a point and measuring approximately 10 to 12 inches. These will serve as the hammock’s hanging arms.
Step 5: Fasten off, weave in all ends, and reinforce the flap points with extra stitches if needed. Attach hooks to the flap tips and mount securely to a shelf or cat tower structure.
#2. Crochet Under-the-Sea Bag
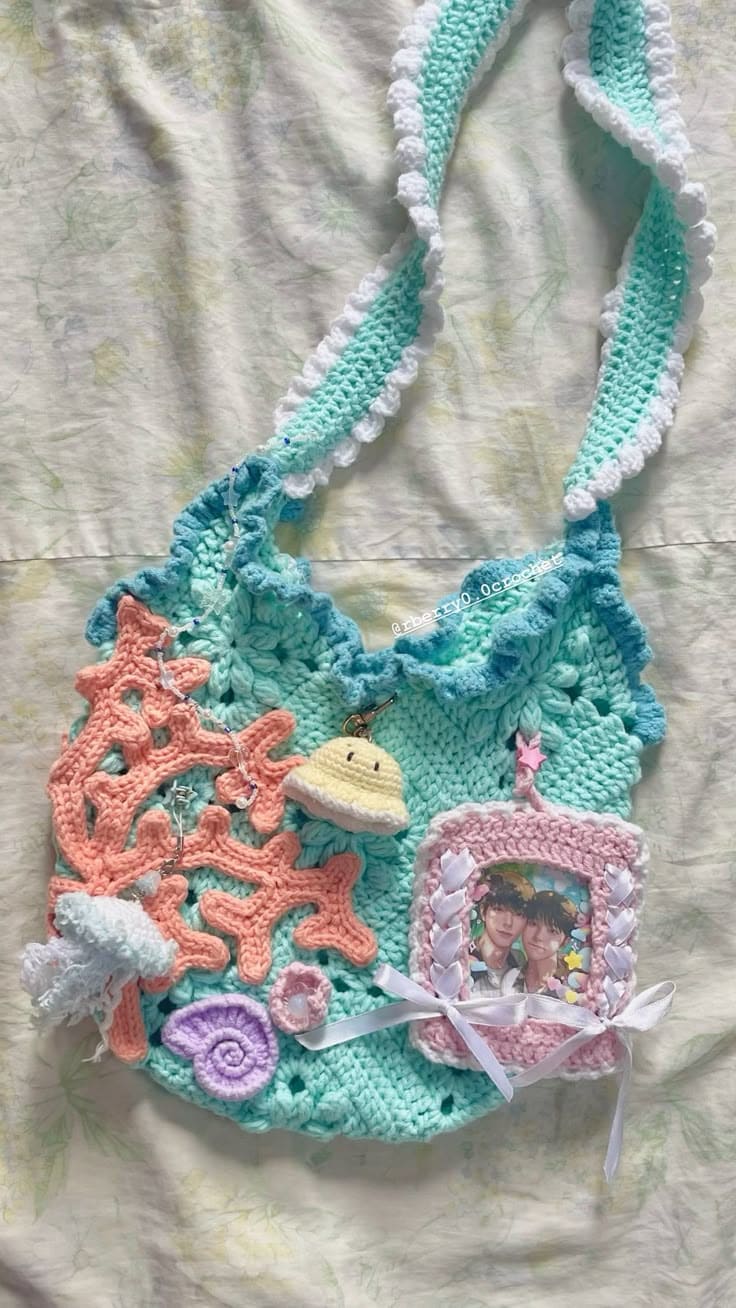
This bag feels like a memory from a dreamy summer. With coral, jellyfish, shells, and a picture frame built right into the design, it’s more than just a bag, it’s a soft, wearable scrapbook.
Materials Needed
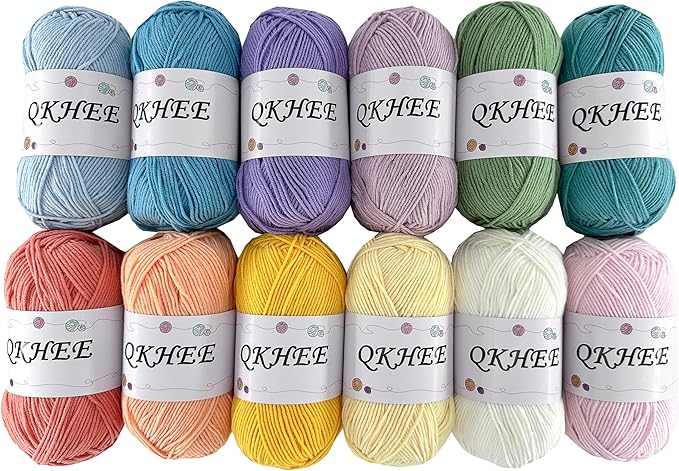
- Cotton yarn: Seafoam green (150g), peach, white, pink, lilac, yellow (20-50g each)
- 4 mm crochet hook
- Yarn needle
- Clear plastic
- Polyfill stuffing
- White ribbon
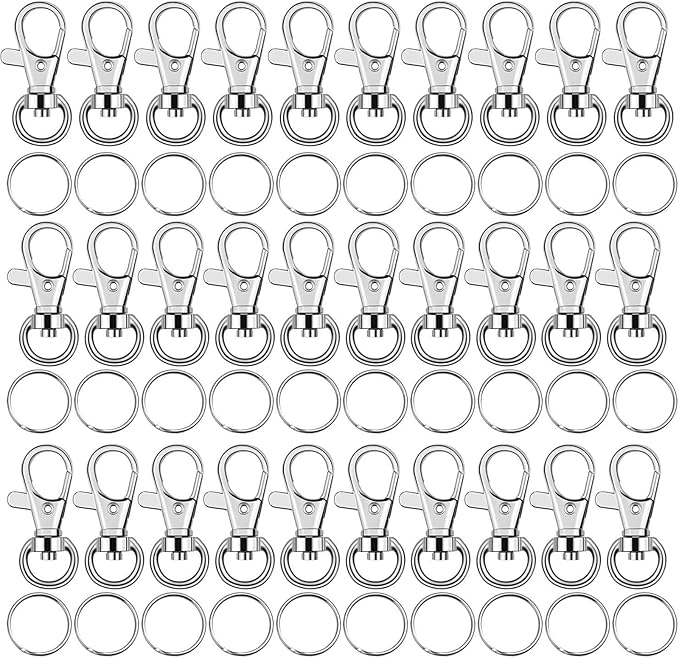
- Keyring and lobster clasp
Step-by-step Guide
Step 1: Start the bag base in seafoam green. Make a magic ring and crochet 6 double crochets. Increase in the round until the base reaches 9–10 inches wide. Build the sides with rounds of double crochet without increasing until it’s about 9 inches tall.
Step 2: For the strap, chain the desired length and work several rows of single crochet until it’s about 2 inches wide. For the ruffled border, switch to white and work [1 sc, 3 dc, 1 sc] into every other stitch.
Step 3: Create coral by chaining a long base in peach and working freeform branching rows with single and double crochet.
Step 4: Make sea elements:
– Jellyfish: Crochet a flat dome in yellow and add ruffled tentacles.
– Shell: Use spirals in lilac or pink.
– Cloud: Use white yarn and bobble stitches.
– Frame: Make a rectangle in pink with an opening. Insert a photo in a clear pocket and attach with ribbon weaving.
Step 5: Stitch or glue the appliqués onto the bag. Add hanging charms with lobster clasps if desired. Tie off all ends and enjoy your sea story in crochet form.
#3. Crochet Plush Bunnies

With their floppy ears, chubby cheeks, and velvety plush yarn, they melt into your hands like a hug.

Materials Needed
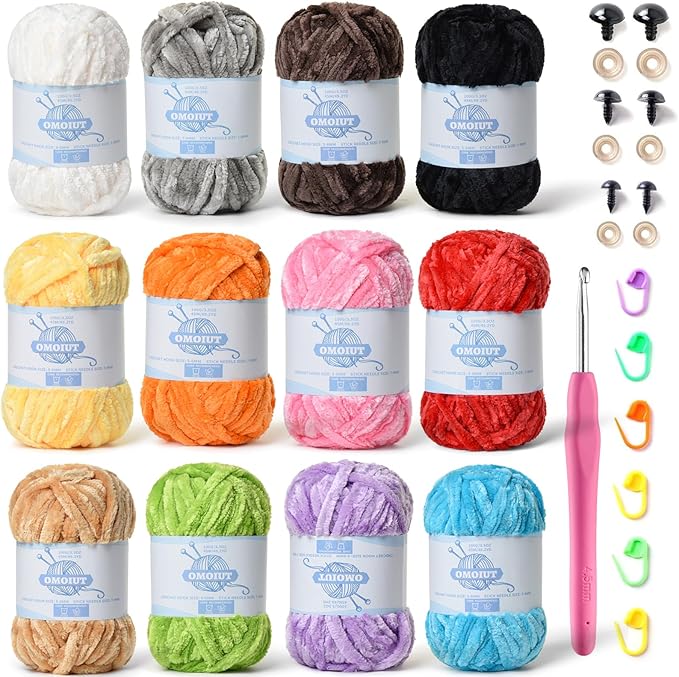
- 100g plush velvet yarn per bunny
- 4.5 mm crochet hook
- Polyfill stuffing
- Safety eyes (12–14 mm)
- Black embroidery thread
- Yarn needle
- Stitch markers (optional)
Step-by-step Guide
Step 1: Start with the head. Make a magic ring and work single crochets in the round, increasing until it forms a ball about 3–4 inches wide. Stuff firmly, insert safety eyes, and shape the face by slightly pulling in the eye sockets and stitching the nose.
Step 2: For the body, crochet another round shape, slightly longer than the head. Stuff well, then stitch to the base of the head.
Step 3: Make four limbs (two arms and two legs) by crocheting short cylinders. Slightly curve the feet by increasing or decreasing on one side. Attach them securely with a yarn needle.
Step 4: For the ears, chain a base and work in rows using half-double crochet. Taper the ends to create a gentle curve. Sew them on drooping down for a soft, sleepy look.
Step 5: Finally, embroider a little mouth or paw pads if desired, then squish it.
#4. Crochet Steering Wheel Covers
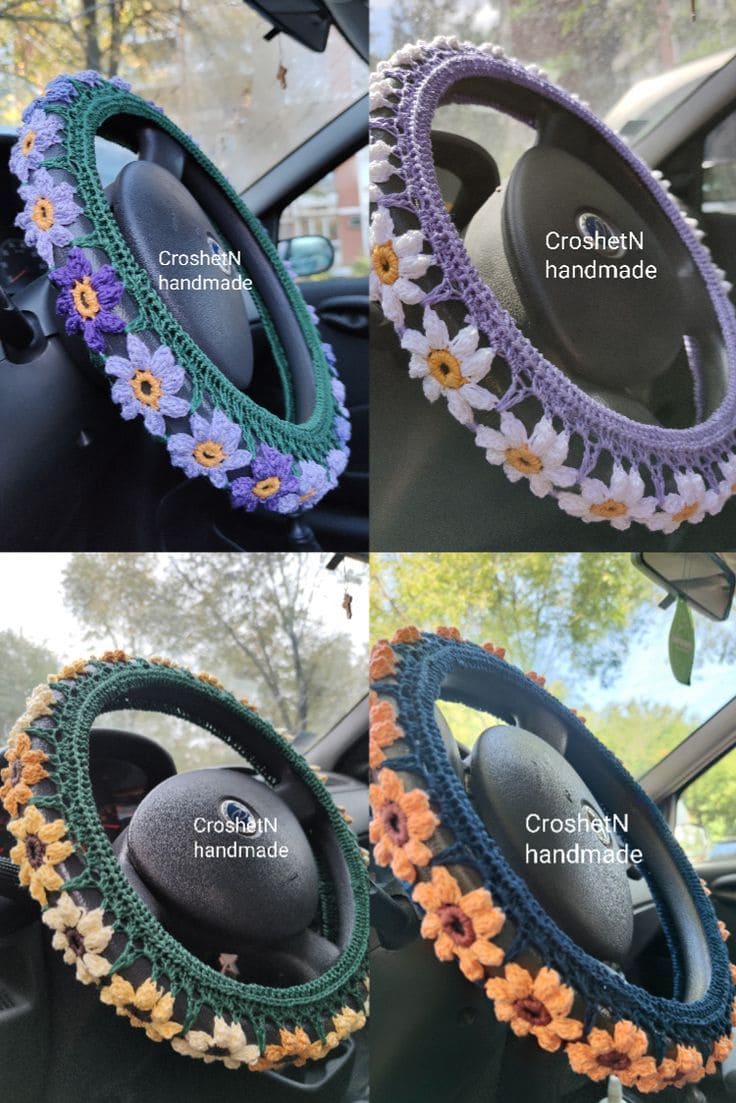
I never thought I’d smile every time I got in the car until I made this. These floral steering wheel covers are not only gorgeous but practical.

Materials Needed
- 3-4 colored cotton yarns (approx. 30–50g per color)
- 3.5 mm crochet hook
- Yarn needle
- Elastic band (optional)
- Measuring tape
- Scissors
Step-by-step Guide
Step 1: Measure the circumference of your steering wheel. Chain enough stitches to match the length, then join into a round.
Step 2: Work several rounds of single or half double crochet to form the inner band. This part should be firm and snug.
Step 3: Begin adding floral motifs around the outer edge. You can crochet them separately, start with a magic ring, chain petals, and fasten off, or crochet them directly onto the last round of the base.
Step 4: For more detail, vary petal colors and center tones. Attach each flower to the base with a yarn needle or crochet them together in the final round.
Step 5: Optional: sew a thin elastic band into the backside of the base for a stretch-to-fit grip.
#5. Crochet Star Blanket
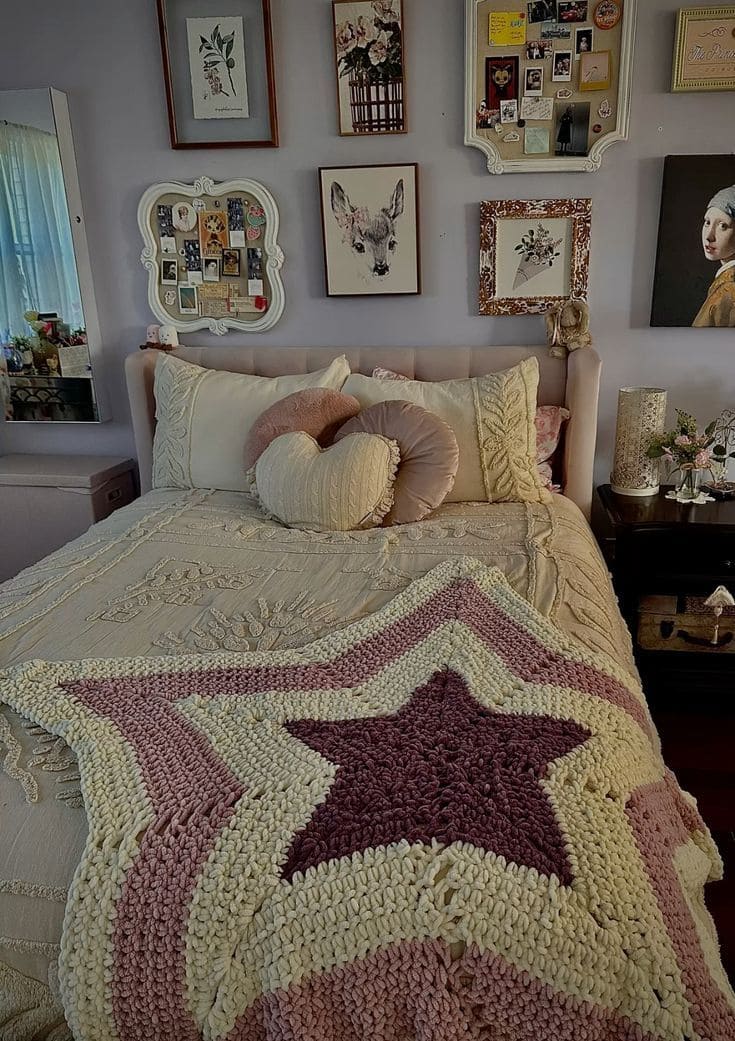
The star shape adds a playful twist to traditional throws, while the plush velvet yarn makes it irresistible to touch.
Materials Needed
- 3 colored velvet yarns (approx. 250g of each)
- 6.5 mm crochet hook
- Stitch markers
- Yarn needle
- Scissors
Step-by-step Guide
Step 1: Start at the center of the star. Make a magic ring and crochet 10–12 double crochets into the center. Join with a slip stitch and begin shaping points.
Step 2: To create the star, divide your stitches into 5 groups (each forming a point). Work in rounds using increases and chain spaces to form sharp, evenly spaced points.
Step 3: Alternate colors every few rounds. Use stitch markers at the tip of each point to maintain shape and consistency. Continue until the blanket reaches your desired size, typically 45 to 60 inches across for a lap or throw blanket.
Step 4: For extra softness and definition, finish the outer edge with a few rounds of single or half double crochet in your border color.
Step 5: Fasten off, weave in all ends, and gently steam if needed to help relax the shape and lay flat.
#6. Crochet Pizza Slice Bandana
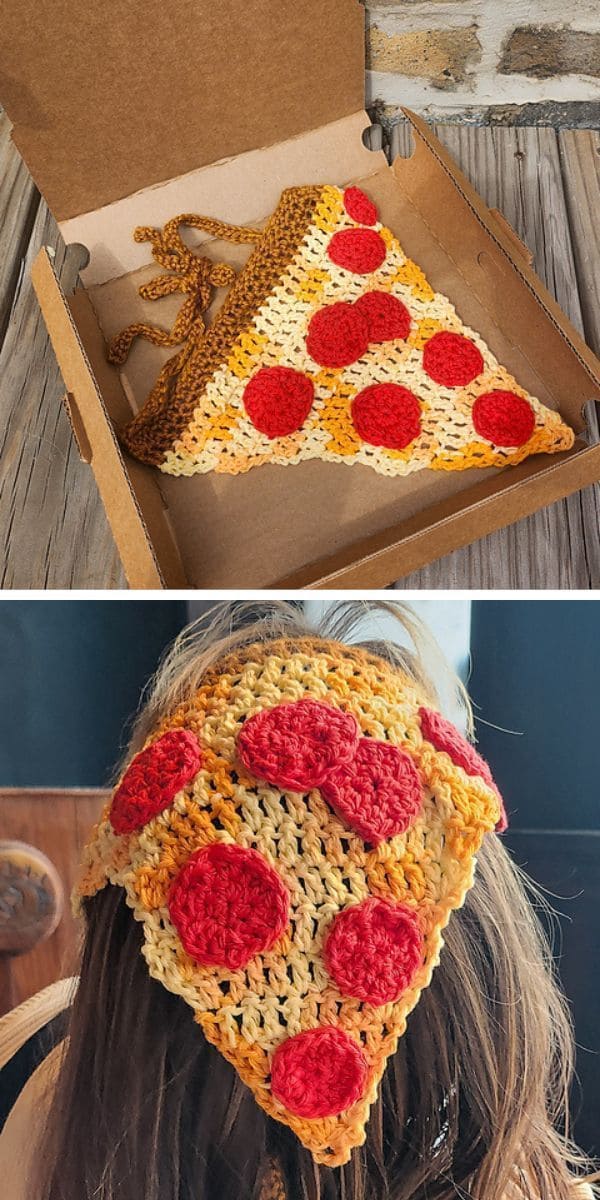
Who says fashion can’t be fun? This pizza bandana is an absolute mood like cheesy, bold, and full of personality.
Materials Needed
- DK cotton yarn: golden yellow (30g), light tan (15g), red (10g), orange (optional)
- 4 mm crochet hook
- Yarn needle
- Scissors
- Stitch marker (optional)
Step-by-step Guide
Step 1: Begin with the cheese triangle. Using golden yellow yarn, chain 3 and work in rows of double crochet, increasing by 2 stitches each row to form a wide triangle. Continue until it reaches desired size, typically about 10 inches long and 9 inches across.
Step 2: With tan yarn, crochet a row or two of single crochet across the top edge to mimic the crust. Optionally add a row of orange “sauce” just below for detail.
Step 3: For the pepperoni, use red yarn to make small flat circles. Start with a magic ring and crochet 6–8 single crochets in the round. Make 6–8 of them depending on how loaded you want your slice!
Step 4: Attach each pepperoni with a yarn needle, evenly spaced over the triangle.
Step 5: For ties, chain 40–50 stitches from each top corner and work a row of single crochet back across. Fasten off and weave in ends.
#7. Crochet Mermaid Net Top
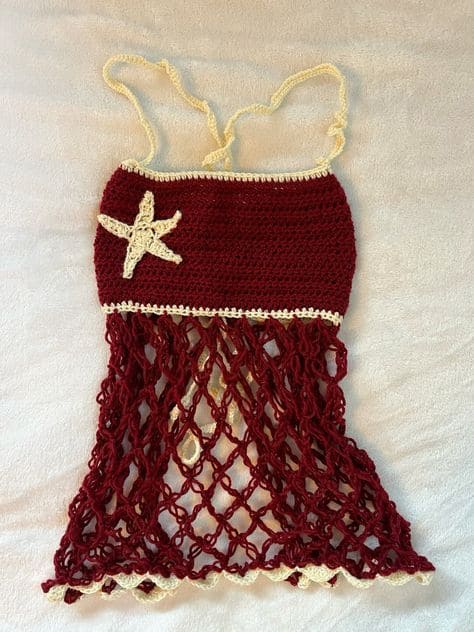
With a solid bodice and flowing netted skirt, it’s the perfect mix of structure and fluidity.
Materials Needed
- DK cotton yarn: deep burgundy (100g) and cream (50g)
- 4 mm crochet hook
- Yarn needle
- Scissors
- Stitch marker (optional)
Step-by-step Guide
Step 1: Start with the top bodice. Using burgundy yarn, chain enough to match your bust measurement. Join in the round and work rows of half-double crochet until it reaches about 6–8 inches tall. Fasten off.
Step 2: With cream yarn, add a border along the top and bottom of the bodice using single crochet or picot stitches for a subtle decorative trim.
Step 3: For the net skirt, join burgundy yarn at the bottom of the bodice. Chain 5, skip 2 stitches, and slip stitch into the next. Repeat to form a mesh base. Continue in rounds, expanding slightly every few rows by adding extra chain loops to create a flared shape. Stop when the skirt reaches desired length.
Step 4: Crochet a simple starfish separately by chaining 5 arms with clusters of double crochets tapering to a point. Sew onto the top left side of the bodice with cream yarn.
Step 5: For straps, use cream yarn to chain two long ties and attach them to the front and back corners. You can make them adjustable by tying behind the neck or back.
#8. Tiny Crochet Frogs
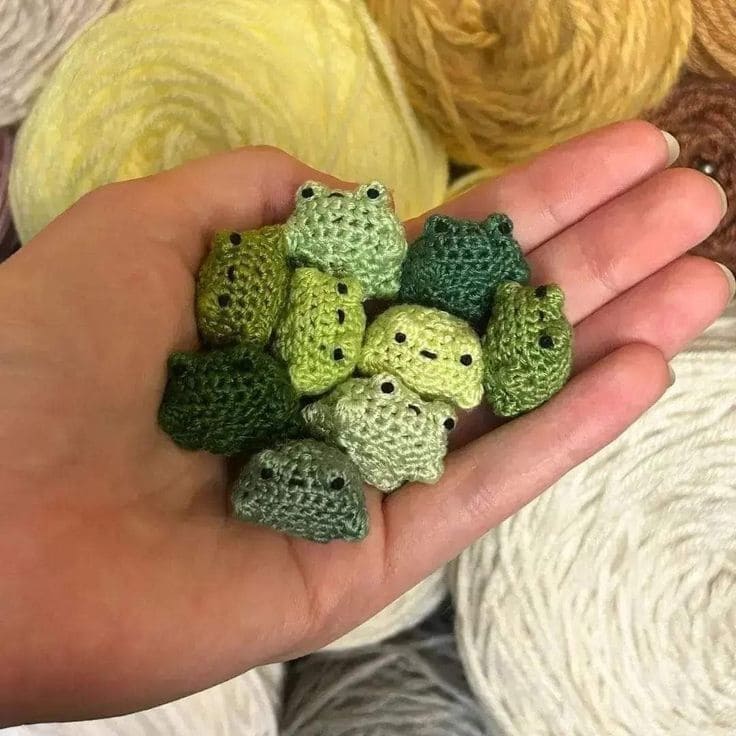
Crocheted in soft greens and small enough to sit on your fingertip, they’re the perfect pocket pals.
Materials Needed
- Embroidery floss
- 1.25 mm or 1 mm steel crochet hook
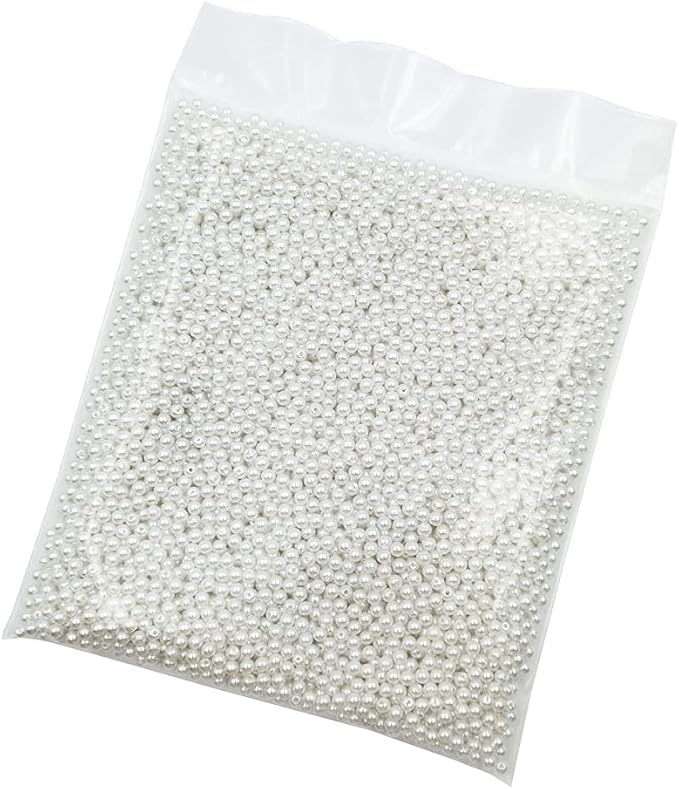
- Black seed beads
- Polyfill
- Yarn needle
- Scissors
Step-by-step Guide
Step 1: Begin with a magic ring. Work 6 single crochets into the ring. Pull tight and join.
Step 2: Increase around to 12 stitches (2 SC in each). Work 2–3 more rounds of SC to build the frog body.
Step 3: Lightly stuff the body with a pinch of polyfill or yarn ends. Then decrease (SC2tog) evenly around to close.
Step 4: For the eyes, either sew on two small seed beads. Optional: add a tiny smile using straight stitch or backstitch.
Step 5: To make the frog look more “frog-like,” crochet 2 small bumps (chain 3, slip stitch back) and attach as eye humps on top, then weave in ends, shape the body gently.
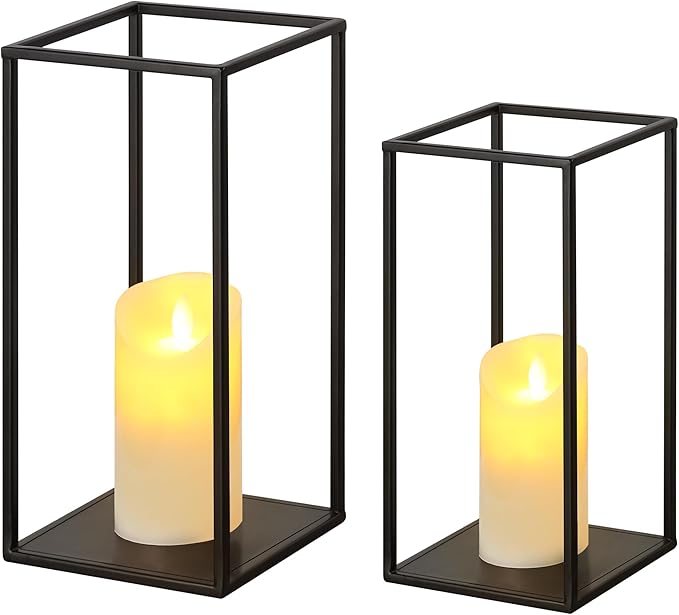
#9. Crochet Lantern Covers
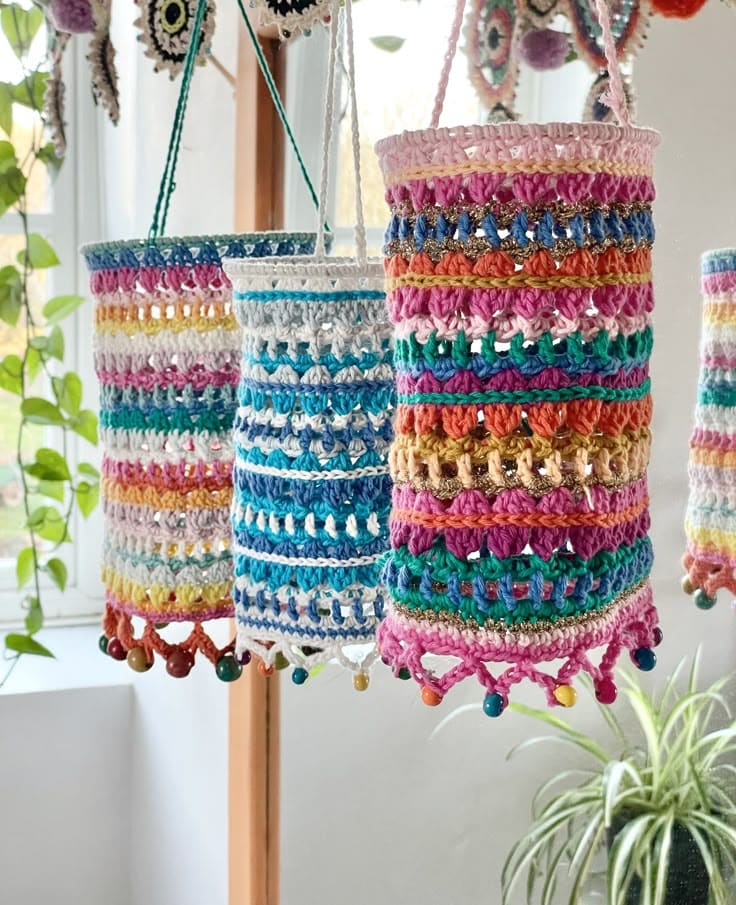
Striped with joyful colors and finished with playful beads, each lantern dances in the breeze and glows like a party in yarn.

Materials Needed
- 8 colored cotton yarns per lantern
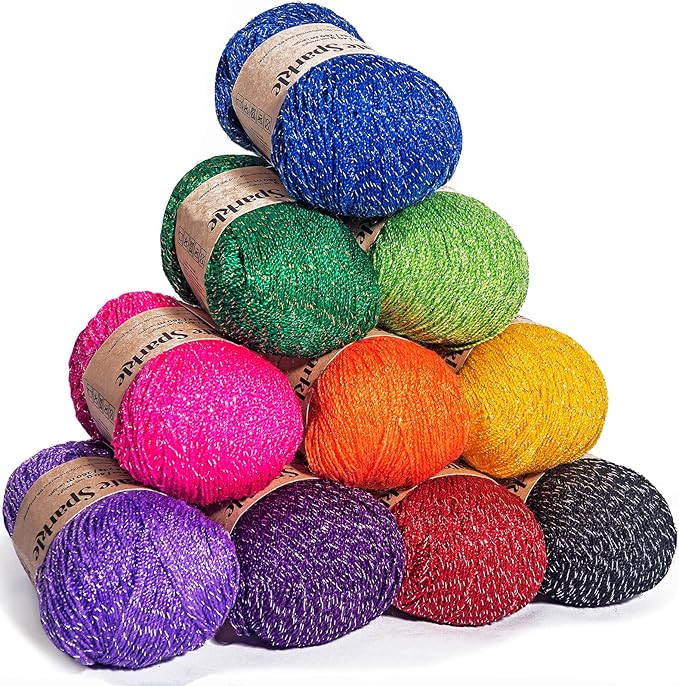
- Sparkle yarn (optional)
- 3.5 mm crochet hook
- Yarn needle
- Lantern frame (optional)
- 15 colorful wooden beads per lantern
- Scissors
- Nylon string
Step-by-step Guide
Step 1: Chain approx. 40–50 stitches to wrap around your cup or lantern frame, then join in the round.
Step 2: Work rows in a mix of stitches, double crochet, shells, openwork (ch-1 skips), puff stitches, alternating yarn colors every row or two. Add sparkle yarn for accent rounds.
Step 3: Continue working until your tube reaches about 6–8 inches long. Test it on your lantern or jar to check fit.
Step 4: For the bottom, crochet a picot edging or looped border. Use a yarn needle to sew one bead onto each point for a finished festive look.
Step 5: At the top, attach a hanging loop by chaining 40–50 stitches and sewing the ends to the inner rim. Weave in all remaining yarn tails.
#10. Crochet Sun Plush
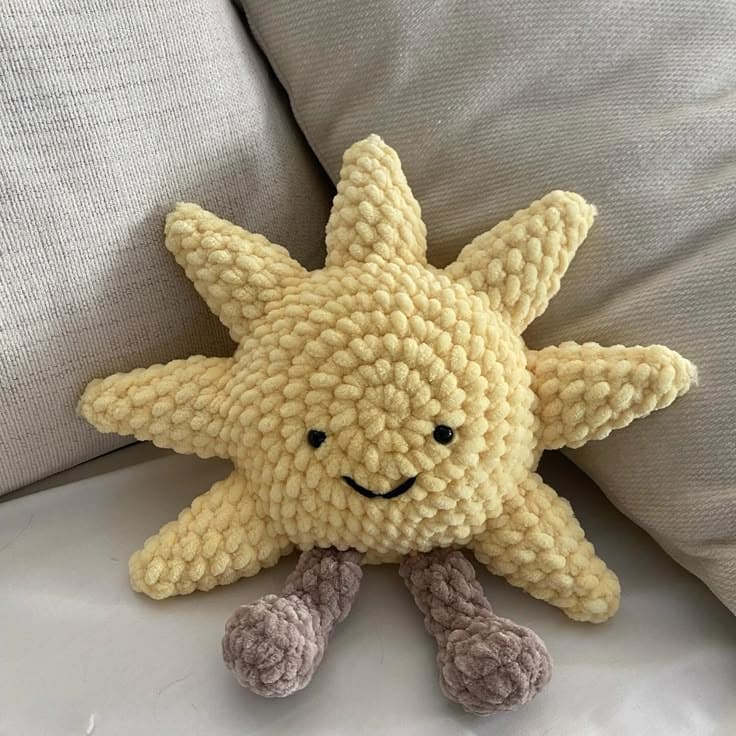
This plushie shines even on cloudy days. With soft bobble stitches and a cheerful smile, it’s like hugging a beam of sunshine.
Materials Needed
- Velvet yarn: 100g yellow, 30g brown
- 4.5 mm crochet hook
- Polyfill stuffing
- Black safety eyes (10mm)
- Yarn needle
- Black embroidery thread
Step-by-step Guide
Step 1: Start with the sun’s round body using yellow yarn. Make a magic ring and crochet 6 single crochets into it. Work in continuous rounds, increasing evenly until the piece reaches about 7 inches in diameter.
Step 2: Create a second identical circle for the back. Before stitching them together, attach the safety eyes and embroider the smile on the front panel.
Step 3: Add the sun rays by crocheting small triangular cones or bobble spikes. Make 8–10 pieces and attach them evenly around the front circle before sewing the back panel on.
Step 4: Stuff the body with polyfill and sew both front and back together securely, tucking in any gaps.
Step 5: Crochet two legs in brown yarn. Use the magic ring to start, and build small tubes about 3–4 inches long. Add bobble-style feet if desired. Stuff lightly, then sew them to the bottom of the sun.
#11. Crochet Earring Holder
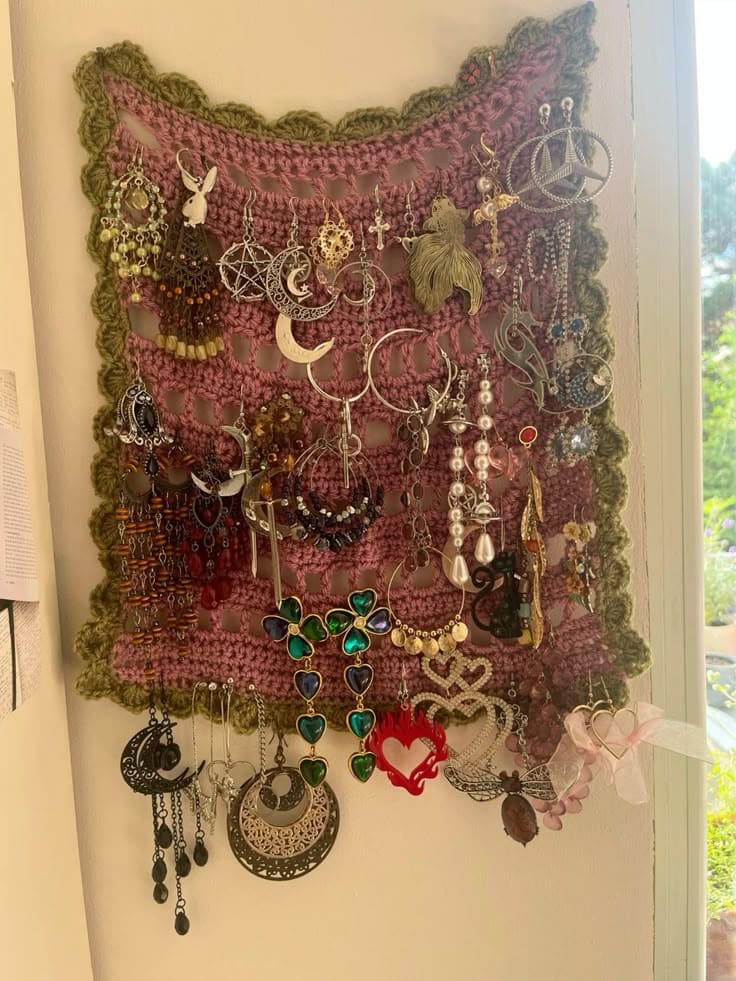
I never knew organizing could look this enchanting. This crochet earring holder doesn’t just save space, it transforms your jewelry collection into a personal tapestry.

Materials Needed
- Worsted weight yarn: 50g mauve, 20g olive green
- 4 mm crochet hook
- Yarn needle
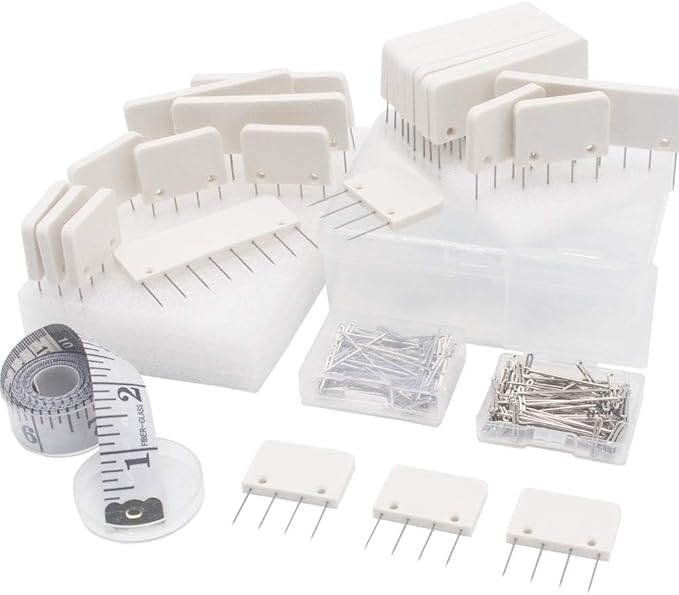
- Blocking pins
- Screws
Step-by-step Guide
Step 1: Start with a foundation chain long enough for your desired width (approx. 40–50 stitches).
Step 2: Work rows of double crochet mesh: dc, ch 1, skip 1, repeating to the end of each row. Continue for 10–12 inches in height, depending on how many earrings you want to display.
Step 3: Add a decorative scallop border. With a contrasting color, sc, skip 1, 5 dc in the next stitch, skip 1, sc around the edge to form gentle waves.
Step 4: Fasten off and block your piece to straighten the edges, then attach to the wall using screws and slide hook earrings directly through the mesh.
#12. Crochet Sloth Planter Holder
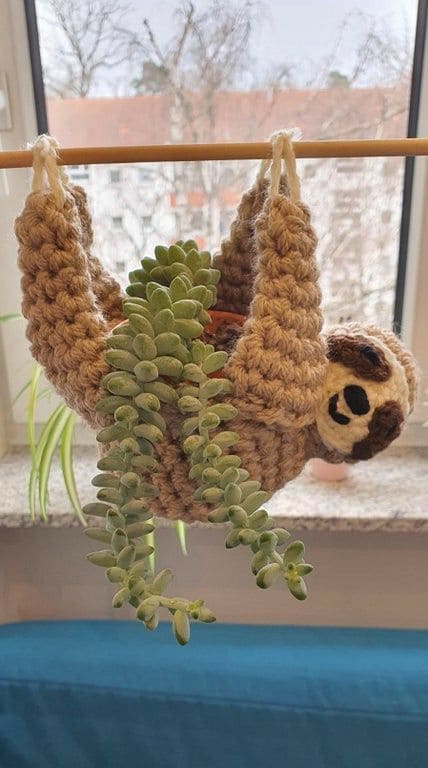
With its soft arms hugging the dowel and a little plant nestled in its belly, it brings a relaxed vibe to the entire room.
Materials Needed
- Worsted weight yarn: 100g brown, 50g cream, small amount of black
- 3.5 mm crochet hook
- Polyfill stuffing
- Yarn needle
- Wooden dowel
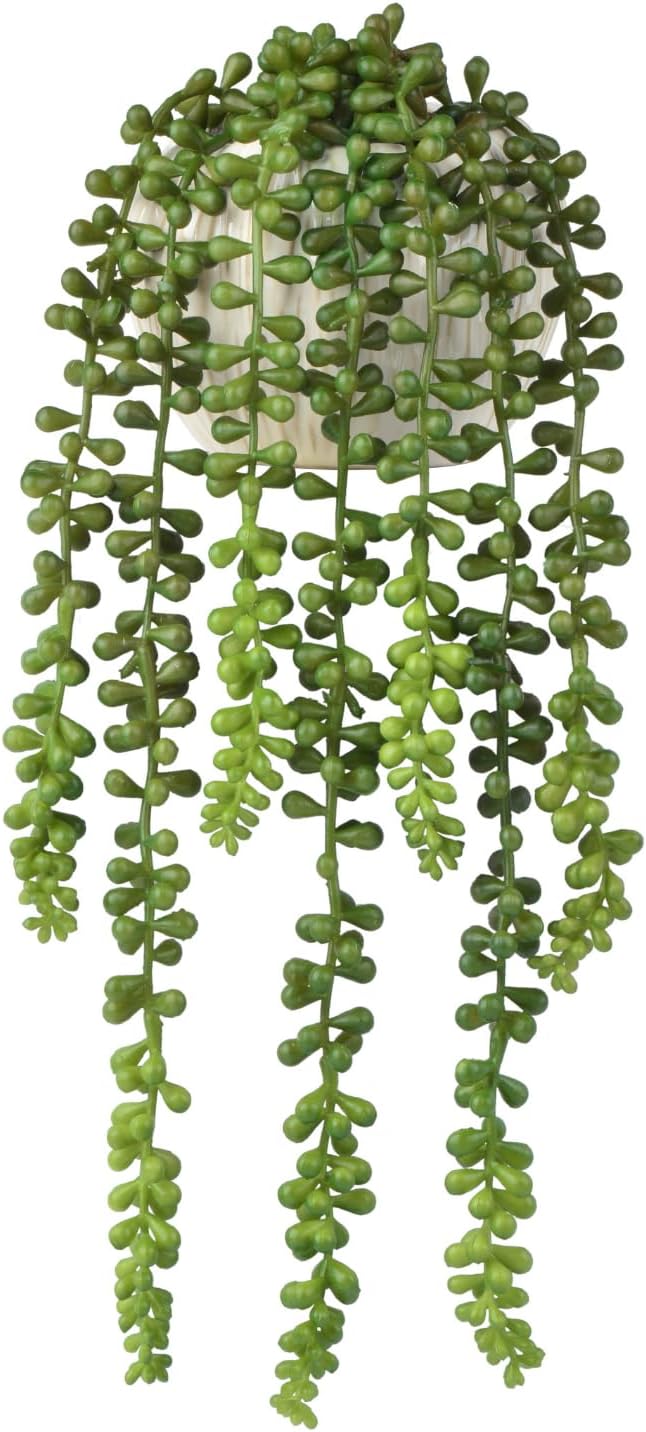
- Small plant pot with succulent
Step-by-step Guide
Step 1: Begin with the sloth’s body. Create a magic ring using brown yarn. Crochet 6 single crochets into the ring and work in rounds, increasing gradually. Build up a rounded cylinder about 6–7 inches long. Stuff with polyfill and close off.
Step 2: Crochet the head using cream yarn, then switch to brown for the back of the head. Add black felt or crochet patches for the eyes and nose. Embroider eyes with black yarn. Stuff lightly and sew to the body.
Step 3: Make two arms and two legs using brown yarn. Each limb should be around 4–5 inches long. Fill lightly, then stitch to the body in a curled shape to hug the dowel. Secure well to support the weight of the plant.
Step 4: Crochet a simple pouch on the belly by working rows or rounds in brown yarn, wide enough to cradle a small planter. Stitch it securely to the body.
Step 5: Loop the sloth’s arms around a dowel or sturdy branch. Add a trailing plant like Burro’s Tail or String of Pearls into the pouch, and hang it up where it can catch some light.
#13. Crochet Cat Scarf
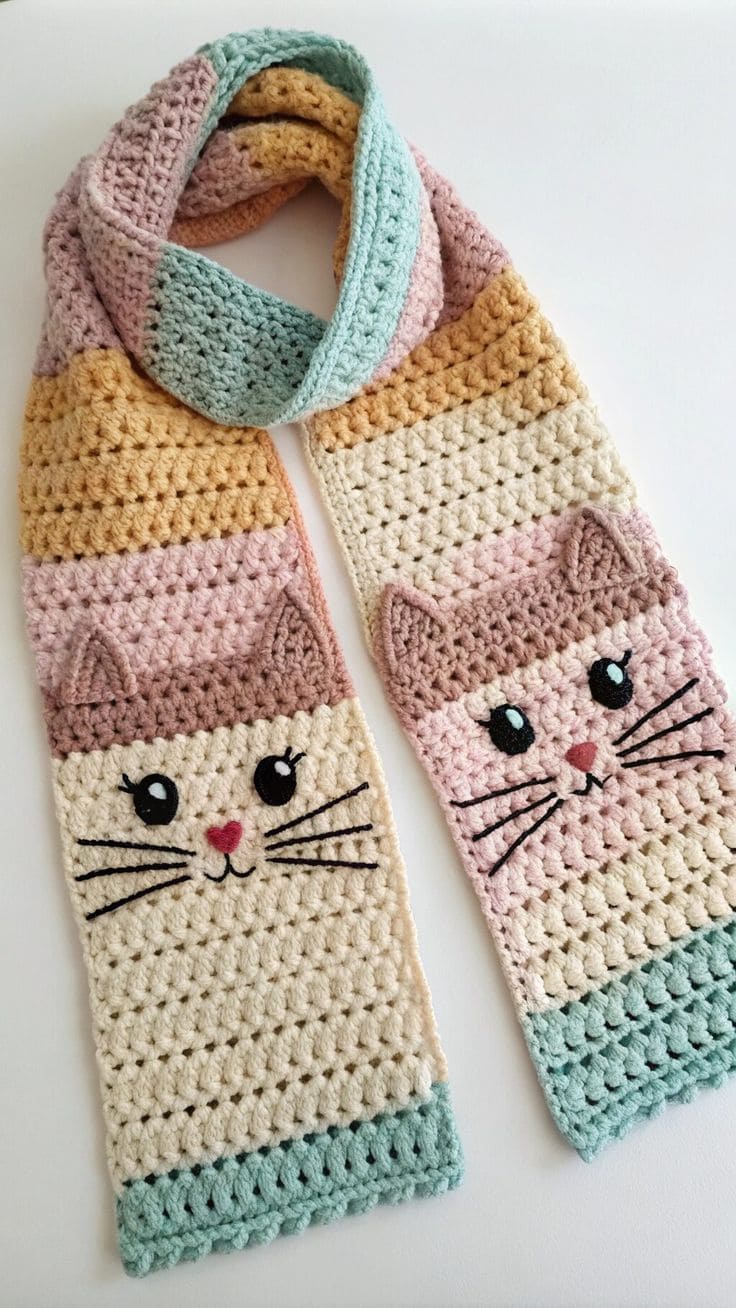
This scarf has become my favorite conversation starter. Soft, colorful, and finished with the sweetest kitty faces at both ends, it’s the perfect blend of fun and functional.
Materials Needed
- Worsted weight yarn: Cream, tan, blush pink, mustard, light blue, brown (approx. 50g each color)
- Black embroidery thread and pink thread
- 5 mm crochet hook
- Yarn needle
- Scissors
- Stitch marker (optional)
Step-by-step Guide
Step 1: Start by chaining the desired width of your scarf (approx. 20 stitches). Work rows of double crochet, switching yarn colors every 10–12 rows to create soft stripes. Continue until it reaches around 55–60 inches.
Step 2: For each cat face, choose one end of the scarf and mark the placement. Use brown yarn to crochet triangles separately for ears and stitch them into position.
Step 3: With black embroidery thread, stitch large round eyes, curved whiskers, and a smiling mouth. Fill in the eyes with white highlights using a few satin stitches.
Step 4: Use pink thread to embroider the nose and add inner ear triangles for detail. Make sure both ends have identical or mirrored cat faces.
Step 5: Fasten off, weave in any loose ends, and lightly steam block if needed to smooth the shape.
#14. Crochet Bear Eyeglass Holder
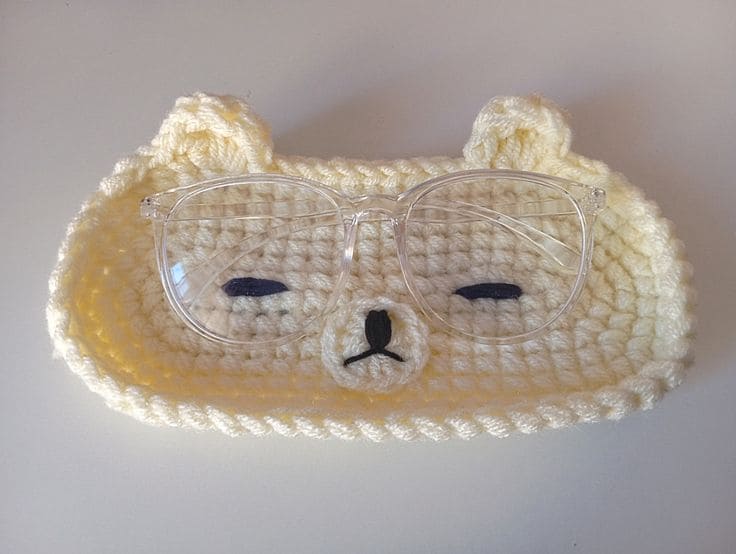
Why toss your glasses on the nightstand when they could rest in the arms of this sleepy little bear? Soft, snug, and so sweet, this crochet eyeglass holder tray keeps your specs safe.
Materials Needed
- Worsted weight yarn: Soft ivory and black
- 3.5 mm crochet hook
- Yarn needle
- Stitch marker (optional)
- Polyfill stuffing
Step-by-step Guide
Step 1: Start with a magic ring. Work 6 single crochets (SC) into the ring. Increase each round evenly (6 stitches per round) until your base is around 18 cm wide.
Step 2: Work 3–4 rounds with no increases to create a shallow tray wall. Use slip stitch to finish cleanly.
Step 3: For ears, make 2 small semi-circles with SC and a few half double crochets (HDC) to round the tops. Stitch onto the top rim of the tray.
Step 4: For nose, create a small stuffed oval using SC in rounds. Sew it to the center and embroider the nose and mouth with black yarn.
Step 5: For eyes, with black yarn, embroider sleepy “closed eye” shapes slightly above the nose for that sweet slumbering expression.
#15. Crochet Seashell Wall Baskets
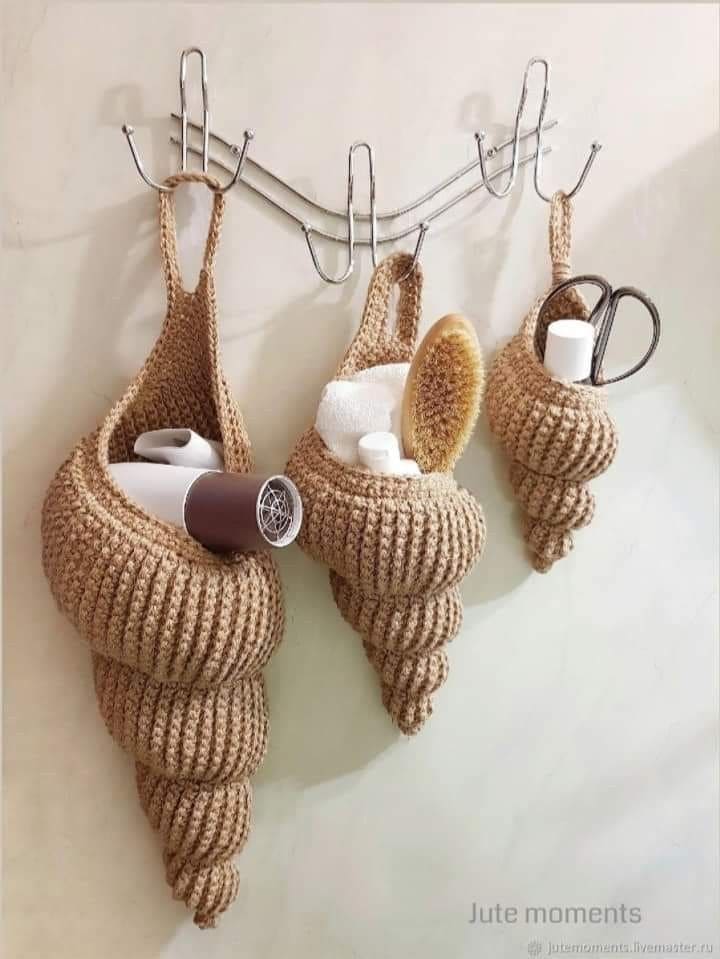
Designed to hold everything from brushes to blow dryers, each swirl gives off major ocean-vibe energy while staying practical and sturdy.

Materials Needed
- Brown cotton yarn (approx. 100–150m)
- 5 mm crochet hook
- Stitch markers (optional)
- Yarn needle
- Wall hook rack
Step-by-step Guide
Step 1: Make a magic ring and crochet 6 single crochets into the ring. Pull tight and continue working in a spiral (no joining).
Step 2: Increase each round evenly by adding 6 stitches per round to form the base spiral. After about 4–5 rounds, begin spacing out increases to elongate the cone shape gradually.
Step 3: Continue single crocheting in the spiral, shaping a tapered shell form by alternating regular rounds and slight increases only on one side. This creates the twisted effect.
Step 4: Once the cone measures about 10 to 12 inches, begin building the basket’s opening by working flat in rows on the wider edge. Create a deep oval shape to allow objects to sit comfortably.
Step 5: Crochet a thick looped handle on top for hanging. Reinforce by working several rounds or doubling the strand for extra strength.
Step 6: Fasten off, weave in ends, and hang your seashell basket on a wall hook. Repeat to make a full trio for ultimate seaside storage.
#16. Crochet Flower Garland
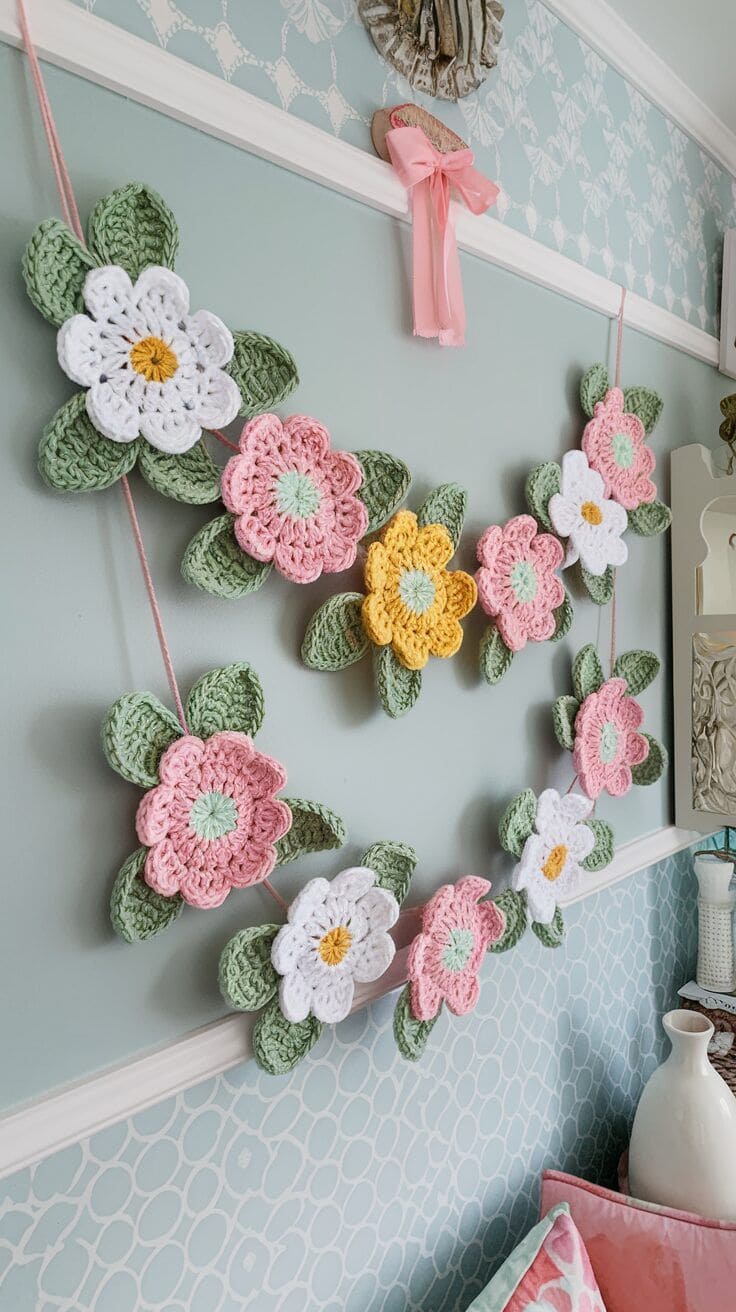
Each flower is soft and textured, with layered petals and gentle colors that pop against the wall. It’s cheerful, nostalgic, and surprisingly easy to make.
Materials Needed
- Cotton yarn: Pink, white, yellow, green, and mint (about 20g per color)
- 3.5 mm crochet hook
- Yarn needle
- Scissors
- Stitch marker (optional)
Step-by-step Guide
Step 1: Start with the flower center using yellow or mint yarn. Make a magic ring and crochet 6–8 single crochets. Join with a slip stitch and fasten off.
Step 2: With the petal color, join to any stitch and chain 2. Work 1 double crochet, chain 2, and slip stitch in the same space. Repeat around to form 6–8 petals. Fasten off and weave in ends.
Step 3: For the leaves, use green yarn. Chain 8, then work back along the chain with single, half double, double, and treble crochets to shape the curve. Mirror it on the opposite side of the chain. Make 2–3 leaves per flower.
Step 4: Stitch or glue the leaves behind each flower using a yarn needle. Arrange them with balance so the flowers look full.
Step 5: Lay out your flowers in order and stitch them onto a long pink yarn, spacing them about 4–5 inches apart.
#17. Crochet Bee Mobile
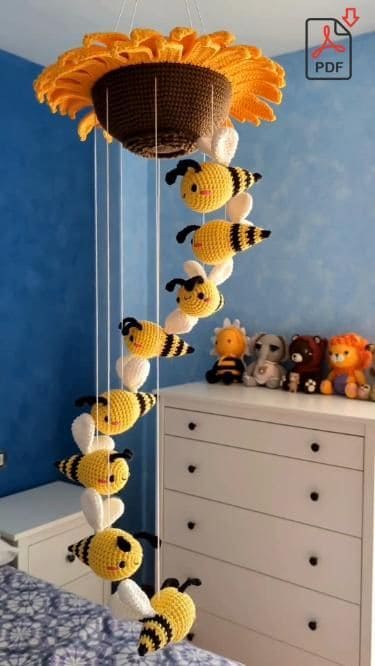
Hanging from a sunflower base, the smiling bees drift gently in a spiral, perfect for a nursery, craft room, or anyone who needs a little daily dose of happy.
Materials Needed
- Cotton yarn: Yellow, black, white, and brown (approx. 20g per color)
- 3.5 mm crochet hook
- Polyfill stuffing
- Strong cotton thread
- Stitch marker
- Yarn needle
- Scissors
- Embroidery thread (black)
- Wooden hoop (optional)
Step-by-step Guide
Step 1: Start by crocheting 6–8 bees. For each bee, create an oval body using yellow and black stripes in single crochet. Stuff as you go.
Step 2: Make two small white wings per bee. Chain 6 and work your way back with single, half double, and double crochets to form leaf-like wings. Sew to the top of each bee body.
Step 3: Embroider simple faces with black thread. Add curved smiles and small stitched eyes, or attach safety eyes if not used in a nursery.
Step 4: Create the sunflower top using brown yarn for the center and yellow for the petals. Work in rounds for the base, then crochet individual petals and attach them around the edge. Reinforce with a hoop or flat base if needed.
Step 5: Cut matching thread to varying lengths. Attach one end to the bee and the other to the base, spacing evenly in a spiral.
Step 6: Add a loop to the top for hanging. Test balance, adjust height, and hang above a crib, bed, or reading nook for a charming flutter of color.
#18. Crochet Pouch

With no sewing required, they’re perfect for beginners or quick gifts. You can use them to store earbuds, pens, lip balm, or little keepsakes.
Materials Needed
- Worsted weight cotton yarn: main color (approx. 30g), accent color (approx. 10g)
- 4 mm crochet hook
- Yarn needle
- Scissors
- Stitch marker (optional)
Step-by-step Guide
Step 1: Start by chaining the width of your pouch (approx. 25–30 stitches for standard). Work in rows of single crochet (SC) until your rectangle is about 3x the desired finished pouch height.
Step 2: Once your rectangle is complete, fold the bottom third up to form the body. Continue crocheting around the open sides using single crochet to join the layers, this eliminates the need for sewing.
Step 3: Leave the top flap open. Round off the corners or add 2–3 decrease rows to give it that envelope-style shape.
Step 4: For the edging, switch to your accent yarn and crochet a round of slip stitches or crab stitch (reverse SC) around the entire border for a finished look.
Step 5: Make a chain of about 60–70 stitches using accent yarn, then thread it around the pouch center to create a bow closure.
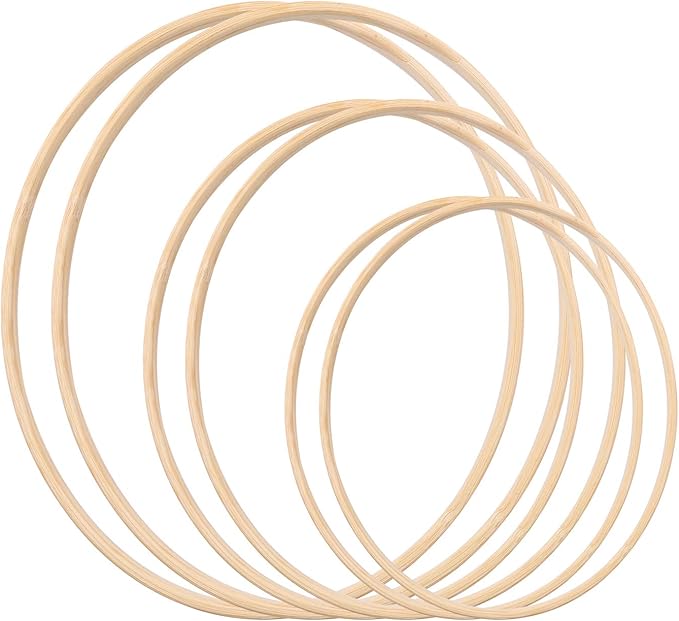
#19. Crochet Hanging Storage Baskets
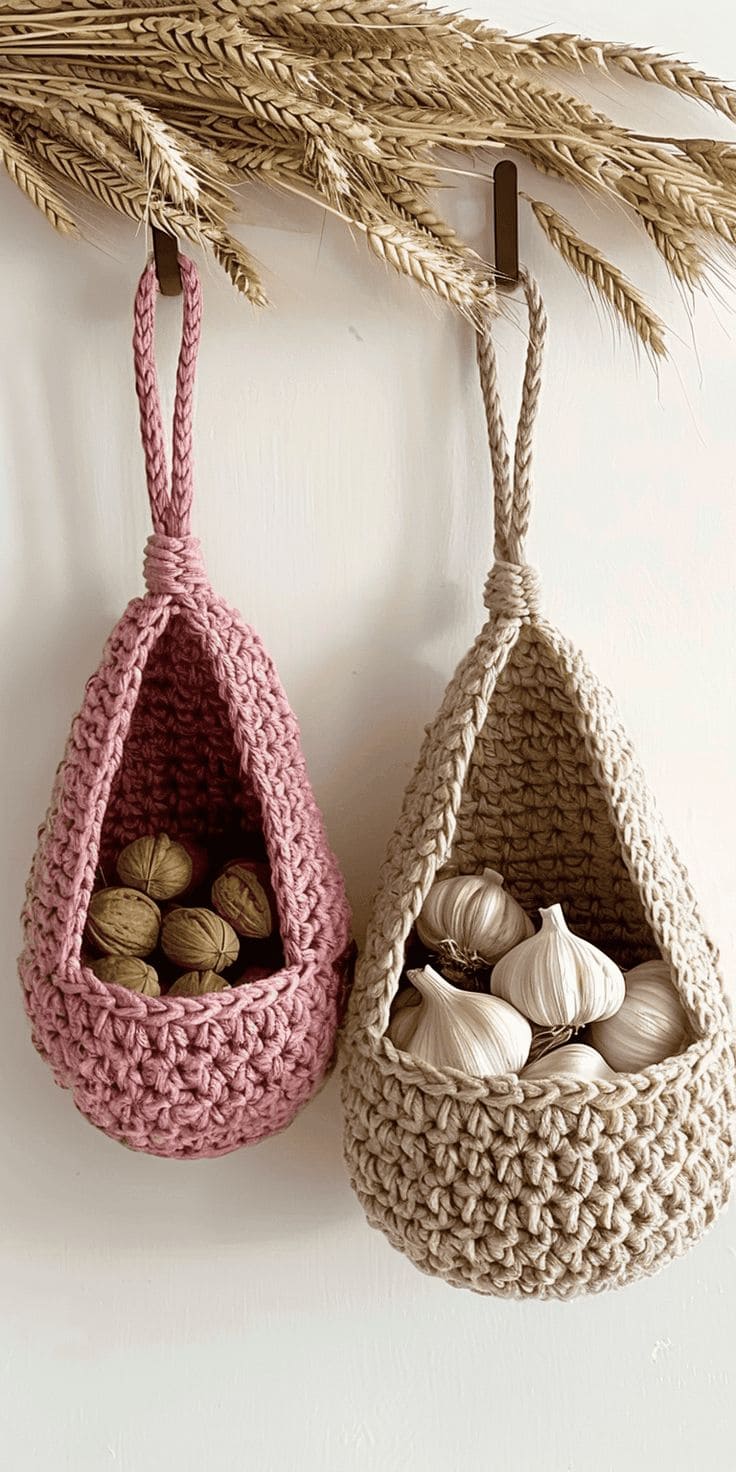
These little baskets are my kitchen’s best-kept secret. Perfect for garlic, nuts, or tiny things that tend to get lost in drawers, they bring warmth and texture to your space while keeping everything in sight.
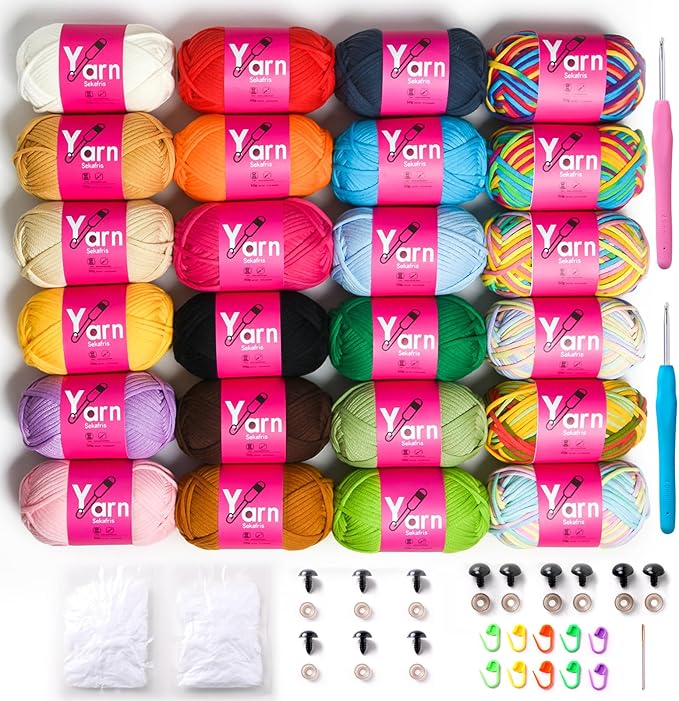
Materials Needed
- Chunky cotton yarn: 100g per basket
- 6 mm crochet hook
- Yarn needle
- Stitch marker (optional)
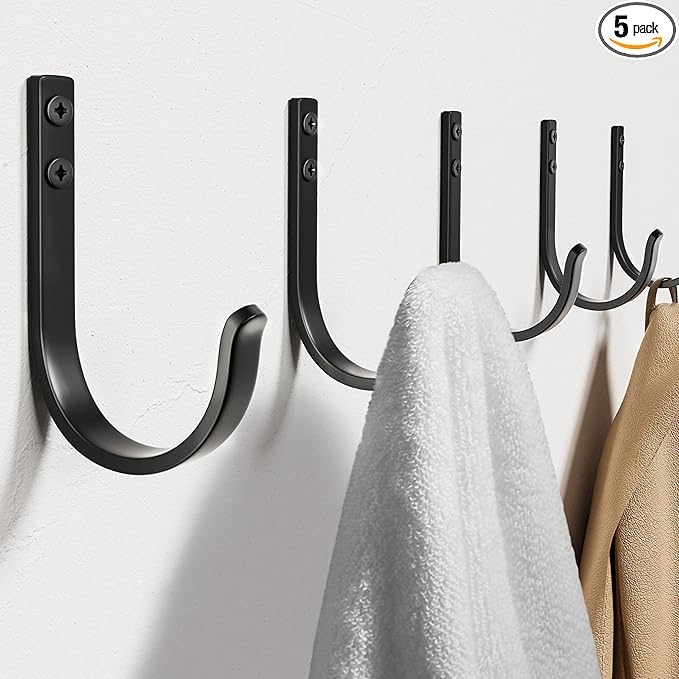
- Wall hook
Step-by-step Guide
Step 1: Start the base. Create a magic ring with chunky yarn. Crochet 6 single crochets into the ring and increase in rounds until you reach a flat circle about 4 inches wide.
Step 2: Work single crochets evenly around the edge without increasing to form the basket’s height. Continue until the piece is about 6–7 inches tall.
Step 3: Begin shaping the front opening by decreasing slightly on one side over a few rounds. This will create the scoop front while leaving the back taller.
Step 4: Once shaped, chain 30–40 for the hanging loop, then slip stitch it back into the opposite side of the rim. Tie off securely and weave in all ends.
#20. Crochet Cactus Pincushion
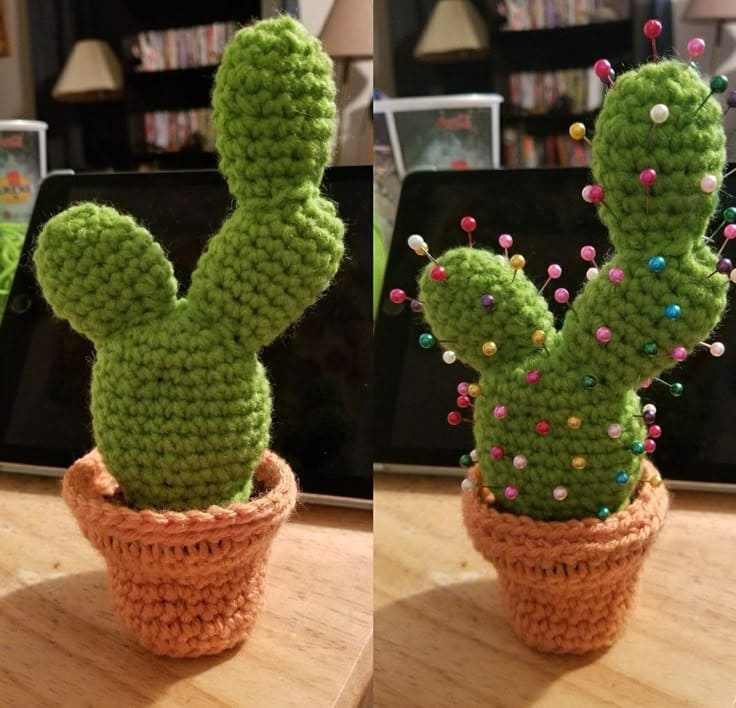
This little guy sits proudly on my craft table, fooling guests and keeping my pins in check.
Materials Needed
- Worsted weight yarn: 50g green, 30g orange
- 3.5 mm crochet hook
- Polyfill stuffing
- Tapestry needle
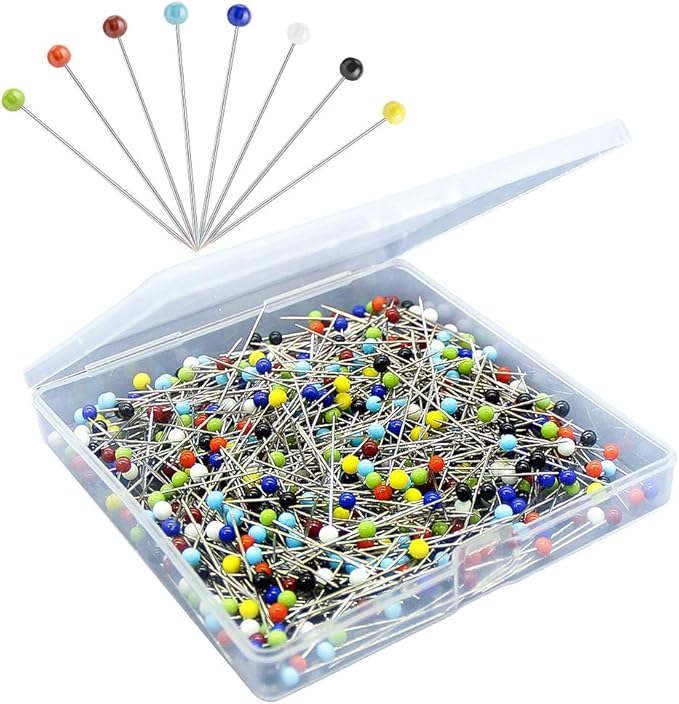
- Straight pins
- Stitch marker (optional)
Step-by-step Guide
Step 1: Start with the cactus base. Create a magic ring with green yarn. Crochet 6 single crochets into the ring. Continue working in the round, increasing gradually to form an oval base.
Step 2: Work even rounds to build the height of the cactus. Once it’s about 4 inches tall, stuff with polyfill and fasten off.
Step 3: Make two smaller “arms” by repeating a similar pattern but stopping at 2–3 inches in height. Curve slightly when attaching to give it that cactus shape.
Step 4: For the pot, start with a magic ring in tan yarn. Work in increasing rounds to create a flat base, then build upward with even rounds. Switch to back-loop-only stitches to shape the lip of the pot.
Step 5: Stuff the pot and the cactus. Stitch the cactus securely into the pot using a tapestry needle. Add your colorful pins to mimic cactus spikes.
#21. Crochet Sofa Caddy
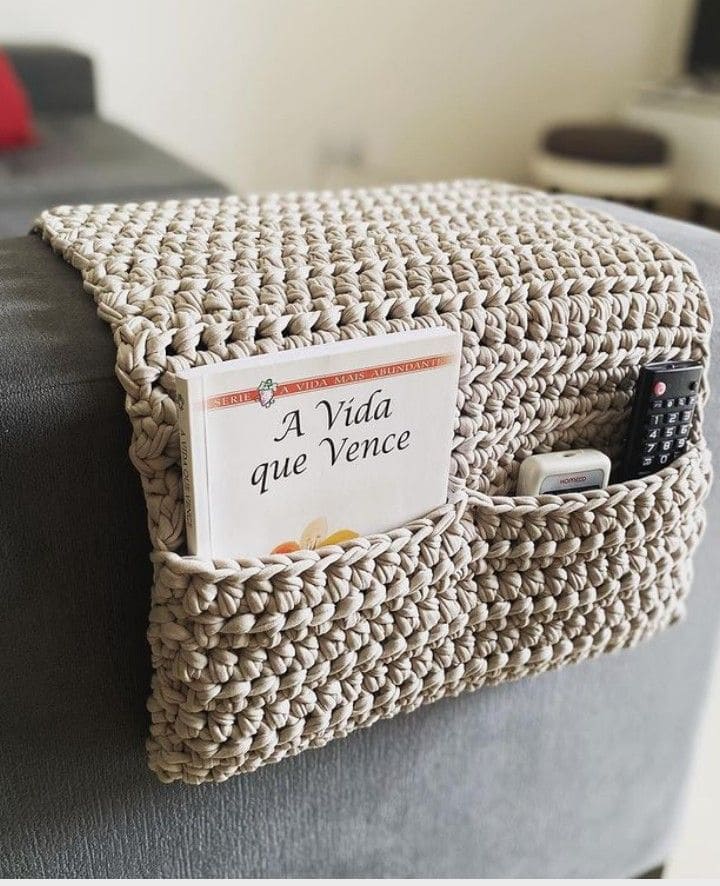
Made with sturdy stitches and thick yarn, it doesn’t slip or sag. It’s a clean, cozy way to stay organized without cluttering your space.
Materials Needed
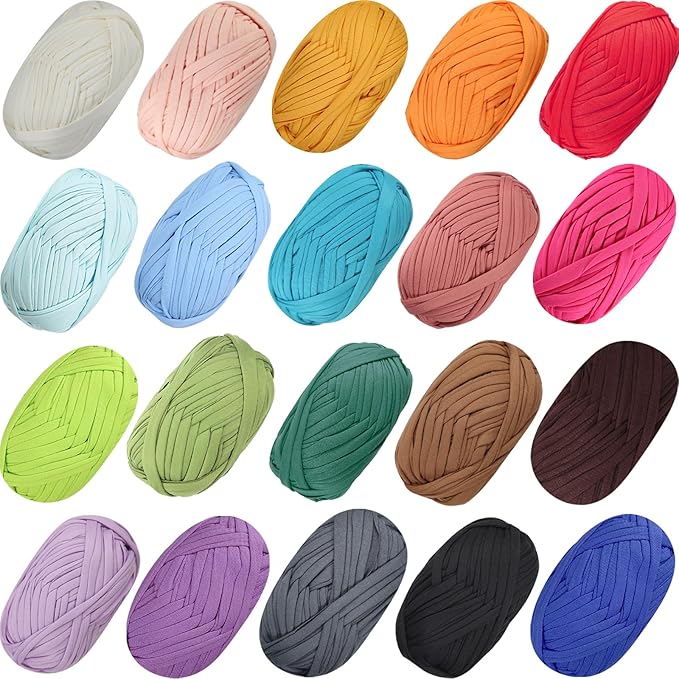
- T-shirt yarn (approx. 200–250g)
- 9 mm crochet hook
- Yarn needle
- Scissors
- Measuring tape
Step-by-step Guide
Step 1: Start with the main body. Chain enough stitches to match the width of your sofa arm (around 18–20 inches).
Step 2: Work in single crochet rows until the piece measures about 30–35 inches long, long enough to drape over the arm and hang down on one side.
Step 3: Fold up one end about 10–12 inches to form the pocket. Use single crochet along the sides to join and secure both edges, forming two open compartments.
Step 4: For added structure, crochet a row of slip stitches around the top edge of the pocket to help it hold its shape.
Step 5: Weave in ends and place over your couch arm. Add a small non-slip mat under it if your fabric is particularly smooth.
#22. Crochet Hanging Plant Basket

Made from soft cotton yarn and filled with cascading leaves, this hanging basket adds texture and nature-inspired beauty to any space.
Materials Needed
- Cotton yarn: 100g beige, 50g light green, and 50g dark green
- 4 mm crochet hook
- Yarn needle
- Macrame rope (approx. 2–3m)
- Stitch marker (optional)
Step-by-step Guide
Step 1: Start the basket base. Using beige yarn, make a magic ring and crochet 6 single crochets into the ring. Work in rounds, increasing evenly to form a flat circle about 4–5 inches wide.
Step 2: Build up the basket sides by working even rounds without increases. Continue until the height reaches about 6–7 inches. Fasten off and weave in the ends.
Step 3: Cut three equal lengths of macrame rope. Attach them evenly spaced around the top rim and knot them at the top to form a hanging loop.
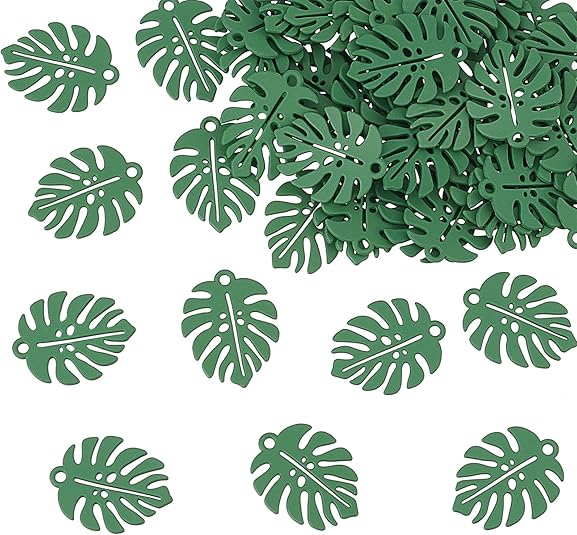
Step 4: For the leaves, use green yarn and chain 6. Into the second chain from the hook, work 1 single crochet, 1 half double crochet, 2 double crochets, and 1 slip stitch. Repeat on the other side of the chain to form a heart-shaped leaf. Make 20–30 in both shades.
Step 5: Chain stems for each leaf using green yarn (10–30 chains each for variation), then attach the leaves at the ends. Secure each stem around the basket with a yarn needle or crochet hook, spacing them out to mimic natural draping vines.
#23. Crochet Bows
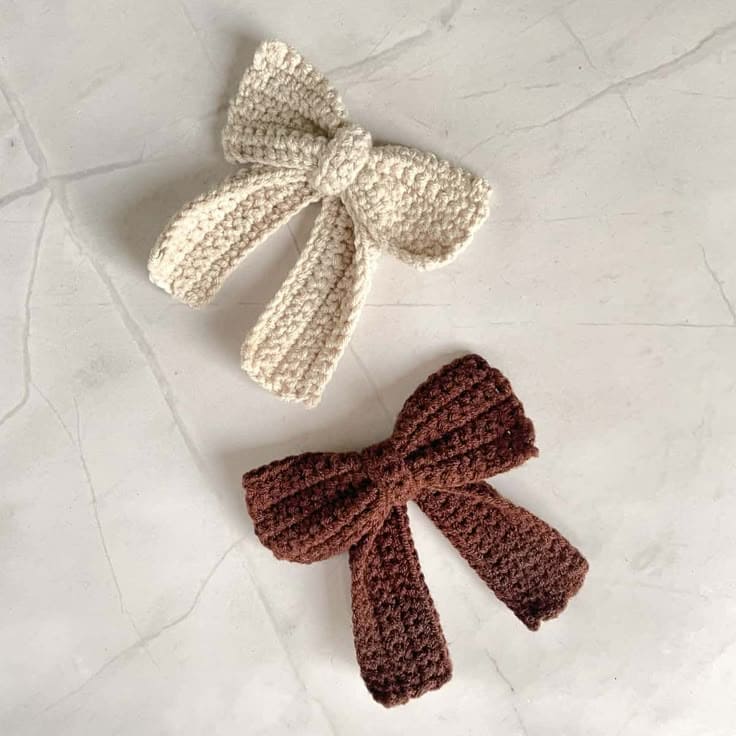
These bows are small, sweet, and endlessly versatile. Whether clipped into hair, stitched onto bags, or tied around gifts, they instantly make things feel more special.
Materials Needed
- Cotton yarn (approx. 10–15g per bow)
- 4 mm crochet hook
- Yarn needle
- Scissors
Step-by-step Guide
Step 1: For the bow’s body, chain 21 (or adjust for your desired width). Work 8–10 rows of single crochet back and forth to form a rectangle. Fasten off.
Step 2: For the tails, chain 31 and work 4–6 rows of single crochet. Make two strips like this and place them overlapping at a downward angle.
Step 3: Roll the main bow rectangle gently to pinch the center. Place it over the tails, then wrap a small rectangle (approx. 6 stitches wide and 3–4 rows tall) around the middle to hold the shape.
Step 4: Sew the center wrap in place with a yarn needle, securing all parts. Weave in ends and fluff the shape.
#24. Crochet Strawberry Curtain Tie
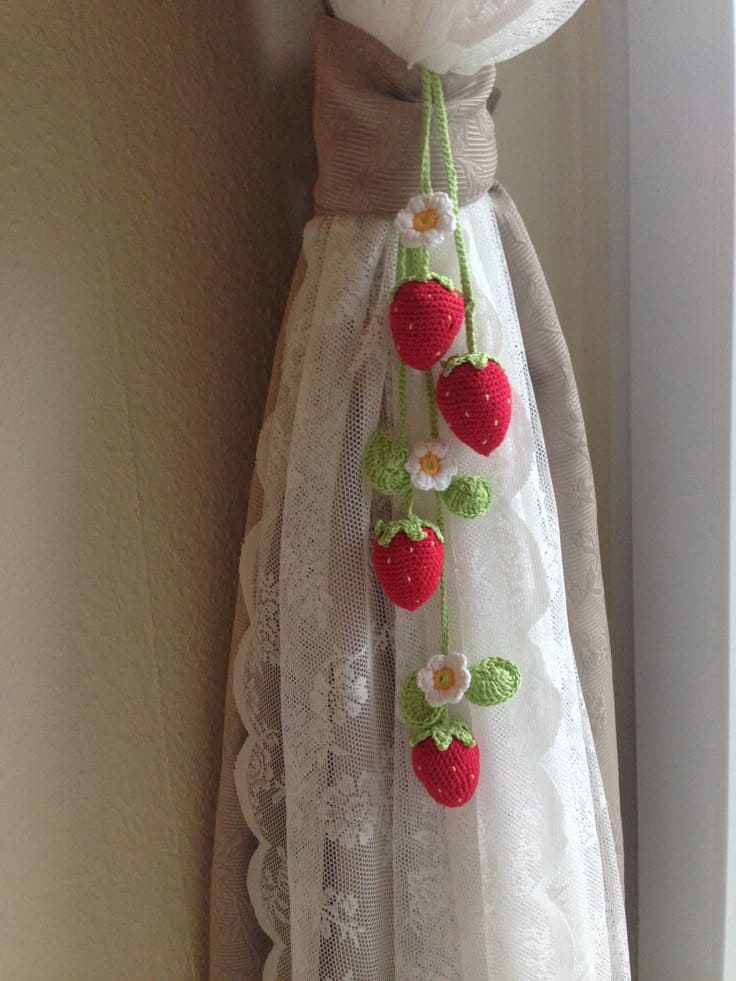
The crochet strawberries and flowers give a soft, handmade charm to my curtains, instantly brightening the whole room.
Materials Needed
- Cotton yarn: Red (20g), green (15g), white (10g), and yellow (small amount)
- 2.5 mm crochet hook
- Yarn needle
- Stuffing
- Stitch marker (optional)
Step-by-step Guide
Step 1: Begin with the strawberry. Using red yarn, create a magic ring. Crochet 6 single crochets into the ring and continue working in the round, increasing slightly to form a cone shape. Once you reach about 1.5 inches in height, lightly stuff and decrease to close.
Step 2: Make the green leafy top by chaining 5, then working small leaf shapes into the chain using single and double crochets. Stitch it onto the top of the strawberry.
Step 3: For the flower, use white yarn to create 5-petal blossoms. Start with a magic ring, work 5 chains and single crochets to form petals. Switch to yellow yarn to embroider or crochet a small center.
Step 4: Use green yarn to crochet chains of various lengths, attaching strawberries, leaves, and flowers at intervals.
Step 5: Once all pieces are connected, knot the top into a loop or tie it directly around the curtain for a fresh, fruit-inspired finish.
#25. Crochet Flower Bookmarks
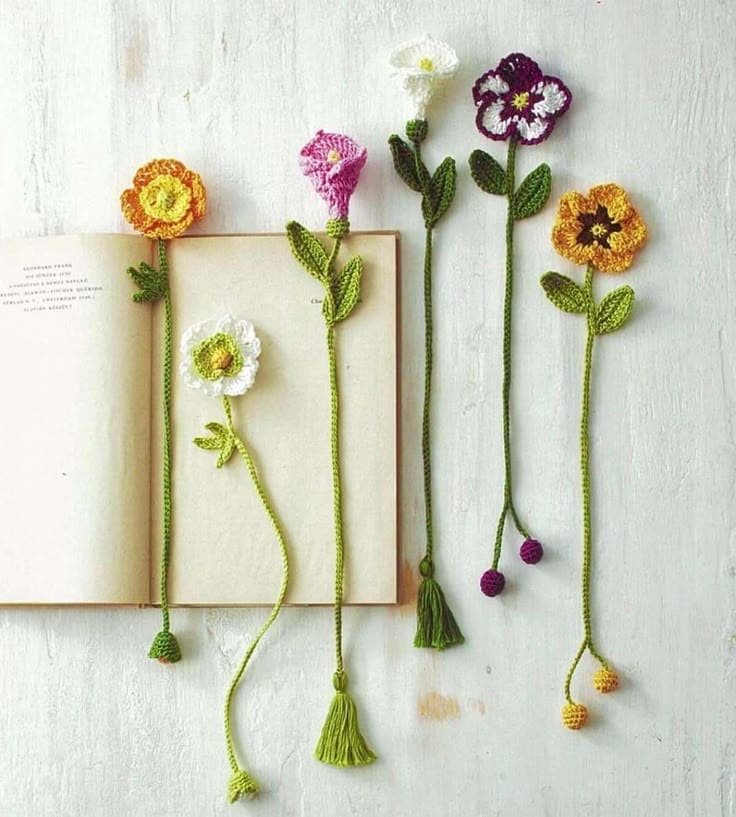
Whether you’re gifting them or slipping one into your own novel, they add a little bit of poetry to every page.
Materials Needed
- Cotton yarn: greens, pink, white, yellow, purple, etc.
- 2.5 mm crochet hook
- Yarn needle
- Scissors
- Stitch marker (optional)
Step-by-step Guide
Step 1: Begin with the flower. Create a magic ring and work your center using a few rounds of single or half-double crochet. Add petals by chaining and working double crochets in clusters around the center. Repeat for different flower types (daisy, pansy, rose).
Step 2: Make the stem by chaining 30–40 stitches in green yarn. Slip stitch back across the chain for a clean, narrow finish.
Step 3: Attach a flower at the top of the chain, and crochet or sew on a leaf about midway down the stem using single crochet with simple shaping.
Step 4: Add a tassel, leaf, or mini berry at the end of the stem to keep it weighted and flat inside your book. For berries, crochet a small ball; for tassels, wrap and tie extra yarn strands.
Step 5: Weave in all ends, gently steam to flatten petals if needed, and slip it into your current read.
#26. Crochet Granny Square Cat Sweater
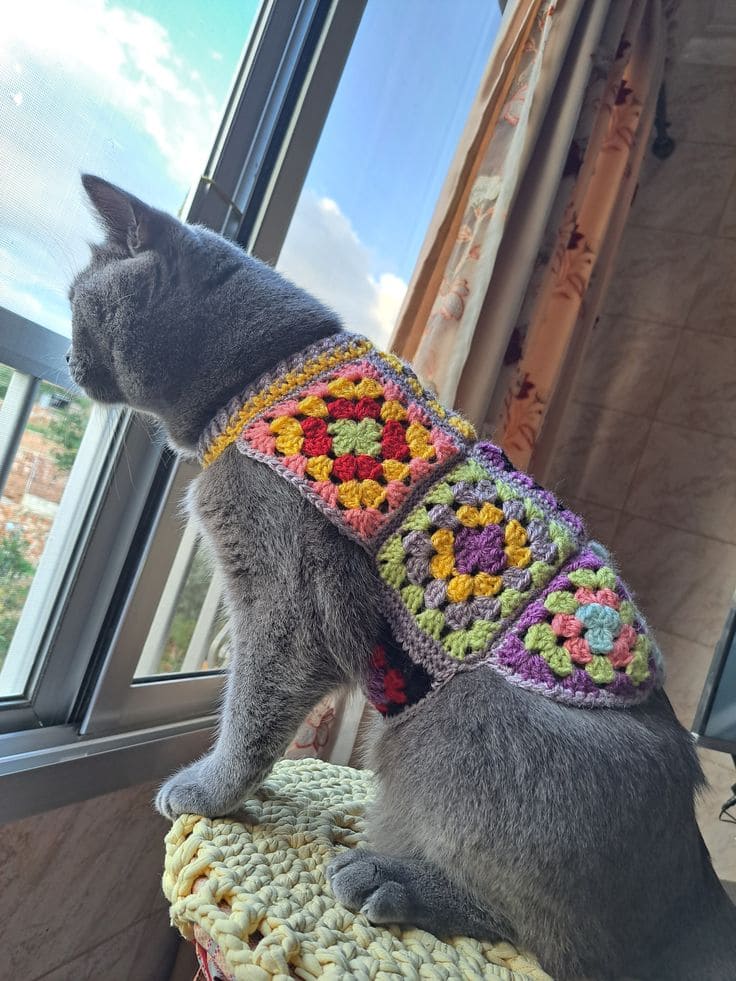
This granny square sweater wraps your feline in soft, handmade charm while keeping them comfy on breezy days.
Materials Needed
- Worsted weight yarn: assorted colors
- 4 mm crochet hook
- Yarn needle
- Scissors
- Measuring tape
- Soft buttons (optional)
Step-by-step Guide
Step 1: Make 6–8 small granny squares (each about 3×3 inches). You can mix colors however you like.
Step 2: Arrange squares in a rectangle shape (2 rows of 3 or 4). Leave a central space open for the neck.
Step 3: Join the squares using slip stitch or whip stitch. Make sure the final piece curves gently around your cat’s body.
Step 4: Add shoulder straps or a chest band by chaining and working a few rows of single crochet, attaching between the front and back panels.
Step 5: If you want a more secure fit, add a strap under the belly or around the chest with a soft button closure, then weave in all ends, and make sure no yarn tails are left for nibbling.
#27. Crochet Floral Drawstring Bag
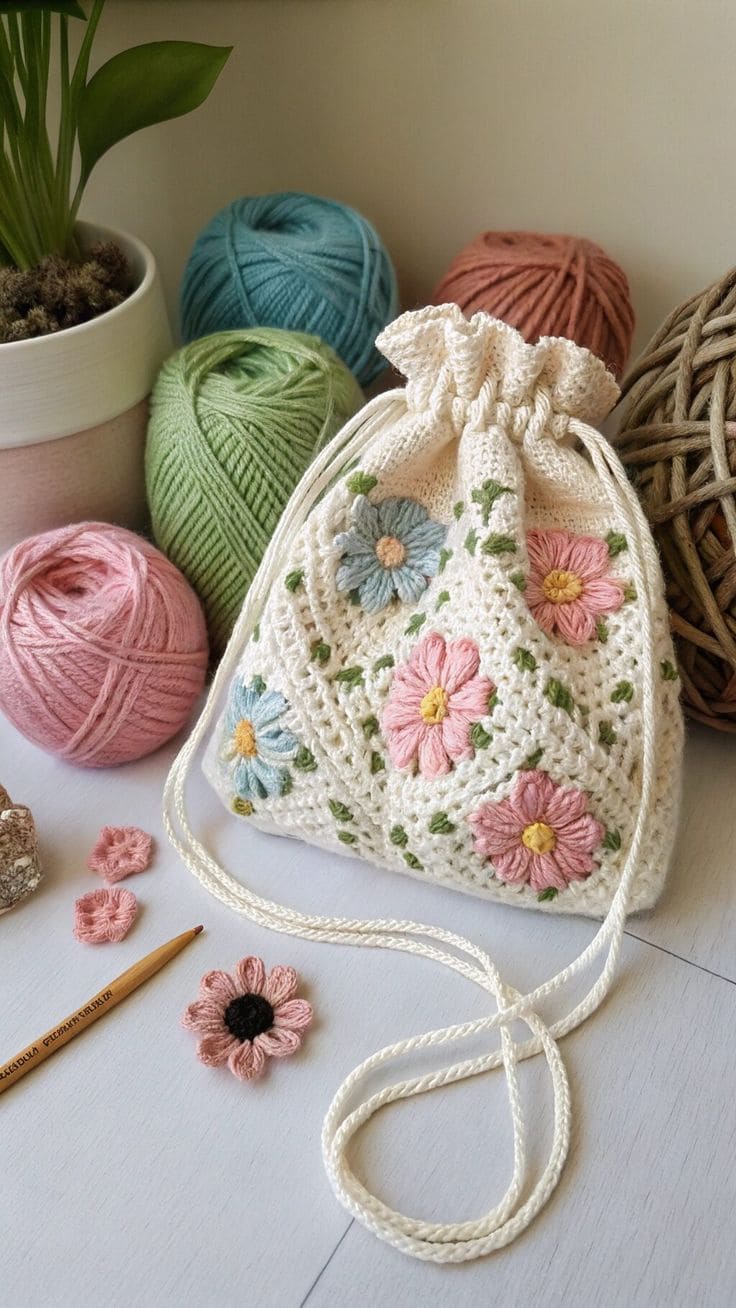
This drawstring bag is a soft, charming blend of granny squares, gentle embroidery, and vintage-style practicality.

Materials Needed
- DK cotton yarn: cream (approx. 100g), pink, blue, yellow, and green (10–15g each)
- 3.5 mm crochet hook
- Yarn needle
- Scissors
- Drawstring cord
- Stitch marker (optional)
Step-by-step Guide
Step 1: Crochet 12–16 small solid granny squares in cream. You can use a traditional granny square base or a tighter variation for a more polished finish.
Step 2: Seam the squares into a tube (3×4 or 4×4 grid), then join the bottom row to form the base. Use slip stitch or whip stitch for a clean join.
Step 3: Work a round or two of single crochet around the top to even the edge, then create a casing for the drawstring by crocheting 3–4 rows, adding a chain space round for the tie to thread through.
Step 4: Embroider each square with pastel daisies or cosmos-style flowers. Use straight stitches for petals, French knots or satin stitches for centers, and little leaves in green.
Step 5: Thread the drawstring cord through the top chain spaces and knot the ends.
#28. Crochet Granny Square Planter Covers
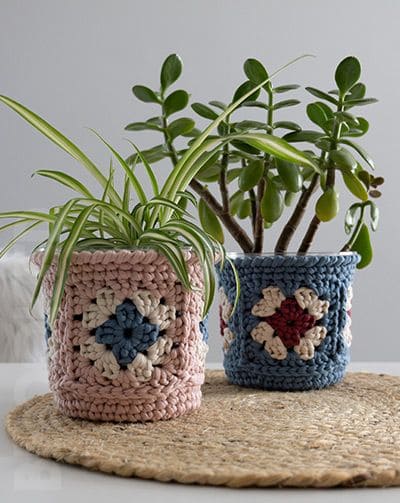
These crochet covers turned my plain pots into cozy, colorful decor. They bring warmth and texture to any shelf or table while still letting the plants shine.
Materials Needed
- T-shirt yarn: 3-4 colors, approx. 20g each
- 7 mm crochet hook
- Yarn needle
- Scissors
- Plant pots
Step-by-step Guide
Step 1: Start by crocheting 5 or 6 classic granny squares using your chosen color combos. Each square should be roughly the same height as your pot.
Step 2: Join the squares together in a strip using slip stitches or whip stitch with a yarn needle. Wrap the strip around the pot and stitch the ends together to form a cylinder.
Step 3: Crochet a flat circle slightly smaller than the pot’s base, then join it to the bottom edge of the cylinder to complete the sleeve.
Step 4: Optionally, add a round or two of single crochet to the top edge for a finished look. Slide the sleeve over your pot and done!
#29. Crochet Keychain Charm
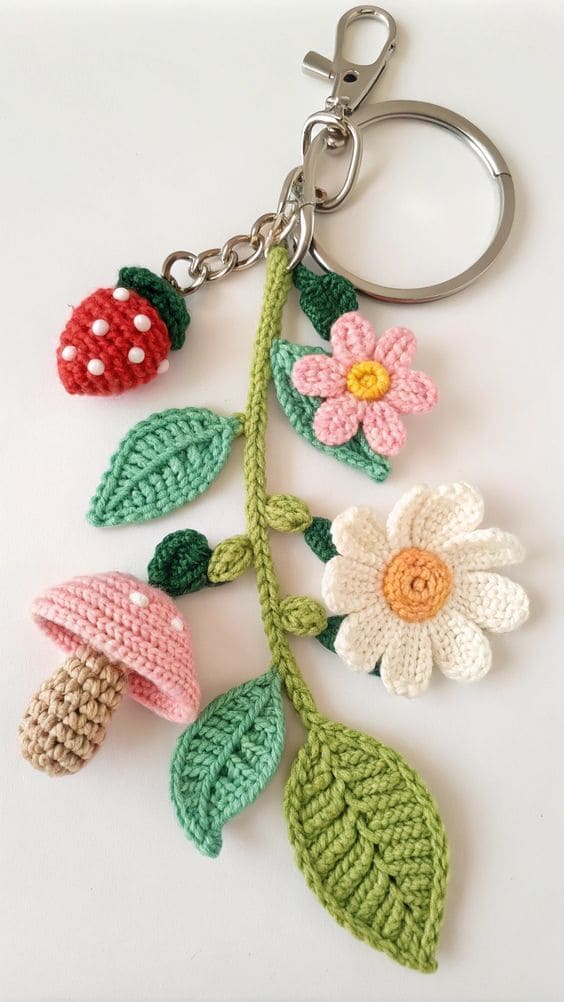
I couldn’t stop smiling after I made this. It’s like carrying a whimsical forest in miniature, complete with a strawberry, mushroom, and flowers.
Materials Needed
- Cotton yarn: Red, green, pink, beige, yellow, white (10g or less)
- 2.5 mm crochet hook
- Metal keyring with lobster clasp
- Yarn needle
- Polyfill
- 20 small white beads
Step-by-step Guide
Step 1: Start with the strawberry. Use red yarn to create a small cone shape using single crochet in rounds. Lightly stuff, then add a green leafy top by chaining and working small scallops. Sew on white beads.
Step 2: For the mushroom, make the cap with pink yarn using a magic ring and increase evenly. Add white spots if desired. Create a beige stem by crocheting a small cylinder and attach it to the underside of the cap.
Step 3: Crochet two flowers using pink and white yarn. Begin with a magic ring center (yellow or orange), then add 5–6 petals by chaining and working single to double crochets.
Step 4: For the leaves, chain 10–14 and work back with varying stitch heights to shape the points. Make small and large ones for contrast.
Step 5: Chain a base vine using green yarn (about 6–7 inches). Attach leaves, mushroom, flowers, and strawberry using a yarn needle, spacing them to drape naturally.
Step 6: Tie the top of the vine to the keyring securely. Add a dab of glue for extra hold if needed.
#30. Crochet Mandala Placemats
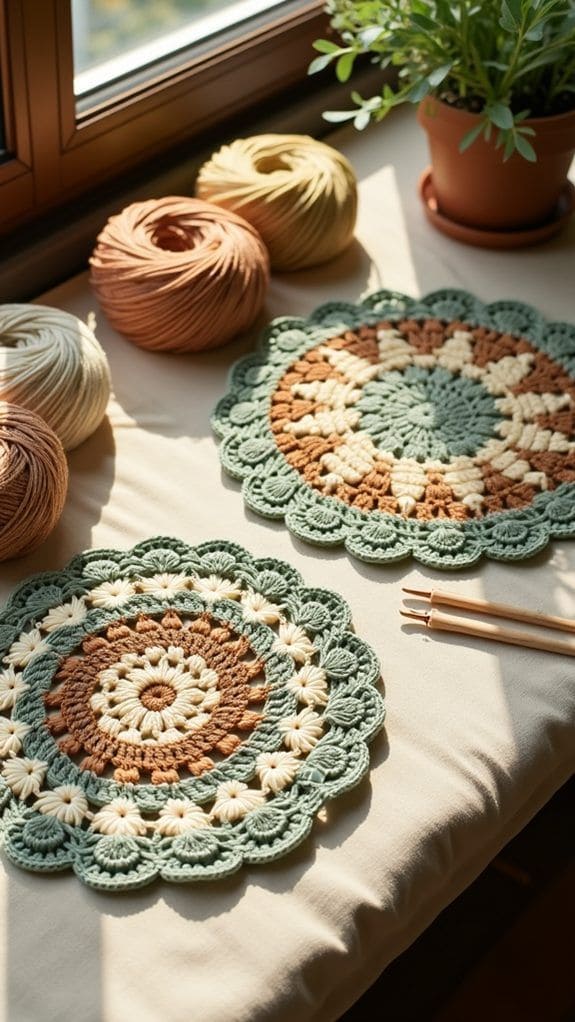
Whether you’re setting a cozy brunch table or just adding something special to your windowsill, they bring warmth, symmetry, and a sense of peace to your space.
Materials Needed
- Cotton yarn (worsted weight): Sage green, warm cream, terracotta, and beige (approx. 20–30g each)
- 4 mm crochet hook
- Yarn needle
- Scissors
- Blocking mat and pins (optional)
Step-by-step Guide
Step 1: Start with a magic ring and work 12 double crochets into the center using brown or rust yarn. Join with a slip stitch.
Step 2: Switch to cream yarn and begin the next round using puff or cluster stitches for a dimensional flower-like ring. Chain 1 between each puff.
Step 3: Use sage green for a round of double crochets, increasing evenly to keep the circle flat. Alternate between solid rounds and rounds with openwork (chain spaces or V-stitches).
Step 4: Repeat the pattern with alternating colors, incorporating textured stitches like popcorns, shells, or star stitches for visual interest. Increase slightly each round.
Step 5: Finish with a scalloped or picot edge in a contrasting color (green or cream). This adds structure and a lace-like frame.
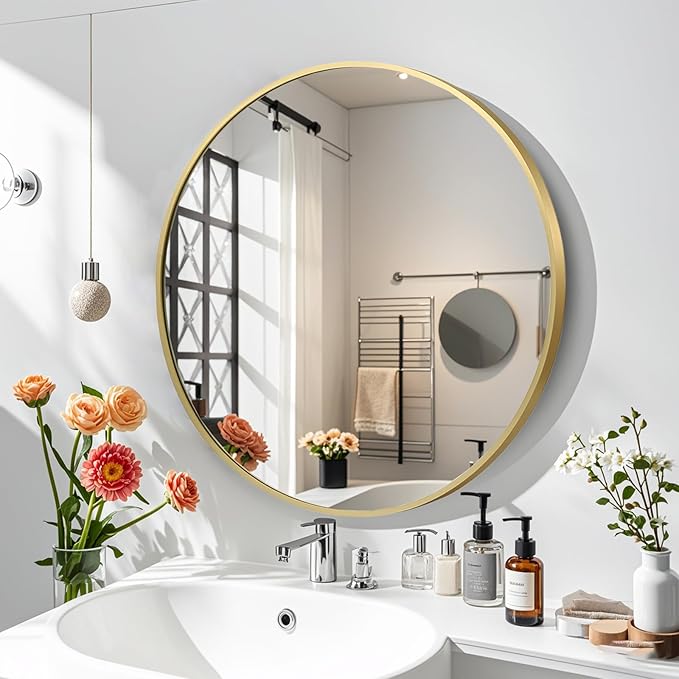
#31. Crochet Flower Mirror Frame
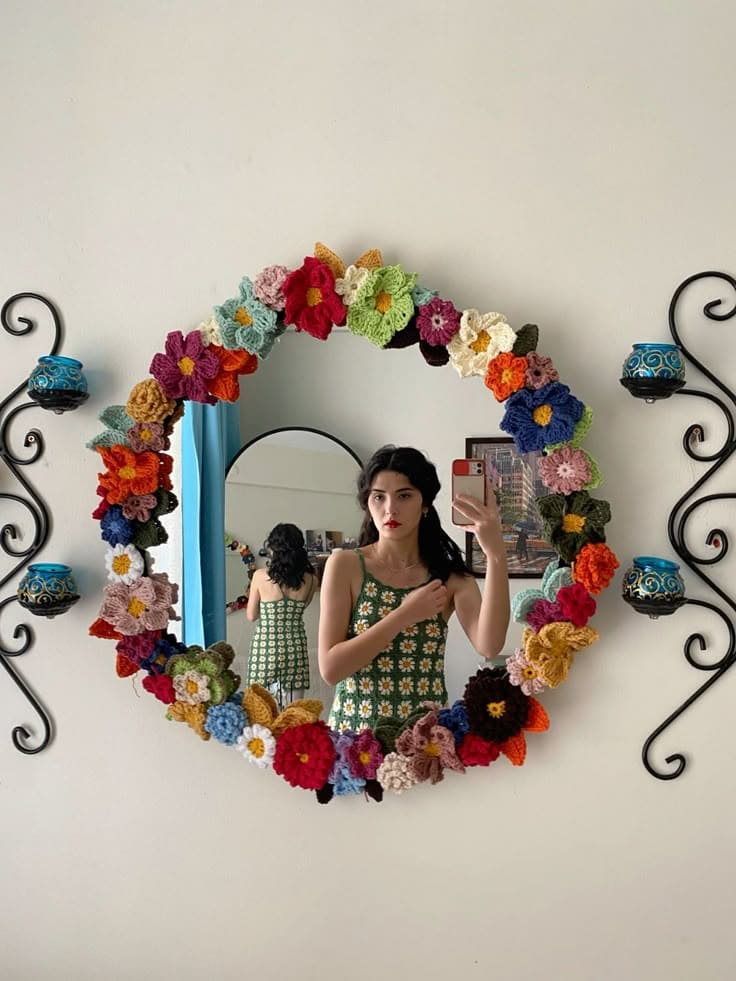
Covered in a riot of crochet flowers in every color imaginable, it turns any wall into a joyful, handmade masterpiece. It’s a celebration of texture, color, and creativity.
Materials Needed
- Worsted weight yarn: assorted colors
- 4 mm crochet hook
- Yarn needle
- Scissors
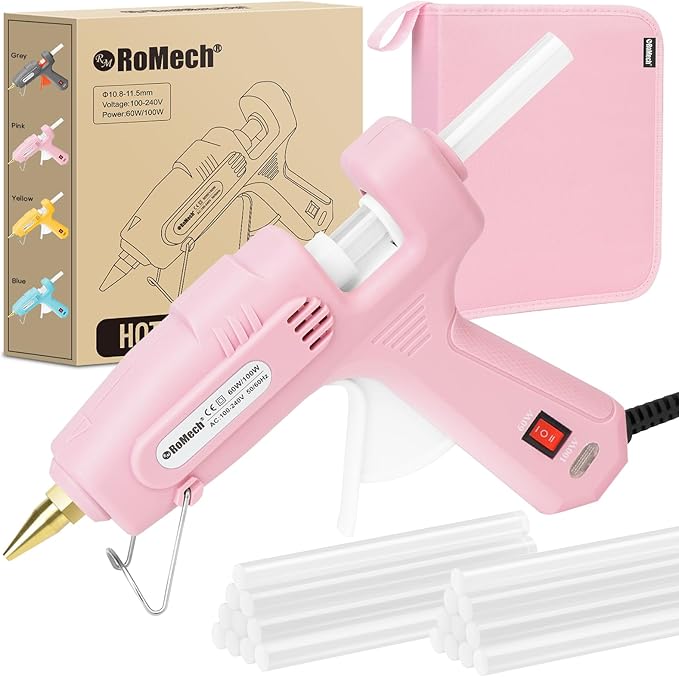
- Hot glue gun
- Basic mirror 20 inches
- Felt backing (optional)
Step-by-step Guide
Step 1: Crochet a collection of 20–30 flowers in varied styles and sizes. Try simple 5-petal blossoms, puff-stitch sunflowers, daisy rounds, and layered blooms for visual texture.
Step 2: Make several leaves and small green accents to tuck in between flowers later.
Step 3: Lay out your flowers around the mirror to plan placement. Balance the colors, sizes, and fullness for harmony and visual rhythm.
Step 4: Using a glue gun or fabric glue, attach each flower one by one around the mirror edge. Press and hold firmly. Tuck small flowers or leaves in any visible gaps.
Step 5: If needed, glue a felt backing to the underside of flower bases to secure loose threads and reinforce stability. Let the glue dry completely before hanging the mirror.
#32. Crochet Hair Clip Organizer
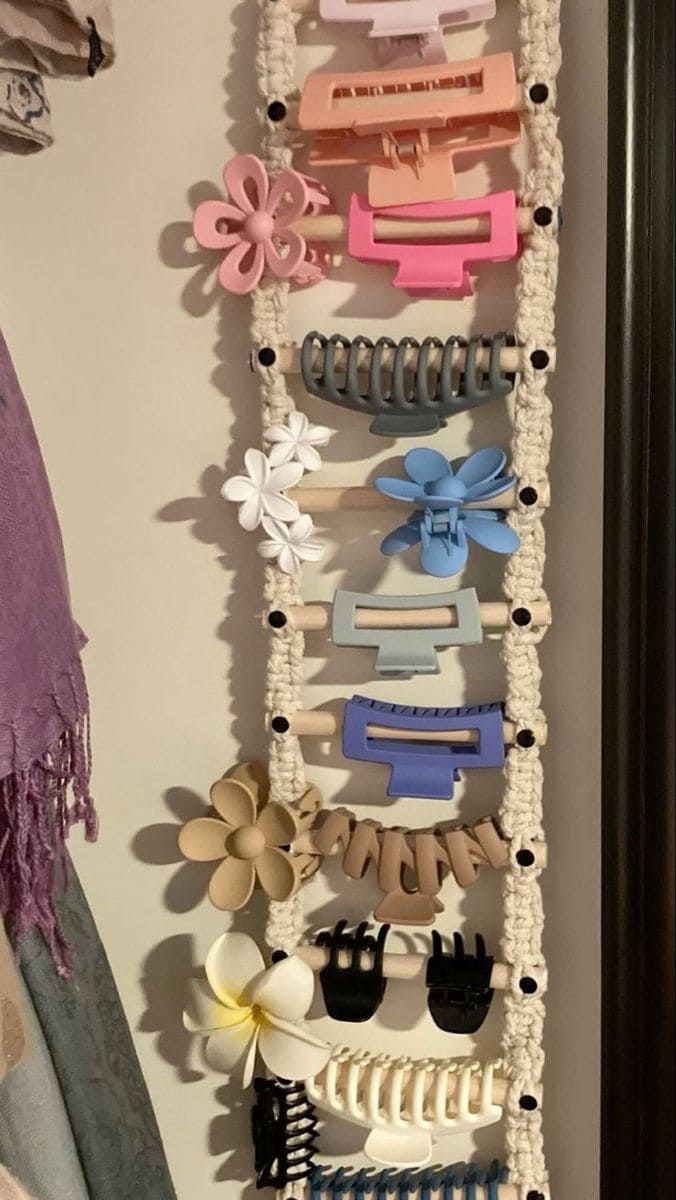
With a simple crochet base and wooden dowels, it’s both functional and decorative, a perfect project for taming clutter with handmade charm.

Materials Needed
- Macrame cord (3–5 mm): Approx. 50–70g in a neutral tone
- 10 wooden dowels (around 10 inches long each)
- 5 mm crochet hook
- Stitch markers (optional)
- Yarn needle
- Buttons (optional)
- Wall hook
Step-by-step Guide
Step 1: Chain about 80–100 depending on desired length. This will be the side of your ladder.
Step 2: Work back in single crochet or half double crochet for 3–5 rows to create a strong side band. Fasten off and repeat for the second side.
Step 3: Using slip stitch or single crochet, join both bands together by adding spaces between them—these are the spots where the dowels will go. Space them evenly every 8–10 rows, leaving open loops to slide dowels through later.
Step 4: Once the ladder structure is complete, weave in ends and slide the wooden rods through the loops from one side to the other.
Step 5: Add buttons where needed to reinforce dowel openings or simply to decorate.
#33. Crochet Goldfish Pouch
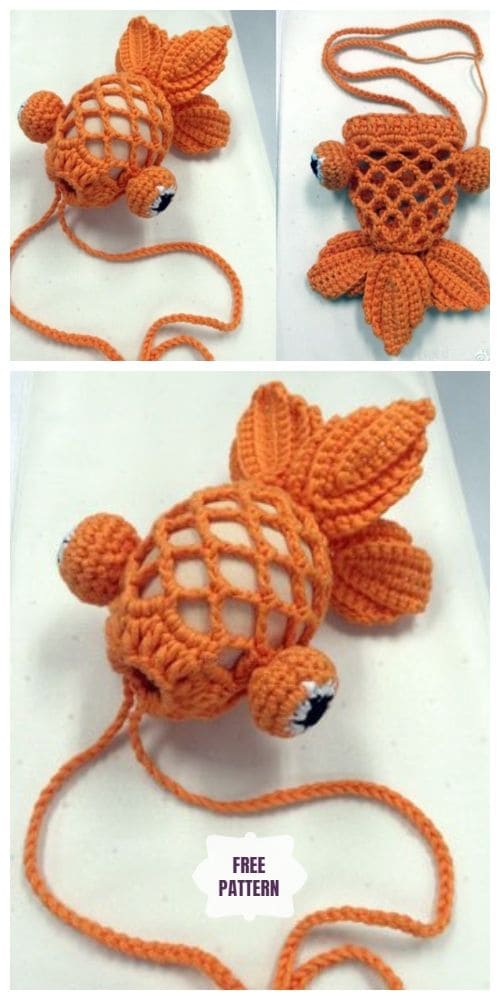
Is it a bag? Is it a fish? It’s both and it’s irresistible. This playful goldfish pouch is as functional as it is fabulous.
Materials Needed
- Worsted weight yarn: Approx. 50g in orange
- 4 mm crochet hook
- Black and white yarn scraps
- Polyfill stuffing
- Yarn needle
- Scissors
Step-by-step Guide
Step 1: For head and eyes, start with a magic ring and work in rounds of single crochet to create a sphere. Add embroider white and black felted circles for the classic goldfish stare. Stuff with polyfill and secure the opening.
Step 2: For body, chain a base ring and build rounds using a mesh stitch (e.g., ch 3, skip 1, SC). Continue until the body reaches around 6–7 inches long and attach to the base of the head securely.
Step 3: Create 4 side fins using fan stitch or shell stitch (crochet 5 DCs in one stitch). For the tail, make two larger scallop panels and sew together at the bottom opening.
Step 4: Attach all fins evenly to the body. Optionally thread a drawstring through the upper edge to cinch it closed or wear crossbody.
#34. Crochet Blue-Edged Roses

With pure white petals and soft blue scalloped edges, they look almost like porcelain flowers brought to life with yarn. Each rose is layered with care, giving it full bloom and dimension.
Materials Needed
- Cotton yarn: 25g white (per rose), 5g baby blue (per rose), 15g green
- 3 mm crochet hook
- Floral wire
- Green floral tape
- Hot glue gun (optional)
- Yarn needle + scissors
Step-by-step Guide
Step 1: For petals, chain a base row (20–40 chains depending on petal size), then work single crochet, half-double crochet, double crochet, treble crochet into each chain to build curvature. Make 5–8 petals of varying widths for each rose.
Step 2: Using blue yarn, slip stitch or single crochet around the edge of each white petal. Slightly increase around corners to keep them smooth and curled.
Step 3: Forming the rose by starting from the smallest petal, rolling it inward tightly and continue wrapping the rest around it, gradually spacing them for fullness and stitching the base together as you go.
Step 4: Crochet simple leaf shapes using green yarn. Insert floral wire through the base of the rose, wrapping the stem and leaves with floral tape for a clean finish.
Step 5: Arrange several finished roses together. Wrap with ribbon or tie with a bow for a finished bouquet look.
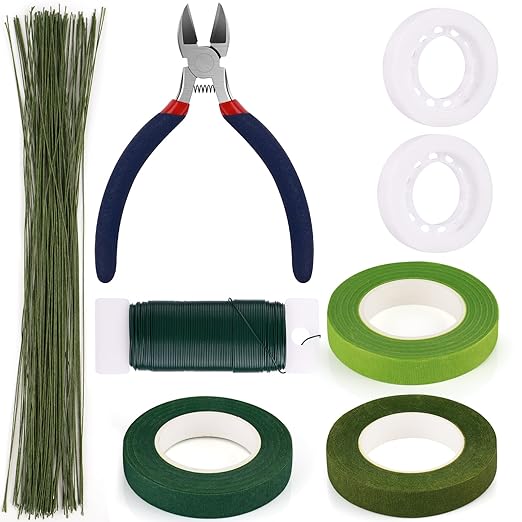
#35. Delicate Crochet Rosary
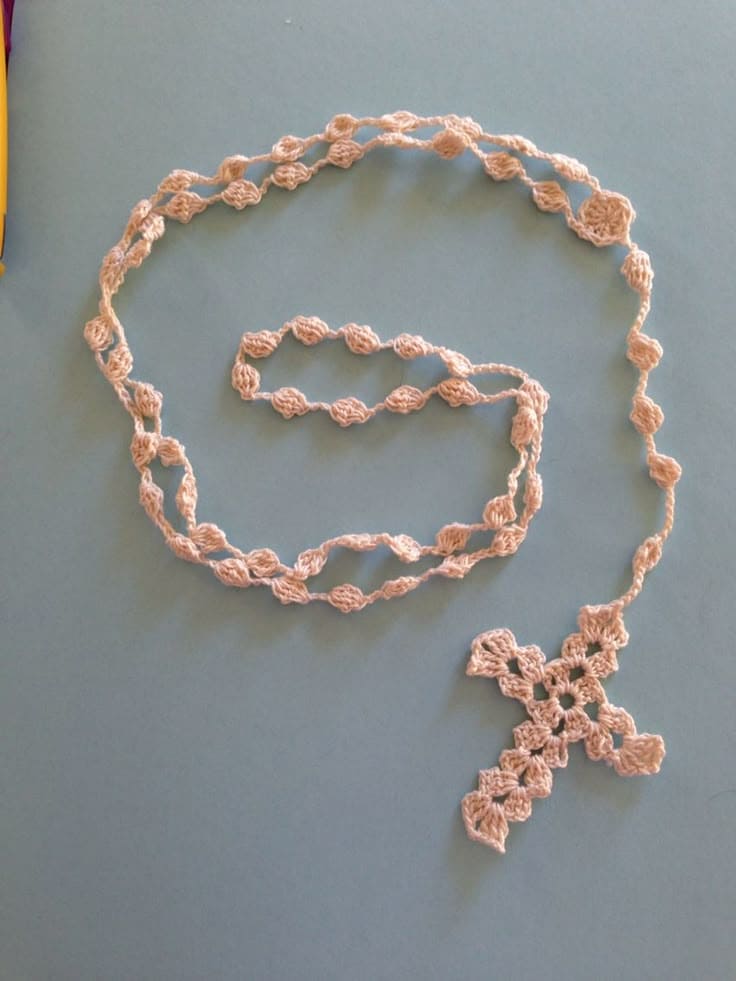
Made with soft, fine cotton yarn and featuring a lacy cross and beaded chain, it serves as a beautiful spiritual token for baptism gifts, First Communion, or daily prayer.
Materials Needed
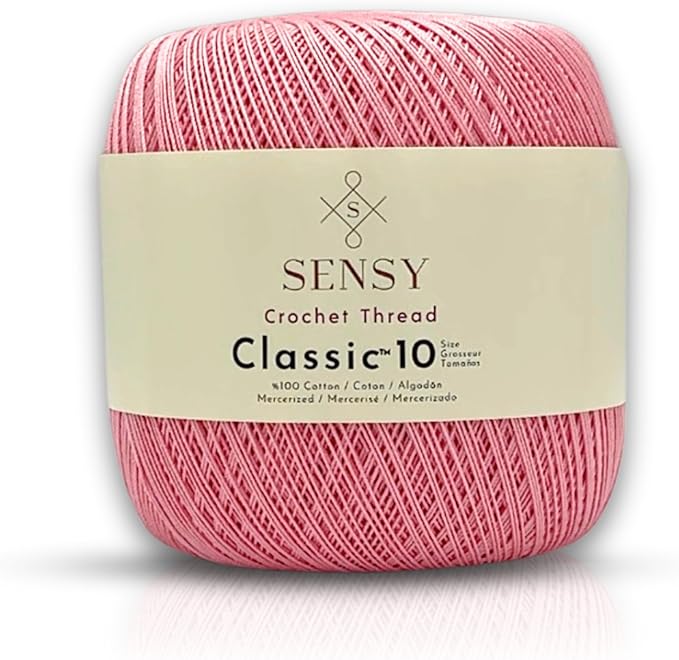
- Size 10 crochet thread
- 1.5 mm steel crochet hook
- Yarn needle
- Small scissors
- Starch (optional)
Step-by-step Guide
Step 1: Chain 5. In the 5th chain from hook, work 3 double crochets together (dc3tog), ch 2. Repeat clusters with a chain space in between to mimic rosary beads (10 for each decade). For each separation between decades, chain 3 between bead clusters.
Step 2: After the final bead cluster, chain 10 and attach to the center of your chain with a slip stitch to form the loop leading to the cross.
Step 3: Crochet the cross, start with a magic ring, work 8 single crochets into the ring, close and slip stitch, build outward with a series of granny-style or filet crochet rows (3 rows tall, with a horizontal 2-row arm) and add picots or lacy edge with ch 3, slip stitch around the tips if desired.
Step 4: Use starch for stiffness and weave in ends neatly and trim excess thread.
#36. Crochet Lip Balm Holder Keychain
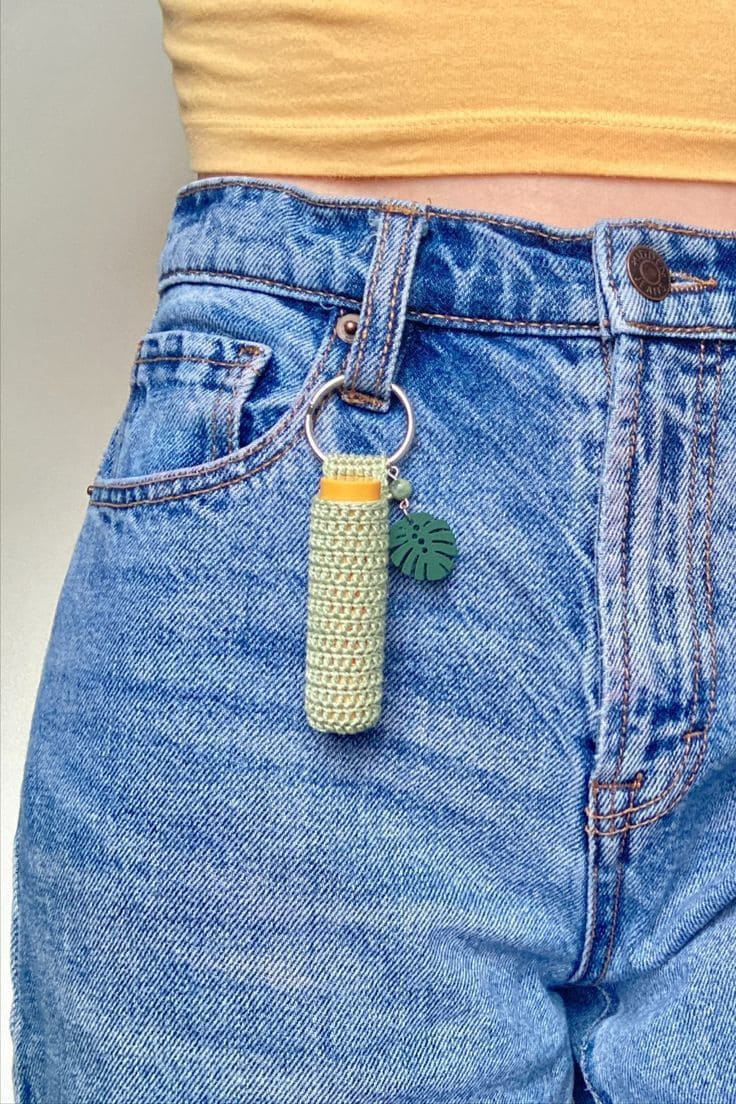
This tiny crochet sleeve is designed to clip right onto your jeans, keys, or bag, making dry lips a thing of the past.
Materials Needed
- Cotton yarn fingering weight: Approx. 5g
- 2.5 mm crochet hook
- Keyring
- Yarn needle
- Optional: Beads and leaf charms
Step-by-step Guide
Step 1: Start with a magic ring. Work 6 single crochets (SC) into the ring. Pull tight and join with a slip stitch.
Step 2: Work in spiral rounds. Continue with 1 SC in each stitch (no increases) for approx. 18–20 rounds, or until your tube reaches the height of your lip balm container.
Step 3: To create the loop, chain 8 at the top of the final round and slip stitch back into the base to form a strap.
Step 4: Fasten off and weave in the tail securely. Slide the keyring through the loop. Add charms on an initial for a personal touch.
#37. Mushroom Plush Crochet Project
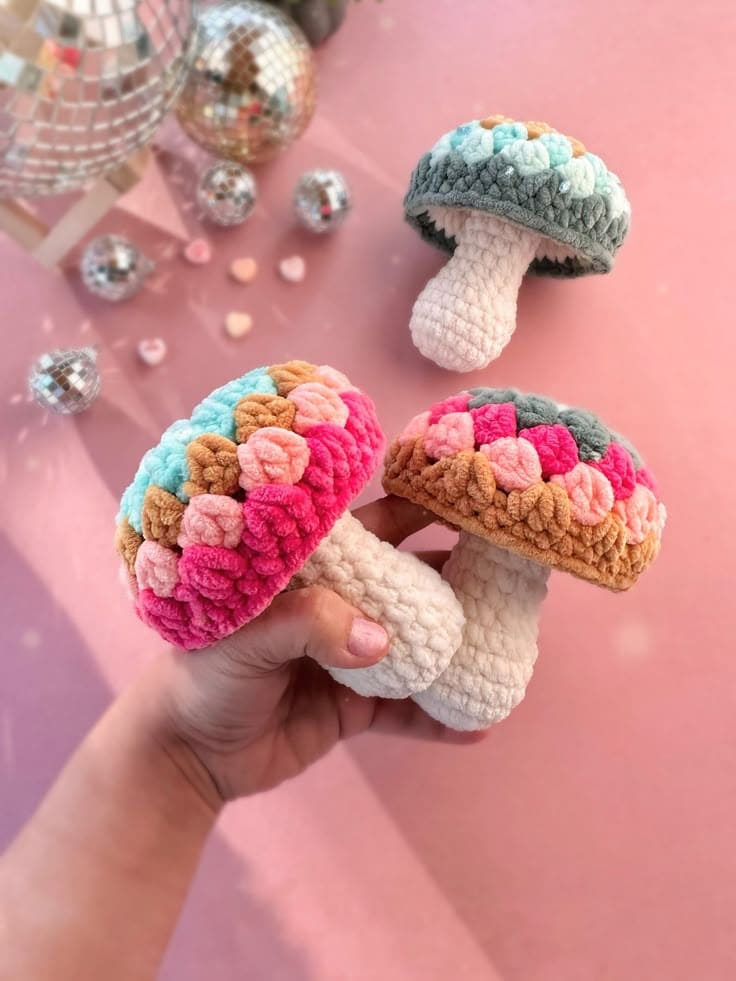
These puff-stitch mushrooms are made with velvet or chenille yarn for that squishy finish.
Materials Needed
- Super bulky velvet yarn: assorted colors
- 6.5 mm crochet hook
- Stuffing fiberfill
- Tapestry needle
- Stitch marker (optional)
Step-by-Step Guide
Step 1: For mushroom cap, create agic ring, 6 SC into the ring, then increase round: 2 SC in each stitch (12). Next, work puff stitch in each stitch (use 5 loops per puff). Increase as needed up to about 30–36 stitches depending on size. After desired width, do 2–3 rounds with no increase.
Step 2: For mushroom stem: with cream or white yarn, chain 6 and join to form a loop and work SC rounds evenly for about 10–12 rows to create a firm tube. Begin decreasing (SC2tog) gradually over 2–3 rounds. Stuff with fiberfill firmly as you go. Next, close with SC2tog until hole closes, fasten off.
Step 3: Tug gently to shape, then secure the seam with invisible stitches using a tapestry needle.
#38. Crochet Christmas Tree Cutlery Holder
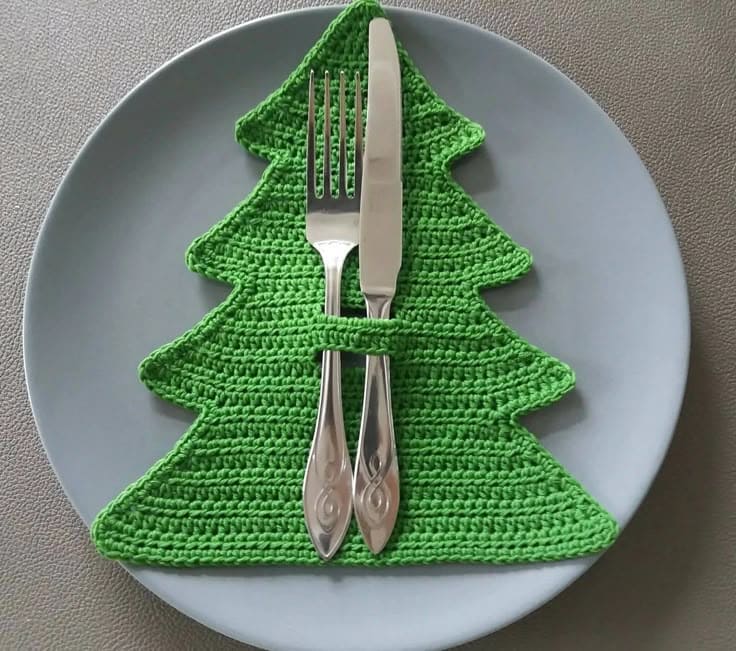
This flat, triangular pouch design doubles as both a decorative napkin and a cutlery wrap.
Materials Needed
- Worsted weight cotton yarn in green
- 3.5 mm crochet hook
- Yarn needle
- Stitch markers (optional)
Step-by-Step Guide
Step 1: For tree base, chain 3, turn, SC in 2nd chain from hook. Increase 1 stitch on each side every row to form a triangle. Continue until desired width (approx. 35–40 stitches wide). Work even in SC rows to your tree’s height (~25–30 rows total).
Step 2: For tree branches, mark 3–4 positions on each side. Create layered “branches” by decreasing 1–2 stitches over 4–5 rows, then increase back out. Repeat until you reach the pointed top.
Step 3: Chain 14–16, join with slip stitch to make a loop. SC 2 rows for stability, fasten off, then sew onto the middle of the tree to hold cutlery in place.