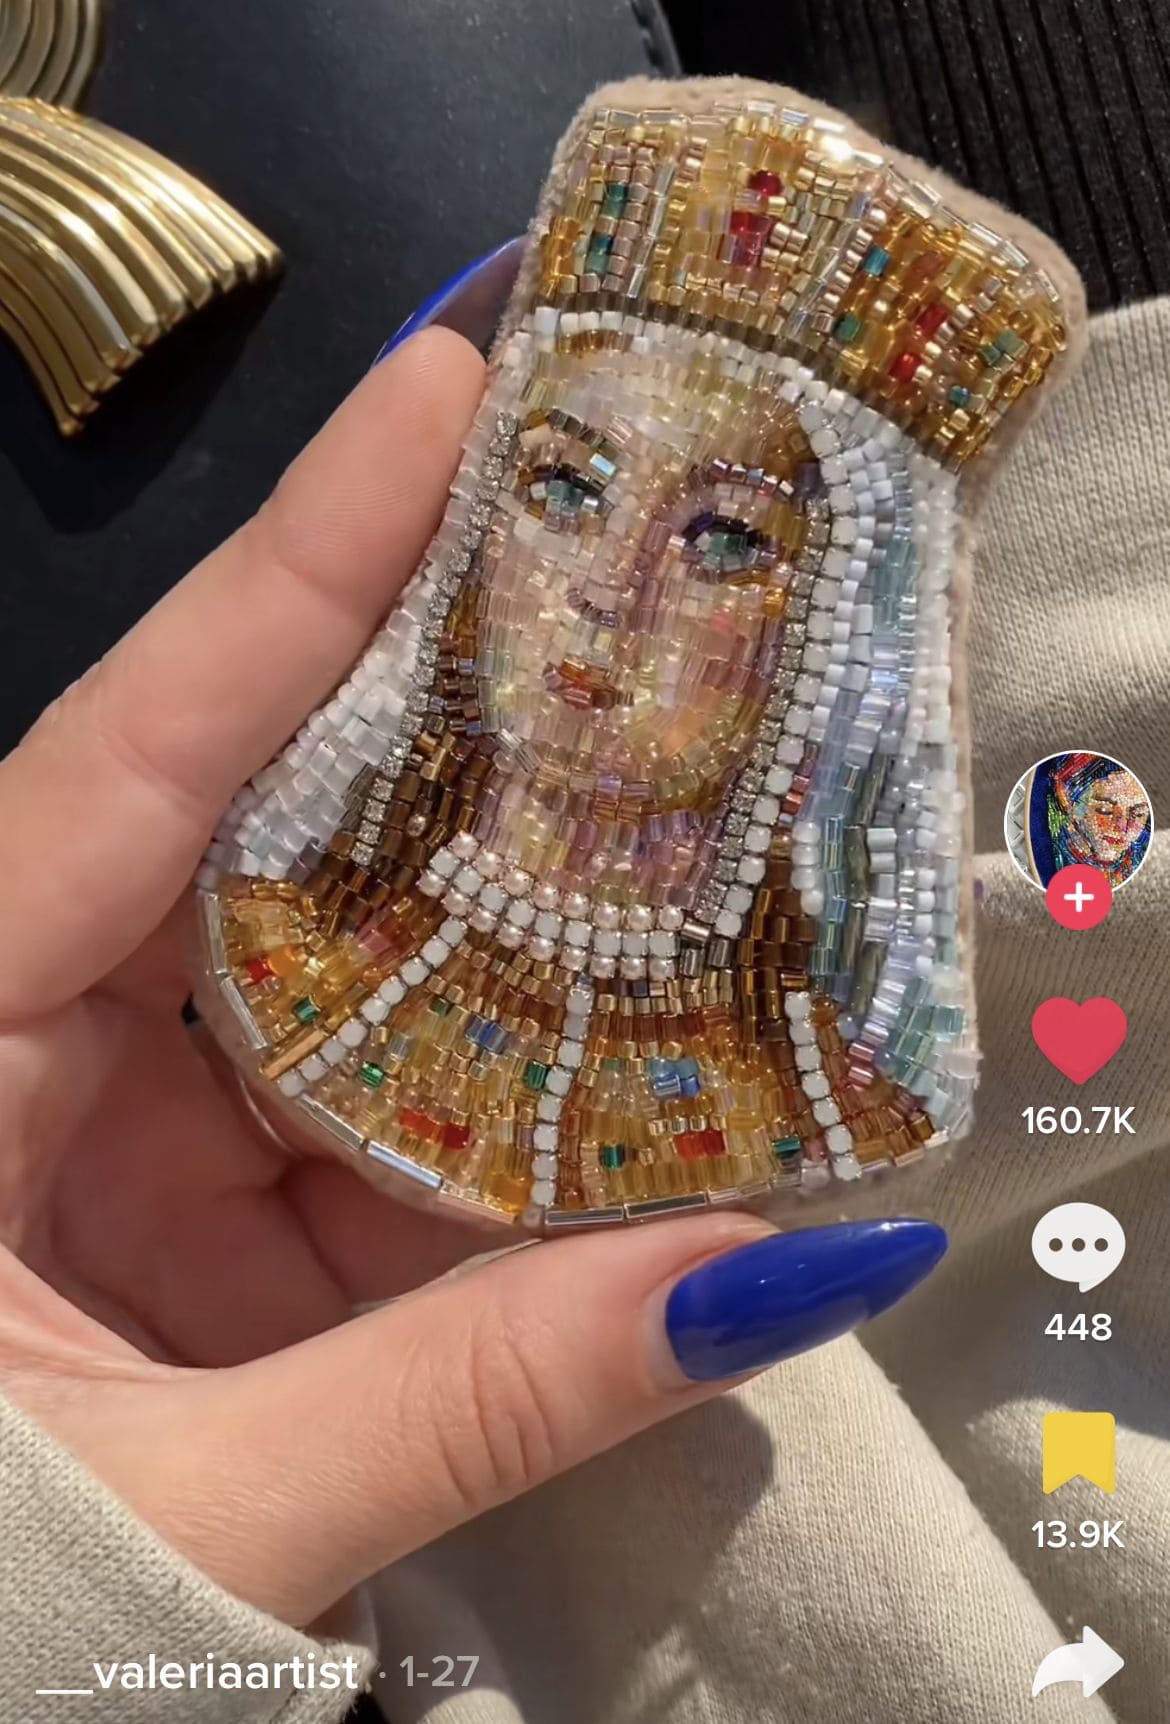
Every bead becomes a brushstroke, and together they paint a soul. The portrait glimmers like a jewel, the golden crown glowing, the eyes gazing softly back.
It feels ancient and modern at the same time, like holding a piece of history reborn through thread and glass.
Materials Needed
- Seed beads and bugle beads in skin tones, gold, white, and accent colors (15-20 grams each)
- Beading needle and strong thread (nylon or FireLine)
- Fabric backing (linen or stiff canvas, 6”×6” or larger)
- Pencil or printed template
- Embroidery hoop (medium size)
- Scissors
- Optional: rhinestones
Step-by-step Guide
Step 1: Sketch or transfer your portrait outline onto the fabric. Then mark key features such as eyes, nose, lips, and accessories.
Step 2: Begin with the face, using light and medium-toned beads for skin, and place darker beads sparingly to add depth and shading.
Step 3: Move on to the hair and clothing, layering beads in directional rows to mimic texture and movement. You can also blend multiple shades for natural transitions.
Step 4: Embroider the crown or accessories last. Then use metallic beads, pearls, or rhinestones to make these details sparkle and stand out.
Step 5: Once complete, secure all threads at the back and consider framing the piece under glass to protect the intricate detail.
Tips:
Portrait bead embroidery works best when you treat beads like paint, mixing shades and experimenting with placement creates lifelike expressions and depth.