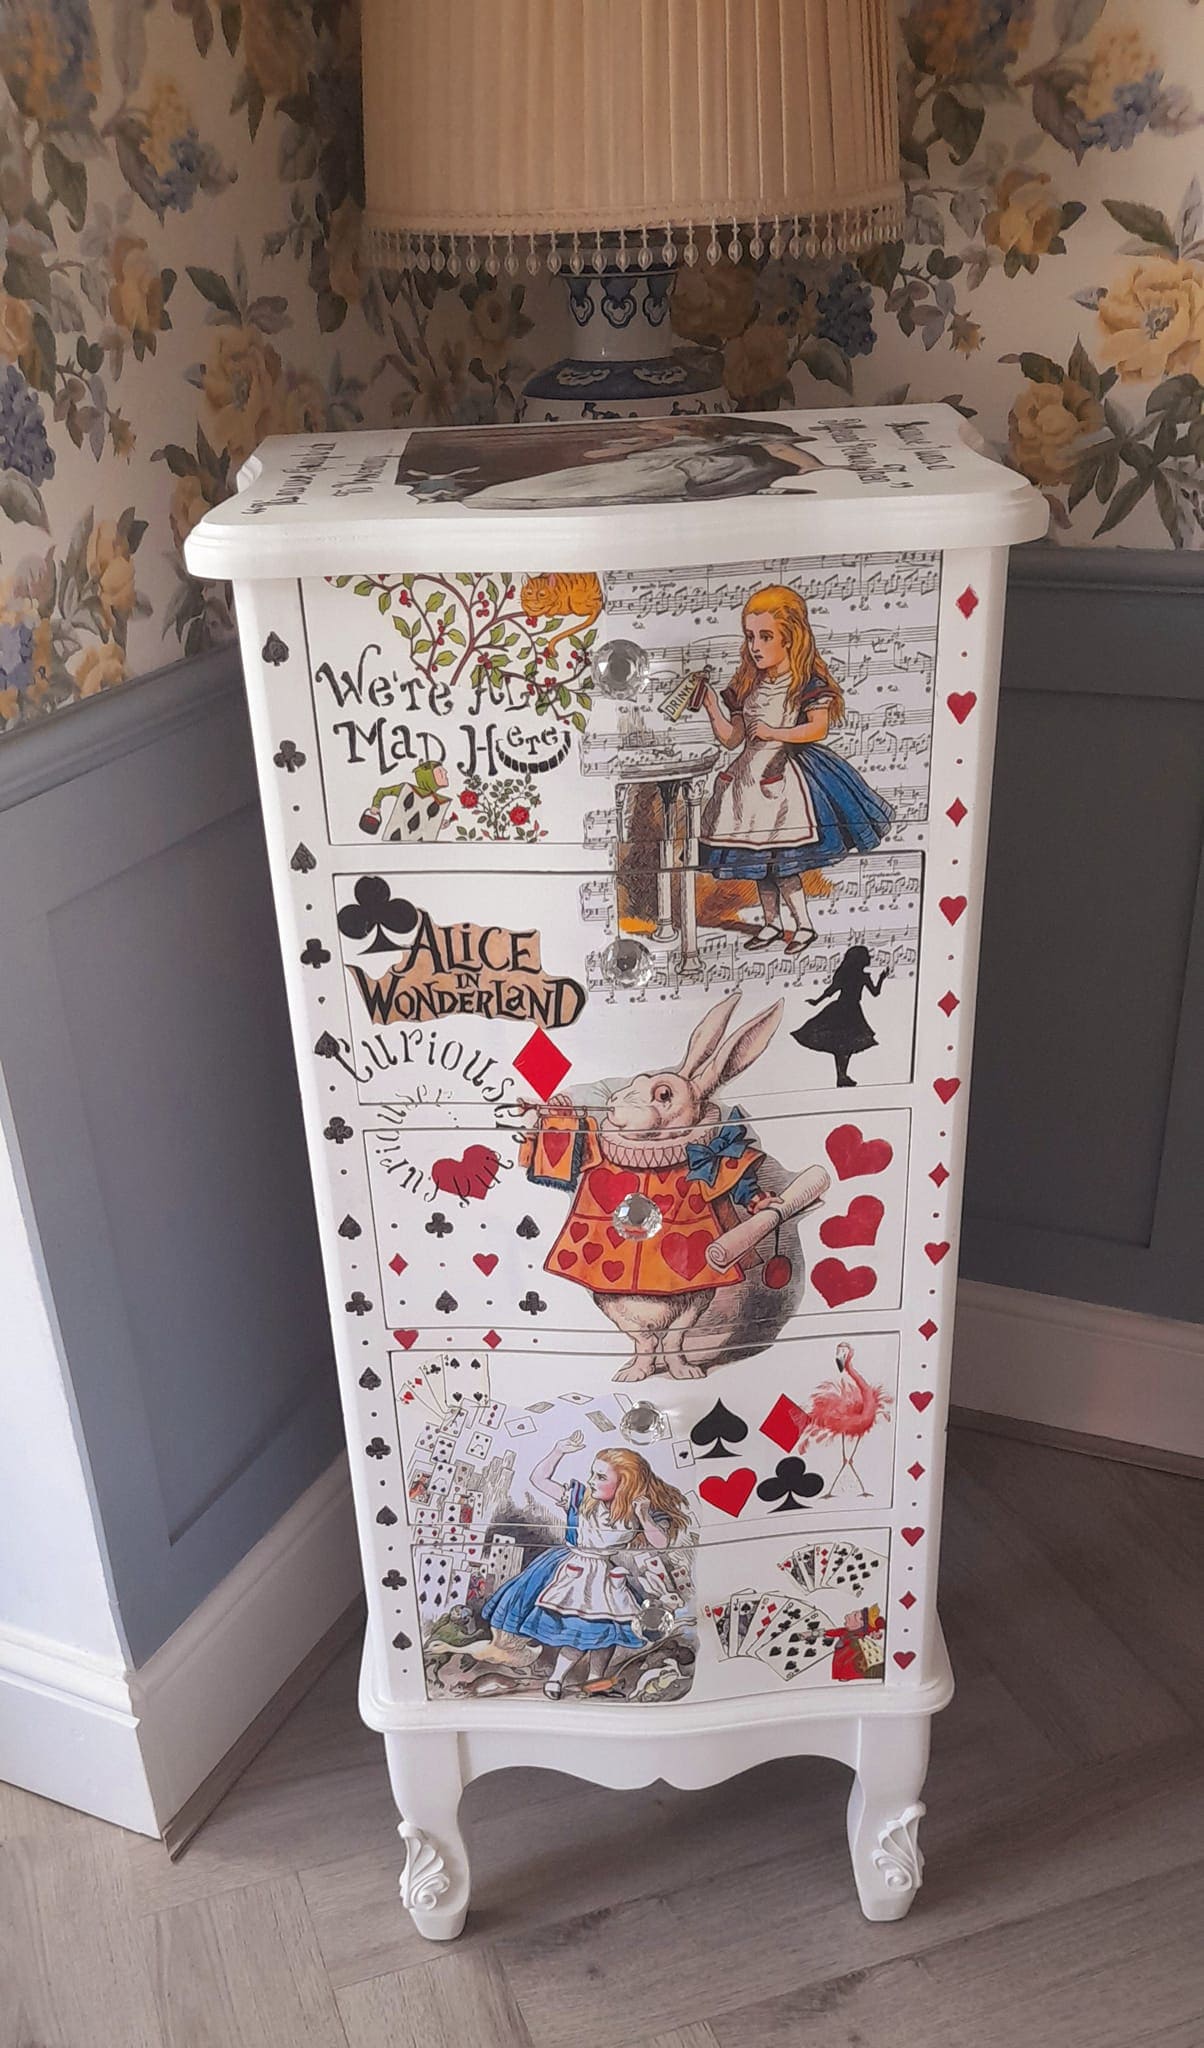
This Alice in Wonderland dresser makeover is the perfect example of how decoupage can turn an outdated piece into a functional work of art.
With layered illustrations, playing card motifs, and crisp white paint, the dresser instantly feels fresh and bold. It brings personality to the room while doubling as a playful statement piece.
Plus, decoupage is affordable, easy to customize, and offers a way to showcase favorite stories or themes. A clear topcoat ensures durability, so the artwork stays vibrant.
For anyone who loves a creative DIY project, this design proves that furniture can be both practical and magical.
Materials Needed
- 1 wooden dresser, approx. 40-50″ tall with 3-5 drawers
- 1 sheet of 120-grit sandpaper and 1 sheet of 220-grit sandpaper
- 1 quart primer (water-based, white)
- 1 quart white chalk paint
- Printed Alice in Wonderland images (laser-printed, A4 or letter size)
- 1 bottle decoupage glue (e.g., Mod Podge 8 oz)
- 1 foam brush (2″) and 1 small soft bristle brush (1″)
- Sharp detail scissors (4-5″)
- 1 can clear topcoat sealer (matte or gloss, 12 oz spray or brush-on)
- Optional: 4-6 crystal or themed drawer knobs, 1 roll painter’s tape, 1 drop cloth
Step-by-step Guide
Step 1: Start by removing all hardware (knobs, handles) from your dresser. You can place a drop cloth underneath to protect the floor.
You sand the surface with 120-grit sandpaper to remove any old varnish, then smooth with 220-grit. Also, wipe away dust with a damp cloth.
Step 2: Apply a thin coat of primer using a foam brush. Let it dry for at least 2 hours before applying two coats of white chalk paint. Allow each coat to dry fully. This creates a clean backdrop that makes the colorful Wonderland illustrations pop.
Step 3: While the paint dries, cut out your Alice in Wonderland images.
You should choose different characters for each drawer (Alice, White Rabbit, Queen of Hearts) to keep the theme balanced. Lay them out first without glue to decide placement.
Step 4: Apply a thin layer of decoupage glue directly on the drawer front, press the image down carefully, and smooth with a clean cloth. Work slowly from the center outward to push out air bubbles. Let each layer dry 20-30 minutes before moving on.
Step 5: Once all images are set, brush another thin coat of glue on top of each piece to seal it in place. Then allow it to dry overnight for best results.
Step 6: Spray or brush a clear protective topcoat over the entire dresser. This prevents peeling and adds durability, especially if it’s used daily.
Step 7: Reattach the knobs or swap them for decorative ones like crystal or vintage-inspired pulls. Step back and admire your Wonderland dresser, each drawer now tells part of the story!
Notes: Patience is key as several thin coats of glue and sealer always look smoother than one thick coat.