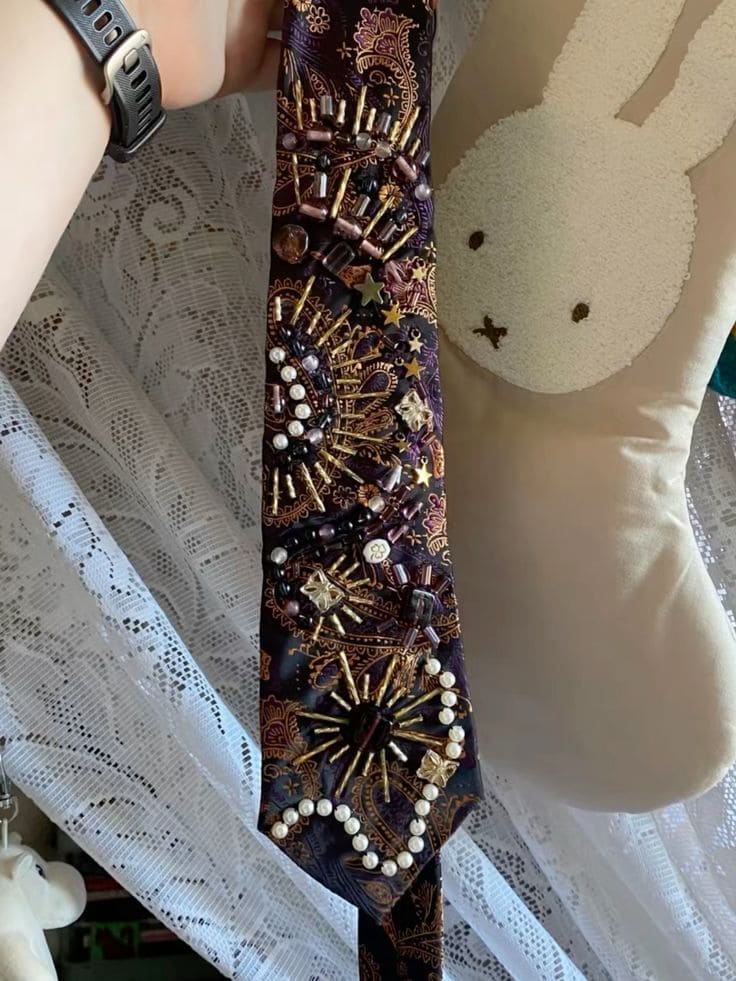
Imagine a night sky stitched into fabric, pearls as constellations, golden rays like falling stars, and beads glowing like hidden galaxies. That’s what this tie becomes once embroidered.
No longer just an accessory, it feels like a secret universe you carry with you, a piece of fabric alive with light and story.
Materials Needed
- Plain or patterned tie (preferably silk or polyester blend)
- 50-70 bugle beads in gold and metallic tones
- 30 pearls and round beads
- Seed beads in black, bronze, and purple (10 grams each)
- 15-20 sequins and rhinestones (optional)
- Beading needle and strong thread
- Embroidery hoop (small, if fabric can be hooped)
- Scissors
Step-by-step Guide
Step 1: Lay the tie flat on a table and sketch your design lightly with chalk such as bursts, stars, or abstract lines all work beautifully.
Step 2: Anchor your thread on the inside lining of the tie, then begin with larger elements like pearls or rhinestones. Also, stitch them down as focal points.
Step 3: Surround these focal beads with bugle beads arranged like sunrays or starbursts. You should secure them tightly so they sit flat on the fabric.
Step 4: Add seed beads in smaller clusters, filling spaces and creating texture. Then mix in sequins for extra shimmer if desired.
Step 5: Keep building section by section until the tie feels balanced with detail. Finish by securing all threads inside the tie lining.
Notes:
Because ties are often handled, make sure to keep your stitches snug. If you want extra durability, add a thin fabric backing to the inside to hide knots and protect the beadwork.