Who knew the humble egg carton, once tossed without a second thought, could become a treasure chest of creativity? I didn’t, until a rainy weekend with no plans and two restless kids changed everything.
We grabbed scissors, paint, and a few egg cartons from the bin. An hour later, we had a tiny garden of painted flowers and wide-eyed bugs staring back at us. Since then, egg carton crafts have become our go-to for fun, mess-friendly afternoons. They’re easy, cheap, and surprisingly magical.
This collection brings together 30 of the best ideas we’ve tried and loved, projects that spark joy, teach little hands to shape big things, and remind me that creativity often starts with what we already have.
This article contains affiliate links. If you purchase through them, I may earn a small commission at no extra cost to you. Thank you for your support!
#1. Egg Carton Doll Ornaments
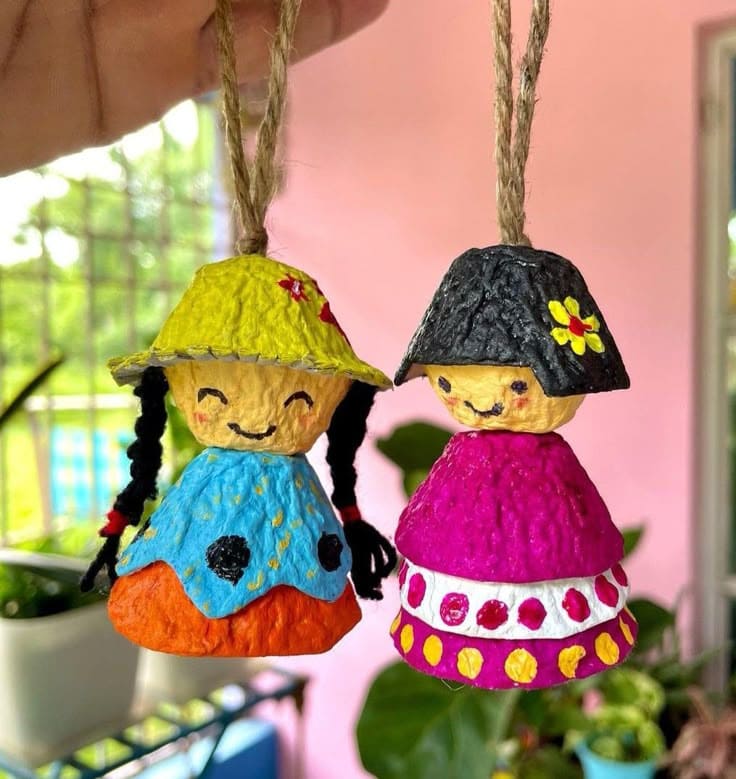
With just a couple of egg carton pieces and some paint, you can create characters that feel like they belong in a storybook.

Materials Needed
- 4-5 egg carton cups (per doll)
- Twine
- Acrylic paint
- Black yarn
- Fine-tip marker
- Craft glue
Step-by-step Guide
Step 1: Trim and shape 4-5 egg carton cups including two or three for the dress, one as a hat and one as a face. Paint them in bright, contrasting colors and let dry.
Step 2: Use a marker to paint the doll’s face on the rounded side of the top piece. Add tiny details like blush, eyes, and smile.
Step 3: Cut small strands of black yarn for hair, then glue on either side of the face. Braid or style however you like.
Step 4: Attach the hat with glue over the hair and add painted flowers if desired. Then glue a twine loop to the top of the hat for hanging.
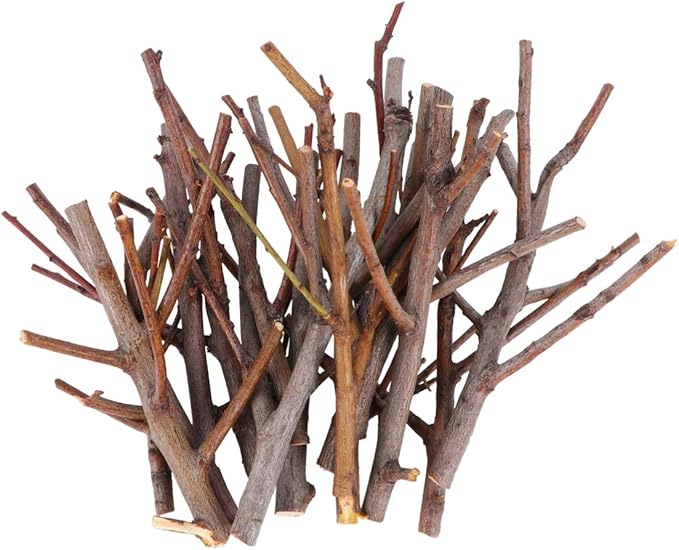
#2. Egg Carton Christmas Tree Forest
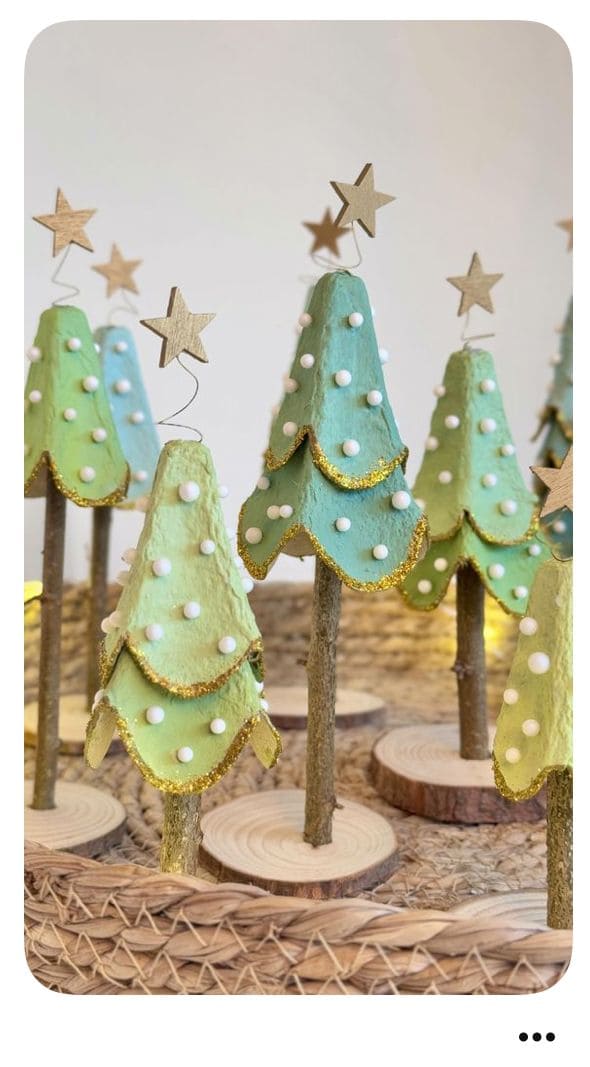
If you’re dreaming of a handmade Christmas, this egg carton forest brings the magic. Each mini tree feels whimsical yet earthy, with frosty whites, sparkly gold trim, and star-topped charm.
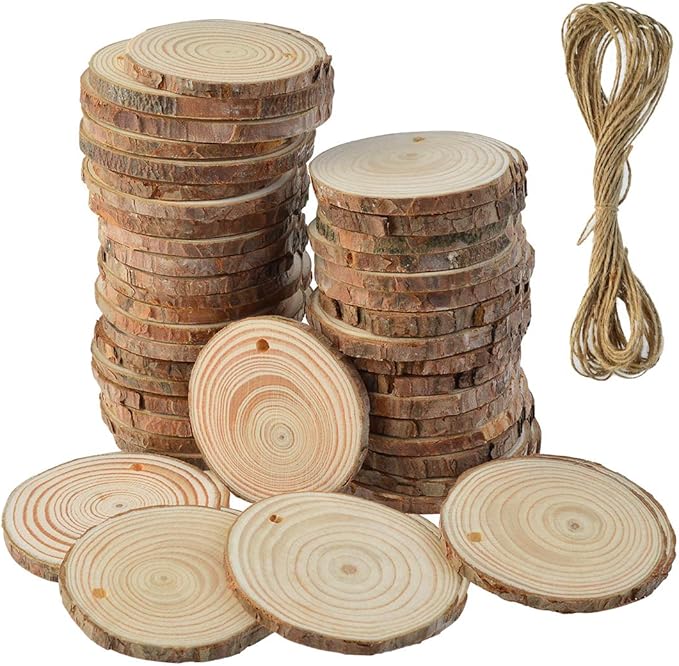 SHOP SMALL WOODEN DISCS
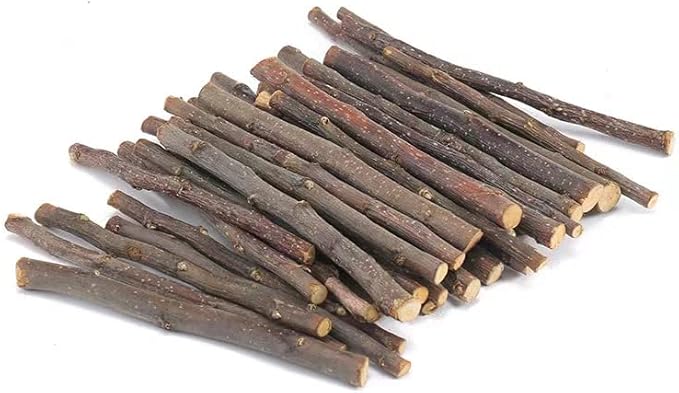 SHOP STURDY STICKS
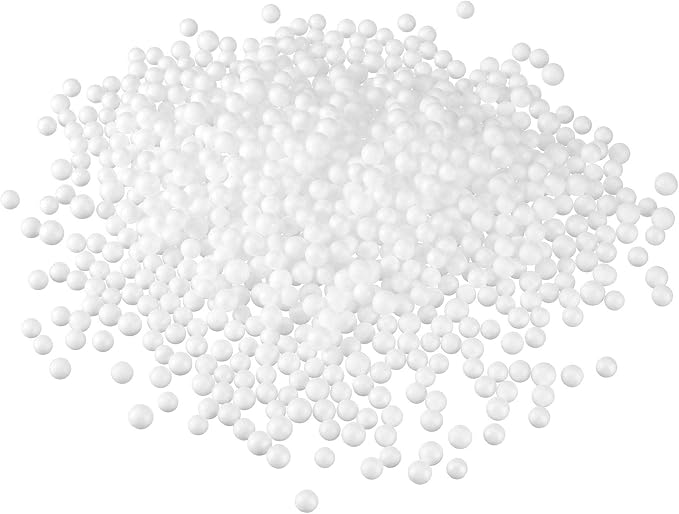 SHOP WHITE FOAM BALLS
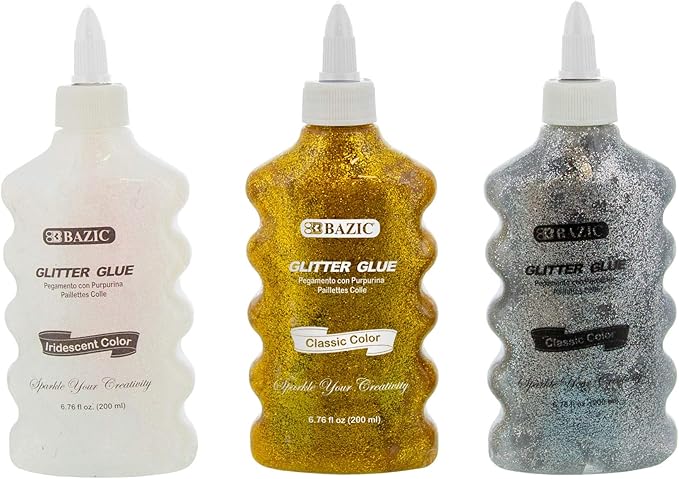 SHOP GOLD GLITTER GLUE
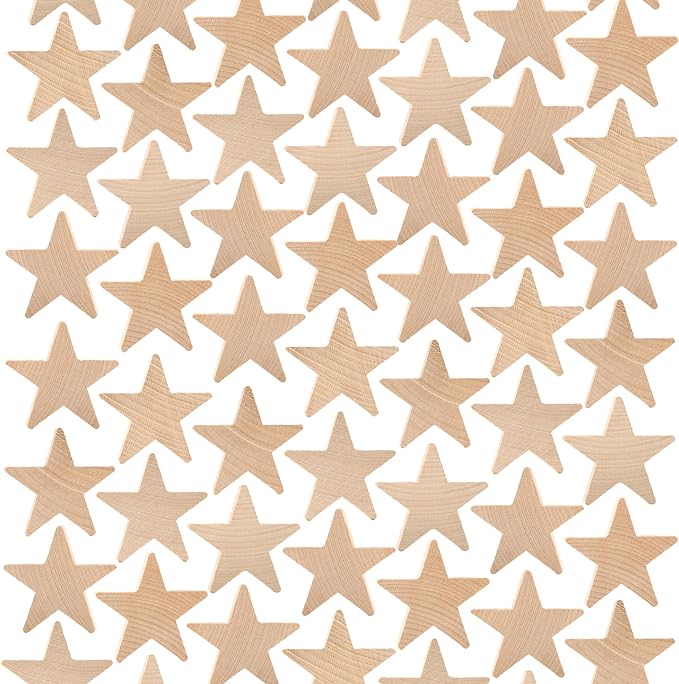 SHOP WOODEN STARS
 SHOP WIRE
Materials Needed
- 2-3 egg cartons
- 5 small wooden discs (approx. 2–3 inch diameter)
- 5 sturdy sticks (4–5 inches tall)
- Acrylic paint (green shades)
- White foam balls
- Gold glitter glue
- Wooden stars + wire
- Hot glue gun
Step-by-step Guide
Step 1: Cut egg cartons into tiered layers including two cone shapes per tree. Paint each in green gradients and let dry.
Step 2: Add gold trim to the edges and glue on white pom-poms for snowy ornaments.
Step 3: Drill or poke holes into wooden discs and glue the stick in place as a tree trunk.
Step 4: Stack and glue the egg carton tiers onto the stick, finishing with a star on top. Let everything dry completely before displaying.
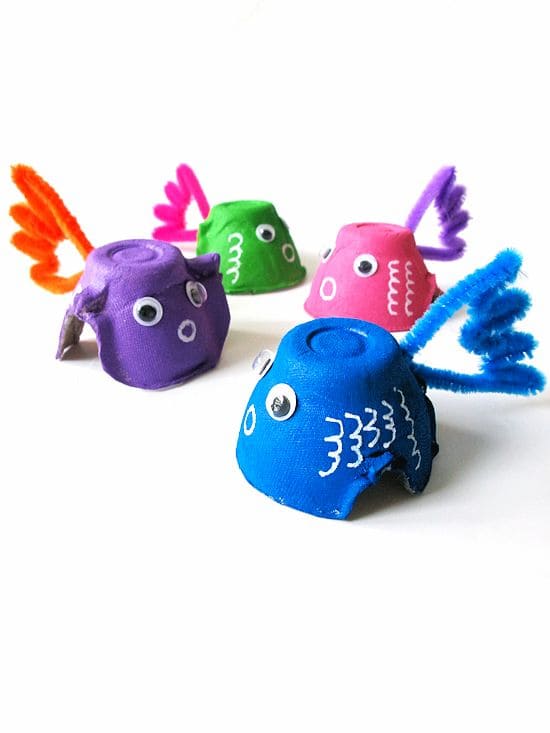
#3. Egg Carton Colorful Fish Craft
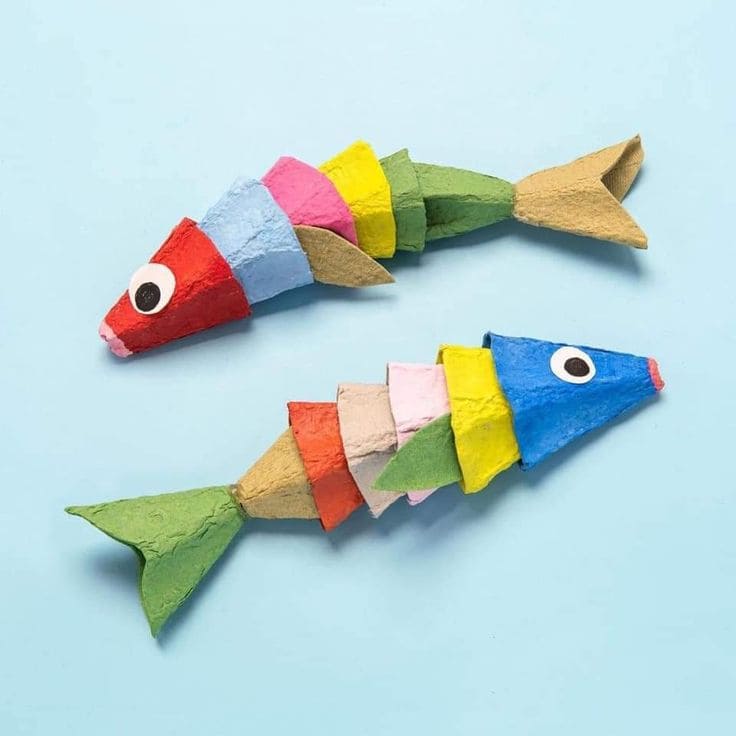
These vibrant little fish are one of my favorite egg carton projects, they’re fun, playful, and perfect for teaching kids about recycling.
Materials Needed
- 1 egg carton
- Acrylic paints in various colors
- Googly eyes
- Small paintbrushes
- Glue
- Scissors
Step-by-step Guide
Step 1: Cut the egg carton into small pointed segments (around 6 pieces per fish), plus one for the head and one for the tail.
Step 2: Paint each piece in different colors. After letting them dry completely, you glue the pieces together in a line to form the fish’s body, arranging colors however you like.
Step 3: Add a googly eye on, then cut and glue on a paper tail fin if desired.
#4. Egg Carton Spring Flower Bouquet
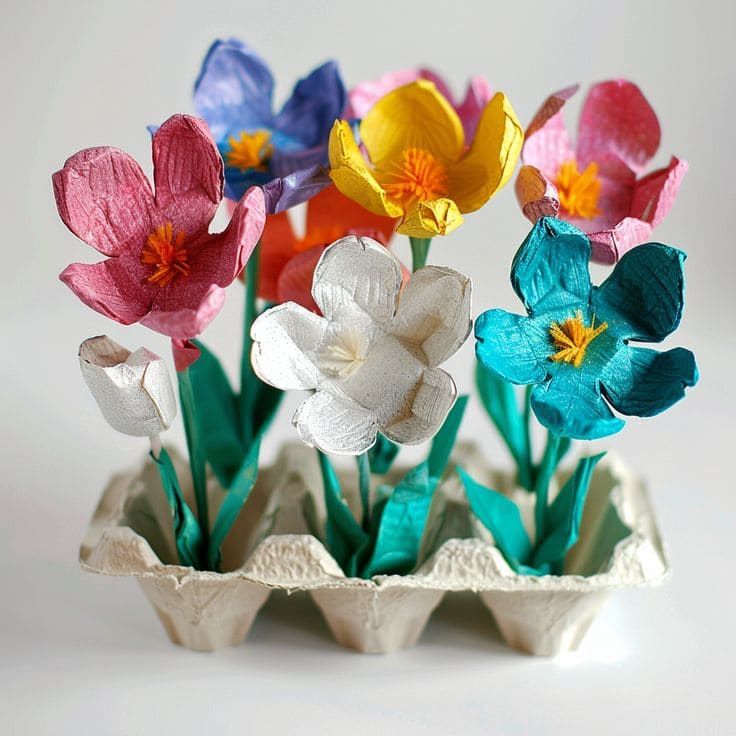
It’s hard not to smile when you see these bold, textured flowers blooming straight out of an old egg carton.

Materials Needed
- 2 empty egg cartons
- Acrylic paints
- Green cardstock
- 6 pipe cleaners
- Hot glue gun
- Scissors
- Optional: yellow craft thread
Step-by-step Guide
Step 1: Cut the egg carton into individual cups, trim each one into petal shapes, then paint the petals with bright, cheerful colors. Let dry completely.
Step 2: Attach each flower to a stem using hot glue. Add a yellow thread center for added detail.
Step 3: Add leaves cut from green cardstock, then place them back into the carton as a bouquet base.
#5. Mini Egg Carton Mushrooms
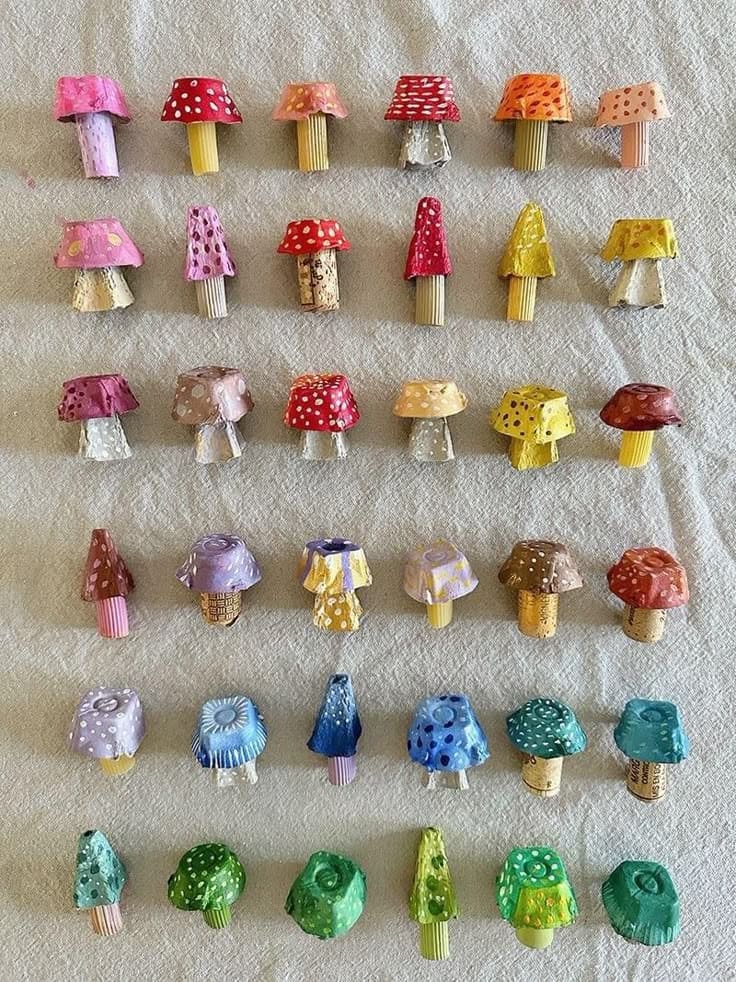
Whether you scatter them in plant pots, use them for fairy gardens, or line them up as a whimsical display, they add a handmade touch that instantly cheers up any space.
Materials Needed
- 6 egg cartons
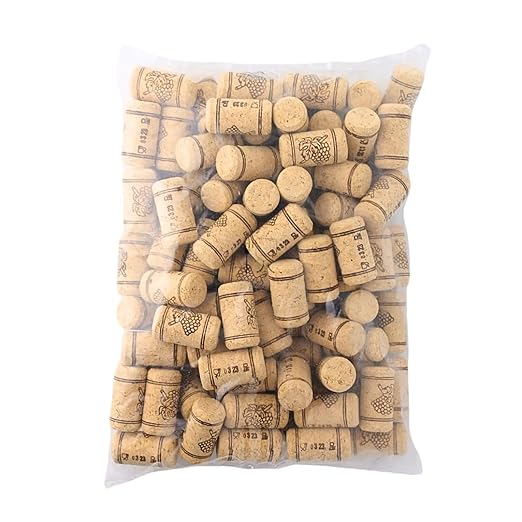
- Small bases (wine corks, or pasta pieces)
- Acrylic paint
- White paint pen
- Hot glue gun
- Scissors
- Optional: clear sealant spray
Step-by-step Guide
Step 1: Cut and shape the egg carton cups into domes or soft square caps to form the tops of the mushrooms.
Step 2: Paint each cap in fun mushroom colors (red, yellow, purple, green, etc.) and let dry. Add white dots or swirls to mimic natural fungi.
Step 3: Finally, choose your mushroom stems like wine corks, penne pasta, sticks and glue each cap on top.
#6. Egg Carton Sea Turtle Beach Scene
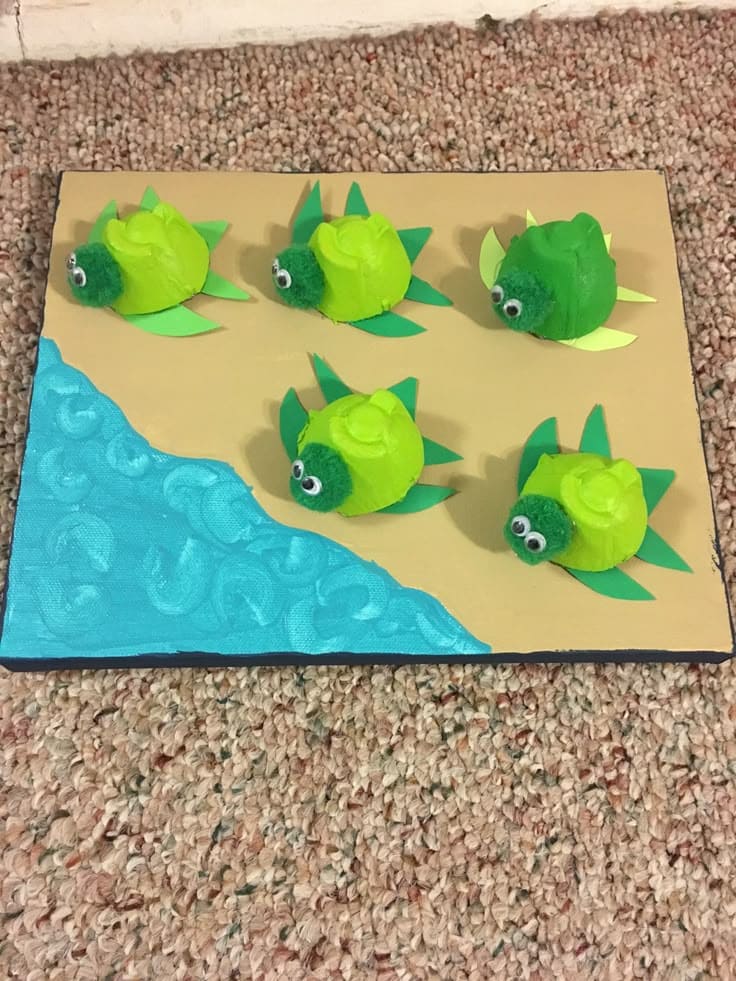
This adorable beach diorama tells the sweet story of baby turtles making their way to the sea.

Materials Needed
- 1 egg carton
- 5 green pom poms
- Small googly eyes (10 pcs)
- Green and yellow construction paper
- Acrylic paint set (green, blue, tan)
- Glue stick
- Cardboard base (~9″x12″)
Step-by-step Guide
Step 1: Paint the base, tan for the sand and blue with swirls for the sea. Let dry.
Step 2: Paint the egg carton cups green for turtle shells and let them dry. Then glue a pom pom onto each shell and attach googly eyes to the pom pom.
Step 3: Cut and glue four flippers under each shell using paper.
#7. Spring Chick Egg Carton Craft
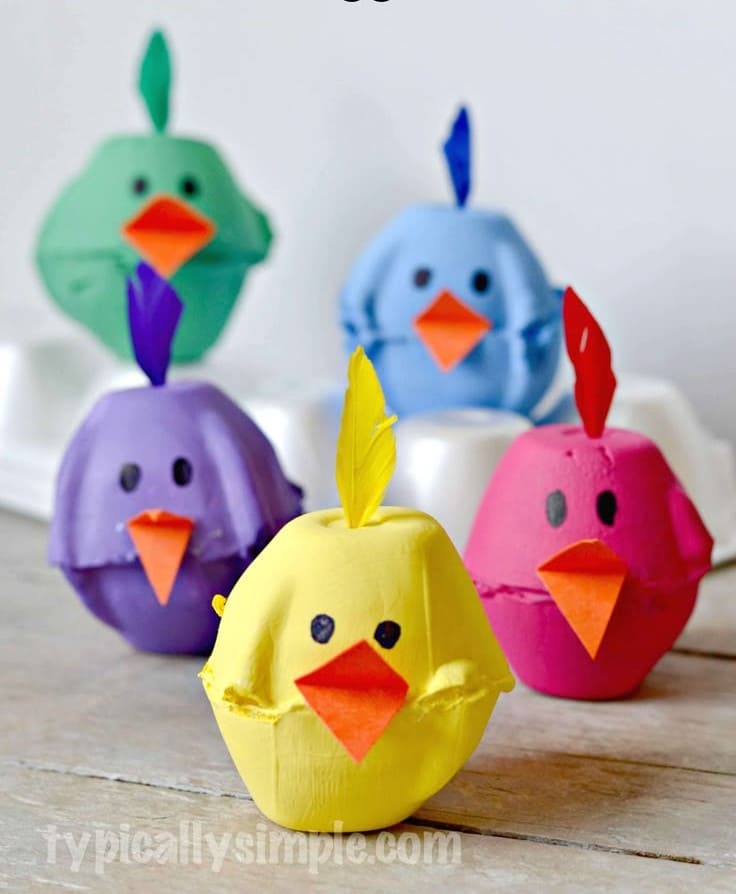
These vibrant little birds are made from simple egg carton cups and are perfect for Easter baskets, classroom crafts, or sunny weekend fun with your little ones.
Materials Needed
- 2 egg carton cups per chick
- Acrylic paint and paintbrush
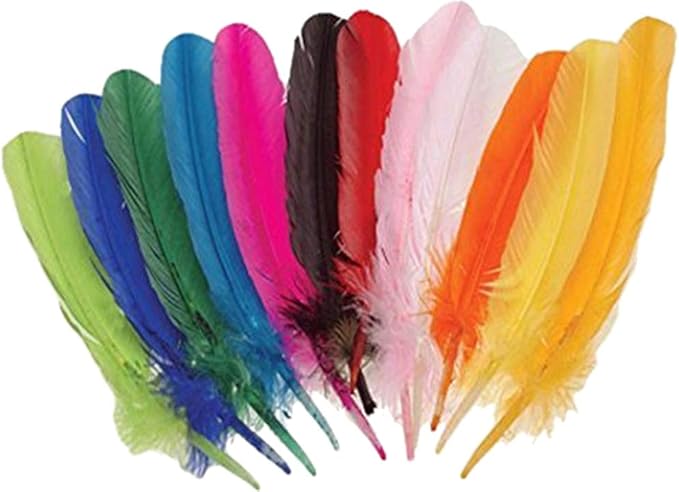
- Small feathers
- Black marker
- Orange craft paper
- Glue
Step-by-step Guide
Step 1: Paint two egg carton cups the same color and let them dry. These will form the chick’s body and head.
Step 2: Glue the cups together, open ends facing each other. Hold for a few seconds until secure.
Step 3: Cut a small diamond shape from orange paper, fold it, and glue it on as a beak.
Step 4: Add googly eyes or draw eyes with a marker, then glue a small feather on top as a cute tuft.
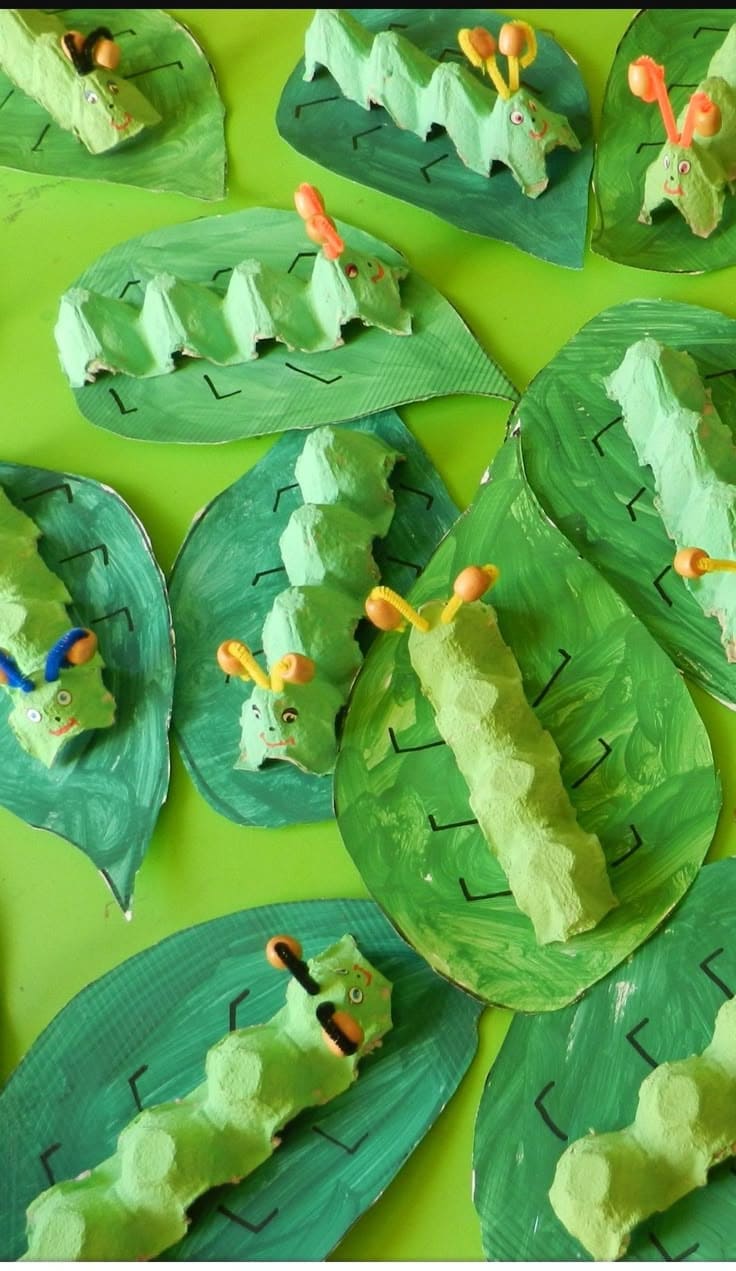
#8. Egg Carton Caterpillar on Leaf
Made from a row of egg carton cups, it’s a great upcycling idea for classrooms or home craft days.

Materials Needed
- 1 cardboard egg carton
- Green acrylic paint and paintbrushes
- Pipe cleaners (various colors)
- Black marker and red marker
- Green construction paper
- Scissors
- Glue
Step-by-step Guide
Step 1: Cut out a strip of 4 connected cups from the egg carton to form the caterpillar’s body. Trim the edges if needed.
Step 2: Paint the caterpillar green and let it dry. Decorate the face with eyes, a smile from marker, and pipe cleaner antennae poked into the top of the head.
Step 3: Cut leaf shapes from green paper, then draw “bite marks” and veins with a black marker.
#9. Whimsical Egg Carton Daisy Garden
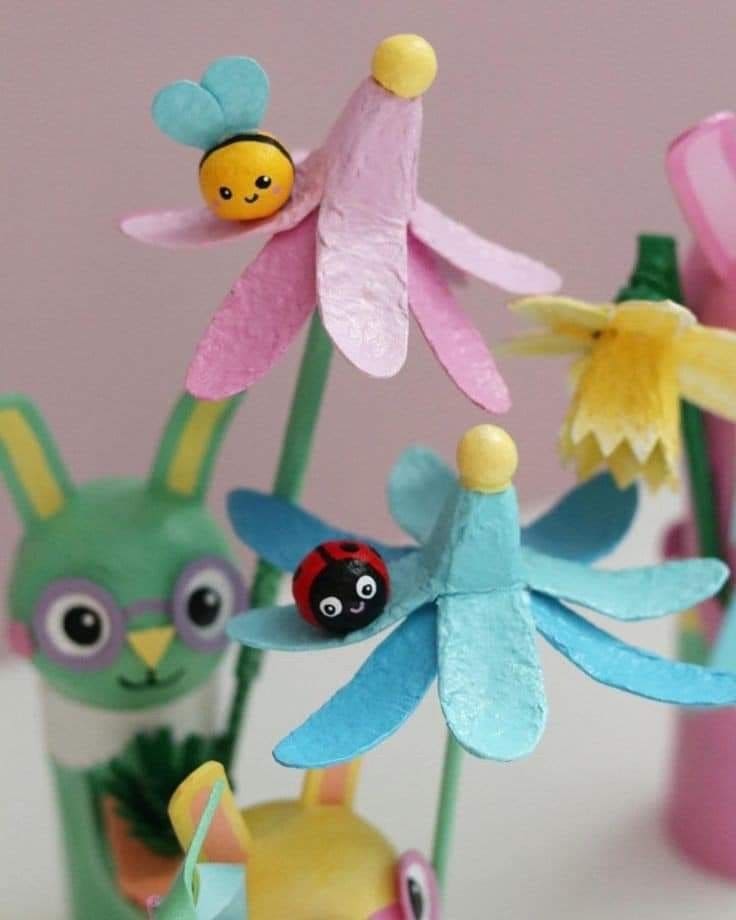
These pastel-colored daisies are bursting with charm and believe it or not, they’re made entirely from old egg cartons!
Materials Needed
- 1 egg carton (preferably pulp style)
- Acrylic paints in pastel tones
- 4 wooden beads
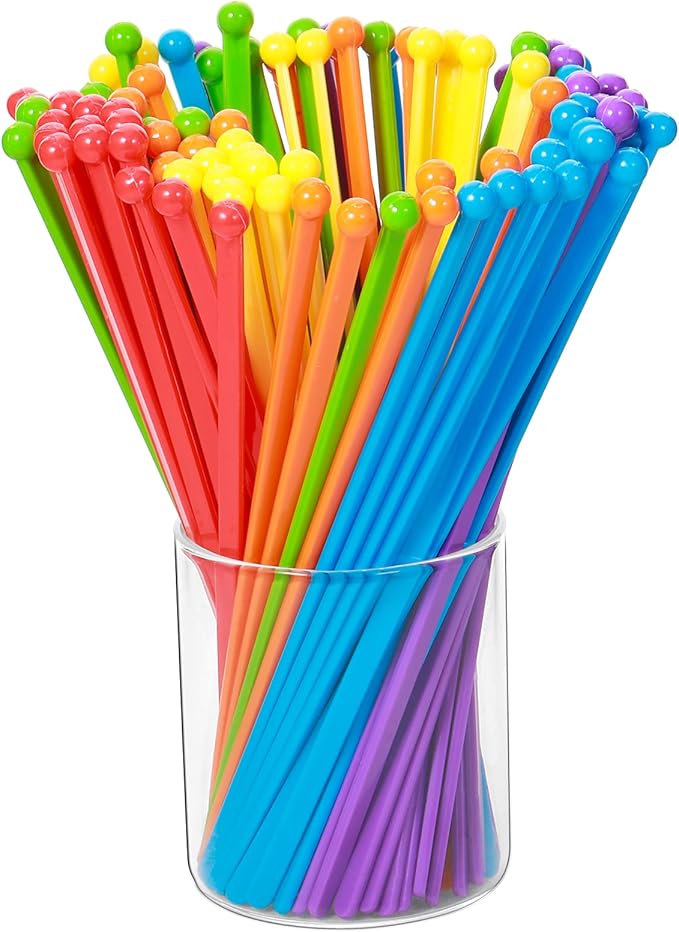
- Plastic sticks
- Black and white paint pens
- Craft glue
Step-by-step Guide
Step 1: Cut out petal shapes from the carton cups. Use eight petals per flower and paint them in soft spring colors. Let dry.
Step 2: Glue the petals in a circle onto a skewer. Top with a painted bead as the center.
Step 3: For added magic, paint tiny bee or ladybug faces on small beads and glue them onto the flowers.
#10. Egg Carton Party Animal Wall Art
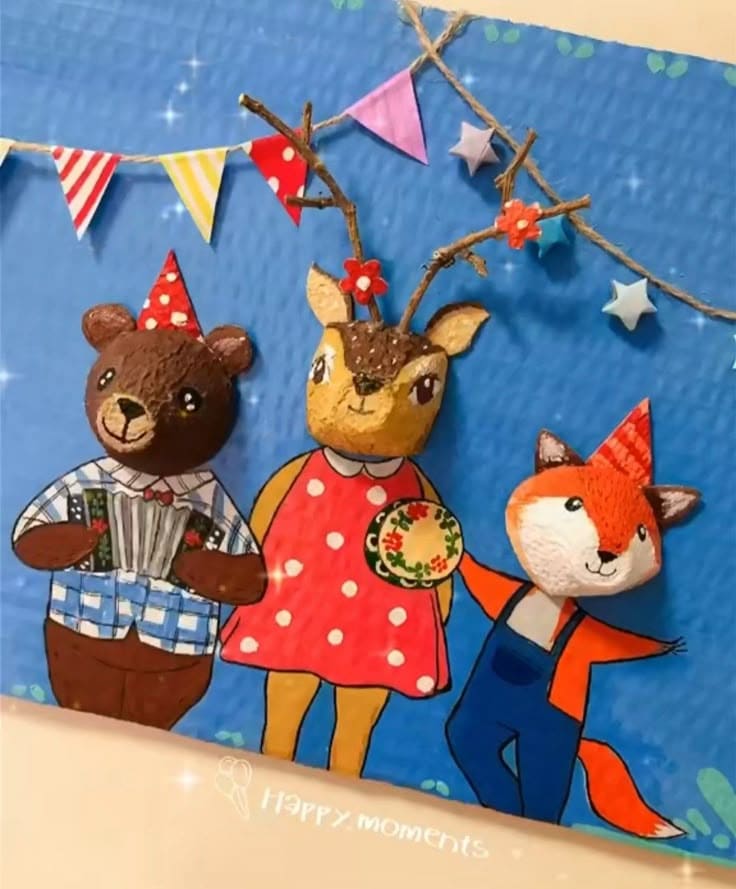
The 3D animal faces, party hats, and hand-drawn outfits give this piece so much personality.
Materials Needed
- 1 pulp egg carton
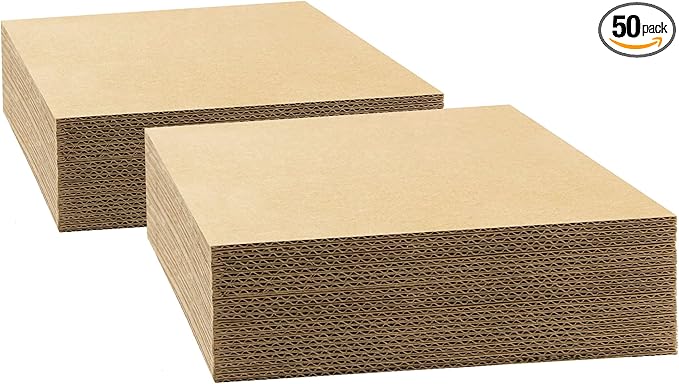
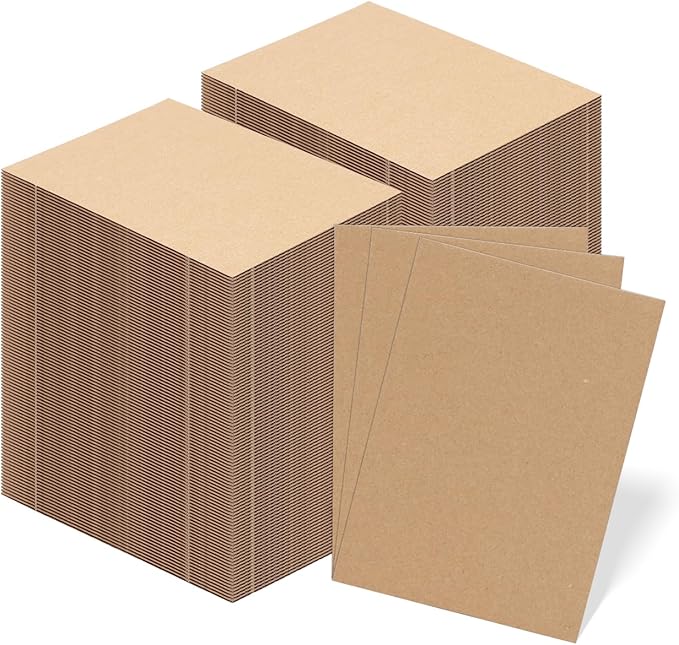
- Thick cardboard (6×9)
- Acrylic paint set
- Twine and paper scraps
- Small twigs
- Glue gun
Step-by-step Guide
Step 1: Cut and paint the egg carton cups to look like animal heads (bear, deer, fox). Let dry fully.
Step 2: Glue the heads onto a painted board background. Draw and paint their bodies directly on the board.
Step 3: Add party hats, a bunting banner, and attach antlers to the deer with glue.
Step 4: Finish with hand-painted details like flowers, clothing, and faces.
#11. Egg Carton Carnival Masks
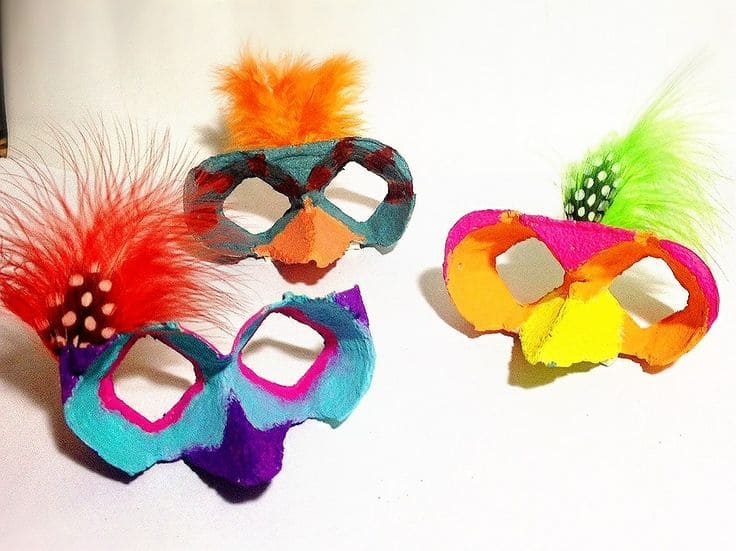
Whether you’re prepping for a party or just sparking some creative play, these egg carton masks offer color, flair, and fun on a budget.
Materials Needed
- 1 egg carton lid
- Acrylic paint in assorted colors
- Craft feathers
- Small scissors
- Craft glue
Step-by-step Guide
Step 1: Cut out two connected egg cups, trimming them into a mask shape. Create eye holes carefully using scissors or a craft knife.
Step 2: Paint the mask base in your chosen colors. Let dry. Then add craft feathers and extra decorations (glitter, stickers, etc.) for flair.
#12. Egg Carton Helicopters

Who knew old egg cartons could take flight, at least in imagination! These mini helicopters are a playful hit, especially for transport-loving kiddos.
Materials Needed
- 1 egg carton cup per helicopter
- Small strip of yellow cardstock
- Acrylic paints (red, black, white, etc.)
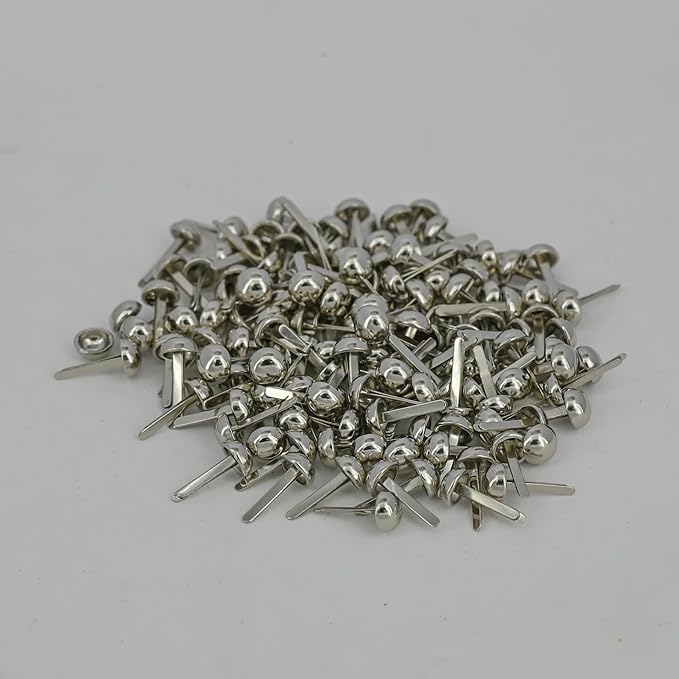
- 1 small paper fastener
- Glue and scissors
Step-by-step Guide
Step 1: Cut out one egg cup for each helicopter body and paint it with bold colors.
Step 2: Create a tail using a strip from the egg carton lid and glue it to the back of the body.
Step 3: Cut two thin yellow strips, cross them into an “X”, and secure the center with a paper fastener.
Step 4: Poke a small hole in the top of the helicopter and insert the fastener so the blades can spin.
#13. Pastel Bunny Buddies From Egg Cartons
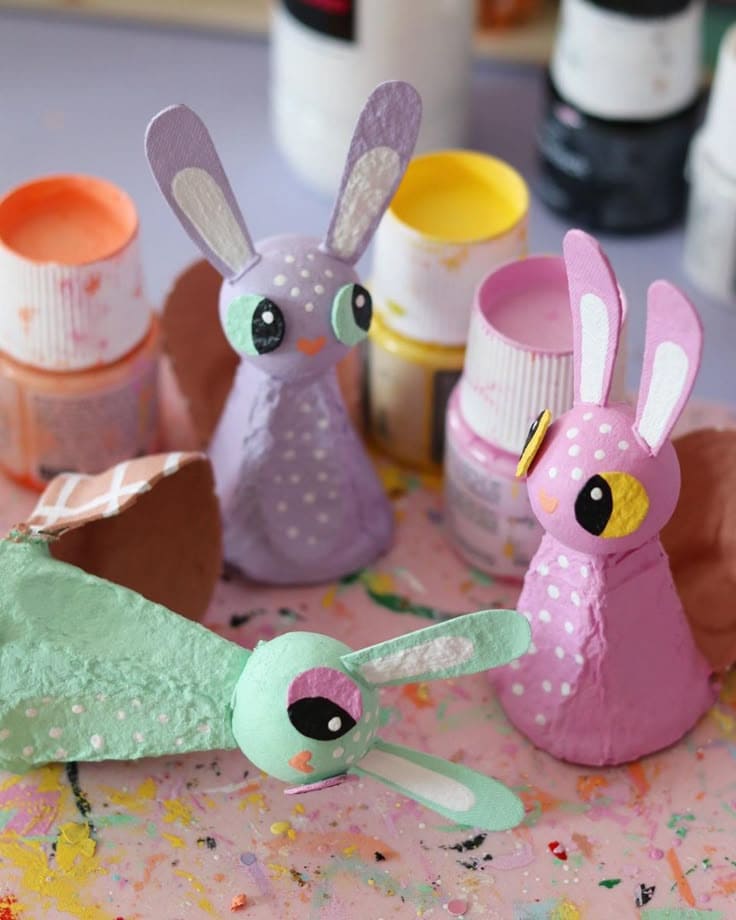
I had so much fun painting them, especially deciding which eye color to give each one. Their tall paper ears and polka dot details bring them to life in the most playful way.
Materials Needed
- 1 pulp-style egg carton
- 1 thick cardstock sheet
- Acrylic paint in pastel shades
- Black and white paint
- Glue gun
- Small scissors
Step-by-step Guide
Step 1: Cut out cone-shaped sections of the egg carton to form the bunny’s body. Paint in your favorite pastel colors.
Step 2: Use cardstock to cut out long bunny ears. Paint and glue them to the back of the head.
Step 3: Paint on big expressive eyes and a cute little nose. Add polka dots or any whimsical details you like.
#14. Egg Carton Crocodile Puppet
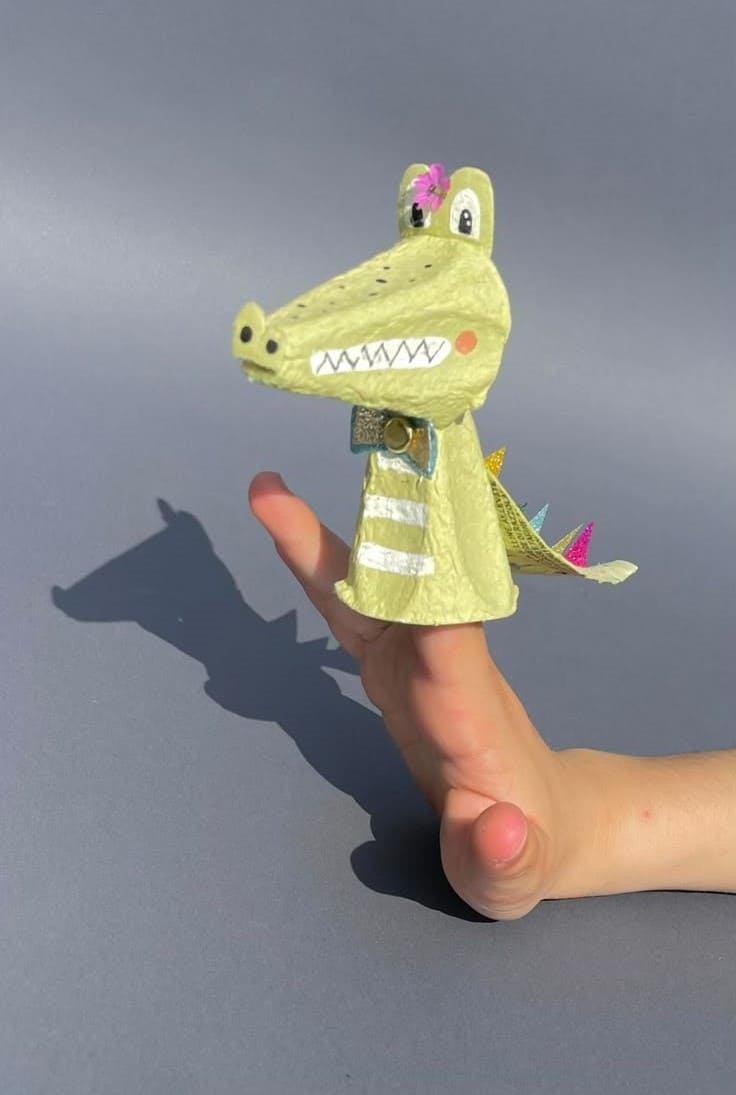
This fun little crocodile craft is a hit with kids! It’s made entirely from repurposed egg cartons, turning everyday waste into a creative finger puppet full of personality.
Materials Needed
- 1 cardboard egg carton
- Acrylic paint (green, white, black, pink)
- A small piece of colored craft foam
- Glitter paper
- Black & white markers
- Small fake flower (optional)
- Glue gun
- Scissors
- Paintbrushes
Step-by-step Guide
Step 1: Cut two pointed sections of the egg carton for the snout and upper jaw. Cut one cone-shaped piece for the body.
Step 2: Paint all parts green and let them dry completely. Use white and black paint for the eyes, teeth, and shirt stripes. Add pink cheeks or a bow decoration as desired.
Step 3: Glue the pieces together to form the crocodile’s head and attach it to the cone-shaped body. Add details like the glitter back spikes and bowtie using glue.
#15. Egg Carton Monsters
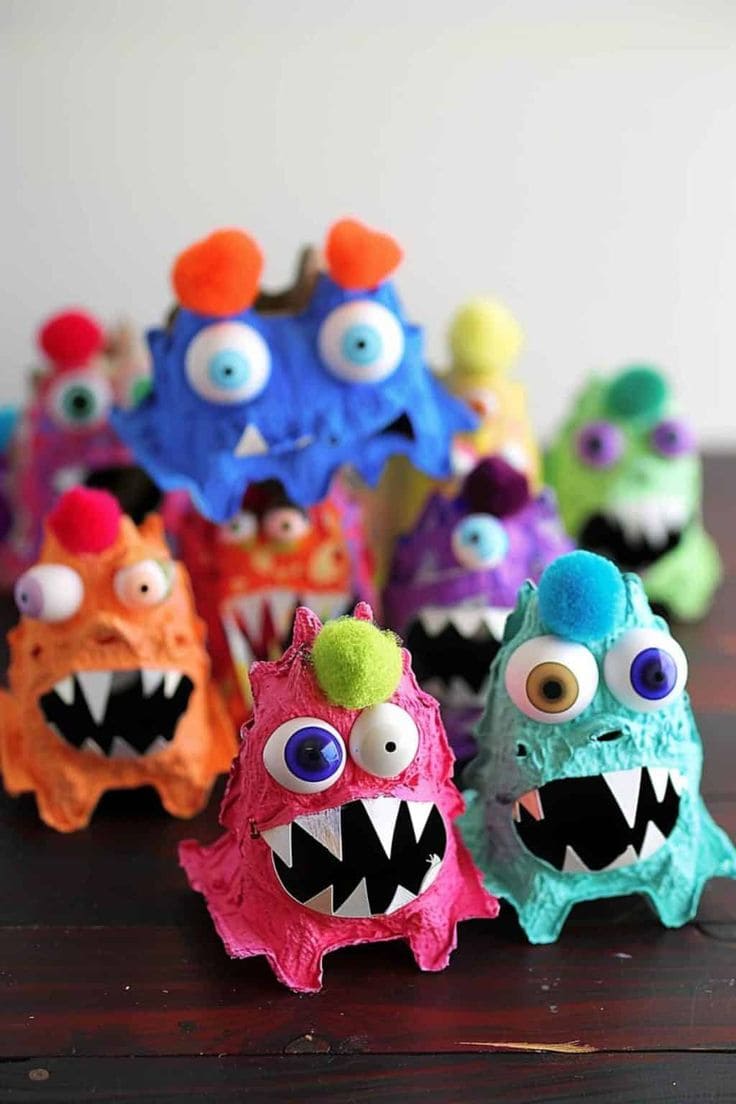
Each one turns out with a personality of its own, silly, spooky, or sweet! Perfect for Halloween crafts, bi activities, or just an afternoon of creative chaos.

Materials Needed
- 1 egg carton cup per monster
- Acrylic paint set
- Googly eyes
- Pom-poms
- White and black paper
- Glue and scissors
Step-by-step Guide
Step 1: Cut out one cup from the egg carton and paint it a vibrant base color. Let dry.
Step 2: Glue on large googly eyes or mix-and-match different sizes for a quirky look.
Step 3: Cut jagged triangles from white paper for teeth and glue them onto the inside edge.
Step 4: Add pom-poms for hair or horns, and draw details with markers or paint.
#16. Egg Carton Ice Cream Cones
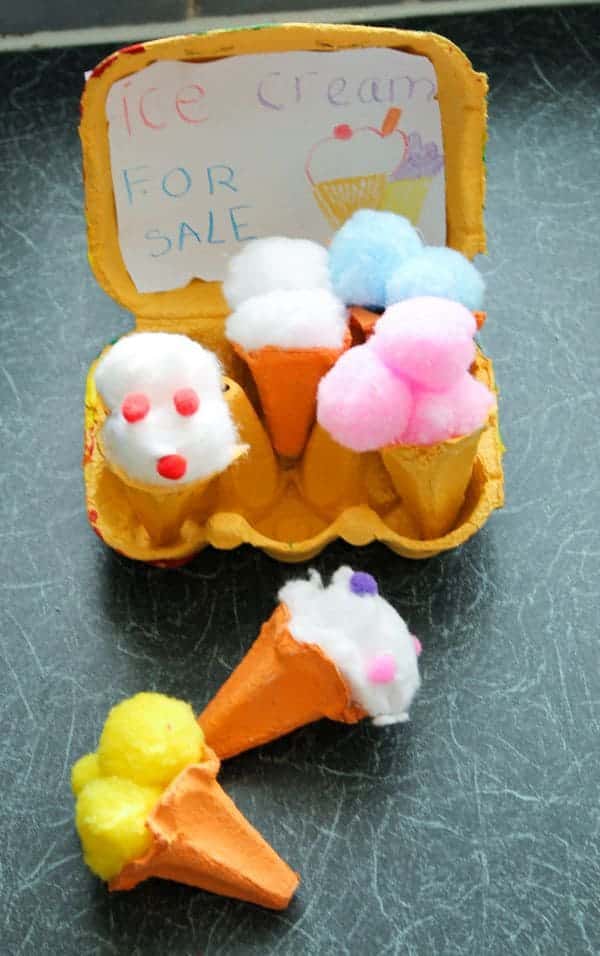
This pretend ice cream stand made from egg cartons is pure childhood magic! It’s imaginative, low-cost, and easy enough for little hands to help.
Materials Needed
- 2 egg cartons
- Cotton balls
- Acrylic paint
- Craft glue and scissors
Step-by-step Guide
Step 1: Cut out each cone shape from the egg carton and trim for a smooth finish. Paint them light brown or tan to resemble cones.
Step 2: Glue cotton balls or pom-poms on top of each cone. You can stack multiple for a fun twist!
Step 3: Add tiny dots of glue and sprinkle on sequins or beads to mimic toppings.
#17. Egg Carton Bumble Bee Hanging Mobile
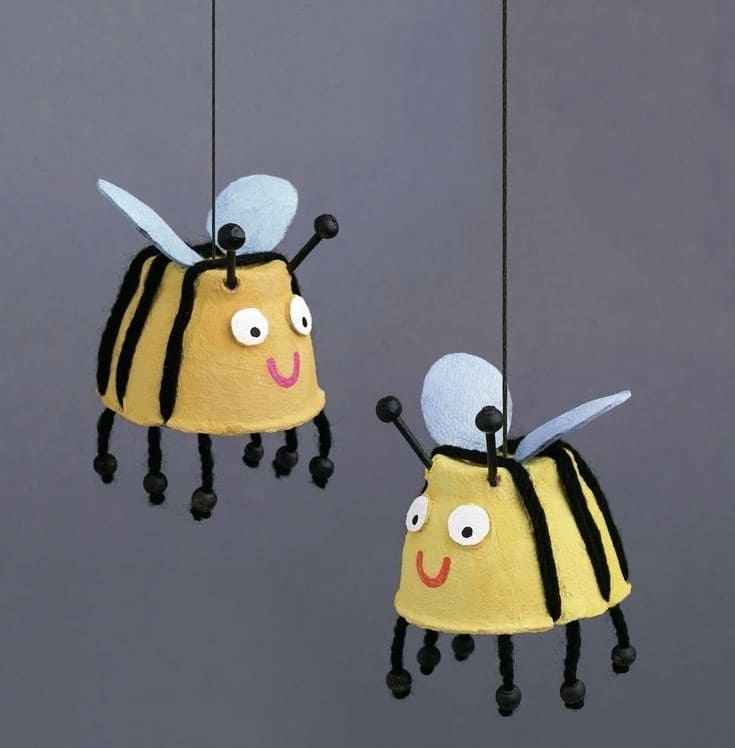
Made from upcycled egg cartons, they’re a great weekend craft for kids, especially for spring or garden-themed decor.
Materials Needed
- 1 egg carton cup (per bee)
- Yellow and black acrylic paint
- Light blue felt
- Black pipe cleaners (3 per bee for antennae)
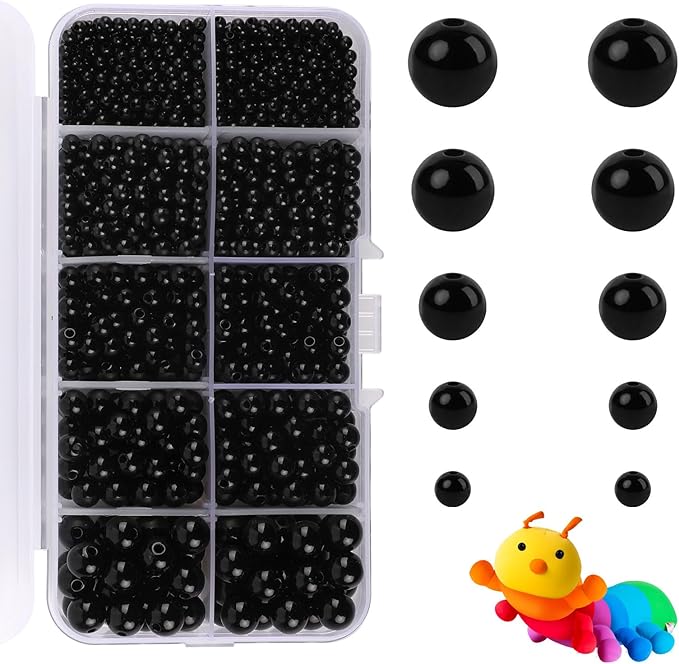
- 8 small black beads per bee
- Googly eyes
- Black string
- Craft glue
- Scissors and a small pin
Step-by-step Guide
Step 1: Cut out a single cup from the egg carton and paint it yellow. Once dry, add black stripes using a fine brush or marker.
Step 2: Glue on googly eyes and draw a smile, then cut small wing shapes from blue felt and glue them to the top of the bee.
Step 3: Poke small holes on the top for antennae and six around the bottom for legs. Thread black pipe cleaners through, knotting or gluing them to secure.
Step 4: Add small beads to the ends of legs and antennae. Attach a thread to the top and hang your buzzing buddy wherever it’ll bring smiles.
#18. Egg Carton Sitting Chickens
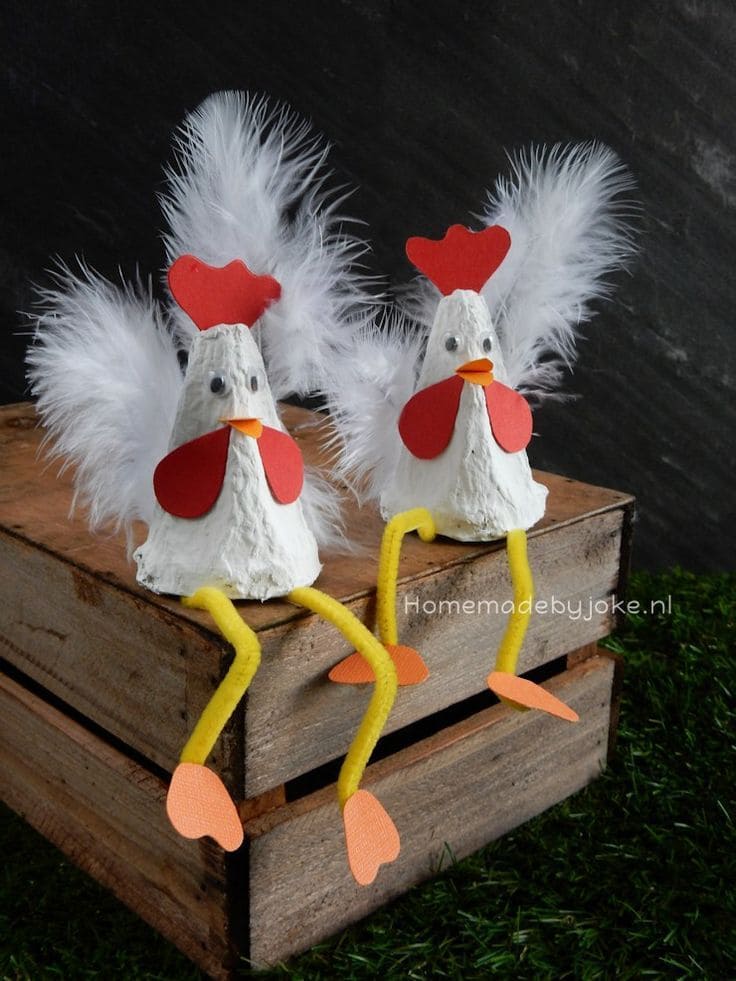
These quirky little chickens are just clucking adorable! They’re made from the pointed cones of an egg carton and brought to life with fluffy wings, googly eyes, and dangly pipe cleaner legs.
Materials Needed
- 2 cone-shaped sections from a cardboard egg carton
- White acrylic paint
- Googly eyes
- Red, orange, and yellow cardstock
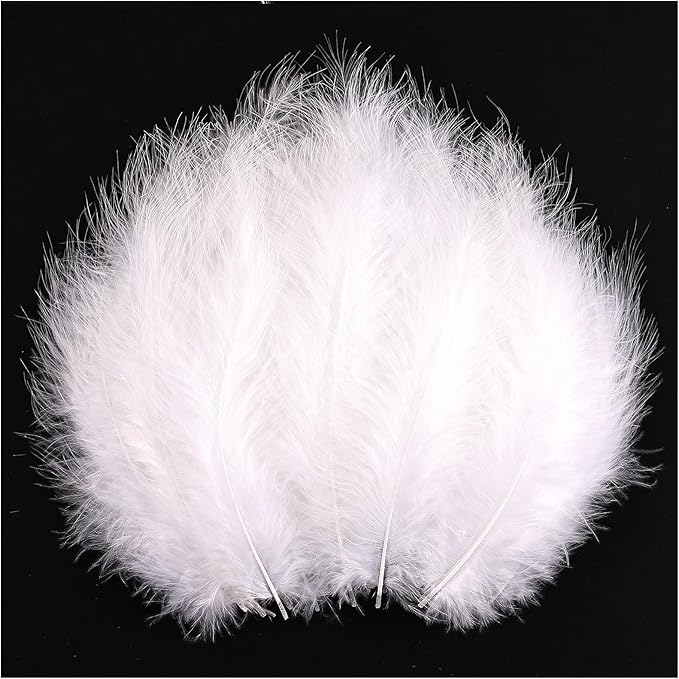
- White feathers
- Yellow pipe cleaners
- Scissors and craft glue
Step-by-step Guide
Step 1: Cut out and paint the cone sections white. Let dry, then glue on googly eyes, red foam for comb and wattles, and orange for the beak and feet.
Step 2: Cut pipe cleaners into legs, bend slightly, and glue them inside the cone.
Step 3: Finish by attaching feathers to the back for wings.
#19. Egg Carton Flower Wall Art
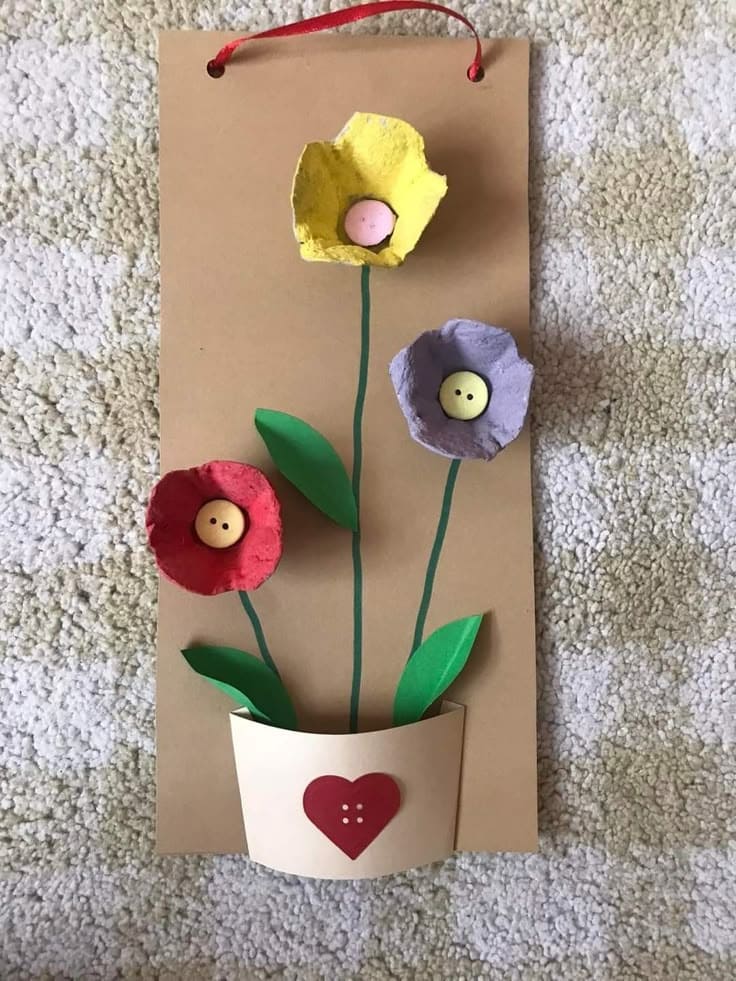
I made this with leftover buttons and paper scraps, it cost almost nothing but looks like a sweet store-bought gift.

Materials Needed
- 3 egg carton cups
- Cardstock (approx. 4″x10″)
- Green and brown scrap paper
- Acrylic paint
- 3 buttons
- Scissors and glue
- Green marker
- Hole punch and ribbon
Step-by-step Guide
Step 1: Paint the egg carton cups in bright flower colors and glue a button in the center of each.
Step 2: Use green marker to draw stems on the cardstock, then glue on leaves cut from green paper.
Step 3: Cut and shape a small paper pot, decorate with a heart or any design, and glue to the bottom.
Step 4: Punch two holes at the top, thread ribbon through, and hang your floral art proudly.
#20. Egg Carton Lobster Craft
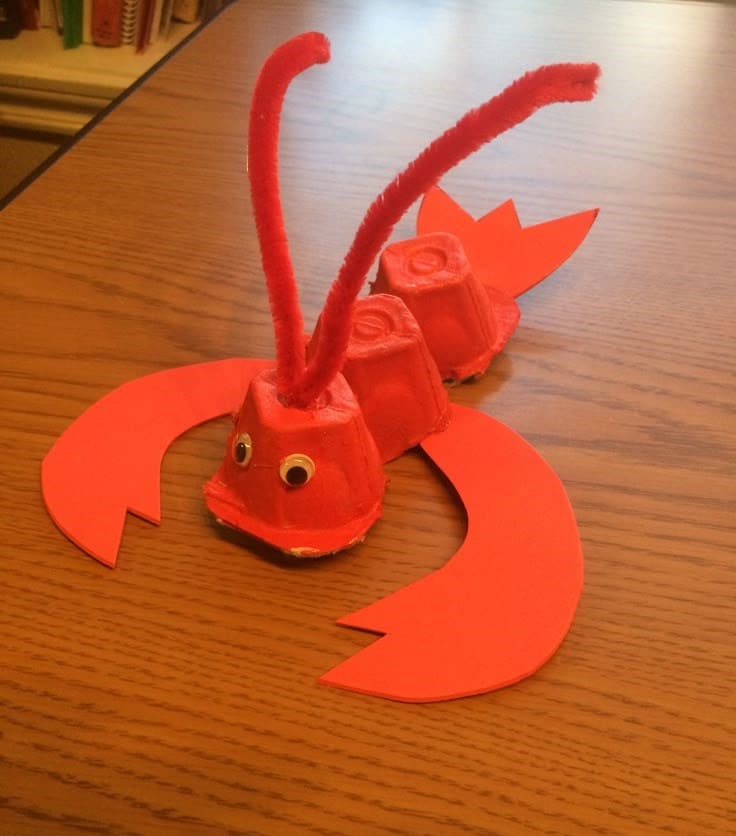
Turn your kitchen recycling into ocean fun with this bold red lobster made from a humble egg carton. It’s a playful, hands-on activity that introduces marine life and helps kids build fine motor skills.
Materials Needed
- 3 cups from a cardboard egg carton
- Red acrylic paint and paintbrush
- 2 red pipe cleaners
- 2 googly eyes
- Red construction paper
- Scissors
- Glue
Step-by-step Guide
Step 1: Cut out three egg carton cups in a row and paint them completely red. Let dry.
Step 2: Cut out two large claws and a tail from red construction paper. Glue the claws on either side of the front cup and the tail to the back.
Step 3: Curl two red pipe cleaners and poke them into the top of the head for antennae.
Step 4: Add googly eyes to the front cup to bring your lobster to life.
#21. Egg Carton Chicken and Chick Nest
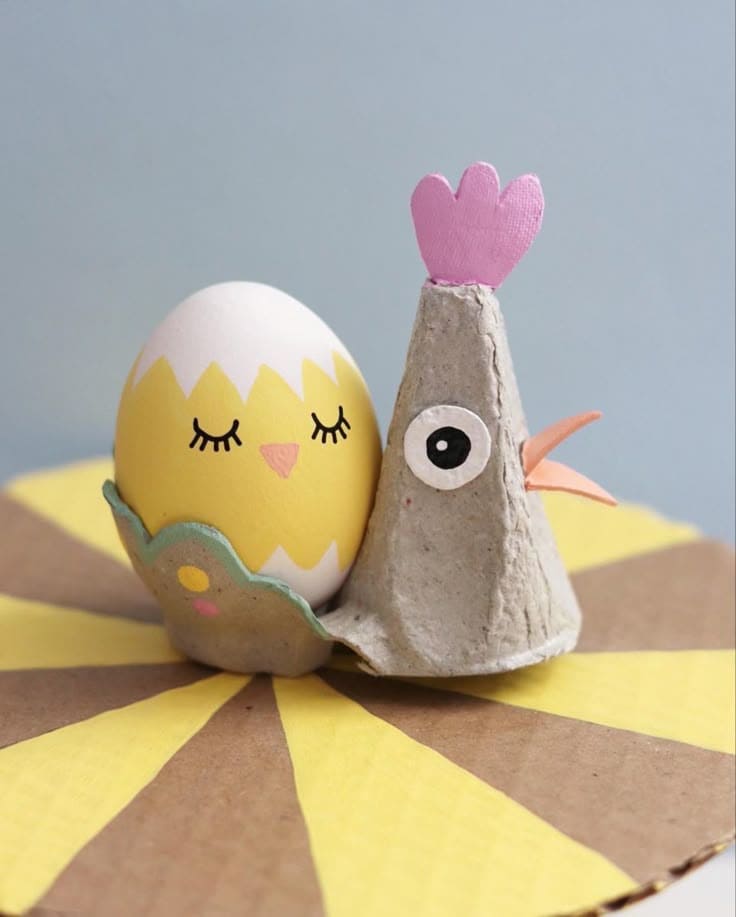
This sweet little nest duo, featuring a wide-eyed mama hen and a sleepy baby chick, is a heart-melting Easter craft that adds charm to any table or shelf.

Materials Needed
- 2 egg carton sections
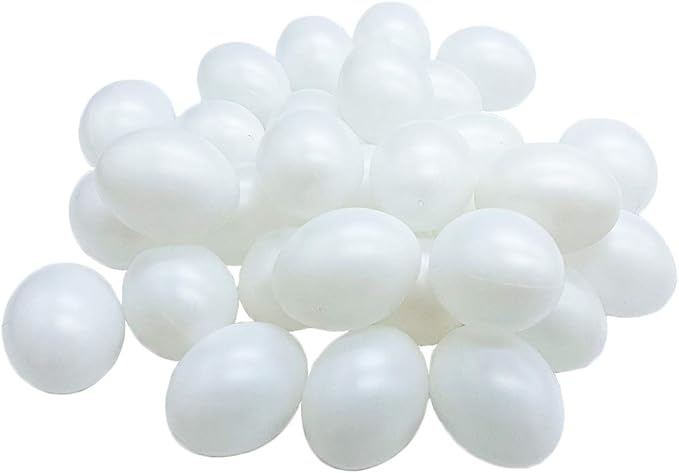
- 1 plastic egg
- Acrylic paint (yellow, pink, white, black)
- Small brush and fine liner
- Colored papers
- Glue
Step-by-step Guide
Step 1: Cut out a rounded base from one egg cup to hold the egg. Paint the top edge to resemble a cracked shell.
Step 2: Paint your egg yellow with a white jagged border and add a cute sleeping face using a thin brush or pen.
Step 3: Shape the tall egg carton cone into a hen with a painted pink comb and glued-on paper beak and eye.
#22. Egg Carton Flower Garland
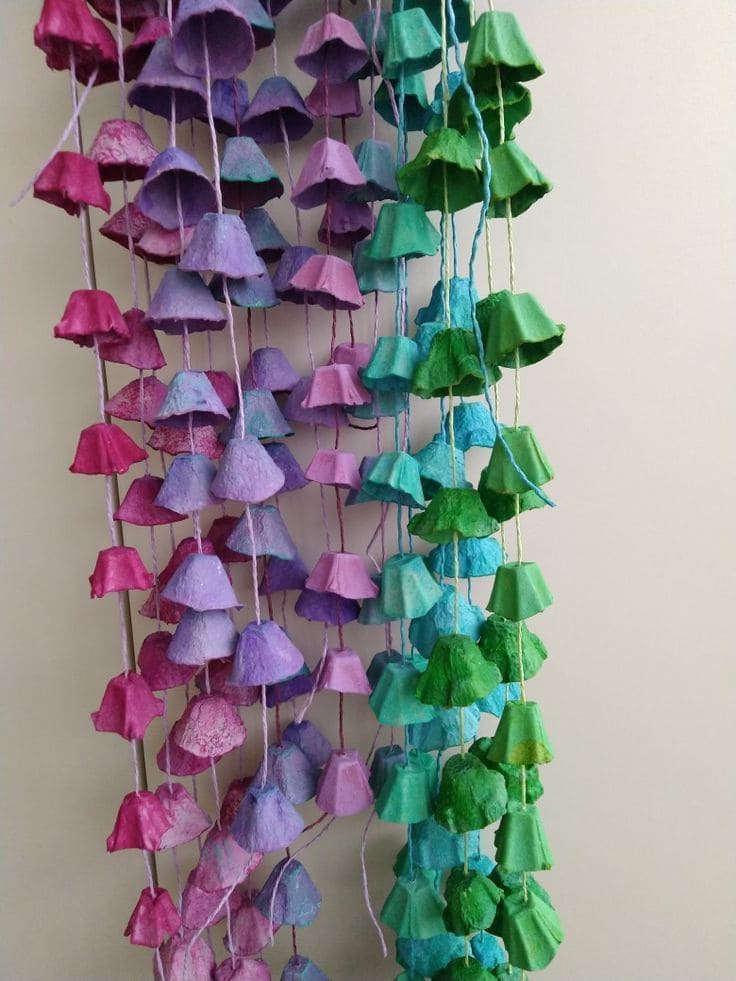
Each bloom is hand-painted and strung together to create a soft, fluttering cascade that sways gently with the breeze.
Materials Needed
- 3 egg cartons (about 40–50 pieces total)
- Acrylic paint and paintbrushes
- Twine (approx. 2–3 meters long)
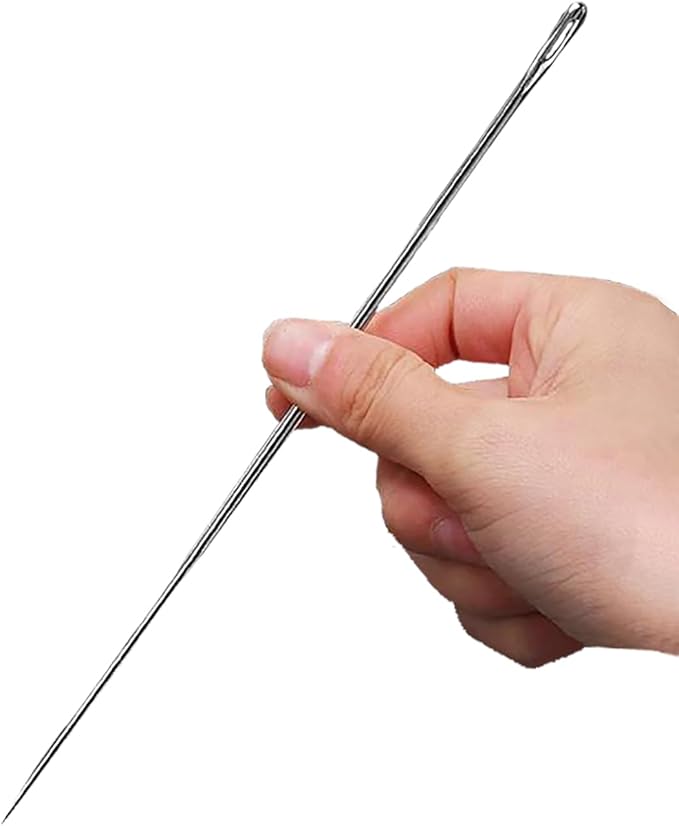
- Large sewing needle
- Scissors
Step-by-step Guide
Step 1: Cut out each cup section from the egg cartons and trim the edges into petal shapes to resemble small bell flowers.
Step 2: Paint each flower in different colors. Mix and match pastel tones or go rainbow-bright. Let dry completely.
Step 3: Use a needle to poke a small hole in the center of each flower, then thread the twine through the holes, spacing flowers a few inches apart. Tie knots under each flower to keep them from sliding.
Step4: Hang the garland vertically from a curtain rod or across the wall like bunting.
#23. Egg Carton Crocodile Portrait
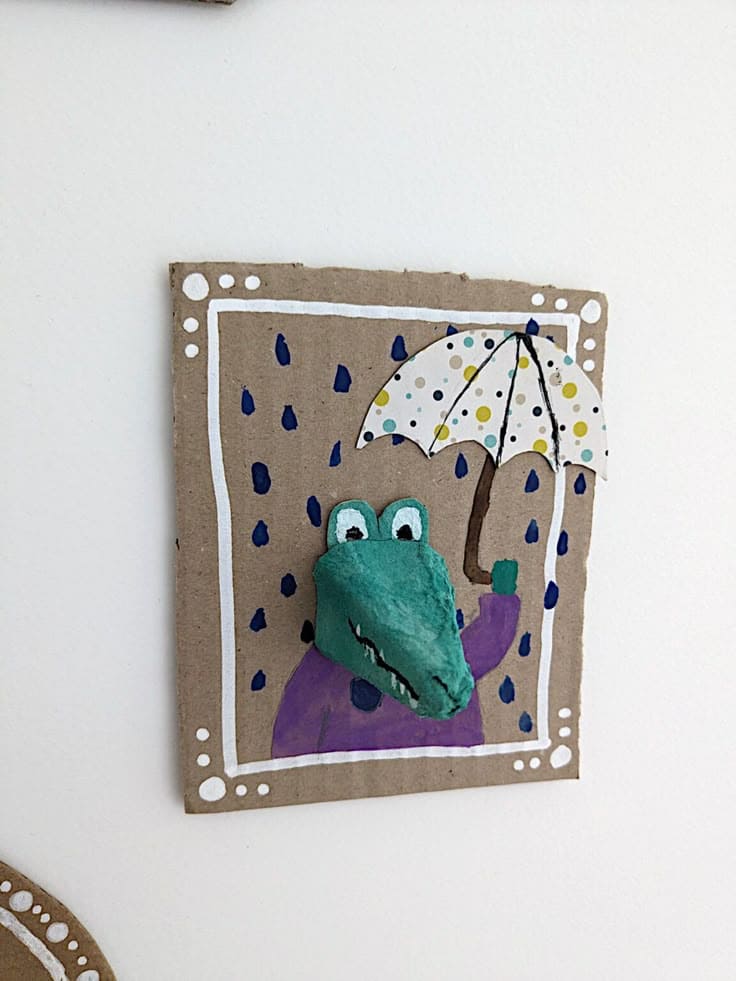
How charming is this 3D crocodile art? This quirky character pops right out of the cardboard background, proudly holding an umbrella in the rain.
Materials Needed
- 1 egg cup section from a cardboard egg carton
- Acrylic paint set
- Thick cardboard piece (5″x7″)
- Craft glue
- Scrap paper
- Fine-tip black marker
- Paintbrushes
Step-by-step Guide
Step 1: Cut and paint the egg cup green to resemble a crocodile’s snout. Add eyes with paint.
Step 2: On the cardboard, draw and paint the crocodile’s body and background (raindrops, frame, etc.).
Step 3: Create a paper umbrella and attach it to the crocodile’s hand with glue, then glue the painted snout in place to complete the 3D effect.
#24. Egg Carton Bell Ornament
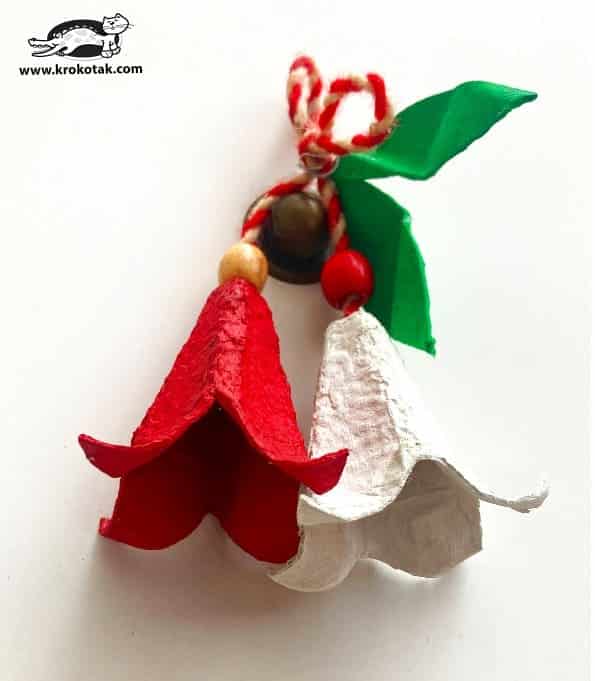
Inspired by Martenitsa colors, the red and white combo represents health and happiness. Lightweight, festive, and totally upcycled!
Materials Needed
- 2 egg carton cups
- Acrylic paint (red and white)
- Red and white twine
- 2 wooden beads
- Green cardstock
- Glue, scissors
Step-by-step Guide
Step 1: Cut out two cone-shaped sections from the egg carton and trim them into floral bell shapes.
Step 2: Paint one cup red and the other white. Let them dry completely.
Step 3: Thread each bell with twine, adding a bead inside for the clapper. Tie the strings together.
Step 4: Cut two leaf shapes from green cardstock and glue to the top.
#25. Egg Carton Mermaid Danglers
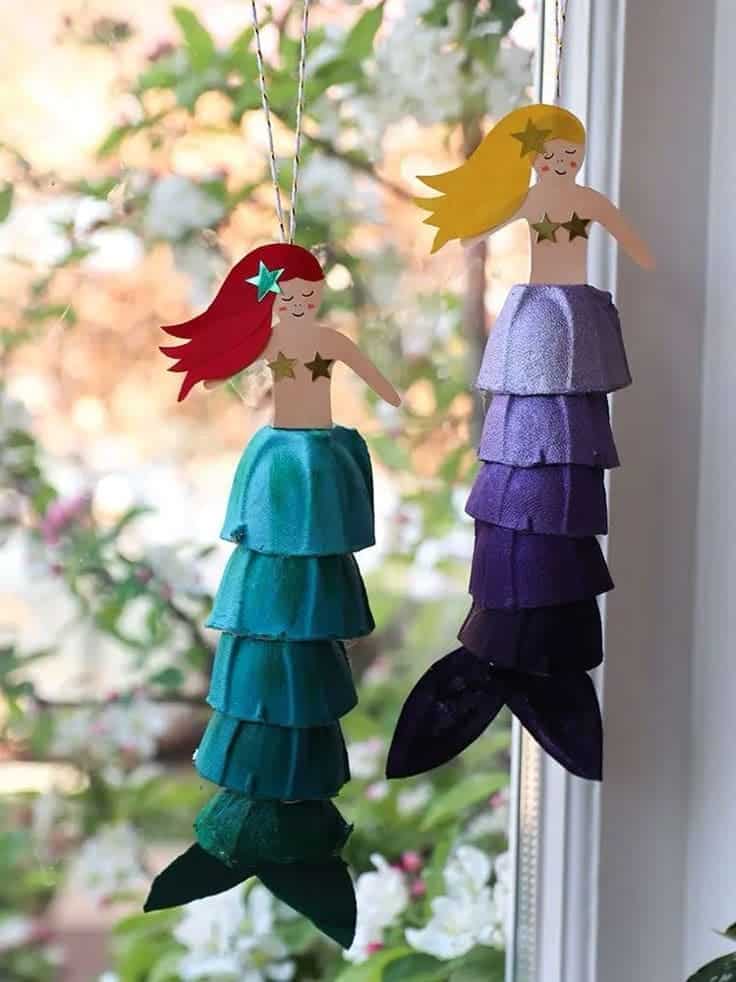
These adorable mermaid crafts are full of charm and shimmer, made from simple egg cartons turned magical with layered tails and dreamy hair.
Materials Needed
- 5 egg carton cups per mermaid
- Paint in gradient shades (blues, purples, greens)
- 2 cardstock sheets
- String
- Scissors, glue, star stickers
- Optional: glitter, tiny gems
Step-by-step Guide
Step 1: Cut and paint several egg carton cups in different tones for the tail layers. Let dry.
Step 2: Glue the cups vertically, slightly overlapping for a fish-scale effect. Add a tail fin cut from carton or felt.
Step 3: Create a mermaid upper body from cardstock. Decorate with drawn-on features and starfish tops.
Step 4: Attach string at the top for hanging. Glue the body on top of the tail stack.
#26. Colorful Egg Carton Fish
These vibrant fish are perfect for preschoolers or anyone diving into ocean-themed crafts. Their cheerful colors and funky pipe cleaner tails make them an instant mood-booster.
Materials Needed
- Egg carton cups (1 per fish)
- Acrylic paint in various colors
- Googly eyes
- 2 pipe cleaners per fish
- Craft glue
- White paint pen
Step-by-step Guide
Step 1: Cut the cups out of the egg carton and trim the edges smoothly. Paint each one in a bold color and let dry.
Step 2: Twist pipe cleaners into fish tails and fins, then poke or glue them into the sides of the cup.
Step 3: Glue on googly eyes, then use a paint pen or marker to draw little gills, scales, and a mouth.
#27. Egg Carton Crabs
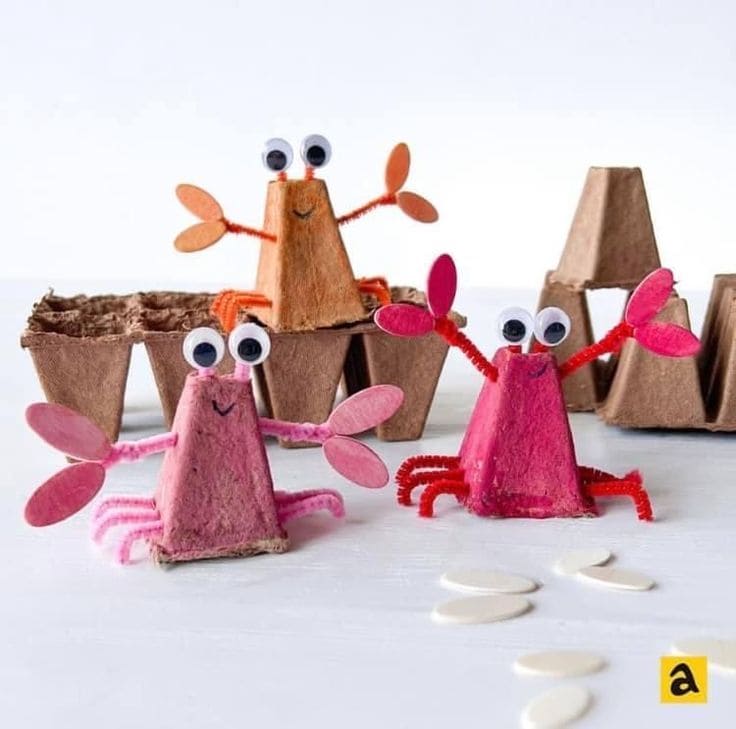
Using just a few household supplies, you can turn recycled materials into playful sea creatures.
Materials Needed
- 1 egg carton
- Pipe cleaners in red, orange, or pink
- Googly eyes
- Acrylic paint
- Craft glue
- Colored paper
- Scissors
Step-by-step Guide
Step 1: Cut out cone-shaped sections from an egg carton. Paint each cone your desired crab color and let dry.
Step 2: Twist and shape pipe cleaners to form legs and arms. Glue them to the inside edges of the cone base.
Step 3: Cut out small oval shapes from colored paper to create claws. Attach to the pipe cleaner arms with glue.
Step 4: Finish by adding googly eyes to the top with glue. You can draw a smile or eyebrows to give your crab some extra personality!
#28. Egg Carton Peppa and George Pig Scene
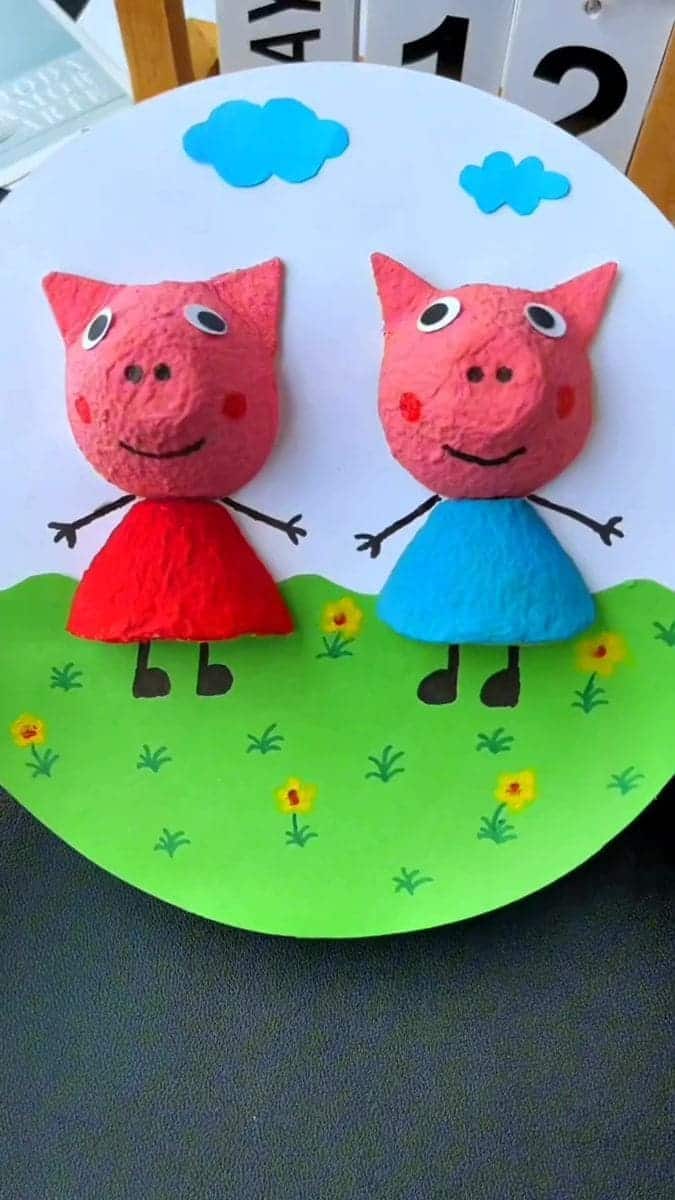
If your kids love Peppa Pig, this easy egg carton craft will absolutely delight them. With a bit of paint and imagination, you can transform simple materials into 3D cartoon fun!
Materials Needed
- 1 egg carton
- Pink acrylic paint
- Colored construction paper (blue, green, red, black, white)
- Black marker
- Glue stick
- Scissors
- Googly eyes
Step-by-step Guide
Step 1: Cut two egg carton cups for the heads. Trim pointed ears from the rim edges and paint everything pink. Let dry.
Step 2: On a white paper circle, draw grass, clouds, and flowers to create a cheerful background. Cut and glue green hills to form the base.
Step 3: Add bodies with colored paper (red for Peppa, blue for George), and draw legs, arms, and shoes directly on the paper.
Step 4: Glue the dry heads in place. Add googly eyes, a drawn mouth, and a snout using a marker or paint dots for nostrils.
#29. Egg Carton Ant Craft
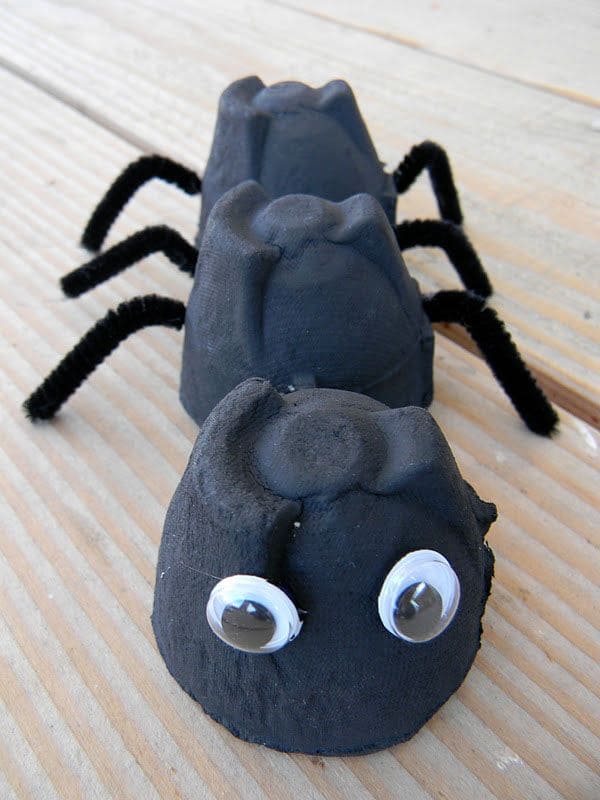
This creepy-cute project is perfect for bug-themed lessons, summer crafts, or just a fun afternoon with kids.
Materials Needed
- 3 egg carton cups
- Black acrylic paint
- 3 black pipe cleaners
- Googly eyes
- Craft glue
- Scissors
- Small paintbrush
Step-by-step Guide
Step 1: Cut out a row of three egg carton cups still connected. Paint the entire surface black and let it dry completely.
Step 2: Carefully poke 3 holes on each side of the middle and back cups. Cut pipe cleaners into thirds, and thread them through to make 6 legs. Bend to shape.
Step 3: Glue googly eyes to the front cup, turning it into the ant’s head.
#30. Egg Carton Jellyfish Art
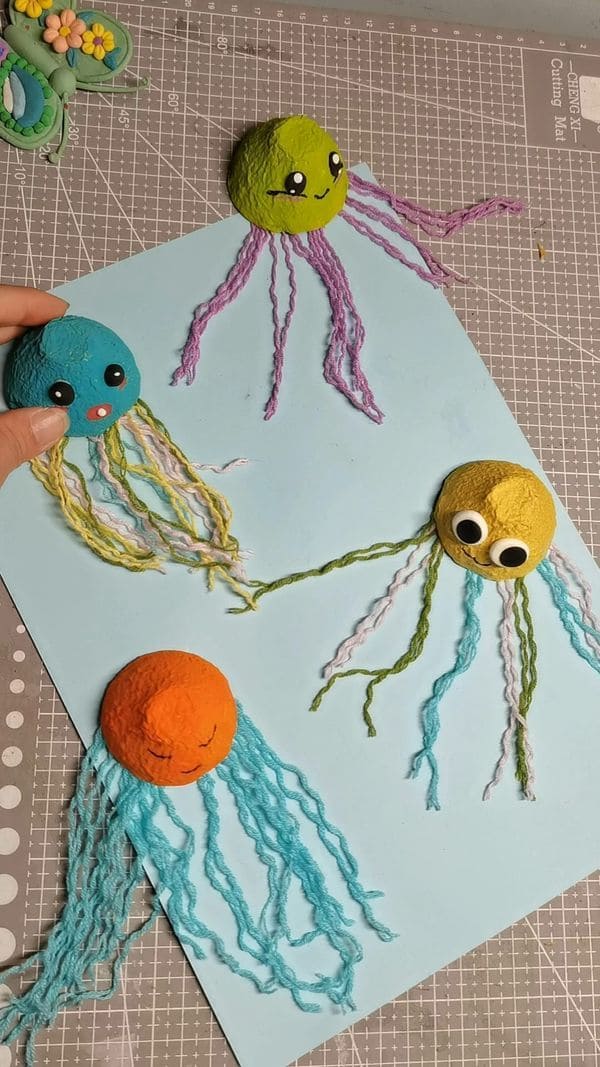
With soft yarn tentacles and expressive little faces, they’re perfect for under-the-sea themes, wall displays, or rainy day fun.
Materials Needed
- 4 egg carton tops
- Yarns
- Acrylic paint & brushes
- Googly eyes
- Glue gun
- 1 light blue cardstock sheet
Step-by-step Guide
Step 1: Cut the dome-shaped cups from the egg carton and paint them bright colors. Let dry completely.
Step 2: Cut several yarn strands (10–15 cm each) and knot or glue them inside the cups for jellyfish tentacles.
Step 3: Add eyes for each jellyfish, then mount onto blue cardstock to make an oceanscene.