DIY driftwood home décor ideas are the perfect way to bring a touch of the beach into your living space while keeping things simple, natural, and stylish.
Driftwood has a raw beauty that feels authentic and organic. Its weathered texture and soft tones can easily warm up any room, turning everyday items into unique conversation pieces.
In this list, you’ll discover 26 easy DIY driftwood projects you can make for your home. From planters and candle holders to wall art and wind chimes, each idea shows how versatile driftwood can be in decorating.
You can collect pieces straight from the beach, repurpose old wood, or even buy ready-made driftwood at a shop. However you source it, these projects will help you capture the beauty of the ocean and enjoy it in your home year-round.
This article contains affiliate links. If you purchase through them, I may earn a small commission at no extra cost to you. Thank you for your support!
#1. Driftwood Candle Holder

I made one as a centerpiece for my coffee table, and it quietly steals the show every evening when I light the candle.
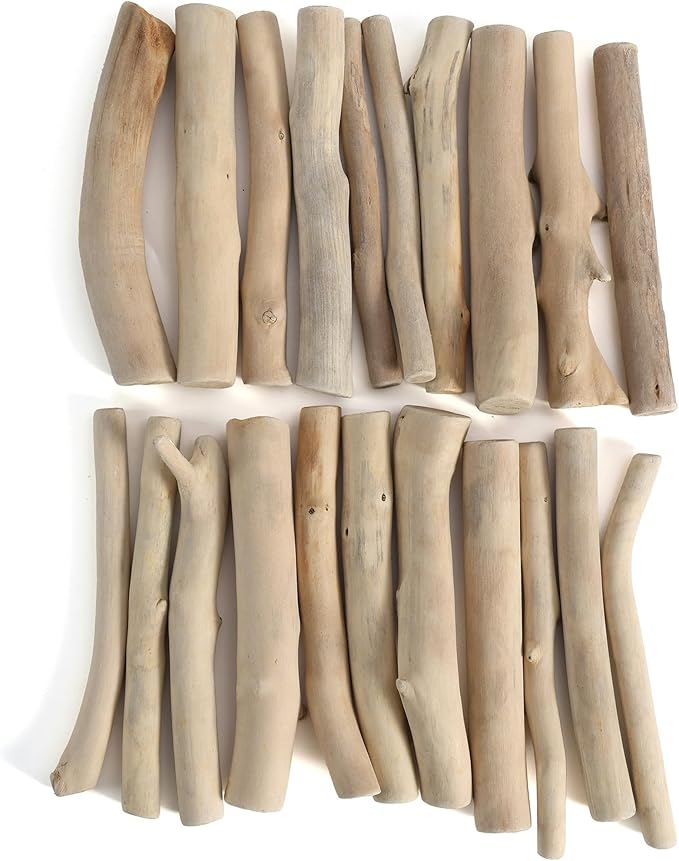 SHOP DRIFTWOOD PIECES
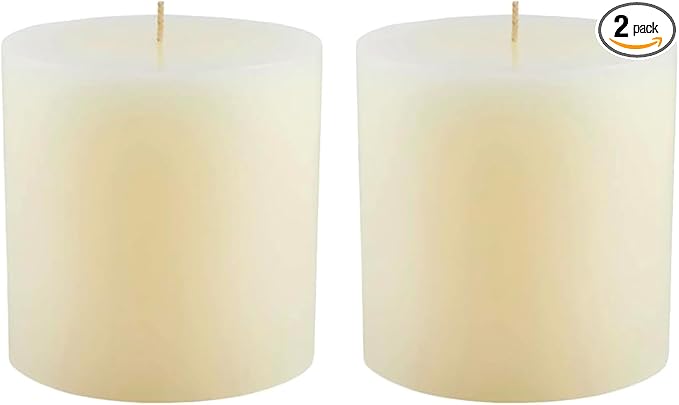 SHOP PILLAR CANDLE
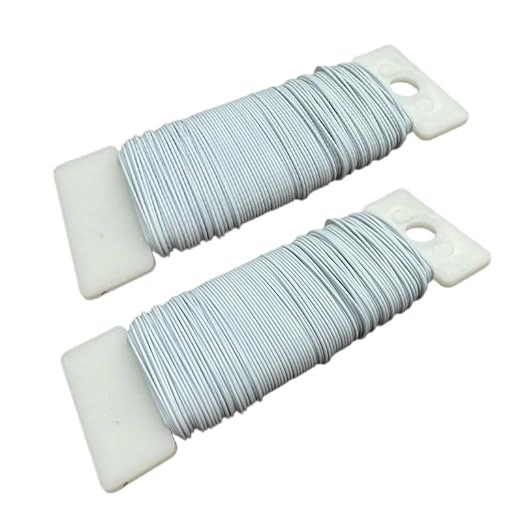 SHOP FLORAL WIRE
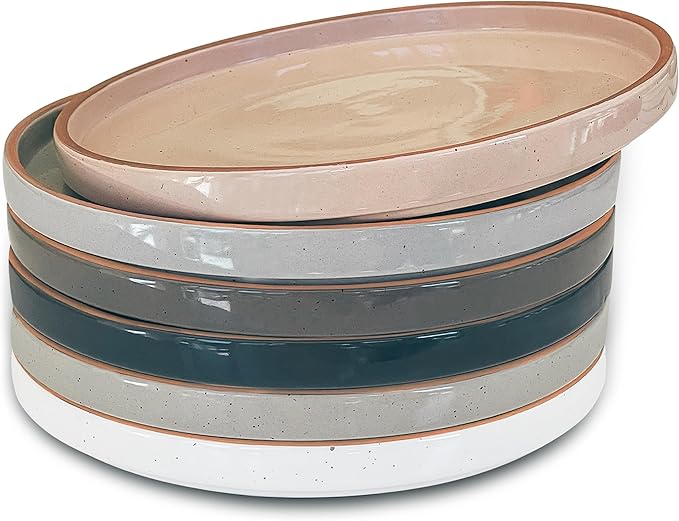 SHOP CERAMIC COASTER PLATE
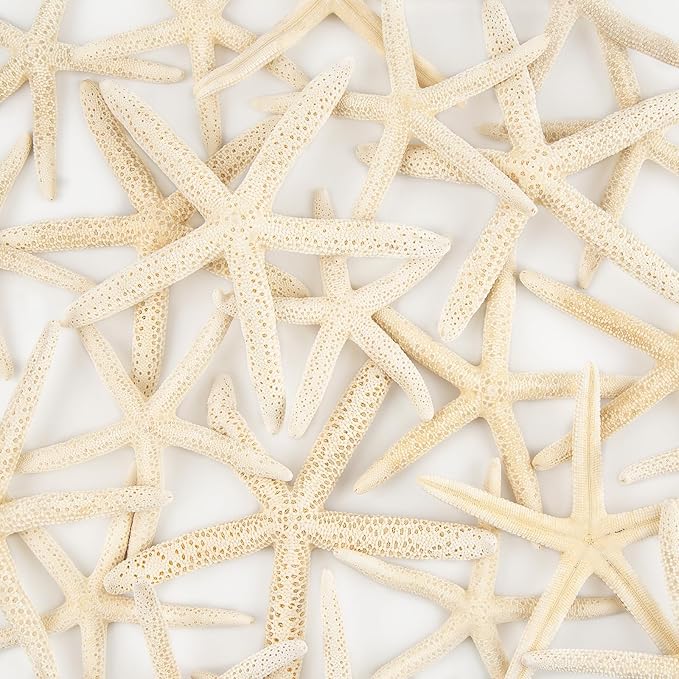
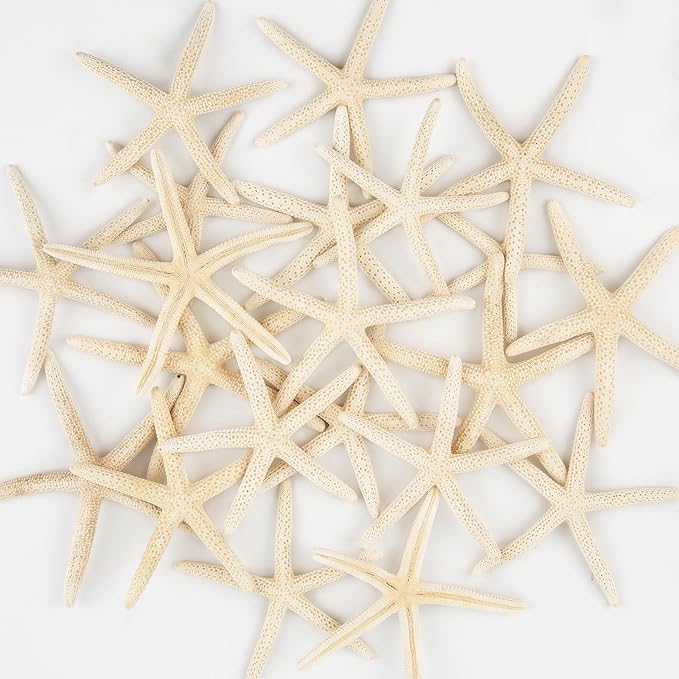 SHOP DECORATIVE STARFISH
Materials Needed
- 20 driftwood pieces (approx. 4–5 inches long)
- Thick pillar candle (around 3.5–4 inches in diameter)
- Floral wire
- Ceramic coaster plate (at least 6 inches wide)
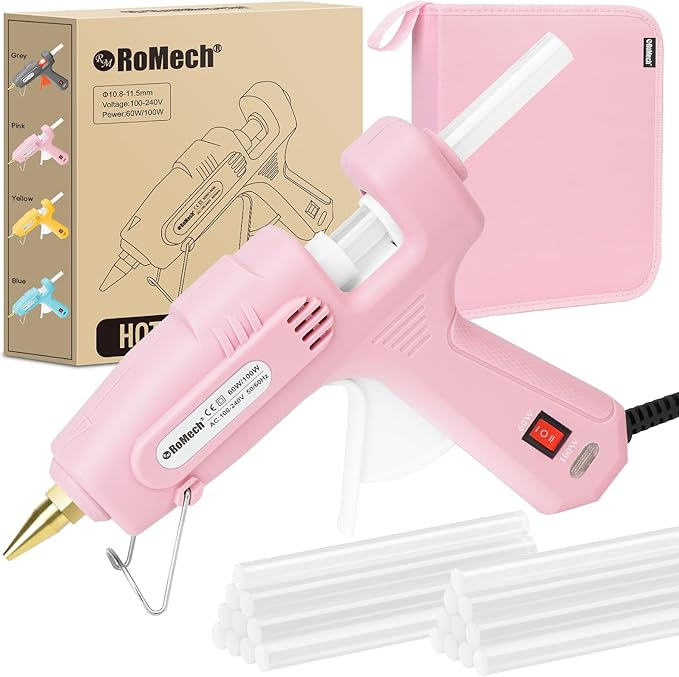
- Hot glue gun (optional)
- Decorative starfish
Step-by-step Guide
Step 1: Place your candle on the center of your coaster plate. Begin arranging your driftwood pieces upright around the candle like a mini fence.
Step 2: Once you’re happy with the arrangement, start wrapping the floral wire around the driftwood to secure them together. Wrap it about 2–3 times, spacing each loop evenly.
Step 3: If you prefer extra stability, dab a small amount of hot glue at the base of each piece of driftwood before pressing it onto the plate.
Step 4: Add your decorative starfish to the front by gently tying or gluing it in place. It gives that final beachy touch.
#2. DIY Driftwood Orb Home Decor
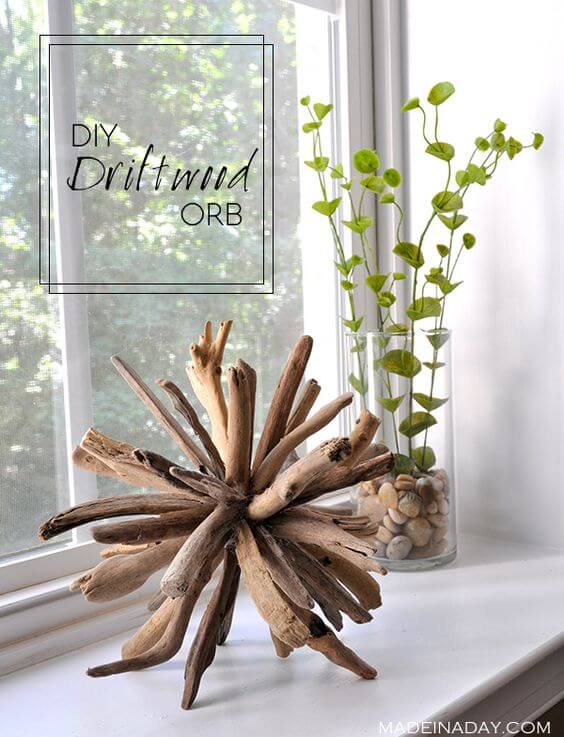
I remember making mine after a beach walk, hands full of driftwood treasures, not knowing it would turn into one of the most complimented items in my home.
Materials Needed
- 30 driftwood pieces (5–8 inches long)
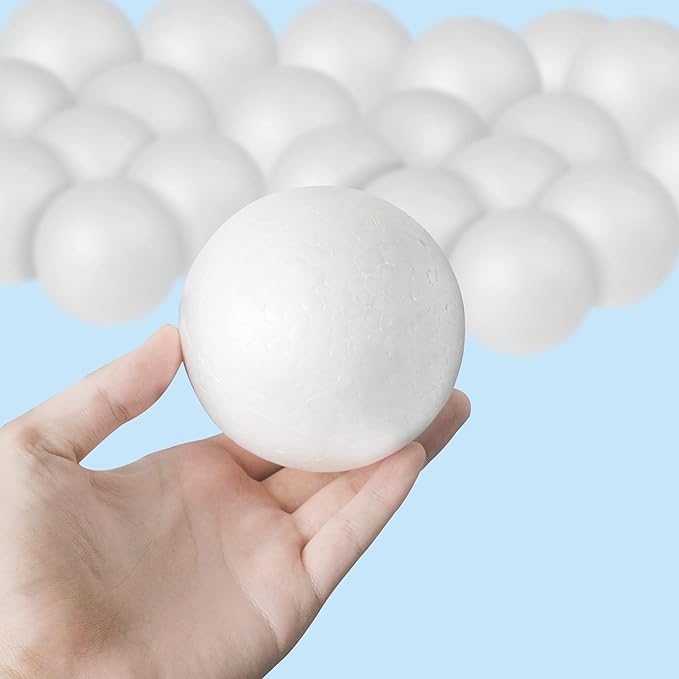
- 4″ styrofoam ball
- Hot glue gun and plenty of glue sticks
- Brown acrylic paint (optional)
Step-by-step Guide
Step 1: If your base is white styrofoam and you want it to blend better, paint it with brown acrylic paint and let it dry completely.
Step 2: Sort your driftwood pieces by length and width. Start by gluing the longer ones into the sphere at opposite points to form an “axis.” This helps balance your orb.
Step 3: Begin layering in more driftwood, turning the base as you go to keep the shape symmetrical. Press each piece firmly into the glue and let it set before adding the next.
Step 4: Fill in gaps with shorter or more curved pieces to create a dense, rounded shape. Step back frequently to check the orb’s balance and adjust.
#3. Gorgeous Beach Bedroom Decor Idea
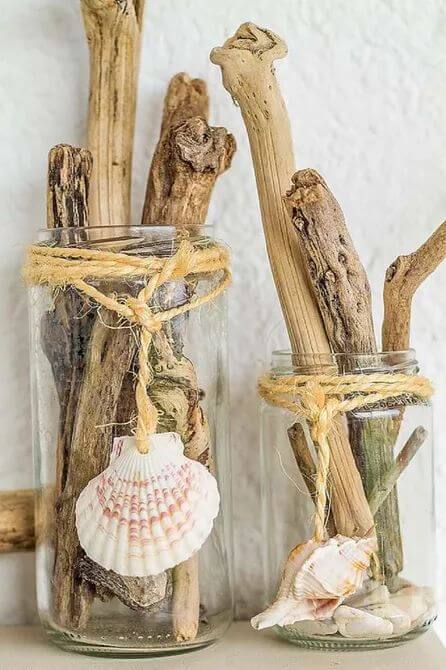
This project is pure shoreline poetry. It’s a beautiful reminder that the most striking decor doesn’t need to be complicated.
Materials Needed
- 2 clean, clear glass jars
- 6 assorted driftwood sticks per jar (6–12 inches)
- Natural jute twine
- Seashells
- Hot glue gun (optional)
Step-by-step Guide
Step 1: Choose jars of varying heights for visual interest. Clean them thoroughly and remove any labels.
Step 2: Fill each jar with an assortment of driftwood sticks. Angle some pieces for a casual, natural look. Let the driftwood stand or lean inside.
Step 3: Wrap twine around the jar necks several times and tie it off in a secure knot or bow. Tuck the ends behind or leave them loose for charm.
Step 4: Use hot glue to attach shells or small pebbles to the twine or directly to the jar.
#4. Driftwood Vase
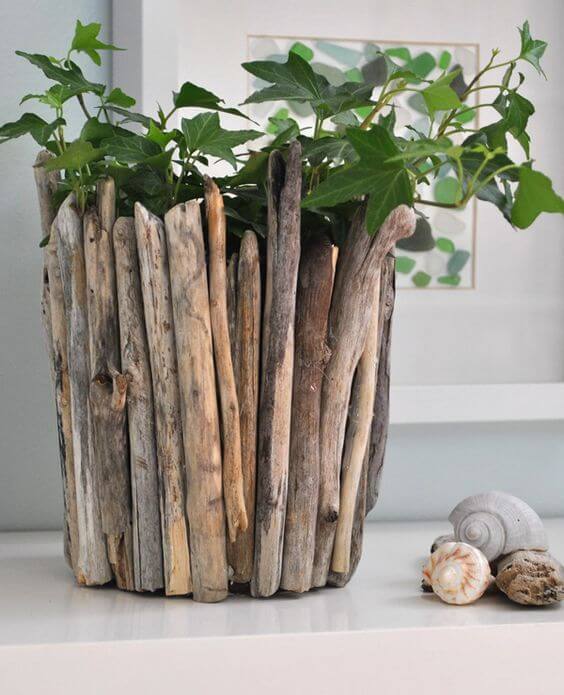
I wrapped this planter on a slow Sunday, and now it lives by my window like a little reminder of tide and time.
Materials Needed
- An old planter pot
- 40 pieces of driftwood (6–12 inches)
- Strong adhesive glue
- Optional: small shells
Step-by-step Guide
Step 1: Clean your pot thoroughly and dry it. Lay out your driftwood pieces to check height consistency, some variation is natural and adds charm.
Step 2: Begin gluing the driftwood vertically around the outside of the pot. Work your way around, keeping them close together. For a tighter finish, overlap or alternate wide and narrow pieces.
Step 3: Once all pieces are in place and the glue has cured, you can wrap the base with twine or tuck small shells into the gaps for a beachy flourish.
#5. Driftwood Art
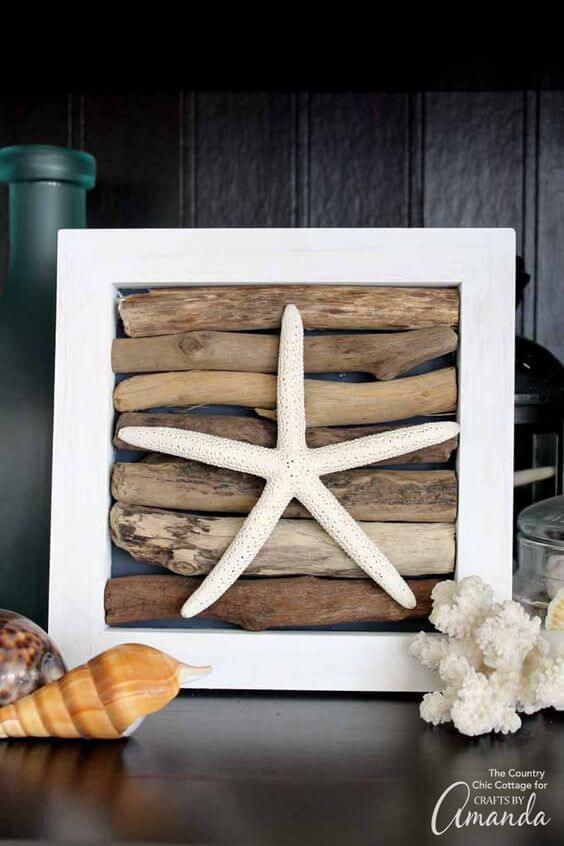
This piece feels like a postcard from the ocean. Perfect for anyone who wants to bring a slice of the seaside indoors without going full nautical.
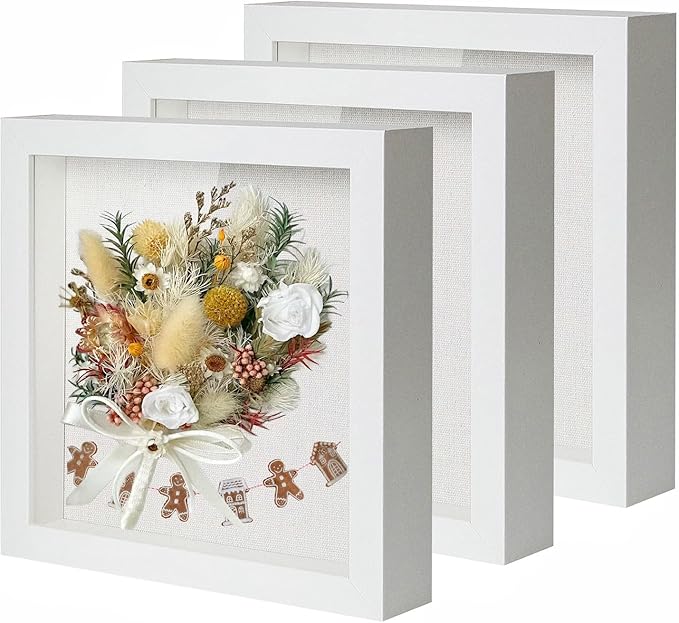
Materials Needed
- 1 deep picture frame (8×8 inches or larger)
- 6-10 pieces of driftwood (each about 6–8 inches long)
- 1 starfish
- Hot glue gun
- Optional: white paint and paintbrush
Step-by-step Guide
Step 1: Remove the glass from the frame if using one with glass. Paint the frame white if desired and let it dry completely.
Step 2: Arrange the driftwood horizontally inside the frame backing, trimming or overlapping pieces as needed to fill the space without gaps. Vary colors and textures for a more organic look.
Step 3: Once you’re happy with the layout, glue each piece of driftwood down firmly onto the backing. Let it dry for 15–30 minutes.
Step 4: Center the starfish and glue it gently onto the driftwood. Press it down until secure.
#6. Driftwood Christmas Trees
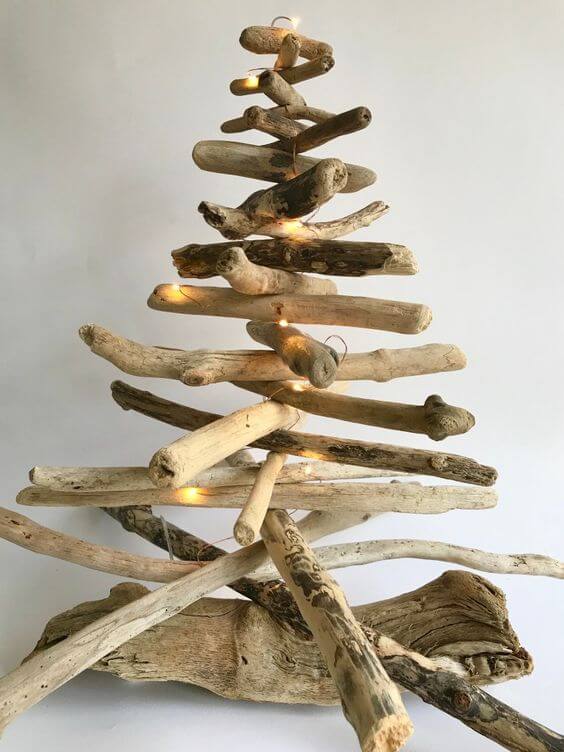
This driftwood tree, with its gentle curves and pale sun-bleached tones, feels like Christmas on the coast.
Materials Needed
- 25 pieces of driftwood in varying lengths (4″ to 18″)
- 1 sturdy piece of driftwood
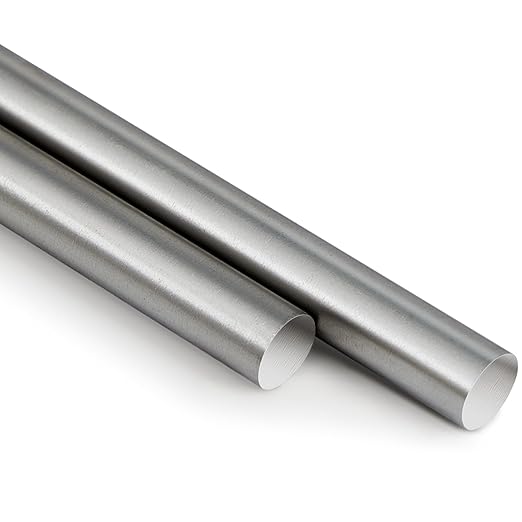
- 1 metal rod (about 18–24″ long)
- Electric drill with a drill bit
- Mini LED fairy lights
- Hot glue gun
Step-by-step Guide
Step 1: Choose your driftwood pieces and lay them out from longest to shortest. These will form the layers of the tree, from base to top.
Step 2: Drill a hole in the center of each driftwood piece using a drill bit the same size as your dowel or rod. Take your time, some pieces may crack if rushed.
Step 3: Drill a matching hole into your wood base. Insert the rod securely with glue if needed.
Step 4: Slide each driftwood piece onto the dowel, rotating them slightly as you go to create a spiral or zigzag tree effect. Leave a few inches at the top for the “tip.”
Step 5: Wrap the tree gently in mini fairy lights. Weave them between the branches for a soft, warm glow.
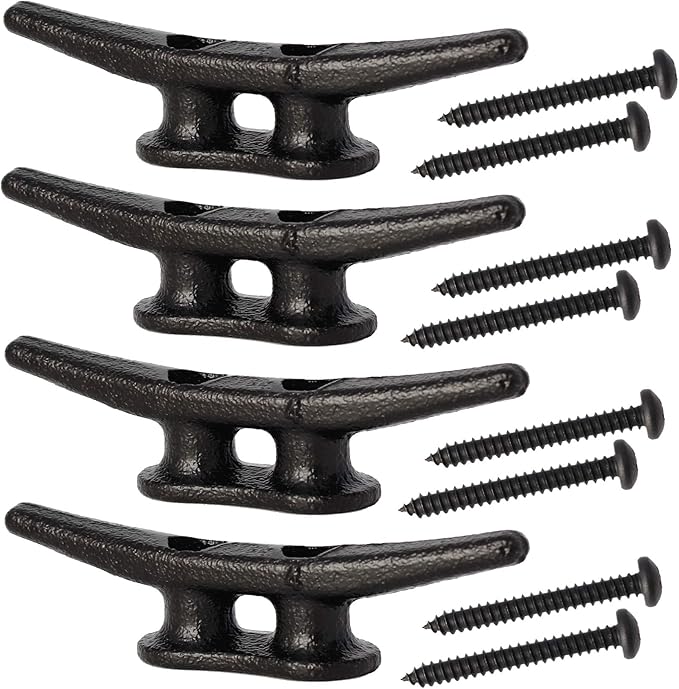
#7. DIY Driftwood Vintage Decoration
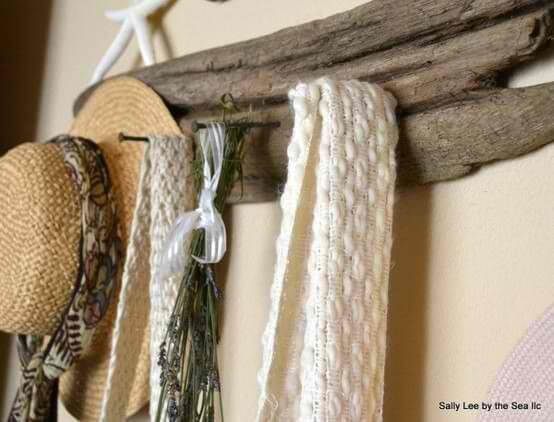
The grainy texture of driftwood, paired with a few hooks, creates something both practical and poetic.
Materials Needed
- 1 long, flat piece of driftwood (18–30″ long)
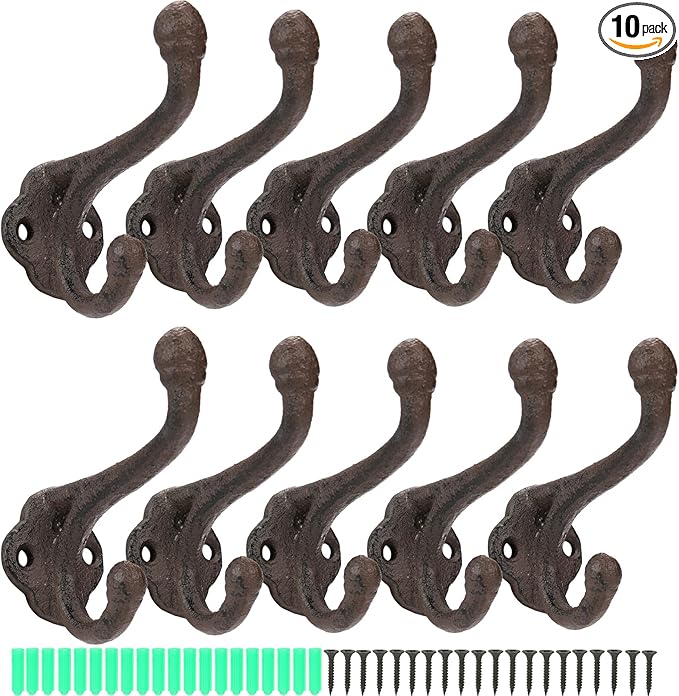
- 4–6 rustic wall hooks
- Screws or nails
- Electric drill
- Wall mounting hardware
Step-by-step Guide
Step 1: Choose a piece of driftwood that’s relatively flat on one side and sturdy enough to hold accessories.
Step 2: Lightly clean the wood with a damp cloth. You can leave the natural weathering or apply a clear sealant for longevity.
Step 3: Evenly space and mark where you want your hooks to go. Screw them in carefully, making sure they’re tight and aligned.
Step 4: Attach D-rings or sawtooth hangers to the back of the driftwood using small screws. Position them about 4 inches from each end for stability.
Step 5: Mount your hanger on the wall. Use wall anchors if needed. Hang scarves, hats, herbs, jewelry, or even dried flowers.
#8. Driftwood Wall Lamp
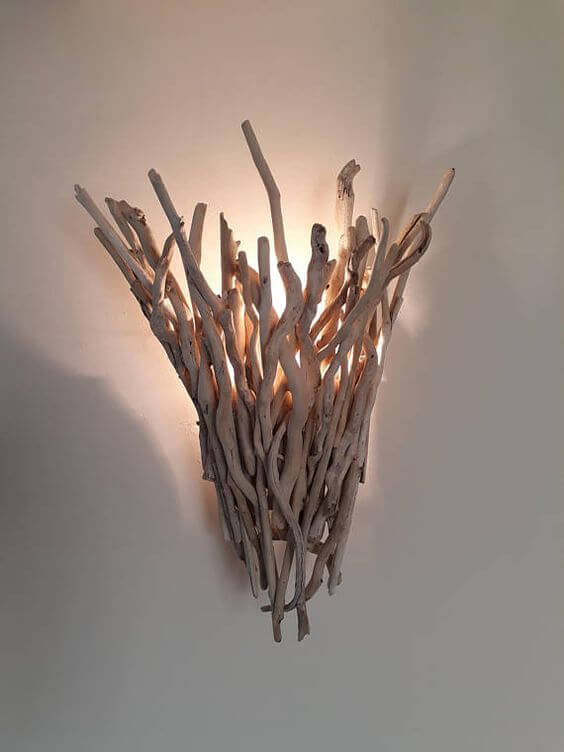
If there’s a way to bottle the essence of a seaside evening, this might be it. The soft glow, filtered through the tangled natural branches, creates a gentle ambiance.

Materials Needed
- 40 pieces of thin, dry driftwood in varied lengths (10–18 inches)
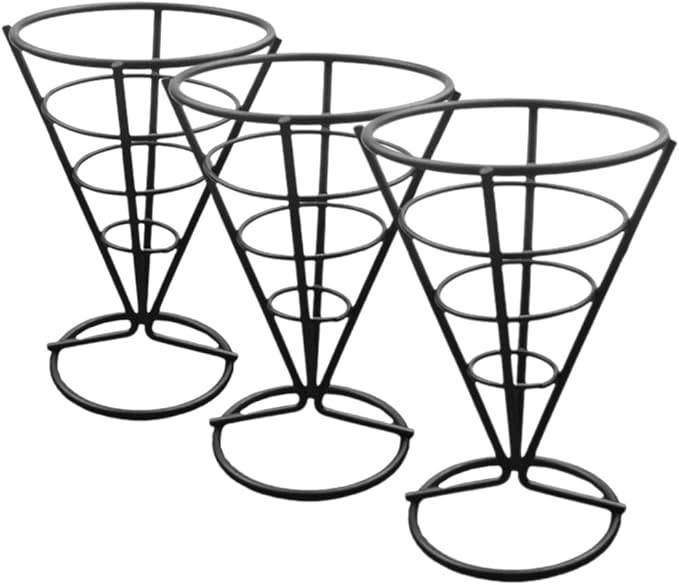
- A cone-shaped wire basket
- Strong hot glue gun
- Wall sconce LED light
- Mounting hardware
Step-by-step Guide
Step 1: Shape your wire basket into an upright cone or a half-cone depending on the look you want.
Step 2: Begin hot gluing or epoxying driftwood branches to the frame, starting from the bottom up. Overlap and cross them for a woven, organic effect.
Step 3: Work your way around, balancing shorter and longer pieces to give a wild but balanced profile. Make sure the frame remains sturdy and well-covered.
Step 4: Attach your LED puck light securely inside the driftwood cone where it won’t be visible but will cast upward light.
Step 5: Mount your piece to the wall using picture-hanging brackets or hooks.
#9. Coastal Decor With Driftwood
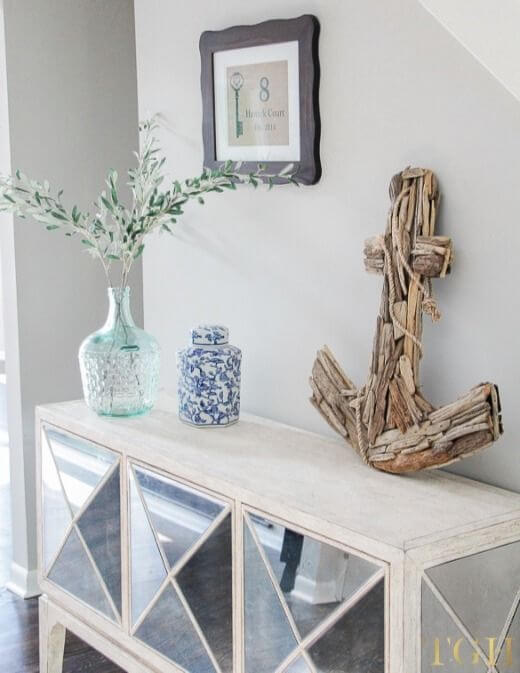
This DIY driftwood anchor brings a grounded, weatherworn elegance to any coastal-themed space. It reminds me of windswept beach walks and quiet moments near the harbor.

Materials Needed
- Driftwood pieces in various sizes and shapes
- A printed anchor outline
- Backing board (approx. 18″x24″)
- Hot glue gun
- Optional: jute rope
- Hanging hardware
Step-by-step Guide
Step 1: Print and cut out the anchor outline. Place it on the board as a guide for arranging the driftwood.
Step 2: Begin by laying down the largest driftwood pieces for the main vertical and horizontal structure. Use shorter or curved pieces for the arms and base of the anchor.
Step 3: Once you’re happy with the layout, start gluing down each piece firmly. Use adhesive generously, especially for layered pieces.
Step 4: For a nautical twist, wrap jute rope around the junctions, especially where the “crossbar” meets the vertical shaft. It adds texture and strength.
Step 5: Attach your hanging hardware to the back or simply lean the finished piece against the wall like in the image.
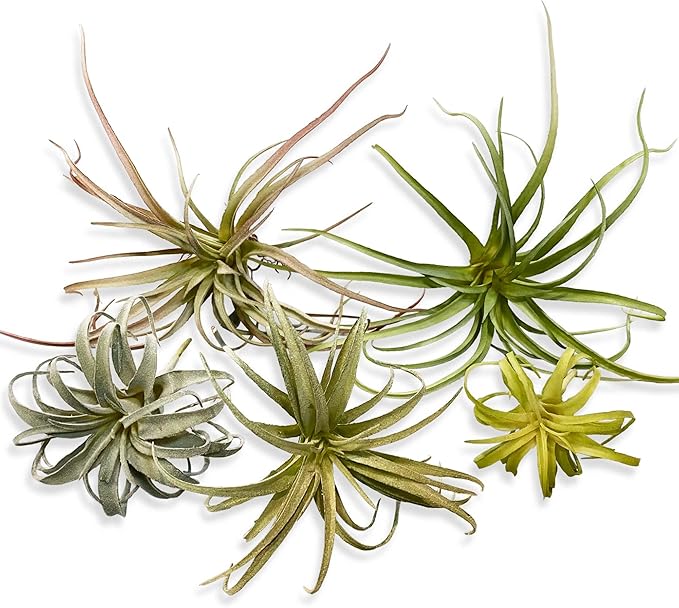
#10. DIY Driftwood Wreath with Air Plants
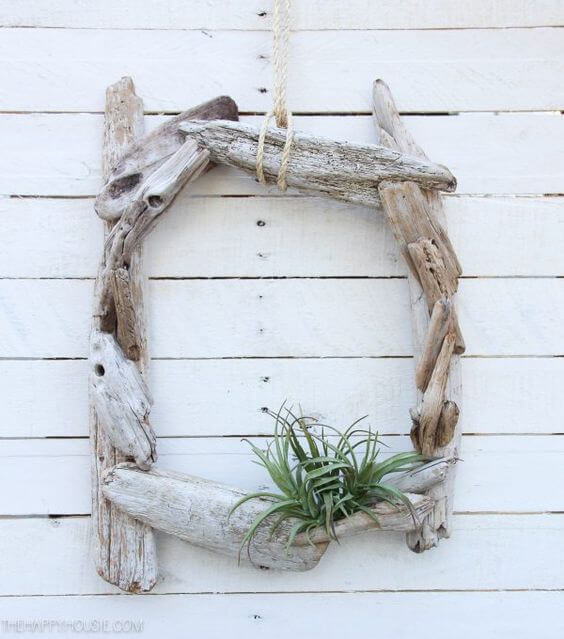
I love how it captures that weathered, salt-kissed look, perfect for a porch, bathroom wall, or summer-themed entryway.
Materials Needed
- 12 pieces of driftwood (approx. 8–14 inches long)
- Natural jute rope
- Hot glue gun
- 1 small air plant (e.g., Tillandsia)
- Optional: sawtooth hanger
Step-by-step Guide
Step 1: Arrange your driftwood pieces into a rectangular or free-form oval shape. Overlap the ends slightly to give the frame a rustic, natural flow.
Step 2: Use hot glue to attach the corners, holding each in place until it sets. Reinforce joints by wrapping twine around key intersections.
Step 3: Take a small air plant and wedge it between the bottom driftwood branches. If it’s too loose, add a dab of glue (only to the wood, not the plant base).
Step 4: Loop a strong jute rope around the top and tie it securely for hanging.
#11. DIY Driftwood Sign
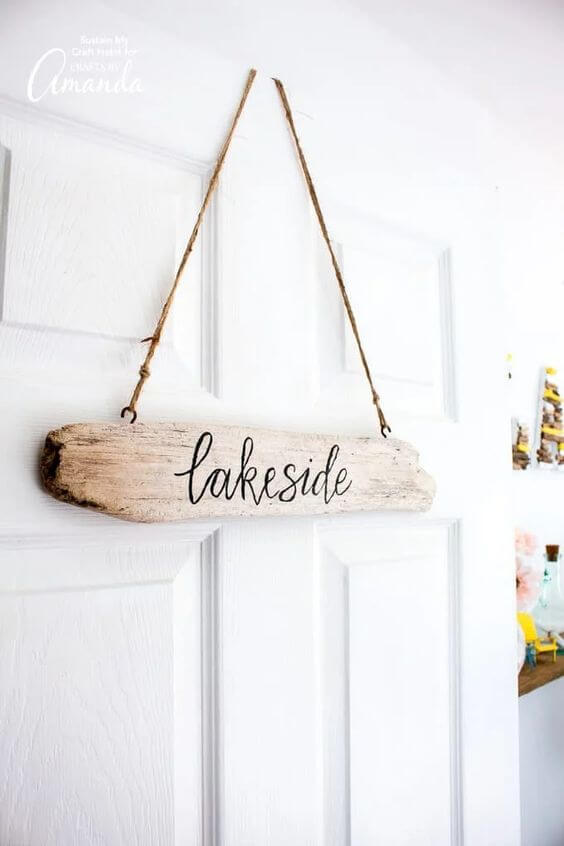
Whether you hang it on your porch, a guest room door, or your lake house entry, it brings instant warmth and character with a single word.
Materials Needed
- 1 piece of driftwood (10–16 inches long)
- Acrylic paint
- Twine
- Small eye screws
- Pencil and stencil
Step-by-step Guide
Step 1: Lightly sand the driftwood if needed, especially if it’s rough or flaky. Use a pencil to sketch your word like “lakeside” or any phrase that resonates.
Step 2: Go over your lettering with a paint marker or thin brush. Let it dry completely before handling.
Step 3: Screw an eye hook into each end of the top edge of the wood. Tie a length of jute rope to each hook, forming a loop for hanging.
Step 4: Hang it wherever you need a touch of rustic calm, above a door, along a hallway, or even on a patio wall.
#12. Handmade Scottish Driftwood Mirror
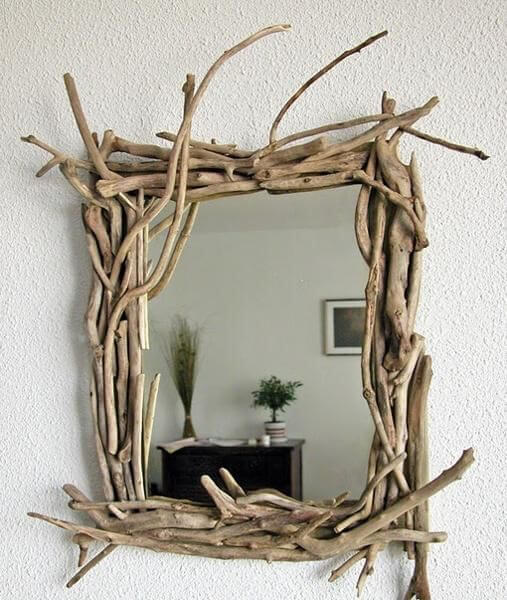
Every time I pass by a mirror framed in driftwood, I feel a little closer to the sea. It’s wild, imperfect, and honest.
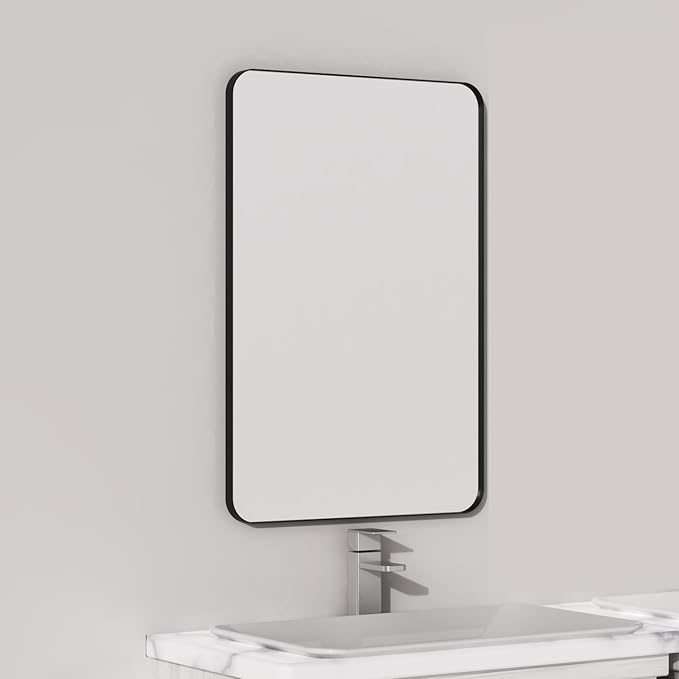
Materials Needed
- Plain mirror with a flat frame (any size)
- 40 medium to large pieces of driftwood (various lengths)
- Strong adhesive glue
- Optional: pruning shears
- Clear matte spray sealer
Step-by-step Guide
Step 1: Clean the driftwood thoroughly. Arrange it around the mirror frame to find a composition you love—overlap some pieces, angle others, and let it feel untamed.
Step 2: Start gluing the driftwood to the mirror frame, pressing firmly for a few seconds each time. Layer pieces for depth and texture.
Step 3: Let the glue cure completely, usually 24 hours. Then spray the entire frame lightly with a clear matte sealer to preserve the wood’s weathered look.
#13. Hanging Rope Driftwood Shelf
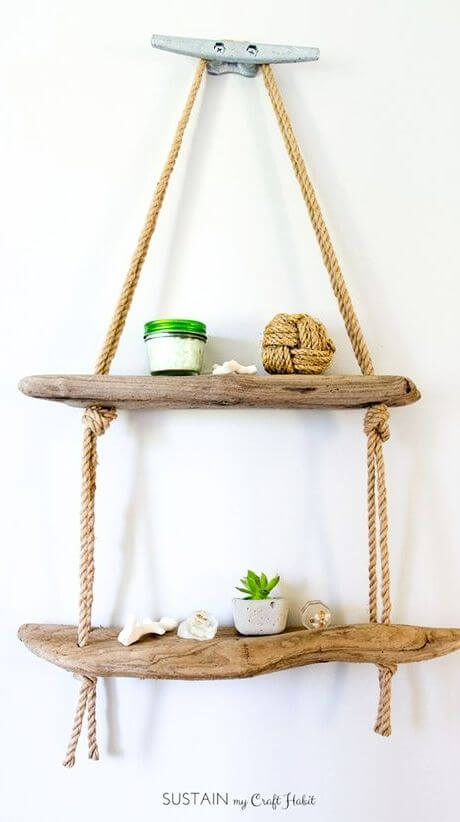
Whether it’s by the entryway or beside a sunlit window, this piece captures the spirit of a beach cottage with almost no cost.
Materials Needed
- 2 pieces of flat driftwood, each about 18–24 inches long
- 10 feet of natural jute rope (½-inch thick)
- Ceiling or wall hook/cleat
- Power drill + ½-inch drill bit
- Scissors, lighter
Step-by-step Guide
Step 1: Drill two holes at both ends of each driftwood piece, making sure they’re aligned vertically.
Step 2: Cut your rope into two equal lengths. Feed one end through the top shelf and knot it underneath. Repeat for the other side.
Step 3: Tie the rope under the second piece to create the second shelf, adjusting to keep it level, then mount the cleat on the wall.
#14. Lovely Driftwood Home Accents
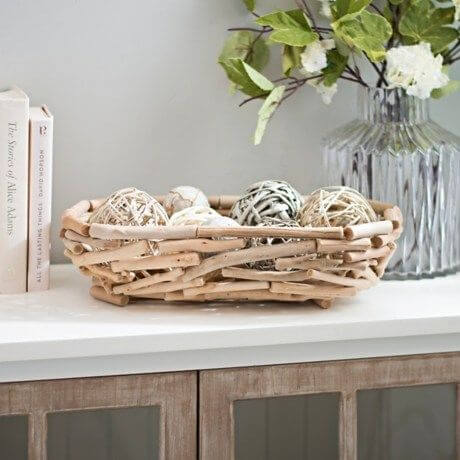
This basket bowl, full of natural tones and raw beauty, feels like something salvaged from a serene shoreline and brought into your home to tell its story.

Materials Needed
- 50 pieces of thin driftwood (5–8 inches long)
- Strong hot glue gun with extra glue sticks
- A medium bowl
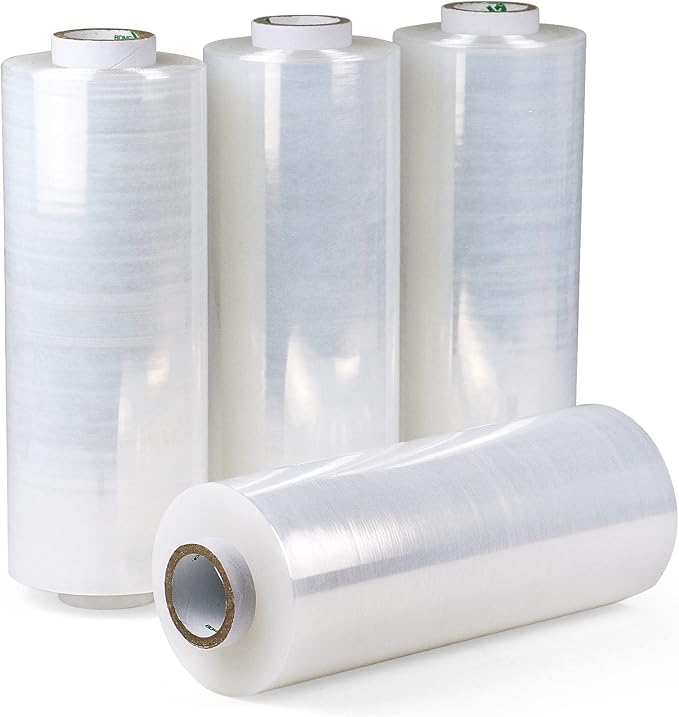
- Cling wrap
- Optional: Clear matte sealer spray
Step-by-step Guide
Step 1: Wrap your bowl mold in cling wrap or wax paper so the glue doesn’t stick permanently.
Step 2: Start laying and gluing driftwood pieces around the bowl’s outside, beginning at the bottom and overlapping as you move upward. Work in layers and vary the angles to build natural texture.
Step 3: Let dry for at least 2–3 hours. Once set, gently separate the driftwood bowl from the mold.
Step 4: If desired, lightly spray the outside with a matte clear sealer for protection and a more finished look.
#15. Driftwood Towel Rack
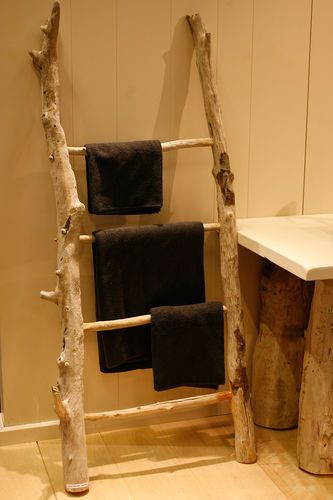
There’s something grounding about the untamed, weatherworn texture of driftwood. This towel ladder, built from salvaged branches, adds a calm coastal aesthetic while serving a useful purpose.
Materials Needed
- 2 long driftwood poles (about 4–5 feet tall)
- 4 thinner, straight driftwood sticks (18–20 inches)
- Screws
- Drill
- Optional: wood glue, clear matte wood sealer
Step-by-step Guide
Step 1: Lay your long driftwood poles parallel on the ground. Measure and mark where you want your rungs, usually 12–14 inches apart.
Step 2: Drill small pilot holes into both the sides and the ends of your rungs. Secure each rung with wood glue, then fasten with screws or nails for extra strength.
Step 3: Let the glue set completely. Optionally, apply a clear matte sealer to preserve the driftwood’s raw texture without making it shiny.
#16. Macrame Plant Hanger With Driftwood
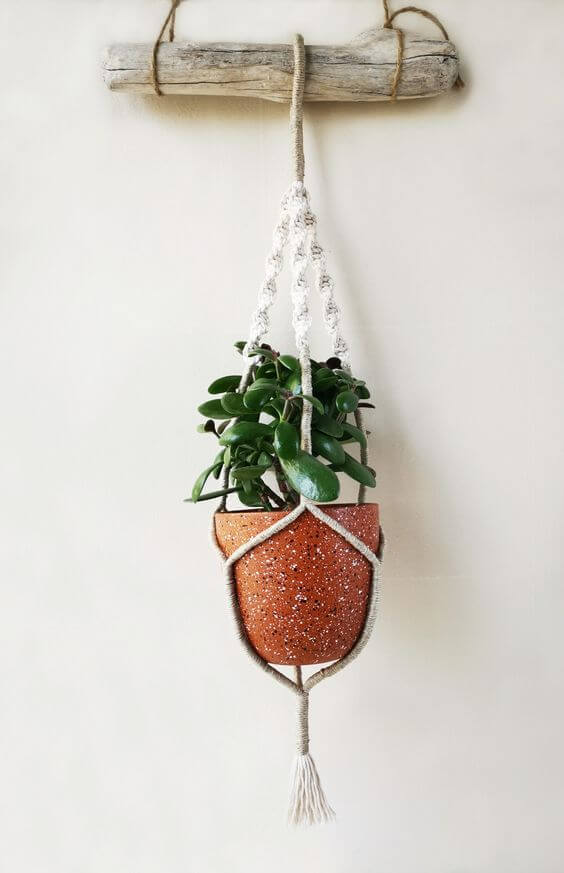
This driftwood macrame hanger delivers just that, gentle texture, rustic flair, and a floating garden moment.
Materials Needed
- 1 piece of driftwood, approximately 12–16 inches long
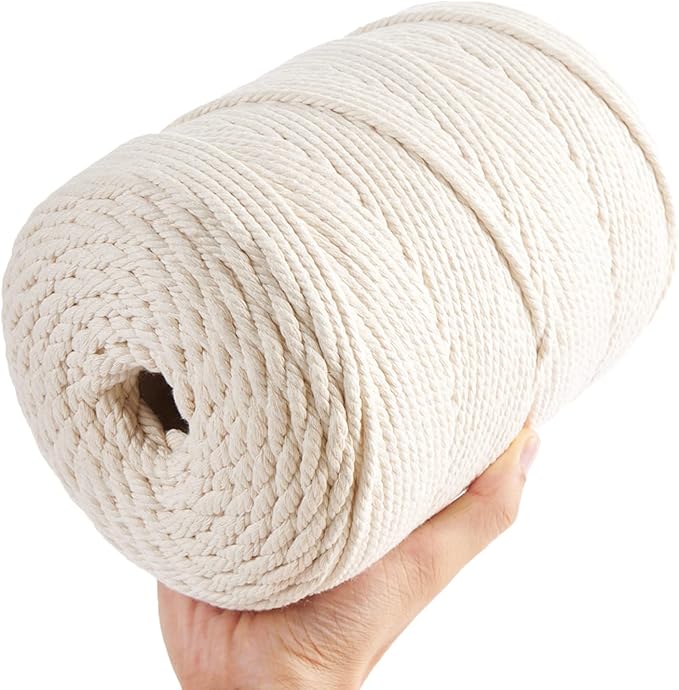
- Macrame cord (about 30–40 feet)
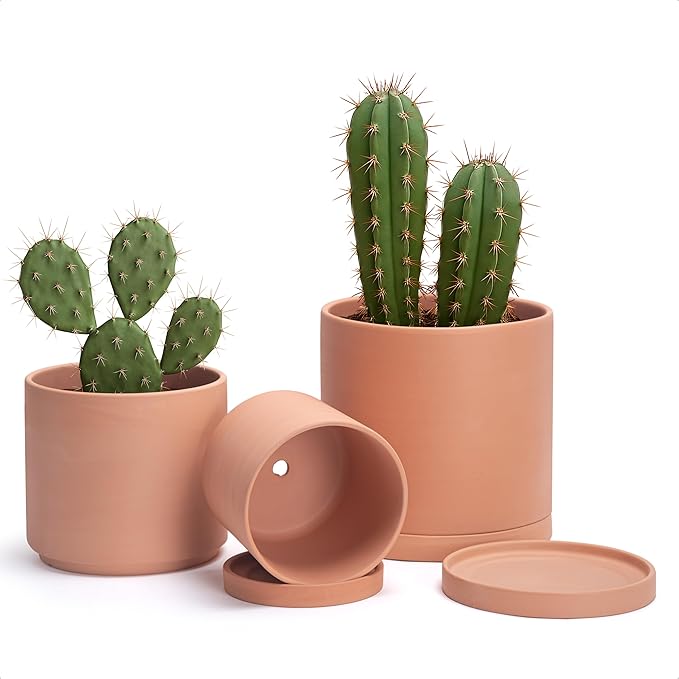
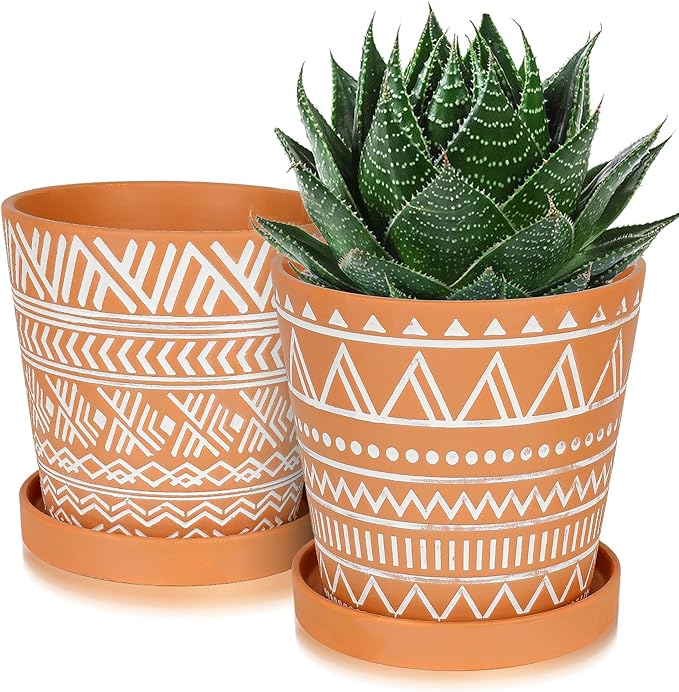
- Small to medium terracotta pot
- S-hook
Step-by-step Guide
Step 1: Start with four equal lengths of macrame cord. Fold them in half and loop them over the driftwood with a lark’s head knot, spacing them evenly.
Step 2: Begin knotting your hanger using basic square knots and spiral knots. After about 4-6 inches of pattern, separate cords into groups of two and tie overhand knots at intervals to form a diamond-shaped cradle.
Step 3: Continue knotting until the cords create a snug net for your pot. Test fit the pot and adjust as needed. Gather all cords together beneath the pot and finish with a final tight knot and fringe or tassel.
Step 4: Hang the driftwood piece on the wall using jute loops or screw in an S-hook for ceiling suspension.
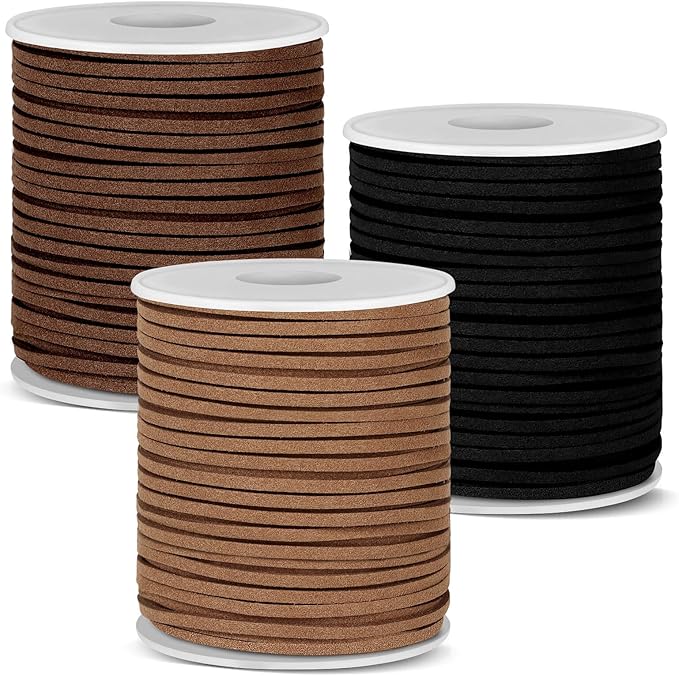
#17. Hanging Driftwood Air Plant Pots
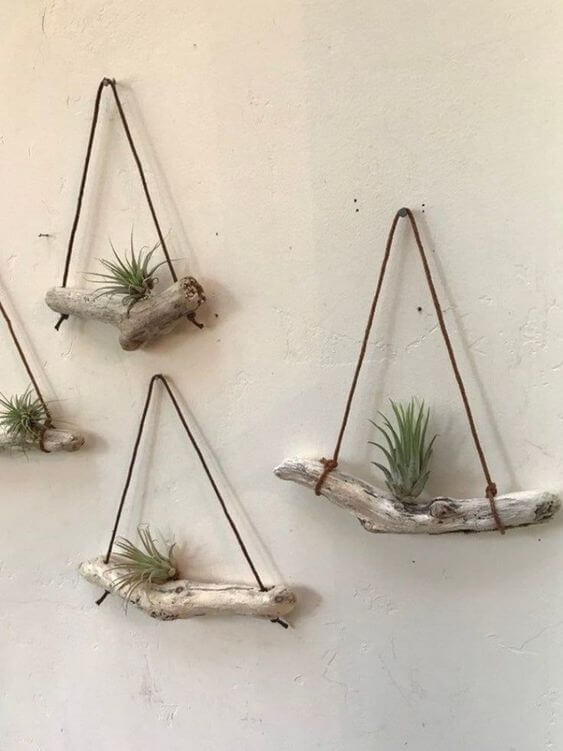
These hanging driftwood cradles are so simple, yet they bring a touch of serenity and movement to any space.
Materials Needed
- Several pieces of flat, palm-sized driftwood
- Air plants (Tillandsia)
- Leather cord (around 18–24 inches per piece)
- Small screw hooks
- Optional: Hot glue gun
Step-by-step Guide
Step 1: Cut your cord into equal lengths. Tie a knot at each end of the driftwood piece, forming a hanging triangle. Make sure it’s balanced to hang level on the wall.
Step 2: Attach the air plant onto the driftwood. You can nestle it in a natural crevice or lightly secure it with a dab of clear glue if needed.
Step 3: Mount each driftwood hanger on your wall using small nails or hooks. Space them out asymmetrically to give an organic, free-flowing feel.
#18. Driftwood Letters
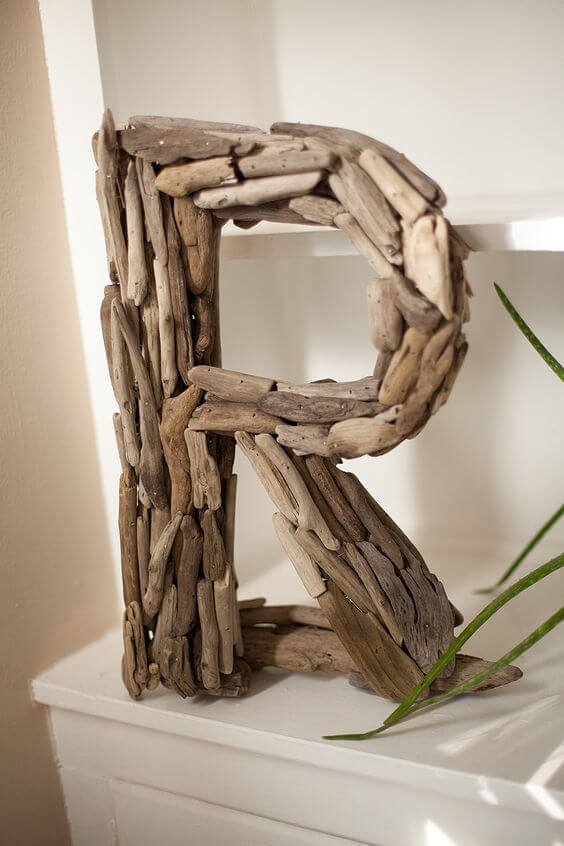
Whether it’s for your entryway, nursery, or gallery wall, a monogram crafted from genuine driftwood instantly makes a space feel both organic and customized.
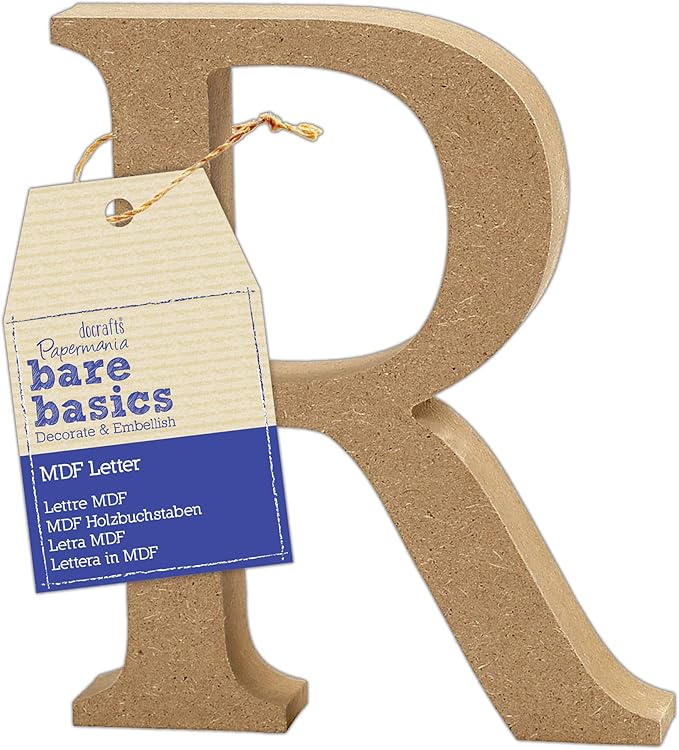
Materials Needed
- A MDF letter base (around 10–15 inches tall)
- Assorted pieces of driftwood
- Hot glue gun and glue sticks
- Sandpaper (optional)
- Clear matte sealer spray (optional)
Step-by-step Guide
Step 1: Lightly sand your wooden letter if needed to prep the surface. This helps glue bond better and removes any splinters.
Step 2: Lay out your driftwood pieces over the letter first without gluing. Test different arrangements to cover all edges and curves naturally.
Step 3: Once satisfied, start gluing each piece in place, beginning with the outer shape and moving inward. Use various sizes and shapes for a layered, natural look.
#19. Driftwood Jewelry Hanger
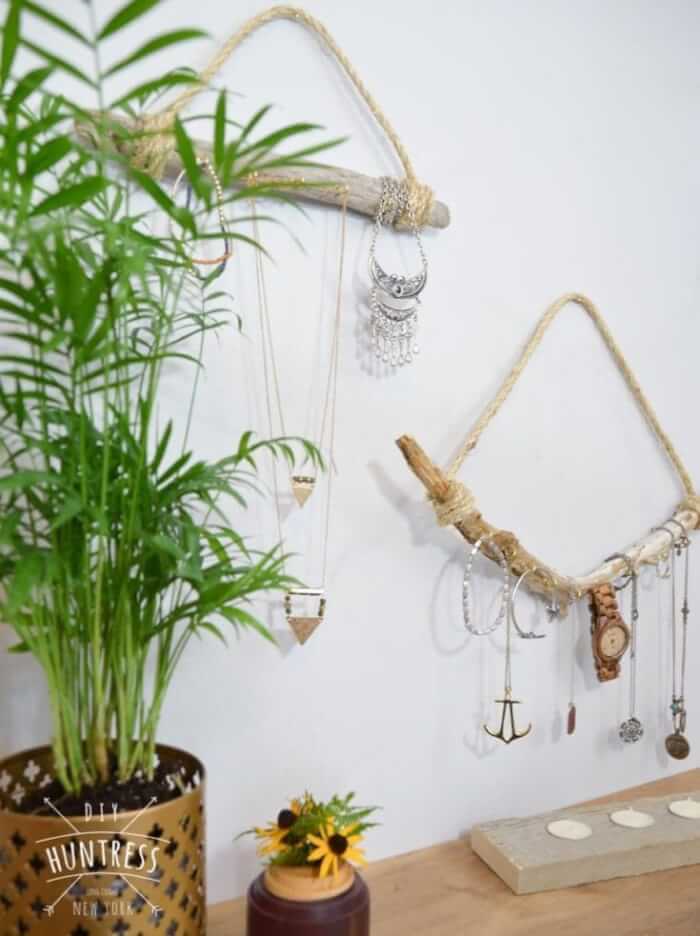
If you’re like me and your necklaces end up tangled in a drawer or mysteriously vanish behind furniture, this project brings order in the most aesthetic way.
Materials Needed
- 1–2 pieces of driftwood (around 12–18 inches long)
- Jute rope, about 2–3 feet
- Small cup hooks
- Drill or nail/screw
- Optional: small nails
Step-by-step Guide
Step 1: Lightly clean and dry the driftwood to remove any dirt or sea residue. You can lightly sand it if needed.
Step 2: Screw in the cup hooks along the bottom or front of the driftwood piece, spacing them evenly. These will hold your jewelry.
Step 3: Wrap the ends of the driftwood with jute rope for a decorative touch, then tie the ends together into a triangle or loop to form a hanger.
Step 4: Hang the piece on the wall using a nail, screw, or command hook. Then hang necklaces, bracelets, or even keys from the hooks.
#20. Painted Driftwood Jewelry Hanger
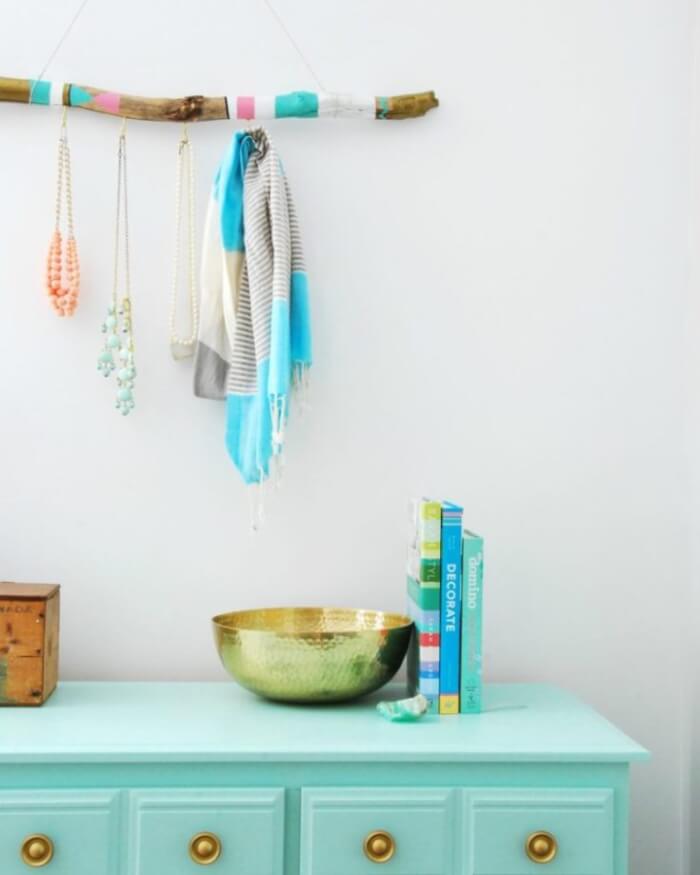
I made something similar for my hallway last spring, and it still feels like a fresh breeze whenever I pass by.
Materials Needed
- A medium-length piece of driftwood (about 18–24 inches long)
- Acrylic paints and paintbrushes
- Twine
- Cup hooks
- Optional: clear sealer spray
Step-by-step Guide
Step 1: Lightly clean the driftwood with a dry cloth or brush. Sand it gently if you want a smoother finish.
Step 2: Use painter’s tape to section off areas to paint. Alternate colors and leave some raw wood visible for contrast. Let dry.
Step 3: Screw in the hooks along the bottom side for hanging jewelry or scarves.
Step 4: Tie twine to both ends and secure it tightly for wall mounting. Hang it on a wall hook or nail, then add your accessories.
#21. DIY Driftwood Clock
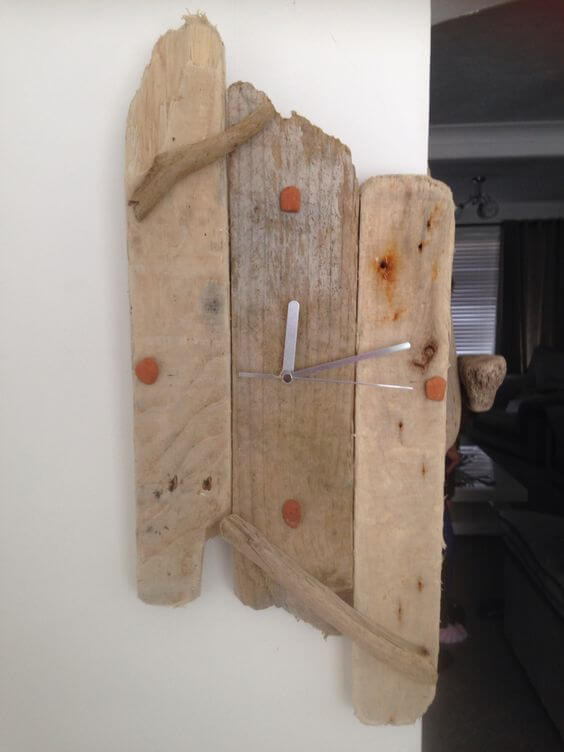
When I first made one of these, I didn’t even care if it kept perfect time. It just felt good to have something on the wall that looked like it washed up from a forgotten harbor.
Materials Needed
- 3pieces of driftwood, approx. 12–18 inches long
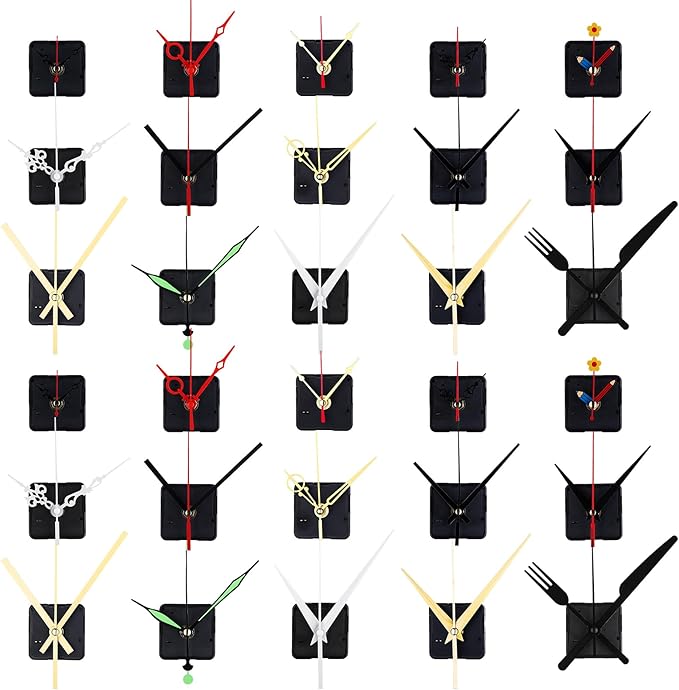
- A basic clock mechanism kit
- Wood glue
- Drill with a spade bit
- Optional: sandpaper, wood stain
Step-by-step Guide
Step 1: Arrange your driftwood planks vertically or horizontally to form a rough rectangle or oval. Keep the edges natural—don’t trim them.
Step 2: Attach the driftwood pieces together on the back using wood glue, a brace, or flat brackets. Let it cure completely.
Step 3: Drill a hole in the center large enough for the clock mechanism shaft to go through.
Step 4: Insert the clock mechanism from the back, secure the hands to the front, and add the battery. If you want, lightly sand or seal it. Then hang it proudly on the wall.
#22. DIY Driftwood Sailboat
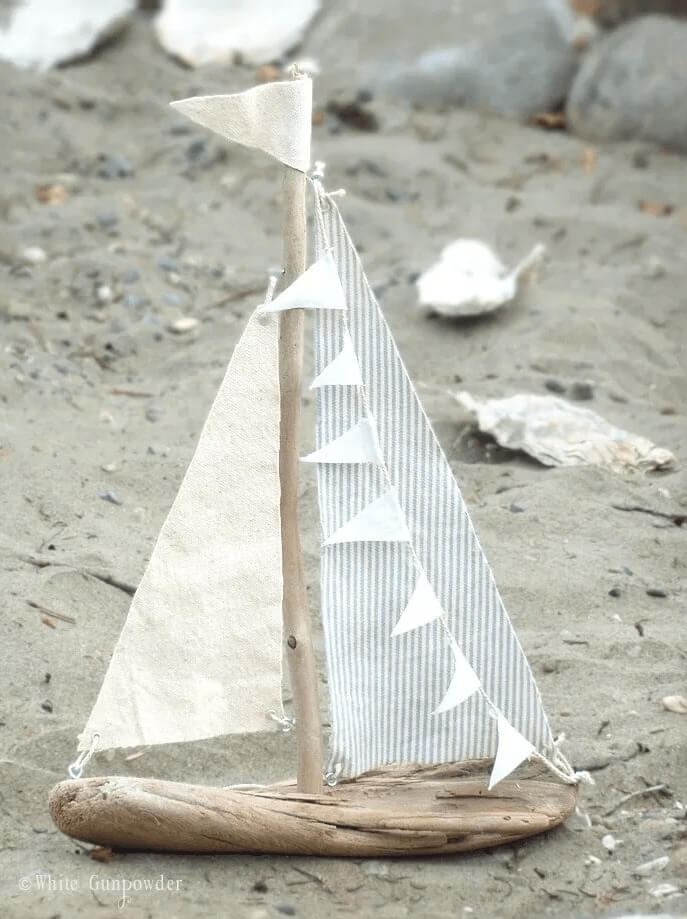
This tiny sailboat project captures that day. It’s a simple creation, but every knot, every stripe of fabric, adds a memory to the room.
Materials Needed
- 1 driftwood piece (about 6–9 inches long)
- 1 thin wooden stick (around 8–10 inches tall)
- Scrap fabric
- Twine
- Hot glue gun
- Scissors and needle (optional)
Step-by-step Guide
Step 1: Drill or hot glue your mast vertically onto the driftwood base. Make sure it’s centered and upright.
Step 2: Cut two triangle-shaped sails from your fabric. One can be classic white, and the other can use stripes or patterns for flair.
Step 3: Attach the sails to the mast and the base using glue or tie them on with string. Keep them loose for a natural billow.
Step 4: Add a twine garland with tiny flags or pennants cut from leftover fabric. Glue it from mast to stern.
Step 5: Add a top flag or wrap some twine at the masthead for extra texture.
#23. Driftwood Wind Chime
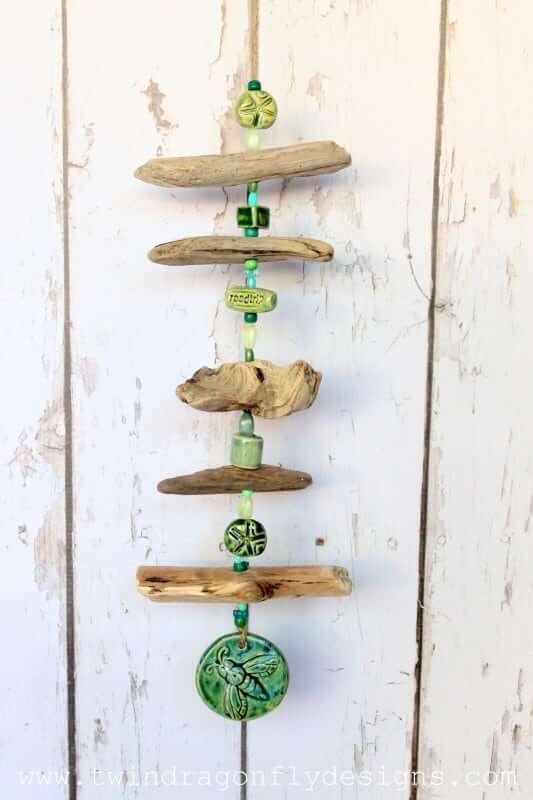
The blend of wood and ceramic creates a grounded yet whimsical vibe, something you’d expect to see swaying gently in a breezy boho porch or reading nook.
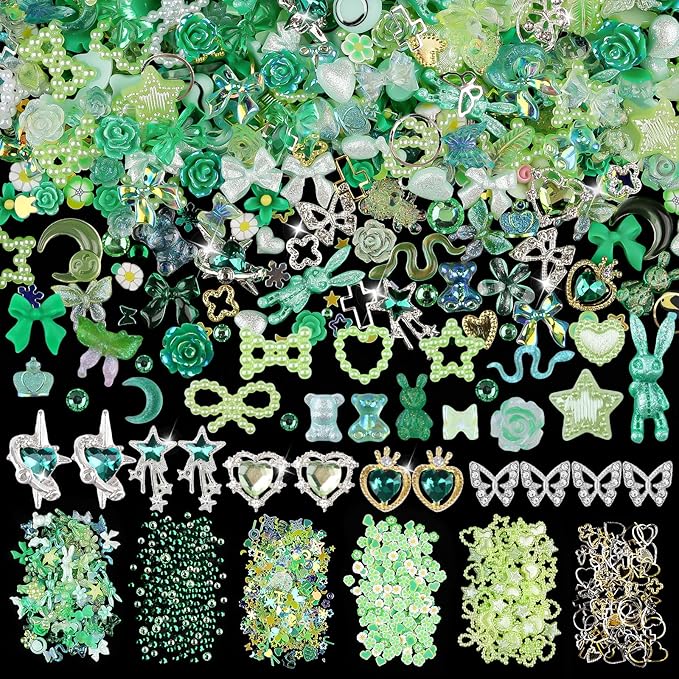
Materials Needed
- 6 small driftwood pieces (3–5 inches each)
- Assorted green and ceramic beads
- Embellishments or charms (like dragonflies, words, symbols)
- Clear nylon thread
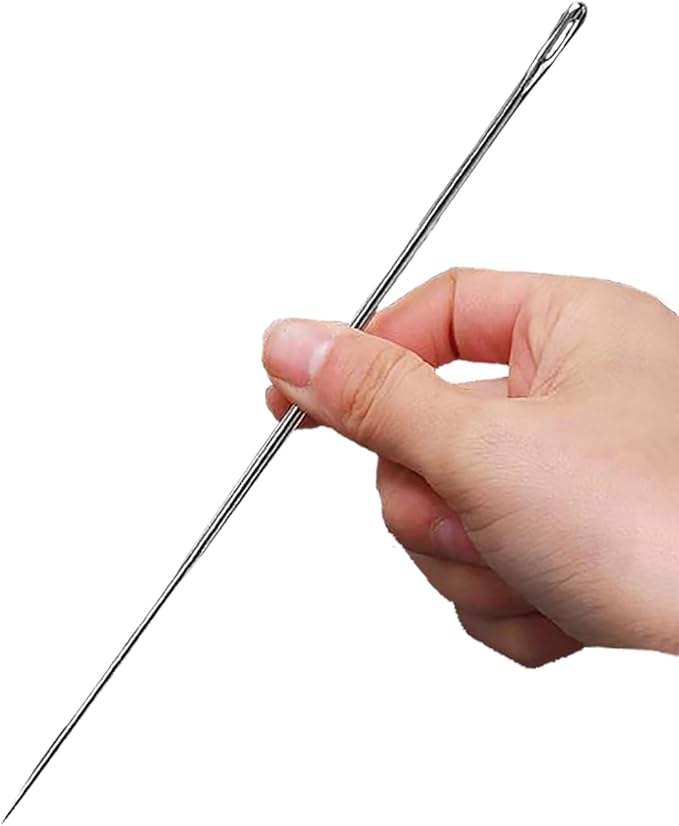
- Long embroidery needle
Step-by-step Guide
Step 1: Lay out your driftwood and beads in the pattern you like. Alternate shapes and textures to keep it visually balanced.
Step 2: Cut a long piece of twine or thread, about 3–4 feet depending on how long you want the hanging to be. Tie a large knot or secure the bottom with your chosen charm or ceramic pendant.
Step 3: Begin threading upward, first a bead, then a driftwood piece, another bead, and so on. Tie small knots under each wood piece to keep it in place if needed.
Step 4: Once all pieces are added, finish with a secure knot and create a loop for hanging.
#24. Driftwood and Rope Picture Hanger
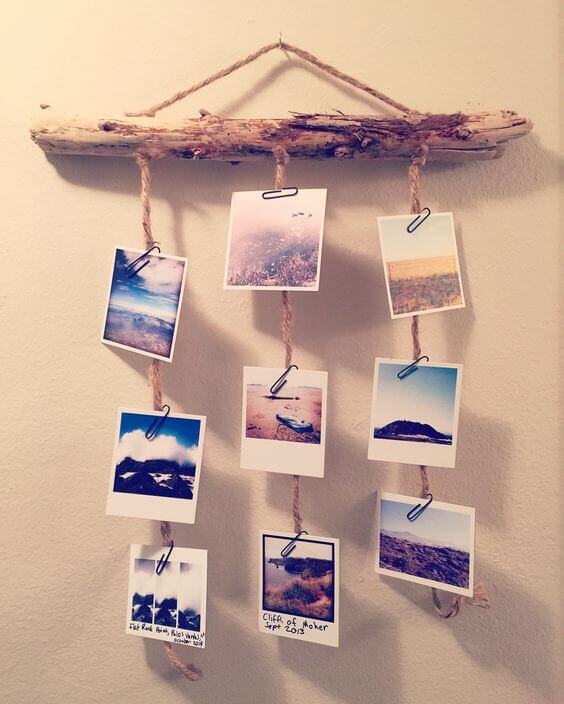
This was one of my favorite weekend projects. I found a piece of driftwood during a morning walk, still damp with salt air.
Materials Needed
- 1 medium driftwood stick (12–18 inches long)
- Jute (around 4 feet)
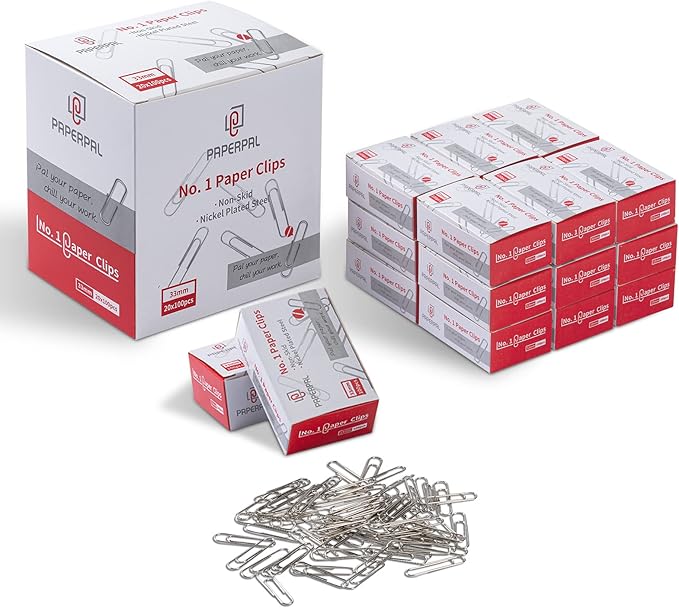
- 9 paper clips
- Your favorite printed photos
- Scissors
Step-by-step Guide
Step 1: Cut three equal lengths of twine (around 18–20 inches each). Tie one end of each piece to the driftwood, spaced evenly.
Step 2: Create a hanging loop by tying a longer piece of rope to both ends of the driftwood.
Step 3: Use paper clips to attach the photos to the twine. Keep them staggered or evenly spaced, up to your aesthetic then hang on a wall hook.
#25. Seashell Driftwood Christmas Tree
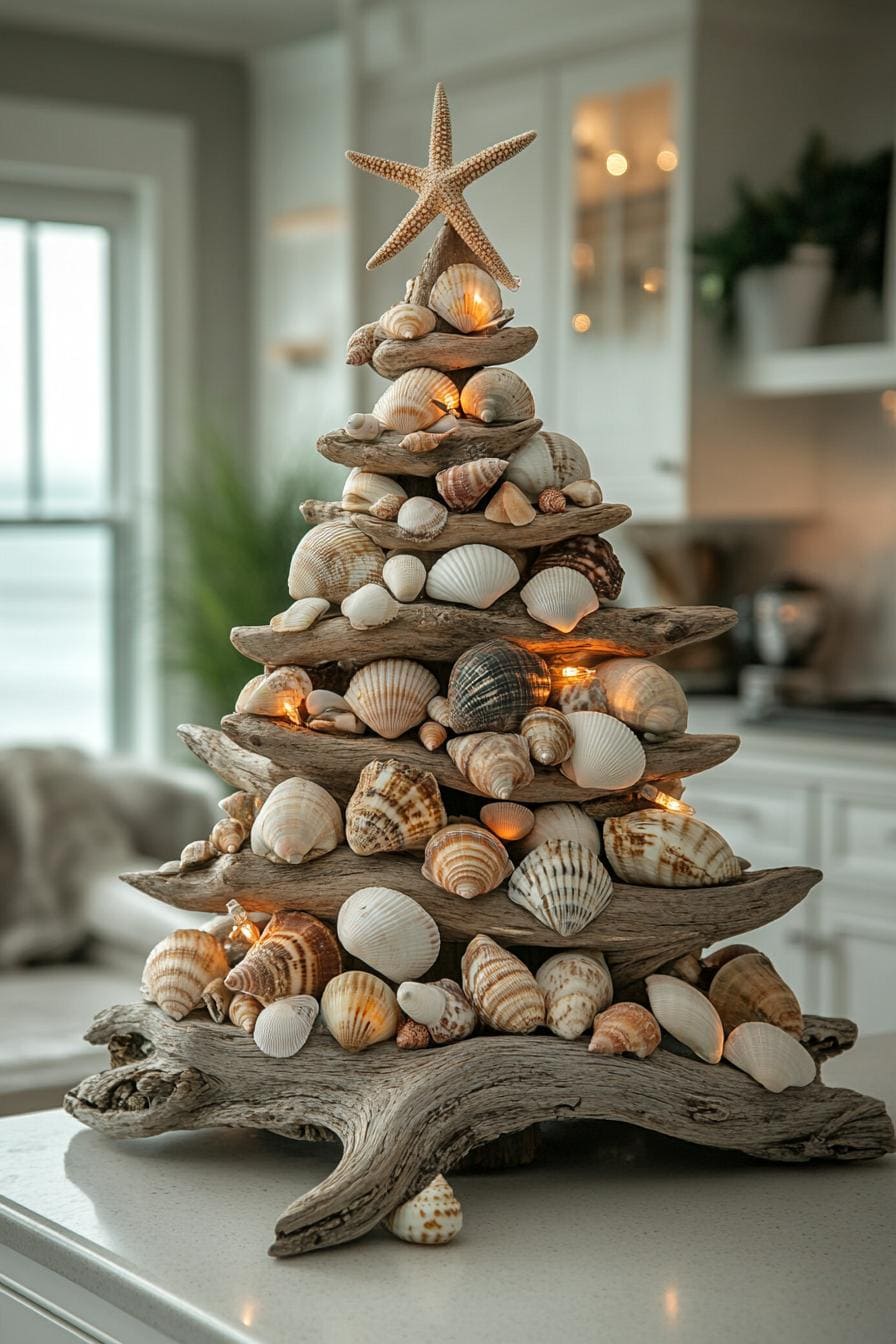
The mix of textures, the rough driftwood, the glossy shells, the soft golden light, felt like bottling the beach and wrapping it in Christmas joy.
Materials Needed
- 20 flat driftwood pieces in varied lengths (4–12 inches)
- 30+ assorted seashells and starfish
- Hot glue gun and sticks
- Fairy lights
- Optional: wooden base
Step-by-step Guide
Step 1: Arrange your driftwood pieces in descending size order. Begin stacking from largest to smallest, gluing each layer at the center. Rotate each layer slightly for that natural spiral look.
Step 2: Once the “tree” is stable and dry, start gluing seashells around the layers. Mix sizes, shapes, and colors for a dynamic pattern. Add a starfish at the top.
Step 3: Wrap or tuck in a short strand of fairy lights, weaving them discreetly between the wood and shells.
#26. Driftwood Jewelry Organizer
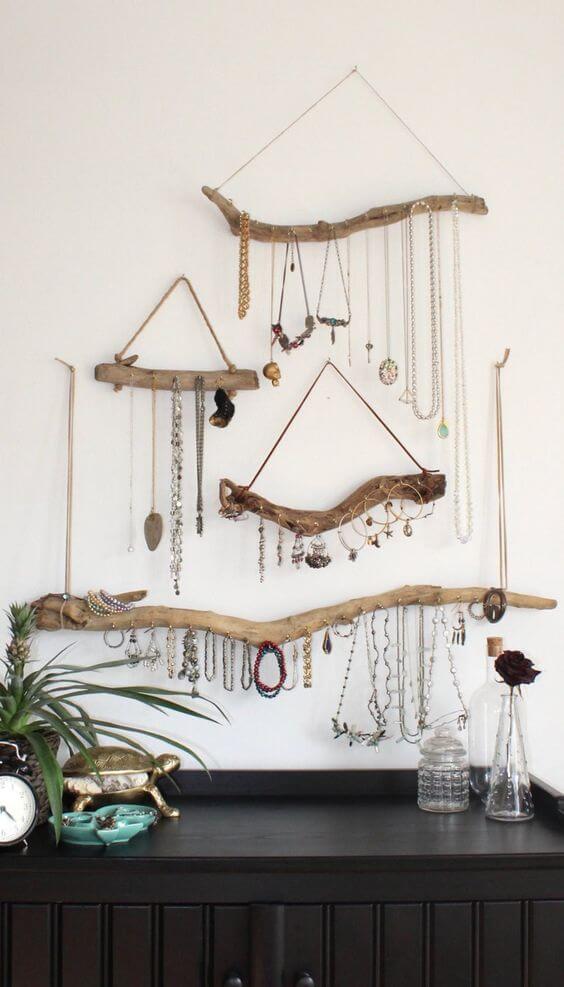
When I made mine, I couldn’t stop smiling every time I looked at it. It brought order to the chaos of tangled necklaces, and added a handmade touch.
Materials Needed
- 5 pieces of smooth driftwood (various lengths: 8″–30″)
- Thin natural rope
- Small screw-in hooks
- Hammer and small nails
- Optional: metal S-hooks
Step-by-step Guide
Step 1: Clean and dry the driftwood if needed. Sand lightly for a smoother finish.
Step 2: Screw hooks evenly along the underside of each piece. Mix sizes for earrings, rings, and longer necklaces.
Step 3: Attach rope to the ends (or back) of each branch and create loops for wall hanging. You can stack them at staggered heights or space them out freely.
Step 4: Hang on nails or adhesive wall hooks and start decorating with your jewelry.