When looking around the garden, I usually feel enough to see, but a sense of melody has never crossed me once. Do you feel that your garden lacks music – one of the most impeccable factors adding charm and beauty to your garden? If you recognize this anytime, a wind chime is the best solution you can call to mind.
For a charming wind chime, you will have plenty of time and available materials to create one by yourself! It’s easy to do and won’t take much time, energy, and even money. These handmade and recycled designs will add melody to any outdoor space, whether you’re looking to add some charm or brighten up a place.
Simply choose a few of your favorites and hang them on a branch or the side of your house.
This article contains affiliate links. If you purchase through them, I may earn a small commission at no extra cost to you. Thank you for your support!
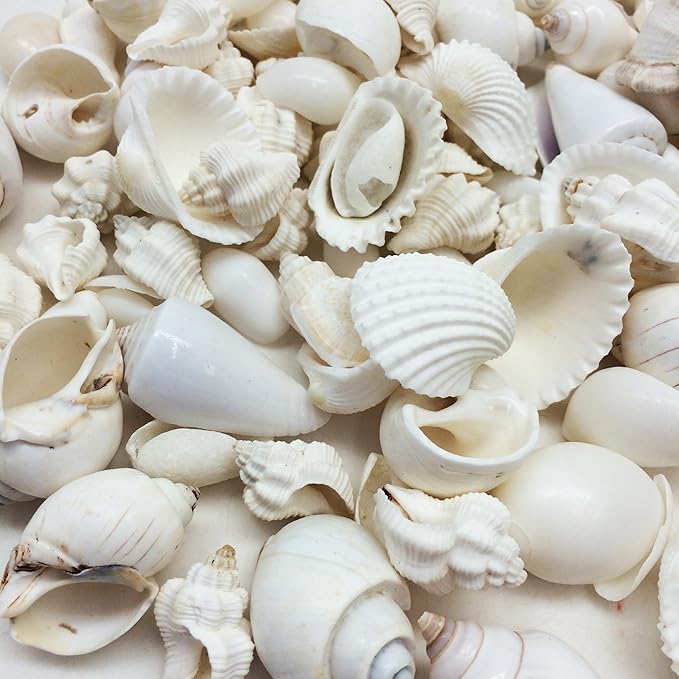
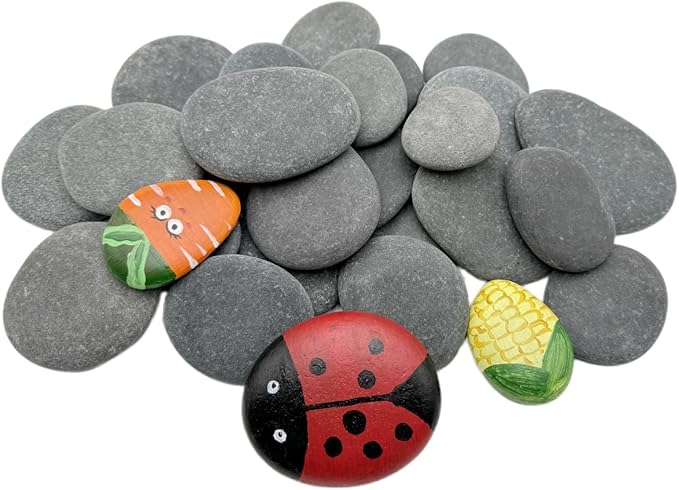
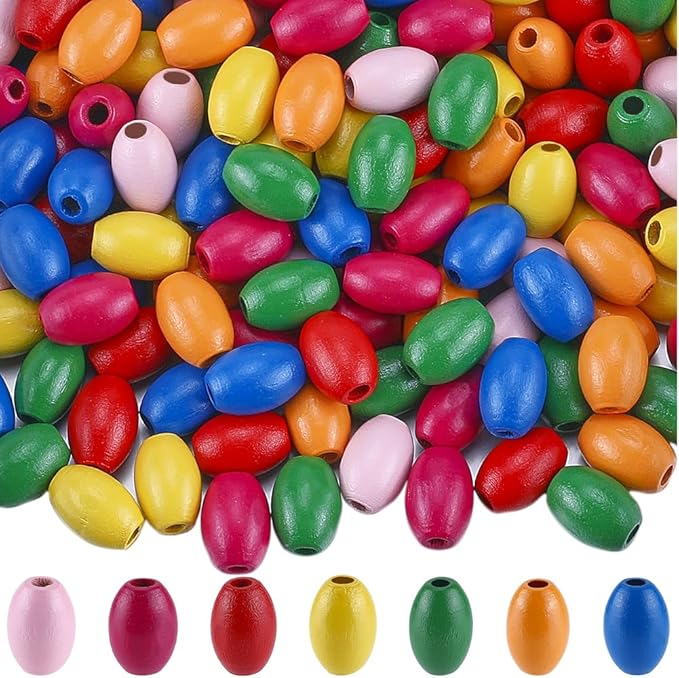
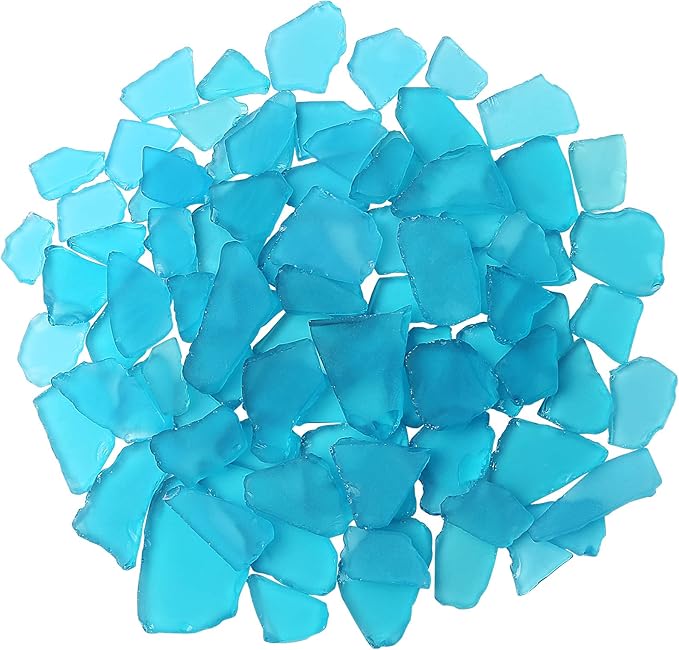
#1. Seashells

I made one after a beachside vacation, using shells we collected and pairing them with turquoise beads for a splash of color.

Materials Needed
- 35–40 medium-sized natural seashells
- 60–80 beads (8–10 mm)
- 6 strong nylon cord
- Glue gun
- Scissors and needle
Step-by-step Guide
- Arrange your shells and beads in a pattern you like. Use the needle to thread the cord through shells. Alternate beads and shells, spacing them out evenly along each strand.
- Once all strands are completed, tie them securely around the starfish. Use a dab of hot glue to reinforce the knots if needed.
- Tie 3–4 cords around the starfish to make a hanger and knot them together at the top.
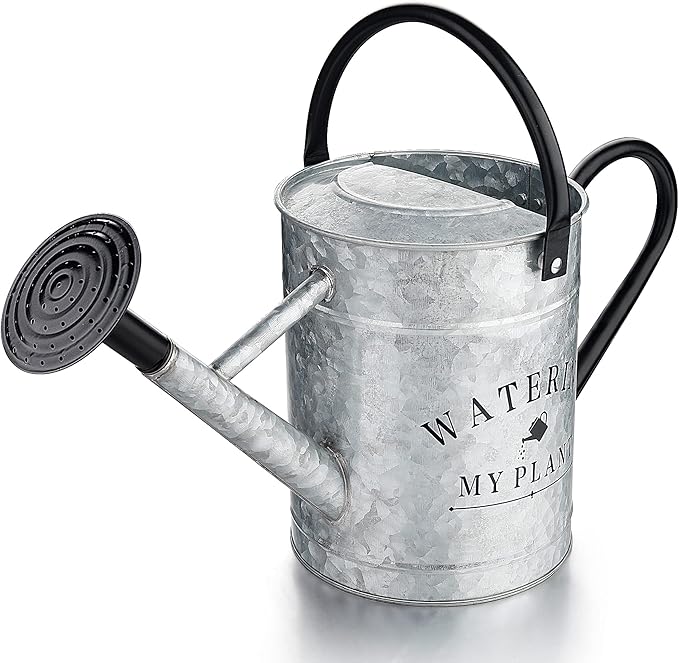
#2. Watering Can
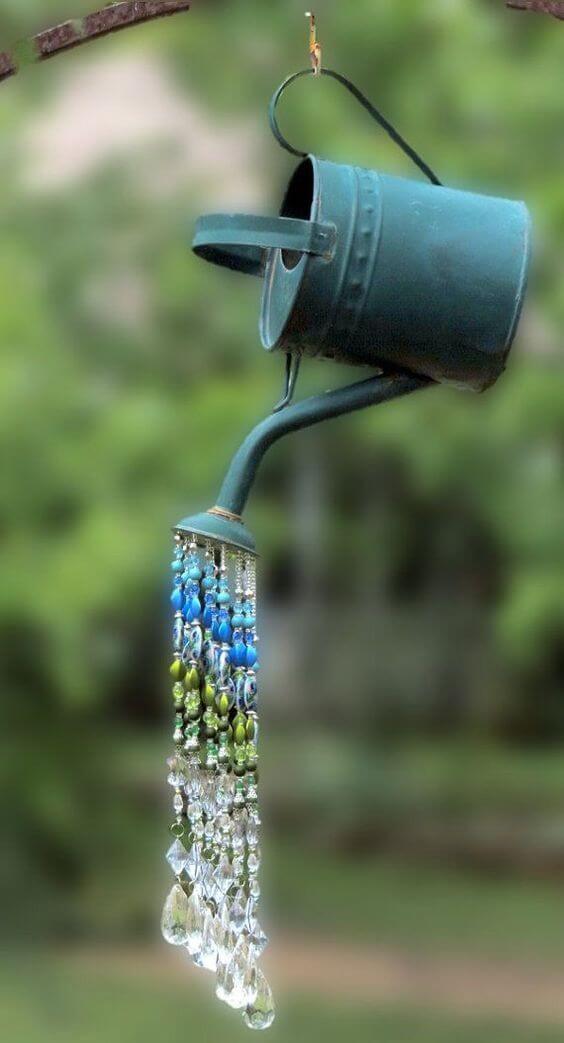
When the breeze blows, it gives off a gentle jingle that’s peaceful and nostalgic.

Materials Needed
- 1 metal watering can
- 40–50 assorted blue, green, and crystal glass beads
- 8–10 strands of clear nylon string
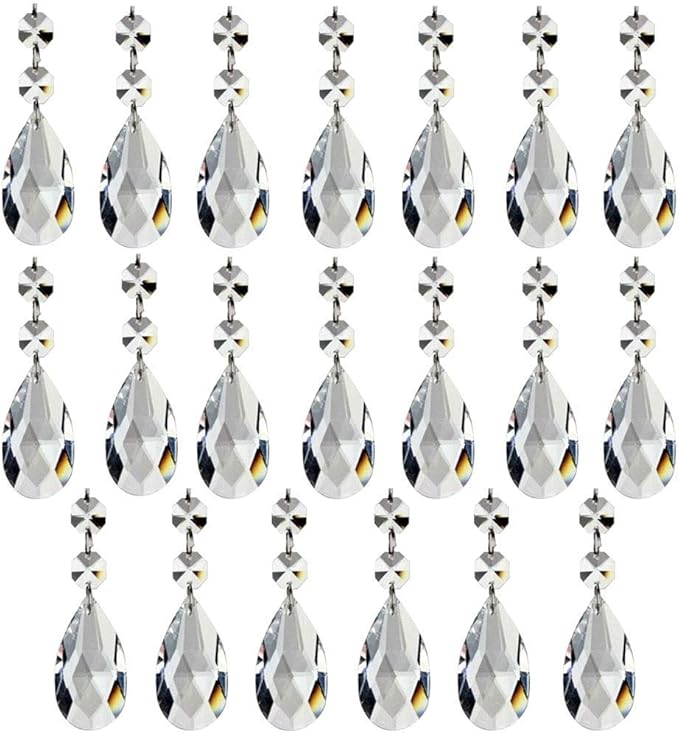
- 5–7 crystal teardrop pendants
- Strong glue
- Needle
- Small S-hook
Step-by-step Guide
- Start by threading your beads onto the nylon strands. Arrange the colors to mimic the gradient of water – blues at the top, transitioning to greens, then ending with crystal teardrops.
- Once the strands are finished, tie or glue them securely into the holes in the watering can spout.
- Attach a sturdy hook or chain to the handle for hanging.
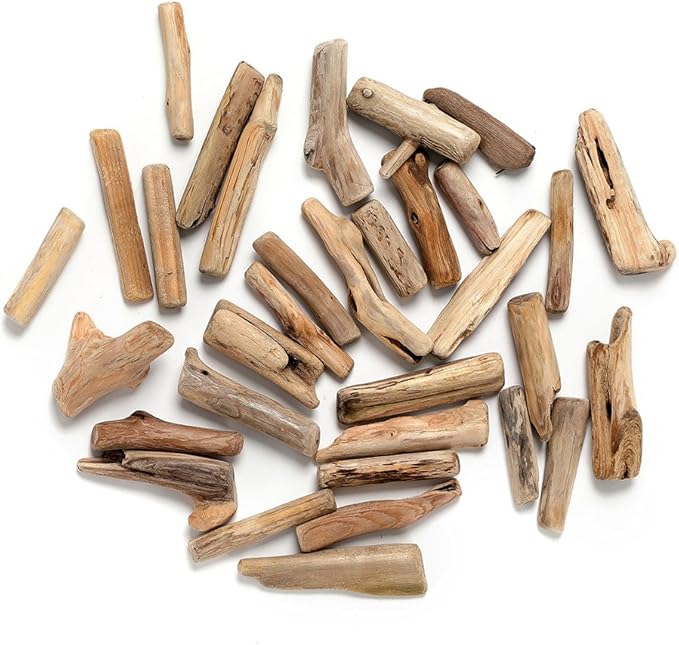
#3. Driftwood Pieces, Why Not?
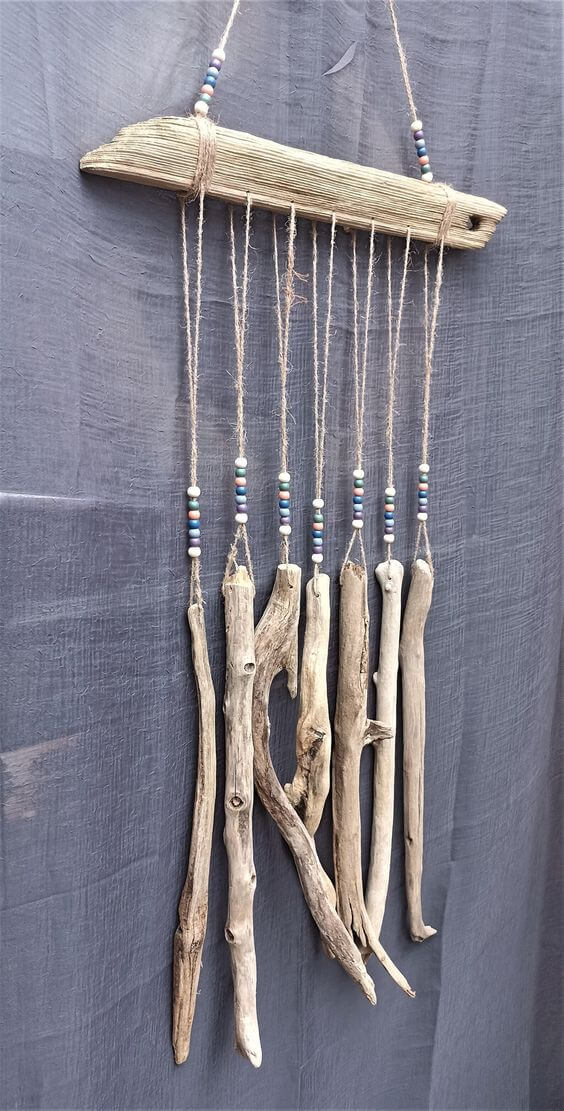
The natural texture and gentle clacking sound remind me of ocean breezes and quiet mornings.
Materials Needed
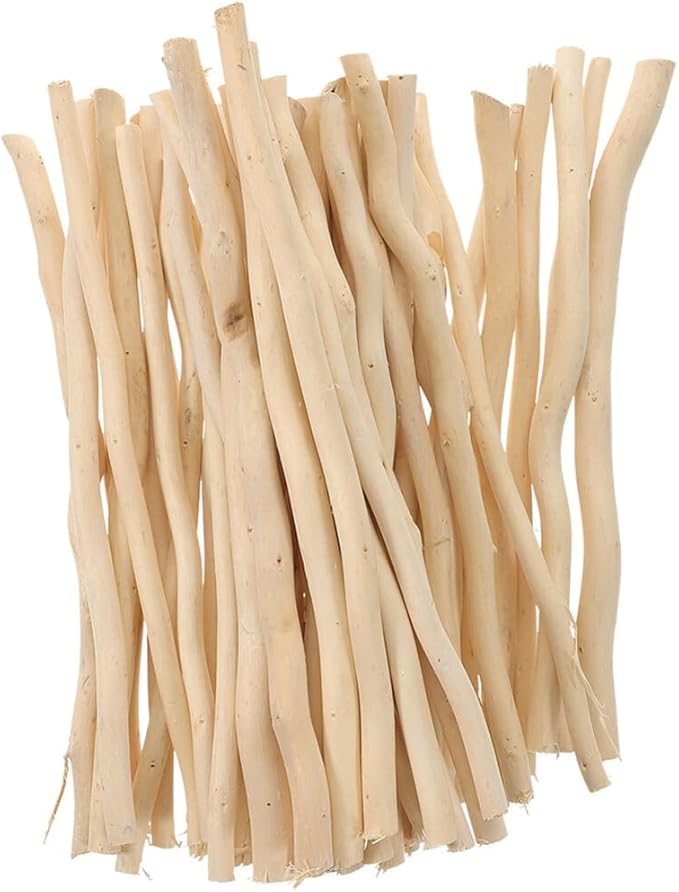
- 1 piece of driftwood (12–18 inches long)
- 7 driftwood branches (each 8–12 inches long)
- 2–3 yards of natural jute twine
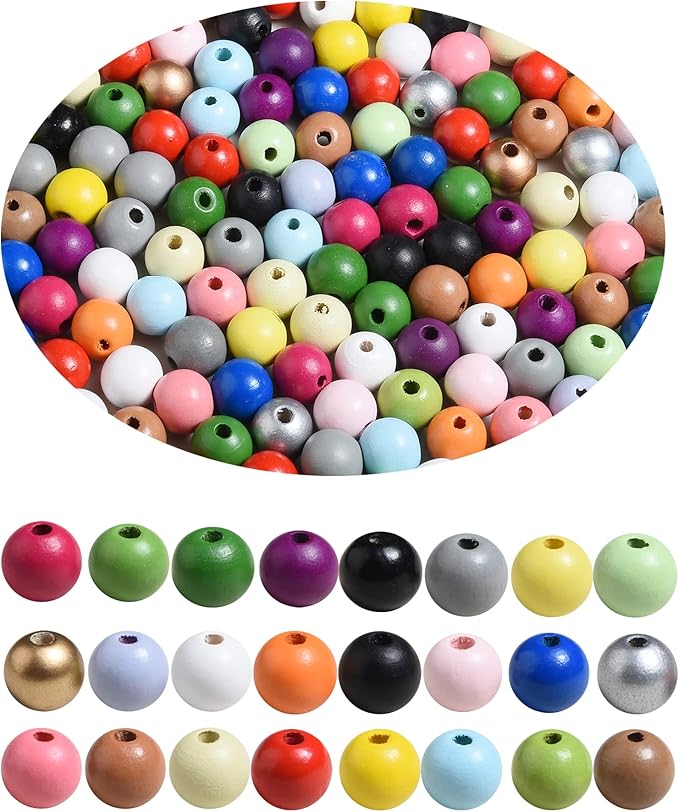
- 40–50 wooden beads
- Scissors
- Drill with small bit (1/8-inch)
Step-by-step Guide
- Drill a small hole near the top of each hanging driftwood piece. Cut twine into equal lengths (about 18 inches each), loop through the driftwood, and add 7 beads above each piece for visual rhythm.
- Tie each twine strand securely onto the long horizontal piece of driftwood, spacing them evenly. Add a few beads on the top section for extra character.
- Tie another piece of twine to both ends of the horizontal driftwood for hanging.
#4. Stones And Wooden Pieces
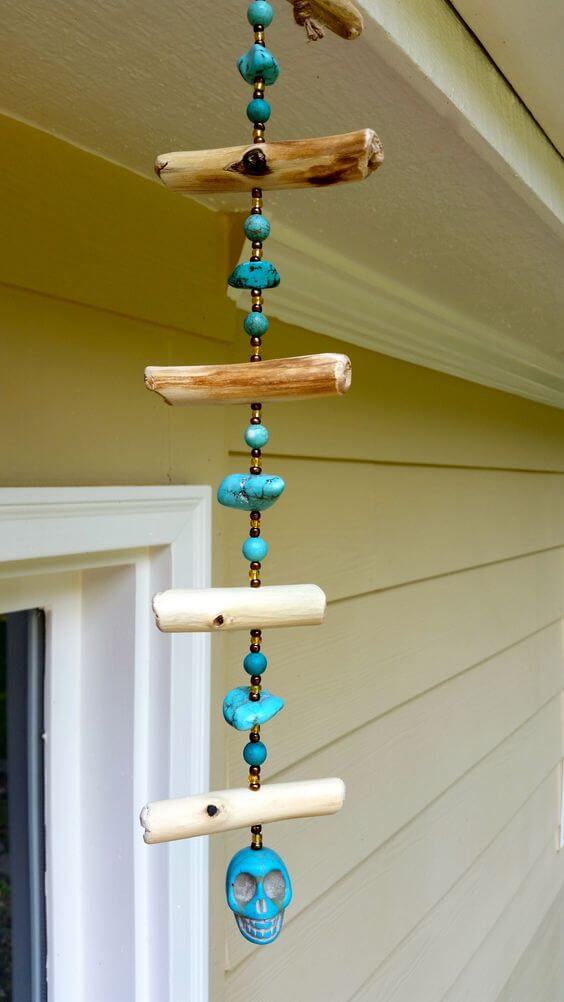
This edgy boho wind chime combines the coastal calm of driftwood with the cool, mystical energy of turquoise stones.

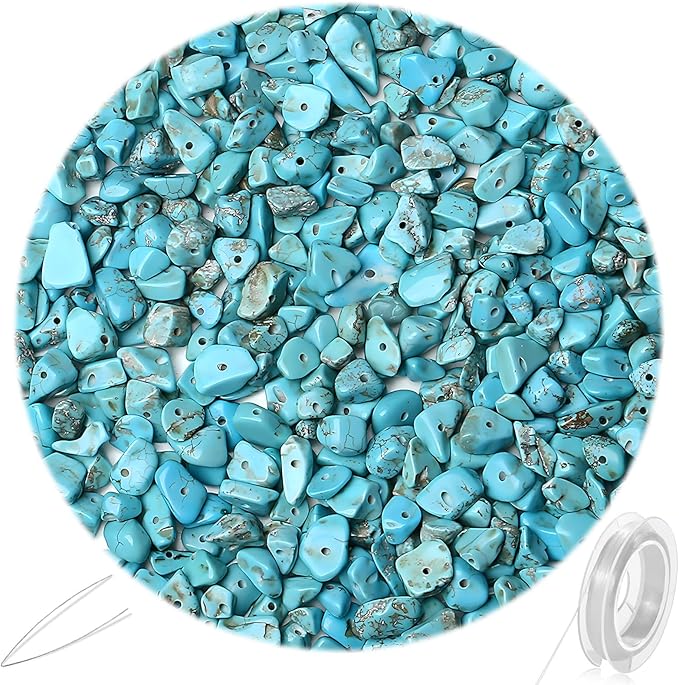
Materials Needed
- 5-6 small driftwood pieces (4–6 inches long)
- 20–25 turquoise beads
- 15 small antique gold spacer beads
- 1 large turquoise skull bead
- 1 yard of strong transparent nylon thread
- Needle
- Drill with small bit (1/16″) for wood
Step-by-step Guide
- Drill small holes in the center of each driftwood piece. Begin stringing your beads onto the nylon thread, alternating turquoise stones and spacers. After every 10-12 beads, insert a driftwood piece and continue the pattern.
- Finish the strand by tying the large skull bead to the bottom. At the top, loop the thread to create a hanging point, securing it with a knot and a drop of hot glue if needed.
#5. Grab Your Stones
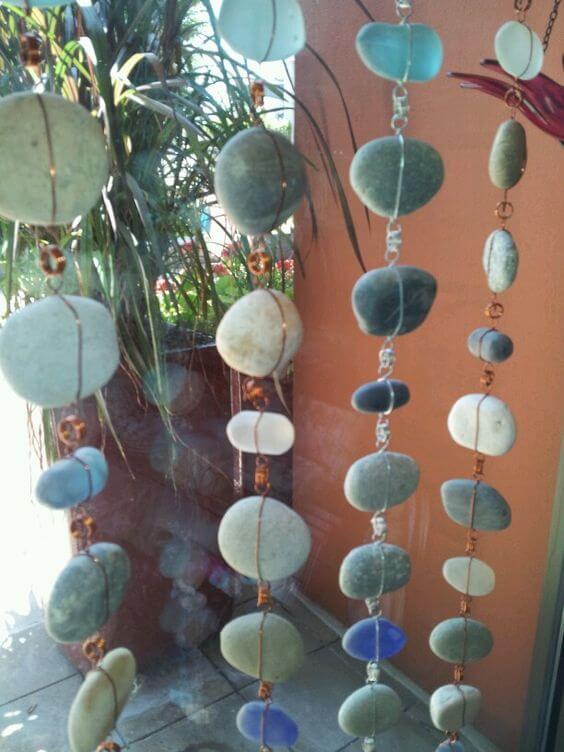
If you love the ocean, this wind chime will feel like bringing a piece of it home.

Materials Needed
- 35-40 flat beach stones (1–2 inches diameter)
- 10–12 pieces of sea glass
- Copper jewelry wire
- Small jump rings
- Jewelry pliers set
- Drill with small stone bit
- Wooden ring
Step-by-step Guide
- If your stones aren’t pre-drilled, use a masonry drill bit to carefully make holes near the top and bottom of each. For thinner stones, wrap securely with wire instead of drilling.
- Start creating vertical strands: thread stones and sea glass using wire and jump rings, alternating materials for a balanced look. Use pliers to twist and secure.
- Attach each strand to your driftwood bar or ring, spacing evenly. Use a separate piece of wire or string to create a hanging loop.
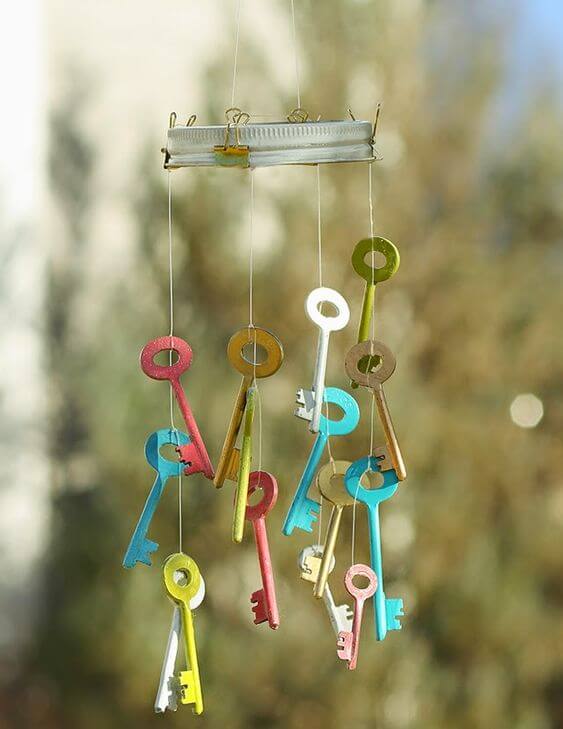
#6. Keep Your Old Keys

This one’s for the sentimental hoarders, the button collectors, and the keepers of old keys with forgotten locks.


Materials Needed
- 1 piece of driftwood (10–14 inches)
- 6–8 old house keys
- 2 large buttons (1–2 inches); 4-5 small buttons
- 40–50 assorted glass beads, charms, or trinkets
- 10–15 jump rings
- Jewelry wire
- Needle-nose pliers set
- Drill with small bit
Step-by-step Guide
- Drill evenly spaced holes across the top of your driftwood piece. Cut several lengths of wire (approx. 12–14 inches each) to form your hanging strands.
- Thread each wire with a unique mix of beads, buttons, old keys, washers, charms, and random finds from your junk drawer. Use jump rings to secure larger objects like keys or buttons.
- Attach each completed strand to the driftwood using jump rings or wire loops through the drilled holes. Add a final loop of beaded wire or string for hanging.
#7. Isn’t It Cute
There’s something satisfying about giving forgotten objects a second life, especially when they make music in the wind.


Materials Needed
- 15 old keys
- Acrylic paint set + small brushes
- 1 mason jar cap
- Fishing line
- Small drill
- Jump rings
- Spray sealant
Step-by-step Guide
- Paint each key in a different bright color and allow to fully dry. Apply a coat of clear sealant to protect them from weather and wear.
- Tie fishing line securely through each key’s top loop or a drilled hole. Vary the lengths for a more dynamic, cascading effect.
- Attach the strings to the mason jar cap by tying around the bar. Space them evenly across the cap and double-knot for durability.
#8. Metal Fits Acrylic Gems
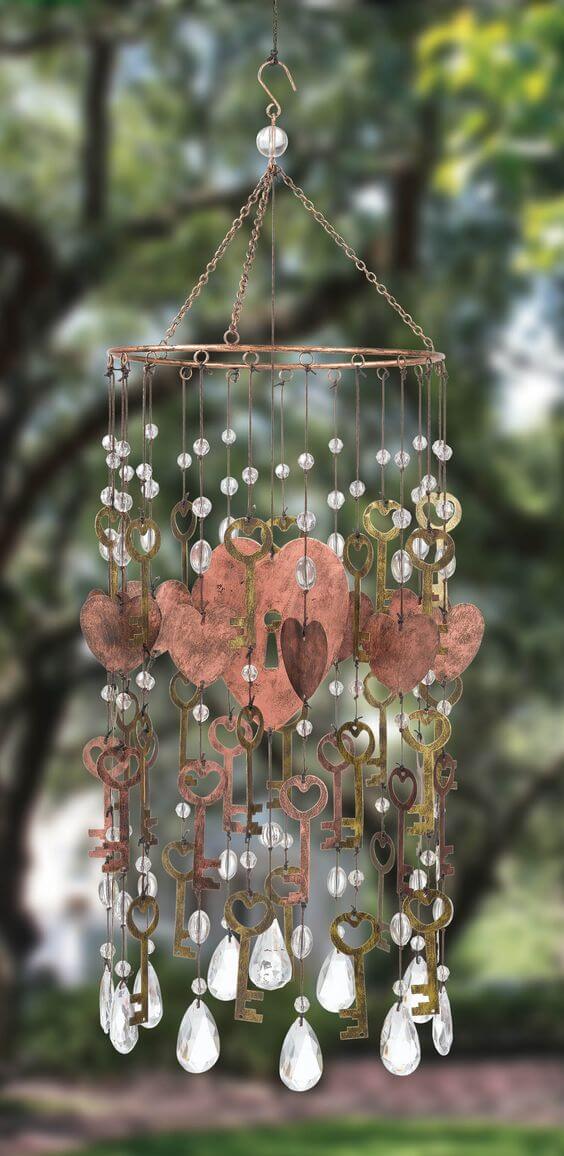
Antique-style keys, crystal-like drops, and heart charms sway gently to the breeze, bringing with them a melodic elegance and a dash of timeless charm.
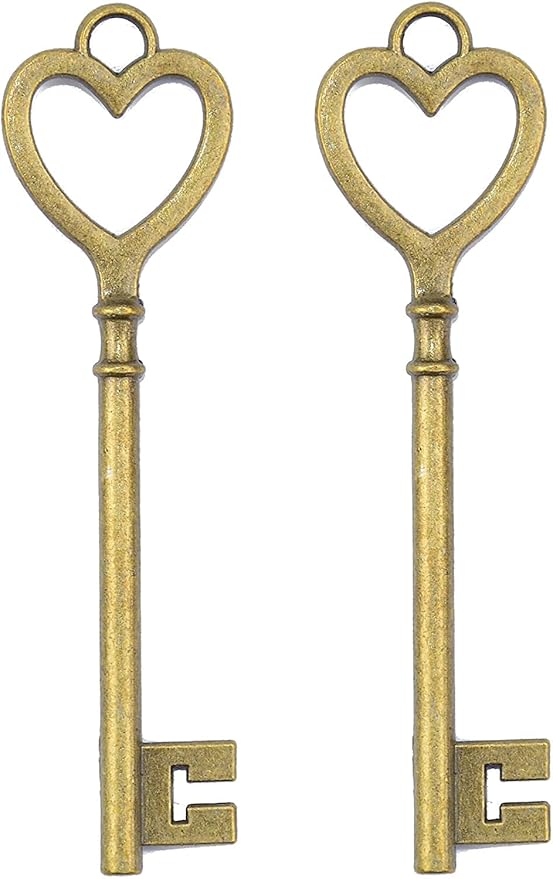
Materials Needed
- 30-35 heart-shaped vintage-style keys
- 15–20 heart metal charms
- 40–50 clear acrylic beads
- 20 large teardrop beads
- 1 metal hoop (approx. 10–12 inches)
- Jump rings and wire loops
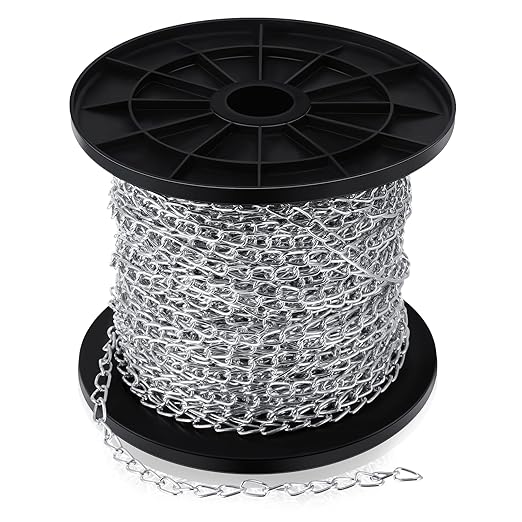
- Chain and hook
- Jewelry pliers and wire cutters
- Fine gauge beading wire
Step-by-step Guide
- Arrange your heart keys and charms in the order you want them to hang. Pre-assemble each strand by alternating beads, charms, and keys on wire or fishing line. Attach each with small loops for security.
- Secure each strand to the metal hoop using jump rings or by wrapping the end of the wire tightly around the frame.
- Attach three evenly spaced chains to the hoop and bring them together with a top hook. Add your final touch: a large decorative bead or charm at the very top.
#9. Boho Chic Style
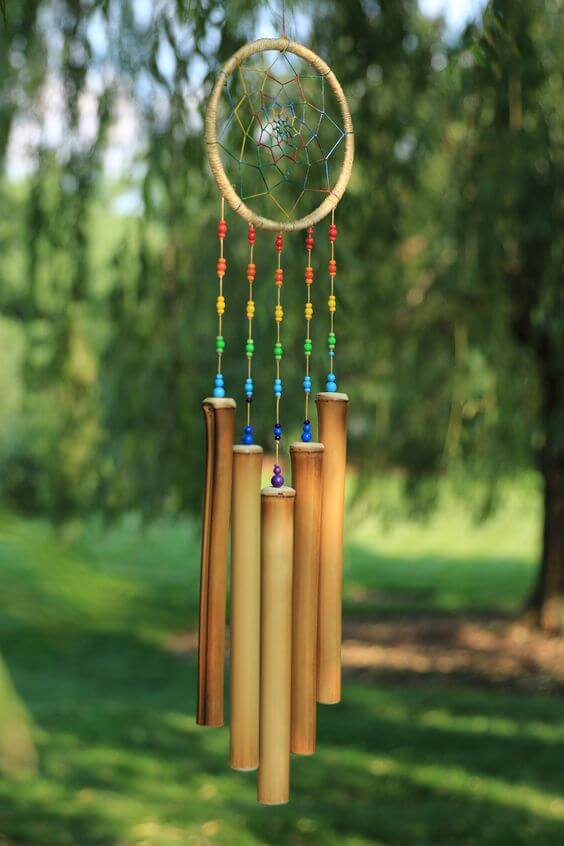
Made with a dreamy dreamcatcher frame and softly toned bamboo tubes, it offers not only a gentle melody but also a stunning splash of color with its rainbow bead strands.
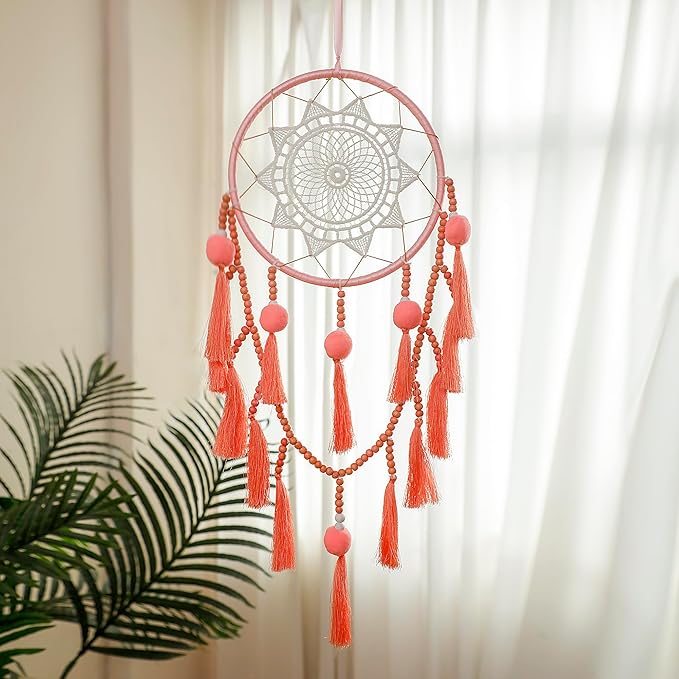
Materials Needed
- 1 dreamcatcher ring (approx. 6–8 inches)
- 5 bamboo chime tubes (8–12 inches long)
- 60 colorful craft beads
- 1 spool of black nylon thread
- Small drill
- Hot glue gun
- Scissors
- Metal ring hook
Step-by-step Guide
- Tie the nylon thread to the bottom loops of your dreamcatcher, leaving equal lengths for each strand. You’ll want around 6 threads for balance.
- Slide colorful beads onto each thread, spacing them in a rainbow gradient. Knot the thread after each bead to keep them from sliding down, and finish by tying or gluing the bamboo chimes at the bottom of each string.
- Adjust the chimes to hang at varying heights for better resonance. Add a strong hook or loop at the top of the dreamcatcher, and hang it in a breezy spot where the sun and wind can bring it to life.
#10. Stained Glass Dragonfly Wind Chime
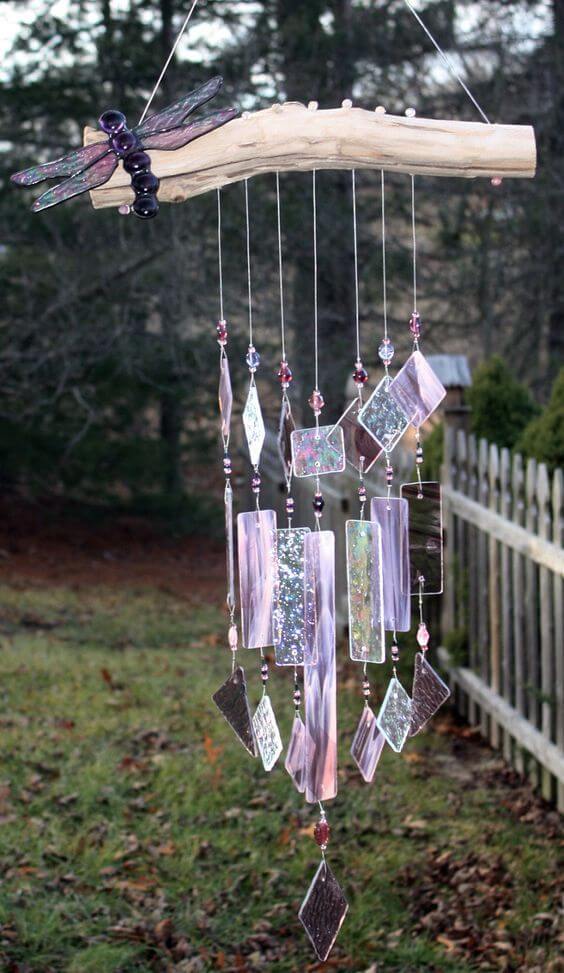
Perfect for a shady tree, porch, or even a sunroom window, it reflects light and sound in the most peaceful way.

Materials Needed
- 10–12 pieces of stained glass
- 1 driftwood branch (12–14 inches)
- 12–15 jewelry wire strands (24-gauge, 12–15 inches each)
- 30–40 small glass beads in purple, pink, or iridescent
- Drill with a glass drill bit (1–2 mm)
- Small pliers and wire cutter
- Transparent nylon thread
- Decorative dragonfly ornament (optional)
Step-by-step Guide
- Carefully drill tiny holes into each stained glass piece near one edge using a glass drill bit.
- Cut wire strands and start threading glass beads and glass pieces in alternating patterns, wrapping the wire ends through drilled holes and securing tightly. Attach each wire to the driftwood at varying lengths for depth.
- Add a loop of transparent nylon thread to the top of the driftwood for hanging, and glue or wire a decorative dragonfly onto one end for a magical finishing touch.
#11. Rustic DIY Flatware Wind Chime

This vintage-inspired wind chime transforms old kitchen treasures into a quirky, music-making masterpiece.

Materials Needed
- 1 vintage or used teapot (8–10 inches wide)
- 12–15 pieces of old silverware (spoons, forks, butter knives)
- 40–50 large round wooden
- Sturdy twine
- Hand drill
- Superglue (optional)
- Metal hook
Step-by-step Guide
- Drill small, evenly spaced holes along the bottom rim of the teapot. Clean off any sharp edges.
- Cut 12–15 pieces of twine or fishing line and thread beads through them. Tie a piece of silverware to the bottom of each strand, then thread through the teapot holes and secure with knots or glue.
- Use the handle or attach a wire loop to the top of the teapot for hanging.
#12. Stained Wine Glass Wind Chime
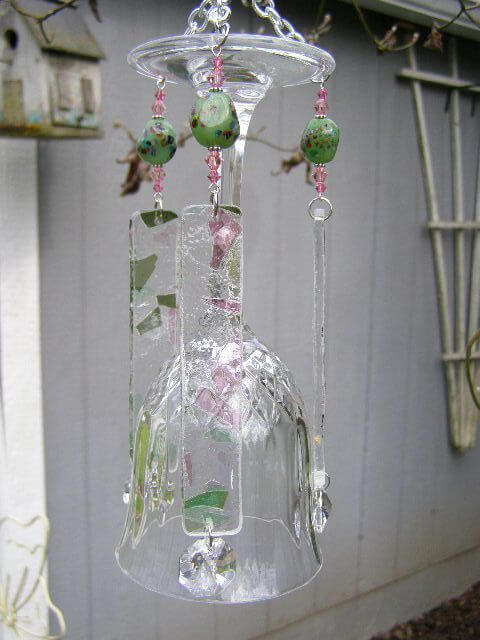
The soft clink of glass and beads swaying in the breeze creates a soothing, romantic atmosphere. It’s perfect for patios, garden hooks, or hanging just outside your window where the sunlight can catch each detail.


Materials Needed
- 1 crystal wine glass
- 3 stained glass pieces (3–5 inches long)
- 12 decorative beads (8–12mm)
- 3 large green beads
- Clear nylon thread
- Small crystal drops
- Glass drill bit and rotary tool
- Jump rings and chain
- Strong jewelry pliers
Step-by-step Guide
-
- Drill tiny holes into the base of the wine glass using a diamond glass drill bit.
- Thread your decorative beads and glass chimes onto nylon or jewelry wire, knotting securely or using crimp beads to hold them in place. Finish each strand with a crystal or prism for sparkle and weight.
- Attach each strand to the drilled holes using jump rings. Then, use additional rings or a chain to create a sturdy hanging loop from the base of the glass.
#13. Game Piece Wind Chime
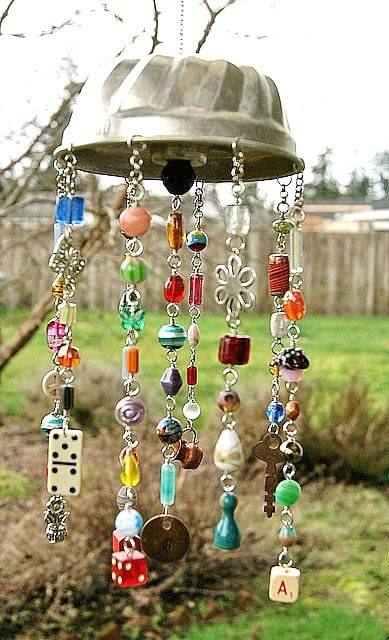
I made one of these on a rainy Sunday using nothing but bits from my junk drawer including old keys, game pieces, broken jewelry and an upside-down vintage cake tin.

Materials Needed
- 1 vintage bundt pan
- 6–10 assorted chains (8–12 inches long)
- 40–60 mixed beads, charms, dice, dominoes, keys, or trinkets
- Jump rings and split rings
- Small hand drill
- Jewelry pliers
Step-by-step Guide
- Flip the bundt pan upside down and drill or punch small holes evenly around the edge for hanging strands. One hole in the center or handle area will be for the top chain.
- Attach jump rings through each hole and begin connecting your trinkets, charms, and beads using short chains or jewelry wire. Alternate between sizes, colors, and materials for a playful effect.
- Once all strands are attached, add a longer chain or wire to the top hole for hanging.
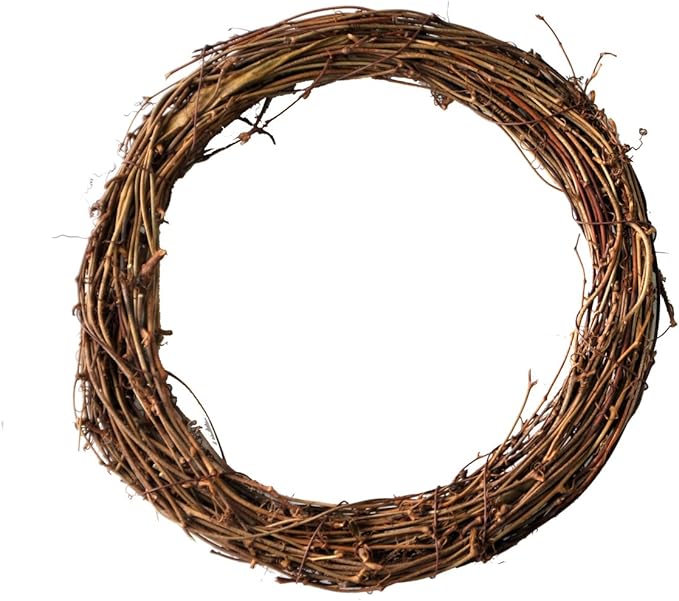
#14. Shabby Chic DIY Wind Chime
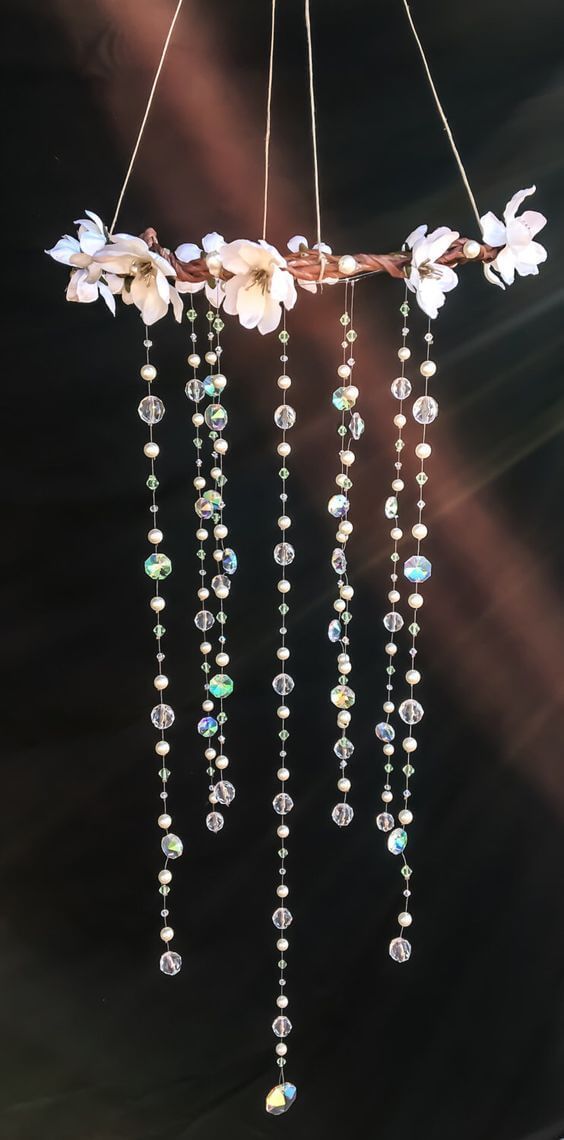
This one felt like a dream to create. The shimmer of light bouncing through crystal beads and the gentle swaying in the breeze turned my patio into something ethereal.

Materials Needed
- 1 grapevine (10–12 inches)
- 9 strands of crystal bead garland (approximately 24–30 inches each)
- Fishing line
- Hot glue gun with clear glue sticks
- 6–8 artificial white flowers
- Scissors and needle
Step-by-step Guide
- Tie the fishing line securely to the base of the wreath in evenly spaced sections. Thread alternating crystal and pearl beads onto each strand, keeping them light and varied in pattern. Tie a knot at the bottom of each strand to hold the beads in place.
- Once all bead strands are finished and knotted, glue or knot them to the underside of the wreath. Ensure they hang evenly and avoid tangling.
- Glue artificial flowers around the top of the wreath for a romantic, blooming effect.
#15. Vintage Teacup Wind Chime
I loved the process of painting each pot, like tiny canvases full of charm.

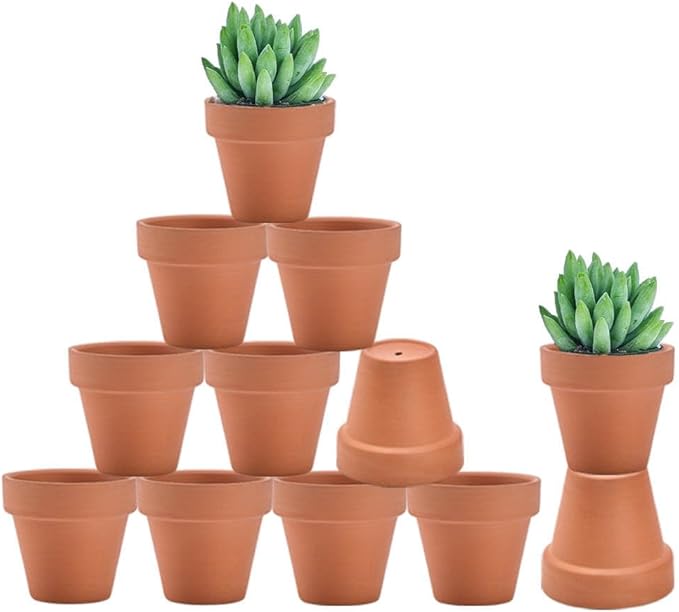
Materials Needed
- 1 large terracotta pot (6–8 inches)
- 5 small terracotta pots (2–3 inches)
- Acrylic paint set and brushes
- Waterproof sealant spray
- Strong nylon cord (8–10 ft)
- 12–15 wooden beads (10–12 mm)
- Metal washer
- Scissors
- Optional: hot glue gun
Step-by-step Guide
- Start by painting each terracotta pot in your favorite colors or floral designs. Once dry, coat each one with waterproof sealant and let cure for a few hours.
- Cut cords to the desired lengths. For each strand, string a few wooden beads followed by a small painted pot, repeating until you reach the top.
- Next, tie knots under each pot to keep them from sliding. Attach each strand through the large pot’s drainage hole, tying knots to secure from the inside.
- Use additional twine to create a hanger by tying it around the base of the large pot or feeding it through its drainage hole.
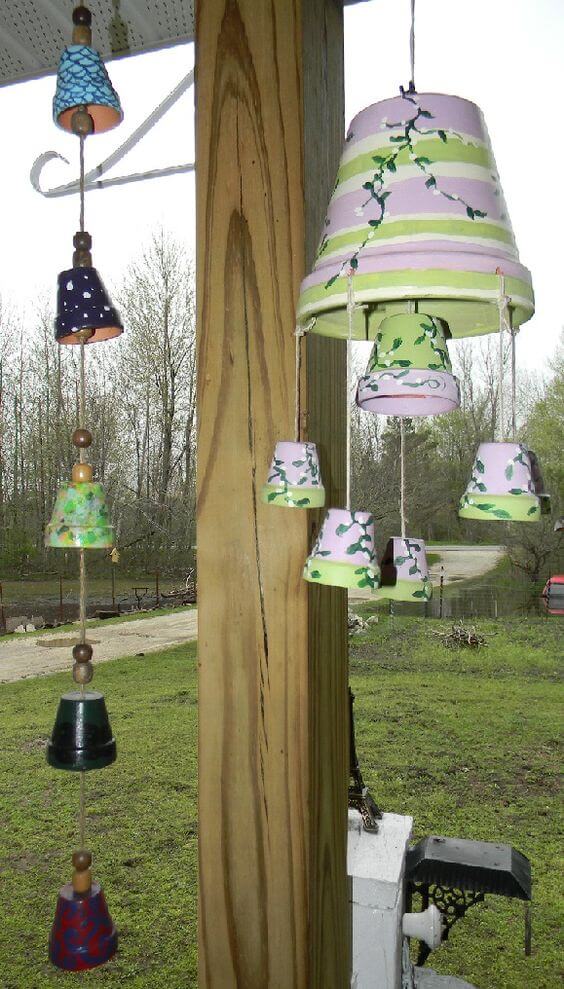
#16. Repurposed Flower Pot Wind Chime
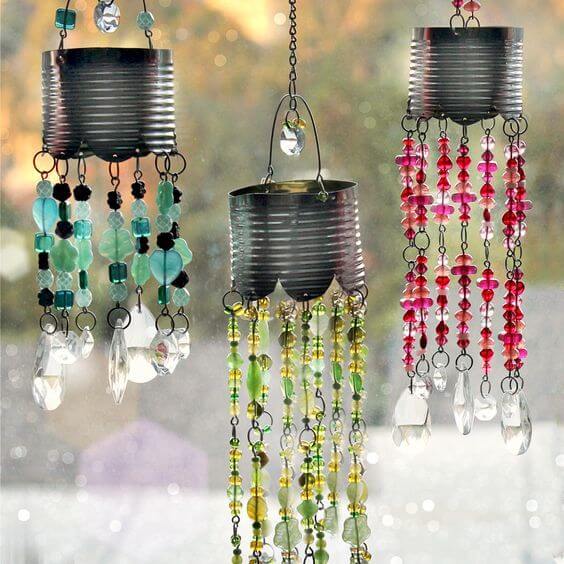
I imagined them dancing in the sunlight, adorned with colorful beads, and they turned into this sparkly, sound-filled delight.
Materials Needed
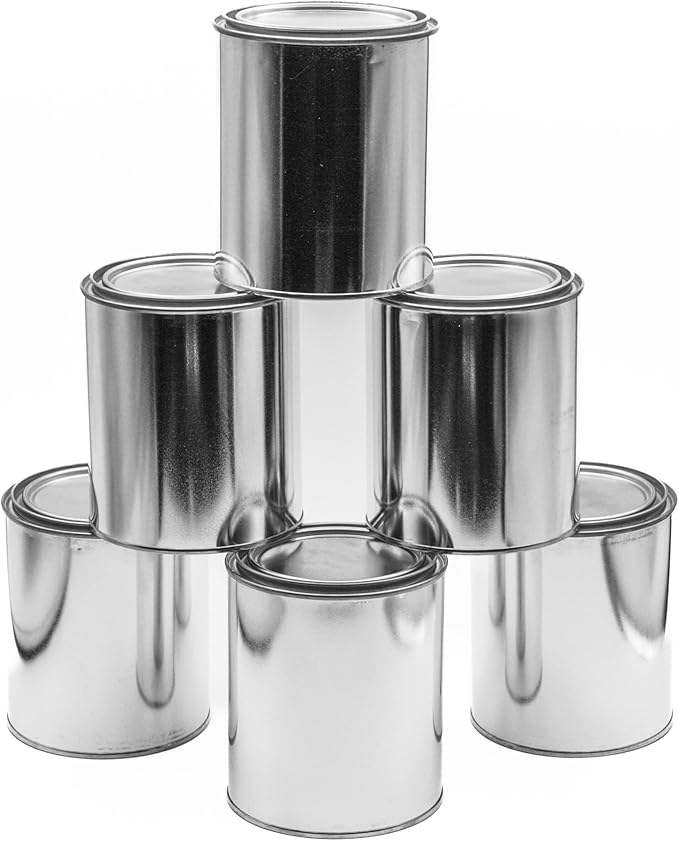
- 3 clean, empty tin cans (14–15 oz)
- 90–120 assorted beads
- 30 jump rings (8–10 mm)
- Chain links
- Beading pliers
- Drill with small metal bit
- Spray paint (optional)
- Fishing line
- Hanging chain
Step-by-step Guide
- Drill or punch 6–8 evenly spaced small holes along the bottom rim of each can for the bead strands, plus one hole at the center of the top for hanging.
- Thread beads onto fishing line or jewelry wire, creating strands about 10–12 inches long. Loop each strand with a jump ring at the top to attach to the can. Mix up colors for a vibrant look or stick with one palette for a coordinated theme.
- Use pliers to connect each jump ring to the bottom rim holes. Finally, add a chain or cord through the top center hole for hanging.
#17. Upcycled Tin Can Wind Chime
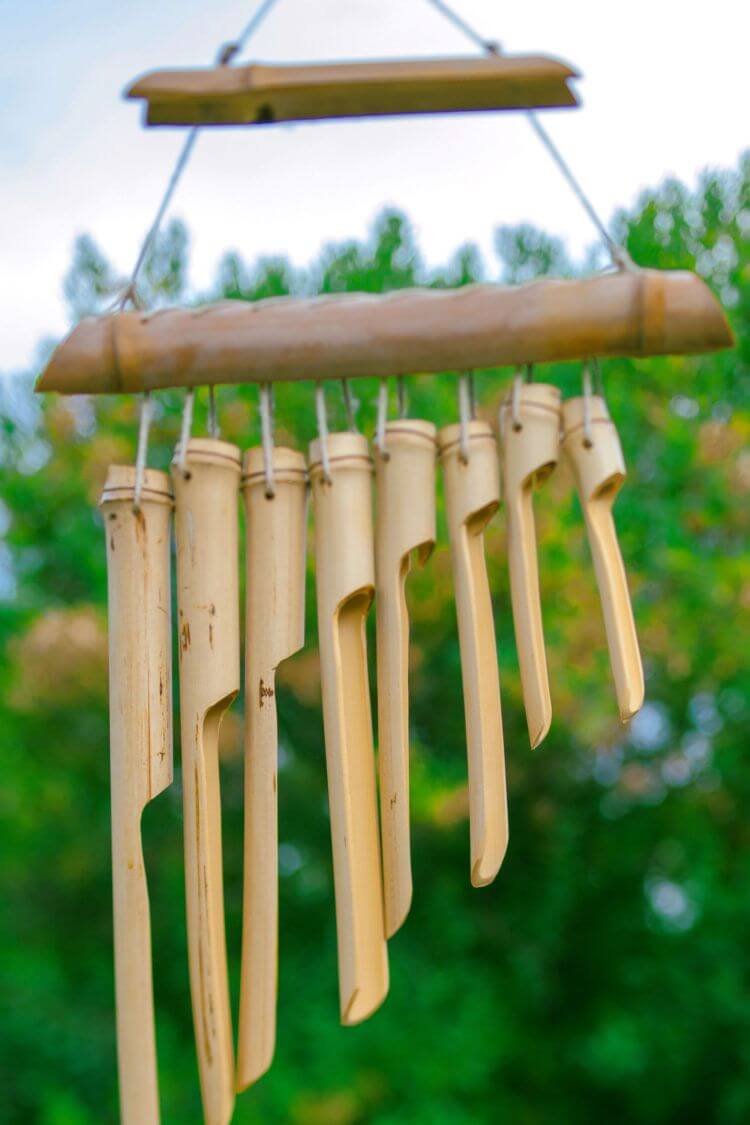
The soft clatter it produces is calm and grounding, perfect for a porch or tucked beneath a tree branch.
Materials Needed
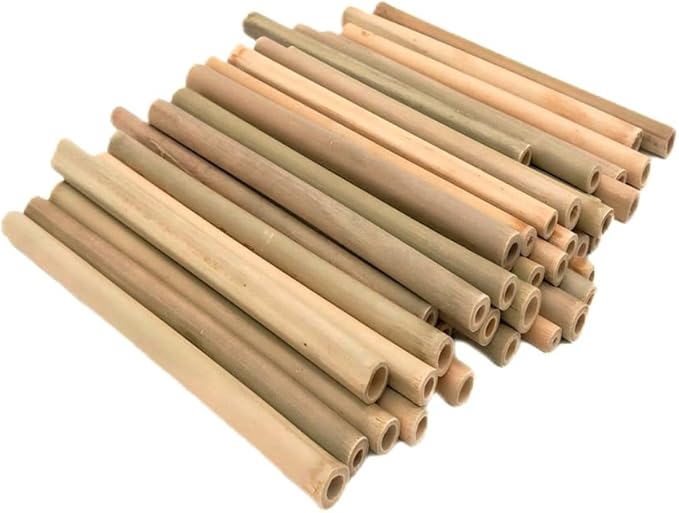
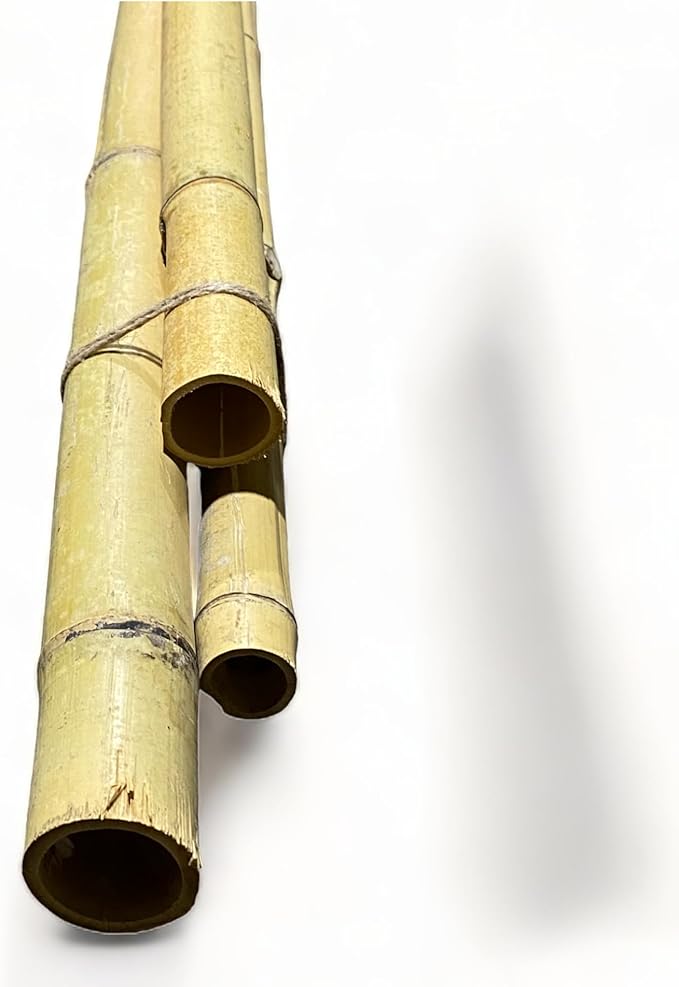
- 1 thick bamboo pole (at least 2.5 inches diameter, 12–14 inches long)
- 8–10 thinner bamboo tubes (around 1 inch diameter, 10–12 inches long)
- Sturdy natural jute twine (6–8 feet)
- Hand saw
- Drill with small wood bit (1/8″)
- Sandpaper (120 grit)
- Optional: wood sealer
Step-by-step Guide
- Cut your bamboo into 8–10 vertical tubes. One end of each piece should be notched diagonally for better sound. Sand the edges to smooth out any splinters. Drill a small hole near the top of each tube for hanging.
- Drill evenly spaced holes through the top horizontal bamboo piece (the base), then thread jute through each vertical tube and tie them through the base.
- Tie three strings to the top bar to form a hanging triangle. Knot them together at the top for hanging.
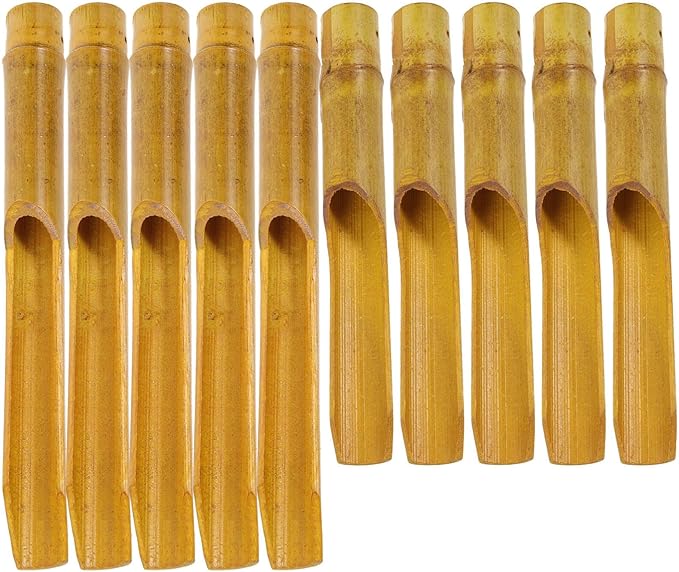
#18. DIY Bamboo Wind Chime
Each clink tells a story, of Sunday brunches, mismatched sets, and hidden cabinets rediscovered.

Materials Needed
- 20 vintage teacups
- 15-18 feet of natural jute twine
- Glue (optional)
- Scissors
Step-by-step Guide
- Choose your teacups and cut twine in varying lengths (18 to 36 inches). Thread one end of the twine through the handle of each cup and tie a strong knot.
- Tie the other end of each string to the branch tree. Space them at least 2 inches apart for movement and sound.
- Add a strong twine or chain to each end of the branch for hanging.
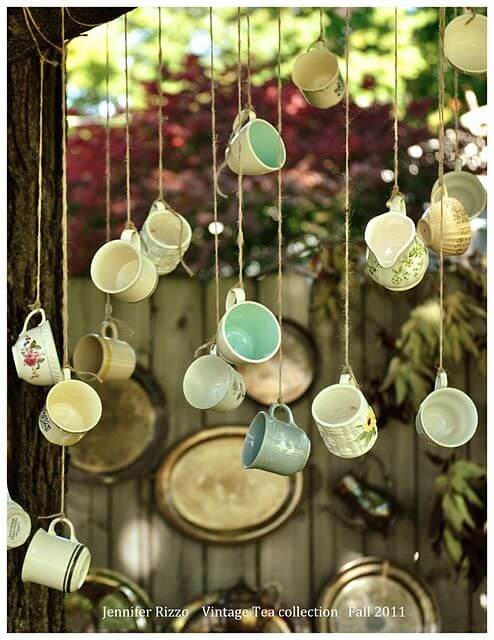
#19. DIY Ceramic Tea Pot Wind Chime
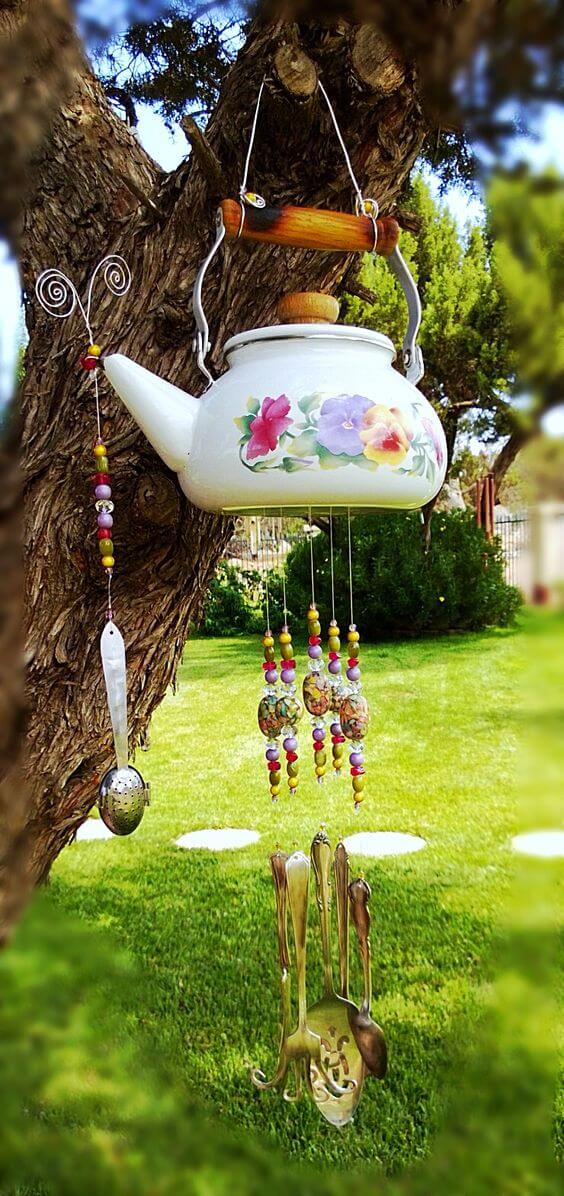
This teapot wind chime is pure storybook charm, imagine a whispering breeze making old cutlery dance and clink below a floral kettle.
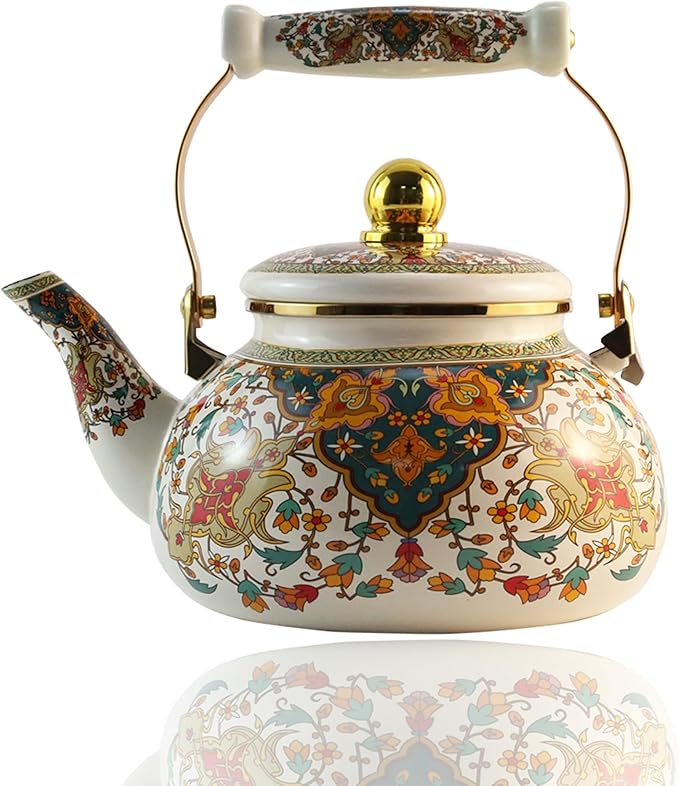
Materials Needed
- 1 vintage ceramic teapot (with handle)
- 5–6 old silverware pieces (forks, spoons, strainers)
- 30 colorful beads
- 5–6 lengths of nylon string
- Drill with ceramic bit
- Super glue
- S-hook
Step-by-step Guide
- If your teapot doesn’t have a hole at the bottom, carefully drill 5–6 small holes in a circular pattern. Thread each piece of string through a hole and secure it tightly with a knot or hot glue.
- Thread colorful beads along each string, leaving 2–3 inches at the bottom. Tie or glue a piece of silverware to the end of each beaded string so it hangs freely and creates gentle chimes when swaying.
- Attach an S-hook or chain to the handle of the teapot and hang your creation from a tree branch, pergola, or porch hook.
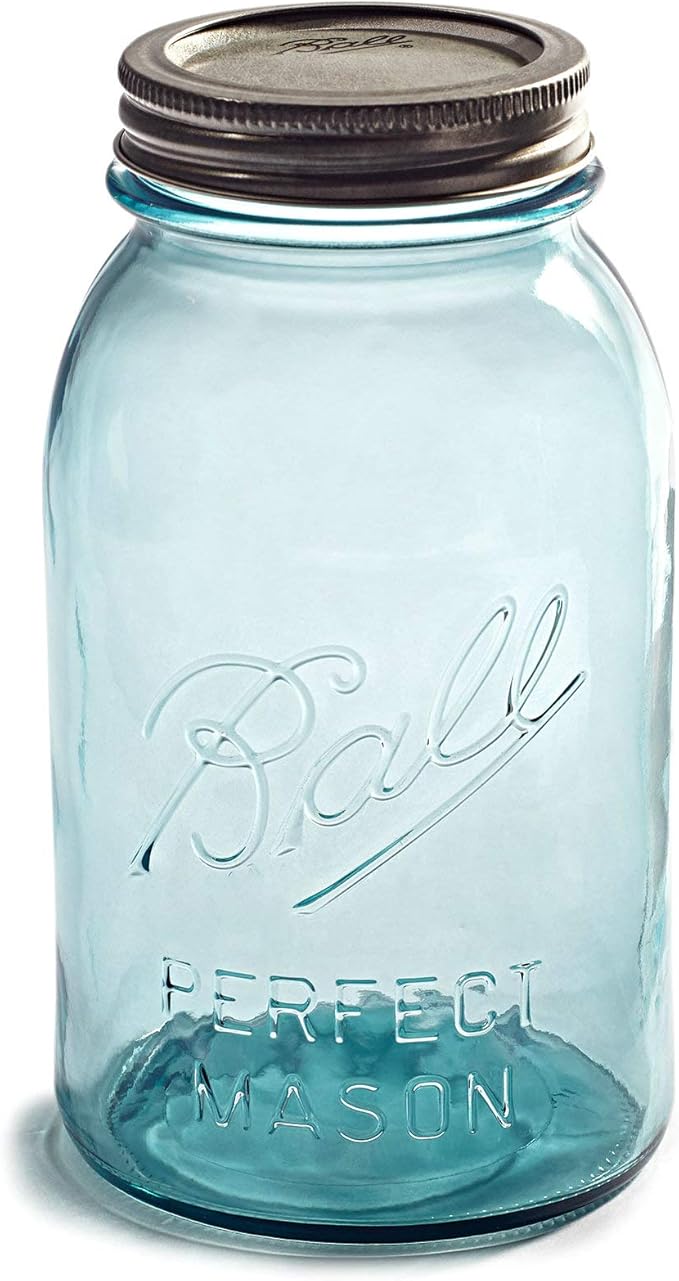
#20. Mason Jar Wind Chime
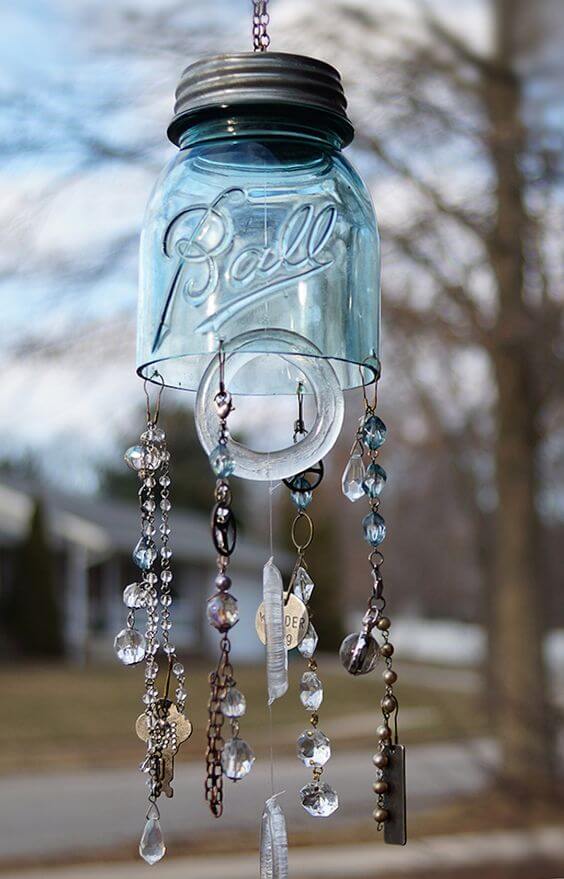
When it sways in the wind, it sings the softest sparkle of sound and reflects light like garden confetti.

Materials Needed
- 1 vintage mason jar with lid
- 6–8 strands of crystal beads
- Clear fishing line
- 5–6 metal trinkets (keys, tags, pendants)
- 1 round glass ring
- Small drill
- Jump rings and jewelry pliers
- Chain
Step-by-step Guide
- Start by drilling or punching 5–6 evenly spaced holes in the metal lid of the mason jar.
- Cut fishing line to desired lengths and string beads, crystals, and charms onto each. Tie knots or use crimp beads to secure items. Loop the top of each strand through the drilled holes and secure tightly with knots or jump rings.
- Hang a large glass ring or focal piece from the center hole, allowing it to clink softly with the others.
- Screw the lid back onto the jar, attach a hanging chain or loop of twine to the jar’s neck, and hang it somewhere that catches both wind and light.
#21. Bottle Wind Chime
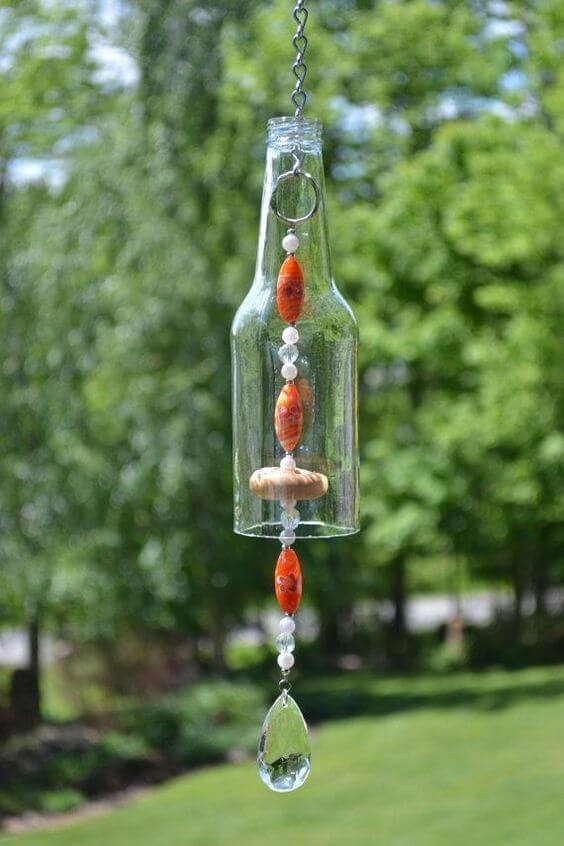
The gentle clinks of beads and crystal offer a soft, tinkling melody that feels like nature’s applause. It’s elegant, simple, and incredibly satisfying to make.
Materials Needed
- 1 glass bottle
- Glass bottle cutter
- 2–3 large decorative beads (approx. 1 inch long)
- 8–10 small beads (pearl or faceted glass, 6–8mm)
- 1 wooden bead as clapper (approx. 1 inch thick)
- 1 teardrop crystal pendant (approx. 1.5 to 2 inches)
- Strong fishing line
- Jump rings and chain
- Safety gloves and sanding sponge
Step-by-step Guide
- Use the bottle cutter to score a clean line around the base of the bottle, then follow the heating and cooling process to safely separate the bottom.
- Thread your beads and wooden clapper onto jewelry wire or fishing line, starting with small beads, then a large decorative one, followed by the clapper and more beads below. Finish with a teardrop crystal to act as the centerpiece and weight.
- Loop the top of the wire around a jump ring and secure it. Insert the stringed section into the center of the bottle and hang using a chain.
#22. Paint Your Old Pot And Bring Out The Keys
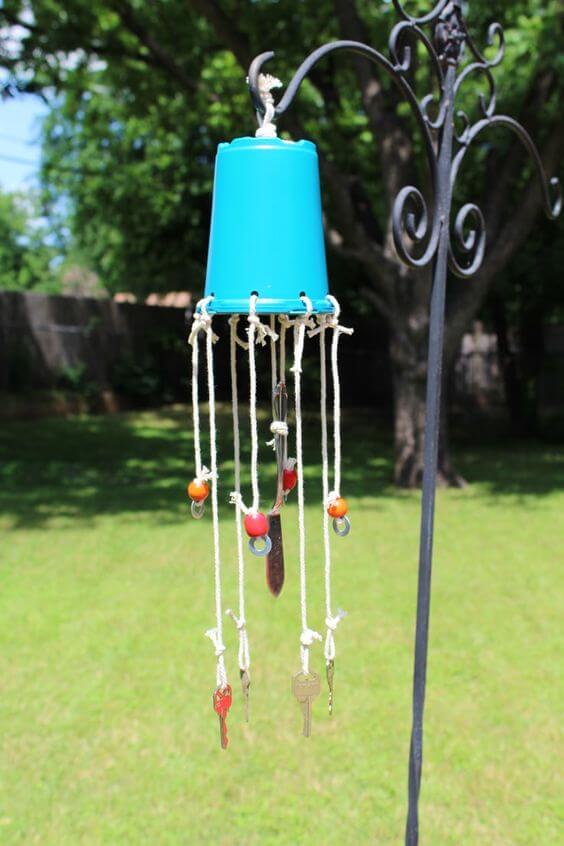
Each time the wind rustles through, it sends off a playful metallic jingle that feels like tiny laughter floating through the yard.

Materials Needed
- 1 sturdy plastic cup (16–20 oz)
- 8–10 old metal keys
- 2 ft of white cotton cord
- 10–12 large colorful wooden beads (10–12mm)
- Small washers (optional)
- Drill
- Scissors
Step-by-step Guide
- Flip the plastic cup upside down and use a heated nail or a small drill bit to make 8 evenly spaced holes near the rim and one at the center for hanging.
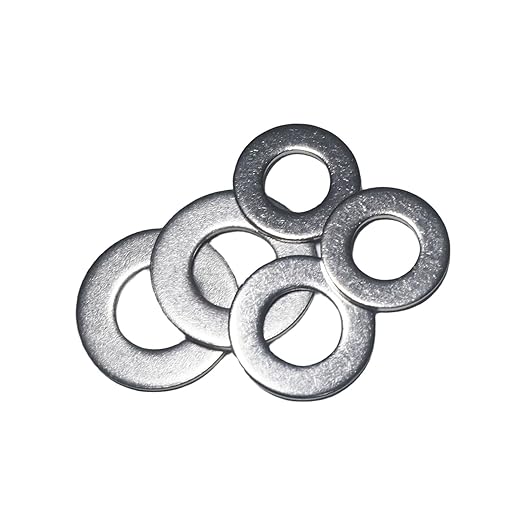
- Cut 9 equal lengths of cord (about 10 inches each). Tie one end of each cord through a hole, and secure a key or washer at the bottom. Add colorful beads above each key, knotting them tightly in place.
- Thread a longer string through the center hole at the top and knot it securely for hanging.
#23. Using Jelly Moulds

The sunlight bounces off each crystal, and every breeze adds a soft chime that feels almost like a fairy whispering through the garden.


Materials Needed
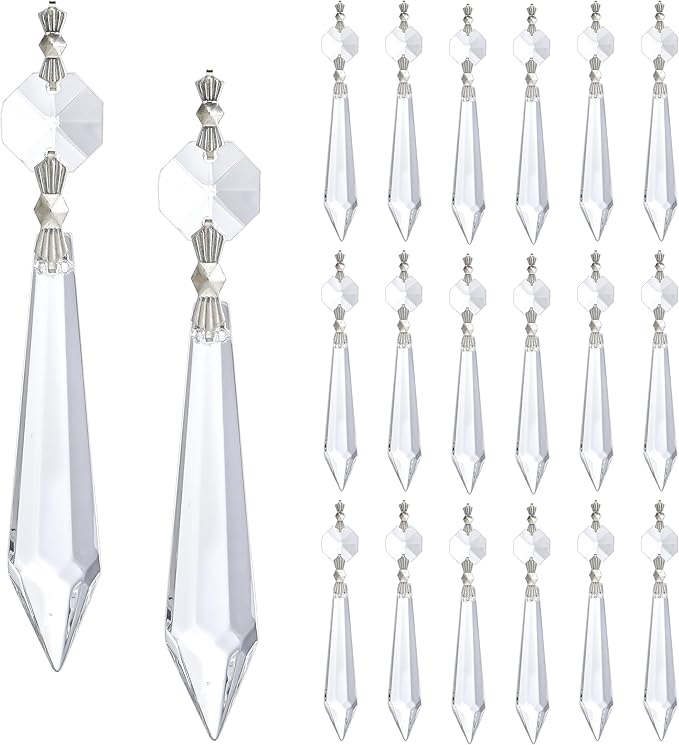
- 1 vintage tart mold (approx. 4–6 inches wide)
- 6–8 crystal chandelier drops
- 20–30 faceted acrylic beads
- 10–12 jump rings
- 1 ft of craft wire
- Needle-nose pliers
- Drill with small metal bit
Step-by-step Guide
- Start by flipping the tart pan upside down and drill or punch 5–6 evenly spaced holes around the outer edge, plus one in the center for hanging.
- Use jump rings or wire to string together beads and crystals into strands about 6–8 inches long. Mix sizes to add texture and sparkle.
- Thread each strand through the holes, securing with knots or wrapping wire. Add a decorative wire hook or loop through the top center hole for hanging.
#24. Pieces Of The Sea

Every summer, I bring a bit of the coast home by crafting sea-inspired wind chimes like this one.
Materials Needed
- 20–25 medium-sized seashells
- 30–40 tumbled sea glass pieces
- Fishing line, 10–15 feet
- 1 metal ring (3–4 inches)
- 12–15 small turquoise beads
- Needle or bead reamer
- Hot glue gun (optional)
Step-by-step Guide
- Start by cutting 5 strands of fishing line, each about 20 inches long. Tie one end of each to the metal ring, spacing them evenly around the edge.
- Thread seashells, sea glass, and beads in a varied pattern onto each line. You can use knots to space elements apart or glue to hold them in place.
- Tie all strands securely. Attach a longer string at the top for hanging, and you’re done!
#25. Upcycled Wine Bottle Wind Chimes

Each bottle has its own soft, mellow chime when the breeze brushes through. You’ll fall in love with how it glows and sings in the afternoon light.


Materials Needed
- 7 empty wine bottles
- Glass bottle cutter tool
- Sandpaper
- 7 metal chains, 12–15 inches long
- 7 decorative heart pendants
- Strong hooks
- Protective gloves and eye gear
Step-by-step Guide
- Clean each wine bottle thoroughly and use a glass cutter to score and carefully break off the bottom 2–3 inches of each one. Sand down the sharp edges until smooth.
- Thread your chain through the bottle neck, attaching a small clapper just inside the bottom opening. The chain should dangle so the clapper swings and taps the inside of the bottle.
- Finish each chime by attaching a heart-shaped tail or pendant to the bottom of the chain. Hang all bottles from a sturdy bar or beam and enjoy your cheerful, musical rainbow display!
#26. Easy DIY Coiled Copper Wind Chime
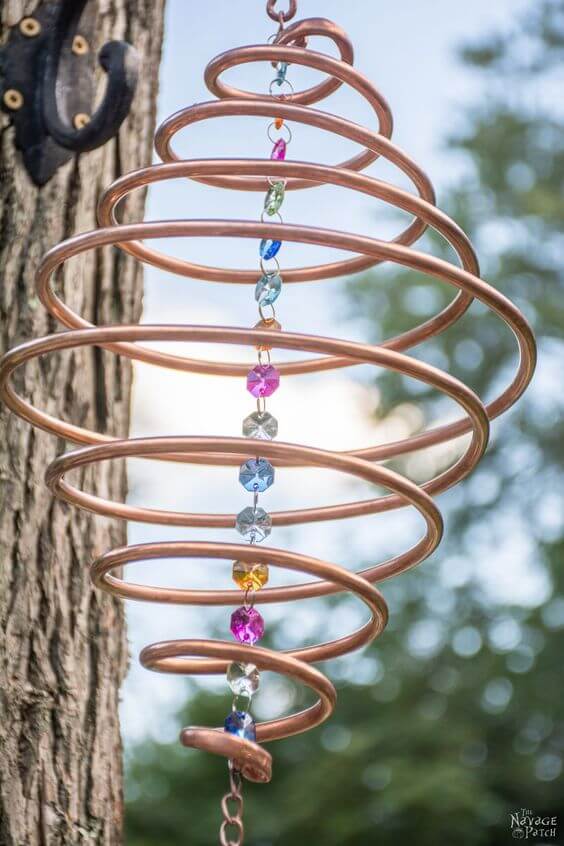
The copper spiral twirls with the gentlest breeze, and the sun catches on the crystals, scattering light like it’s casting spells across the garden.

Materials Needed
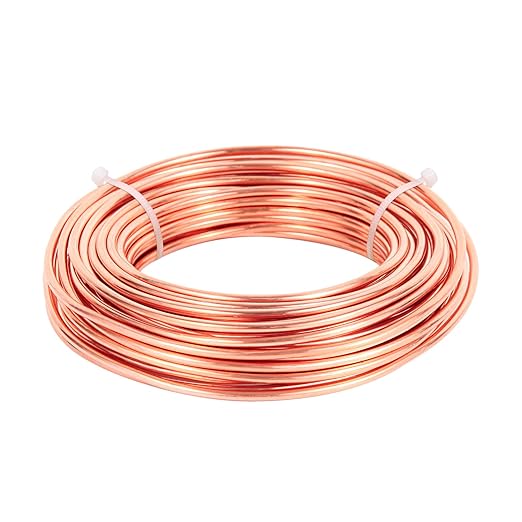
- 1 copper coil (¼ inch soft copper tubing, ~6 ft)
- 15–18 faceted crystal beads (8–12mm)
- 12-inch length of strong fishing line
- 1 ceiling hook
- Needle-nose pliers and wire cutters
- Chain (optional)
Step-by-step Guide
- Start by carefully winding the copper tubing around a large round object like a paint can or flower pot to create an even spiral shape.
- String your beads onto the fishing line, alternating colors for a rainbow effect or keeping it monochrome for elegance. Tie knots or use crimp beads between them to keep spacing even.
- Suspend the beaded strand in the center of the spiral, securing it at the top and letting it hang down freely. Add a drop-shaped bead or charm at the bottom for added sparkle.
#27. Repurposed Ice Cream Spoon Chime
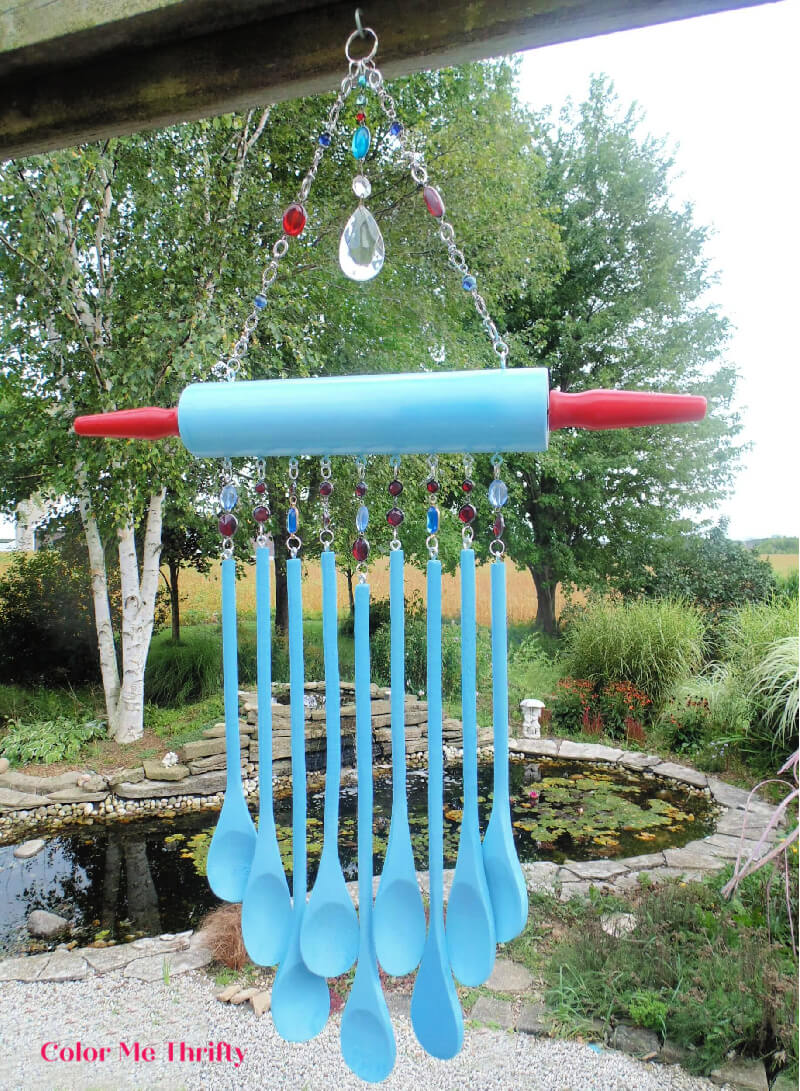
A fresh coat of pastel paint gave everything a playful pop, and the final result brings such a quirky, happy vibe to the garden. It’s functional whimsy with a musical twist.
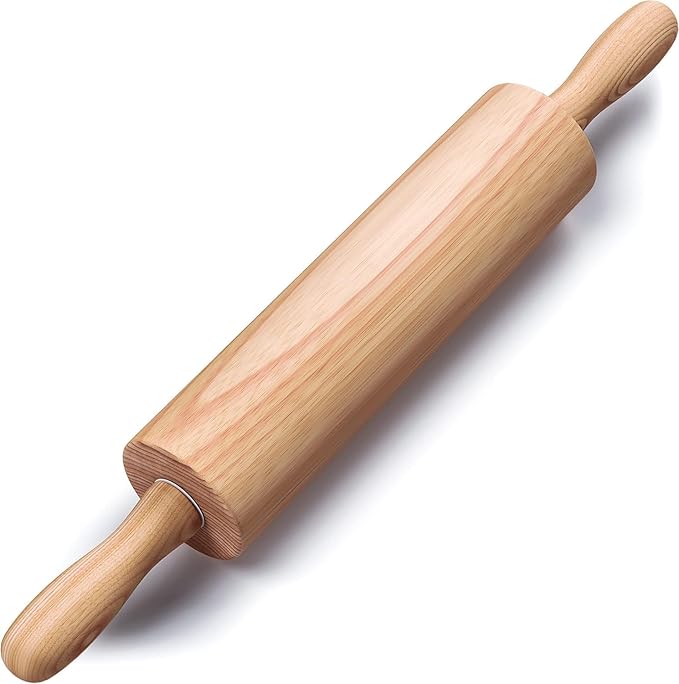
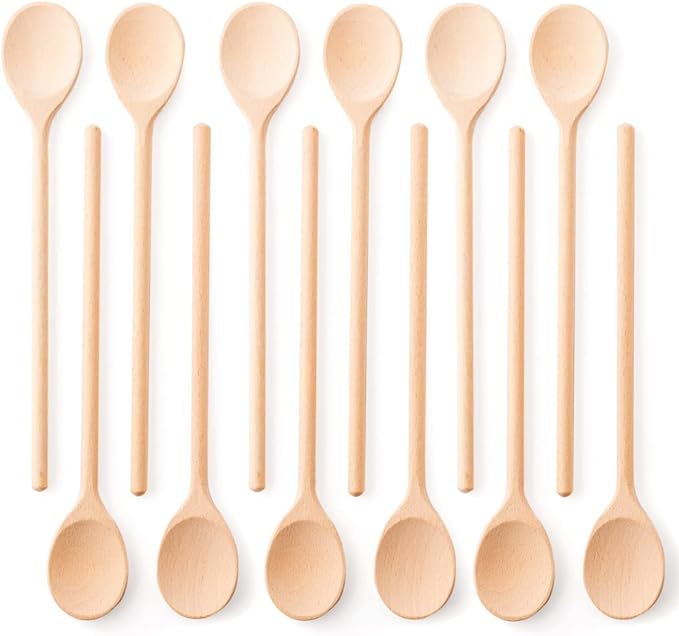
Materials Needed
- 1 wooden rolling pin with handles
- 10 wooden spoons (approx. 10 inches long)
- Spray paint
- 30 mixed glass or acrylic beads
- 1.5 ft of jewelry chain
- Screw eyes (⅜ inch)
- Jump rings and jewelry pliers
- Drill with small bit
Step-by-step Guide
- Paint the spoons and rolling pin in your chosen color and let them dry fully. I used a soft aqua blue and red for a vintage pop.
- Drill small holes in the top of each spoon handle and along the bottom of the rolling pin. Screw in the eye hooks and use jump rings to attach the spoons.
- String colorful beads along chains of varying lengths and attach them between the spoons for added sparkle and movement. Use jump rings to fasten everything securely, and finish by adding a strong loop at the top for hanging.
#28. Luxurious Colander Pendant WInd Chime
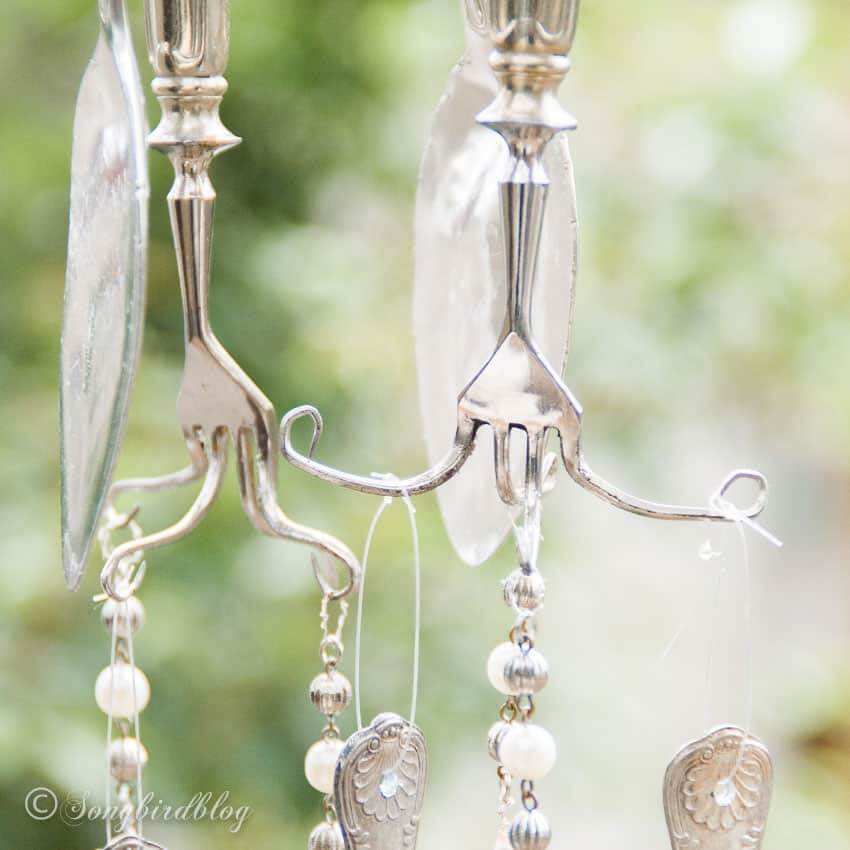
Every breeze now brings a soft, enchanting jingle that feels like a whisper from the past. It’s elegant, timeless, and honestly one of the easiest yet most charming projects I’ve ever created.


Materials Needed
- 3–4 vintage forks
- 2–3 silver spoons with patterned handles
- 12–15 pearl and metallic beads
- 3–5 jewelry wire strands
- Small jewelry pliers and wire cutter set
- Drill with a metal bit (1/16″)
- Jump rings and swivel hooks
Step-by-step Guide
- Gently bend the tines of the forks into curving scrolls using pliers (heat slightly if needed to soften).
- Drill tiny holes near the top of each spoon and fork to string the wire or fishing line through. Attach jump rings to connect strands of beads and utensils.
- Combine all components by threading your bead strings through the curled fork tines or jump rings, finishing with a sturdy top loop for hanging.
#29. Silverware Wind Chime
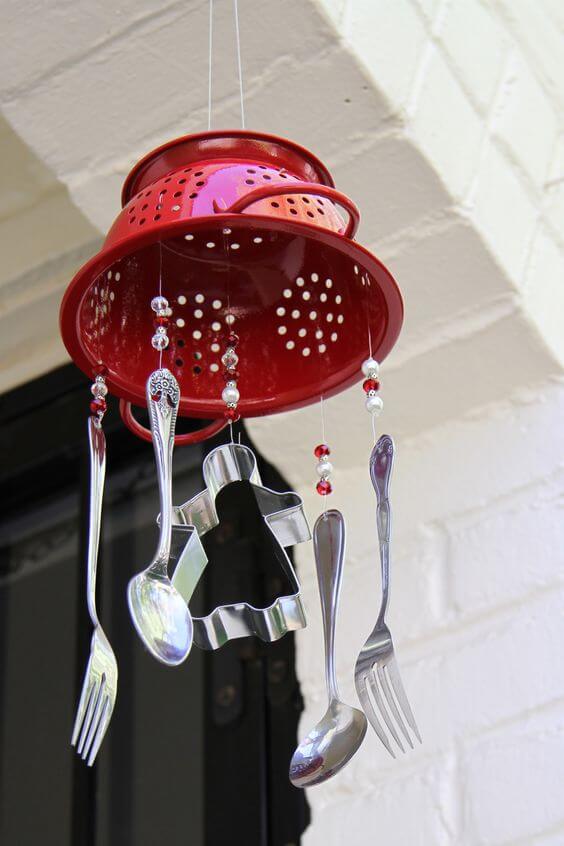
This cheerful red colander wind chime instantly became the star of my back porch. It jingles sweetly with every breeze and adds a quirky pop of color and charm.


Materials Needed
- 1 metal colander (about 8–10 inches wide)
- 3 spoons and 3 forks
- 1 large metal cookie cutter
- 20–25 assorted plastic beads (red, white, or clear)
- Fishing line
- Drill with 1/16″ metal bit
- Needle-nose pliers and jump rings
Step-by-step Guide
- Drill 6–8 evenly spaced holes around the rim of the colander. These will be where your flatware and beads dangle. If your colander already has holes, you can skip this step and thread directly.
- Use the fishing line to thread beads and tie on spoons, forks, and the cookie cutter in the center. Vary the lengths slightly for a cascading look.
- Secure the top with fishing line tied to the colander’s handles or an added ring.
#30. Cheese Grater Wind Chime
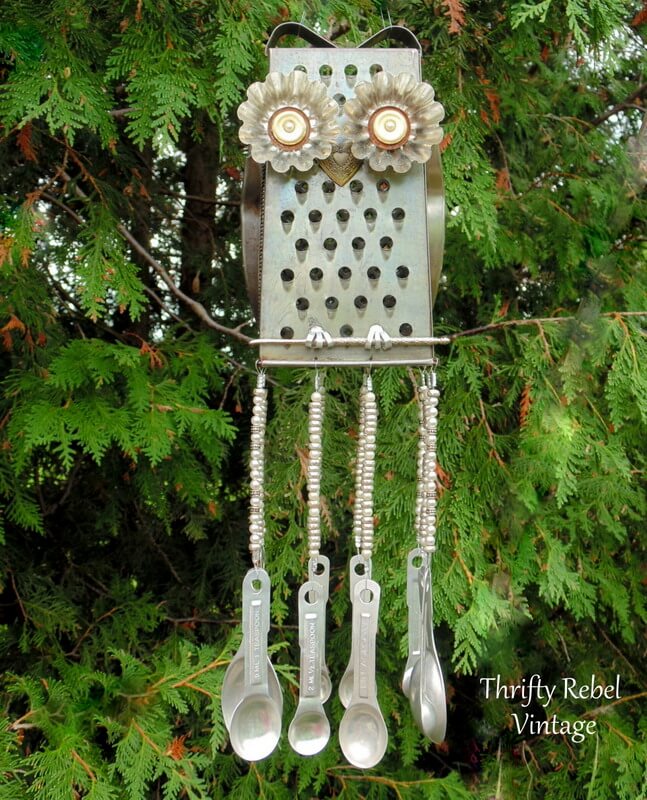
Made almost entirely from thrifted finds, this quirky piece makes clever use of ordinary kitchen scraps, and the results are both artistic and full of character.

Materials Needed
- 1 box-style metal cheese grater
- 2 metal tart molds
- 2 vintage bottle caps
- 1 small metal heart charm
- 20–30 metallic beads
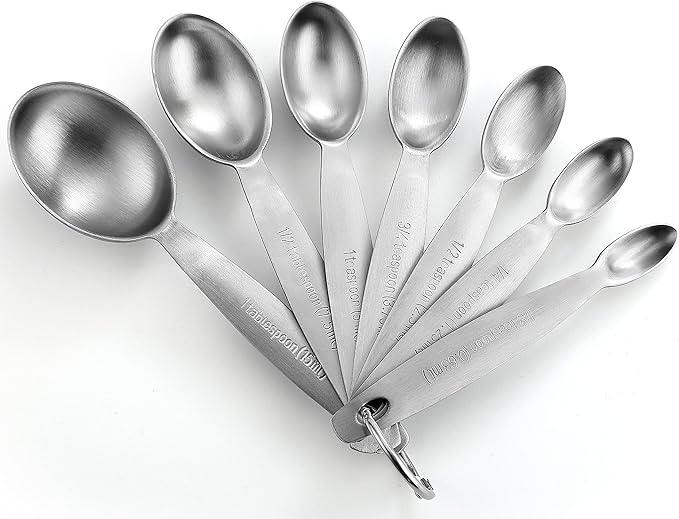
- 4 metal measuring spoon sets (at least 4–5 pieces each)
- Fishing line
- Drill with 1/16″ bit or a strong hole punch
- Glue gun
Step-by-step Guide
- Flip the grater upside down and glue on the tart molds for eyes. Add buttons or bottle caps to the centers. Attach a small metal heart below the eyes to create the beak.
- Drill four holes at the bottom edge of the grater. Thread fishing line or metal wire through the holes, then add beads and attach a full set of measuring spoons at the bottom of each strand.
- Attach a wire loop at the top handle of the grater for hanging.