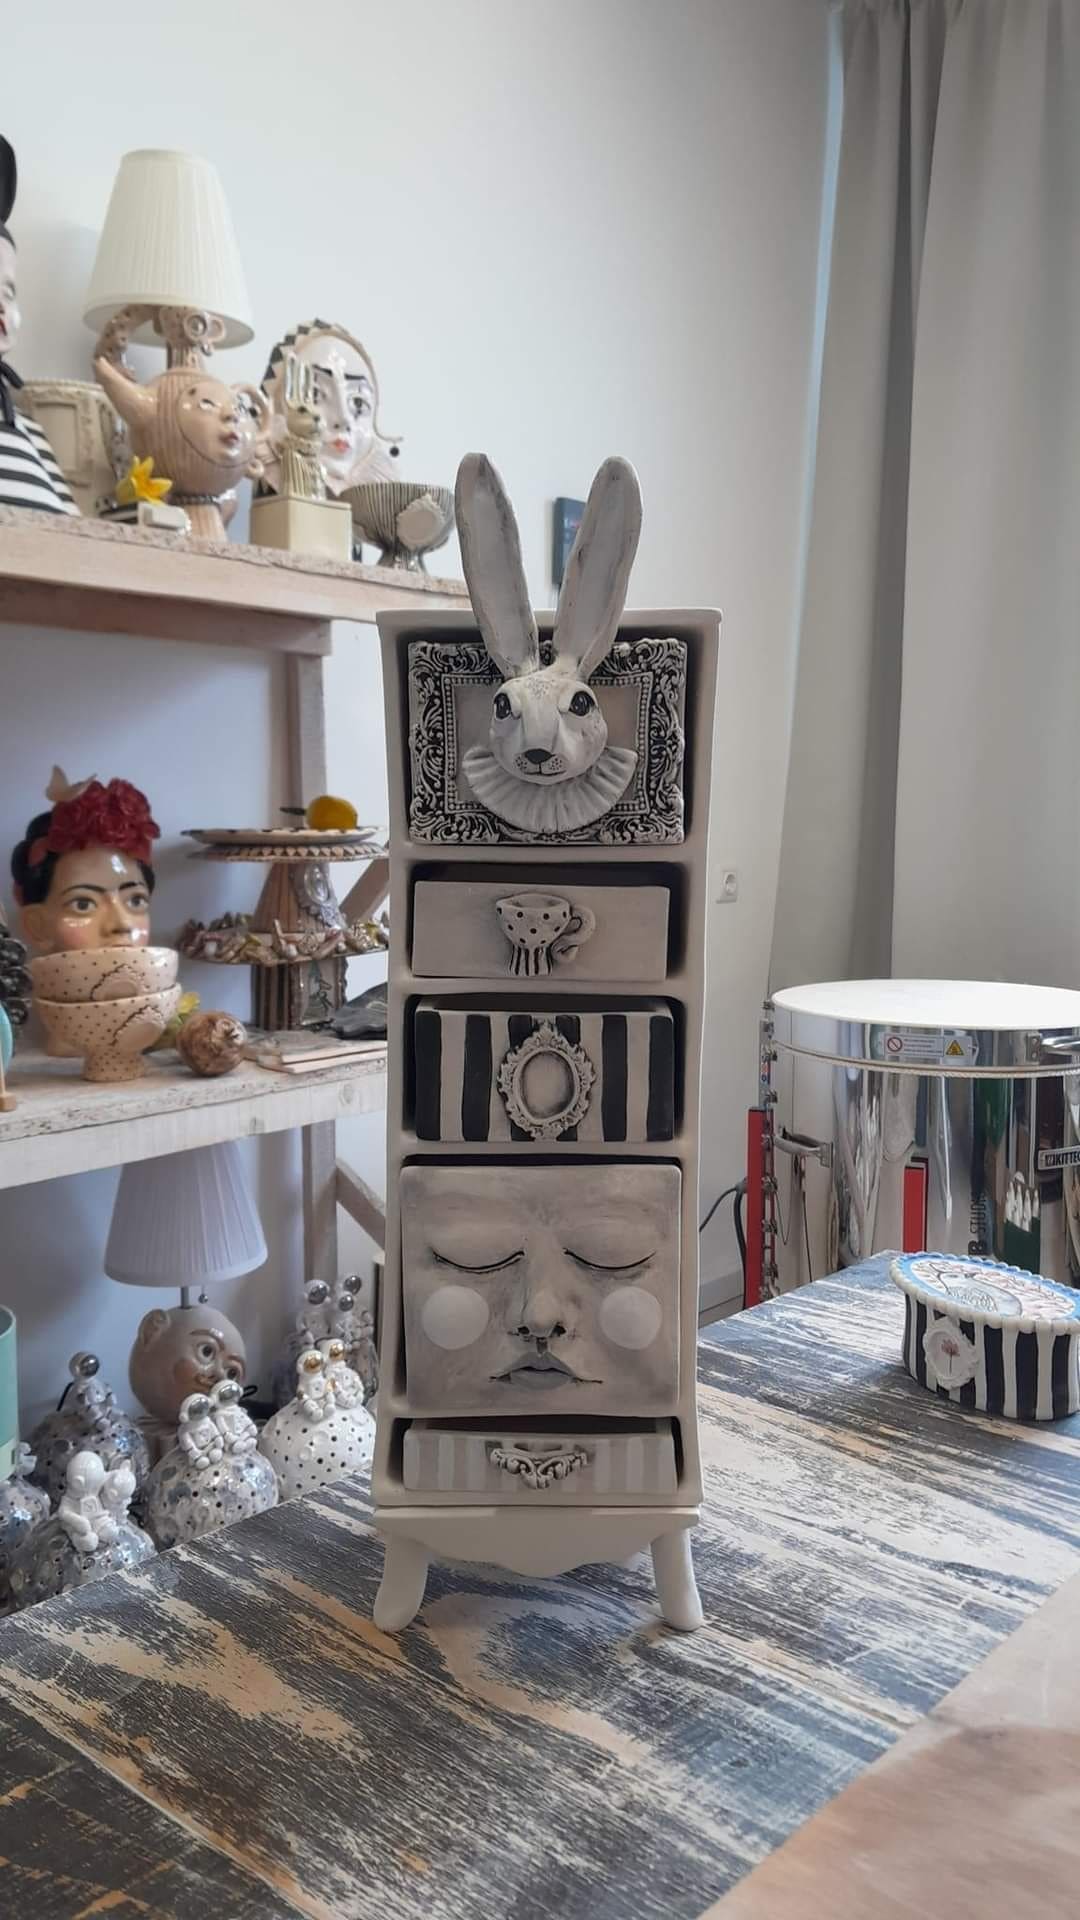
This imaginative dresser makeover proves that furniture can be more than functional, it can be sculptural art. By combining chalk paint, stencils, and handmade or store-bought appliqués, this cabinet becomes a true statement piece.
Plus, the rabbit head drawer pull, striped panel, and serene painted face create texture and dimension, turning plain wood into something enchanting.
Perfect for an eclectic interior, an artist’s studio, or a child’s room, this DIY makeover allows you to explore sculptural painting techniques without needing advanced skills. With the right prep and patience, you’ll turn an ordinary cabinet into something extraordinary.
Materials Needed
- 1 narrow dresser or cabinet, approx. 3-40″ tall with 4–5 drawers
- 120-grit and 220-grit sandpaper sheets
- 1 quart white chalk paint
- 1 pint black chalk paint
- 1 bottle clear wax or matte sealer (8-12 oz)
- 3D appliqués or decorative mouldings (rabbit head, teacup, ornate frames, face panel – approx. 3-6″ each)
- Wood glue or strong adhesive (8 oz bottle)
- Detail paintbrushes (1/2″ and fine tip)
- Painter’s tape
- Optional: sculpting clay if you want to hand-make embellishments
- 1 drop cloth and clean cloths for prep
Step-by-step Guide
Step 1: Begin by removing any old knobs or hardware. Sand the dresser with 120-grit to remove varnish, then finish with 220-grit for a smooth surface. Then wipe away dust with a damp cloth.
Step 2: Apply two coats of white chalk paint over the entire dresser, letting each coat dry for at least 1-2 hours. This creates the neutral base for your design.
Step 3: Plan the layout of your appliqués.
You place the rabbit head on the top drawer, a sculpted face panel on the lower drawer, and smaller pieces like the teacup and ornate frame across the middle drawers. Also, remember to test-fit before gluing.
Step 4: Use wood glue or a strong adhesive to attach the appliqués firmly to each drawer. Then press them down and allow to set for several hours (overnight is best for heavier pieces).
Step 5: Once dry, paint over the appliqués with a matching coat of white chalk paint so they blend seamlessly with the dresser.
You then add black accents for detail—for example, stripes on one drawer using painter’s tape, or shading around the appliqués to highlight texture.
Step 6: For the dreamy face drawer, lightly shade with watered-down black chalk paint to emphasize the contours of the cheeks and eyelids. A fine detail brush works best here.
Step 7: Seal the entire piece with clear wax or a matte sealer to protect the finish and prevent chipping. Buff lightly if using wax for a soft sheen.
Step 8: Reassemble and place in your chosen space. This piece will now stand as a surreal, magical addition to your décor.
Tips: If you’re skilled with clay, create your own whimsical embellishments for a one-of-a-kind design.