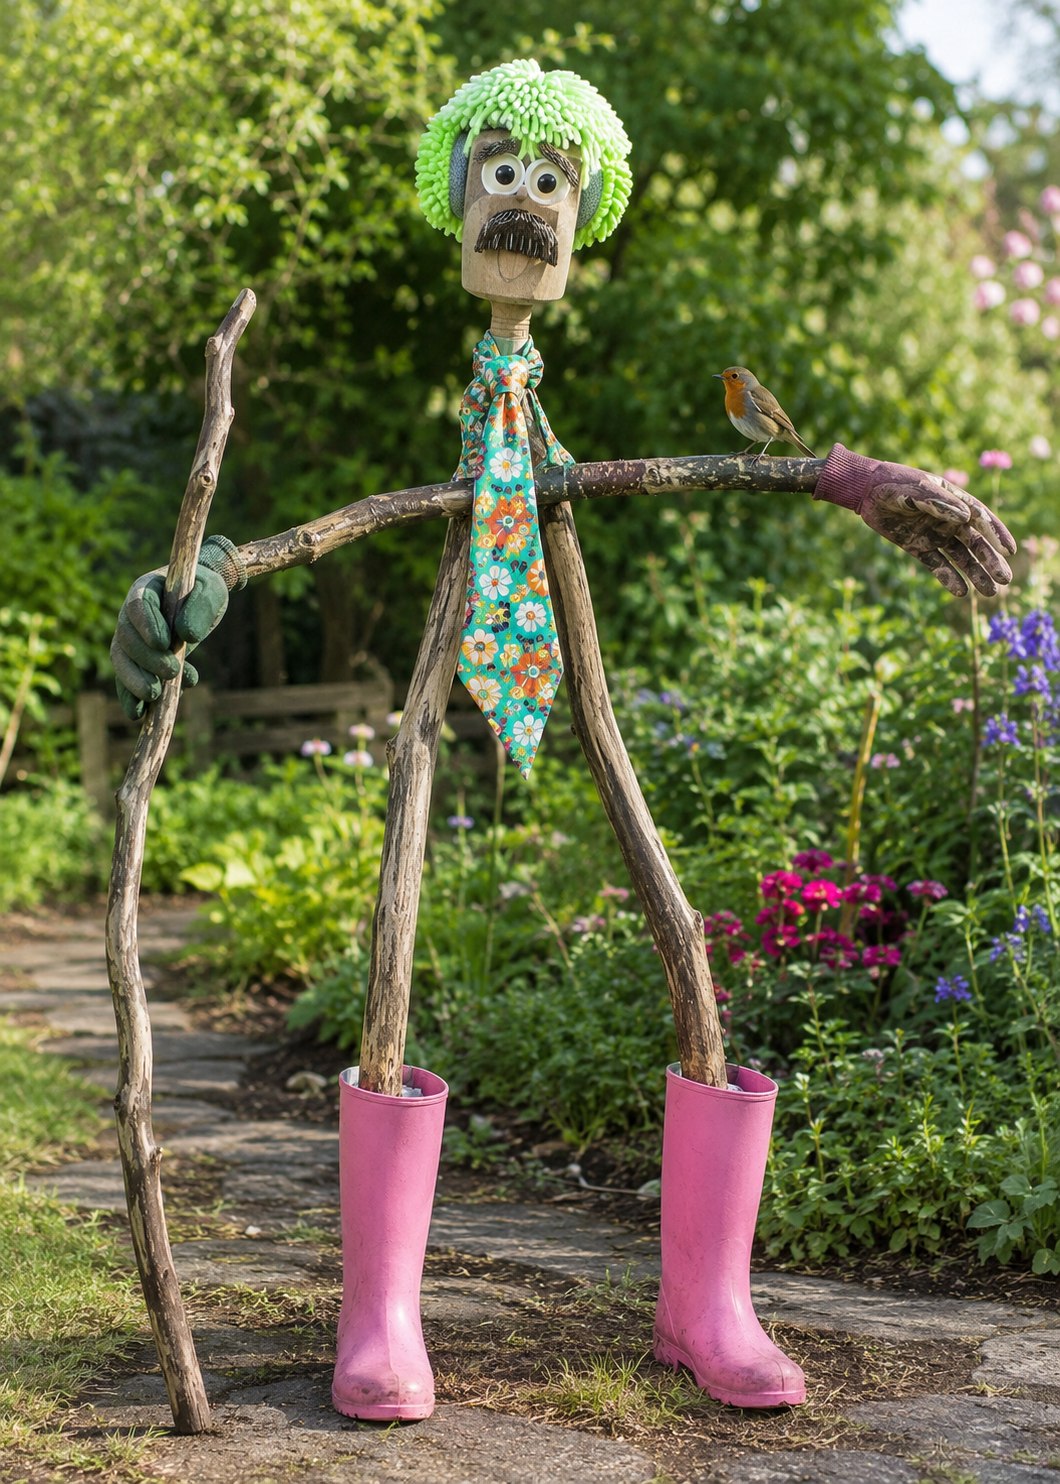
A homemade garden scarecrow is a fun way to reuse old items while adding personality to your outdoor space. This cheerful design uses natural branches for the body, pink rain boots for the feet, garden gloves for the hands, and a mop head for playful green hair.
Step-by-Step Guide
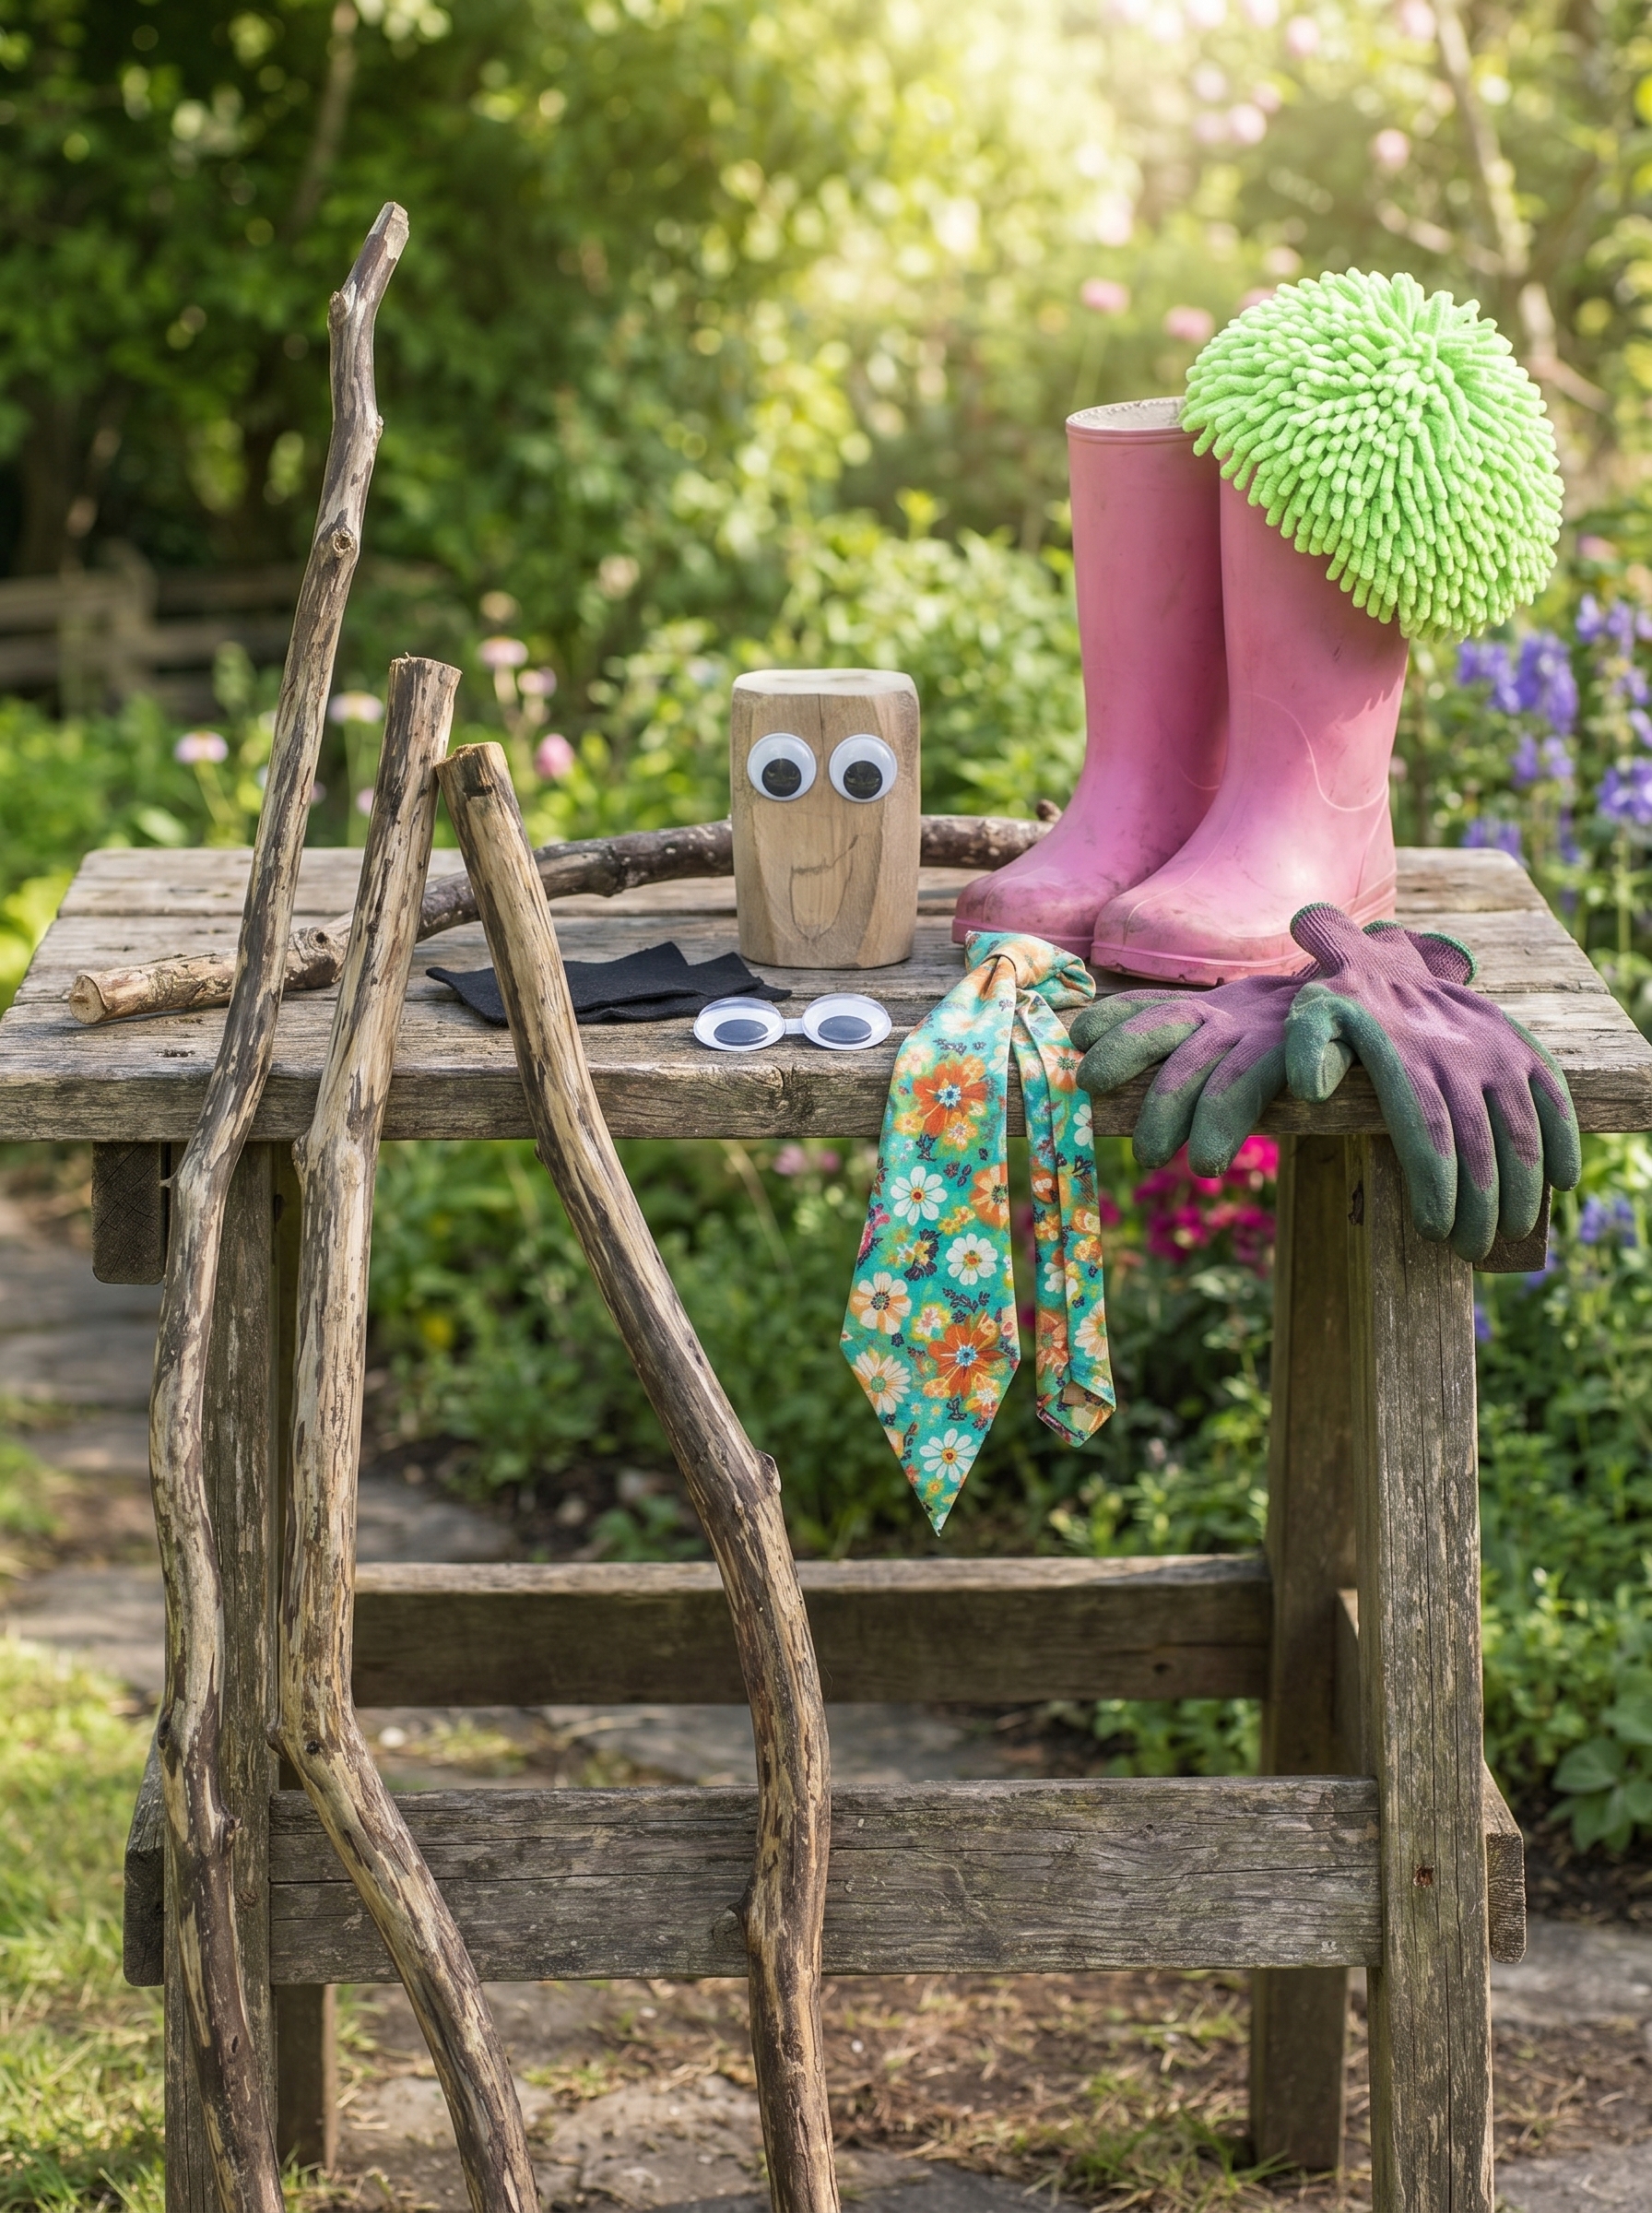
Step 1: Gather the Main Materials
Collect two long sturdy branches for the legs, one long branch for the arms, and one shorter upright stick for the neck and head support. You will also need a small wooden block or square scrap wood for the face, a colorful necktie, two garden gloves, a pair of rain boots, googly eyes, black felt or paint, and a mop head.
Choose branches with natural curves if you want the scarecrow to look funny and animated. Slightly uneven wood gives the figure more character.
Step 2: Build the Body Frame
Place the two long branches upright as legs. Push the bottom ends into the rain boots so they stand firmly. Add small stones, sand, or soil inside each boot to weigh them down.
Next, attach a horizontal branch across the upper part of the body to create the arms. Use strong twine, wire, or screws to secure the branches together. The frame should feel balanced before you add decorations.
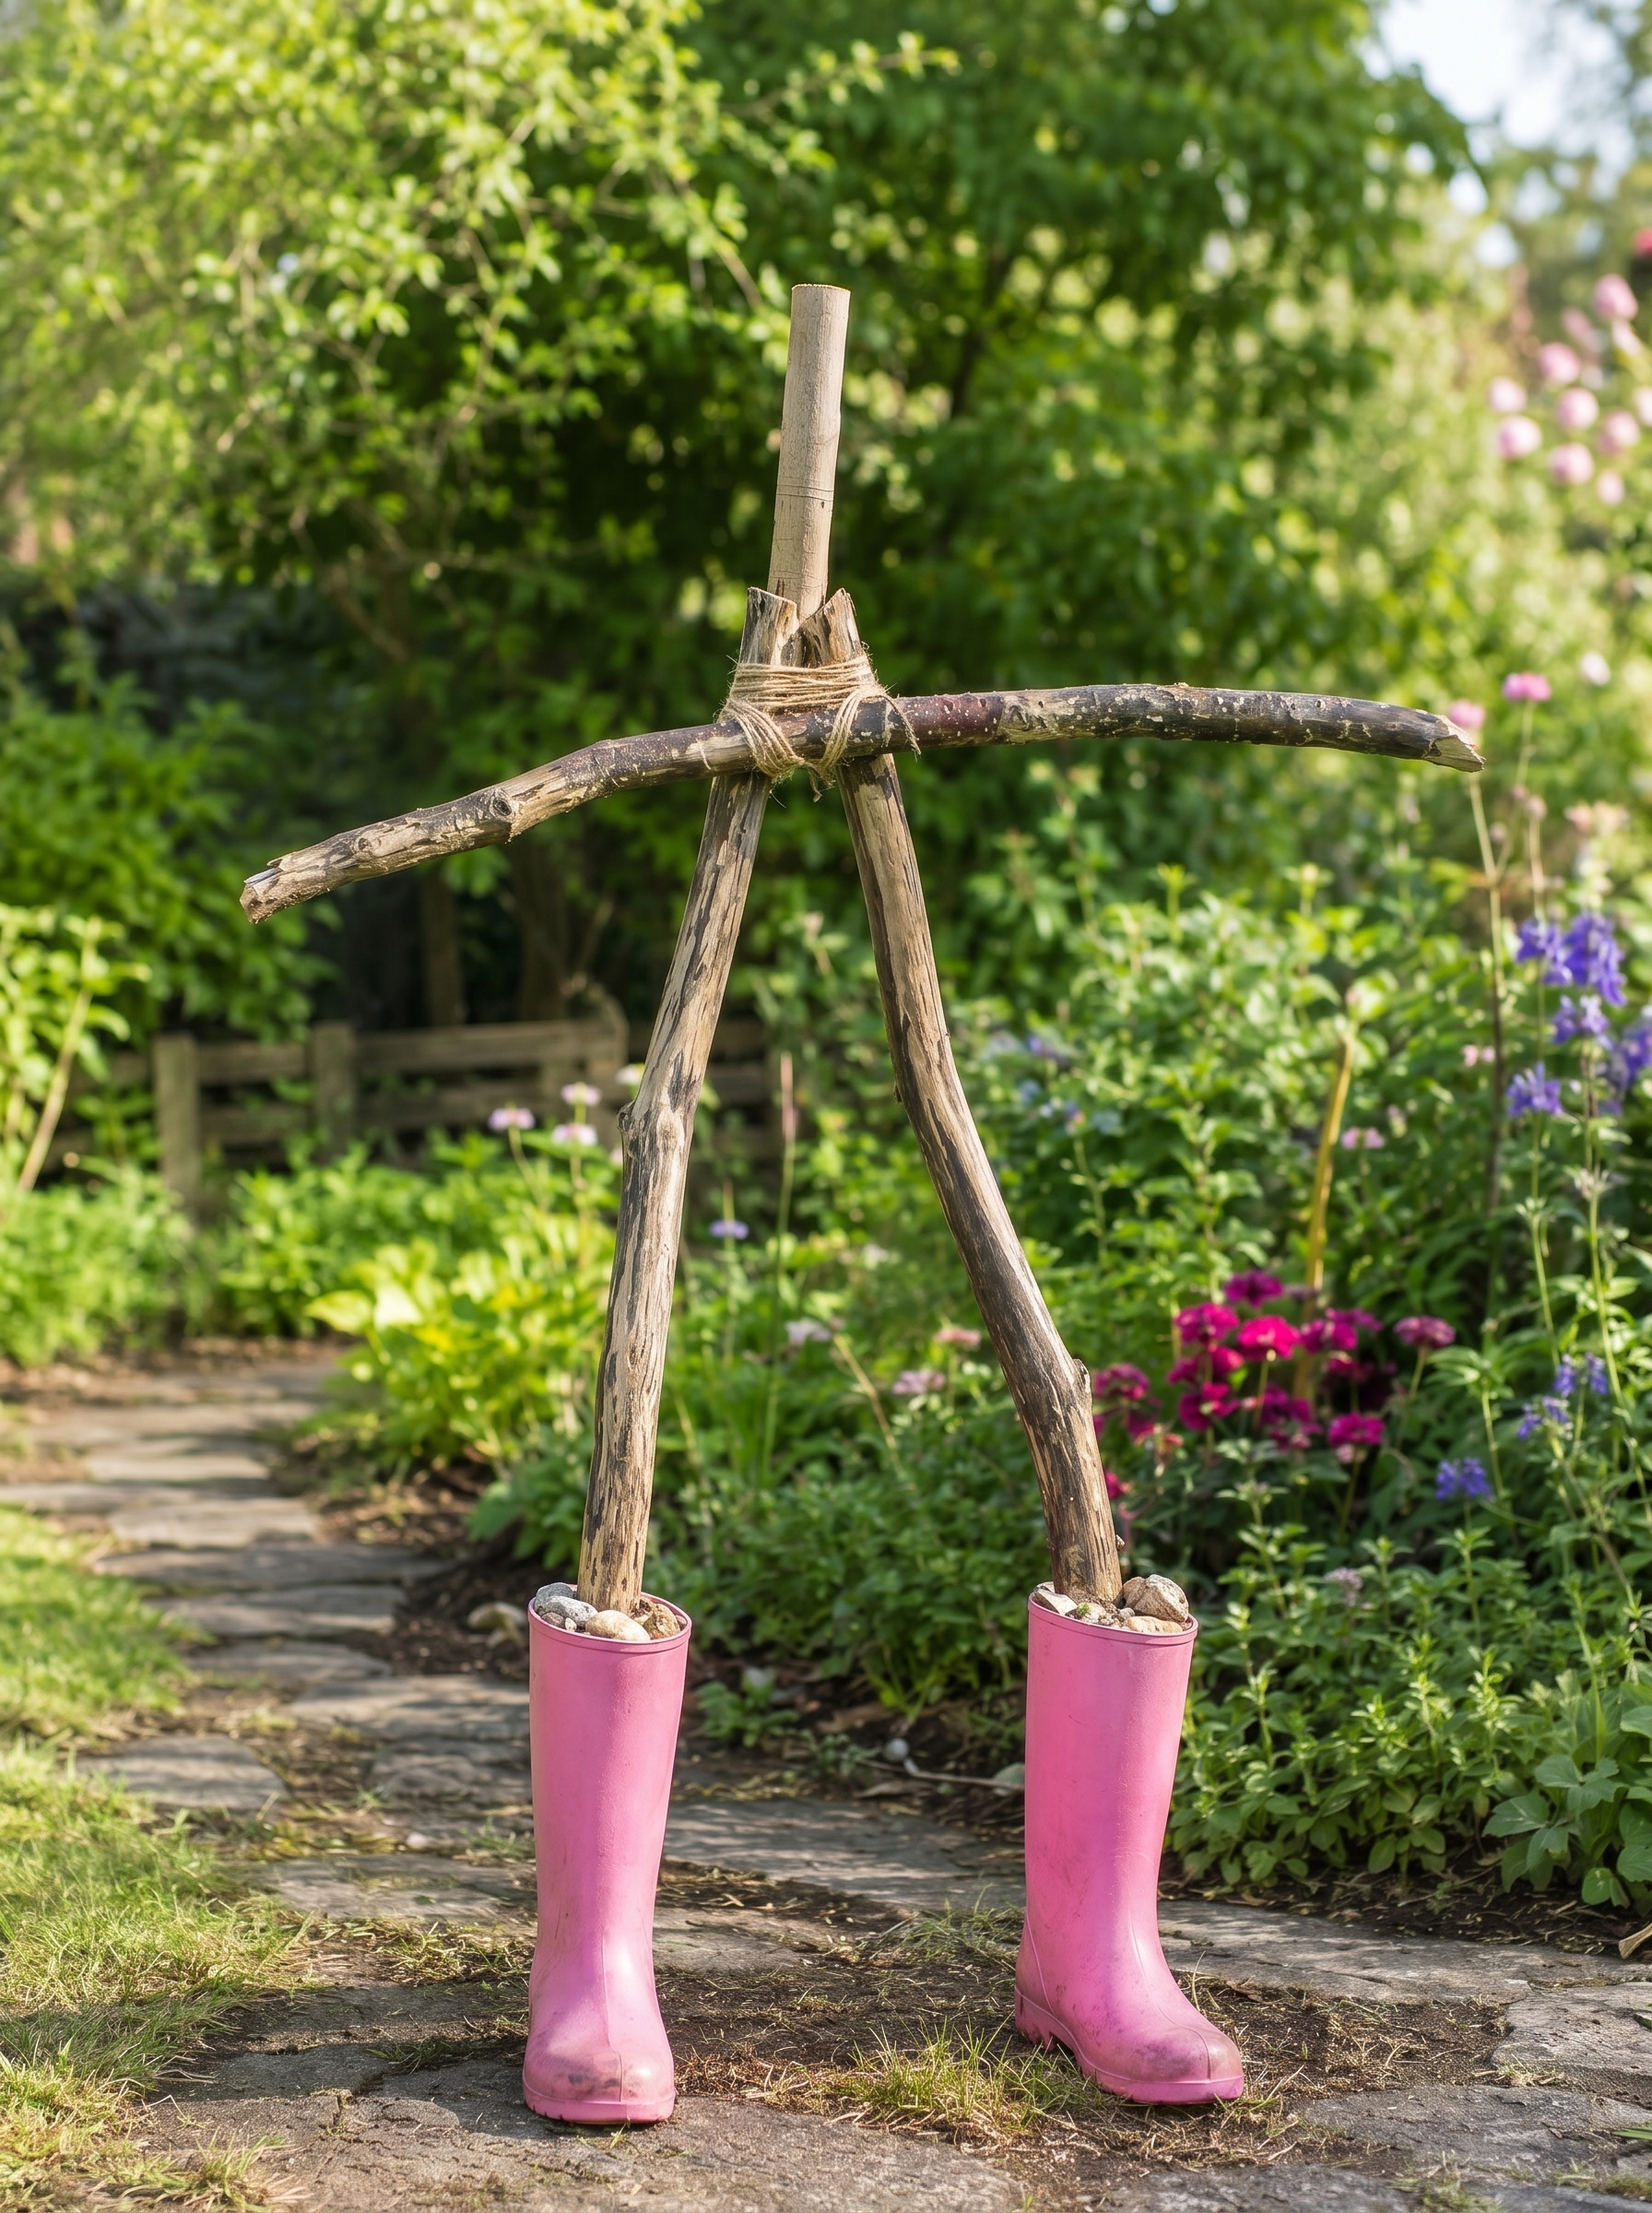
Step 3: Add the Head Support
Attach a short vertical stick at the center where the arms meet. This piece will hold the wooden face and help keep the scarecrow upright.
Make sure the head support is straight and tight. If the branches are slippery, wrap the joint with garden wire first, then cover it with twine for a more rustic look.
Step 4: Create the Wooden Face
Use a small wooden block, scrap wood square, or thick craft cube for the head. Sand rough edges so it is safe to handle.
Glue on two large googly eyes. For the eyebrows and mustache, cut shapes from black felt, foam, or fabric. You can also paint them with black acrylic paint. A slightly serious expression makes the scarecrow look extra charming in a silly way.
Step 5: Attach the Mop Hair
Place a clean mop head over the top of the wooden face. A bright green microfiber mop works well because it looks fluffy and playful.
Secure the mop strands with hot glue, screws, or strong craft adhesive. Let some strands fall around the sides of the face like wild hair. This detail gives the scarecrow its most memorable look.
Step 6: Dress the Scarecrow
Tie a colorful necktie around the center stick below the head. Let it hang down naturally between the branch legs.
Slide one garden glove onto each end of the horizontal arm branch. If the gloves are loose, stuff them with newspaper or fabric scraps, then tie them in place with twine. Different glove colors make the design feel more lively and handmade.
Step 7: Secure the Figure Outdoors
Move the scarecrow to your garden path, flower bed, or vegetable patch. Push an extra support stake into the ground behind the body if the boots alone do not hold it steady.
Tie the frame to the stake with wire or strong cord. This helps the scarecrow stay upright during wind or rain. For better durability, keep the wooden head sealed with outdoor varnish.
Step 8: Add Final Personality Details
Adjust the arms so they stretch out naturally. Place a walking stick or curved branch in one glove if you want the scarecrow to look like a garden helper.
You can add a scarf, buttons, a hat, or small fabric patches for more detail. Keep the final look lighthearted. A DIY garden scarecrow should feel imperfect, whimsical, and full of cheerful outdoor personality.