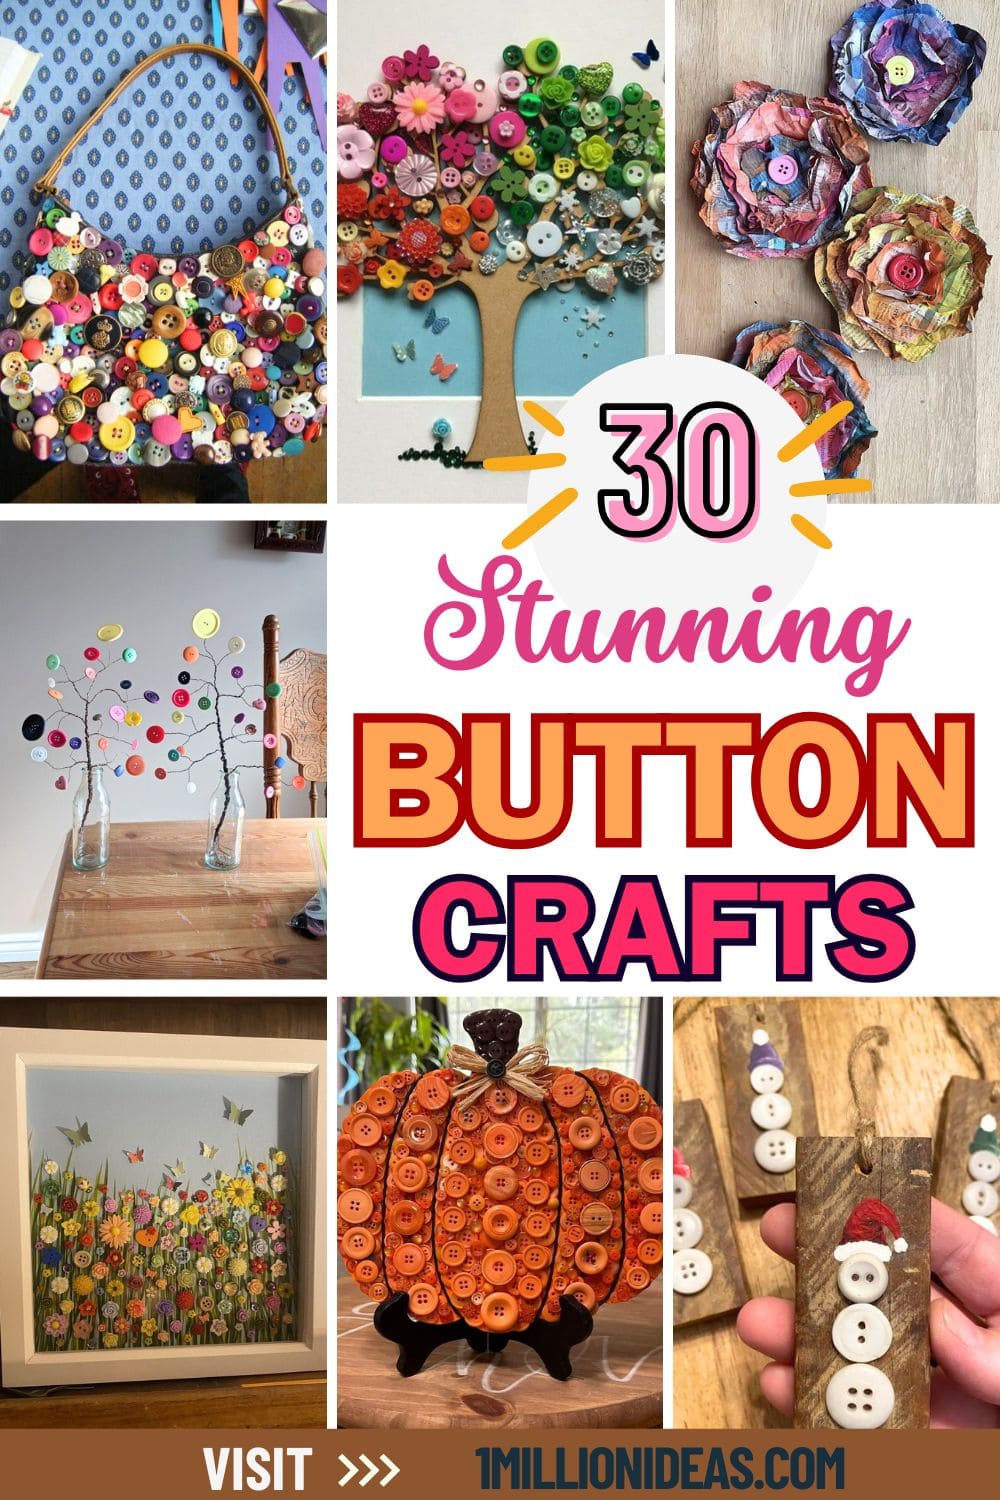
Buttons are more than just fasteners; they’re tiny treasures waiting to be transformed into creative masterpieces!
Whether you’re a seasoned crafter or a beginner, button crafts are a fantastic way to recycle old buttons and add a personal touch to your projects. From colorful home décor and playful accessories to thoughtful gifts, the possibilities are endless.
This collection of 30 fun and creative button craft ideas is here to spark your imagination and inspire your next project. Each idea is unique, easy to customize, and guaranteed to bring joy to your crafting journey.
This article contains affiliate links. If you purchase through them, I may earn a small commission at no extra cost to you. Thank you for your support!
#1. Charming Button Blossom Trees
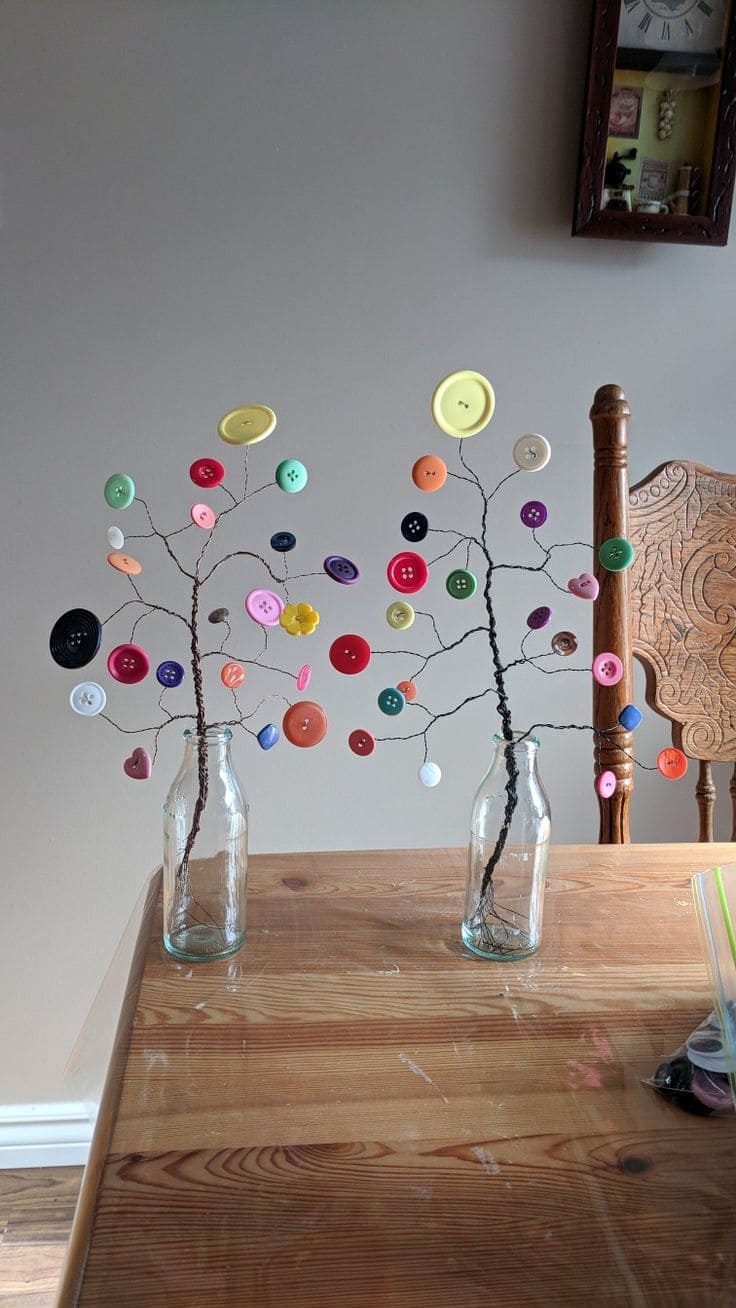
If you’re looking for a delightful craft idea, these button blossom trees are perfect!
Materials Needed
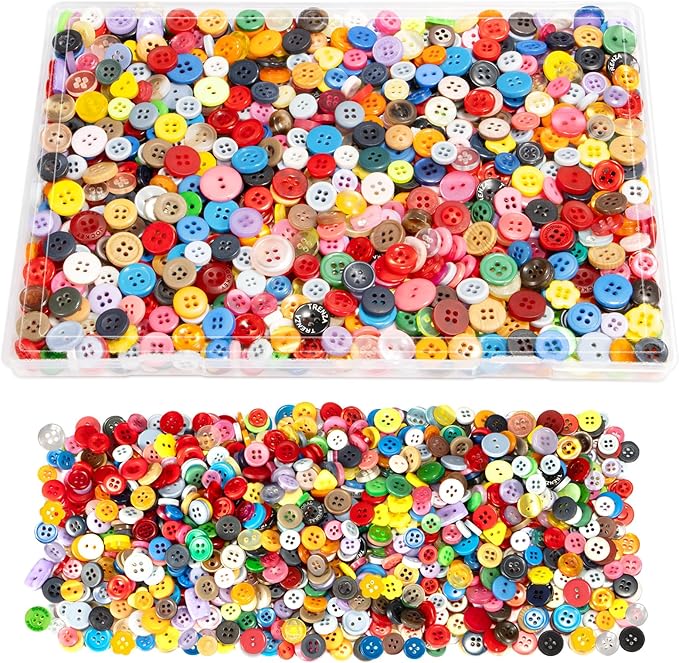
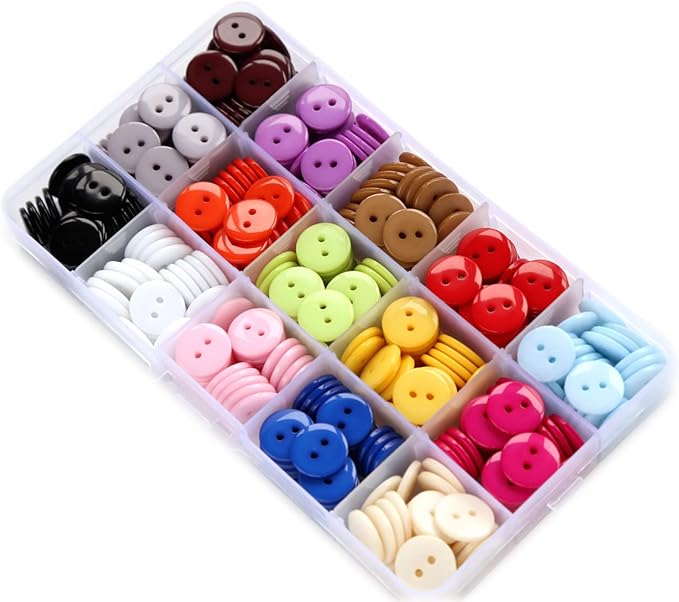
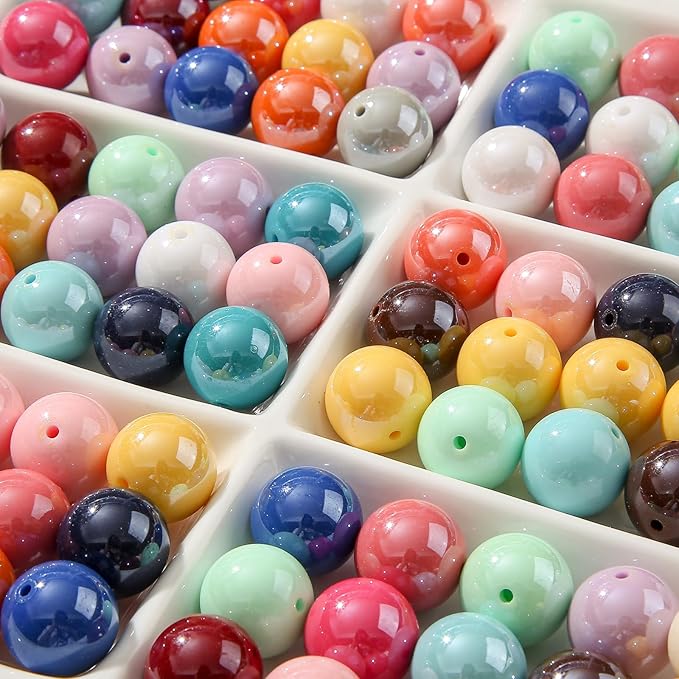
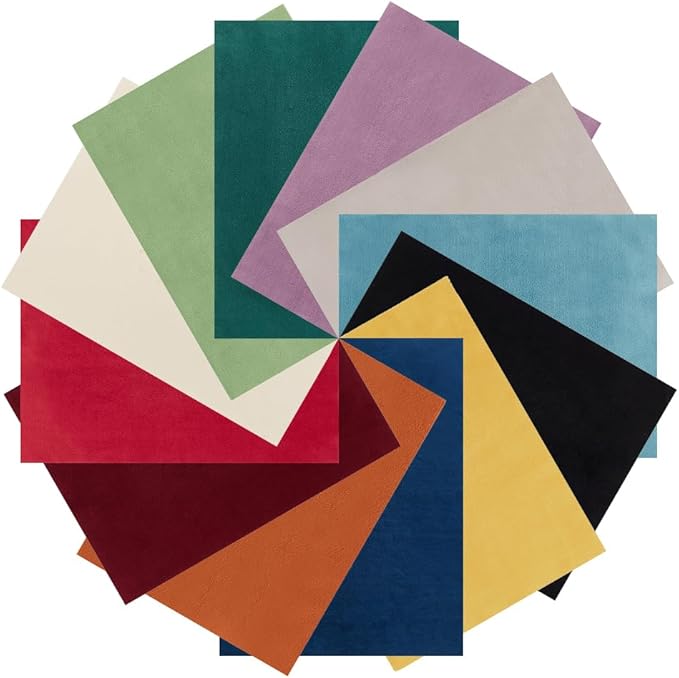
- 35–40 assorted buttons in various colors and sizes
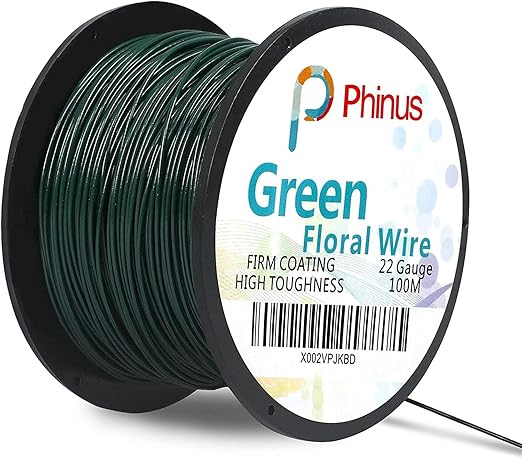
- 6–8 floral wires (22–24 gauge, 12–16 inches long)
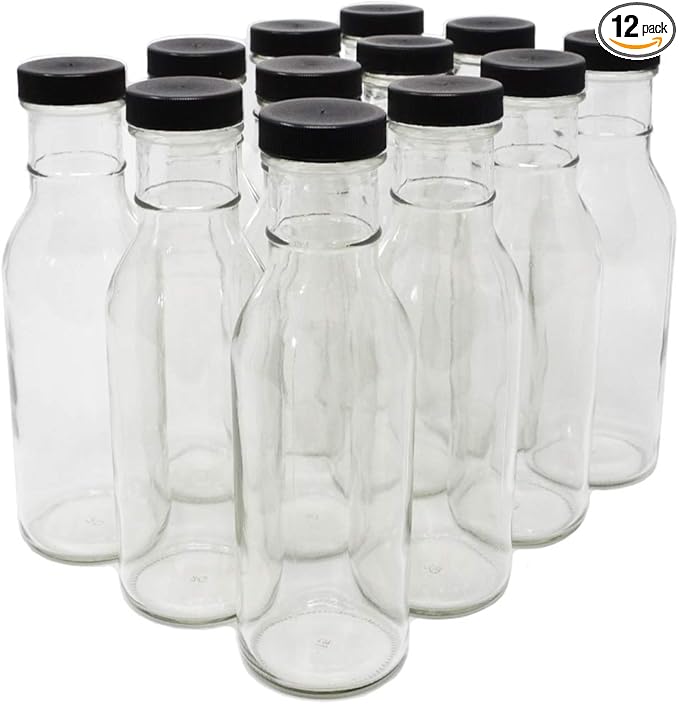
- 2 recycled glass bottles
- 1 Glue gun
- 1 pair of Scissors
Step-by-step Guide
Step 1: Thread one button onto the end of each wire and twist tightly so the button is secure. Repeat until all your wires have button tips. Gently shape the wires into natural-looking branches.
Step 2: Start twisting several buttoned wires together at their bases to create a central “trunk.” Continue adding wires as you go, varying angles and directions for a realistic tree effect.
Step 3: Once the tree is complete, place it into a clean glass bottle.
#2. Whimsical Button Meadow Frame Art
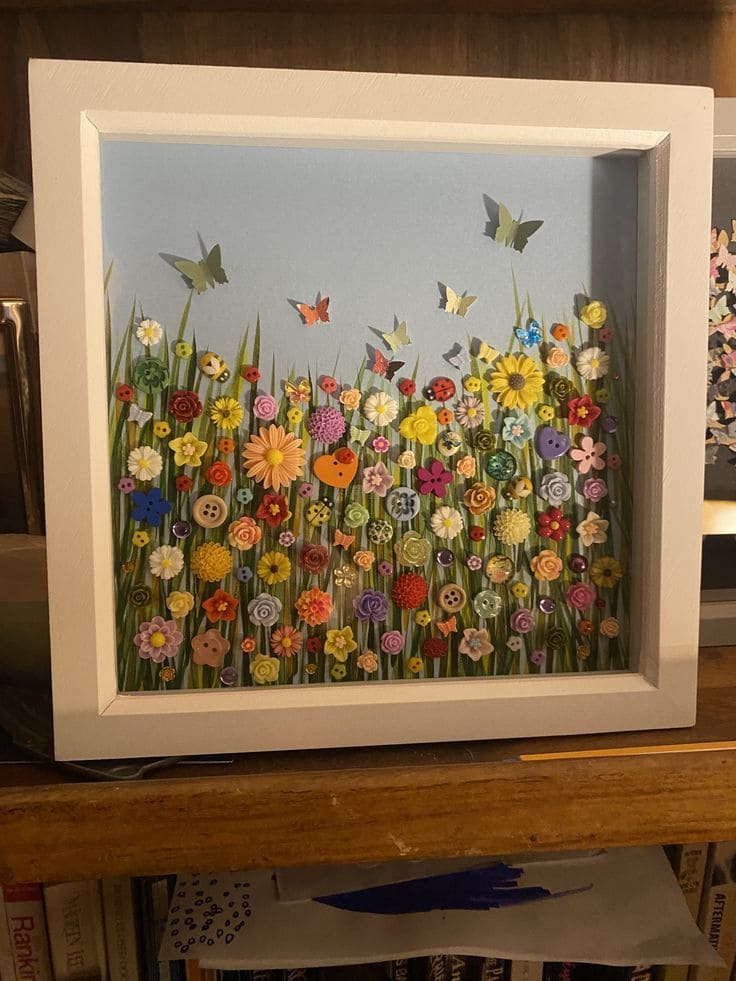
I made this button meadow during a quiet weekend, and every time I glance at it now, I smile.
Materials Needed
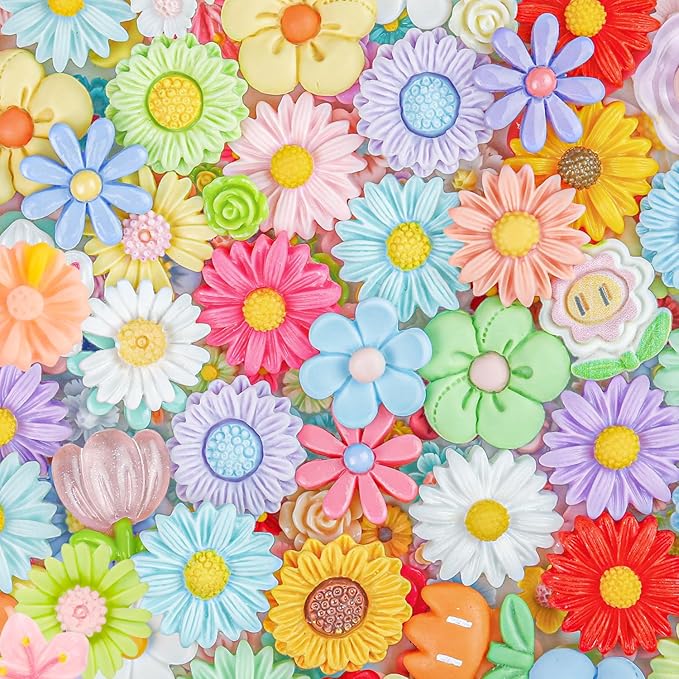
- 80–100 assorted buttons (flower-shaped, round, textured)
- 30-40 flower charms
- 1 deep shadow box frame (8×10 inches)
- 1 sheet of sky blue cardstock (8×10 inches)
- 10–15 green paper quilling strips
- 1 pack of butterfly stickers
- 1 Glue gun
- 1 pair of Scissors
Step-by-step Guide
Step 1: Start by gluing the sky-blue cardstock to the backing of your shadow box. Then arrange green paper strips vertically at the bottom, mimicking tall grass stems.
Step 2: Layer your buttons across the grass in a floral arrangement, starting from the bottom. Vary the button sizes, colors, and textures to give the scene dimension. Add smaller ones as buds and tiny filler flowers.
Step 3: Stick a few butterflies fluttering above the “meadow” to create movement. Once the glue has dried, pop the panel back into the frame.
#3. Vintage Button Heart Decor
This charming button heart was one of those crafts that felt like stitching emotion into art. The earthy button tones, aged paper, and vintage key evoke a sense of quiet love that’s perfect year-round.
Materials Needed
- 40-60 brown and neutral-toned buttons (wood, plastic, or fabric-covered)
- 1 piece of stiff cardboard backing (10×10 inches)
- 1 sheet of vintage music paper
- 1 mini metal skeleton key
- 1 piece of twine (8–10 inches)
- 1 small kraft paper tag
- Hot glue gun
- Scissors
Step-by-step Guide
Step 1: Cover the cardboard with your vintage music paper using glue. Let it dry flat, then sketch a heart shape lightly in pencil as your button guide.
Step 2: Begin layering and gluing the buttons along the heart outline, mixing shapes, textures, and sizes for a rustic feel. Leave a small space at the top left to tie and glue on the twine and metal key.
Step 3: Write or stamp “Be Mine” on the kraft tag and nestle it near the center or side of the heart. Attach it with glue and a bit of twine.
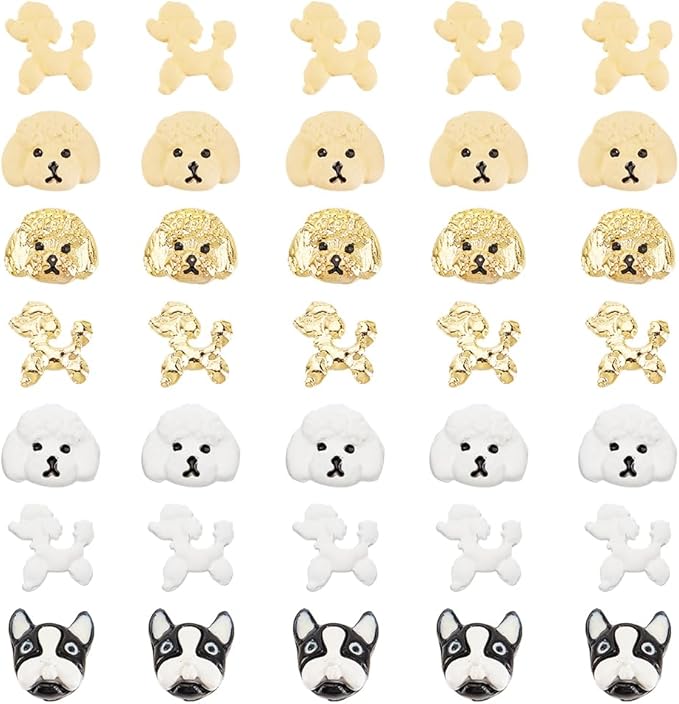
#4. Adorable Button Dog Ornaments
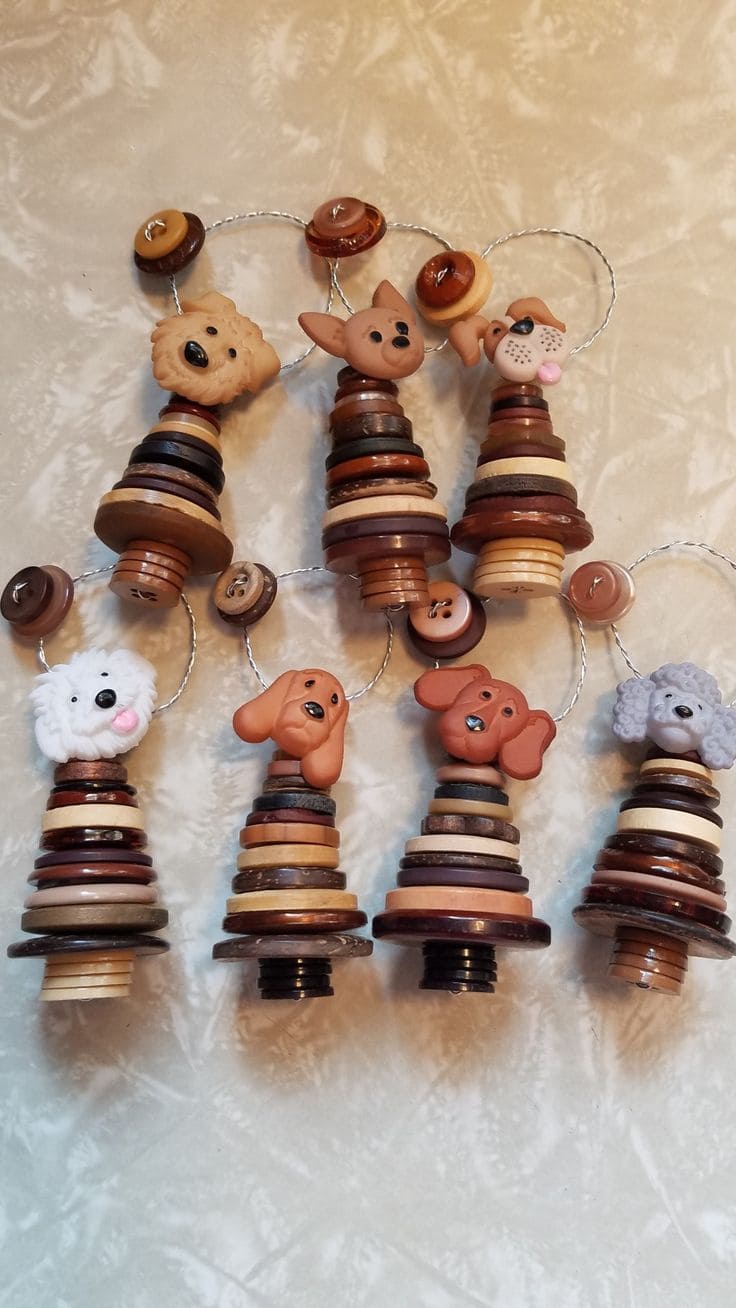
These little button puppies are great as gift tags, Christmas ornaments, or even year-round decor.
Materials Needed
- 100-120 brown-toned assorted buttons (ranging 0.5–1.5 inches wide)
- 6–8 mini dog face cabochons
- 6 loops of craft wire (about 7 inches per ornament)
- 1 needle tool
- 1 hot glue gun
Step-by-step Guide
Step 1: Cut a piece of craft wire and twist a small loop at one end. Begin stacking your buttons from largest to smallest to form a conical shape. Slide them down the wire one at a time.
Step 2: Next, glue a dog face cabochon on the smallest button and secure it. Create a hanging loop by twisting the remaining wire and attaching a decorative button at the top if desired.
Step 3: Finish with any final glue touch-ups.
#5. Vibrant Button Bag Fashion
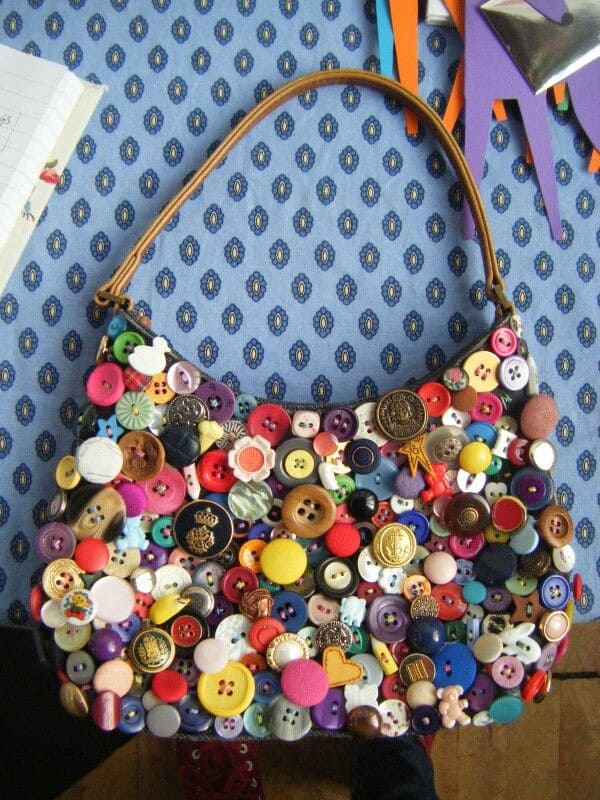
For girls who love unique accessories, this vibrant button bag is a dazzling way to showcase your creativity!
Materials Needed
- 250–300 assorted colorful buttons in mixed sizes
- Mini charms
- 1 sturdy fabric or faux leather handbag
- 1–2 tubes of strong fabric glue
- 1 needle with upholstery thread
- Tweezers (optional)
Step-by-step Guide
Step 1: Clean your bag first, then spread out the buttons on a flat surface and blend large and small ones randomly for balance or group by color for a gradient look.
Step 2: Start gluing the buttons onto the bag, pressing each one down firmly for 20–30 seconds. Let them dry in sections so nothing shifts. If your bag gets a lot of wear, consider sewing on the heavier buttons with a strong thread.
Step 3: After it’s fully dry (wait at least 24 hours), check the edges for any loose pieces. Add extra glue where needed.
#6. Charming Button and Paper Blossoms
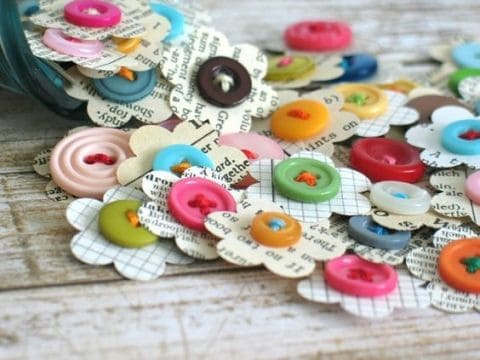
Each one feels like a miniature keepsake. They’re easy to mass-produce, budget-friendly, and a brilliant way to use those scrap papers you can’t bear to throw out.
Materials Needed
- 20–30 colorful buttons in assorted sizes
- 4–6 pages of vintage-style book
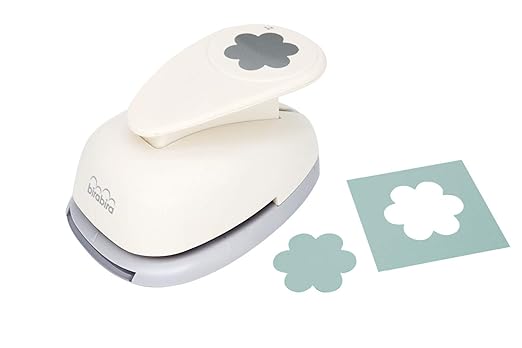
- 1 flower-shaped craft punch (around 1.5 to 2 inches)
- 1 needle and colorful thread
- Scissors
Step-by-step Guide
Step 1: Use the flower punch to cut flower shapes from your paper scraps. Choose different patterns, old maps, or book pages for added character.
Step 2: Match each paper flower with a button. Next, sew the button in the center of the paper flower with a contrasting thread.
Step 3: Let them dry flat, then store them in a jar or small box.
#7. Unique Button-Embellished Denim Makeover
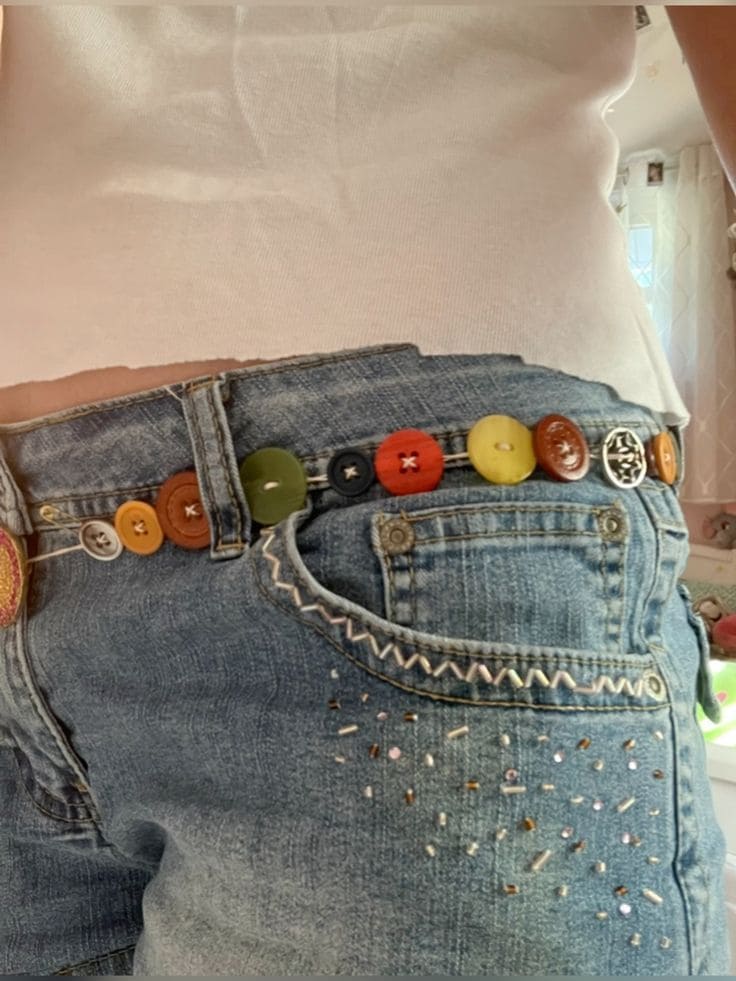
Instead of tossing out old denim, why not give it a chic button-embellished makeover?
Materials Needed
- 20–25 assorted buttons in different sizes/colors
- 1 pair of denim jeans
- 1 needle and heavy-duty thread
- 1 pair of scissors
- Optional: fabric glue
Step-by-step Guide
Step 1: Lay your jeans flat and plan the button placement around the waistband, belt loop to belt loop, mixing colors and sizes for a playful vibe. Use pins or chalk to mark positions.
Step 2: Use your needle and strong thread to hand-sew each button securely onto the waistband. Tie knots on the inner side and trim any extra thread. Repeat along the entire top.
Step 3: Once all buttons are sewn, you can add optional embroidery, rhinestones, or beads to other parts of the denim to complete the look.
#8. Chic Button-Embellished Phone Case DIY
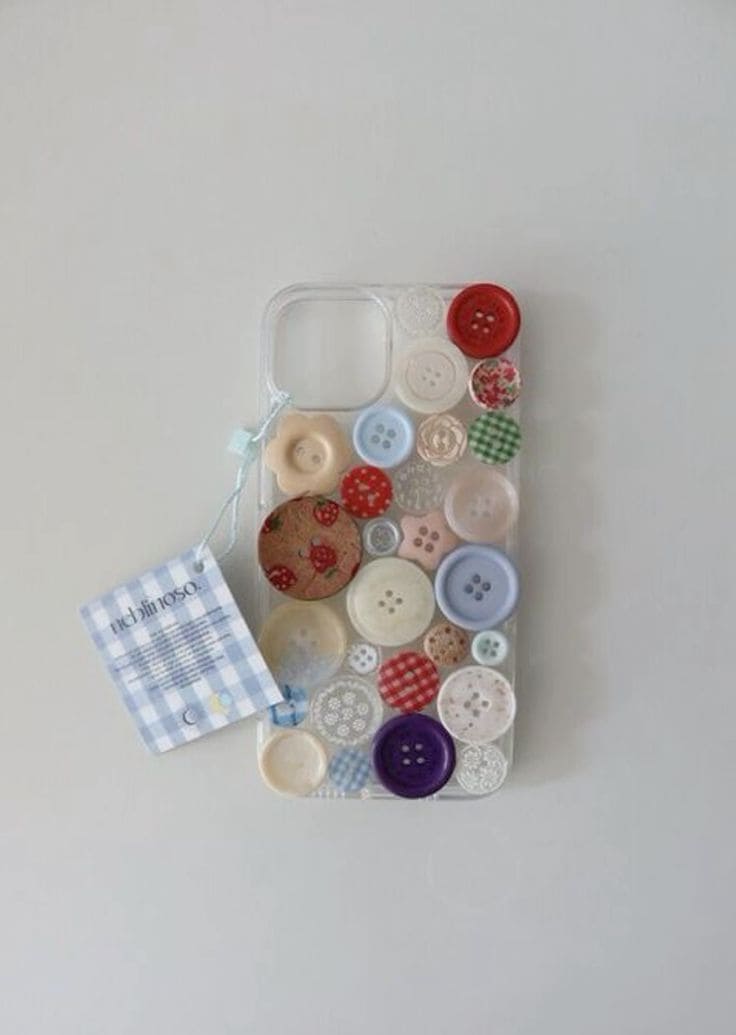
I had this old, clear phone case sitting in my drawer, scratched up and bland. Rather than toss it, I turned it into a one-of-a-kind accessory using buttons I’ve collected over the years.
Materials Needed
- 18–25 assorted buttons in mixed colors and textures
- 1 clear phone case
- 1 tube of strong craft adhesive
- 1 tweezer
- Rubbing alcohol and a soft cloth
Step-by-step Guide
Step 1: Clean your phone case thoroughly with rubbing alcohol to remove any residue. Let it dry completely.
Step 2: Arrange your buttons on the back of the case first without gluing, to find a layout you love. Try mixing sizes, colors, and patterns for visual interest.
Step 3: Using a small amount of glue on each button, attach them firmly to the case. Press gently and hold for a few seconds. Let dry for 24 hours before use.
#9. Radiant Button Lampshade
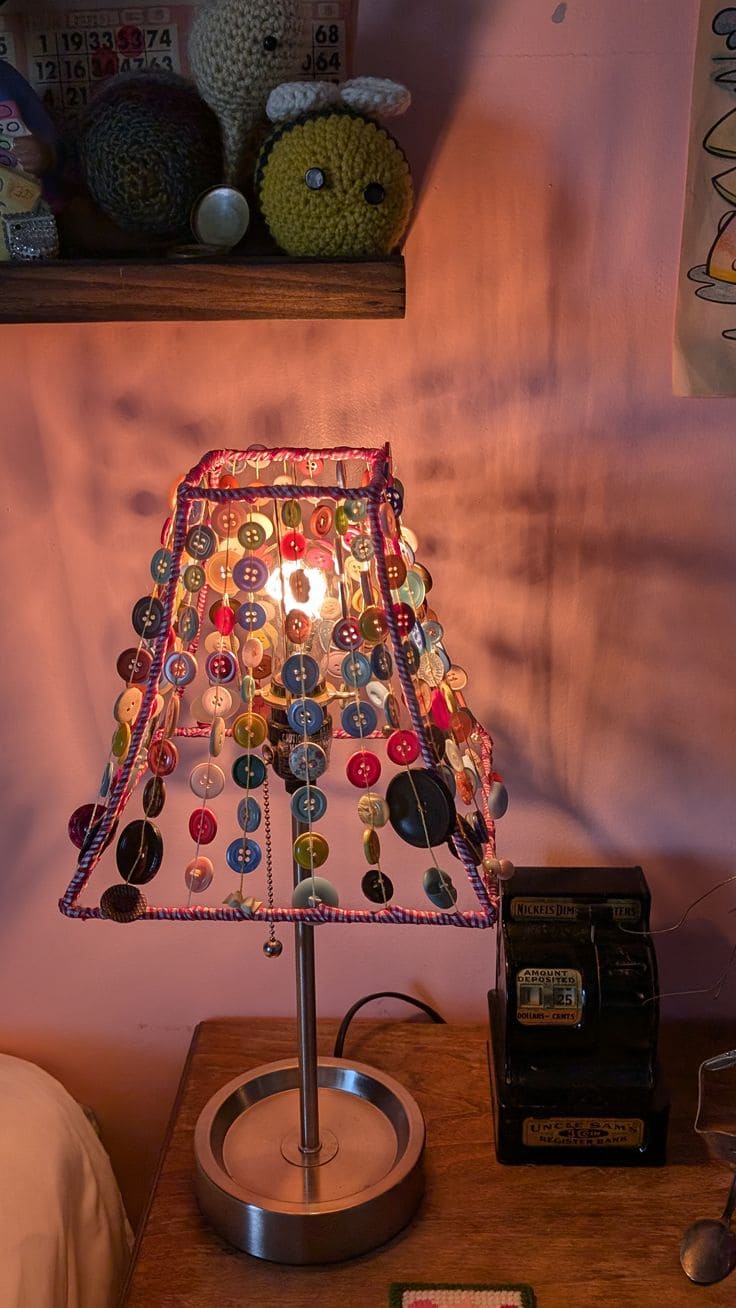
When the light flickers through all those colors, it’s like your childhood scrapbook came to life.
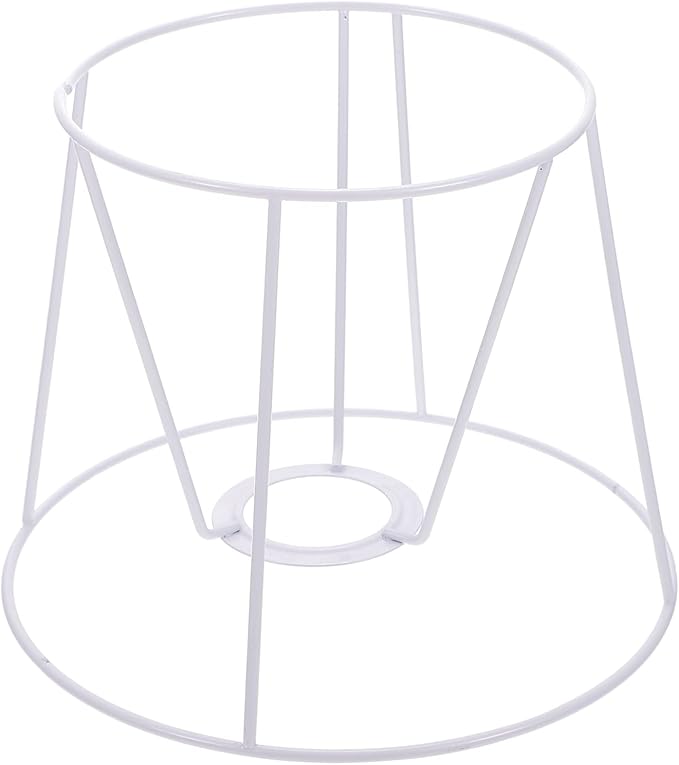
Materials Needed
-
- 200-250 assorted buttons in varying sizes and colors
- 1 bare lampshade wire frame
- 25-30 strands of clear nylon thread, 12–18 inches long
- Hot glue gun and glue sticks
- 1 roll of washi tape
Step-by-step Guide
Step 1: Begin by wrapping your lampshade frame with washi tape to soften the metal and add a colorful outline. Secure the ends with glue.
Step 2: Thread buttons onto strands of nylon thread, tying knots beneath each button to keep them in place and give dimension. Make 25-30 vertical strings depending on the shape of your frame.
Step 3: Tie each strand securely to the top and bottom rings of the frame so they hang like vertical bead curtains. Adjust for even spacing and hot glue in place if needed.
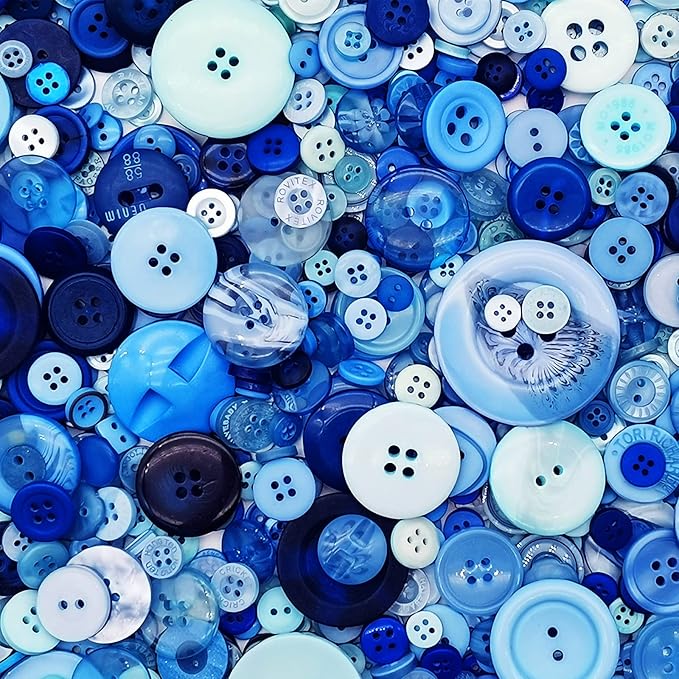
#10. Elegant Button Ball Gown Silhouette Art
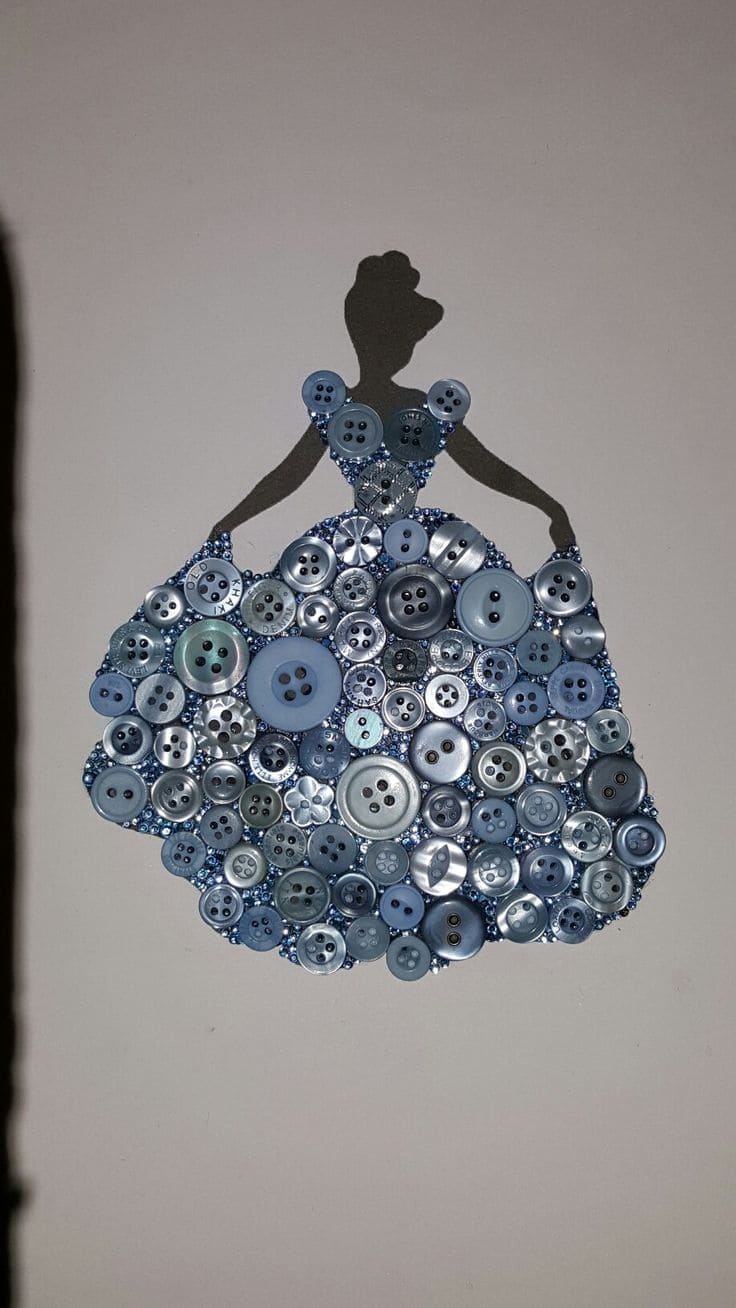
Whether you hang it in a nursery or gift it to a dreamer, this art piece adds a hint of fantasy and elegance.

Materials Needed
- 70-80 light blue buttons in assorted sizes
- 600-700 Blue rhinestones
- 1 sheet of black cardstock
- 1 blank white canvas (11×14 inches)
- Glue gun with precision tip
- Pencil and scissors
Step-by-step Guide
Step 1: Sketch or print a princess silhouette and carefully cut it from black cardstock. Glue it centered on your canvas. Let dry.
Step 2: Begin layering the skirt area with buttons, starting from the bottom. Use larger buttons as the base and fill gaps with medium and small ones for dimension.
Step 3: Once you complete the dress form, add a few buttons along the bodice and shoulders to mimic sleeves. Press and hold each for a secure bond.
#11. Delicate Button Dandelion Canvas Art
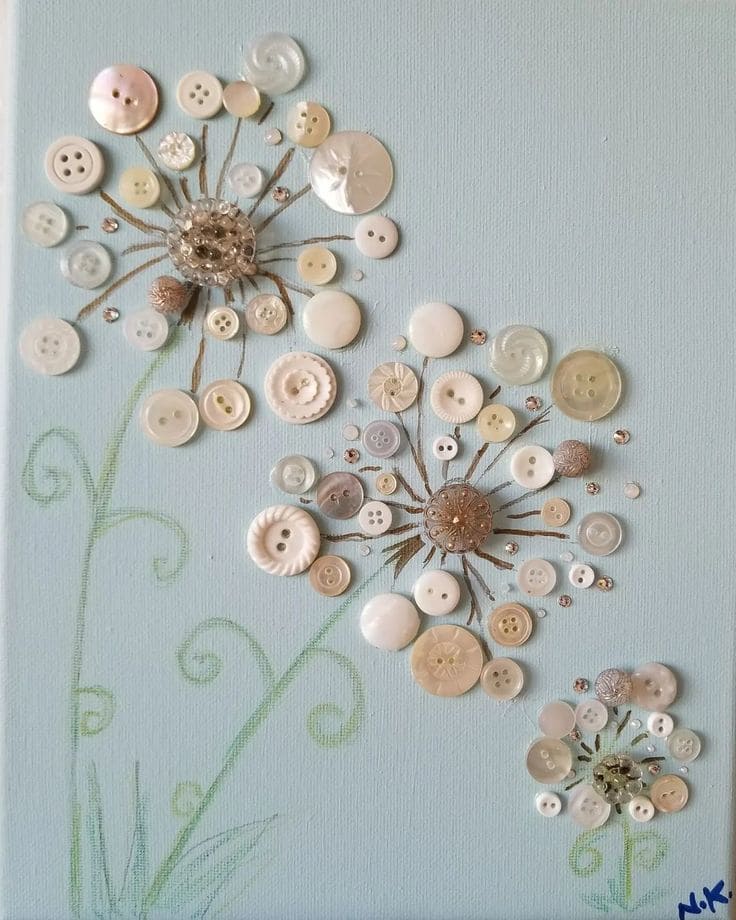
It’s the perfect weekend art therapy, and it transforms spare buttons into something truly elegant. A dreamy fit for bedrooms, baby nurseries, or a nature-lover’s nook.
Materials Needed
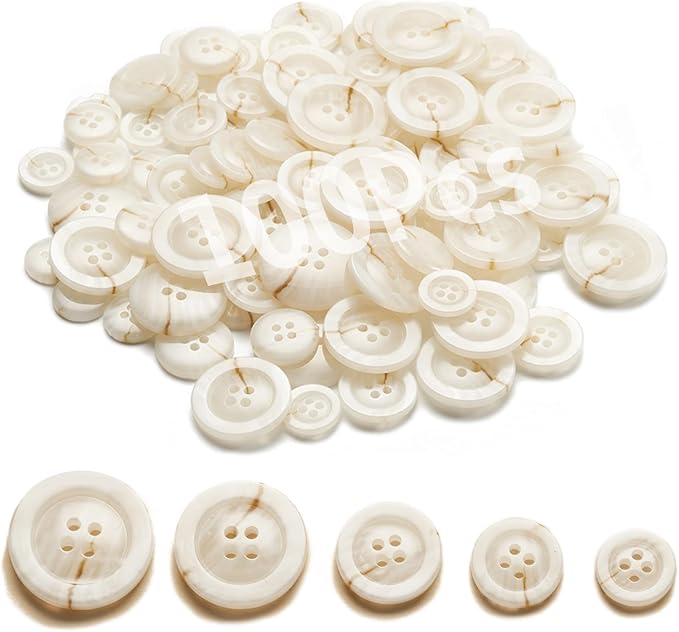
- 70-80 white and cream buttons in assorted sizes
- 1 light blue canvas (12×16 inches)
- 1 fine-tip gold paint pen
- Glue gun
- Optional: a few small clear rhinestones
Step-by-step Guide
Step 1: Sketch or freehand spiral stems with curls in light green on your canvas. Then use the gold pen to draw lines radiating from three central spots where each dandelion’s “head” will be placed.
Step 2: Begin gluing your buttons: start with the largest in the center of each bloom, then gradually place medium and smaller ones out along the lines. Randomize shapes and heights for a natural feel.
Step 3: Fill in the outer dandelion seeds with smaller buttons and a few rhinestones for sparkle.
#12. Charming Button Flower Accent Pillow
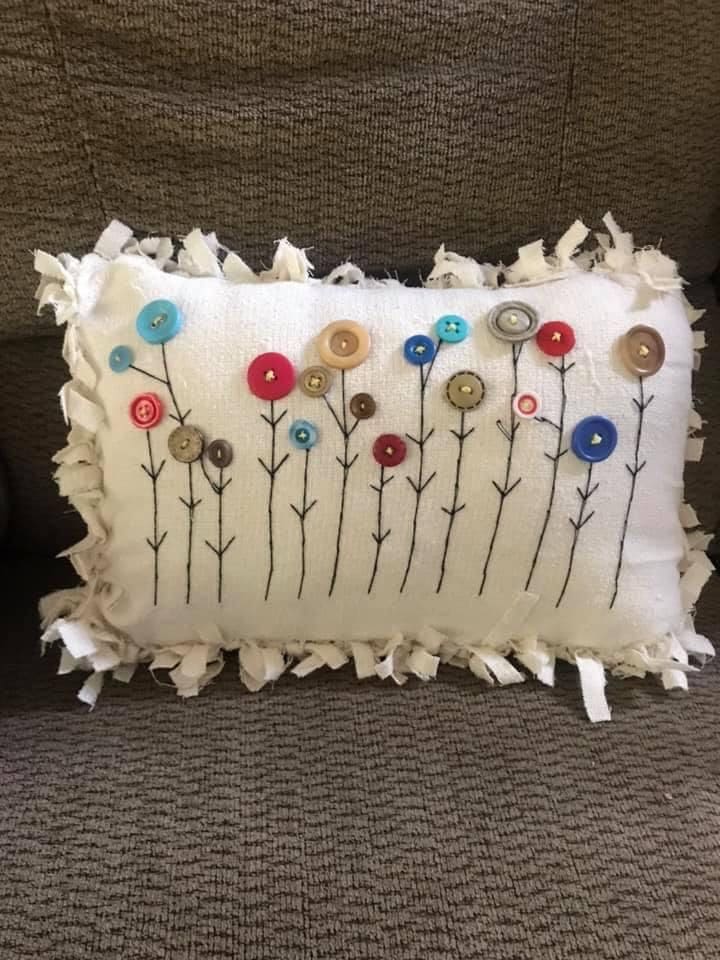
This is the kind of craft that makes you smile every time you pass by and it’s perfect for beginners too.
Materials Needed
- 18-20 colorful buttons in assorted sizes
- 1 white fleece (16×12 inches)
- 1 pillow insert
- Black embroidery floss and needle
- Hot glue gun or sewing thread
- Scissors
Step-by-step Guide
Step 1: Lay your pillow fabric flat and draw 12-14 vertical lines in pencil for stems. Stitch over them using black embroidery floss, adding tiny branches on the sides like leaves.
Step 2: Arrange the buttons on top of the stitched stems as flower heads. Once you’re happy with the look, secure them using either a needle and thread or a hot glue gun for quicker work.
Step 3: Fill your pillowcase with stuffing or insert a pillow form.
#13. Vibrant Button Tree of Blessings Art
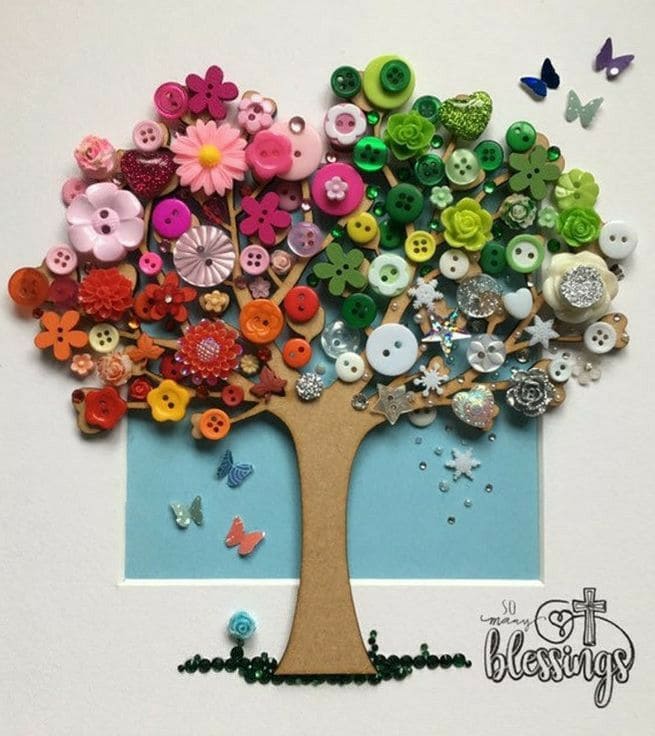
This joyful button tree isn’t just beautiful, it radiates positivity and charm. It’s a bright reminder of nature’s color palette, handmade with love.
Materials Needed
- 60–70 buttons in rainbow colors
- 1 MDF tree cutout (8–10 inches tall)
- 1 white canvas panel (12×12 inches)
- Small gemstone stickers
- Tacky craft glue
- Pencil
Step-by-step Guide
Step 1: Glue the MDF tree onto the center of your canvas or frame backing. Let it dry flat for about 15 minutes.
Step 2: Arrange buttons in rainbow order from left to right: reds, pinks, oranges, yellows, greens, blues, and whites. Mix sizes and textures for depth. Once you’re happy with the look, glue them in place.
Step 3: Add butterfly stickers or rhinestones around the tree and along the base.
#14. Festive Button Ornament Christmas Card
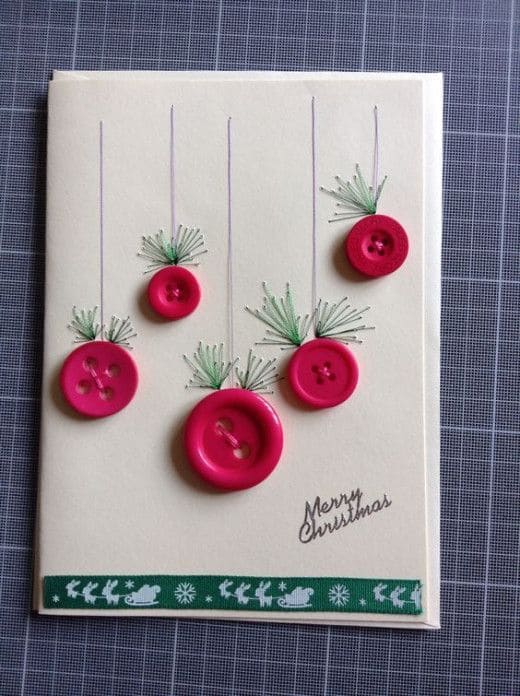
On holidays like Christmas, you can create this festive button ornament card to add a personal touch to your greetings!

Materials Needed
- 5 red buttons (0.5–1 inch)
- 1 blank cream cardstock card
- Green embroidery thread
- Purple fine liner pen
- 1 strip of Christmas ribbon
- Tacky glue
- Scissors
Step-by-step Guide
Step 1: Arrange the buttons on the front of your card to mimic hanging ornaments. Once you’re happy with the placement, glue them down and let dry.
Step 2: Using your pen, draw thin vertical lines from the top edge of the card down to each button. These become the ornament “strings.”
Step 3: Add pine-like details above each button using green thread (glued in tiny fans). Finish it off with a strip of ribbon at the bottom and write “Merry Christmas.”
#15. Vintage Button Bookmark
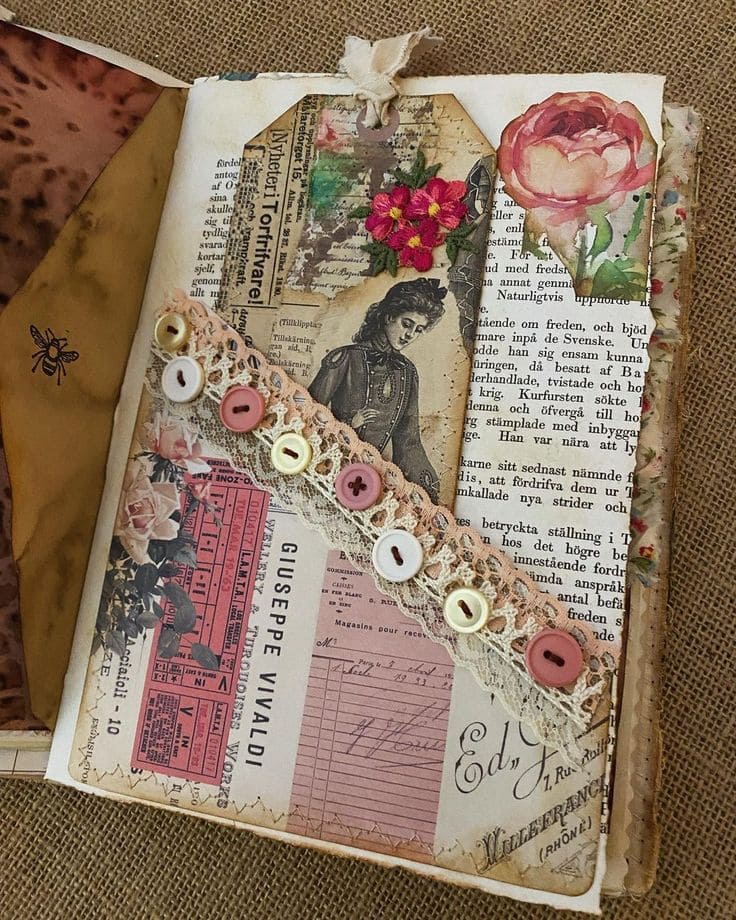
This one, with its muted tones, Victorian portrait, and lace-bound button detail, feels like stepping into a forgotten love letter.
Materials Needed
- 1 sheet of vintage-style scrapbook paper
- 7–8 small buttons (white, cream, mauve)
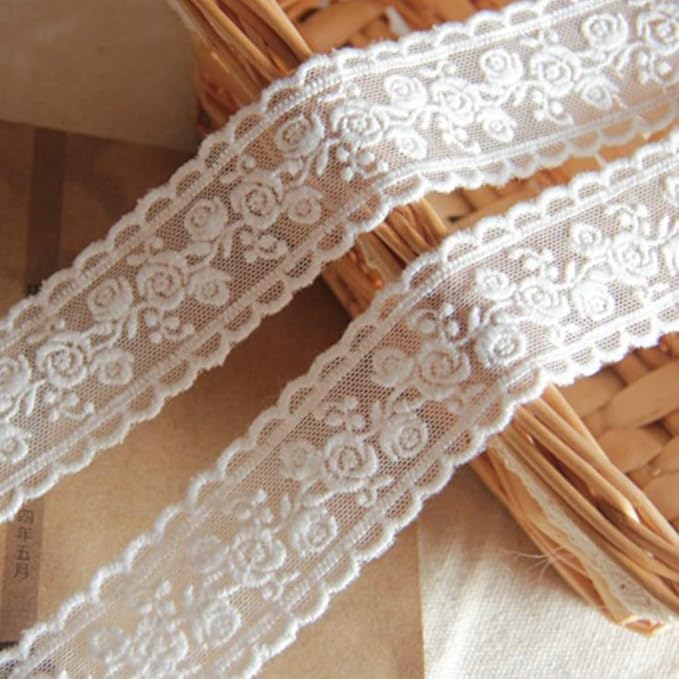
- 1 strip of lace trim (8–10 inches)
- 1 vintage ephemera pack
- 1 small tag with ribbon
- Glue stick
- Black fine liner
Step-by-step Guide
Step 1: Glue your base scrapbook paper onto the journal page. Layer vintage ephemera – tickets, music sheets, or receipts – diagonally to form a collage background.
Step 2: Add the tag behind a horizontal lace strip. Stitch or glue small buttons evenly along the lace and glue the entire strip across the page as a pocket.
Step 3: Ink the edges of your papers for depth, tuck the portrait tag into the pocket, and sketch or write something meaningful beside it.
#16. Charming Button Heart Keychain Craft
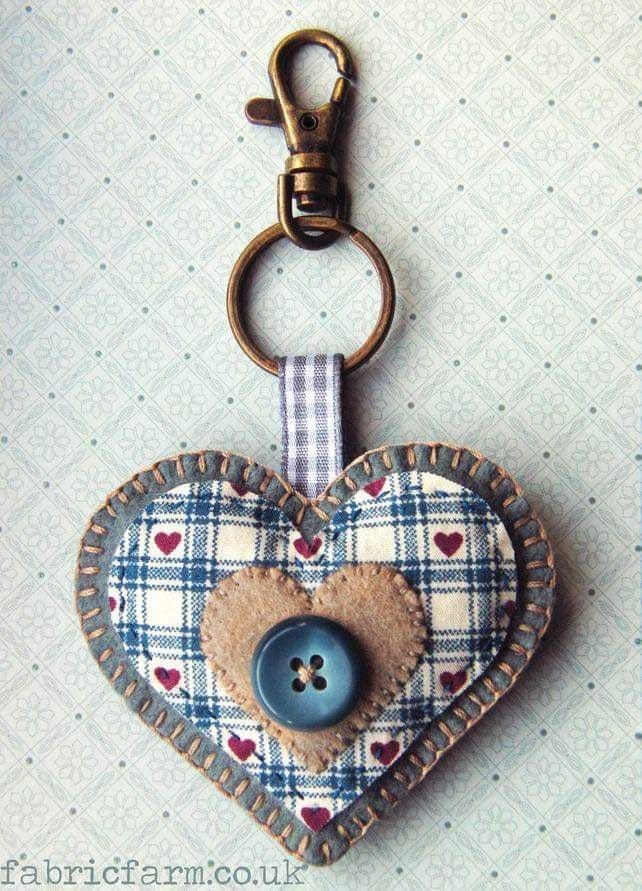
If you often forget small things like keys, this charming button heart keychain is a lifesaver!
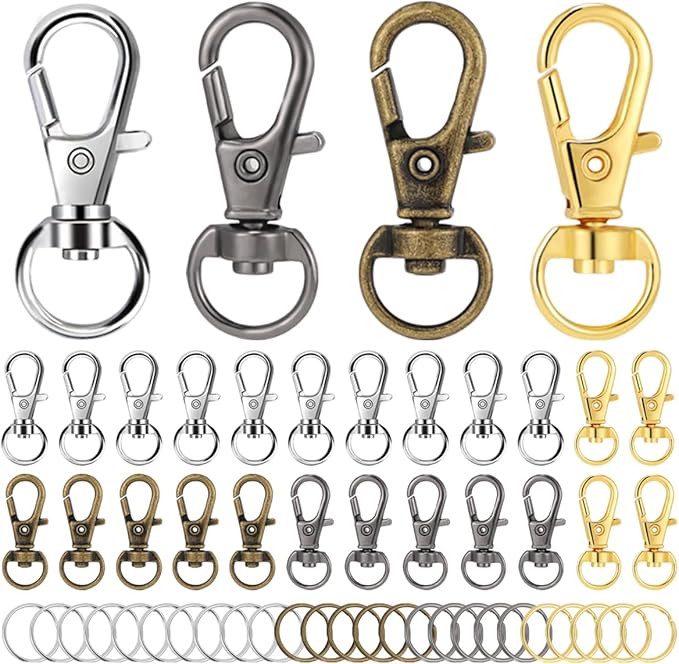
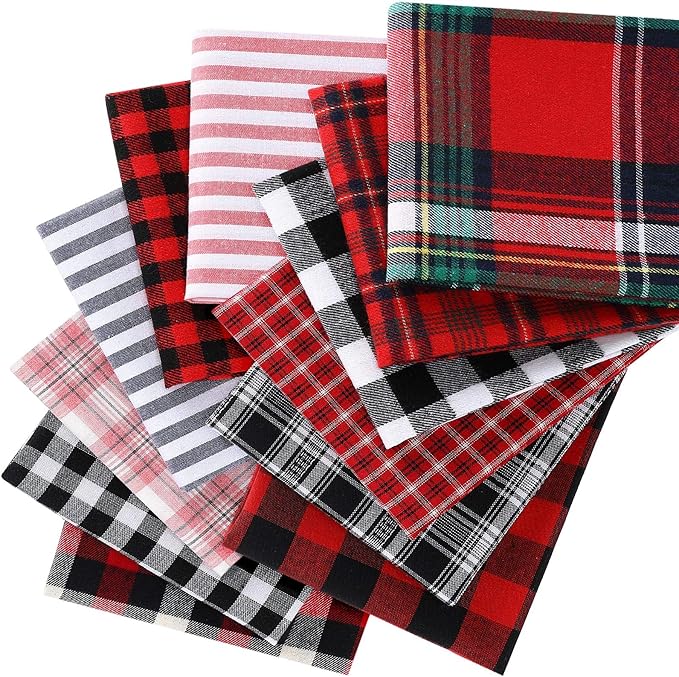
Materials Needed
- 2 pieces of plaid cotton fabric (4″ x 4″)
- 2 pieces of wool felt (3″ x 3″)
- 1 large blue button (approx. 1 inch)
- 1 strip of ribbon (2.5 inches long)
- 1 metal keychain ring with clasp
- Embroidery thread and needle
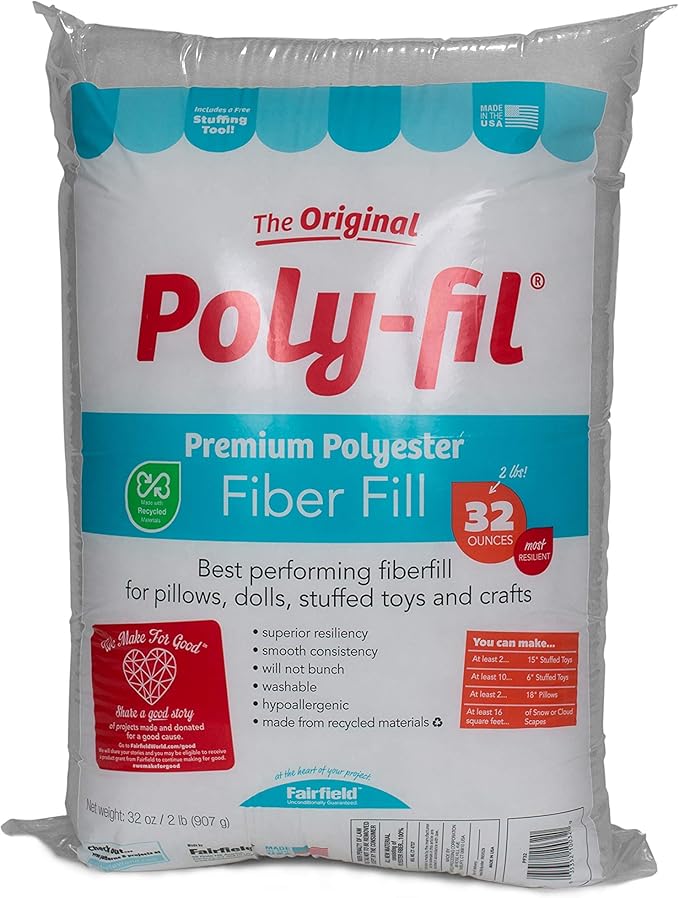
- Polyester stuffing
- Scissors
- Hot glue gun
Step-by-step Guide
Step 1: Cut two heart shapes from the plaid fabric and one smaller heart from the felt. Sew or glue the felt heart onto one fabric heart. Stitch the button in the center.
Step 2: Place the two fabric hearts together (right sides out), sew around the edge using a blanket stitch, and leave a small gap. Lightly stuff with filling and close the gap.
Step 3: Attach the ribbon loop between the top edges of the heart, secure the metal ring through it, and give it a gentle tug to check it’s secure.
#17. Adorable Button Hair Clips for Kids
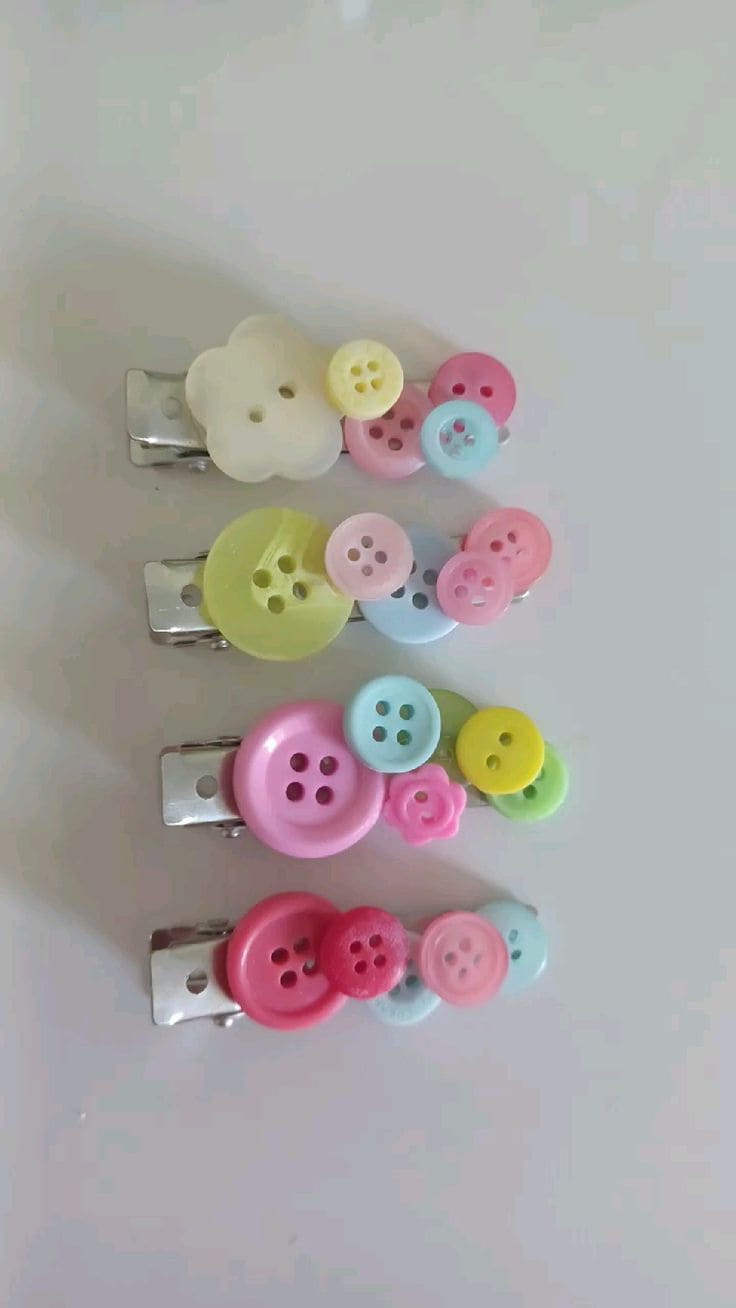
You can personalize each with different shapes or colors, or keep a matching theme like I did here with soft mint, lemon, blush, and lilac.
Materials Needed
- 20 small pastel buttons (½ to 1 inch size)
- 4 plain metal hair clips
- 1 tube of strong craft adhesive
- Toothpick
- Paper towel
Step-by-step Guide
Step 1: Start by laying out button designs on each clip to visualize how they’ll look, try layering or tilting them slightly for dimension.
Step 2: Apply a small dab of glue on the back of each button and gently press it onto the clip, holding it in place for 10–15 seconds.
Step 3: Let clips dry on a flat surface for at least 1 hour before wearing or gifting, and wipe off any stray glue with a clean cloth.
#18. Trendy Button Rings Accessories
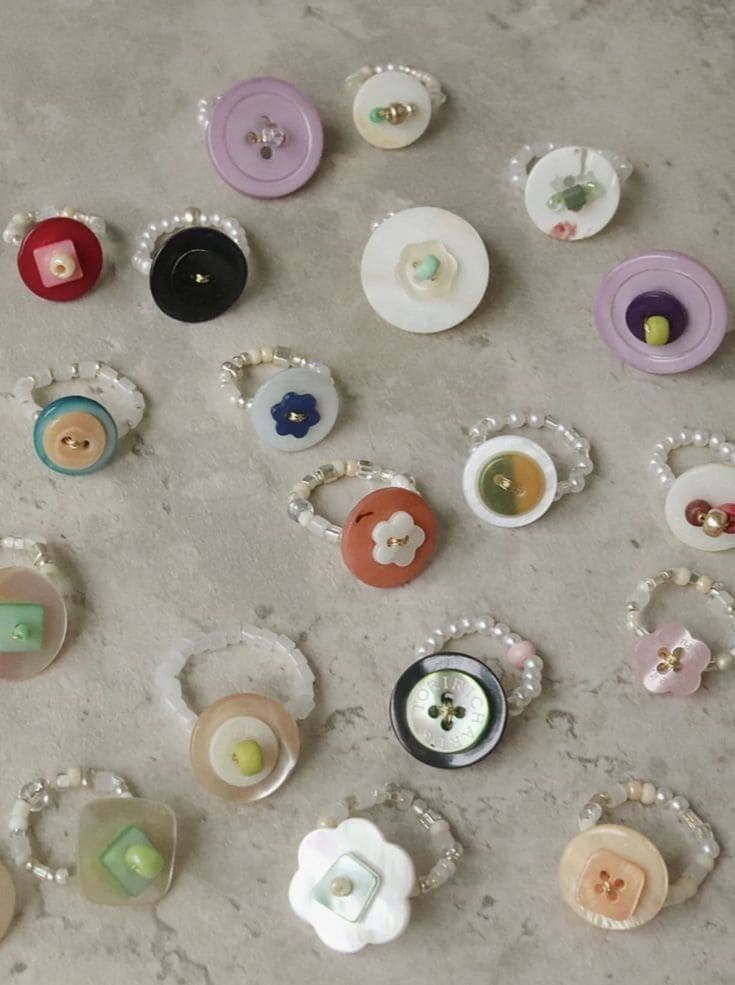
Tiny, twinkly, and full of charm, these button rings are my favorite quick craft for rainy afternoons or last-minute handmade gifts.
Materials Needed
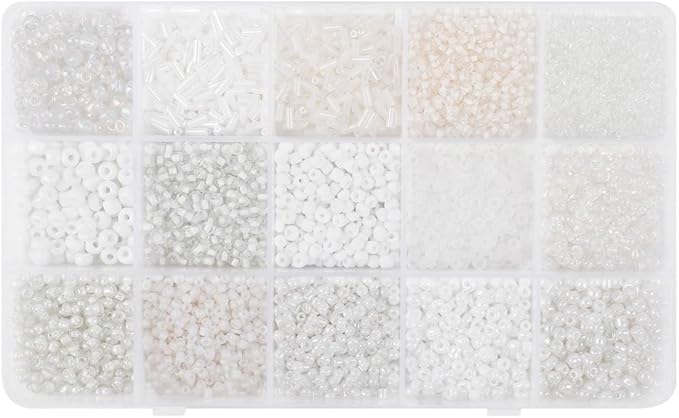
- 10-20 assorted buttons (½–1 inch diameter)
- 50-100 seed beads
- 1 pack of clear elastic jewelry cord
- 1 small tube of jewelry glue
- Scissors
Step-by-step Guide
Step 1: Cut a 6-inch length of elastic cord and slide on 6-8 beads, then center a button by threading both ends of the cord through the holes from opposite sides.
Step 2: Add 6–8 more beads on each side to complete the ring shape, then knot both ends tightly behind the button and secure with a dab of glue.
Step 3: Trim the excess cord and let it dry fully before slipping it on.
#19. Playful Button Charm Bracelet DIY
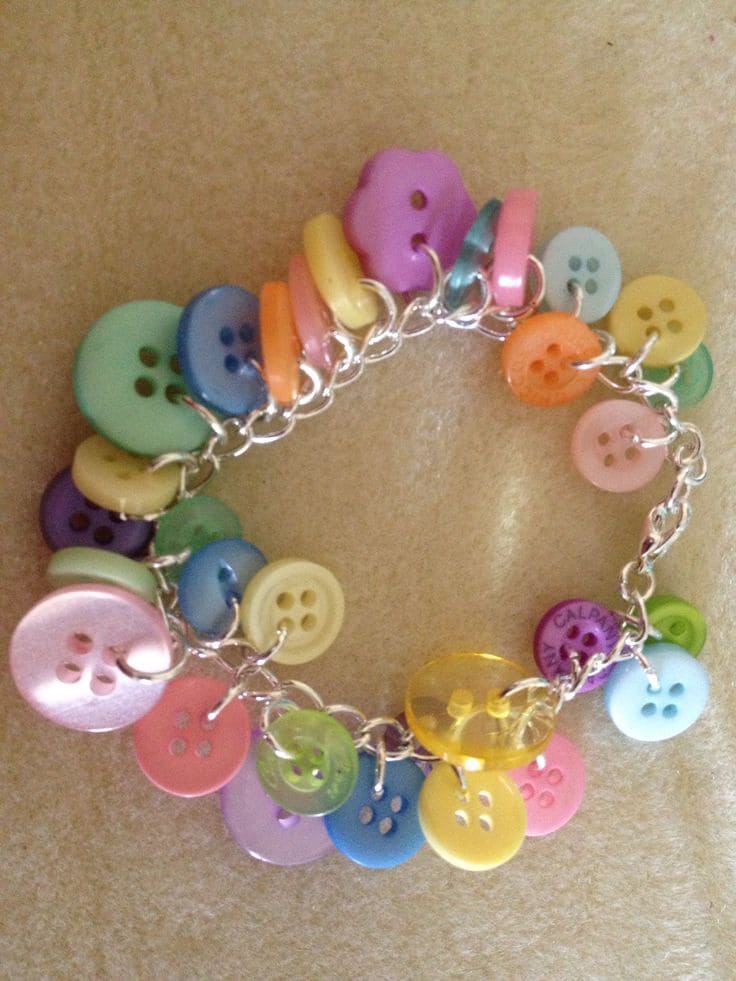
Making it felt like stringing together sprinkles, each button a bright burst of childhood glee.
Materials Needed
- 35-40 colorful buttons (¼ to 1 inch)
- 1 7-inch silver chain bracelet
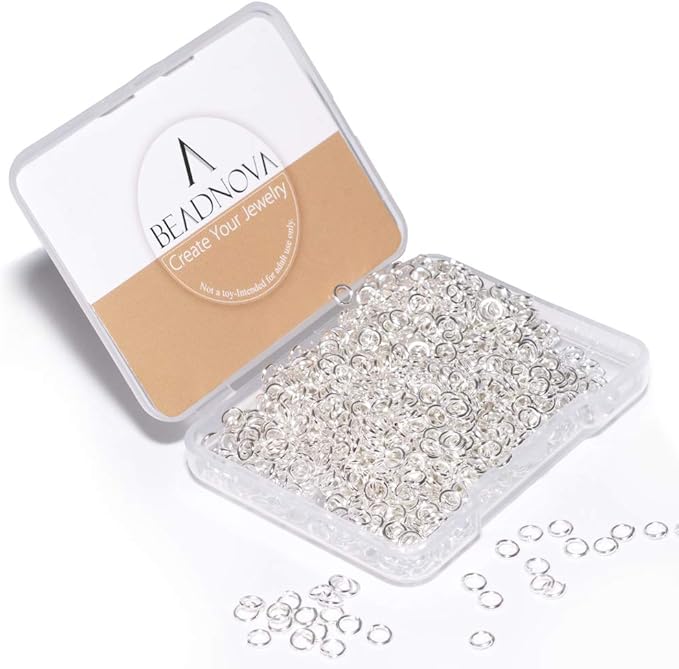
- 30–35 jump rings (6–8mm)
- 1 pair of needle-nose pliers
Step-by-step Guide
Step 1: Open each jump ring using the pliers, thread it through a buttonhole, and then attach it to a chain link before gently closing the ring.
Step 2: Mix button sizes, shapes, and shades for a playful, layered look, spacing them every 1–2 links for a full charm effect.
Step 3: Once the chain is filled, secure the clasp and give it a gentle shake.
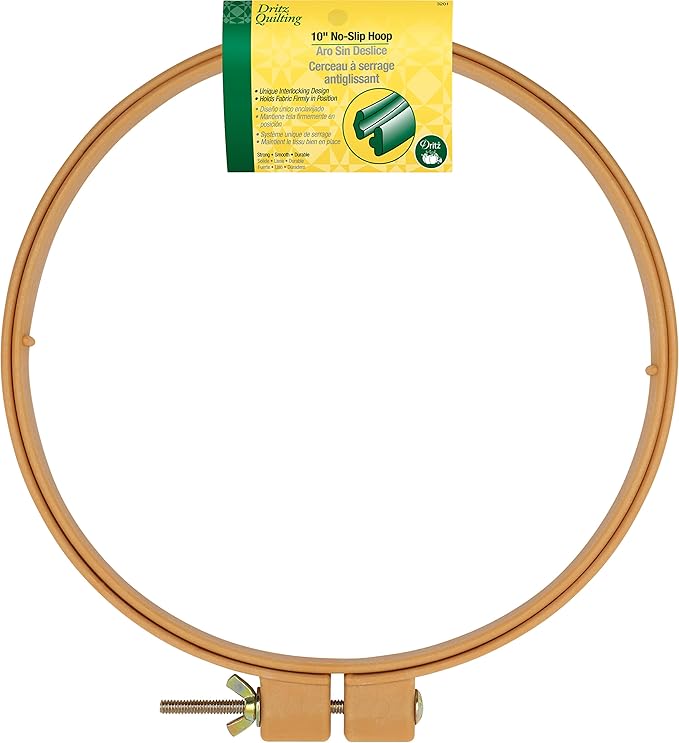
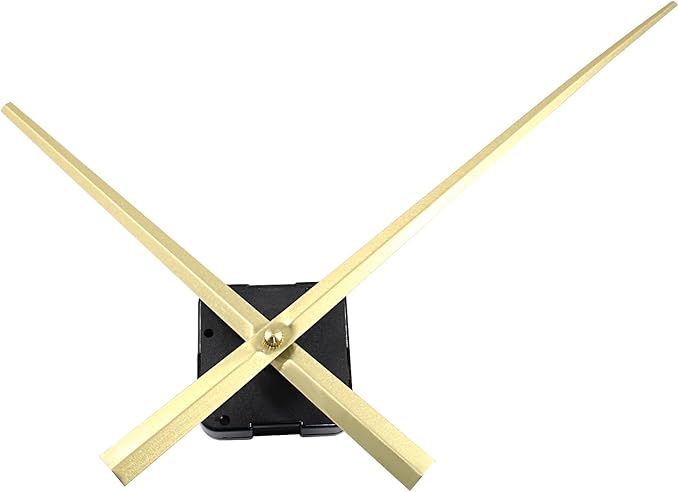
#20. Creative Button Clock
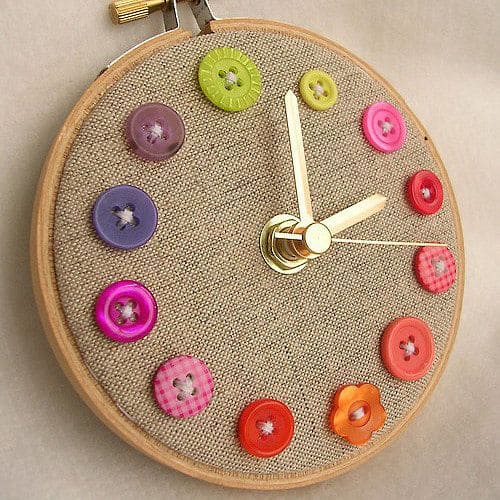
With soft linen, cheerful buttons, and ticking gold hands, this button clock turns any wall into a storybook moment.
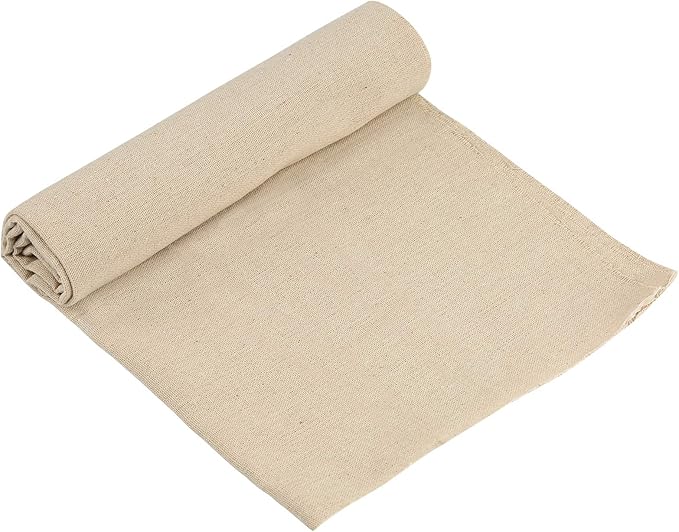
Materials Needed
- 1 8-inch embroidery hoop
- 1 piece of linen (10 x 10 inches)
- 12 assorted colorful buttons (½ to 1 inch)
- 1 quartz clock movement kit with hands
- 1 awl
- Glue gun
Step-by-step Guide
Step 1: Stretch your fabric tightly in the embroidery hoop and secure the back; make a small centered hole with an awl for the clock shaft.
Step 2: Insert the clock movement through the back, following the kit’s instructions, and attach the hands.
Step 3: Glue one button at each hour mark around the hoop face, spacing them evenly like numbers on a clock.
#21. Romantic Red Button Heart Frame
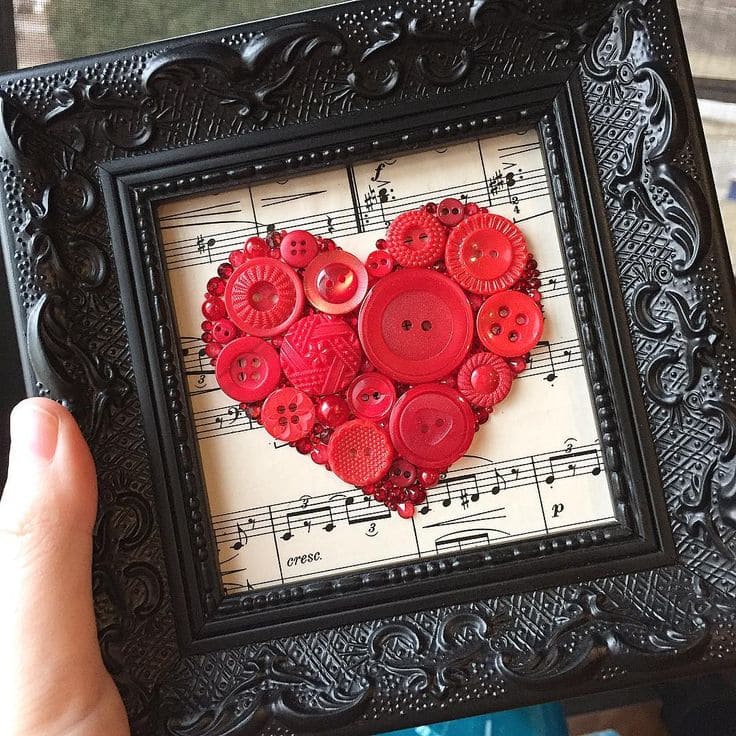
For the next Valentine’s Day, you can create this romantic red button heart frame to express your love!

Materials Needed
- 20–25 red buttons in various sizes (½ to 1¼ inches)
- Red rhinestones
- 1 vintage-style black frame (5×7 inches)
- 1 piece of sheet music paper
- Hot glue gun
- 1 white cardstock sheet
Step-by-step Guide
Step 1: Trim your sheet music to fit the frame and glue it onto white cardstock for support. Lightly sketch a heart shape in the center with a pencil.
Step 2: Start hot-gluing buttons inside the heart outline, layering them as you go for dimension. Use smaller buttons to fill gaps or define edges.
Step 3: Let the glue cool completely, pop the finished piece into the frame (without the glass), and it’s ready to display.
#22. Festive Button Pumpkin
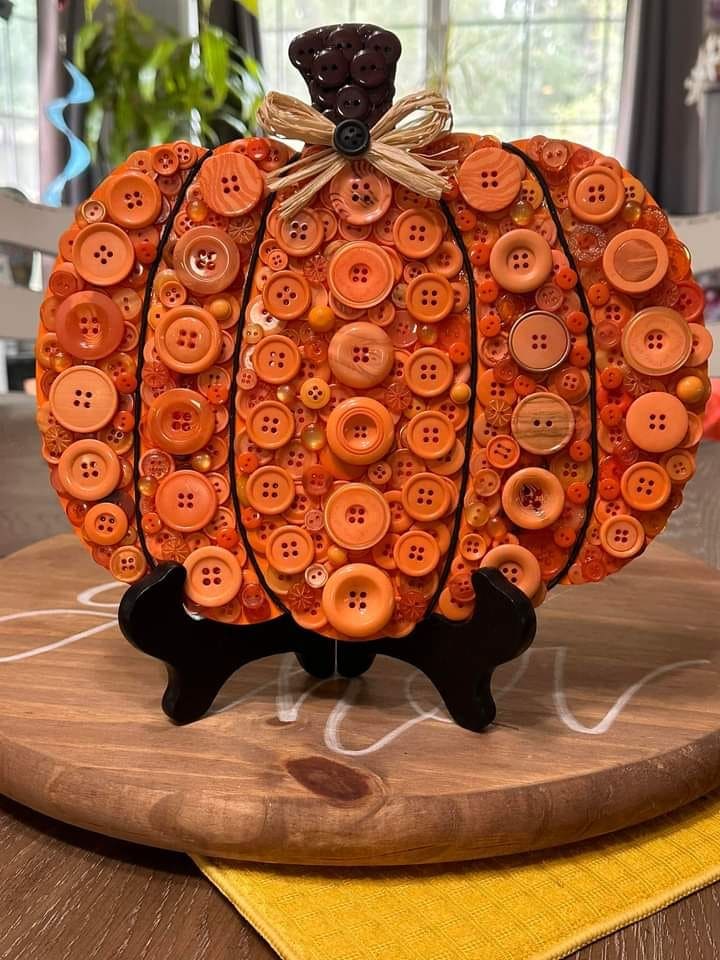
With its bright orange glow and playful textures, it captures the warmth of autumn in the sweetest way.
Materials Needed
- 200-300 assorted orange buttons (½–1 inch wide)
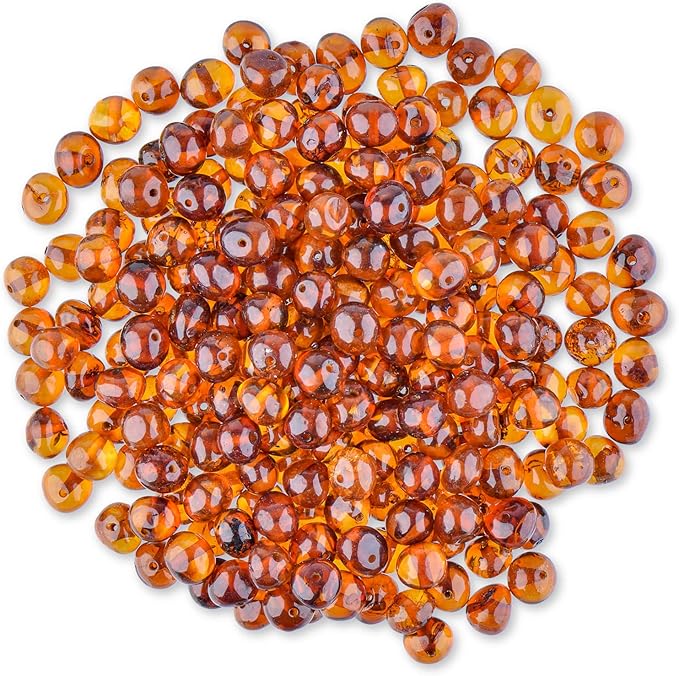
- 12–15 small amber filler beads
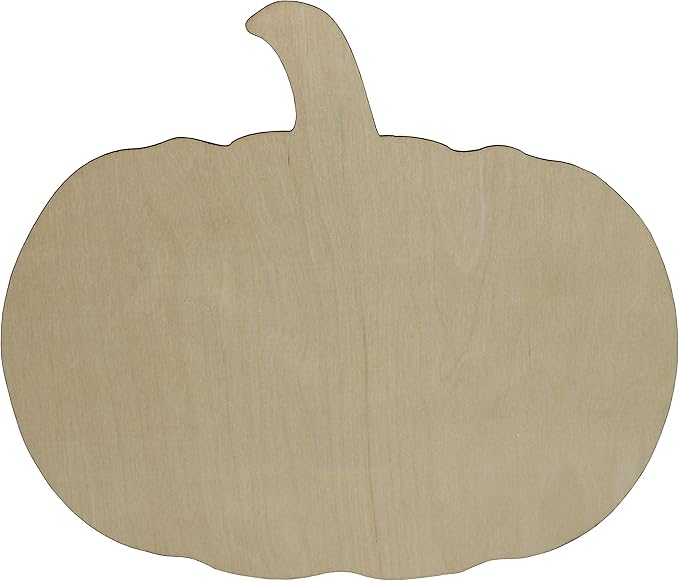
- 1 pumpkin-shaped wood cutout (10–12 inches)
- 6–8 brown buttons
- 1 small raffia bow
- Hot glue gun
- Black paint pen
Step-by-step Guide
Step 1: Paint or outline the pumpkin’s vertical ridges with a black marker to give it that three-dimensional look. Let dry completely.
Step 2: Start gluing down your buttons from the center out, mixing sizes and layering smaller ones on top to add texture. Fill gaps with mini buttons or beads.
Step 3: Finish with the stem by using dark brown buttons for contrast and hot glue a raffia bow at the top for a rustic fall flourish.
#23. Rustic Button Snowman Christmas Ornaments
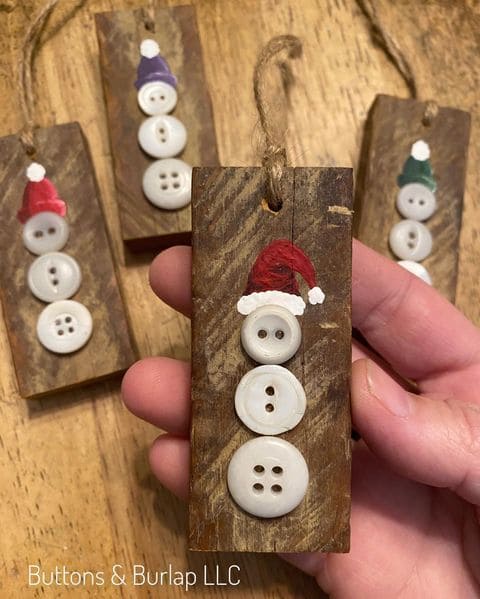
Inspired by the cozy charm of winter, these rustic button snowman ornaments are a delightful craft idea!
Materials Needed
- 4 small reclaimed wood pieces (1.5 × 3.5 inches)
- 12 white buttons (¾ to 1 inch wide)
- Red, purple, and green acrylic paint
- Jute twine (about 12 inches)
- Hot glue gun
- Small paintbrush and white paint pen
- Drill
Step-by-step Guide
Step 1: Lightly sand the wood blocks and drill a hole near the top for the twine. Paint a simple Santa hat above where the buttons will go, adding snowy details with the paint pen.
Step 2: Stack and glue 3 white buttons vertically below the hat. Let dry fully and add any face details if you wish.
Step 3: Cut a piece of twine, loop it through the hole, and knot.
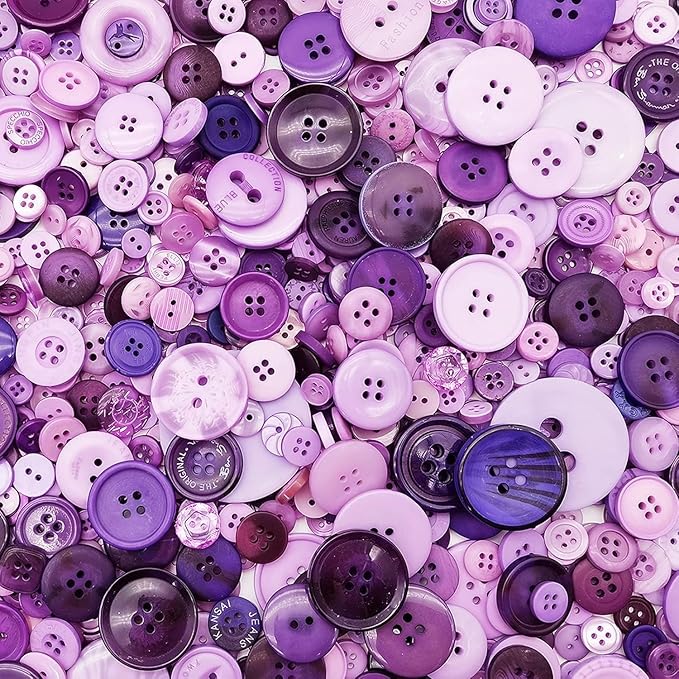
#24. Charming Button Cat Silhouette Art
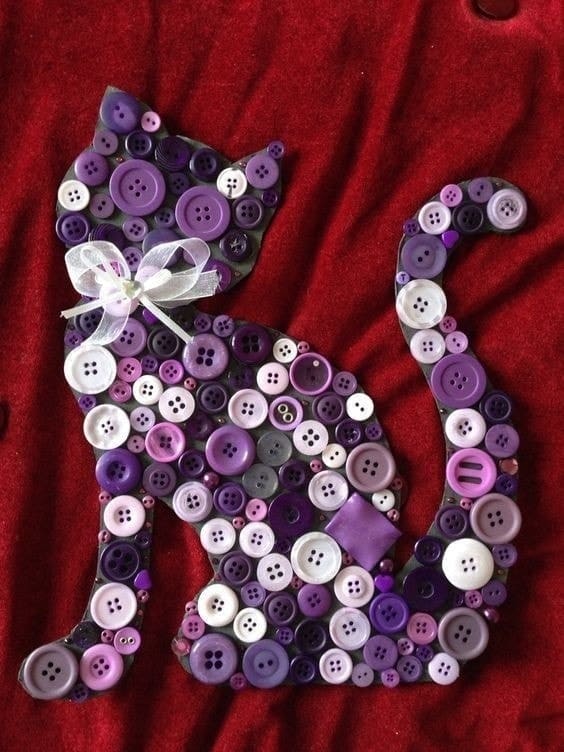
I created one just like this to honor my first rescue cat, it sits proudly above my sewing nook and still brings me comfort and smiles.

Materials Needed
- 150-200 buttons in assorted purple hues
- 1 chipboard cat silhouette (10–12 inches tall)
- 1 red velvet fabric (12 × 14 inches)
- Hot glue gun and glue sticks
- White organza ribbon (12 inches)
- Scissors and fabric glue
Step-by-step Guide
Step 1: Cut your background fabric and glue it to a frame backing or thick board. Trace and cut a cat silhouette onto chipboard, then center and glue it onto the velvet.
Step 2: Start placing buttons on the silhouette, largest ones first, filling in spaces with medium and small buttons. Play with color variation for a dynamic effect.
Step 3: Once dry, tie a bow with the organza ribbon and glue it at the neck.
#25. Cozy Button-Embellished Yarn Wreath DIY
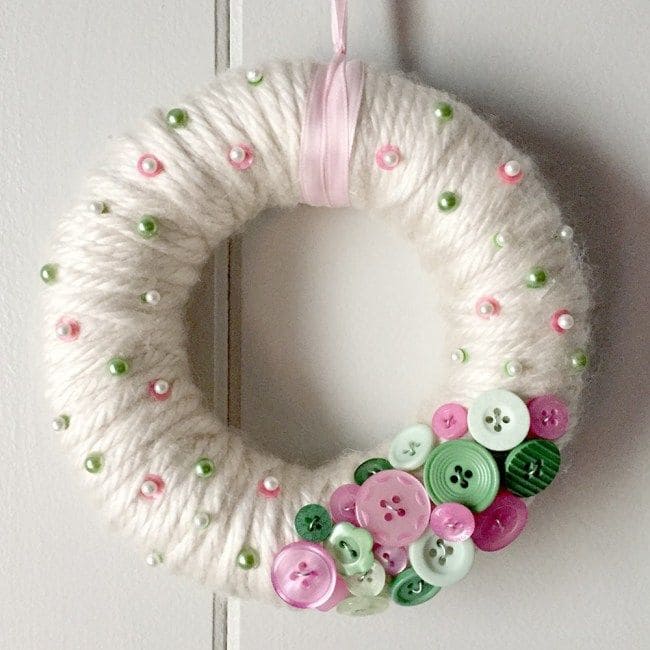
This wreath brings the gentleness of winter and the joy of spring into one cozy, heartwarming craft.
Materials Needed
- 1 foam wreath form (10 inches)
- 1 skein chunky cream yarn (approx. 100g)
- 35–40 assorted buttons in pink and green tones
- 25–30 pearl beads (4mm)
- Hot glue gun and glue sticks
- 1.5 ft pink satin ribbon (0.5 inch wide)
Step-by-step Guide
Step 1: Start by wrapping the entire foam wreath with the yarn, making sure each round overlaps slightly. Secure the ends with hot glue at the back.
Step 2: Cluster your buttons on the lower third of the wreath. Use larger buttons at the center of the cluster and fill gaps with smaller ones. Alternate colors for a balanced look.
Step 3: Glue pearl beads randomly around the rest of the yarn-wrapped surface. Attach the ribbon at the top as a hanger.
#26. Chic Button Drop Earrings DIY
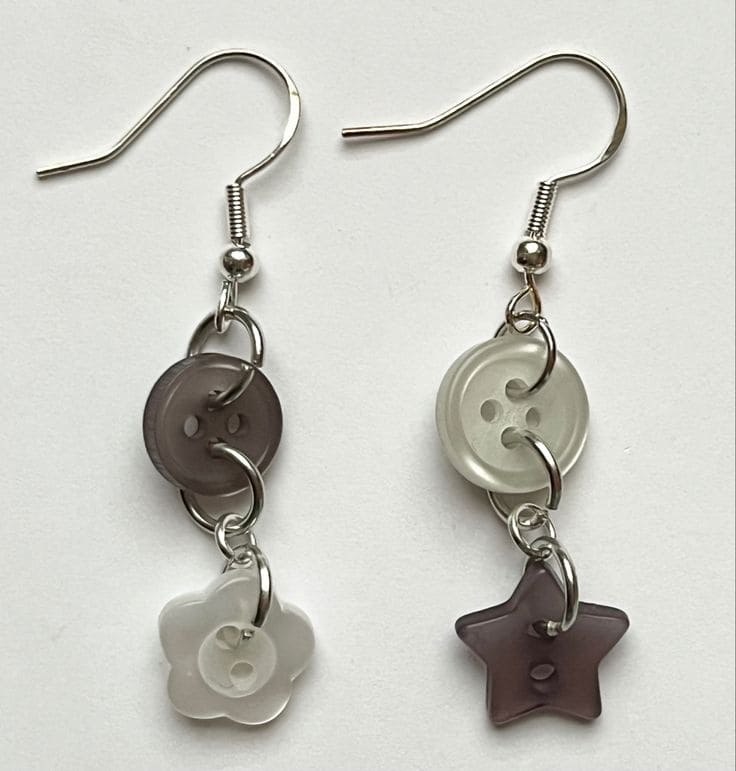
I love how each one is slightly mismatched yet still pairs so perfectly. They’re fast to make and a great way to use up extra craft supplies.
Materials Needed
- 2 French hook earring wires
- 2 round buttons (approx. 1 cm diameter)
- 2 novelty-shaped buttons (flower and star)
- 4 small jump rings (6–8mm)
- 2 jewelry pliers
Step-by-step Guide
Step 1: Open a jump ring with pliers, attach a round button and the earring hook, then close the ring securely. Repeat for the second earring.
Step 2: Use another jump ring to attach the novelty-shaped button to the bottom hole of the first button, creating a little dangle.
Step 3: Check that all pieces are secure, and you’re ready to wear them or wrap them up as a cute handmade gift!
#27. Rustic Button Christmas Tree Canvas Art
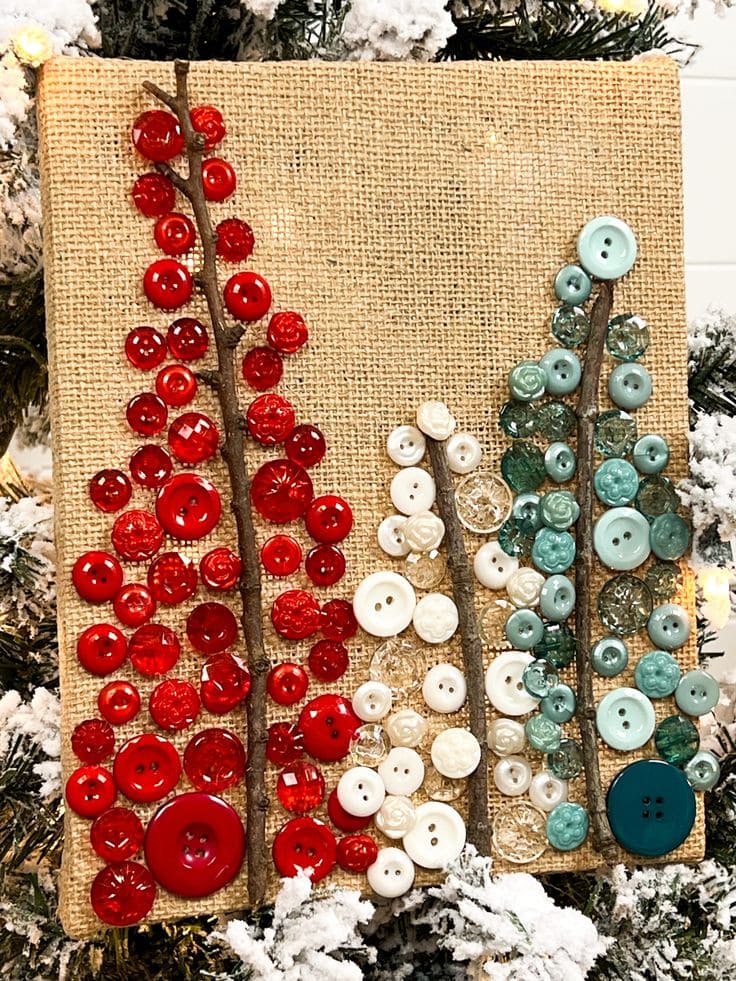
You can create this rustic button Christmas tree canvas to add a festive and handmade touch to your home!
Materials Needed
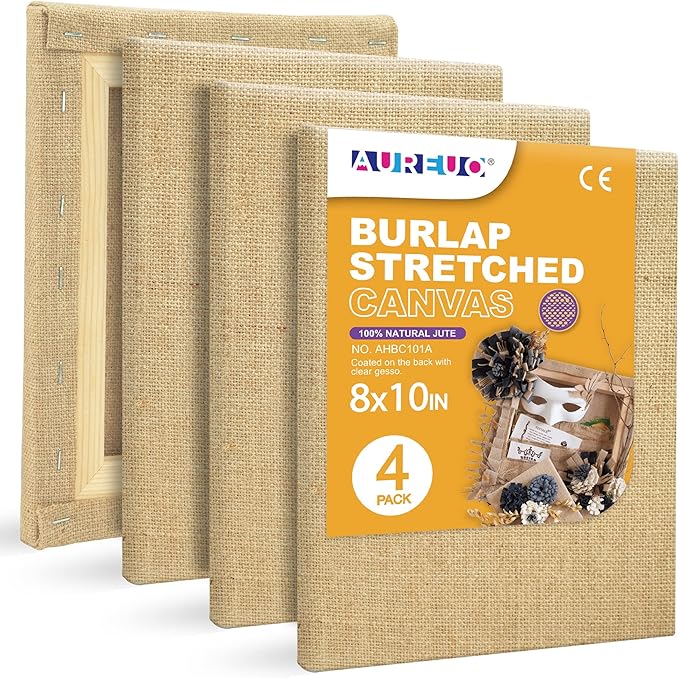
- 1 burlap canvas (8 x 10 inches)
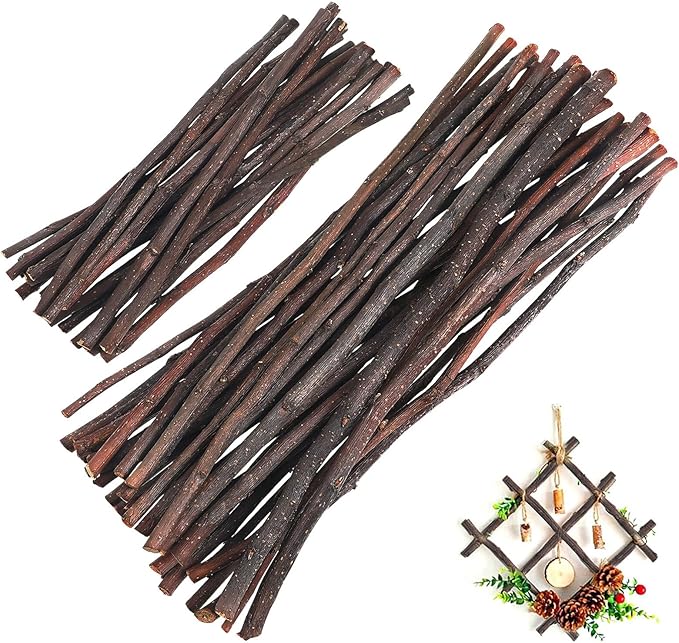
- 3 small twigs (8–10 inches each)
- 60-65 red buttons
- 25–30 white/pearl buttons
- 20–25 teal or seafoam buttons
- Hot glue gun with glue sticks
- Sharp scissors
- Pencil
Step-by-step Guide
Step 1: Begin by arranging the twigs vertically on the canvas in a staggered layout, like a row of stylized trees. Glue them down once you like the spacing.
Step 2: Sort your buttons by color and size, and start gluing them on either side of each twig to mimic branches. Go heavy at the bottom and lighter at the top for a tree-like taper.
Step 3: Fill any small gaps with tiny buttons or pearls. Let dry completely and then hang your rustic button forest somewhere it can shine with a touch of holiday charm.
#28. Vibrant Button and Paper Flowers DIY
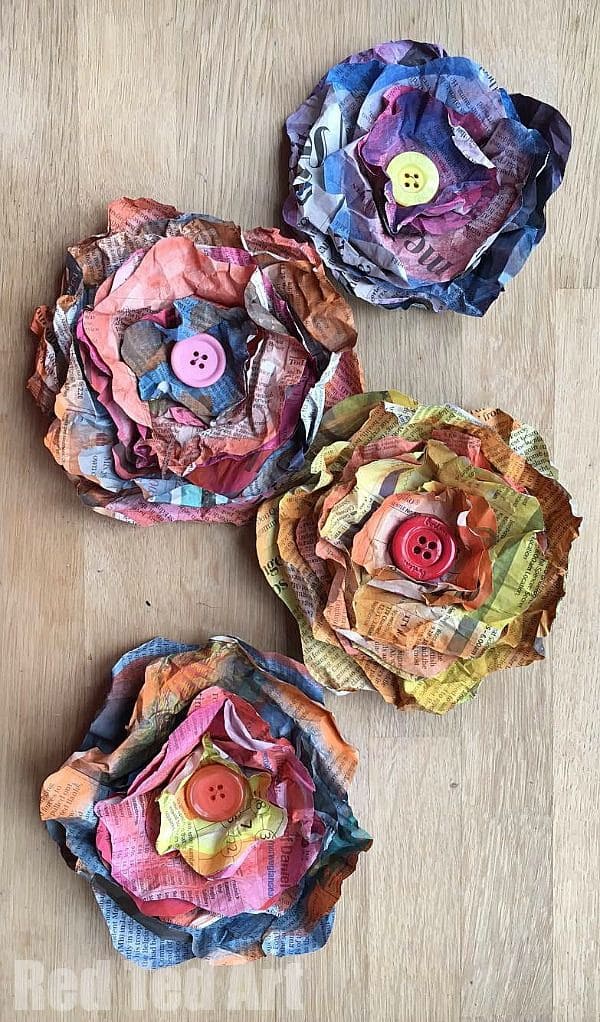
With just some recycled paper, vibrant paint, and playful buttons, you can create flowers that look like they’ve tumbled out of an artist’s dream garden.
Materials Needed
- 5–6 sheets of newspaper
- Watercolor or acrylic paint in assorted colors
- 4 large colorful buttons
- Craft glue
- Scissors
- Paintbrushes
Step-by-step Guide
Step 1: Tear the paper into 4–5 different-sized circles per flower (don’t worry about perfect shapes – ragged edges make them prettier). Paint each circle in rich, contrasting colors and let them dry.
Step 2: Once dry, crumple each circle gently for texture. Unfold and stack from largest to smallest, gluing each layer at the center.
Step 3: Finish each flower by gluing a colorful button in the middle.
#29. Charming Fruit-Themed Button Napkins
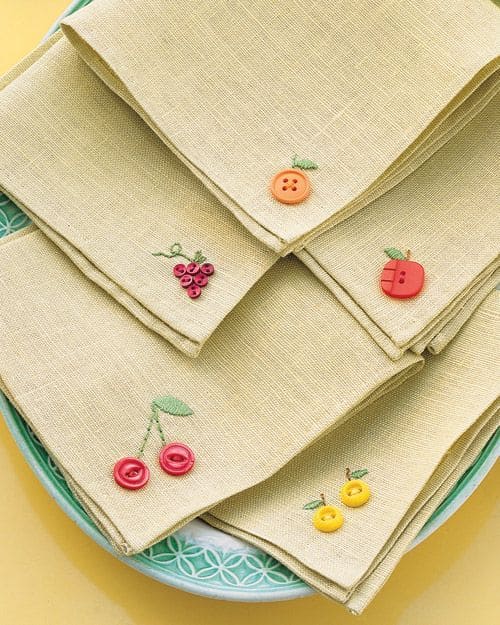
These fruit-themed button napkins are the kind of tiny detail that makes a brunch table feel like a summer memory.
Materials Needed
- 5 plain linen napkins (12–16 inches)
- 20 small round buttons (red, yellow, orange, pink)
- Embroidery thread and needle set
- Fabric marker
- Scissors
Step-by-step Guide
Step 1: Decide your fruit designs like cherries, grapes, apples, oranges and lightly sketch the stems or leaves with a fabric pencil. Position buttons where the fruits will go.
Step 2: Stitch the button “fruit” securely in place using matching thread. Use embroidery floss to add stems, leaves, or tiny vines around each.
Step 3: Finish off the back with small knots. Press the napkins gently with a cloth barrier to protect the thread.
#30. Adorable Button-Eyed Fabric Owls DIY
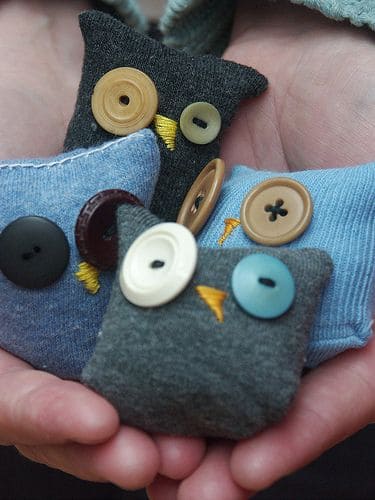
Each owl has its own quirky personality and they make heartfelt gifts, especially for little hands or as drawer sachets filled with lavender.
Materials Needed
- 4 small fabric scraps (5×5 inches)
- 8 assorted buttons (1 large + 1 small for each eye)
- Polyfill
- Felt scraps
- Needle and thread
- Fabric glue (optional)
Step-by-step Guide
Step 1: Cut two 5×5 inch squares for each owl. Round the corners slightly for a softer shape. Stitch around three sides, leaving the top open.
Step 2: Turn the fabric right side out, stuff lightly, and stitch the top closed or hand-sew for a clean look. Glue or stitch on felt triangles for beaks and mismatched buttons for those googly eyes.
Step 3: Add final decorative stitches or even a small hanging loop at the top.