Propagating Thuja from cuttings using Aloe Vera may sound like an unusual combination, but this DIY method can work wonders for your garden. Thuja, also known as arborvitae, is a popular evergreen shrub known for its striking green foliage and aromatic scent. Aloe Vera, on the other hand, is renowned for its natural growth-boosting properties. Combining the two in propagation is a bit like using a secret potion for plant growth.
In this guide, we’ll walk you through a step-by-step guide to ensure your propagation project is a resounding success.
Materials Needed
- Thuja Cuttings: Start with healthy Thuja cuttings. These are typically 4-6 inches long, taken from the current season’s growth. Choose cuttings with no signs of disease or damage.
- Aloe Vera Gel: Aloe Vera is a key player in this method. You’ll need fresh Aloe Vera gel, which is well-known for its natural rooting hormone properties. You can either use fresh Aloe Vera leaf or store-bought Aloe Vera gel.
- Rooting Container: Select a rooting container with drainage holes. It can be a small pot or a seed tray, but make sure it’s clean and sterilized.
- Potting Mix: Use a well-draining potting mix. You can create your mix by combining peat moss, perlite, and a bit of sand.
- Pruning Shears: Clean and sharp pruning shears are essential for taking Thuja cuttings.
- Clear Plastic Bag or Plastic Wrap: This will be used to create a humid environment around the cuttings.
The Step-by-Step Guide
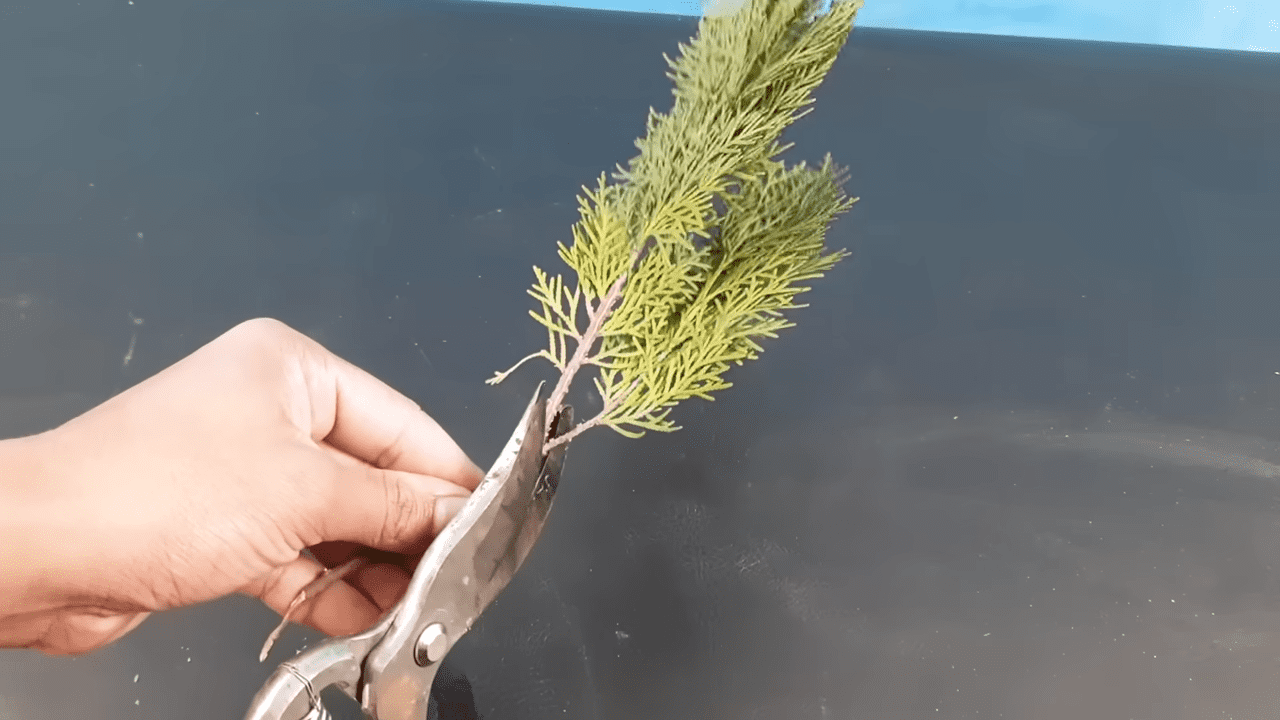
Step 1: Preparation
To get started, sterilize your pruning shears using rubbing alcohol or hydrogen peroxide. This prevents the introduction of any pathogens to your cuttings. Take your Thuja cuttings from the current season’s growth. You should aim for cuttings that have no signs of damage or disease and take multiple cuttings to increase your chances of success.
Next, cut a fresh Aloe Vera leaf or use store-bought Aloe Vera gel. The gel should be extracted and applied to the cut ends of your Thuja cuttings. This gel acts as a natural rooting hormone, promoting root growth.
The potting mix matters too. It should be well-draining to encourage root development. Fill your rooting container with this mix, leaving about an inch from the top.
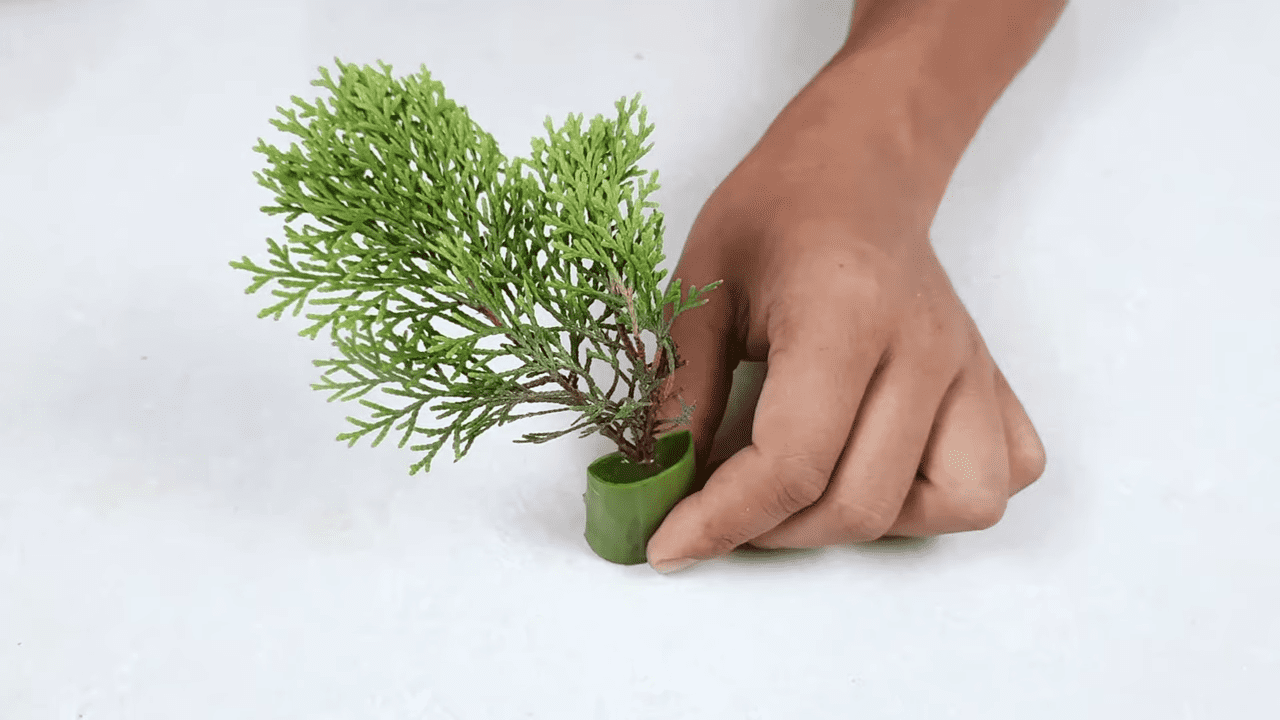
Step 2: Planting
Gently make a hole in the potting mix using a pencil or stick. Place your Thuja cuttings in these holes, making sure they are secure and won’t topple over. You can plant multiple cuttings in the same container. To create a humid environment for your cuttings, cover the container with a clear plastic bag or plastic wrap. This helps to retain moisture and promote successful propagation.
Now you’re almost done. Place your container in a bright, indirect light location. Avoid direct sunlight, as this can cause excessive heat and drying. Keep the temperature consistent, ideally between 65-75°F (18-24°C).
Step 3: Monitoring
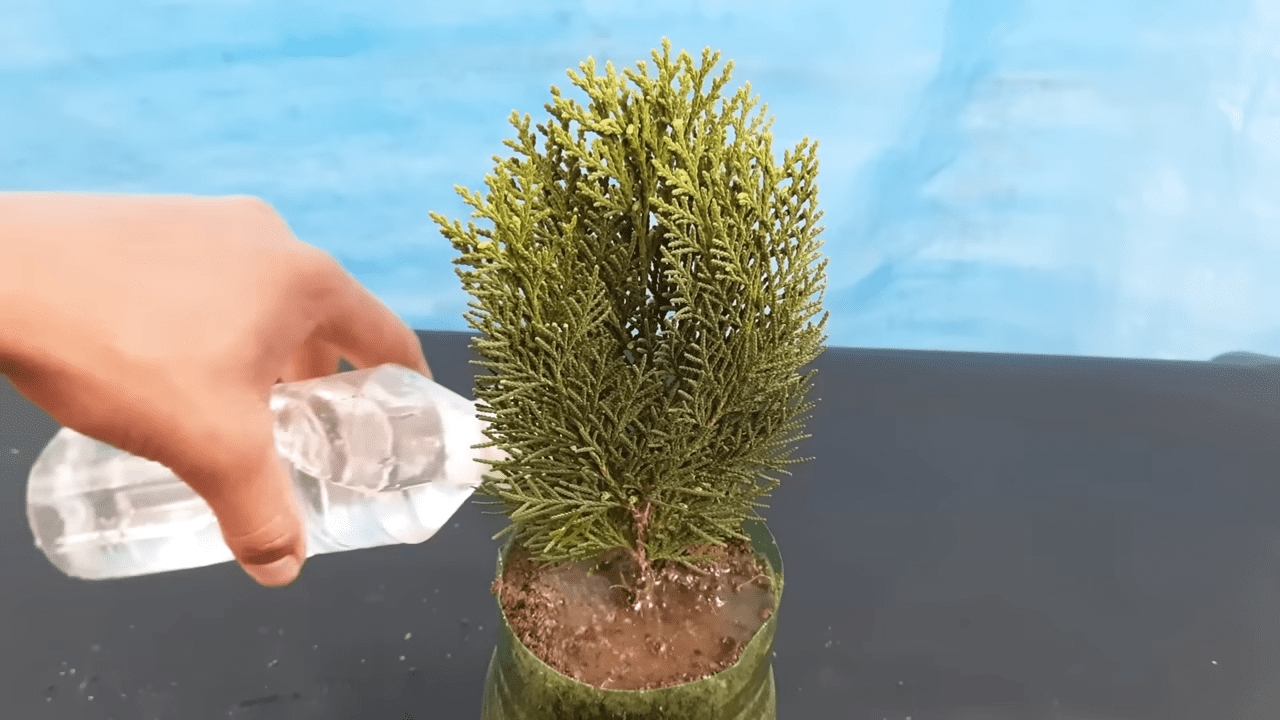
It’s crucial to regularly check the humidity inside the bag or under the plastic wrap. Mist the cuttings with a spray bottle every few days to keep the environment humid. Do not water the cuttings directly, as this can cause rotting. You should change the water in the spray bottle regularly to prevent bacterial growth.
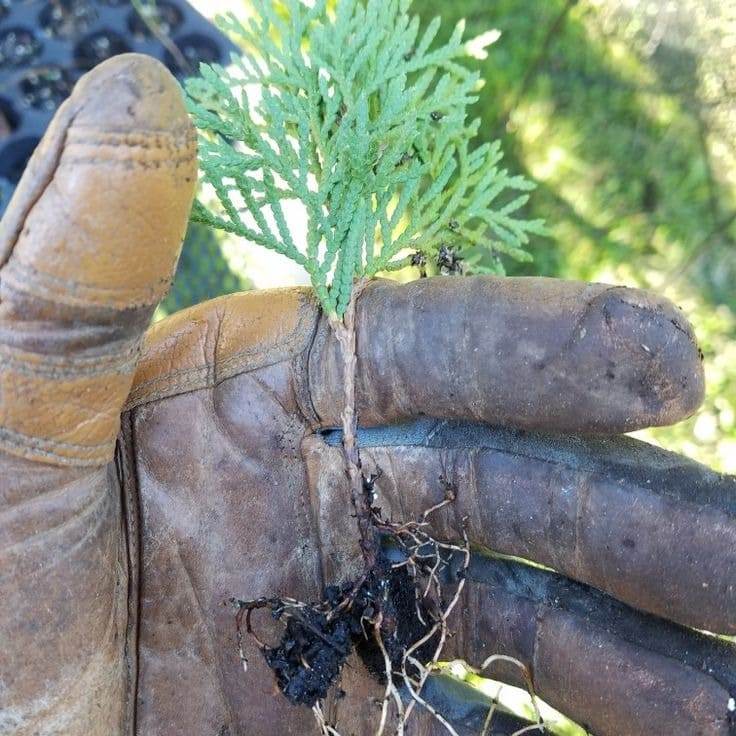
Step 4: Transplanting
Check the cuttings for roots after three or four weeks. You can gently tug on the cuttings to see if they resist. You can also carefully remove the plastic bags or wrap and look at the bottom of the pots for root growth. If you see roots, you can transplant the cuttings into individual pots with fresh potting soil. If you don’t see roots, you can put the plastic bags or wrap back and wait for another week or two.
Once the cuttings have roots, you can remove the plastic bags or wrap and place the pots in a bright and airy place. Water the cuttings as needed to keep the soil moist, but not wet. You can transplant the cuttings outdoors when they are well established, typically the following spring.
Some Common Propagating Problems
1. Choosing the Wrong Type Of Cuttings
You should use softwood or semi-hardwood cuttings, which are young and flexible branches that snap easily when bent and avoid hardwood cuttings.
2. Using Unclean Or Dull Tools
You should use clean and sharp pruning shears or scissors to cut the Thuja branches. Sterilize them with rubbing alcohol or a 10% bleach solution to prevent the spread of diseases.
3. Exposing The Cuttings To Direct Sunlight
It works best if you place the cuttings in a warm and well-lit area with indirect sunlight. Avoid direct sunlight, as it can scorch the cuttings.
Propagating Thuja from cuttings using Aloe Vera is a creative and natural way to boost your gardening success. It’s like giving your plants a little extra love and care. By following these steps and tips, you’ll be well on your way to a garden full of thriving, aromatic Thuja shrubs.