19 DIY Garden Insect Crafts Ideas for Kids are a wonderful way to spark creativity and bring more color into your backyard. Instead of endless hours on screens, children can dive into hands-on projects that turn everyday items into adorable bees, ladybugs, snails, and even fireflies.
These insect crafts are simple to make, use materials you likely already have at home, and help kids connect with nature in playful ways.
By exploring this collection, you’ll discover projects perfect for preschoolers and older kids alike, each designed to be fun, educational, and garden-friendly.
By the end, you’ll have a whole set of bright little bugs ready to decorate your outdoor space while keeping your kids happily entertained.
#1 Golf Ball Bee Craft
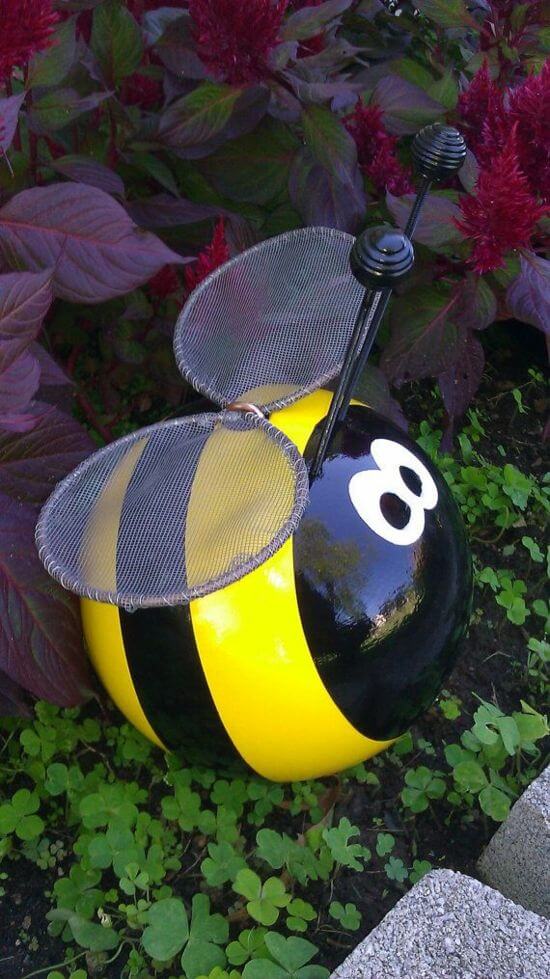
This golf ball bee is a cheerful little insect that instantly adds character to your garden. The bold yellow and black stripes give it that unmistakable bee look, while mesh wings make it feel playful and full of life.
You can make one by painting an old golf ball with outdoor acrylic paint, then attaching wire or screen wings with hot glue. Adding antennae is simple; just use black pipe cleaners or wires with beads at the tips.
Place your bee among flowers or greenery for a fun surprise that kids will love spotting. If you want to make a swarm, paint several golf balls at once and arrange them in different spots around your yard for a lively buzz.
#2 Ladybug Painted Rocks
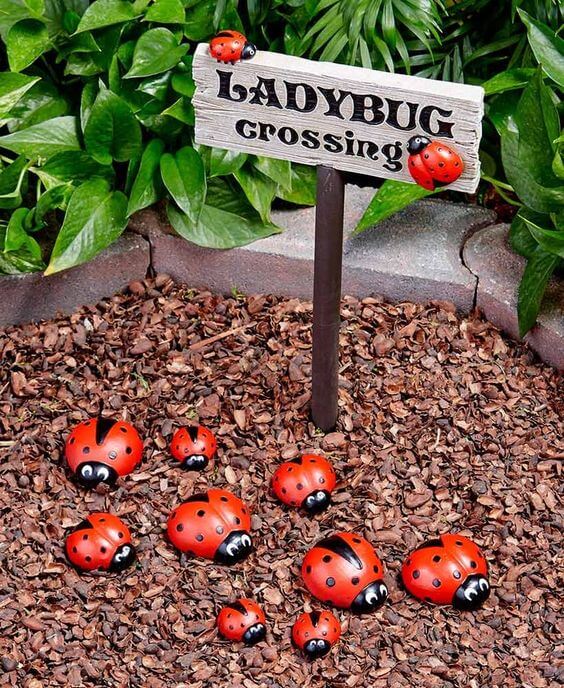
These ladybug painted rocks bring an instant touch of charm to any garden corner. With their bright red shells and black polka dots, they look like a cheerful colony of real ladybugs resting in the mulch.
To make your own, simply collect smooth river stones, paint them with red acrylic paint, then add black heads, dots, and a line down the center for wings. A clear sealer will help protect them from outdoor weather and keep the colors bright.
Kids will love arranging them in groups, or even making a playful “Ladybug Crossing” sign to complete the scene. You can also tuck a few into flowerbeds or potted plants for a hidden surprise that makes the whole garden feel alive.
#3 A Blue Worm

This cheerful rock worm is a colorful garden buddy that kids will adore making. Each stone is painted a bright shade of green and decorated with vibrant polka dots in purple, yellow, orange, and pink, giving it a playful personality.
To recreate this, gather several smooth rocks, paint them in a matching base color, then let your kids choose fun dot colors using cotton swabs or the tip of a paintbrush.
The headstone can be made extra special with big eyes and a wide smile to bring the worm to life. Once the paint dries, line the rocks up in the grass or flower bed so the worm looks like it’s crawling through the garden.
For extra fun, try making more worms in different colors so your kids can create a whole family of them.
#4 Colorful Painted Rock Bugs
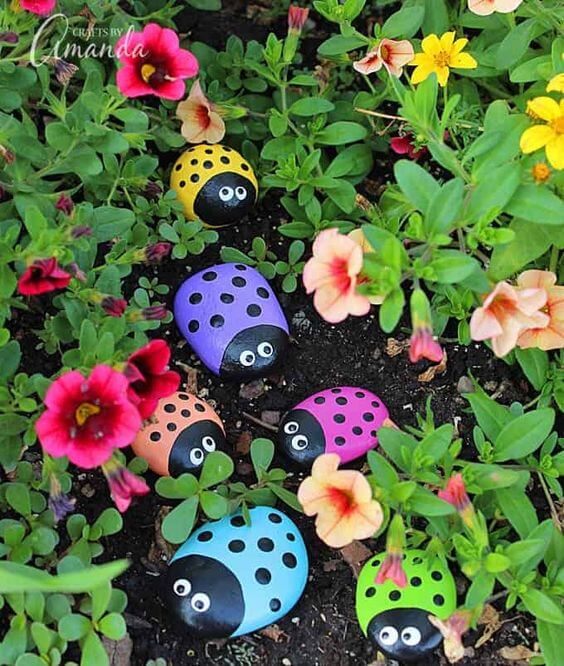
These colorful painted rock bugs look like a rainbow scattered across the garden. Instead of the traditional red and black, each little bug is painted in cheerful shades of yellow, purple, orange, pink, blue, and green.
To make your own, start by painting smooth stones in your chosen base colors, then add black heads, spots, and tiny white eyes for personality. A clear outdoor sealer will keep them shiny and help protect against rain or fading.
Kids will love experimenting with different color combinations, and you can even let them create matching “bug families” in sets of two or three.
Nestle the finished bugs among flowers, along pathways, or even in potted plants for a fun surprise that feels both whimsical and crafty.
#5 Colorful Snails
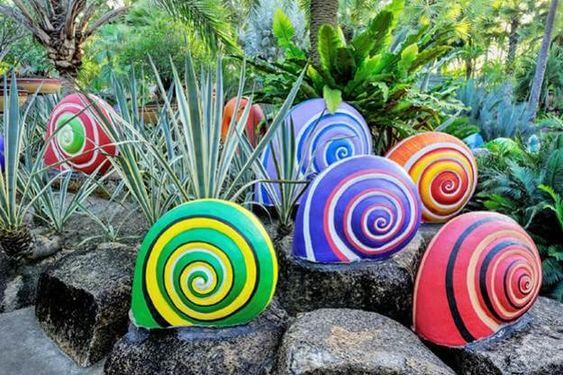
These colorful snails look like they’ve crawled straight out of a storybook and into the garden. Their shells are painted with bold spiral designs in every shade you can imagine greens, yellows, purples, blues, reds, and oranges making them pop against natural rocks and plants.
To create a similar look, you can use large stones or cement forms, then paint on a spiral pattern with bright acrylic paints. A coat of weatherproof sealer will help the colors stay vivid under the sun and rain.
Kids will enjoy choosing their favorite color combinations, and you can line them up along pathways or place them in clusters for a magical effect.
#6 Animal Friends

These flowerpot animal friends are bursting with personality and charm, each one doubling as a planter and a playful garden decoration.
With just a few stacked terra cotta pots, you can create buzzing bees, ladybugs, frogs, bunnies, and more, all painted in bright, kid-friendly colors.
To get started, stack two or three pots upside down, paint them with stripes, dots, or faces, and glue on fun extras like wings, ears, or googly eyes. Add soil and colorful flowers on top, and suddenly your critter becomes a living garden friend.
Kids will love choosing which animal to make and watching flowers bloom as part of their creations. They’re perfect for lining walkways, decorating flower beds, or even gifting to friends as handmade garden treasures.
#7 Old Tire Bug – Planter

This old tire bug planter is a creative way to upcycle while adding a splash of whimsy to the garden. The stacked tires are painted bright red with bold black dots, transforming them into a giant ladybug that feels both playful and decorative.
To recreate it, clean and stack two or more tires, give them a fresh coat of outdoor paint, and add cheerful bug details like eyes, a smile, and antennae. Fill the top tire with soil and plant colorful flowers that mimic the bug’s vibrant “wings.”
It’s a wonderful project for kids to help with since they can join in the painting and pick which blooms to plant. Beyond being adorable, this planter gives new life to old tires and instantly becomes a centerpiece in your yard.
#8 Spring Topsy Turvy Pots
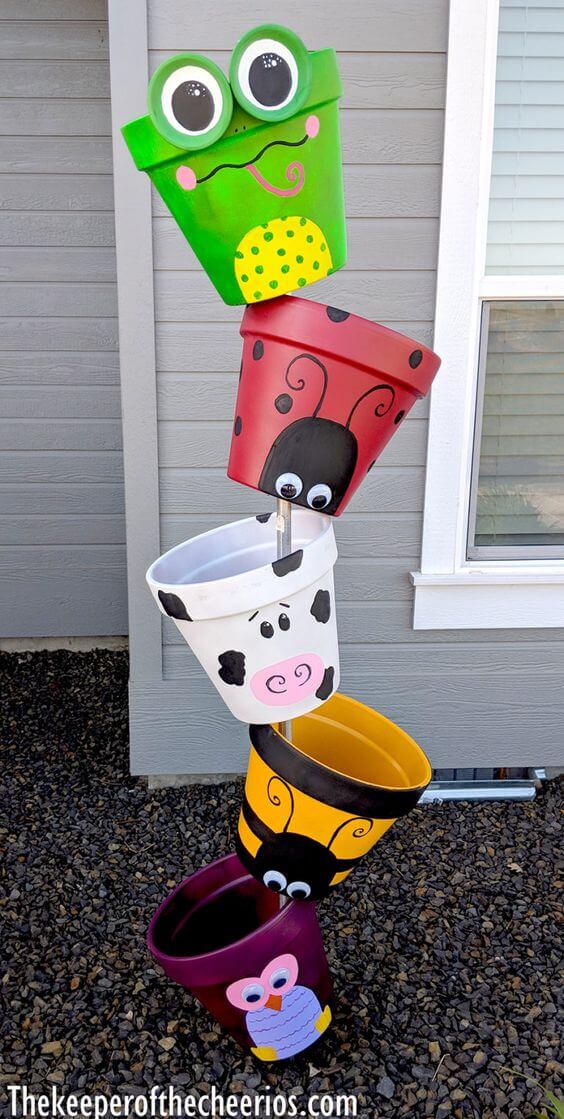
These topsy-turvy pots look like they’re magically balancing, while each one is painted to show off a different cheerful character.
With a frog, ladybug, cow, bee, and owl stacked on top of one another, the design turns plain terra cotta pots into a fun tower of garden friends. To make this, thread pots onto a sturdy rod, tilting each slightly so they lean at whimsical angles.
Let the kids paint each pot with their favorite critter, using bright colors, googly eyes, and fun details like swirls or wings. You can even plant flowers inside some of the pots for an added burst of life and color.
#9 Clay Pot Snail, Made From Terra Cotta Flower Pots
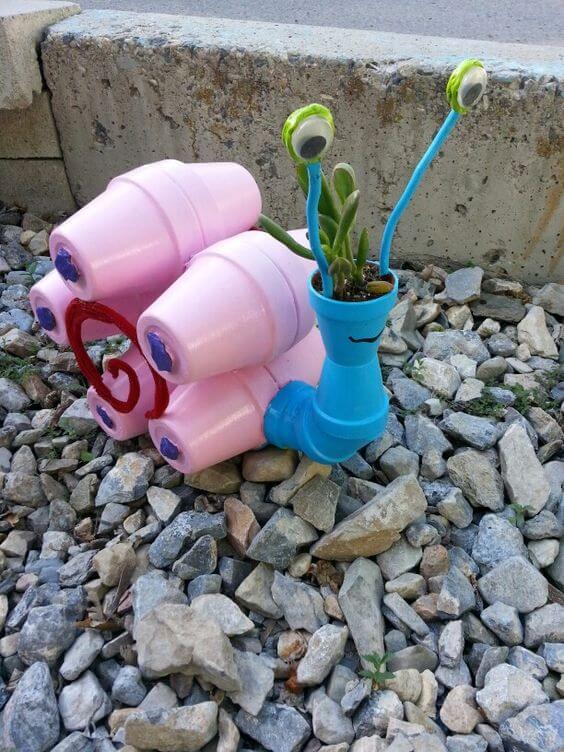
This clay pot snail is a delightful garden friend made from simple terra cotta pots and painted in fun, eye-catching colors. Its pink shell, crafted from stacked pots, swirls with a bold red spiral, while the blue head sports a smiling face and quirky googly-eyed antennae.
To build your own, stack several small pots on their sides for the shell and use a larger one upright for the snail’s head. Secure them with strong glue, then let the kids go wild with paints and playful details.
Adding a small plant inside the head pot makes the snail even more charming, as if it’s carrying greenery along its journey. Place it on gravel or in the flower bed for a whimsical decoration that kids will be proud to say they made.
#10 Paver Caterpillar
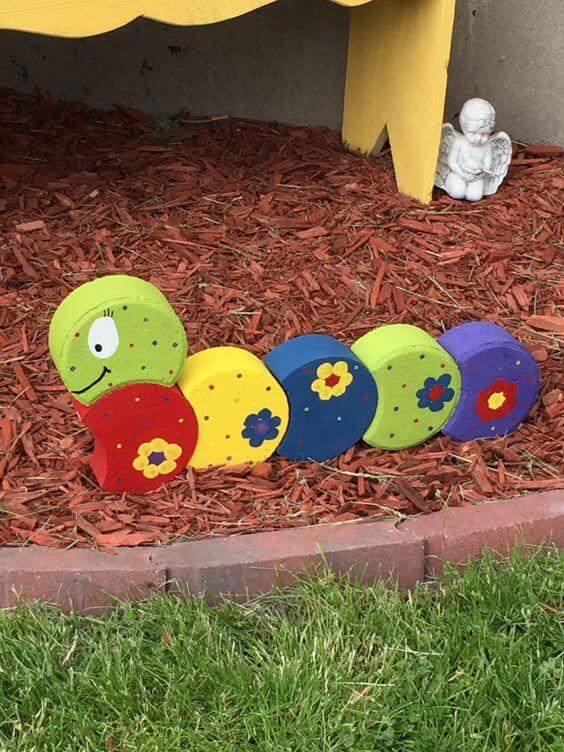
This paver caterpillar is a burst of color that instantly livens up the garden. Made from round concrete pavers, each section is painted in bold shades of red, yellow, green, blue, and purple, with sweet flower details to add charm.
The head paver is decorated with a big smiling face, giving the caterpillar a playful personality that kids will love.
To make one, line up several pavers in a row, paint them with outdoor-safe paint, and let the kids add dots, flowers, or even glitter for extra fun. Seal the finished pieces with a clear coat to protect them from rain and fading.
Place the caterpillar along a garden bed, under a tree, or near the lawn’s edge, and it will look like it’s happily crawling through your outdoor space.
#11 Plastic Lid Ladybugs
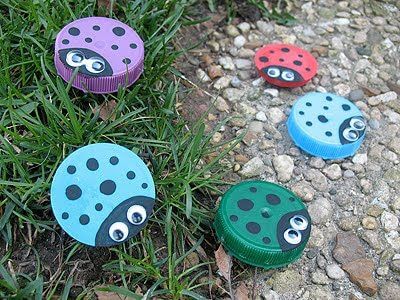
These plastic lid ladybugs are a fantastic way to recycle while creating something adorable for the garden. Each bottle cap is painted in bright colors like purple, red, blue, and green, then decorated with black dots and tiny faces.
To make them, paint the lids with acrylic paint, add a half-circle head in black, and stick on googly eyes for instant personality. Kids can easily help with this project since the lids are small and simple to paint.
Once finished, you can scatter them in the grass, place them in flower pots, or glue magnets to the back to use indoors. It’s a simple craft that teaches kids about upcycling while letting them create their own colony of little bugs.
#12 Paver Snail
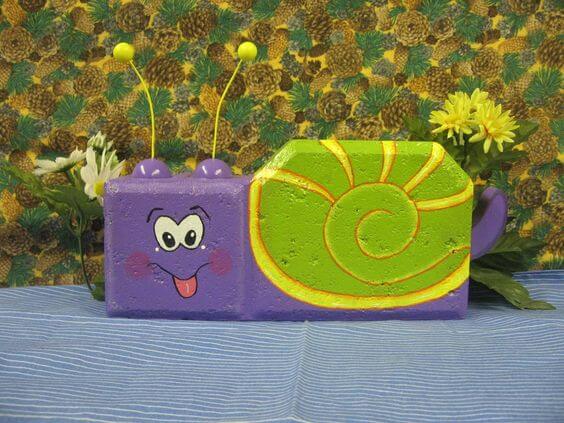
This paver snail is a wonderful mix of durability and charm, made from a simple concrete block painted in bright, happy colors.
The body is painted purple with a cheerful cartoon face, complete with rosy cheeks, wide eyes, and a silly tongue that makes kids smile. The shell is painted in bold green with a spiral pattern outlined in yellow, making it stand out beautifully.
To bring it to life, add a pair of antennae using pipe cleaners or wires topped with beads or foam balls. It’s an easy project that kids can paint with just a little guidance, and the heavy paver makes it sturdy enough to sit in the garden year-round.
#13 Decorative Stones Dragonfly Garden
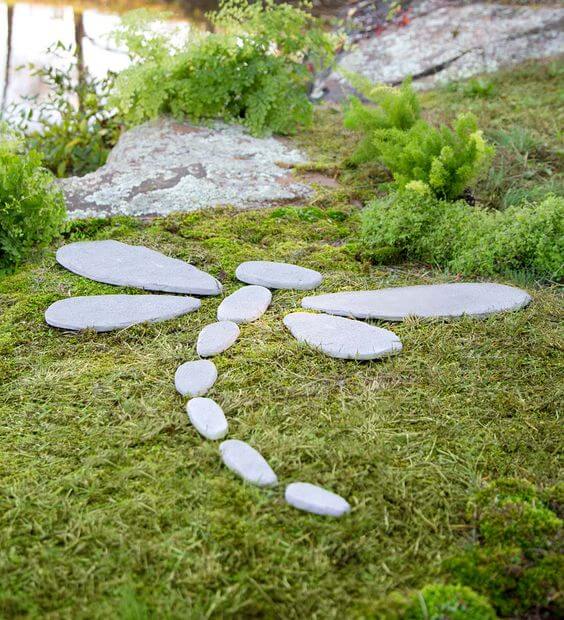
This dragonfly made from decorative stones adds a graceful touch to the garden while keeping the design simple and natural. Flat stones of different sizes are arranged carefully to form wings and a segmented body, giving the insect a lifelike yet artistic appearance.
To create your own, gather smooth, flat rocks, then place them directly on the grass, moss, or a soil bed to shape the dragonfly. Kids can join in by helping to choose and arrange the stones, turning it into a fun family project.
For a polished look, you can paint the stones in soft colors or seal them with a clear coat for shine. It’s a beautiful way to decorate without clutter, blending art with the natural landscape in a subtle, timeless style.
#14 DIY Glass Bottle Dragon Fly

This glass bottle dragonfly is a striking way to repurpose old bottles into eye-catching garden art. Four green bottles form the wings, while glittery spheres create the eyes, and a sturdy rod acts as the body.
To make one, simply slide bottles onto a strong metal rod or rebar, attach the decorative eyes, and secure the structure into the ground or a wooden base. The glossy glass catches sunlight beautifully, making the dragonfly shimmer during the day.
Kids can help by painting the bottles or adding glitter if you want a more colorful finish. It’s a wonderful project for blending recycling with creativity, turning something ordinary into a bold outdoor decoration that feels both whimsical and modern.
#15 DIY Hanging Bee Craft Garden Decoration
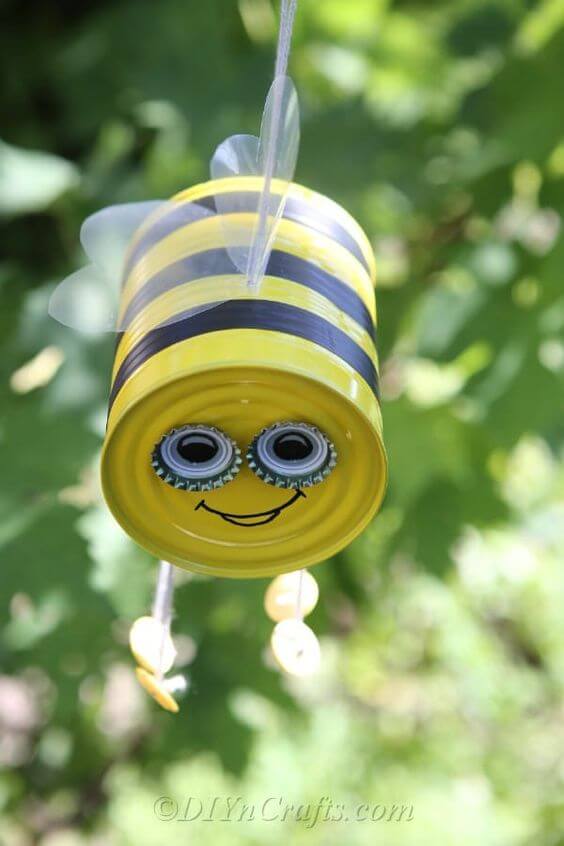
This hanging bee craft turns an empty tin can into a buzzing little friend for your garden. Painted with bright yellow and black stripes, it’s complete with bottle cap eyes, a smiling face, and wings that catch the sunlight.
To make one, clean and paint a recycled can, attach wings made from plastic or cardstock, and glue on eyes, bottle caps, or googly eyes. Thread a piece of string through the top so the bee can hang from a tree branch, porch, or even a garden stake.
Kids will enjoy decorating each bee differently, and you can add fun touches like button feet or glittery wings. It’s a simple way to reuse materials while adding cheerful movement and personality to your outdoor space.
#16 Yellow Clay Pot Bee
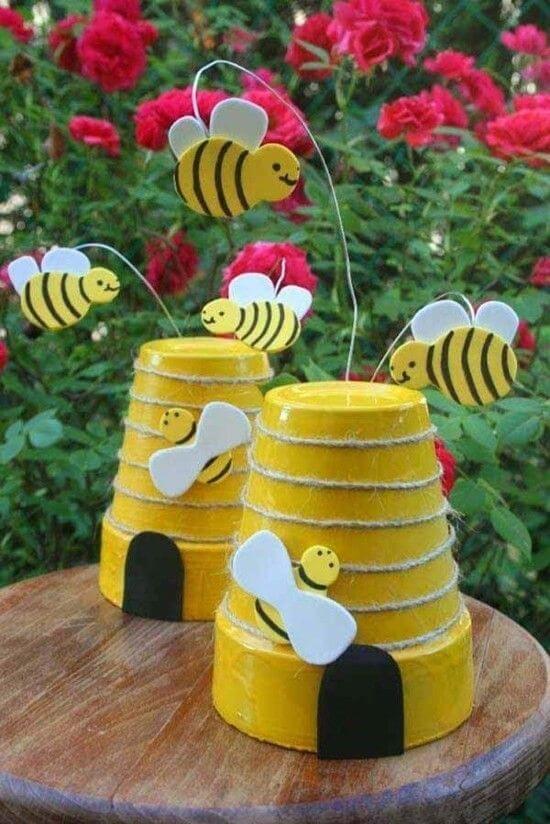
These yellow clay pot bees look like tiny hives buzzing with life, making them a perfect decoration for a garden or patio. Upside-down pots painted in bright yellow are stacked with rope lines to mimic a beehive, complete with a little doorway at the base.
Cute wooden or foam bees are attached around the hive, with some even suspended on wires so they appear to be flying. To make your own, paint clay pots yellow, glue on rope for texture, and add bees using craft sticks, foam, or painted wood.
Kids can help paint the stripes and wings, turning each bee into a unique character. This craft not only brightens outdoor spaces but also teaches children about the importance of bees in nature.
#17 Golf Ball Lady Bug Craft
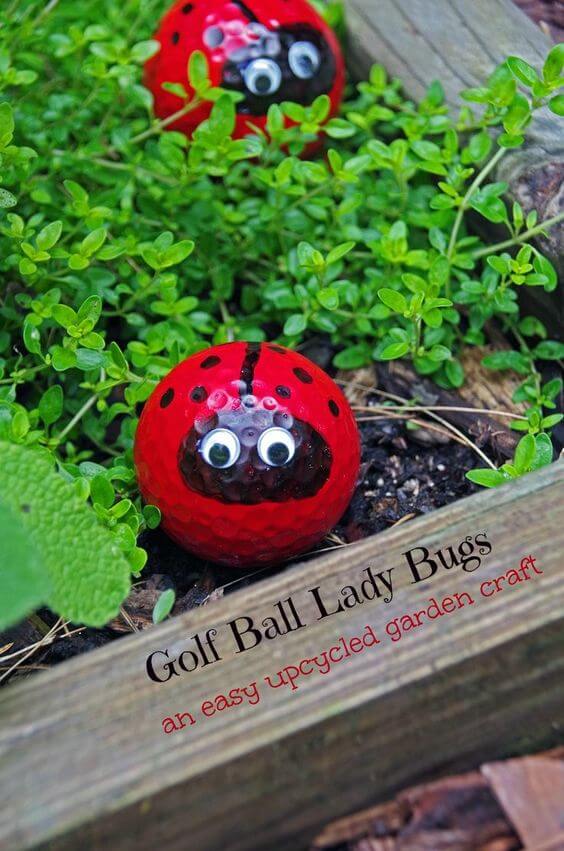
These golf ball ladybugs are an adorable way to give old golf balls a second life. Painted in bright red with black dots and little faces, they look right at home nestled in garden greenery.
To make them, simply coat the golf ball with red acrylic paint, then add a black face and dots once it dries. Glue on googly eyes for a fun touch that kids will love.
A clear sealer helps protect the paint from weather, so your ladybugs can stay outside longer. Place them in clusters among plants or along garden edges, and you’ll have a cheerful group of little bugs peeking out at every turn.
#18 Old Tire Snails

This old tire snail is a clever way to upcycle discarded tires into a fun garden decoration. The coiled shape of the tire naturally forms the snail’s shell, while a painted section at the front creates its head and body.
To make one, cut and bend part of the tire to form the head, paint the shell in bright colors, and add big, friendly eyes on top. The sturdy rubber makes it durable enough to stay outdoors year-round, while the playful design adds whimsy to any corner of the yard.
Kids will love helping to choose the snail’s colors and painting on fun details. This project not only brings charm to the garden but also shows how recycled materials can become something creative and full of personality.
#19 Pop Bottle Firefly
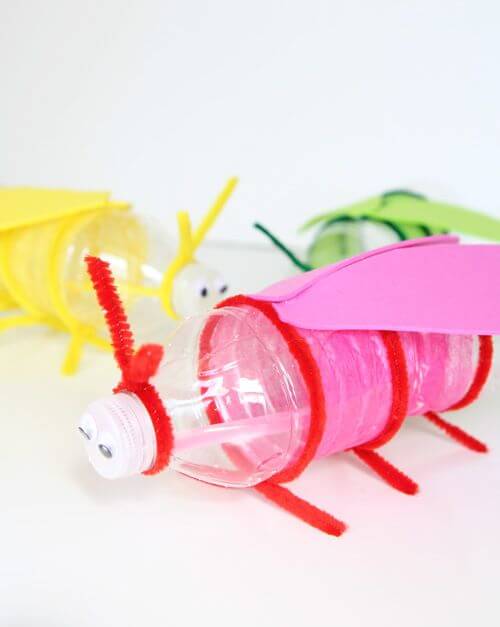
These pop bottle fireflies are a bright and imaginative way to recycle while crafting something playful. Made from clear plastic bottles, they’re decorated with pipe cleaners, foam wings, and googly eyes to create cheerful little bugs.
To make one, clean an empty bottle, wrap colorful pipe cleaners around the body, and glue on wings cut from foam sheets or cardstock. Add googly eyes to the cap and bend pipe cleaners into antennae for extra personality.
For a magical touch, you can place a glow stick or battery tea light inside the bottle so the firefly glows at night. Kids will love making these in different colors and setting them around the garden for a twinkling outdoor display.