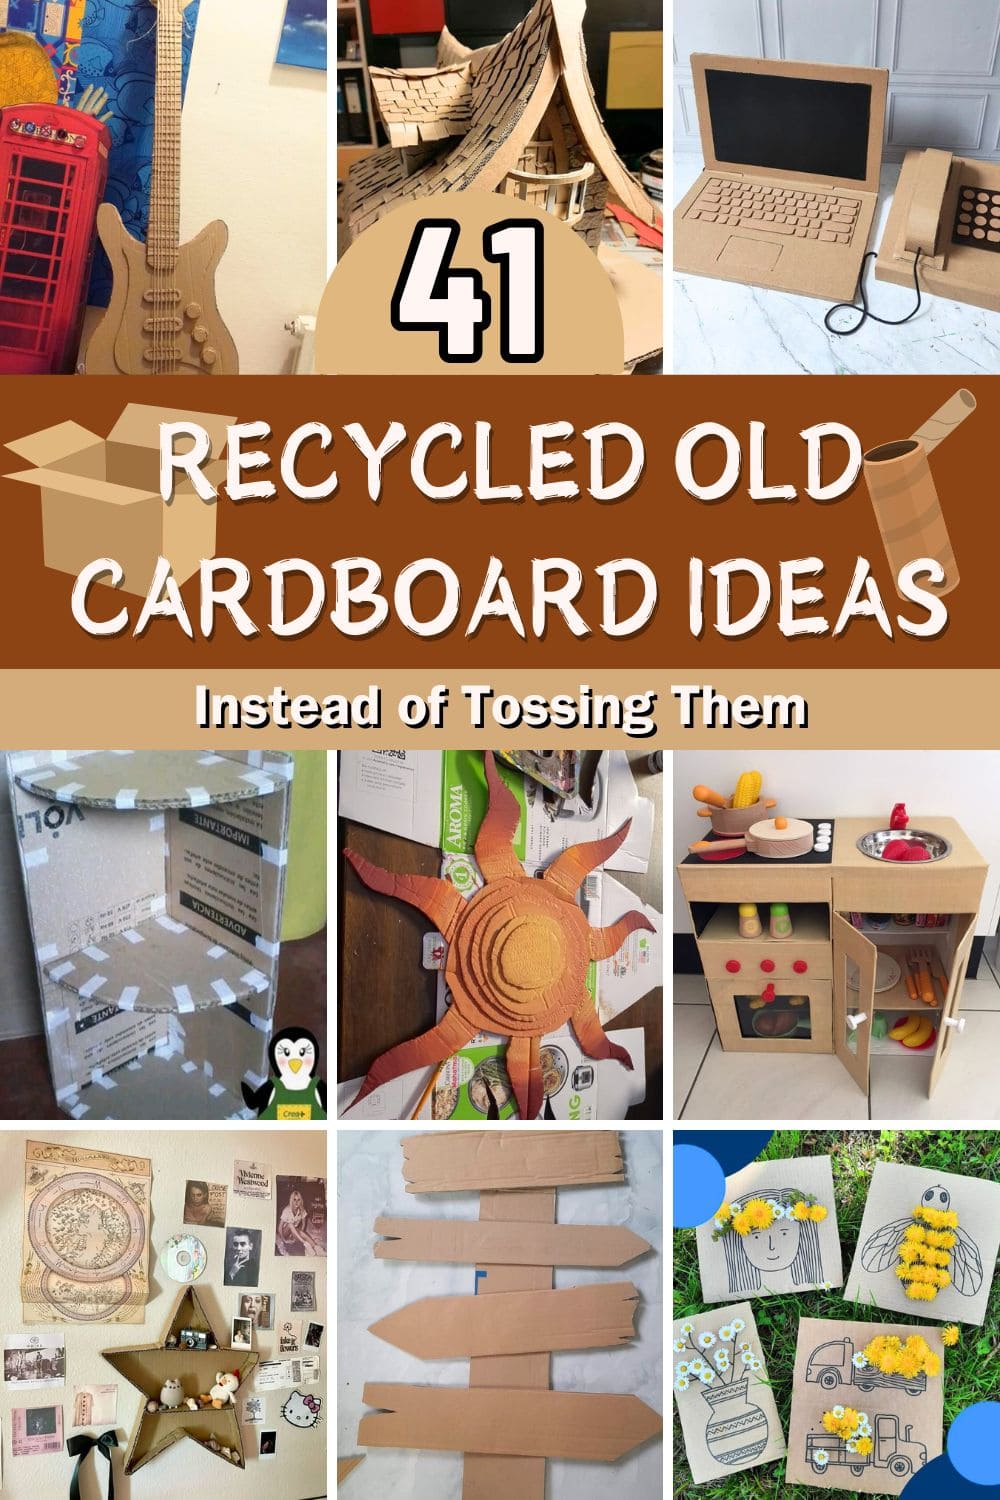
Before you toss that pile of old cardboard into the recycling bin, think again! Cardboard isn’t just packaging, it’s a goldmine for creative, budget-friendly DIY projects.
With a little imagination, you can transform discarded boxes into stylish organizers, fun kids’ crafts, or even functional home décor. Whether you’re looking to declutter, entertain the kids, or add a personal touch to your space, there’s a cardboard craft for you.
Plus, repurposing cardboard helps reduce waste, making it an eco-friendly alternative to buying new materials. Ready to turn trash into treasure? Here are over 40 inspiring ideas to give your old cardboard a second life!
This article contains affiliate links. If you purchase through them, I may earn a small commission at no extra cost to you. Thank you for your support!
#1. Radiant Cardboard Sunburst
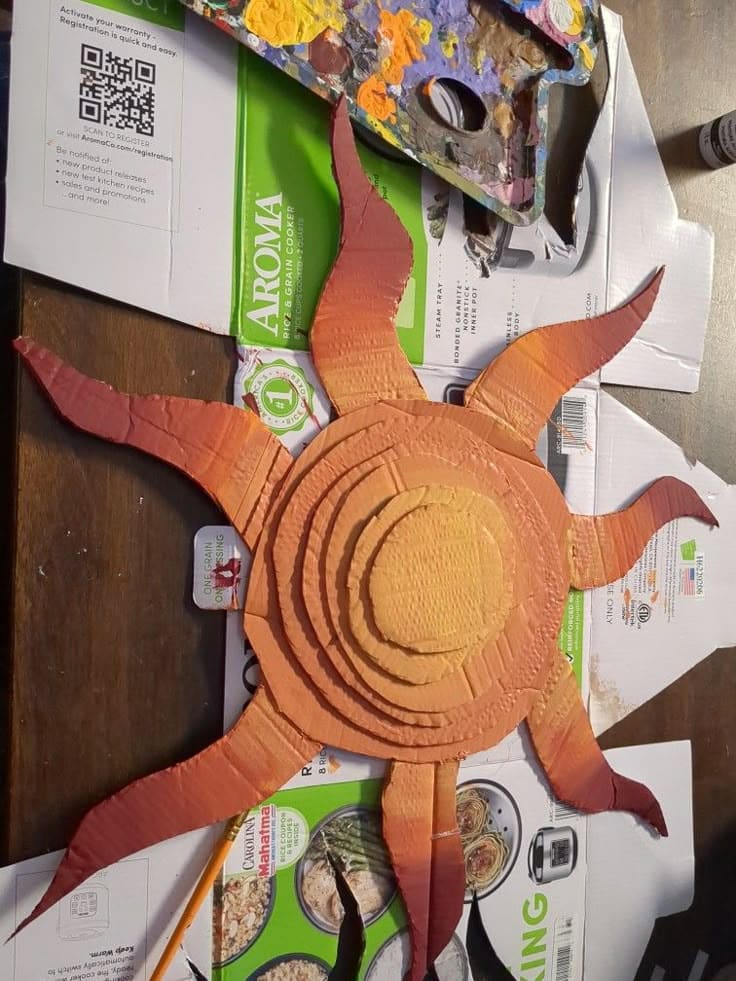
This vibrant sunburst cost me nothing but time and paint, and honestly, it turned out to be one of my favorite low-cost wall art pieces yet.
Materials Needed
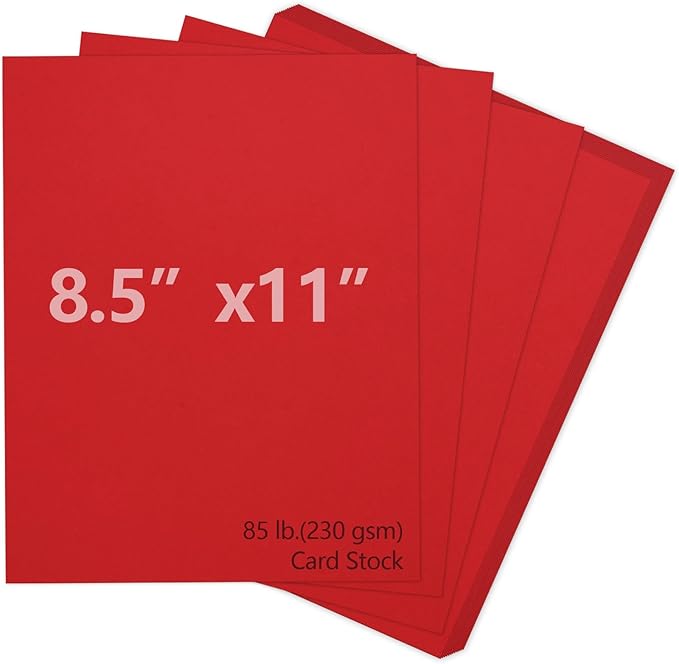
- 2–3 sturdy cardboard sheets
- Craft knife or sharp scissors
- A regular pencil
- Acrylic paints
- Hot glue gun + glue sticks
- Small paintbrush
Step-by-step Guide
- Sketch a large sun shape on your cardboard, including a circular center and 8–10 flame-like rays. Cut out the shape, then cut smaller circles to layer the sun’s center for dimension.
- Use hot glue to stack and secure the center layers first, then attach each of the rays behind the base circle. Let the structure dry and cool for a few minutes.
- Paint the entire sun in layers, starting with yellow in the center and blending outward with orange and red. Add dry-brushed highlights or deeper lines for extra contrast.
#2. Majestic Cardboard Humpback Giant
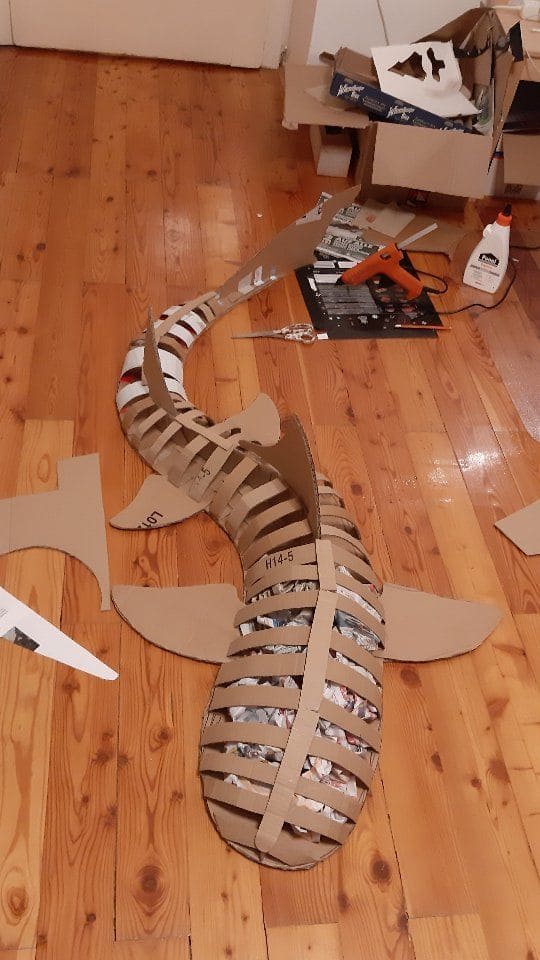
I bet you’ve never seen cardboard quite like this! This majestic humpback whale, crafted from recycled materials, is a testament to the power of imagination and resourcefulness.
Materials Needed
- 4–5 large cardboard sheets
- Glue gun and glue sticks
- White glue or PVA glue
- Scrap paper or old newspapers
- Craft knife or heavy-duty scissors
- Ruler and pencil
Step-by-step Guide
- Sketch and cut out the central spine and curved ribs of the shark using cardboard. Attach the ribs to the spine with hot glue, spacing them evenly to form the base skeleton.
- Add vertical support strips along the top and bottom of the ribs, shaping the body. Begin attaching the fins and tail pieces – these should be cut separately and glued into place.
- Stuff the inner space with crumpled newspaper for support, especially around the belly and jaw.
#3. Rustic DIY Cardboard Signpost for Creative Decor
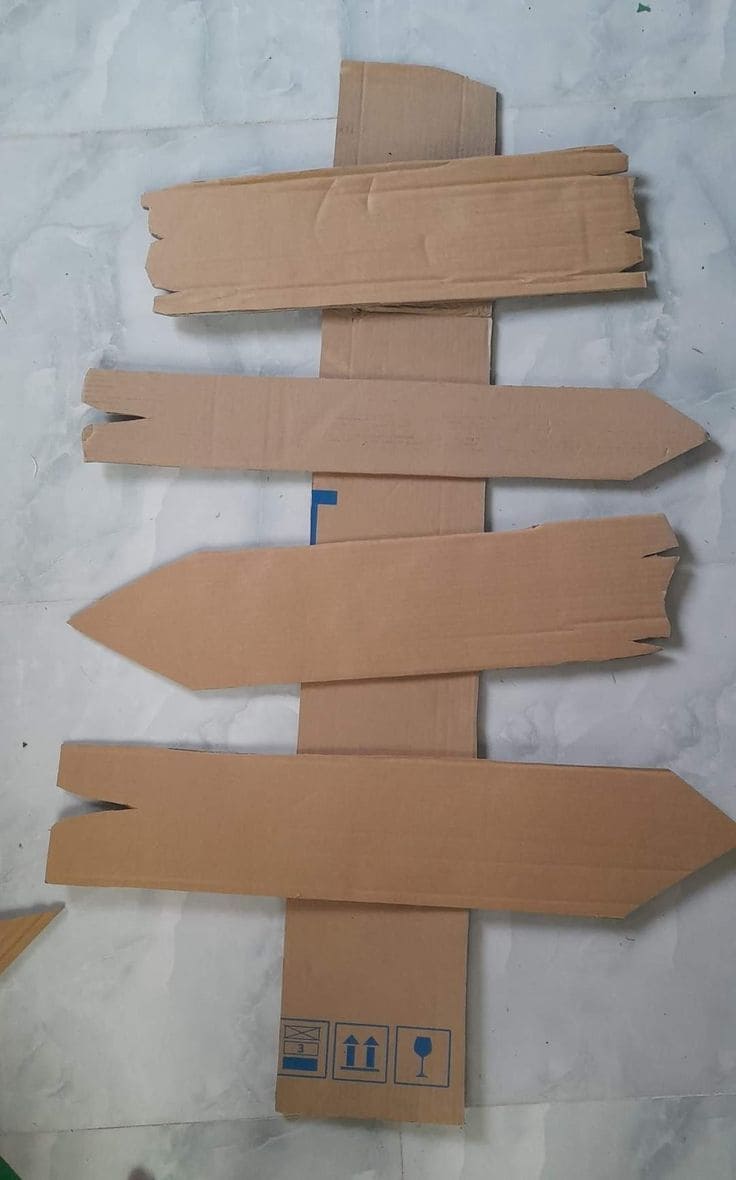
I whipped this up during a rainy afternoon and honestly, it became one of my favorite quick spooky season crafts.
Materials Needed
- 2–3 medium-sized cardboard sheets
- Hot glue gun and glue sticks
- Box cutter or craft knife
- Acrylic paints or spray paints in black, white, or your theme colors
- Paintbrushes
- Pencil or marker
Step-by-step Guide
- Cut one large cardboard strip for the post and 4–5 panels for the directional signs. Shape the ends with points or jagged edges for a distressed look.
- Lay out your sign panels on the post, adjusting their tilt and spacing for a playful style. Glue them down securely with hot glue.
- Once dry, paint the sign with your choice of colors and add lettering or designs. For a weathered feel, dry-brush some darker paint around the edges.
#4. Charming Cardboard Star Display
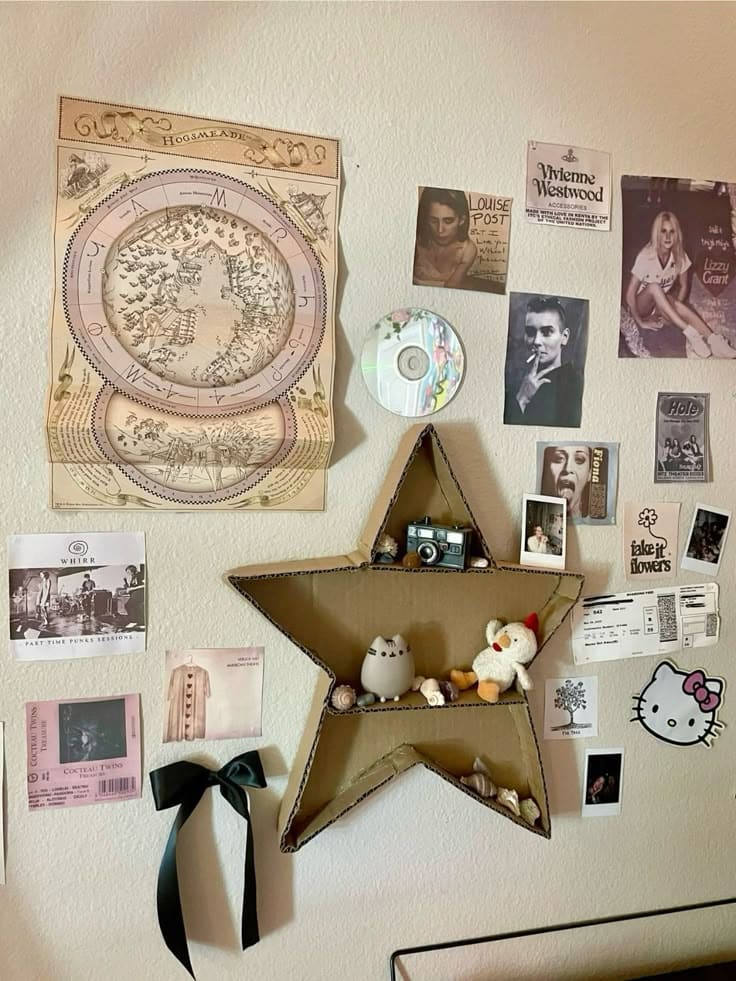
Whether you’re a student decorating a dorm or someone craving a soft vintage nook, this piece can hold tiny toys, mini Polaroids, and warm nostalgia all in one.
Materials Needed
- 2 large flat cardboard sheets
- Box cutter or X-Acto knife
- Ruler and pencil
- Hot glue gun and glue sticks
- Brown marker or acrylic paint (optional)
Step-by-step Guide
- Sketch and cut out two identical large star shapes. Then cut 2-inch-wide cardboard strips long enough to run along all five edges of the star to form the depth of the shelf.
- Glue the edge strips vertically along one star shape to create the shelf’s side walls. Add a few horizontal strips inside to create compartments, then glue the second star on the back to close it up.
- Reinforce joints with extra glue. Optionally, color or paint the edges to give it a wood-like or polished finish.
#5. Groovy Cardboard Guitar
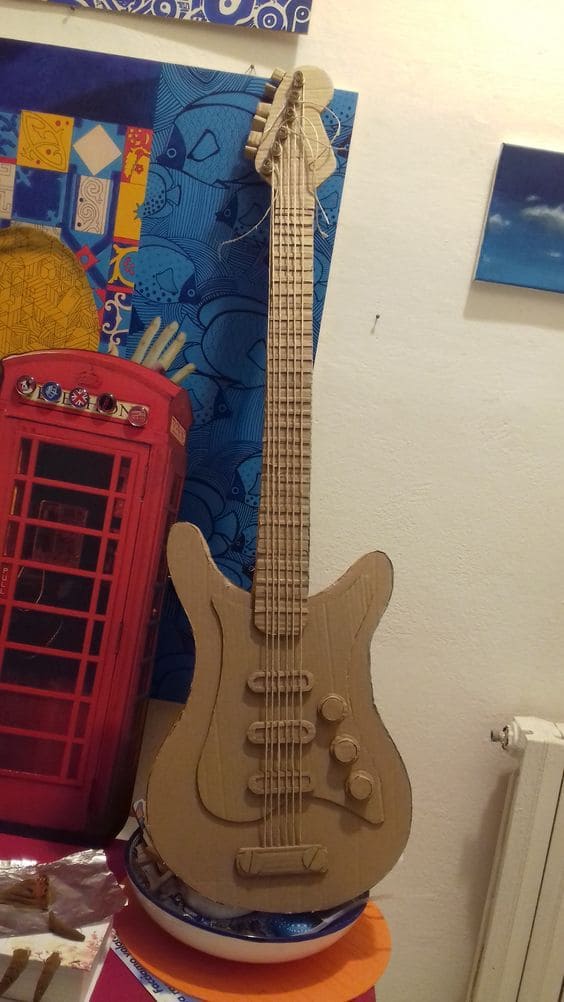
This life-sized cardboard electric guitar was one of my favorite projects, it brought out the inner rock star in me without a single dollar spent.
Materials Needed
- 3–4 large cardboard sheets (each at least 60 × 40 cm)
- Box cutter or craft knife
- Hot glue gun and glue sticks
- Ruler and pencil
- Jute string or twine
- Optional: Brown or metallic paint
Step-by-step Guide
- Draw a full-size guitar body (approx. 70 cm tall and 25 cm wide) on one cardboard sheet. Cut out the shape and trace it two more times for layering thickness.
- Repeat the same for the neck, making sure it’s long enough (about 50 cm) and wide enough (4–5 cm) to stay stable.
- Glue the body layers together. Add raised parts like pickups, knobs, and the bridge by layering small cardboard pieces in the appropriate shapes. Use ruler lines and precision for neatness.
- Cut long narrow strips (about 0.5 cm wide) for frets and string guides. Attach jute string across the neck to mimic the guitar strings, gluing them tightly at both ends.
#6. Charming DIY Cardboard Corner Shelf
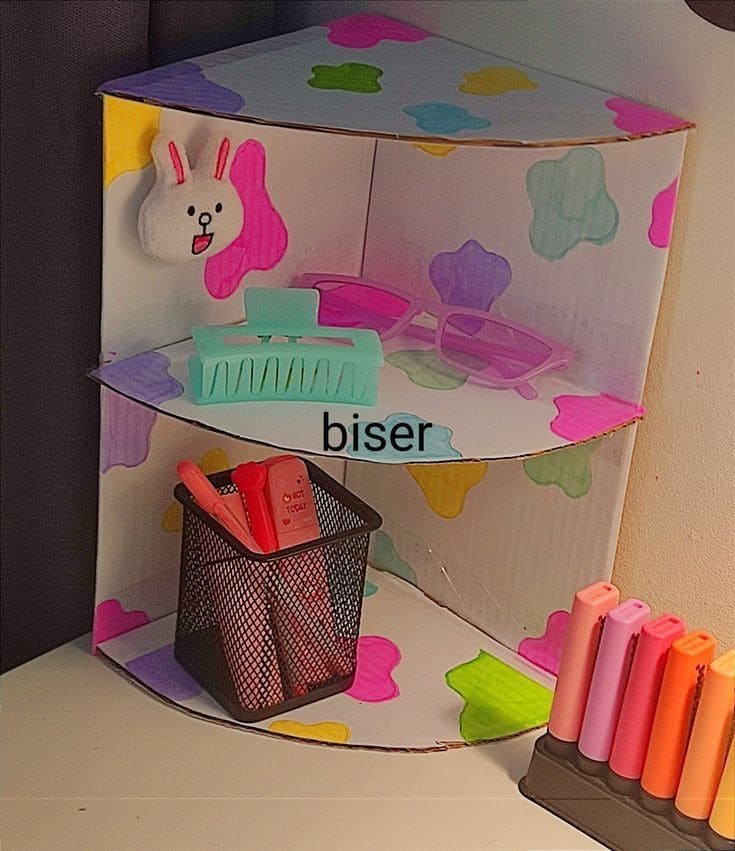
With just a few sheets of cardboard and some doodling magic, I created this tiered storage unit that holds everything from markers to glasses.
Materials Needed
- 2–3 medium-sized cardboard sheets (each approx. 40 × 40 cm)
- Ruler and pencil
- Box cutter or scissors
- Glue stick or hot glue gun
- Color markers or paint pens
- Optional: Washi tape
Step-by-step Guide
- Measure and cut out three quarter-circle platforms with a 20 cm radius. Cut an additional back piece (25 cm × 25 cm) and two identical side panels with a curved front to match the platform shape.
- Glue the back piece vertically, attaching the side panels on either end to form a corner box. Then, glue each platform layer at equal intervals (about 9–10 cm apart) inside the frame.
- Use markers or paint to decorate your organizer with patterns, colors, or characters. Line the edges with washi tape for extra charm and reinforcement.
#7. Pensive Cardboard Companion
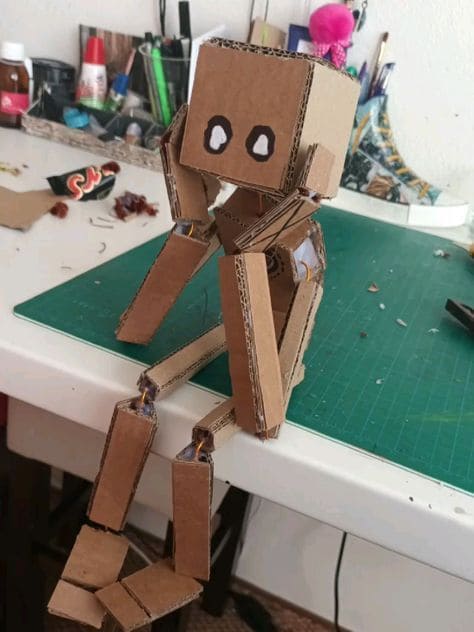
I made him during a weekend slump, and honestly? It was weirdly therapeutic.
Materials Needed
- 2–3 medium-sized cardboard sheets (at least 30 × 40 cm each)
- Hot glue gun
- Craft knife
- Ruler and pencil
- Black marker
- Optional: Split pins/brads
Step-by-step Guide
- Cut out one rectangular head (5 × 5 × 5 cm), a torso (5 × 7 cm), two arms, two legs, feet, and hands, all sized proportionally to the torso. Use double-layered cardboard for a sturdier look.
- Assemble the parts using hot glue or split pins at joints to allow movement. Start from torso, then attach arms and legs.
- Draw two wide eyes on the front of the head. Sit your buddy on the edge of your desk and adjust the limbs into a reflective, resting pose.
#8. Handy Cardboard Corner Shelf
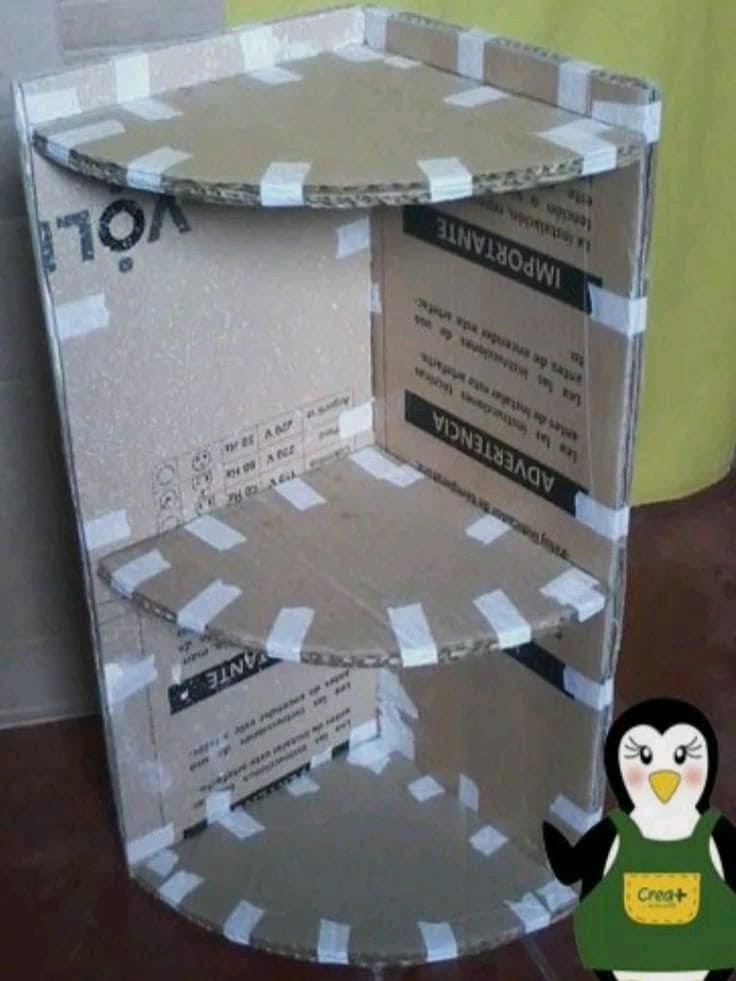
I created this shelf when I needed extra space on my cluttered desk but didn’t want to buy more plastic. It’s simple, surprisingly strong, and fits into corners perfectly.
Materials Needed
- 3 medium-sized cardboard sheets (at least 40 × 60 cm each)
- Box cutter or craft knife
- Measuring tape and pencil
- Double-sided tape or hot glue gun
- White duct tape
- Optional: Patterned contact paper
Step-by-step Guide
- Cut 2 identical curved side panels about 30 cm high and 20 cm wide. Then cut 3 quarter-circle shelves with a radius of 15 cm. Also, cut 1 flat rectangular back piece, 30 cm tall and 20 cm wide.
- Use duct tape or hot glue to attach the curved side panels to the rectangular back. Add the quarter-circle shelves at equal intervals, securing them with tape and reinforcing the edges.
- Once everything is fixed and dry, reinforce each joint with additional strips of tape for strength.
#9. Tech-Inspired Cardboard Set
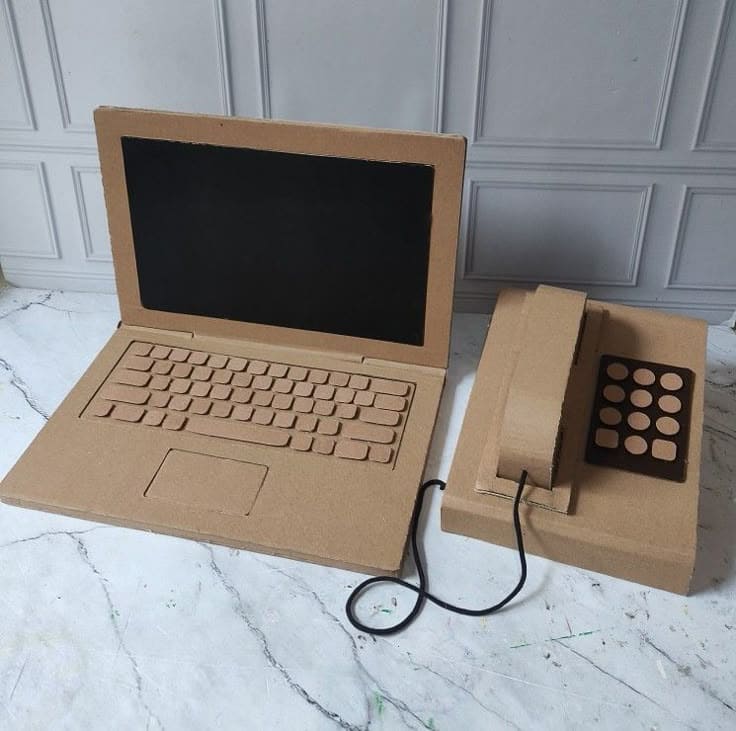
Whether you’re creating a mini office for playtime or a quirky decor set, this pretend laptop and retro-style telephone duo is simple, eco-friendly, and way cheaper than plastic alternatives.
Materials Needed
- 2 large cardboard sheets (at least 40 × 60 cm)
- Box cutter or craft knife
- Black construction paper
- Glue stick
- Thin black cord or shoelace
- Ruler, pencil, and round object
Step-by-step Guide
- Cut two identical rectangles for the laptop base and screen – each about 30 × 20 cm. Cut a black rectangle slightly smaller for the “screen” and glue it in place.
- Cut and glue keyboard key shapes (3 cm x 1 cm) onto the base, plus a square touchpad below them. Add layering if you want a more 3D keyboard.
- For the phone, cut a block base (around 20 × 12 cm), then stack layers for the receiver’s curved top. Make two thin rectangles for the receiver handle and glue on a cord.
#10. Playful Hello Kitty Cardboard Gameboy
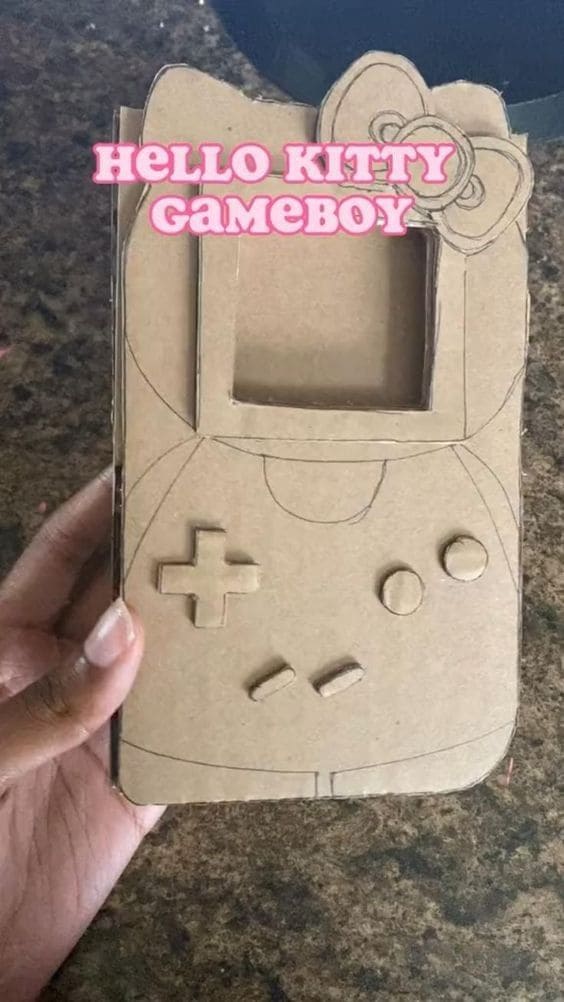
This Hello Kitty–themed cardboard GameBoy isn’t just adorable, it’s a fun little project that’s simple enough for kids to try or for adults looking to relax creatively.
Materials Needed
- 2–3 small pieces of cardboard (about 15 × 10 cm)
- Craft knife or box cutter
- Craft glue
- Pencil
- Black marker
Step-by-step Guide
- Cut the base rectangle of the GameBoy body and sketch the outline of Hello Kitty ears and bow. Cut the shape carefully and double-layer it for thickness.
- Draw and cut out a square for the screen and glue a backing piece behind it to give it dimension. Cut and attach buttons (D-pad, circles, and small angled bars) to the front with raised layers.
- Use a fine-tip black marker to outline the details like the bow, body lines, and screen border.
#11. Retro-Inspired Cardboard TV Storage Units
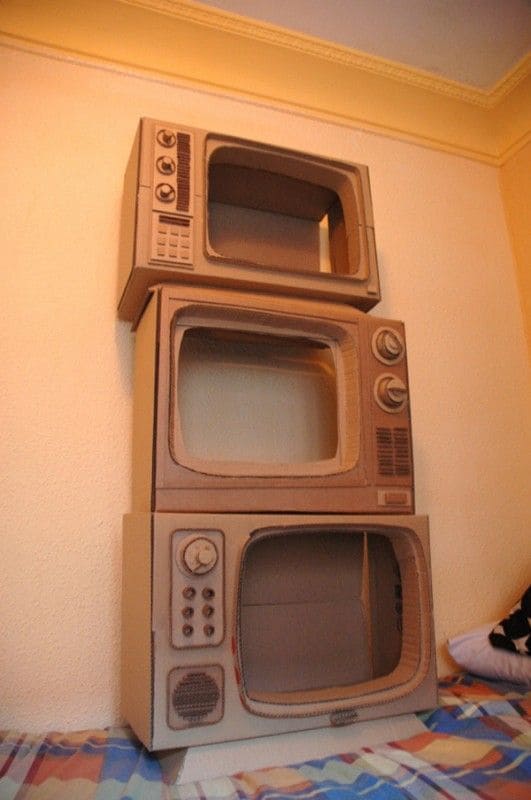
Inspired by mid-century TV designs, I used this trio as a fun, themed storage solution for books, toys, or even art supplies.
Materials Needed
- 3 large cardboard boxes (each around 40 × 30 × 25 cm)
- 1–2 extra cardboard sheets
- Craft knife and cutting mat
- Hot glue gun
- Ruler, compass, and pencil
- Black marker
Step-by-step Guide
- Choose three boxes of similar size and cut large, rounded rectangles out of one side to create the “screen” opening. Stack them to get a sense of proportion.
- Use extra cardboard to cut out dials, buttons, speaker panels, and screen frames. Layer these elements using hot glue to give dimension to each “TV.”
- Add vintage style by drawing tuning dials, vents, and numbers using a marker or paint. Once all three TVs are finished, stack them carefully and secure with glue or leave loose for flexibility.
#12. Sparkle-Infused Tiered Cardboard Display
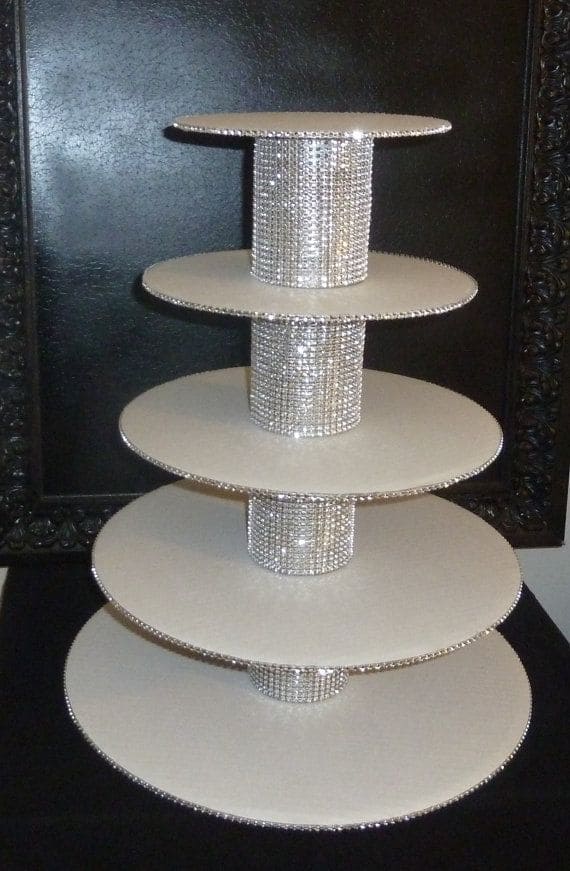
If you’re looking to add a touch of glamour to your party, this tiered cupcake stand, crafted from recycled cardboard, is a showstopper.
Materials Needed
- 5 round cardboard cutouts (diameters: 30 cm, 26 cm, 22 cm, 18 cm, 14 cm)
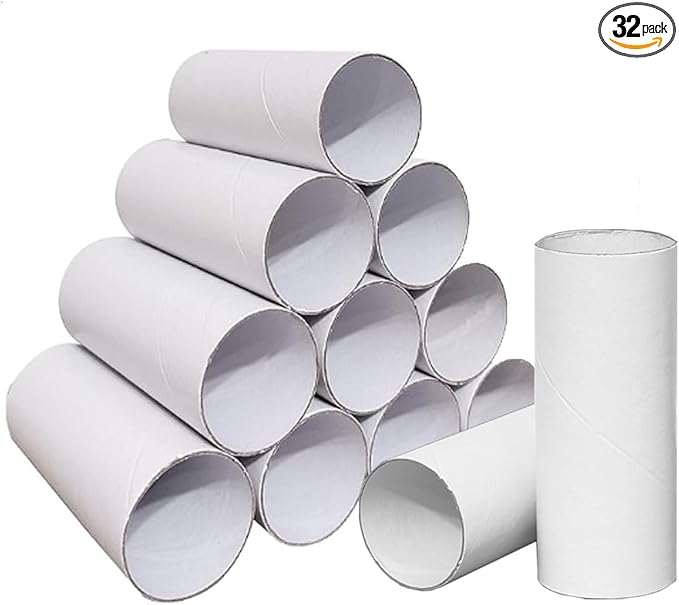
- 4 empty cardboard tubes (each about 10 cm tall)
- Hot glue gun
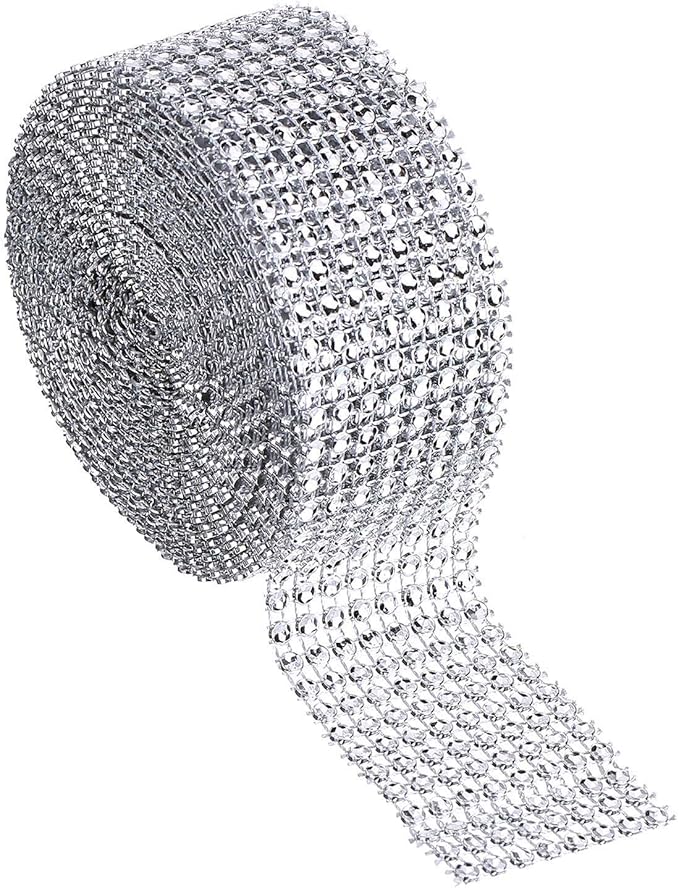
- Silver rhinestone ribbon wrap – approx. 3 meters
- White or metallic spray paint
- Optional: glitter, Mod Podge
Step-by-step Guide
- Cut out the five cardboard circles using a compass and utility knife. Sand edges lightly if needed. Spray paint both sides of each circle and let dry completely.
- Cover each cardboard tube in rhinestone ribbon using hot glue. These will be your pillars between tiers.
- Start from the base: glue one rhinestone-wrapped tube in the center of your largest circle. Let it set, then glue the next largest circle on top. Continue stacking until all tiers are glued.
- Wrap rhinestone ribbon around the edge of each tier for a cohesive, glamorous finish. You can also seal with Mod Podge for added strength and shine.
#13. Imposing Cardboard Axe Creation
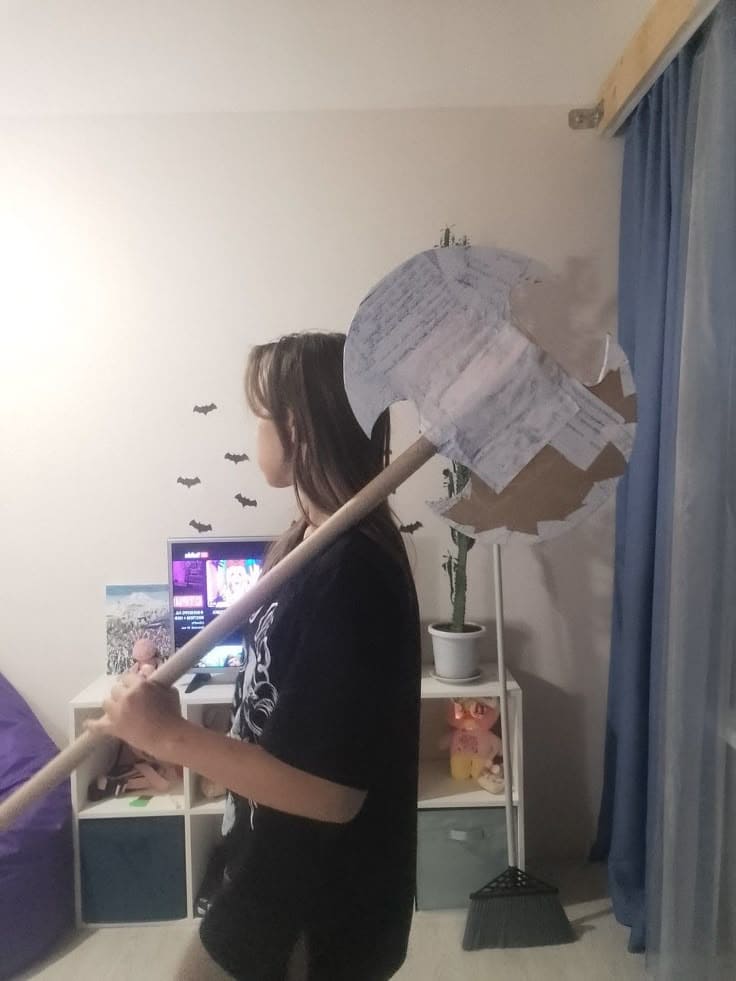
This cardboard battle axe was a last-minute idea for a Halloween costume, but it turned out to be a total hit!
Materials Needed
- 2–3 large cardboard sheets (at least 50 cm x 50 cm per blade half)
- 1 broomstick handle (about 90–100 cm long)
- Hot glue gun and glue sticks
- White craft paper
- Acrylic paint set – silver, black, and brown
- Craft knife and cutting mat
- Masking tape
- Pencil and ruler
Step-by-step Guide
- Sketch one half of the axe blade onto cardboard. Use a ruler for symmetry. Cut it out and trace to make the second blade. Cut a center grip notch in each where the handle will sit.
- Sandwich the two blades with glue, leaving the center groove to slide the stick through. Wrap with masking tape to reinforce the connection between blade and handle.
- Cover the blades with layers of white craft paper or old book pages using glue or Mod Podge. This helps create texture and strengthens the structure.
- Once dry, paint the blade with silver or grey and lightly dry-brush black to add depth. Use brown or metallic gold for handle details.
#14. Blossoming Cardboard Stand
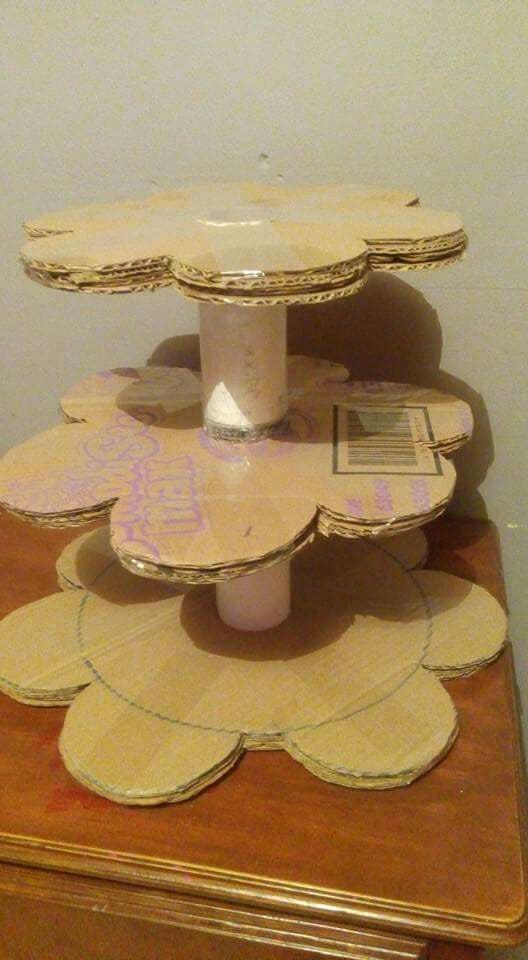
This adorable cupcake stand’s got a rustic, handmade charm, and it’s perfect for displaying treats at kids’ parties, baby showers, or even just weekend family snacks.
Materials Needed
- 3–4 medium cardboard sheets (at least 40 cm x 40 cm each)
- 2 empty toilet paper rolls or short mailing tubes
- Hot glue gun and glue sticks
- Pencil and ruler
- Scissors or craft knife
- Optional: Acrylic paint or contact paper
Step-by-step Guide
- Start by drawing and cutting out three flower-shaped circles in graduated sizes: bottom (30 cm), middle (25 cm), and top (20 cm). Cut each layer twice and glue them together for strength.
- Trim your cardboard tubes to 10–12 cm each to serve as the pillars. Paint them or cover with colored paper if desired.
- Glue one tube vertically at the center of the base tier. Add glue to the top of the tube and place the middle tier on it, pressing firmly. Repeat for the top layer.
- Let the structure dry completely. Optionally, decorate the edges with ribbon, lace, or glitter paint for a party-ready finish.
#15. Stylish DIY Cardboard Shelf with Drawer
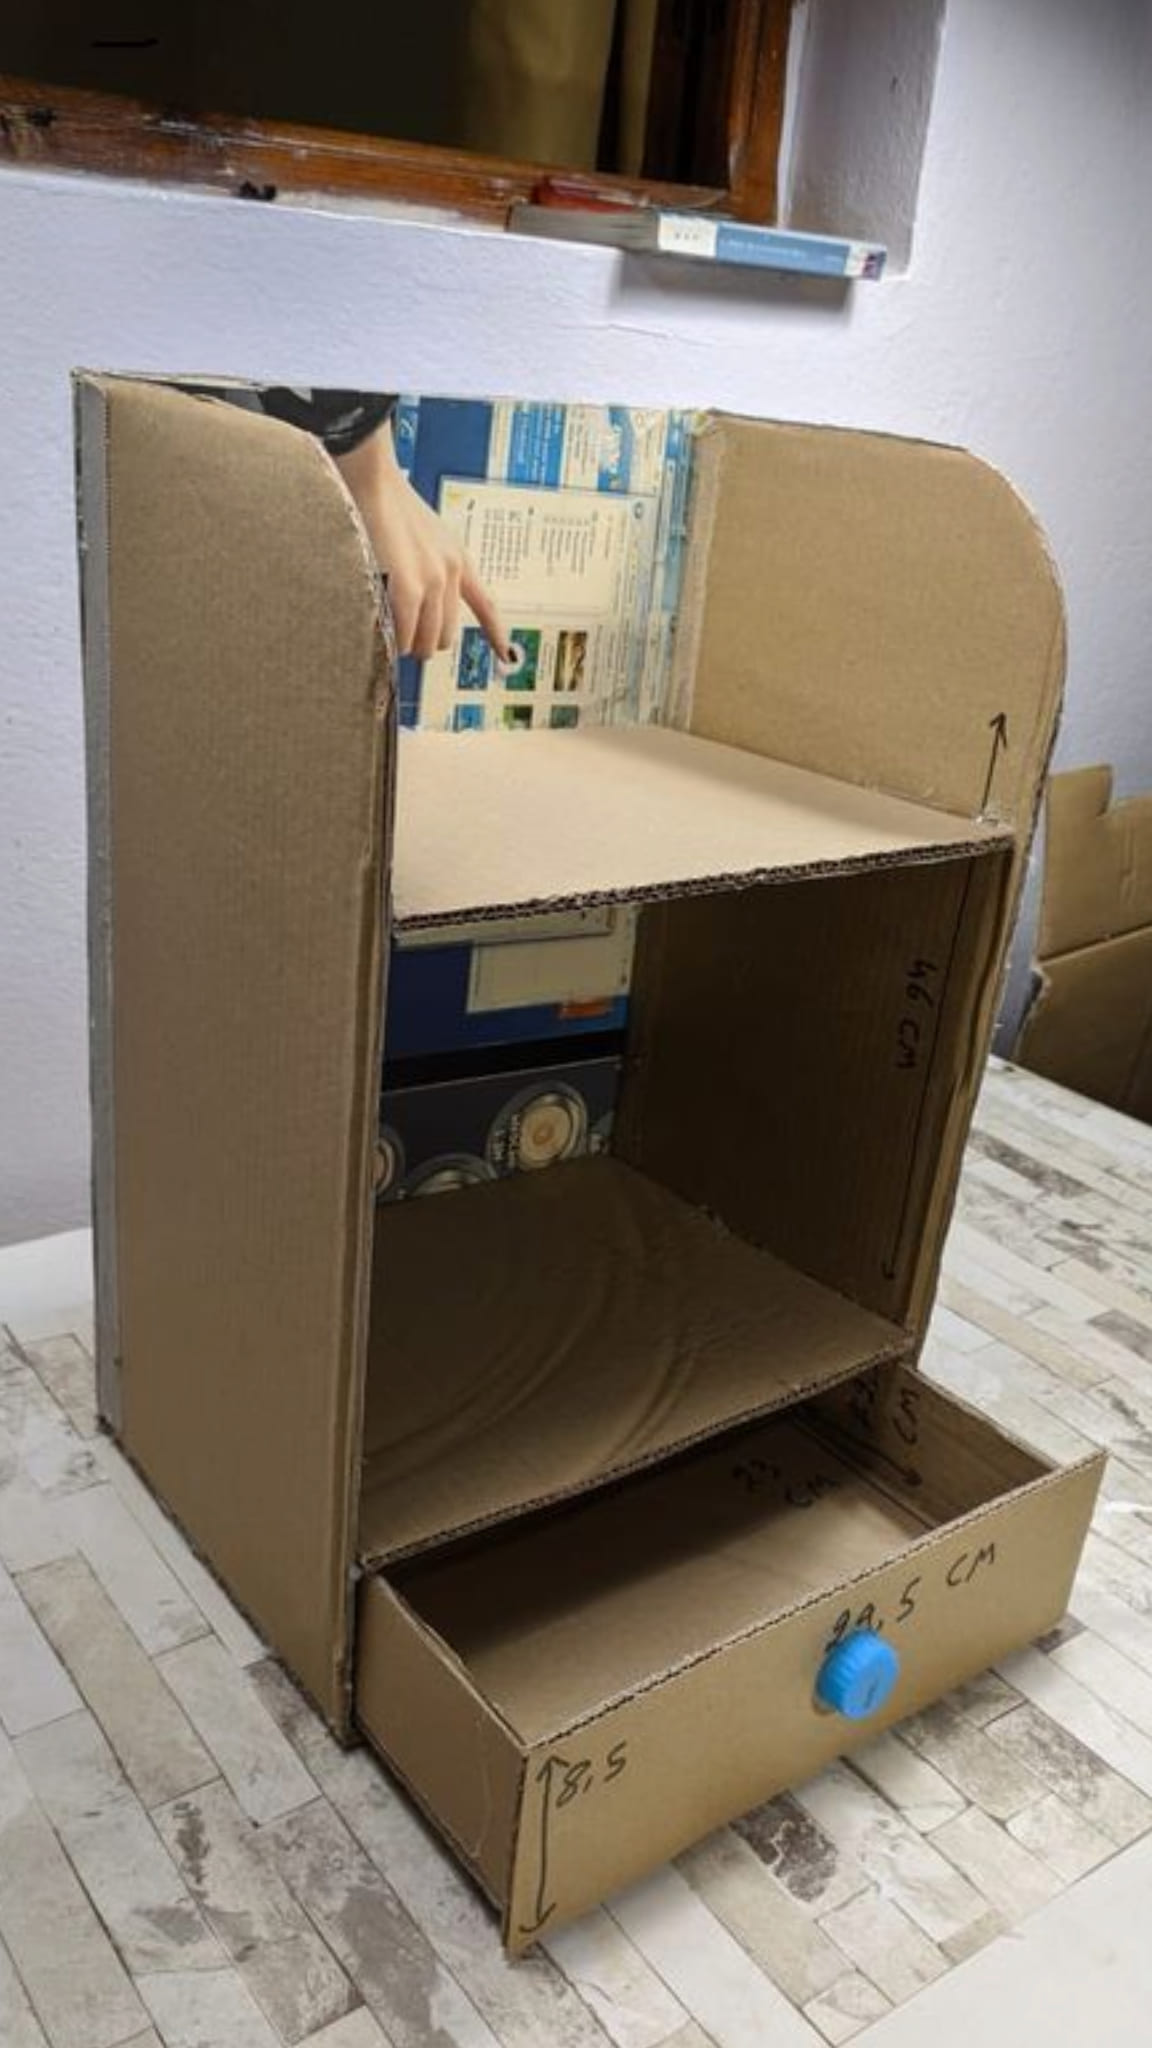
With a 2-tier shelf and a bottom drawer, it looks like something you’d buy at a store, yet costs nearly nothing.
Materials Needed
- 3–4 large cardboard sheets (at least 60 cm x 40 cm each)
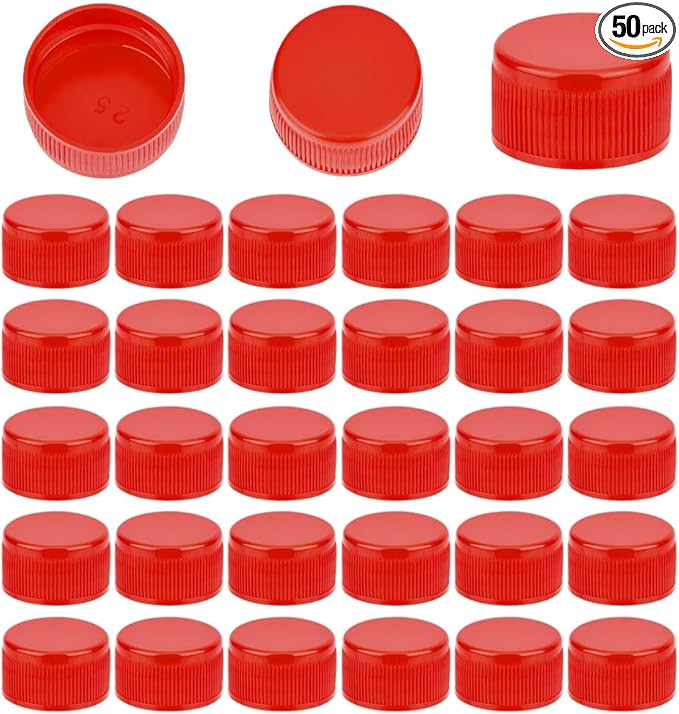
- 1 small plastic bottle cap
- Hot glue gun and glue sticks
- Box cutter or craft knife
- Metal ruler and pencil
- Optional: wrapping paper, washi tape, or paint
Step-by-step Guide
- Cut two side panels measuring 46 cm high x 18.5 cm deep with a rounded top edge. Then, cut three horizontal rectangles (22.5 cm x 18.5 cm) for the top, middle shelf, and base. Secure the structure using hot glue, first attaching the shelves between the side panels.
- For the drawer, cut a box base of 22.5 cm x 18.5 cm and sides that are 5 cm tall. Create a front face and glue a bottle cap in the center as a handle. Slide the drawer into the bottom space.
- Finish by gluing a rear panel (46 cm x 22.5 cm) to strengthen the whole structure. Add color or wrapping if desired.
#16. Sweetheart Cardboard Shelves
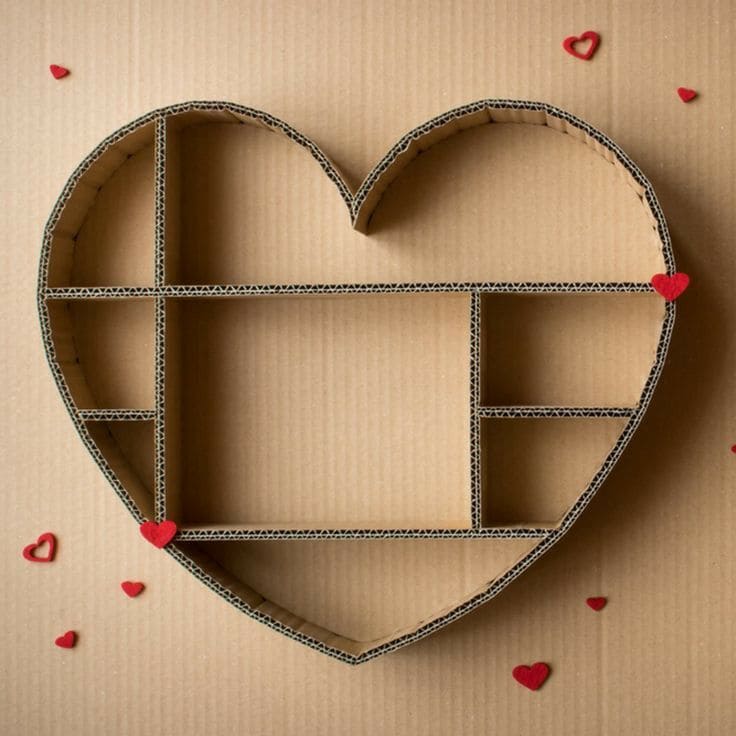
Like a warm hug, this heart-shaped shelf is a testament to the charm of recycled cardboard.
Materials Needed
- 2 large cardboard sheets (at least 60 x 60 cm)
- Craft knife or box cutter
- Hot glue gun with glue sticks
- Pencil and ruler
- Compass or round lid
- Optional: heart stickers
Step-by-step Guide
- Draw a large heart shape on one cardboard sheet (about 50 cm wide), then cut it out. Use this as a template to trace and cut a second identical piece for the back panel.
- For the walls, cut long cardboard strips about 5 cm wide to run along the edge of the heart, this gives the shelf its depth.
- Glue the edge strips around one heart shape to create the frame. Carefully attach the second heart to the back to form a full box-like shape.
- Measure and cut internal dividers to form the cubbies. These can be horizontal and vertical strips sized to fit your layout. Glue them in place, making sure everything is flush and snug.
- Finish with a few cute hearts or embellishments to give it that playful touch.
#17. Cute Kitty-Themed Cardboard Storage Box
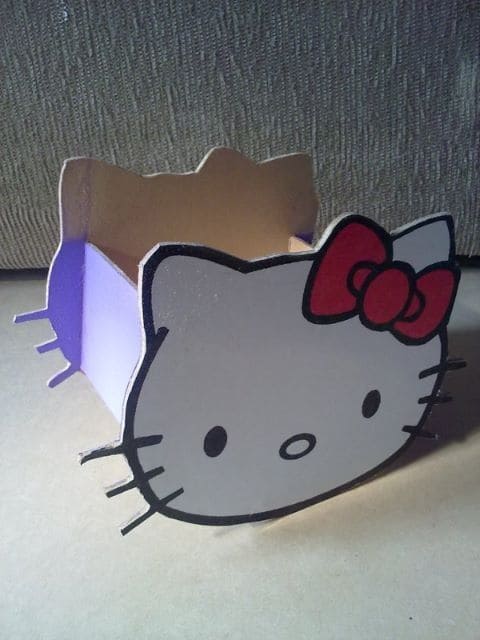
If you’re a fan of all things cute and iconic, this Hello Kitty organizer is a must-make. It’s the perfect desk buddy to hold pens, clips, or even small beauty essentials.
Materials Needed
- 1 medium-sized cardboard sheet (at least 35 x 35 cm)
- White and red acrylic paint
- Black permanent marker
- Scissors or craft knife
- Hot glue gun with glue sticks
- Optional: Purple paint
Step-by-step Guide
- Draw two identical Hello Kitty faces (approx. 15 x 12 cm) on cardboard and cut them out. Use one as the front and one for the back. Cut three rectangles: two for the sides (5 x 12 cm) and one for the bottom (5 x 15 cm).
- Paint both Hello Kitty faces white and let them dry completely. Use the black marker to outline the shape, eyes, and whiskers, then add the red bow. Paint the side panels in a matching accent color, like lavender or soft pink.
- Glue the pieces together by attaching the sides and bottom between the two face panels. Make sure everything is aligned and sturdy.
#18. Adorable DIY Cardboard Doll with a Heart
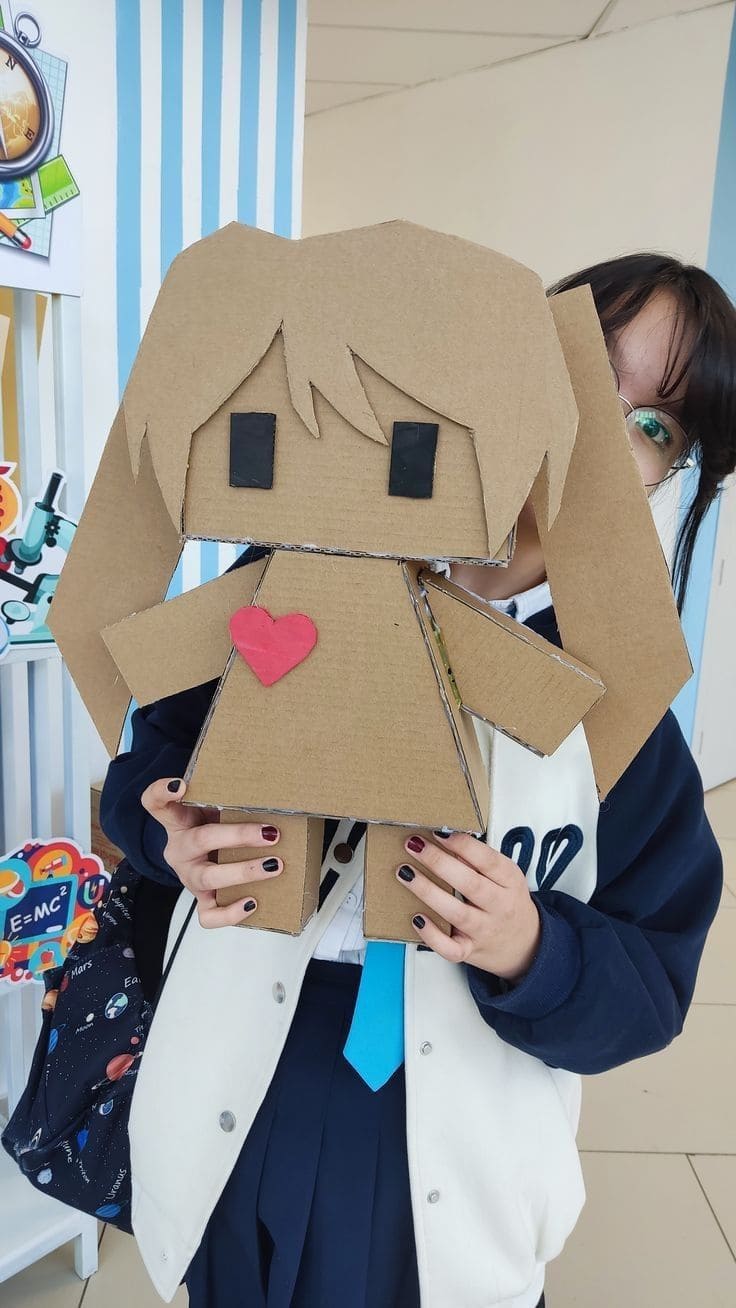
Inspired by the charm of chibi-style figures, this recycled cardboard doll brings creativity to life with its boxy design and playful details.
Materials Needed
- 3–4 medium-sized cardboard sheets (at least 50 x 70 cm each)
- Hot glue gun with extra glue sticks
- Black paint
- Red craft foam or paper
- Craft knife or scissors
- Ruler and pencil
- Optional: Clear tape
Step-by-step Guide
- Draw and cut out the major pieces: one 25 x 25 cm square for the head, two identical 25 x 8 cm rectangles for the legs, two 20 x 7 cm arms, and one 20 x 25 cm triangle dress-like body.
- Cut two hair panels shaped like sideways “V”s and glue them at an angle to the sides of the head.
- Assemble the 3D figure by gluing the body pieces together like a box sculpture. Use extra cardboard strips inside as support braces. Add the hair, legs, and arms with reinforced glue tabs.
- Paint on the black square eyes. Cut a red foam or paper heart and glue it on the chest. Finish by reinforcing seams with clear tape on the inside or painting the edges for a clean finish.
#19. Creative Upcycled Rope and Cardboard Basket
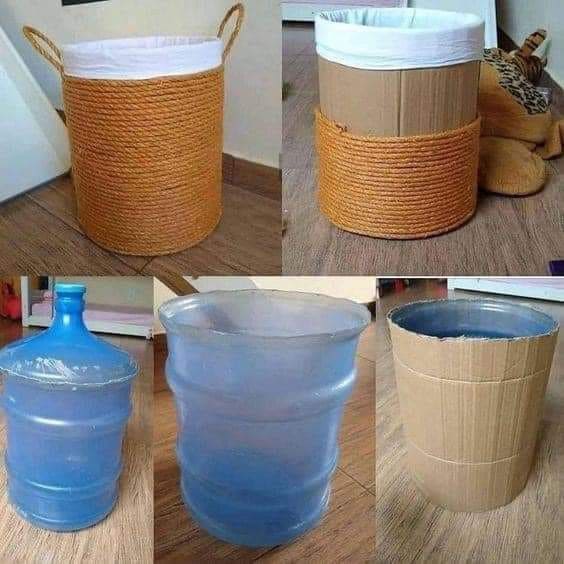
This project turned a leftover water jug and cardboard scraps into a stylish woven-look basket – durable, decorative, and deceptively simple.
Materials Needed
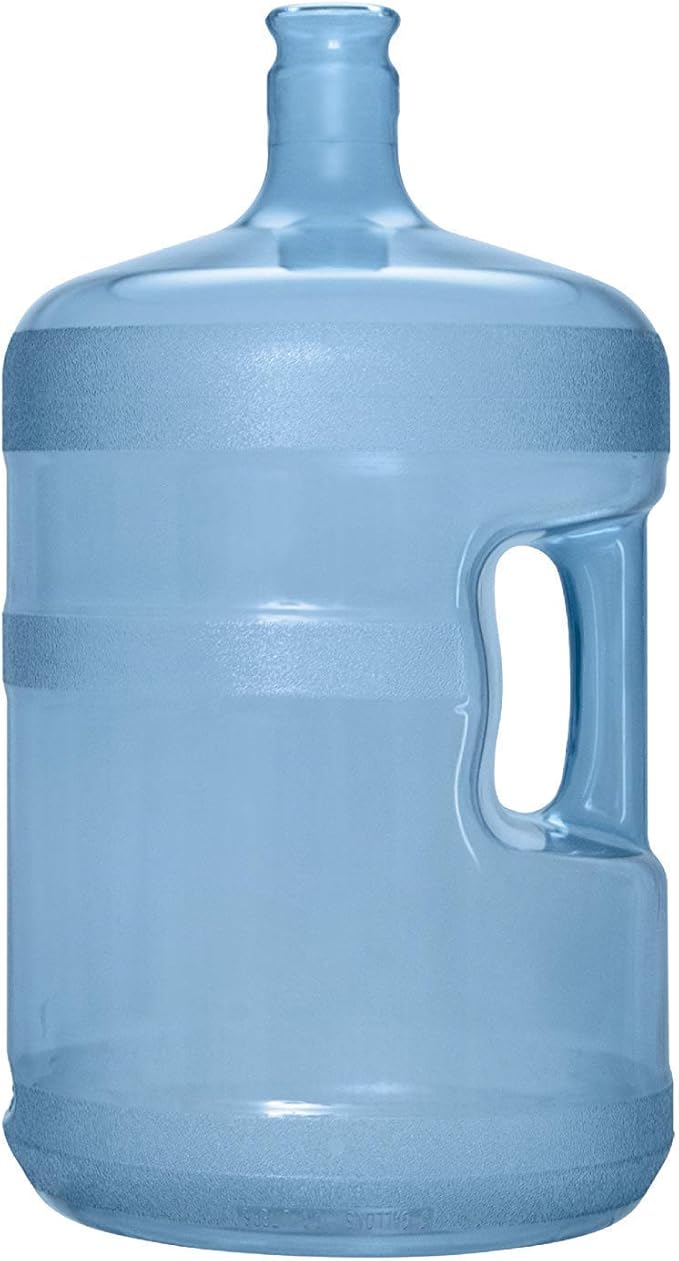
- 1 empty 5-gallon water bottle (approx. 30 cm high)
- 1 piece of cardboard sheet (25 x 80 cm)
- Hot glue gun + glue sticks
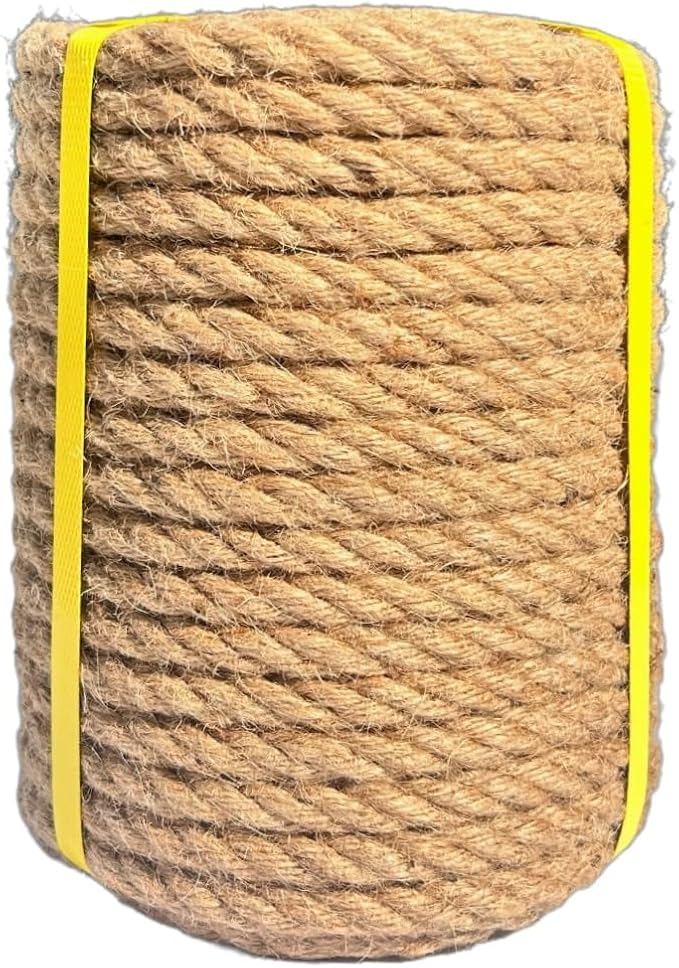
- Jute rope – about 8–10 meters
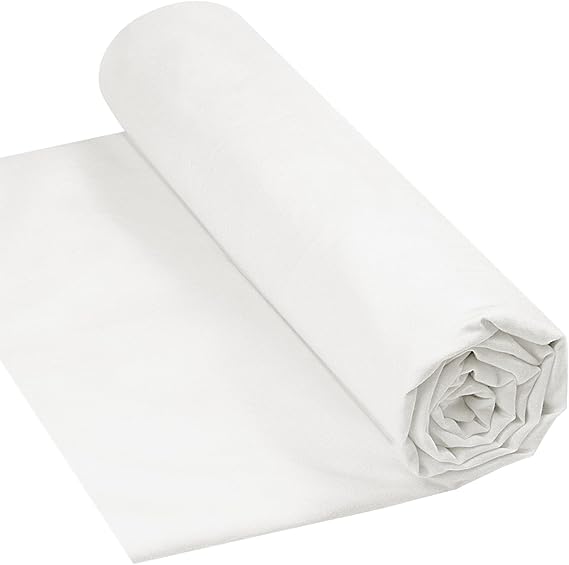
- Fabric lining (optional)
- Scissors or utility knife
- White glue (optional)
Step-by-step Guide
- Cut the top off the plastic water jug with a utility knife to get a clean basket base.
- Wrap the jug with cardboard to create a straight outer wall. Secure it tightly with hot glue, trimming to fit.
- Begin hot-gluing the jute rope from the bottom up. Wind it slowly and tightly around the form, gluing every few inches for hold.
- You can fold an old pillowcase over the rim and glue the edge down with fabric glue or white glue.
- Finally, glue short rope loops to each side as handles.
#20. Adorable DIY Cardboard Play Kitchen Set
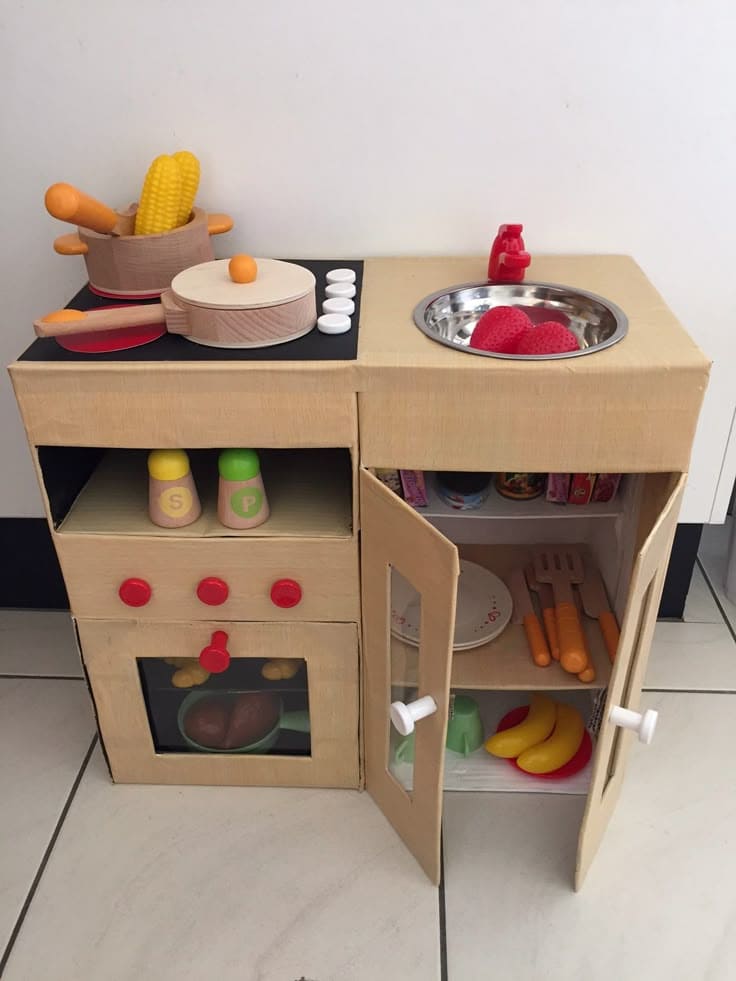
This is one of those projects that sparks joy, both while making and while being played with.
Materials Needed
- 3–4 large cardboard boxes (at least 60×40 cm in size)
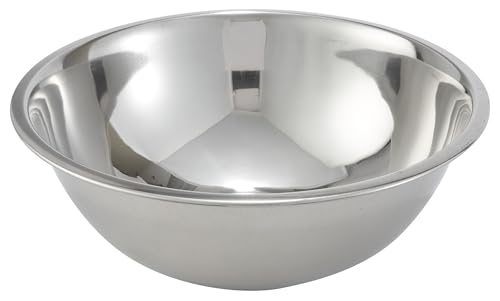
- 1 round metal bowl (about 14 cm diameter)
- Hot glue gun + glue sticks
- Utility knife
- Colored paper, tape, or paint (optional)
- 4 plastic bottle caps
- 2 small knobs
- 1 sheet of clear plastic
- Velcro strips or magnets (optional)
- Ruler and pencil
Step-by-step Guide
- Construct the base from sturdy cardboard by stacking and gluing layers for stability. Measure out the kitchen top at about 50 cm wide and 30 cm deep.
- Cut out two square openings—one for the sink (to fit the bowl) and one for the stovetop. Insert the bowl and glue it in securely. Use a round container to trace burner circles on black paper or paint directly on the surface.
- For the stovetop knobs, glue bottle caps in a row on the front. If you want them to turn, poke a skewer through the center and attach them with cardboard discs inside.
- Create an oven door by cutting a square panel, adding a window using clear plastic, and attaching it with a hinge-style flap of cardboard. Add a small cap or knob for the handle.
- Build cabinet doors with small rectangular panels. Glue clear plastic in the center and attach with hot glue hinges or fabric strips. Add your chosen handles.
- Add shelves inside both the cabinet and oven. Cover the entire kitchen with matching kraft paper, printed vinyl, or paint to unify the look.
- Decorate with mini spice bottles, utensils, and food toys to finish the play set.
#21. Whimsical Cardboard Muncher
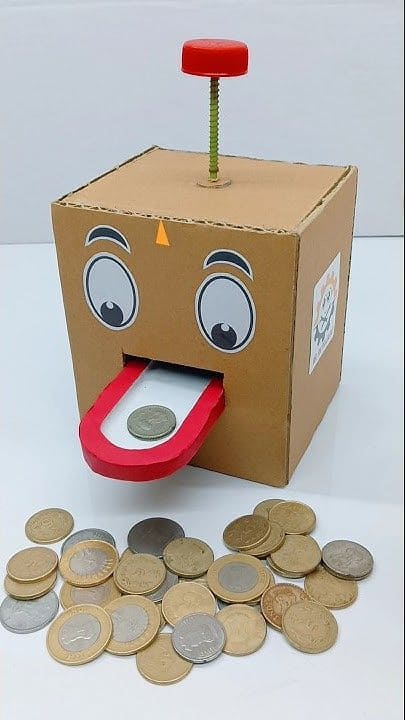
I loved how it turned scrap cardboard into something that helps teach saving and brings joy every time a coin drops inside.
Materials Needed
- 1 small cardboard box (about 12×12×12 cm)
- 1 red plastic bottle cap
- 10 cm screw rod
- 1 rubber band
- 1 strip of thick red paper
- Hot glue gun + glue sticks
- Utility knife
- 1 white cardboard strip
- 2 printed cartoon eyes
- Black marker
Step-by-step Guide
- Cut a small rectangle on the front face of the cardboard box, this will be the mouth.
- Create the tongue using a strip of red foam or cardboard, about 10 cm long. Fold the end inside the box and glue the tongue just below the slot so it looks like it’s sticking out.
- Cut a slit in the top of the box to insert your rod or screw. Glue a red bottle cap to the top of it to act as a press-button.
- Inside the box, connect a rubber band to the bottom of the rod and anchor it so that when you push the button, it pushes the coin inside the box and then springs back up.
- Decorate the face with printed or hand-drawn cartoon eyes and a little triangle nose.
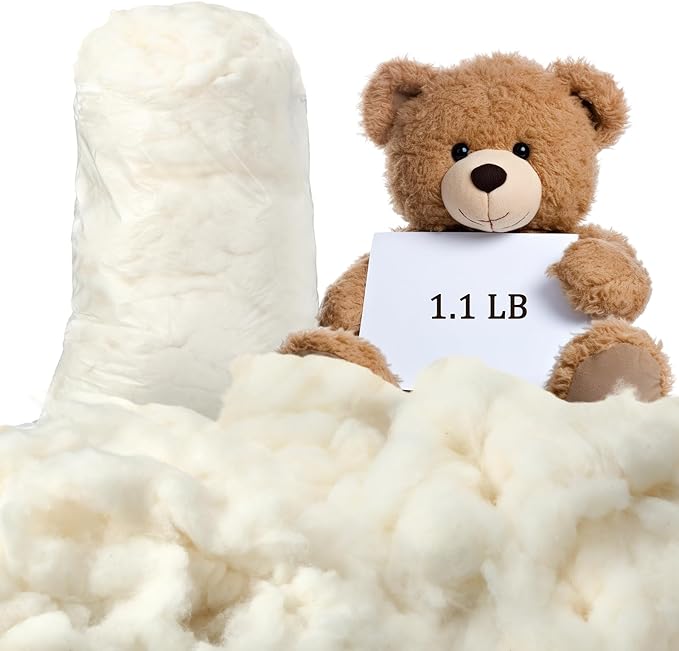
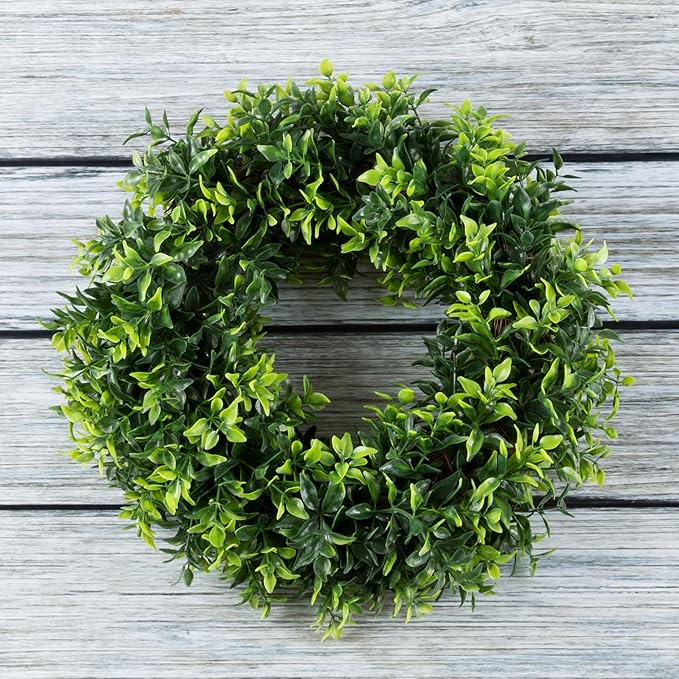
#22. Cozy DIY Cardboard Fireplace for Winter Charm
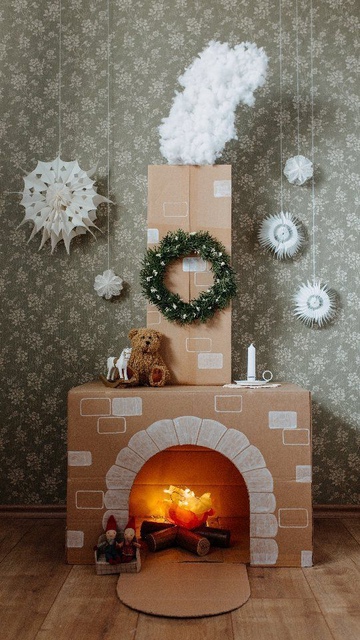
This cardboard fireplace was a heartwarming hit at my holiday party, and it’s proof that festive spirit doesn’t need to cost a thing.

Materials Needed
- 2–3 large cardboard boxes
- 1 string of LED fairy lights
- 1 piece of red tissue paper
- 1 handful of cotton batting
- 1 small green wreath
- White chalk marker
- Glue gun and scissors
- Optional: mini logs or paper towel rolls
Step-by-step Guide
- Stack two boxes: one large one as the fireplace base, and a tall narrow one above it as the chimney. Secure them with tape or glue.
- Cut an arch on the front box to form the fireplace opening. Fold down the cut flap slightly to act as the hearth.
- Paint or draw faux bricks around the arch and on the boxes. Use a white chalk marker or acrylic paint for a soft brick look.
- Inside the arch, place a few rolled brown paper logs or real sticks. Crumple red cellophane into flame shapes and place your LED lights inside for a glowing fire effect.
- On top of the chimney, glue cotton stuffing to look like rising smoke. Let it fluff out for a whimsical look.
- Decorate with a mini wreath, fairy lights, candles, or small festive ornaments to give it that true Christmas feel.
#23. Blossoming Cardboard Canvases
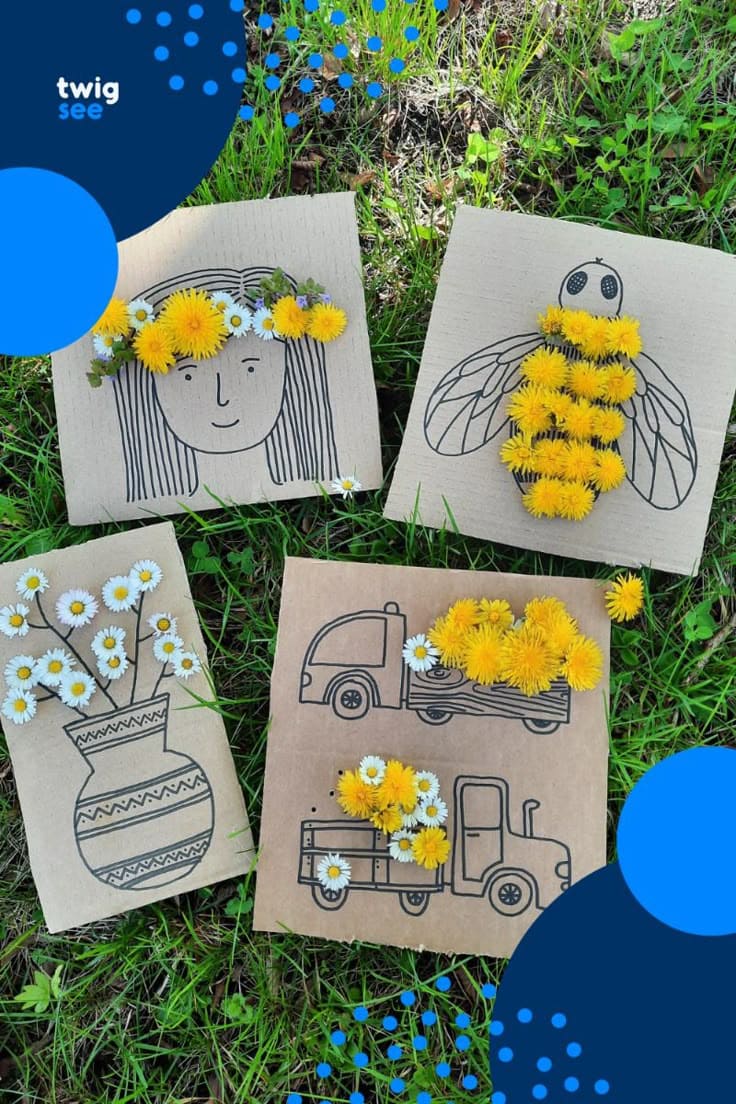
For the next projects, consider transforming recycled cardboard into charming canvases, like these nature-inspired artworks.
Materials Needed
- 4 small squares of cardboard (approx. 20 x 20 cm each)
- Black permanent marker
- Wildflowers (dandelions, daisies, etc.)
- Hot glue gun or non-toxic glue
- Optional: Scissors or box cutter
Step-by-step Guide
- Draw simple outlines of people, animals, vases, or vehicles on each cardboard piece using a black permanent marker. Keep the illustrations open and minimal to leave room for creativity.
- Head outdoors and gather fresh wildflowers like daisies, dandelions, or clovers. Pick a few different shapes and colors to add variety.
- Arrange the flowers on the drawings to fill in hair, bee stripes, vases, or truck beds. Once you like how they look, carefully glue them down.
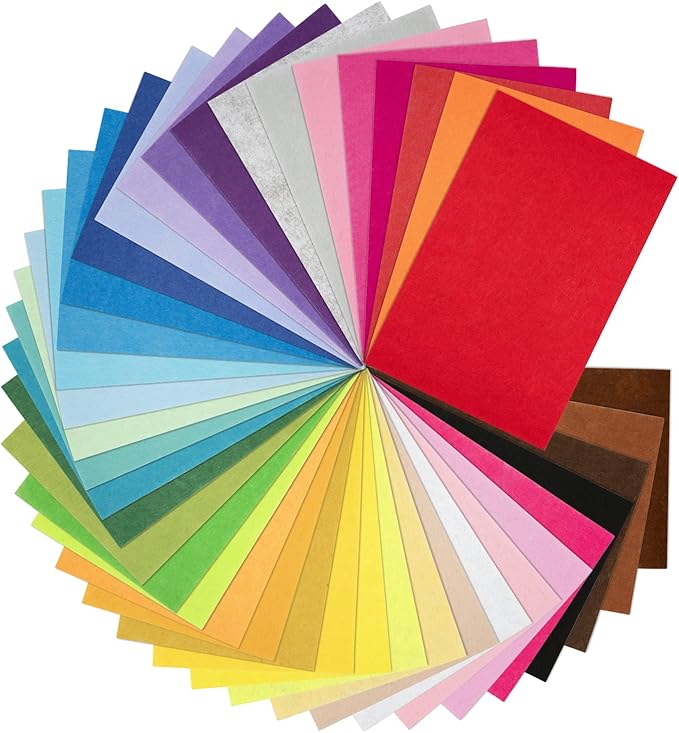
#24. Whimsical Miniature Room from Recycled Cardboard
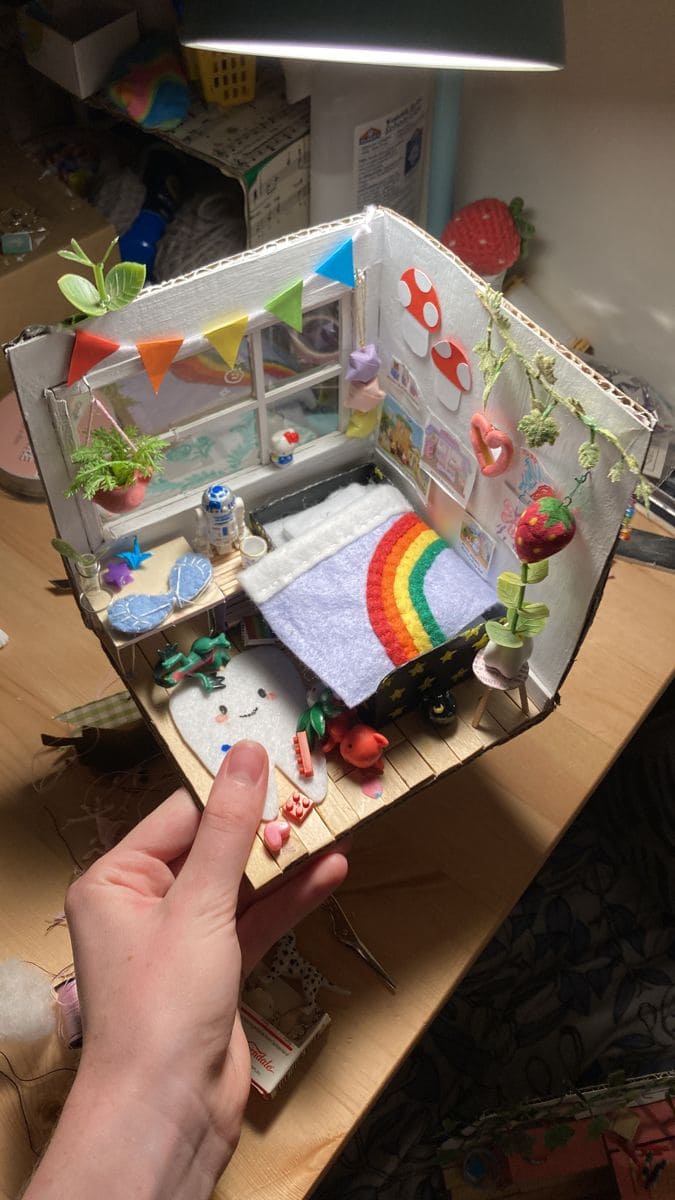
This miniature rainbow-themed room made entirely from cardboard and craft scraps is like a dreamy world in the palm of your hand.
Materials Needed
- 3 medium pieces of cardboard (each approx. 20 x 20 cm)
- 1 sheet of white felt
- Small rainbow-colored felt strips
- Toothpicks
- Mini clay items or charms
- Hot glue gun and scissors
- Craft paper
- Clear plastic piece
- Acrylic paints (optional)
Step-by-step Guide
- Cut and glue three pieces of cardboard together to form an L-shaped room base with two walls and a floor.
- Create the bed from two stacked cardboard rectangles with sides folded up, and cover it in felt for a mattress. Add a handmade rainbow blanket on top using thin felt strips.
- Add a mini rug using felt, glue on clay toys, tiny pillows, and small furniture pieces. For the window, glue a piece of plastic between two cardboard frames and attach it to the wall.
- Decorate with colorful paper bunting, craft paper posters, string plants, and other whimsical elements. Get playful with personality.
#25. Eco-Friendly Cardboard Cat Playground Haven
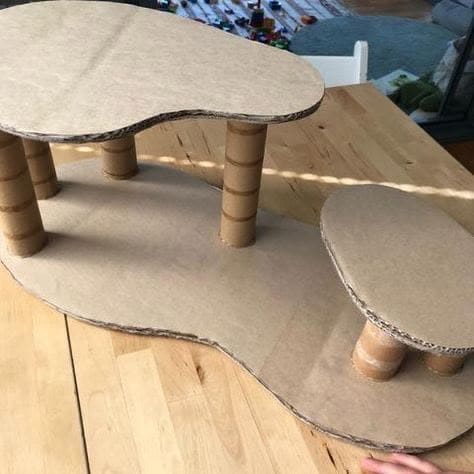
This platform has become a stage for so many adventures in our home as it’s not fancy, but it’s creative, strong, and full of possibility.
Materials Needed
- 2 large cardboard sheets (approx. 60 x 40 cm); 2 smaller cardboard sheets (approx. 35 x 25 cm)
- 7 cardboard tubes , each 10–15 cm tall
- Hot glue gun and extra glue sticks
- Box cutter or craft knife
- Pencil and ruler
- Optional: brown craft paper or paint
Step-by-step Guide
- Draw and cut out two matching base shapes from the large cardboard sheets using an organic blob or kidney shape. Do the same for the two smaller elevated platforms.
- Cut your cardboard tubes to even height (10–15 cm ). Use four for the big platform and three for the smaller one.
- Glue the legs vertically to the base. For added stability, glue a second matching platform on top of the tubes to sandwich everything tightly together.
#26. Imaginative Cardboard Car Garage

With three levels of play, working ramps, and space for dozens of toy cars, it kept the kids racing all afternoon.
Materials Needed
- 2 large cardboard sheets (approx. 60 x 45 cm); 1 medium sheet (approx. 45 x 30 cm); 1 small sheet (approx. 30 x 20 cm)
- 7 cardboard tubes cut to 20 cm height
- 1 longer cardboard tubes (approx. 45–50 cm)
- White masking tape
- Glue gun and glue sticks
- Scissors or box cutter
- Toy cars
Step-by-step Guide
- Cut your base platform from a large cardboard sheet. Stack the cardboard tubes vertically and glue them in place as pillars at the corners, then glue your first-floor platform above them.
- Repeat the pillar-and-platform technique to create the second level.
- Create the ramps by cutting long strips of cardboard. Slightly bend them and attach them with hot glue or tape, connecting the floors.
- Add white tape strips or drawn lines to create parking spots, lanes, and road markings. Get creative with cardboard traffic cones, barriers, or elevators.
- Use the long cardboard tubes to create a “loop-style” fast ramp. Tape it securely from the top floor down to the base with a gentle slope so toy cars slide down easily.
#27. Spinning Cardboard Memories
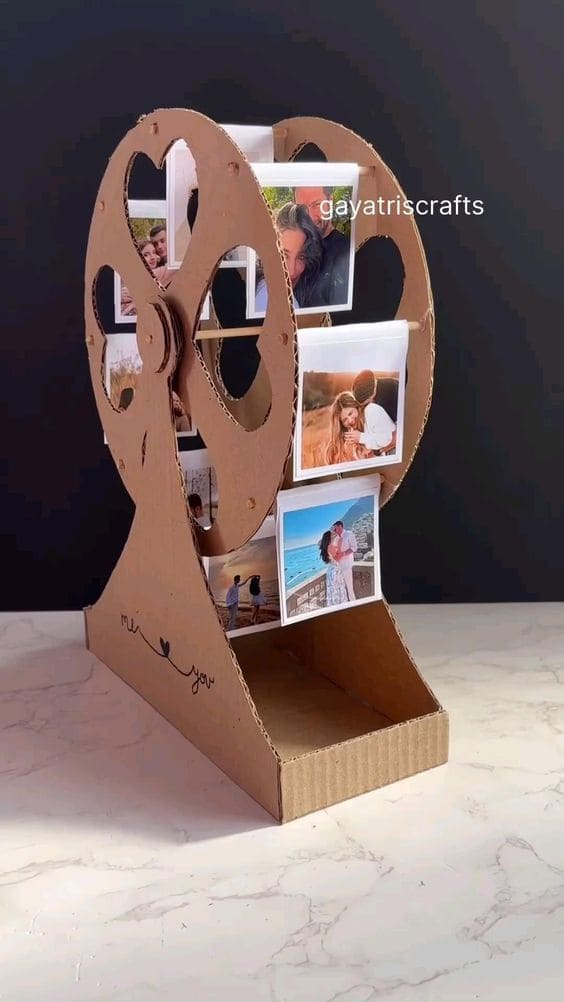
You and your loved ones will adore this spinning cardboard Ferris wheel, a charming way to display cherished photos.
Materials Needed
- 2 medium cardboard sheets (at least 30 x 30 cm each)
- 1 sturdy rectangular base piece (20 x 10 x 6 cm)
- 9 thin wooden skewers
- Hot glue gun and glue
- Mini binder clips
- 8–10 printed square photos (6 x 6 cm)
- Compass
- Craft knife and ruler
Step-by-step Guide
- Trace and cut two identical circles (about 20 cm diameter) from cardboard. Cut out 4 large heart shapes within each circle to give the feel of a Ferris wheel.
- In each wheel, poke a small hole in the center using a skewer. This is where your wheel will rotate from.
- Cut a rectangular triangle-shaped base that stands upright and holds both wheels at the same height. Glue the side supports to the base box.
- Insert the skewer through the center of both wheels and anchor it to the side walls of the triangle base. Make sure it can still spin smoothly.
- Use glue to attach your photos back-to-back on mini strips of cardboard or directly onto the “buckets” between both wheels. Space them evenly.
- Decorate with hand lettering, washi tape, or cute designs.
#28. Vintage Cardboard Gramophone
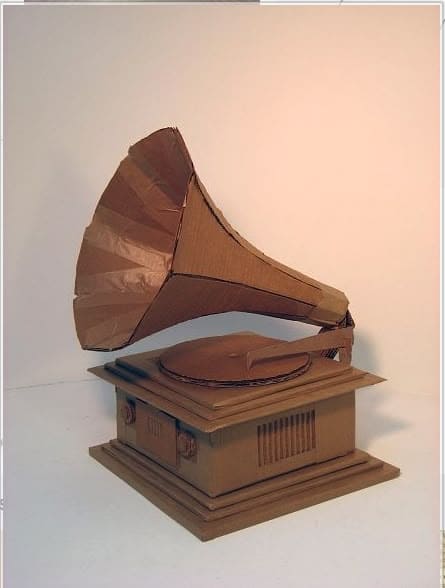
There’s something magical about gramophones, their old-world charm, the elegance of their design.
Materials Needed
- 2 large cardboard sheets (50 x 50 cm)
- 1 paper cone or create your own trumpet bell from thin kraft cardboard
- 1 circular base plate (20 cm diameter)
- 4–5 small rectangular cardboard strips (2 x 15 cm)
- Glue gun
- Craft knife, scissors, ruler
- Optional: Brown acrylic paint
- Pencil
- Small piece of cardboard tubing
Step-by-step Guide
- Cut out a square base box (around 25 x 25 cm) and build it up into a rectangular box with height around 10–12 cm. Add layered cardboard edging to give it depth and form ridges for a realistic look.
- Create the turntable using a circular disc and glue it to the center of the box top. Add a raised small circle at the center to mimic the spindle.
- Craft a horn by cutting triangular panels and assembling them into a large cone shape. You can use masking tape on the back side to hold the shape, then coat with glue to firm it up.
- Connect the horn to a bent tube or a rolled cardboard strip to act as the tonearm. Secure one end into the top box corner and position the other end near the turntable.
- Add faux knobs or sliders using small cardboard rounds, rectangles, or beads glued on the front. Carve or draw tiny lines to mimic vents or speaker grills.
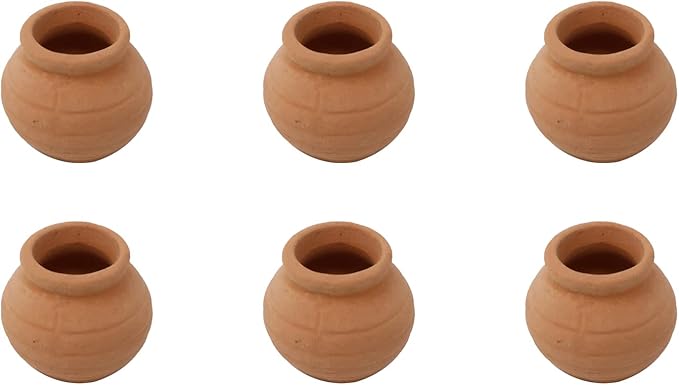
#29. Charming Cardboard Floral Vase
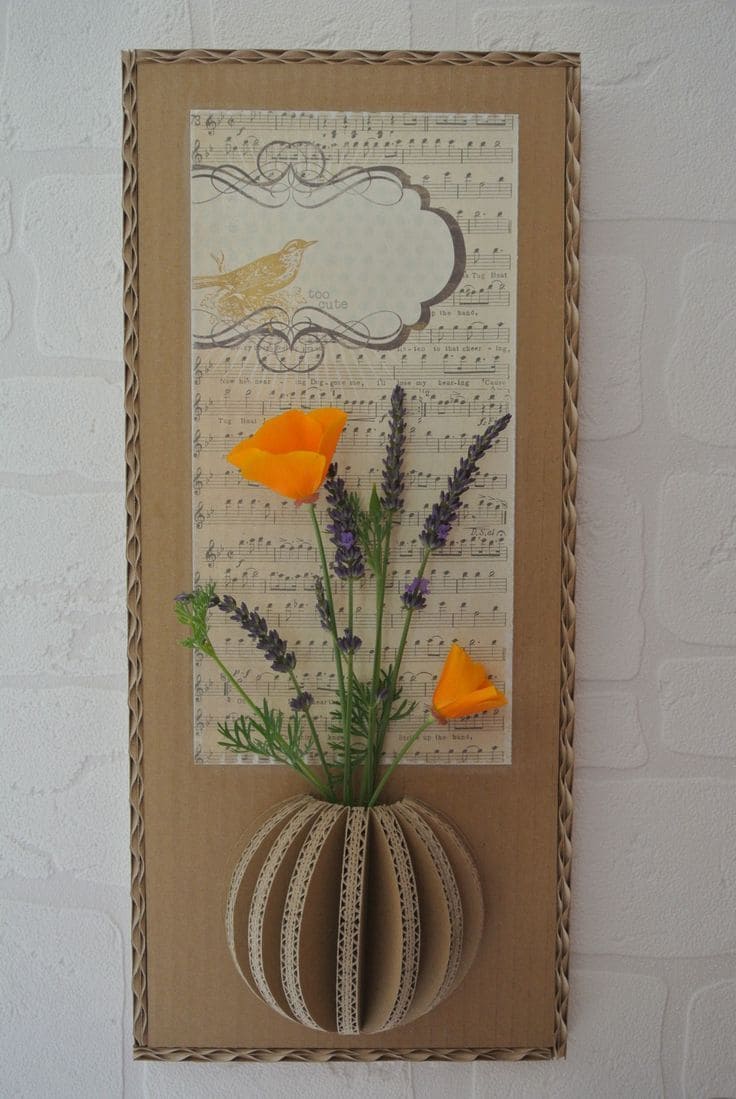
I’ve always loved combining textures, and this DIY 3D wall vase was born from that love, corrugated cardboard meets vintage sheet music, with a bouquet of joy popping out.

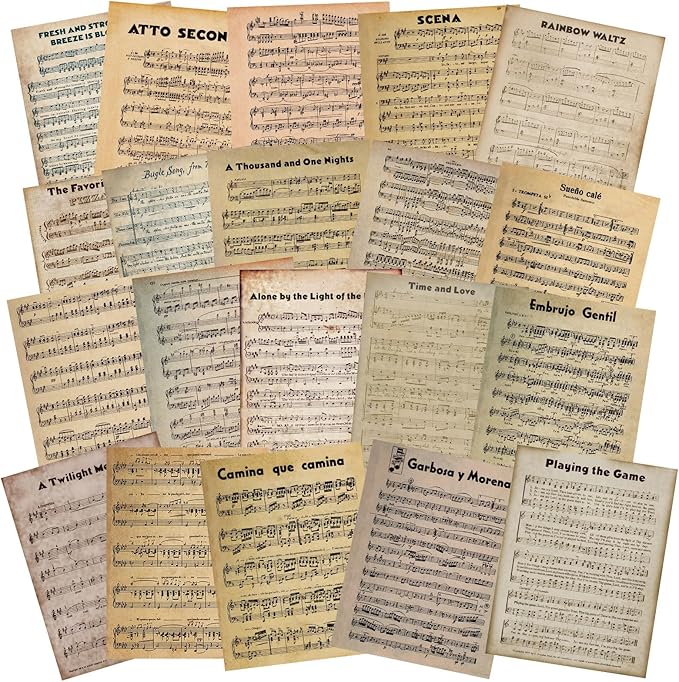
Materials Needed
- 1 cardboard rectangle (30 x 50 cm)
- 1 printed sheet music (A4 size)
- 7-9 curved cardboard vase slices (each around 15 cm tall, semi-oval)
- Hot glue gun
- Craft knife and ruler
- A few dried or artificial flowers
Step-by-step Guide
- Start by mounting the cardboard base vertically and gluing the vintage music paper to the center. Leave enough space at the bottom for the 3D vase to “pop” out.
- Cut 10–12 identical vase-shaped slices from thick corrugated cardboard. Curve them slightly by hand and glue them edge-to-edge to form a dome or sphere-like illusion—just the front half.
- Secure this 3D vase structure to the base board, centered beneath the music sheet. Reinforce with hot glue along the seams so it stays firm.
- Add a small pocket or gap at the top of the vase to slide in real or faux flower stems. I used dried lavender and orange poppies for contrast.
#30. Charming Cardboard Turtle
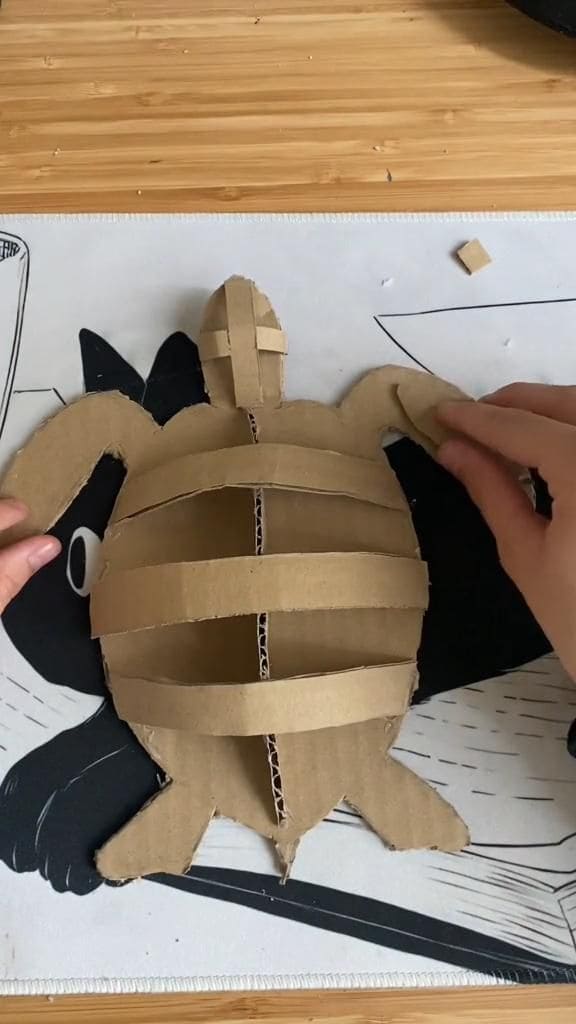
This craft is a sweet mix of sculpture and play. It’s not just a turtle, it’s a tribute to slow, thoughtful making.
Materials Needed
- 2 large pieces of cardboard (at least 30 x 40 cm each)
- Pencil and scissors
- Hot glue gun
- Ruler and compass
Step-by-step Guide
- Begin by sketching out the turtle’s full shape (shell, flippers, tail, and head) on one of the cardboard sheets. Cut it out carefully.
- Cut a strip of cardboard for the turtle’s spine (around 20 cm long and 2–3 cm wide) and glue it upright along the center of the shell.
- Cut and gently curve 3 to 4 horizontal strips, each slightly shorter than the last, to arch across the turtle’s shell like ribs. Attach them perpendicular to the spine to shape the domed shell.
- Add volume to the head using smaller, curved segments – stack and glue them to give the face a round form.
#31. Chic and Functional DIY Cardboard Organizer
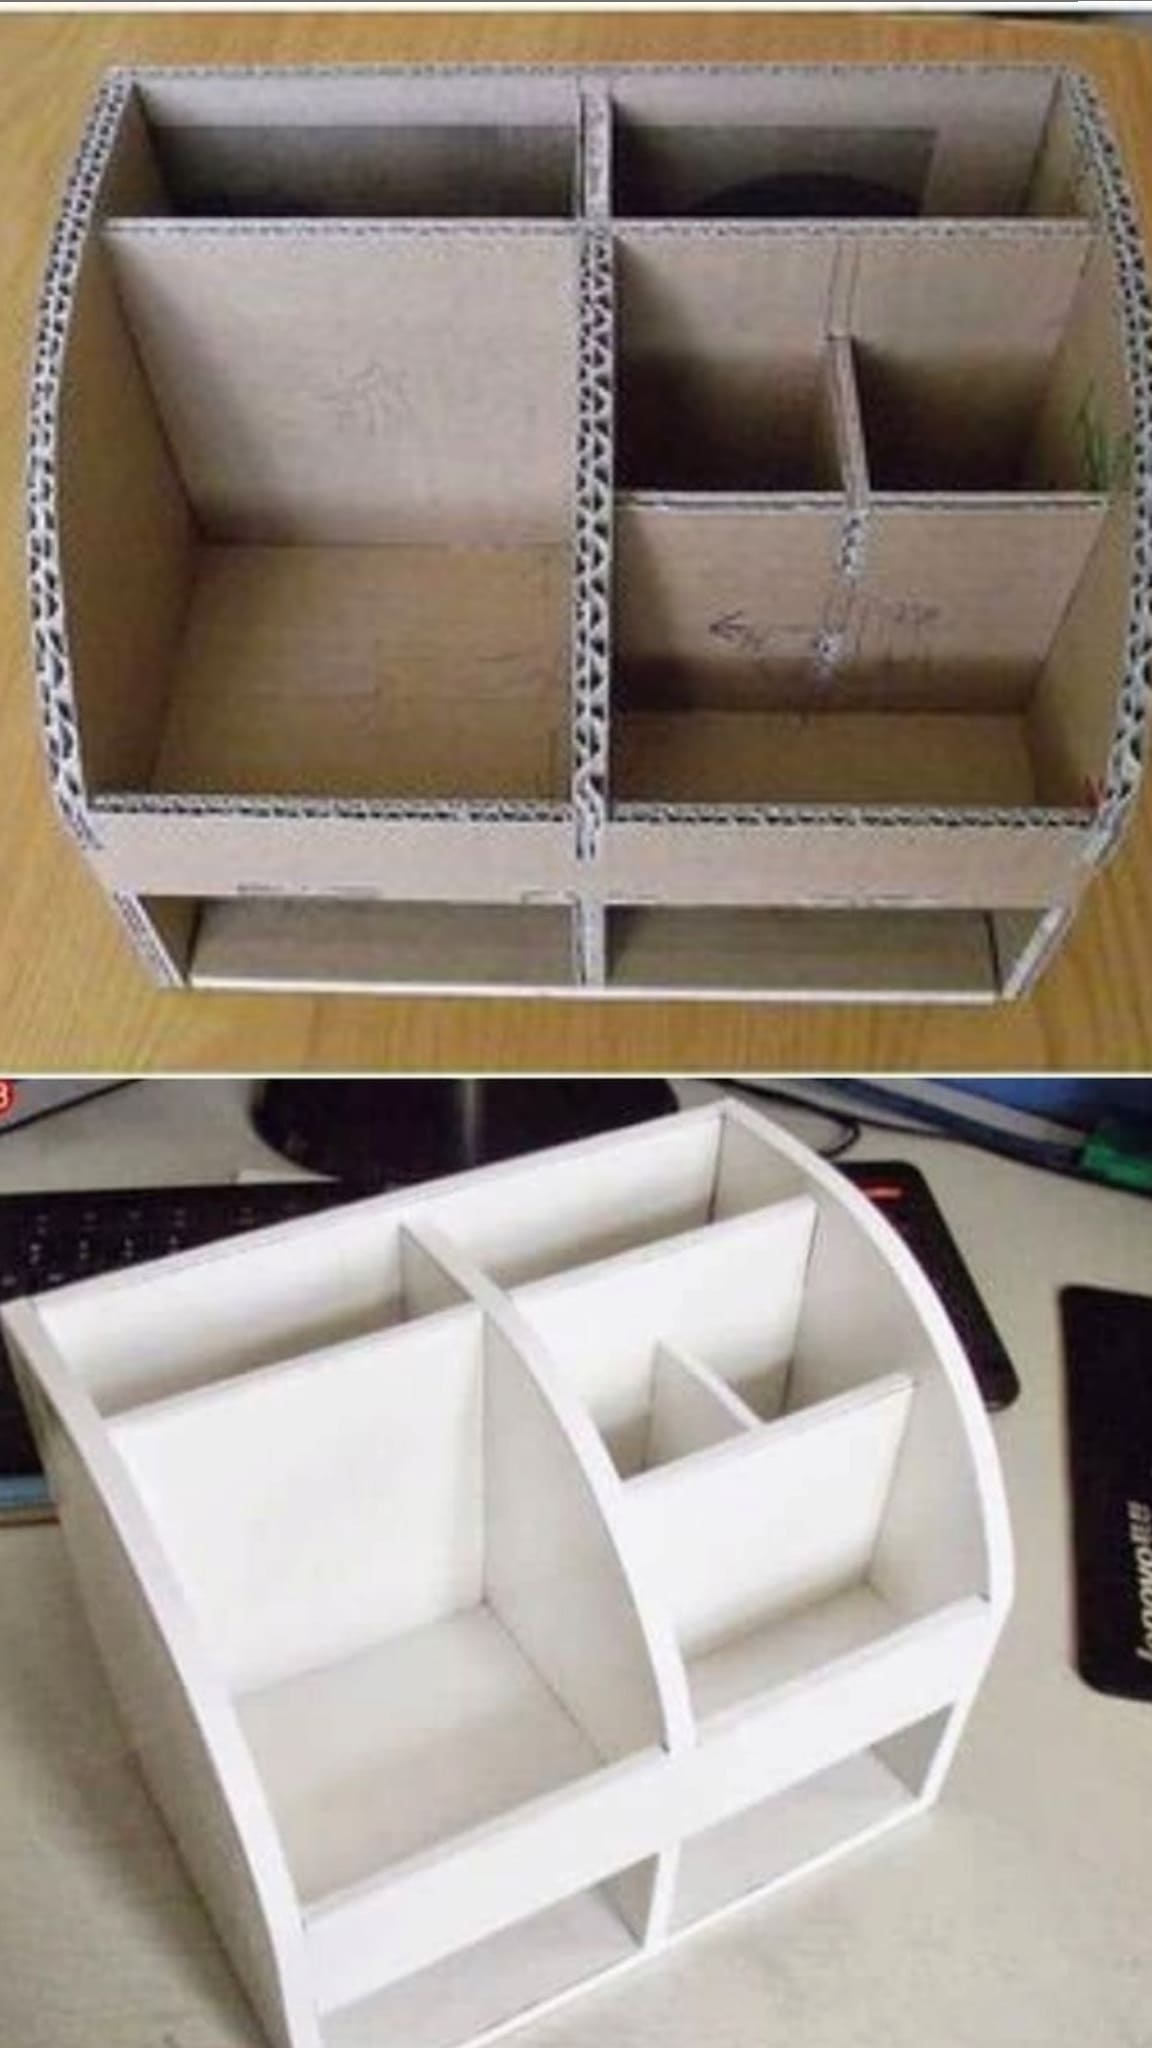
I always have odds and ends cluttering my workspace like pens, sticky notes, scissors. So I made this sleek desk organizer out of old cardboard and a touch of white paint.
Materials Needed
- 2–3 medium-sized cardboard sheets (approx. 35 x 50 cm)
- Ruler, pencil, and precision cutter
- Hot glue gun
- White acrylic paint
- Paintbrush
- Optional: Matte varnish
Step-by-step Guide
- Start by sketching your dimensions. The overall box in the photo is about 25 cm wide, 18 cm deep, and 15 cm tall. Cut out two identical side panels with a gentle curve on top for style.
- Cut five internal divider pieces to create upper compartments – two large, two small, and one central vertical wall. Fit and glue them inside the box as shown, making sure they sit flush with the base.
- For the bottom layer, cut two horizontal dividers and one vertical center strip to form open cubbies. Attach them to the underside with glue.
- Once assembled and stable, paint the entire organizer in two coats of white. Let it dry between layers. You can seal with matte varnish to protect the finish.
#32. Ethereal Cardboard Portrait Sun-catching
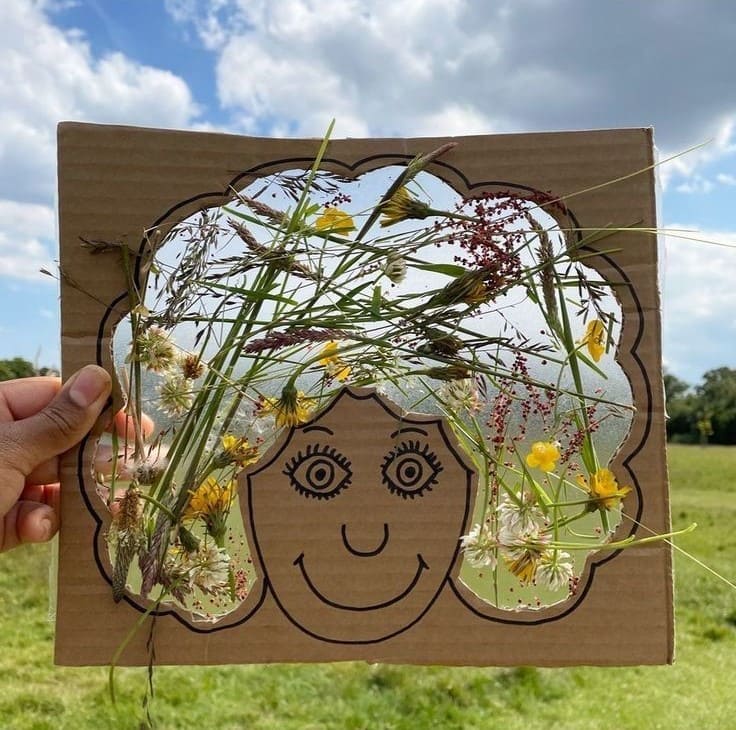
Whether you’re at a picnic, summer camp, or just in your backyard, this project brings the joy of nature right into your art.
Materials Needed
- 1 piece of cardboard, approx. 30 x 30 cm
- Clear plastic sheet
- Wildflowers, grasses, or leaves collected from outdoors
- Hot glue gun
- Black marker
- Craft knife
Step-by-step Guide
- Draw a simple face on the cardboard – eyes, nose, big smile – and sketch a big poofy hairstyle outline around it. Cut out the hairstyle section carefully with a cutter, leaving the rest of the head intact.
- Tape or glue a clear plastic sheet behind the cutout area. This will act like a window to hold your wildflowers and grasses.
- Slide the flowers and greenery between the cardboard and plastic, arranging them like whimsical curls or a floral crown. Tape or glue them lightly into place so they don’t fall out when upright.
#33. Handy Cardboard Napkin Holder
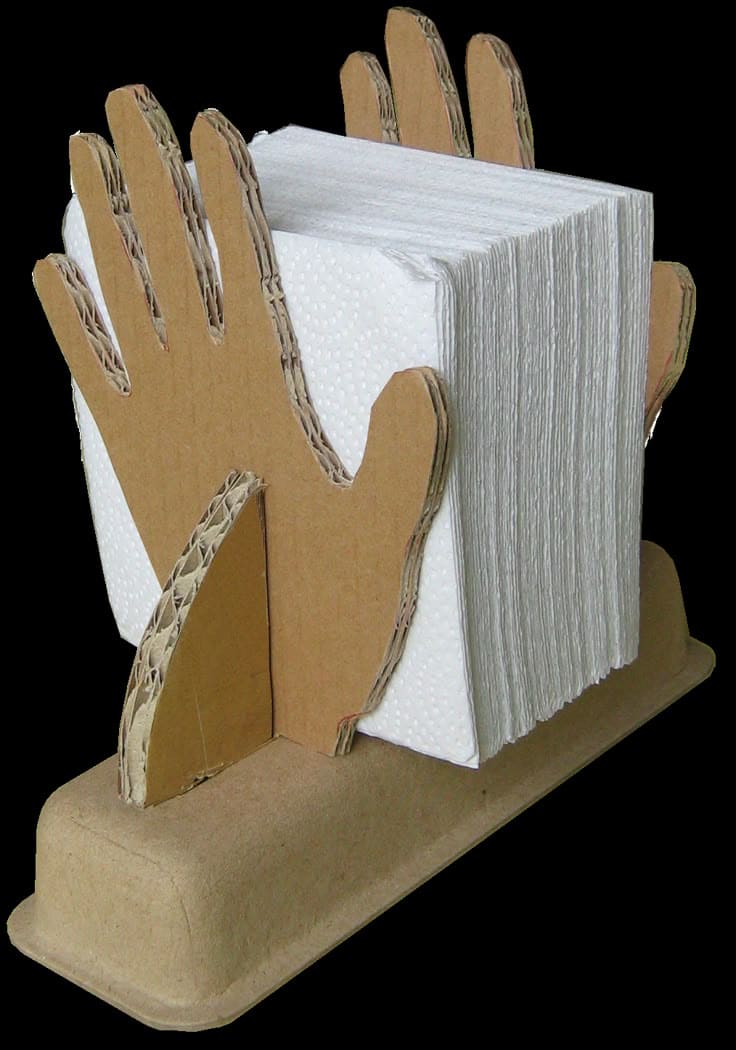
This cardboard napkin holder is shaped like a pair of hands, gently cupping your napkins with care.
Materials Needed
- 2 cardboard sheets (min. 25 x 30 cm each)
- 1 egg carton base or recycled tray
- Pencil and scissors
- Craft glue
- Optional: brown paint
Step-by-step Guide
- Place your hand on a cardboard sheet and trace around it twice. Cut out the hand shapes and glue each to an extra cardboard layer to make them thicker and more durable. Repeat this so you have four reinforced hands.
- Take an egg carton or a thick recycled tray and glue two hand cutouts standing upright on opposite sides to form the napkin slot. Angle them slightly outward for balance.
- Add two smaller cardboard wedges at the base of each hand for added stability.
- Once the glue is dry, place your napkins in the center slot and admire your helping hands in action.
#34. Eco-Friendly Cardboard Cleaner
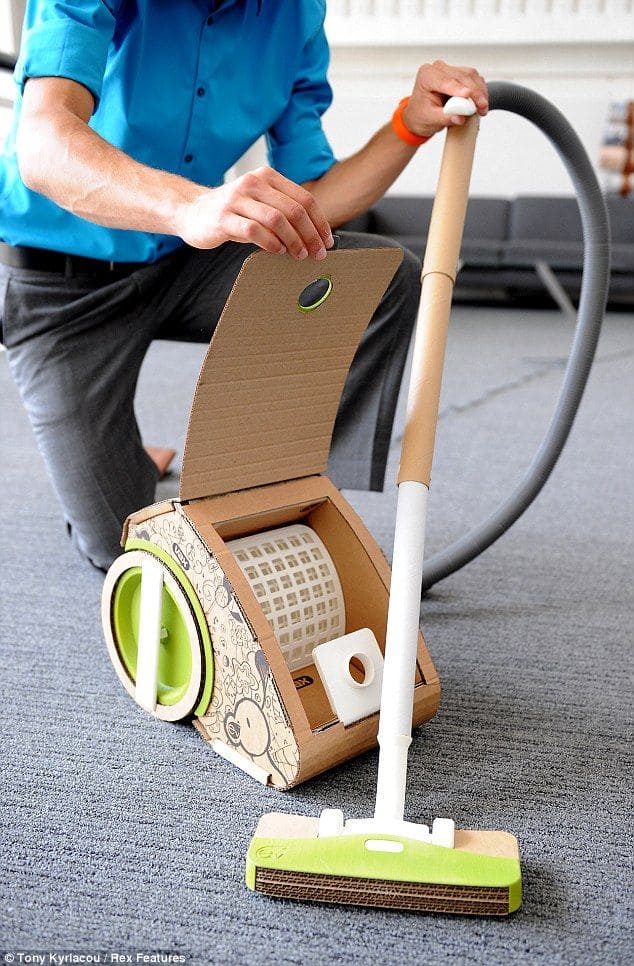
Whether for a science fair or just pretend chores at home, this cardboard vacuum is a hands-on masterpiece that’ll leave people impressed and inspired.
Materials Needed
- 3-4 large cardboard sheets (at least 40 x 60 cm)
- 2 plastic lids or discs (15–20 cm diameter)
- 1 thick paper tube (around 70 cm)
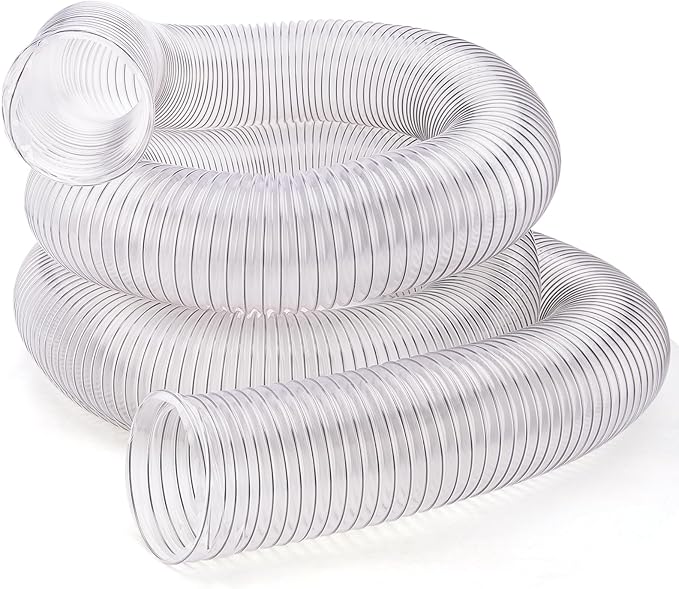
- 1 flexible hose
- 1 plastic mesh container
- Craft glue
- Cutter, pencil, ruler, and markers
- Optional: green acrylic paint
Step-by-step Guide
- Cut a rectangular box with a sloped front to mimic the vacuum cleaner body. Reinforce the inside with doubled cardboard panels to keep it sturdy.
- Attach two large plastic lids as wheels on both sides. Use skewers or thick sticks as axles, secured with glue. Add decorative patterns to mimic real vacuum buttons and dials.
- Insert a paper mesh basket into the open middle chamber to represent the filter drum. Cut out a circular window flap to act as the access lid.
- For the handle, glue one end of the thick paper tube into the top of the body and attach a short, rectangular cardboard brush head on the other end. Fix the hose at the back to complete the illusion.
#35. Whimsical Cardboard Frame
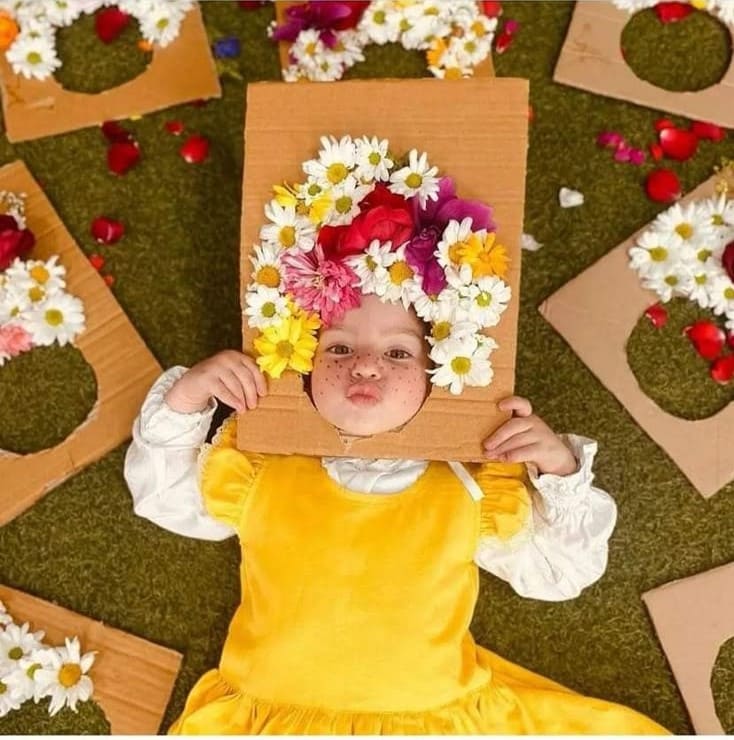
This beautiful flower crown frame craft captures pure springtime joy with just a scrap of cardboard and a handful of cheerful blooms.
Materials Needed
- 1 large cardboard square (around 30 x 30 cm)
- Box cutter
- Hot glue gun
- Fresh flowers in assorted colors
- Pencil and ruler
- Optional: Double-sided tape
Step-by-step Guide
- Draw a circular face-sized hole in the center of your cardboard sheet and carefully cut it out using a craft knife. Smooth the edges with scissors if needed.
- Pick a bright mix of daisies, mums, roses, or paper flowers. Begin gluing them around the top and sides of the cut-out circle, layering them to resemble voluminous hair or a flower crown.
- Let the glue dry fully. You can decorate the rest of the board with petals, glitter, or markers for extra flair.
#36. Quirky Cardboard Clock
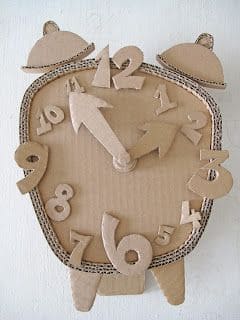
With chunky numbers and playful proportions, it turns learning into an artistic adventure. Best part? No batteries required, just imagination.
Materials Needed
- 2 medium cardboard sheets
- Hot glue gun
- Pencil and ruler
- Scissors or craft knife
- Compass
- Optional: Brass paper fastener
Step-by-step Guide
- Draw the classic shape of an alarm clock on your cardboard, including the twin bells and feet. Cut it out and trace it again for a sturdy double layer. Glue the two together.
- Cut out large, bold numbers (1–12) and thick hour/minute hands. You can make them 3D by layering extra cardboard behind each digit.
- Arrange the numbers around the clock face in an irregular, playful way for a whimsical look. Glue them in place.
- Attach the clock hands at the center with a glue dot or paper fastener if you want them to spin.
- Add the top bells and feet last for that nostalgic alarm clock silhouette.
#37. Curved Cardboard Form
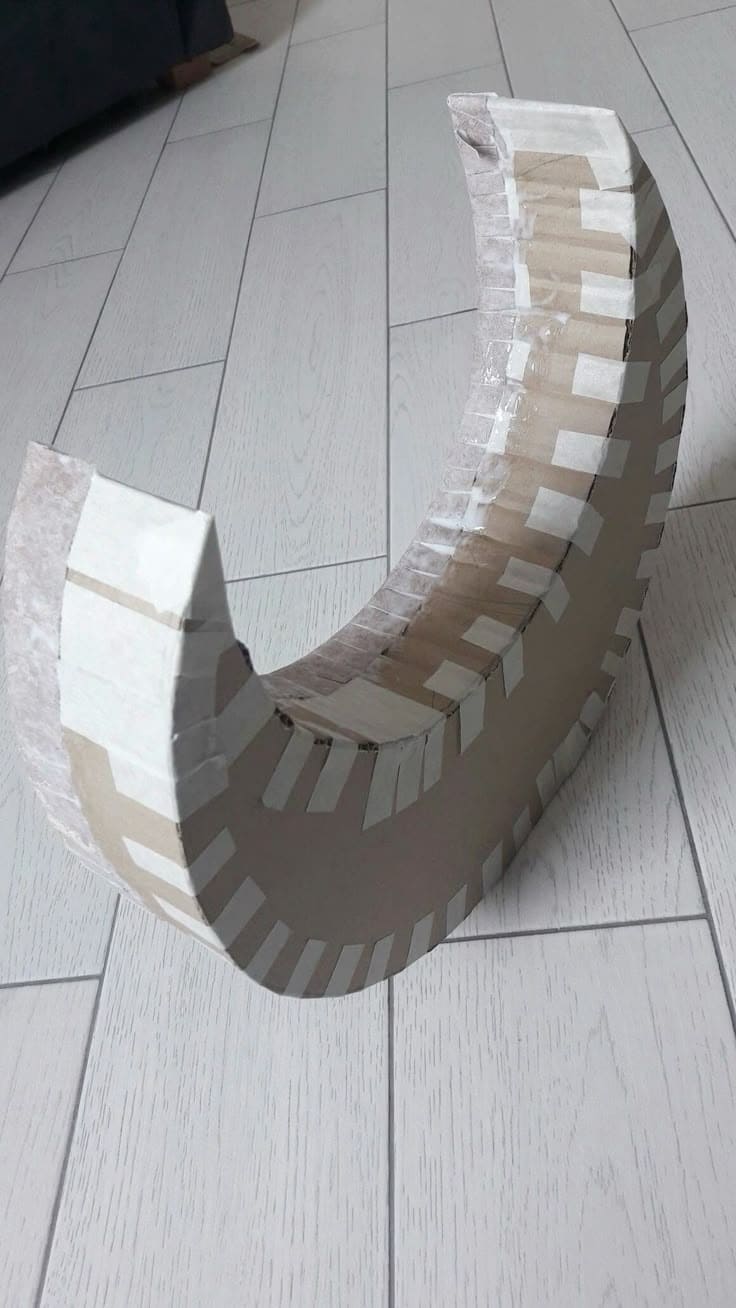
This clever cardboard rocking base is the perfect core structure for building your own rocking toy—whether it’s a horse, animal, or fantasy creature.
Materials Needed
- Thick cardboard sheets (at least 3-ply)
- Box cutter
- Pencil and flexible ruler
- Hot glue gun
- Masking tape or paper tape
Step-by-step Guide
- Sketch a large half-moon or crescent shape on cardboard. Cut out 4–6 identical layers for extra strength. Glue them together in a stack.
- Repeat the same for the other side. You’ll need two identical curved sides. Tape around the edges to smooth out any rough corners and keep layers aligned.
- Cut wide strips of cardboard to wrap between the two curved sides, forming the structure’s depth (about 8–10 cm). Attach the strips around the entire curve using hot glue and strong tape for a snug, sturdy shell.
- Reinforce the ends (flat areas where the rocker touches the ground) with extra layers to handle pressure and balance.
#38. Sleek Cardboard Multi-Tier Storage Shelf
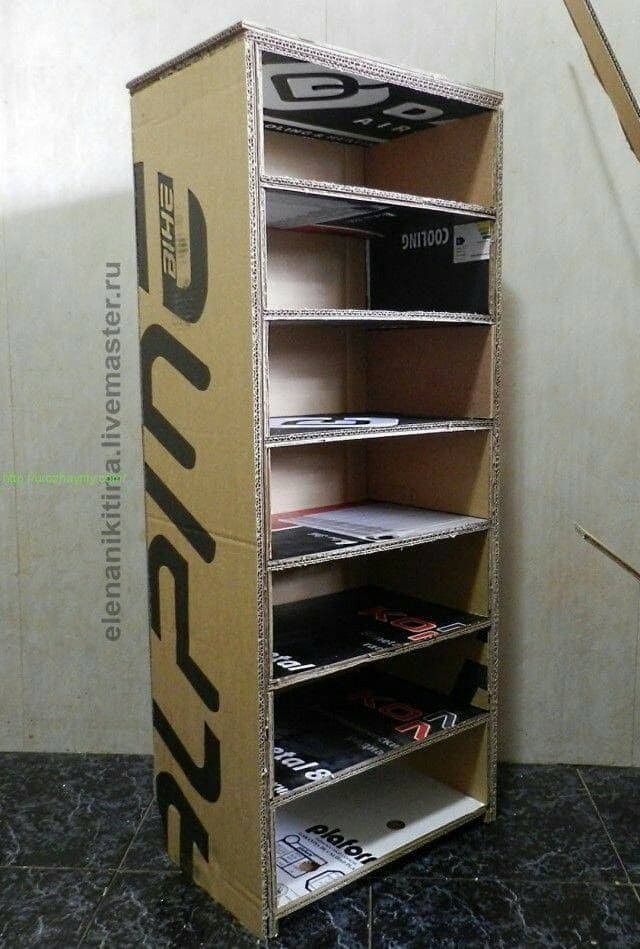
Designed with seven open shelves and a slim vertical profile, it’s perfect for small spaces and cozy corners.
Materials Needed
- 3–4 large cardboard boxes (same thickness)
- Ruler and pencil
- Box cutter or utility knife
- Hot glue gun
Step-by-step Guide
- Cut two identical side panels about 90 cm tall and 25 cm deep (35 x 10 inches).
- Measure and cut 7 identical rectangles (each around 40 cm wide x 25 cm deep) for the shelves. You can adjust the height spacing to your liking, but aim for about 10–12 cm (4–5 inches) between each.
- Create shelf support strips by cutting narrow cardboard strips (4 cm wide) to line the inside edge of each shelf. Glue them along the inside walls.
- Glue each shelf securely in place, starting from the bottom up.
- Cut a back panel to match the full height and width of the structure, and glue it to the rear side.
- Reinforce the outer corners by adding extra layers of thin cardboard along the edges.
#39. Nostalgic Cardboard Vintage TV Creation

This adorable mini retro TV made from cardboard is the perfect craft to spark imagination and hands-on fun.
Materials Needed
- 1 small cardboard box (shoebox size)
- Extra cardboard scraps
- Hot glue gun
- Pencil and ruler
- Scissors
- Masking tape
- Optional: black marker or paint
Step-by-step Guide
- Take your box and carefully cut out a large rectangular opening on one side. Leave at least a 1-inch frame around the edges for support.
- Cut small circular shapes from scrap cardboard to create knobs and dials. You can stack layers to give them a 3D, tactile look. Glue these onto the side like an old television control panel.
- Add a pair of antennae at the top using narrow strips of cardboard. Cut them in a V-shape and glue them securely at an angle.
- Reinforce the edges and seams using masking tape for a cleaner finish. You can also use paper tape or washi tape for extra flair.
- Decorate the TV body with faux speaker grills, a power button, or even draw a vintage brand logo using markers or paint.
#40. Whimsical DIY Cardboard Ice Cream Stand
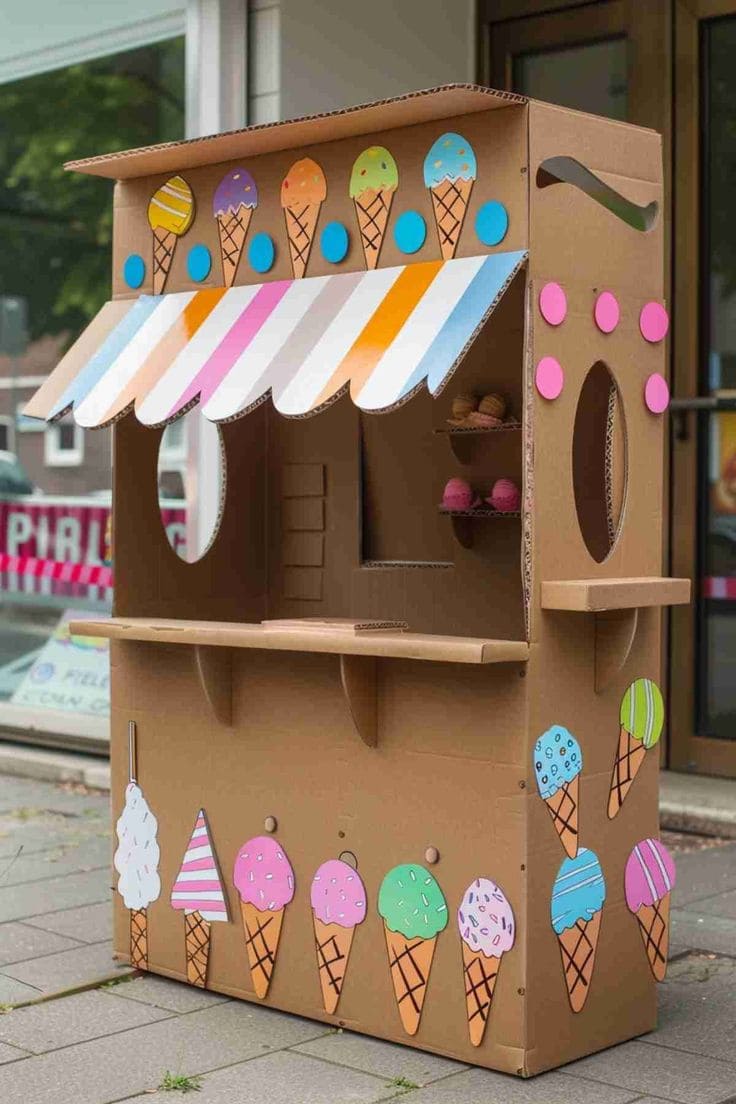
For little entrepreneurs with big imaginations, this delightful cardboard ice cream stand is a dream come true! Designed with colorful scoops, playful cutouts, and a striped awning, it brings a fun and interactive twist to pretend play.
Whether it’s a sunny-day lemonade stand reimagined or your kid’s first tiny business, this colorful project brings the scoops, smiles, and sparkle of imagination to life—no sticky mess required!
Materials Needed
- 2–3 large cardboard boxes
- Box cutter
- Hot glue gun and glue sticks
- Ruler and pencil
- Paints or colored paper
- Paper plates or felt
- Optional: string or wooden sticks
Step-by-step Guide
- Use a large box as the base counter. Cut out a wide front opening (window-style) and smaller side windows for “serving.”
- Attach an overhead “awning” by cutting a flap and gluing on a cardboard roof. You can make it scalloped for extra cuteness.
- Cut strips of colored paper or paint stripes onto the awning for a vibrant candy-shop look.
- Decorate the stand with hand-drawn or printed ice cream cones, scoops, and sprinkles. You can even cut out felt scoops and stack them onto cones for extra play.
- Add a small shelf inside for organizing “menu” items and cones. Use glue to attach and reinforce everything from behind.
#41. Enchanted Cardboard Cottage

With its curved roof, rounded windows, and fairy-tale balcony, it’s perfect for dollhouses, fantasy displays, or simply showcasing your paper architecture skills.
Materials Needed
- 3–4 large sheets of cardboard
- Hot glue gun and sticks
- Craft knife
- Ruler, pencil, and compass
- Scissors
- Optional: textured paper, aluminum foil, or craft sticks
Step-by-step Guide
- Start with a base, cut a large oval or rectangular shape for the foundation. Sketch your house’s floor plan on it.
- Build the walls and cut out arched windows and doors. For a stone-like texture, glue on small cut-out pebble shapes or crumpled paper ovals.
- The curved roof is the star – cut long arched strips and gently bend them over the structure, layering in textured shingles or roof tiles as you go. Use hot glue to secure the form.
- Create the balcony by rolling a strip into a semi-circle and gluing it below a window. Add tiny rails using toothpicks or skewers.
- Layer shingles onto the roof, working from the bottom up. You can use irregular rectangular cardboard pieces or textured materials for extra depth.
- Add decorative trims around windows and edges.